How to Install a Grab Bar in a Shower: Safe DIY Guide (2026)
A grab bar in a shower anchors into solid wood: a wall stud, added blocking, or a hollow-wall anchor specifically rated for body weight. Learning how to install a grab bar in a shower starts with confirming what is behind the finish wall, because drywall alone and plastic wall plugs will not hold a person.
That single decision comes before the drill, the bar, or the tile. Get it wrong and the bar flexes, pulls out of the wall, or takes a tile with it on the way down.
Contents
Time: 2 to 4 hours for a straightforward install into studs, longer if you cut the wall for blocking · Cost: materials run to the low hundreds of dollars; professional installation varies widely by region, so get two or three quotes · Difficulty: moderate DIY · Skill level: comfortable with a drill and a level
Tools and Materials
Sort the list into the hardware you buy and the tools you already own. Buy the hardware after you know what is behind the wall, since the mounting system depends on the backing you find.
Hardware and materials
- Grab bar, 18 to 36 inch in 1-1/4 inch diameter stainless steel, load rated to at least 250 lb for body weight. Two wall flanges and two decorative escutcheons usually ship with the bar.
- Mounting fasteners matched to the backing: 2-1/2 inch #12 stainless steel screws for studs, or a grab-bar-rated hollow-wall anchor system for a cavity with no framing. Bring 2 inch wood screws for a temporary cleat and 1-1/2 inch screws for the blocking itself.
- Wood blocking, 2×4 or 3/4 inch plywood cut to fit between studs if you need to add your own backing.
- 100% silicone kitchen and bath sealant for a continuous bead under each flange and around the finished escutcheon. A mildew-resistant type cures better in a wet room.
- Masking tape, a pencil, and a paper towel for marking and for catching grit.
Tools
- Stud finder with a deep scan mode, plus a backup method for when it cannot read through tile.
- Hammer drill or cordless drill with a hammer setting for masonry backer board.
- Drill bits matched to the surface, plus a 1-8 inch wood bit for the pilot hole and a 1-1/4 inch hole saw when the flange needs a recess.
- 9 inch or 12 inch spirit level and a 6 inch torpedo level for tight corners.
- Tape measure, 4 foot carpenter square, and a 1/2 inch chisel for the tile or surround edge.
- Safety gear: eye protection, work gloves, ear protection, a dust mask for masonry drilling, and knee pads for a low shower pan.
If you are still choosing the bar itself, our guide to the best shower grab bars for safety breaks down load ratings and finishes, and grab bars built for tile showers covers the flange styles that suit a tiled wall.
Before You Start
Put the bar where it will actually be used. Most falls happen at the step-over threshold and while standing to wash, so the useful positions are a horizontal bar on the back wall and a vertical bar near the entry wall.
- Mounting height: 33 to 36 inch from the shower floor, which is the ADA reference range most residential work follows.
- Wall clearance: 1-1/2 inch between the bar and the finished wall.
- Horizontal bar on the back wall: 18 to 24 inch from the showerhead end.
- Vertical bar: 4 to 6 inch in from the shower door jamb or opening.
- Stud spacing: commonly 16 inch on center in newer homes, sometimes 24 inch in older framing or in metal studs.
- Load rating: at least 250 lb for a single user. People who cannot push themselves back up weigh far more than they weigh standing, so buy the heavier rating if there is any doubt.
Adjust those numbers to the person using the shower. A shorter user often does better with a bar a few inch lower than the standard range, and the bar has to be reachable without standing on one foot.
Inspect what is behind the wall
Run the stud finder across the full width of the intended bar location and mark every edge it reports. A bar that spans two studs with an anchor in each is the strongest and most common install. If one flange lands in a cavity, you have three choices: shift the bar, add blocking, or use a rated hollow-wall anchor.
Protect the shower and the water
Cover the pan with a thick towel or cardboard, keep a vacuum or broom within reach, and turn the shower valve off if any drilling happens near a fitting or the wall shares plumbing with the wet side. Old shower homes frequently have a mixing valve or supply line sitting exactly where a flange wants to go.
Know when a permit is in play
A grab bar in an existing private bathroom is usually a repair, not new construction, so it rarely needs a permit on its own. Work that cuts into framing, moves plumbing, or builds toward accessibility compliance in a rental or a commercial bathroom can trigger one, and your local building department is the only reliable source.
How to Install a Grab Bar in a Shower: Step-by-Step Instructions
There are two versions of this job. If a stud or blocking sits behind each flange, you screw straight into it. If the wall is an empty cavity, you either open the wall and add backing or use a mounting system approved by its manufacturer for body-weight loads. Decide which version you are in before step three.
Step 1: Inspect the Wall and Plan the Bar Placement
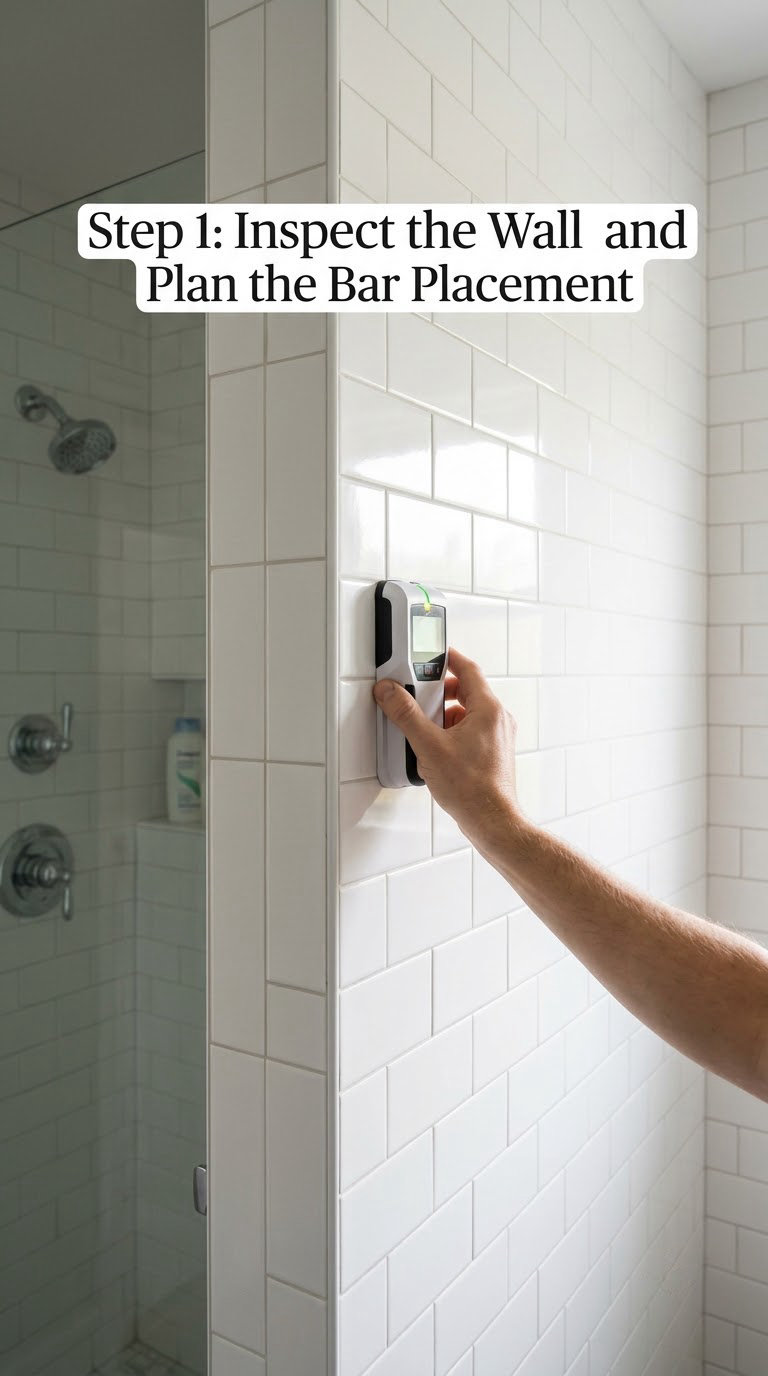
Hold the bar against the wall at your chosen height and confirm the reach. Someone using it should be able to grip it without fully extending the arm and should not have to step across the bar to get in and out of the shower.
Tap the wall with a knuckle. A hollow, boxy sound means cavity. A flat, solid sound usually means backer board or masonry. In a tiled shower, sound alone is not proof, so pair it with a stud finder and a careful test hole.
Mark every stud edge with pencil and a strip of tape, then mark the flange centers. Do not trust a stud finder reading alone in a wet room, where moisture readings can be wrong. Confirm with a 1/8 inch test bit drilled straight into a spot that would be hidden by the escutcheon if it is wrong.
Step 2: Mark the Mounting Holes
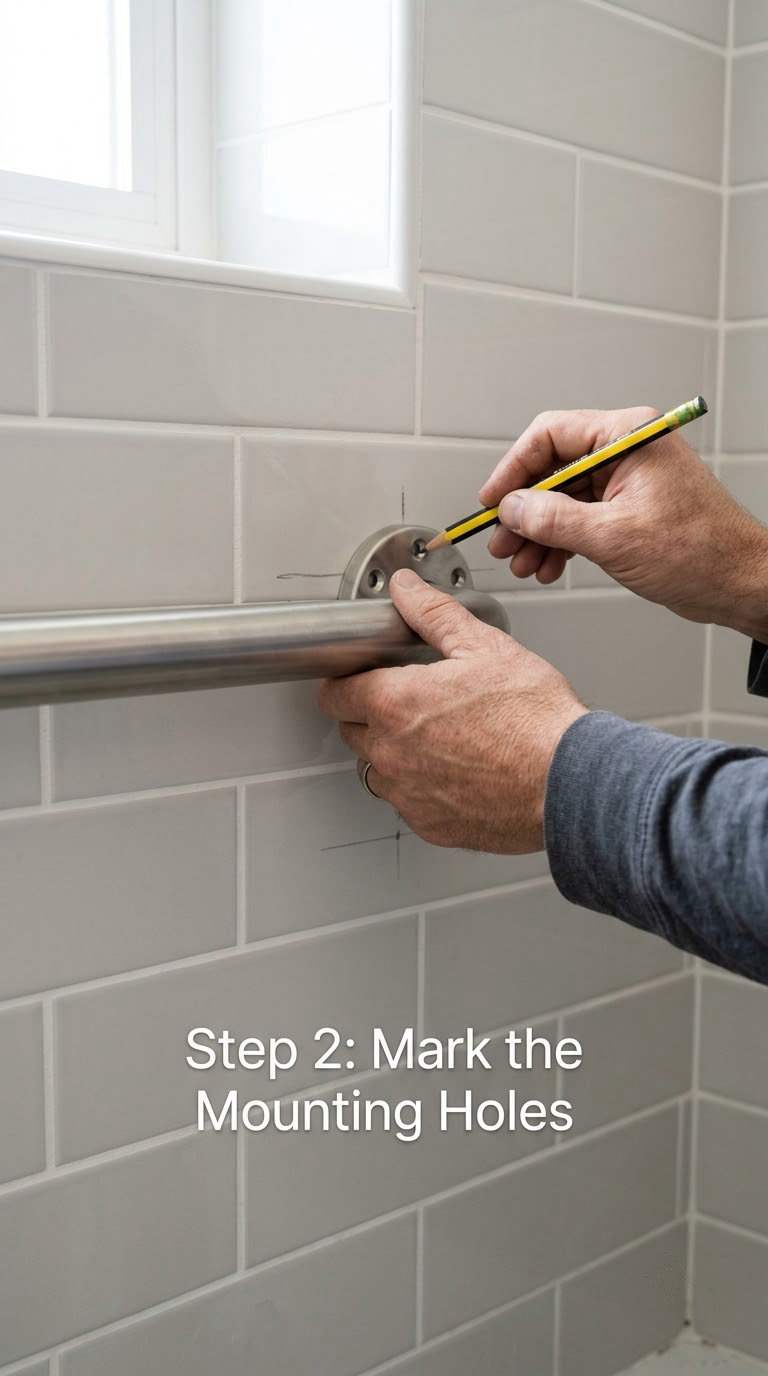
Hold the bar or one flange in position and put the level on top of the bar, not on the flange. Mark every hole location through the flange holes with a pencil or fine marker, then double-check the spacing against the manufacturer’s template.
Keep the manufacturer’s clearances. Most bars need at least 1-1/2 inch from the finished wall to the bar centerline, and some flanges need a shallow recess so the escutcheon sits flat against the tile. If the back of the flange is deeper than the wall buildup allows, use the surface-mount flanges that come with the bar rather than forcing a recess.
Masking tape over the marked spots helps on glossy tile. It gives the pencil or marker something to bite, and it marks the spot if a bit does skip.
Step 3: Drill Pilot Holes and Check the Backing
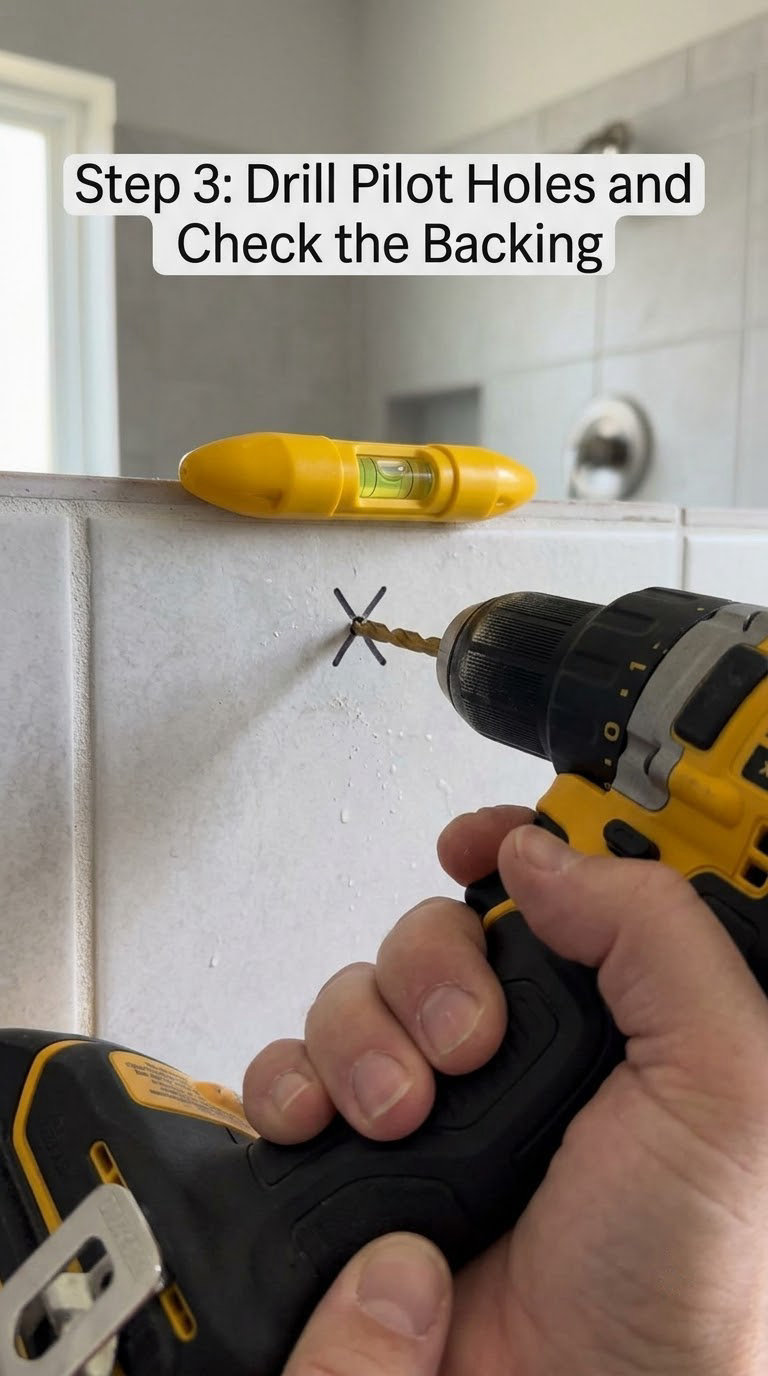
Match the bit to the surface you are drilling, and go through the layers in order. Work from the finished face inward, and back the tile with the tape you placed earlier.
- Drywall or plaster: a 1/8 inch bit, then step up to the screw size, or use a twist bit to start the hole so the screw does not wander.
- Ceramic tile: a carbide-tipped arrowhead bit with the drill at low speed and steady pressure. Do not use hammer mode on ceramic or porcelain; the shock splits the tile.
- Porcelain or natural stone: a diamond hole saw or diamond core bit, run slowly and cooled with water. Keep the bit flat on the surface for the first fraction of an inch.
- Cement board or concrete backer: a carbide masonry bit with the hammer setting on, edges kept square to the wall.
The moment the bit passes the finish layer, look at the hole. Solid wood, a nail head, or dense gray material means you have framing. An empty gray hole you can see daylight through means cavity, and the method changes here.
Step 4: Add Blocking or Install the Approved Mounting System
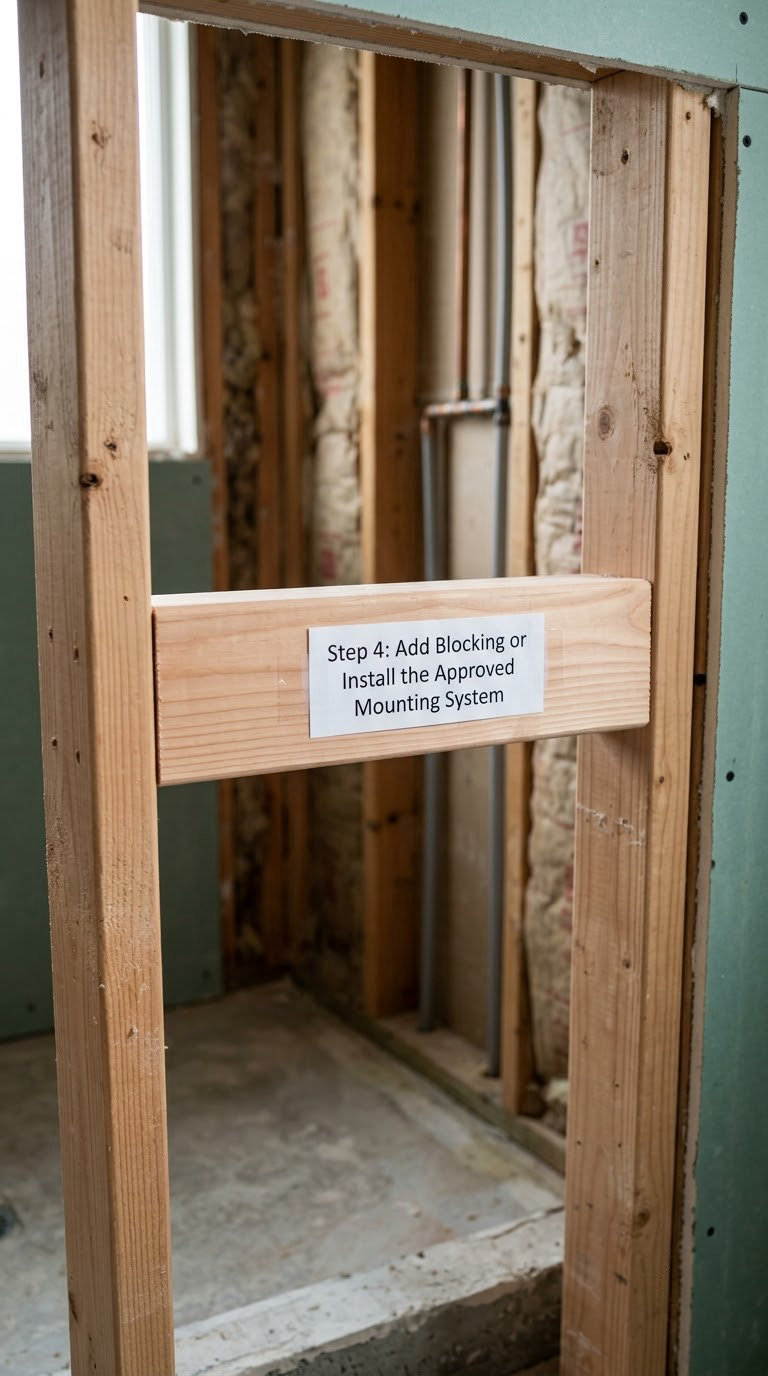
If you found solid backing, skip to step five. If you did not, you have two honest routes.
Route one, add blocking. Mark a rectangle between the two studs, roughly 16 inch wide by 8 inch tall, centered on each flange. Cut the drywall or backer board with a drywall saw or a hole saw, then cut a 2×4 or 3/4 inch plywood block to fit tightly between the studs. Screw the blocking to each stud with two 1-1/2 inch screws per end, keeping the screws clear of the pilot hole locations. Patch the openings with a moisture-resistant backer patch and finish to match before the flanges go on. This is the strongest fix and the only one that keeps the bar rated for full body weight long term.
Route two, use a rated hollow-wall system. Some manufacturers publish a hollow-wall mounting plate for their bars, rated for a stated load in drywall or a cavity wall. Use it only exactly as written, with the specified screw length and the specified number of fasteners. Where studs are available, always screw into the stud instead.
Standard drywall anchors, plastic wall plugs, adhesive pads, and suction cups are not body-weight hardware. Suction grab bars are a balance aid on smooth flat surfaces only, and the safety analysis of suction grab bars explains when they let go on tile and textured walls.
If cutting into the wall means disturbing tile you cannot replace, or you find wiring or a plumbing elbow where the screw wants to go, stop here and hand the job to a pro.
Step 5: Secure the Mounting Flanges and Attach the Bar
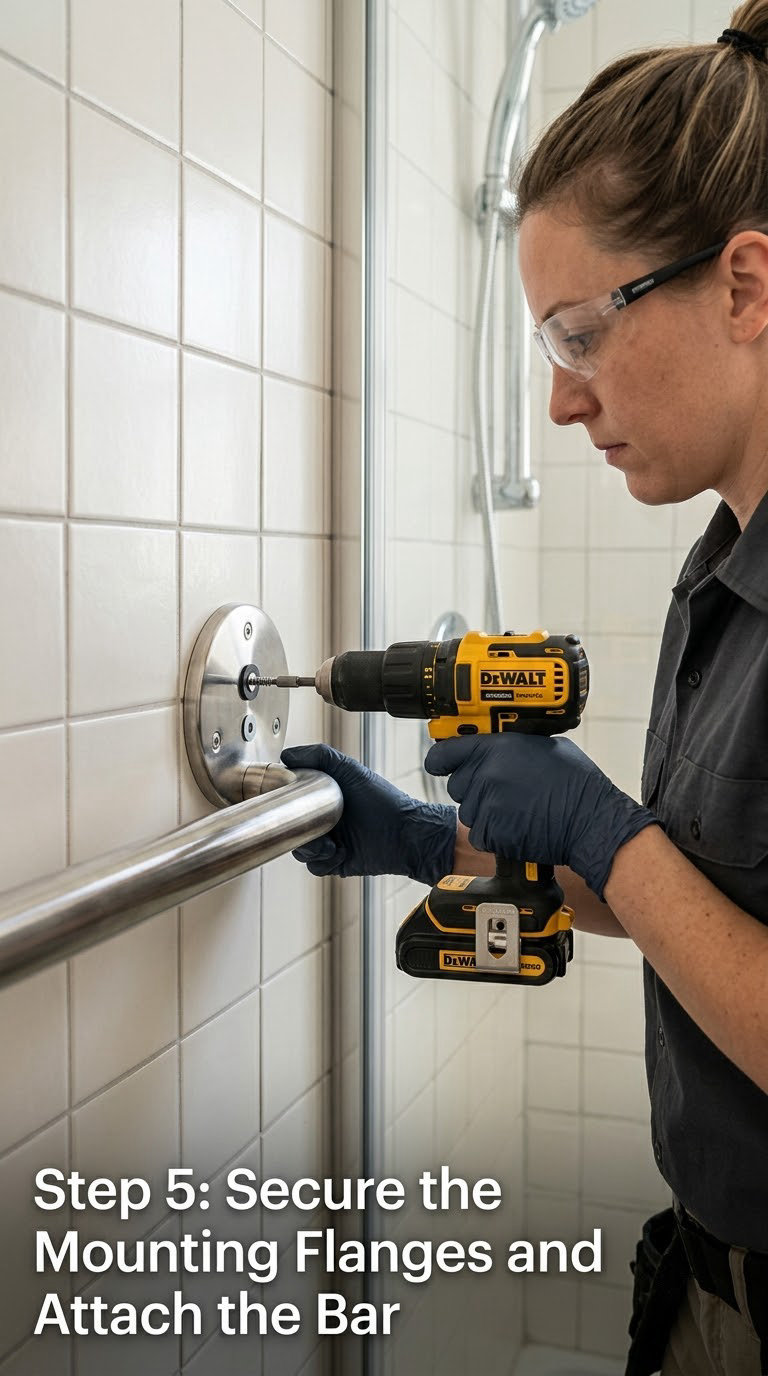
Run a continuous bead of 100% silicone around the back face of each flange and let it squeeze out slightly when you press the flange to the wall. That bead is what keeps water out of the cavity, and it matters more than most people expect.
Press each flange into place, hold it against the wall, and drive the screws with a driver rather than a high-torque setting. Tighten until snug, then a fraction more. Overtightening cracks tile and strips drywall, and neither helps the bar hold more weight.
Slide the bar onto the flanges and tighten the set screws evenly with an Allen key, working from one end to the other so the bar seats flat. Fit the escutcheons over the flanges and run a thin bead of sealant around their base.
Step 6: Check Level, Tightness, and Sealant Cure Time
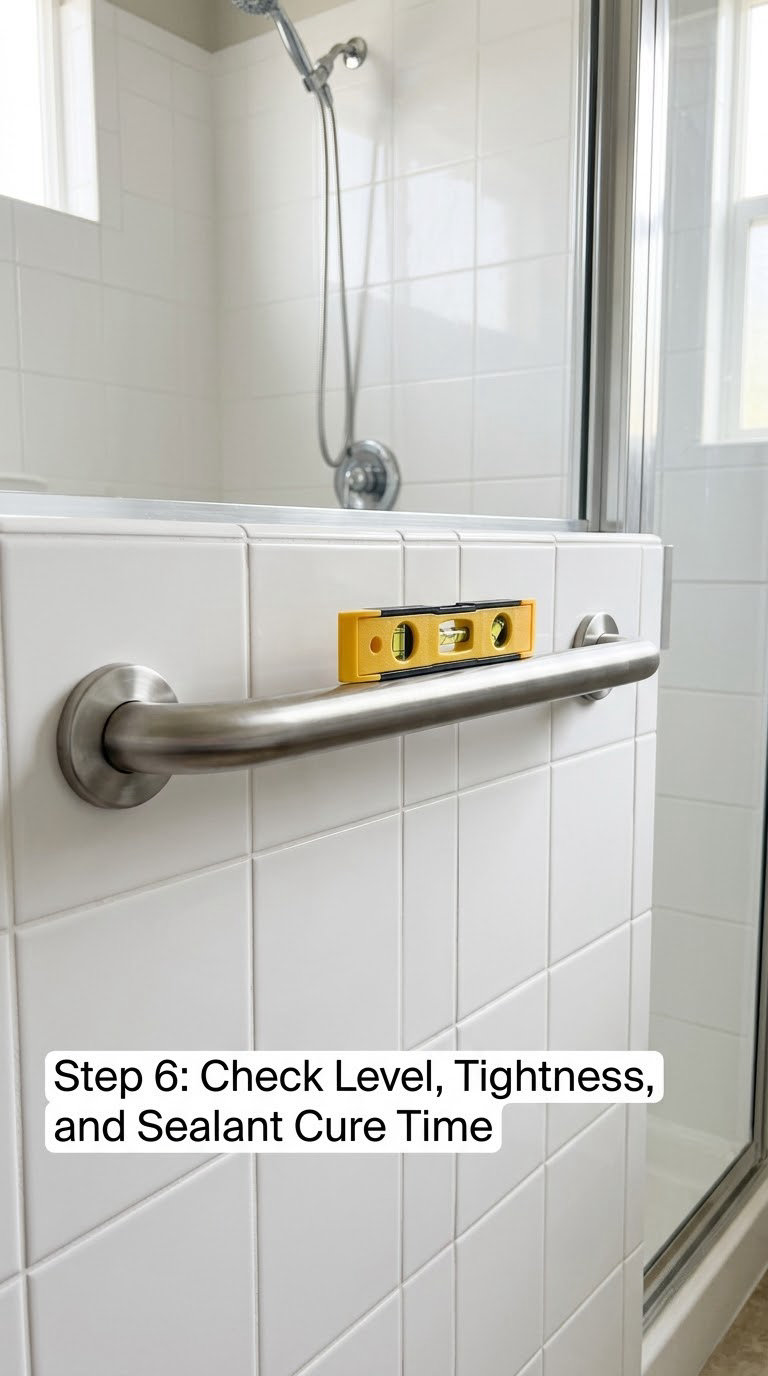
Put the level on the bar before the sealant sets and shim it if needed. Grab the bar with both hands at each end and try to rock it. There should be no movement at the flanges and no creak in the wall.
Then load it properly. Apply steady downward and outward pressure in stages, increasing gradually, rather than throwing your full weight on it in one sudden pull. A bar that flexes, rotates, or moves at the flange is not installed correctly, and you should find out today rather than when someone slips.
Silicone needs time. Most kitchen and bath sealants are skin dry in about 30 minutes and fully cured in 24 to 48 hours. Keep the shower dry for the full cure on the label, and treat the bar gently for the first day. New silicone stays slightly soft for weeks and slowly firms up as it cures.
Common Mistakes to Avoid
Almost every grab bar failure traces back to one of these.
- Drilling before confirming the backing. The fix: probe with a small bit in a spot the escutcheon will hide, and confirm solid wood before you mark the final hole.
- Using drywall anchors or plastic plugs for a body-weight bar. The fix: screw into a stud or blocking, or use a hollow-wall system published for that load.
- Hammer mode on ceramic or porcelain tile. The fix: run the diamond or carbide bit at low speed with steady pressure, and wet-cool the bit on porcelain and stone.
- Drilling into plumbing or a valve without locating it first. The fix: map the rough-in and the valve location before drilling, and turn the water off for any drilling near the wet wall.
- Skipping silicone under the flange. The fix: a continuous 100% silicone bead, then a second bead around the escutcheon base after the bar is set.
- Misaligning the flanges. The fix: mark all holes with the bar held and leveled in position, transfer with a template, and re-check before the first full-size hole.
- Overtightening. The fix: snug plus a touch, then stop. Use a manual driver for the final turns.
- Treating a towel bar as a grab bar. The fix: replace it with a load-rated steel safety bar anchored to framing.
- Skipping the load check. The fix: test the finished bar with staged pressure before anyone depends on it.
When to Call a Pro
Some grab bar installs are routine, and some are genuinely beyond a weekend project. Call a qualified contractor or handyman when any of these apply.
- The wall has no accessible backing and cutting it open would damage tile, a surround, or a finish you care about.
- Metal studs with no blocking are what you find, and the bar is meant to take a full body-weight pull.
- Concealed plumbing, a shower valve, or wiring sits where the flange has to go.
- The shower is a one-piece fiberglass or acrylic surround you do not want to risk, or the walls are plaster, lath, or an unusual material.
- Permit and inspection requirements apply because the work is part of an accessibility retrofit on a rental or commercial property.
- You cannot say with confidence that the finished assembly will support the person who needs it.
Ask for the load rating of the bar and the hardware, how many fasteners land in solid wood, and whether the flange is sealed with silicone. Our guide to installing a corner shower caddy covers a related case where a shallow wall cavity needs careful planning before anything is drilled.
Maintenance
A grab bar is inspected twice a year, and it takes five minutes. Grab both ends and apply steady pressure in several directions, including a pull away from the wall and a downward load. Any movement, flex, or creak means take the bar out of service and find out why.
Look at the escutcheon perimeter for a failed seal. When the silicone lifts, peels, or goes hard and cracked, the water is going behind the tile. Cut the old bead out carefully, dry the surface, and re-caulk with 100% silicone.
Wipe the bar with a mild bathroom cleaner and a soft cloth, then dry it. Avoid abrasive pads and bleach-based cleaners on powder-coated or satin finishes, because they cut the coating and leave bare metal that will pit and corrode.
Stainless steel shows water spots as a cosmetic issue, but rust staining or a rough surface means moisture is sitting on the metal. Check the fasteners for corrosion, and confirm the wall behind the flange still feels solid and dry. Soft wallboard, staining, or a musty smell means the cavity is getting wet, which is a bigger problem than the bar.
Frequently Asked Questions
Do grab bars need to be installed into studs?
Studs are the best option, not the only legal one. A grab bar can be installed into added blocking, into an existing shower wall with rated blocking, or with a hollow-wall mounting system the manufacturer publishes for body-weight loads. Standard drywall anchors and plastic wall plugs are not acceptable for a bar meant to support a falling adult. If no framing or approved anchor system is available, add backing.
Can I install a shower grab bar over tile?
Yes. Drill through tile with the right bit and slow, steady pressure, then drill the substrate behind it with a wood or masonry bit. Use a carbide arrowhead bit for ceramic tile and a diamond hole saw cooled with water for porcelain or natural stone. Avoid hammer mode on tile, because the vibration is what cracks it. Masking tape over the marked spot reduces chipping.
What type of screw should I use for a grab bar?
Into a wood stud or blocking, use 2-1/2 inch #12 stainless steel screws and drive them 1-5 to 2 inch into the solid wood. Stainless resists corrosion in a wet room and will not streak rust down the tile. For blocking, use 1-1/2 inch screws to attach the block itself. Match any hollow-wall system to the screw length its manufacturer specifies, since too long a screw can blow out the back of the wall.
What height should a shower grab bar be installed?
Most guidance points to 33 to 36 inch from the shower floor for a horizontal bar on the back wall, with 1-1/2 inch of clearance from the finished wall. A vertical bar near the entry usually sits on the same height range and 4 to 6 inch in from the door jamb. Height out of that range makes the bar harder to grip, so lower it for a shorter user rather than installing out of habit.
How do I install a grab bar without removing the tile?
You do not have to remove tile. Drill through it with a diamond or carbide bit, patch the cut hole after mounting if the chip is unsightly, and seal the flange with 100% silicone. If the wall behind the tile is an empty cavity and you cannot add blocking without opening it, use a hollow-wall mounting system rated for the load. Cutting out tile to add blocking is a last resort because matching grout and color is rarely perfect.
Do grab bars need to be sealed with silicone?
Yes, every flange should be sealed. Run a continuous bead of 100% kitchen and bath silicone under each flange before pressing it to the wall, then a thin finishing bead around the escutcheon base. Without it, water tracks along the screw holes into the wall cavity, which leads to rot and loose anchors. Let the sealant cure fully, usually 24 to 48 hours, before using the shower.
Conclusion
The whole job comes down to one question asked before anything is drilled: is there solid wood, or a mounting system rated for a full body-weight load, behind each flange? Confirm that, choose hardware that matches the backing, then mark, drill, seal, and load-test in that order.
Start by probing the wall with a stud finder and a small test bit at the height the user can actually grip. If you get solid wood on both flanges, this is a straightforward afternoon job. If you get a cavity with plumbing or tile you do not want to disturb, bring in a contractor before the first full-size hole.