How to Replace a Light Switch Safely: Simple Steps (2026)
You can replace a standard single-pole light switch yourself in about 20 minutes, but only after the circuit is dead. Turn the breaker off at the panel, confirm the wires are dead with a voltage tester, then transfer each conductor to the matching terminal on the new switch.
Here is the part most tutorials skip. Flipping the wall switch off does not de-energize the box. The hot conductor is still live at the switch terminals, which is exactly why the breaker, not the wall switch, is the thing you turn off. Get that backwards and the job turns from a 20-minute fix into a hospital visit.
Contents
Below is the process I would walk a cautious beginner through, in the order I would do it myself, with the stops built in.
Time: 20 to 30 minutes for a single-pole switch, plus 10 minutes to find the breaker · Cost: minimal, one replacement switch and a few wire connectors · Difficulty: Easy DIY, if the wiring is copper and conventional · Skill level: Beginner with careful habits
Tools and Materials
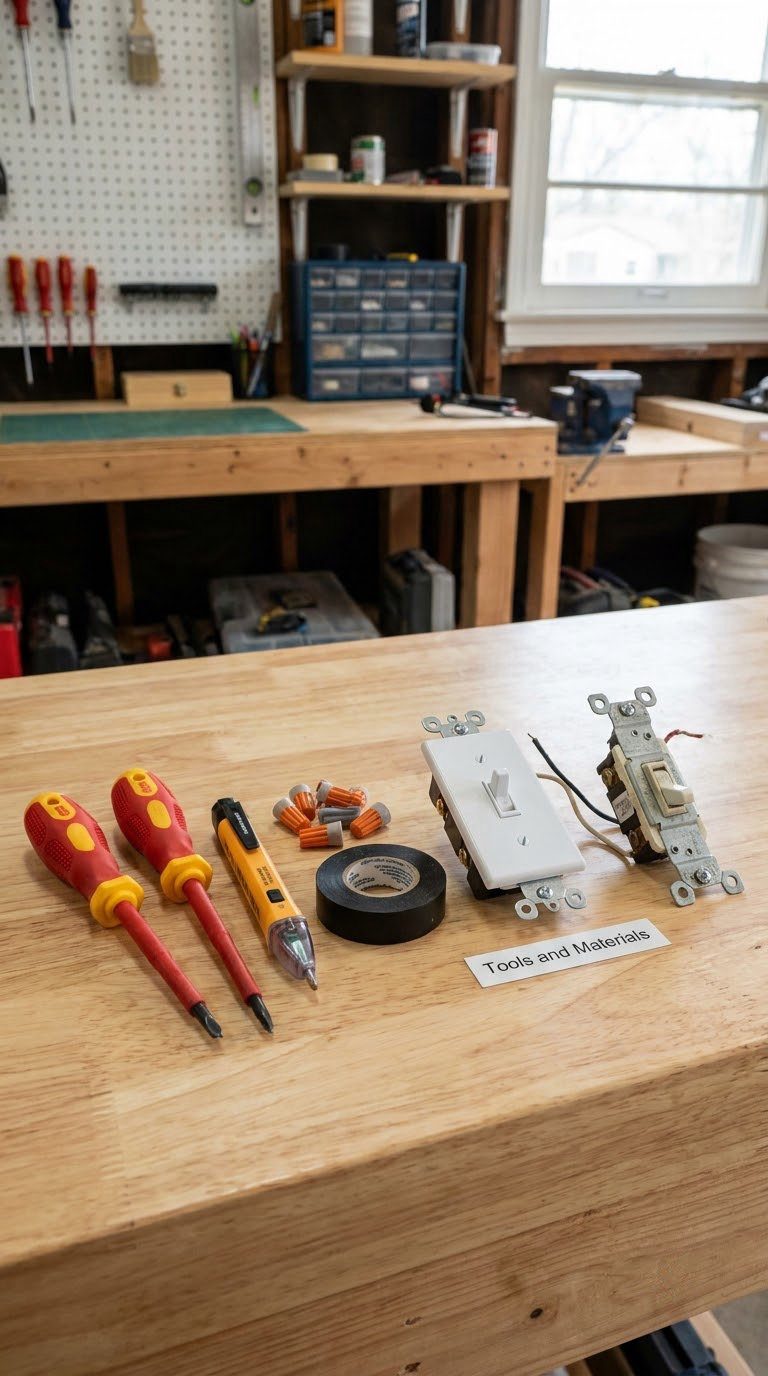
What you genuinely cannot skip is short. What is nice to have is longer, and I will flag which is which because a voltage tester is the one item people leave out and then regret.
Required
- A non-contact voltage tester or a two-pole tester rated for 120/240V. This is the tool that tells you the wire is dead instead of assuming it.
- Insulated slot and Phillips screwdrivers, 3/32 inch and 1/4 inch tips for the terminal screws, plus a Phillips for the cover plate.
- Wire strippers sized for 14 or 12 AWG, and needle-nose pliers for shaping the loop.
- Listed wire connectors (wire nuts) and, if the existing conductors are damaged or you are moving connections around, a package of them. Grab three or four extra.
- The correct replacement switch. See the next paragraph, because buying the wrong one is the most common reason a swap fails.
- Safety glasses and gloves with an insulating layer if you have them.
Helpful, Not Required
- A headlamp or flashlight, since the box is usually dark and you will be holding wires with one hand.
- Electrical tape for flagging conductors and for a temporary wrap on a ground wire with nothing to land on yet.
- A small 2 x 4 block or a switch extender ring, if the screws on the old switch have chewed the threads in the box.
- Your phone, for the photo step in Step 3.
To pick the right switch, look at the old one before you shop. A single-pole switch has two brass terminal screws, or two brass plus a green ground screw. A three-way switch has three, and it controls a light from two locations, usually at the top and bottom of a stairway. A dimmer is a single-pole device with a dial or a slider and often a separate wire nut lead. If you count more screws or see a bundle of white wires capped together in the box, buy the matching three-way or four-way device rather than guessing. This is the single most common DIY failure, and electricians on the forums say it constantly: people buy a single-pole for a three-way location, install it, and the light only works from one spot.
Style is the easy part. If your current switch is a toggle, a rocker or Decora-style switch will fit the same box, though the plate opening can look different. If you are upgrading rather than replacing, our guide to smart light switch kits covers the ones with a neutral wire requirement, which is the part that trips people up.
Before You Start
How to replace a light switch safely comes down to one habit: never trust the wall switch to tell you the power is off. Do these checks in order.
Find the right breaker. If your panel is labelled, look for the switch by room. If it is not labelled, turn the light on, then flip breakers one at a time until the light goes out. Note which one it was, turn it back on, and tape a label to it. That five-minute job saves you from a wrongly-deadened circuit later, and it is the fix that homeowners on DIY forums ask for most often.
Switch it fully off and confirm it. Push the breaker to the off position. Then test every conductor in the box with the tester before your hands go anywhere near them. If the tester beeps, lights up or shows a reading, stop. Something is still energized, and guessing which circuit you turned off is not a plan.
Protect your hands and eyes. Gloves and glasses are not ceremonial. Conductor tips left too long by the last person can be sharp, and a screwdriver slipping off a terminal screw puts metal across a hot wire.
Look before you disconnect. With the breaker off, open the box and look at the conductors. Solid bare copper or green-insulated means a normal modern install. Silver-grey conductor, or insulation that looks like cloth or rubber with no colour printed on it, means an older install. Multiple unfamiliar conductors, a box that will not hold the switch, exposed copper outside a connector, or visible scorching are all stop signs.
Anything on that last list belongs with a licensed electrician. Aluminum branch wiring from the 1960s and early 1970s, cloth insulation in older houses, damp-location or outdoor boxes, and anything you are unsure about are not beginner territory. If a permit is required in your area for the work you are doing, a pro handles that filing too.
Step-by-Step Instructions
Work in this order and do not skip ahead. The order is not a preference; the test comes before the removal so that you never pull a live switch out of the wall.
Step 1: Turn Off the Power and Test the Circuit
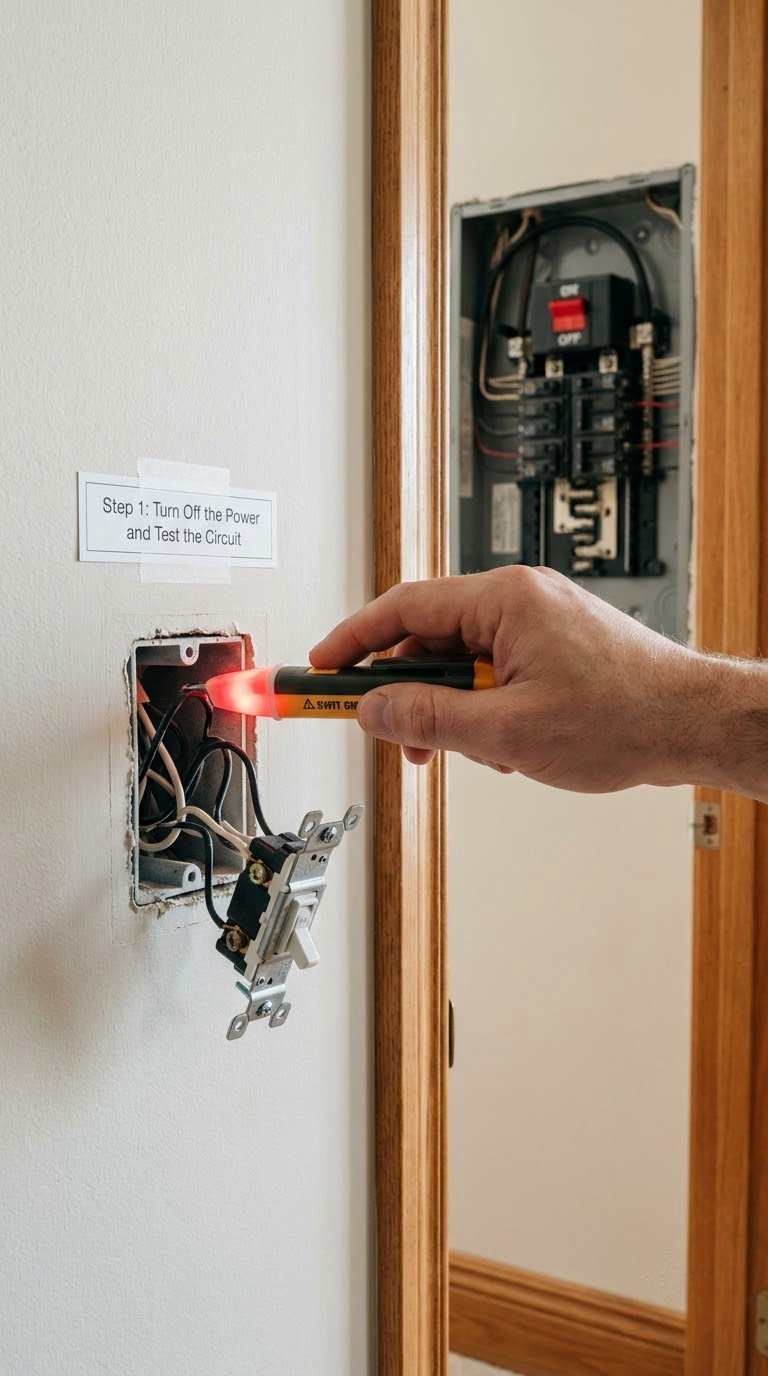
Switch off the breaker you labelled, then verify before you touch anything. Hold the non-contact tester near each conductor in turn, and if you have a two-pole meter, touch one lead to the bare or green ground and the other to each terminal. Check both terminal screws and every wire in the box, not just the two you expect to move.
The check that takes five seconds: the tester must show nothing on every conductor. Then try a known-live test, like a functioning receptacle elsewhere, to confirm the tester itself is working. An unverified tester is not a safety device. If your reading is ambiguous or the tester behaves oddly, treat that as live and stop.
Check: zero voltage on all conductors, verified tester, breaker handle in the off position, and a strip of tape on the breaker so nobody flips it back on while you work.
Step 2: Remove the Existing Switch
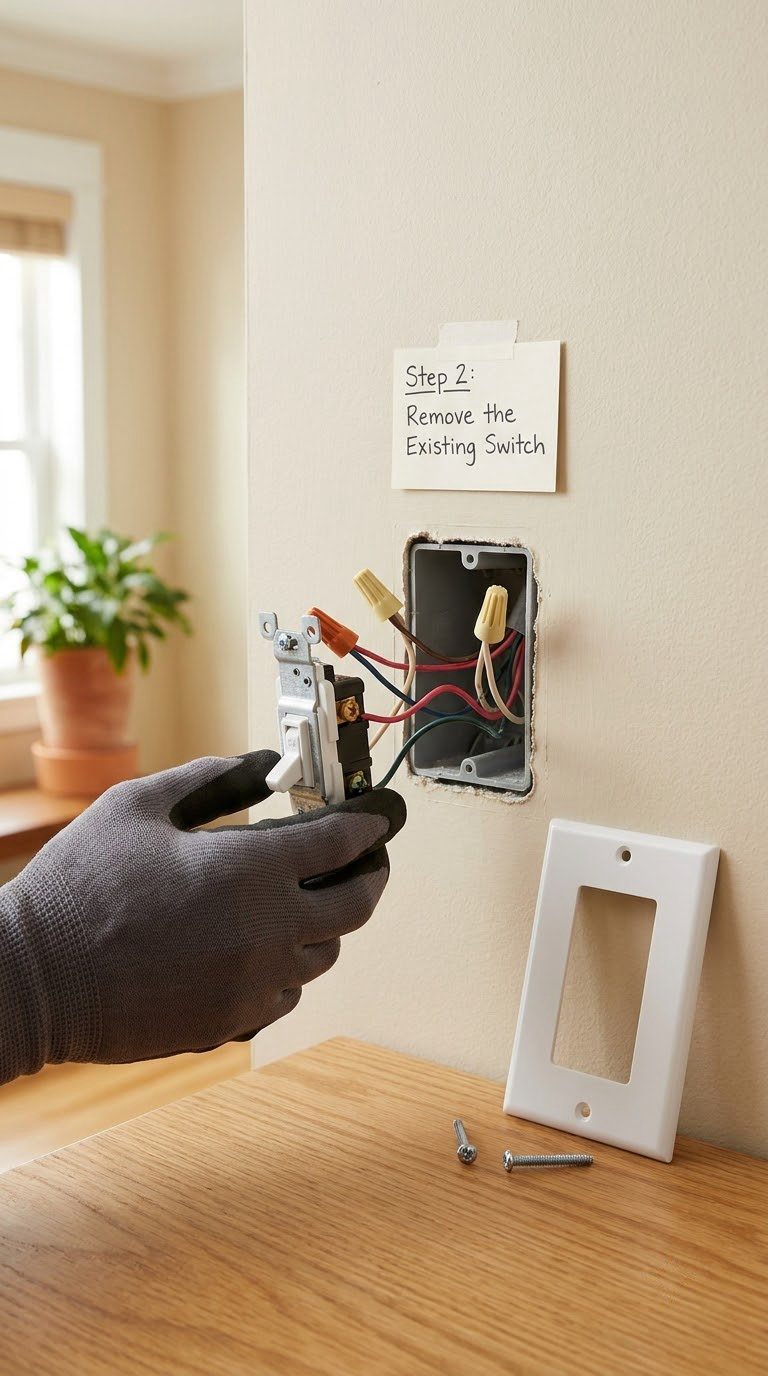
Remove the two cover plate screws, set the plate and screws on a folded cloth so they do not vanish into the wall, and loosen the two mounting screws on the switch body. Hold the switch as you back those screws out, because the whole assembly is only held by the wires and it will drop once the last screw clears.
Pull the switch straight out of the box and let the conductors hang slack. Never yank a wire to gain slack, and never twist the switch body in the box. Support the conductors with one hand, gently, as you move.
Check: the switch is fully out and the wires move freely without resistance, and the box itself is not loose in the wall. A box that rocks will not hold a switch properly, and that is a separate fix.
Step 3: Inspect and Identify the Wiring
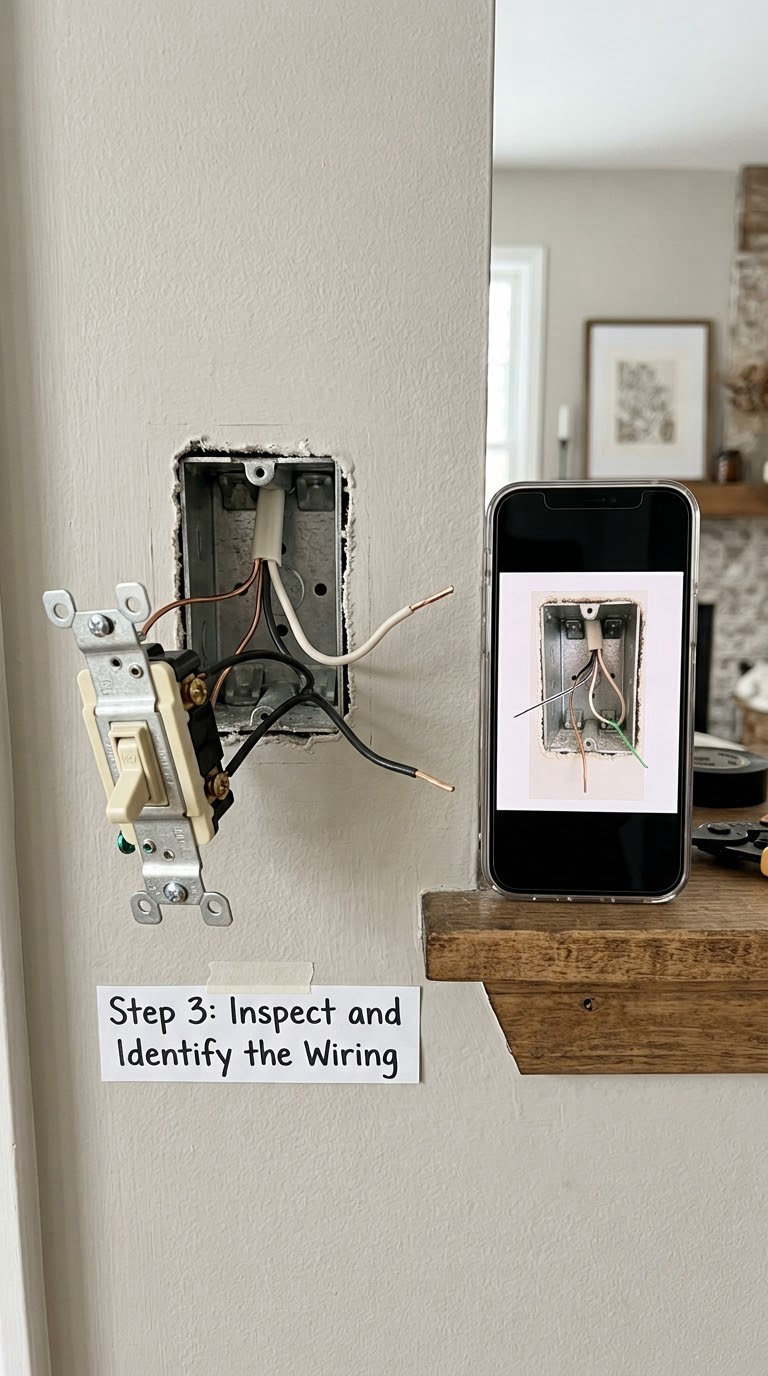
Take a photo of the existing connections before you disconnect a single conductor. Two clear phone photos from two angles take under a minute and they are the single best safety net on this job: if something goes sideways, or you find yourself explaining the job at 9pm, you have an exact record of what was where.
On a standard single-pole box you are looking for two hot conductors, usually black or red, and a bare or green ground. A white conductor may or may not be present. In a switch loop, the black conductors are the ones that switch the power, and a white conductor that has been taped and used as a hot is normal on older installs, which is one more reason the photo matters.
Identifying the hot in a dead box takes one step: with the breaker off, touch one meter lead to the ground and the other to each terminal screw in turn. The terminal that reads voltage is your line or common side, and the other is switched hot. If both read the same, something is not what you think it is and you should stop rather than continue. If the box has three or more hot conductors and multiple wire nuts, it is a multi-switch run, not a single-pole, and that is a different procedure.
Check: hot identified, ground identified, no cracked or discoloured insulation, no conductor that has been cut back so short that re-landing it on a terminal would leave bare copper outside a connector.
Step 4: Connect the Replacement Switch
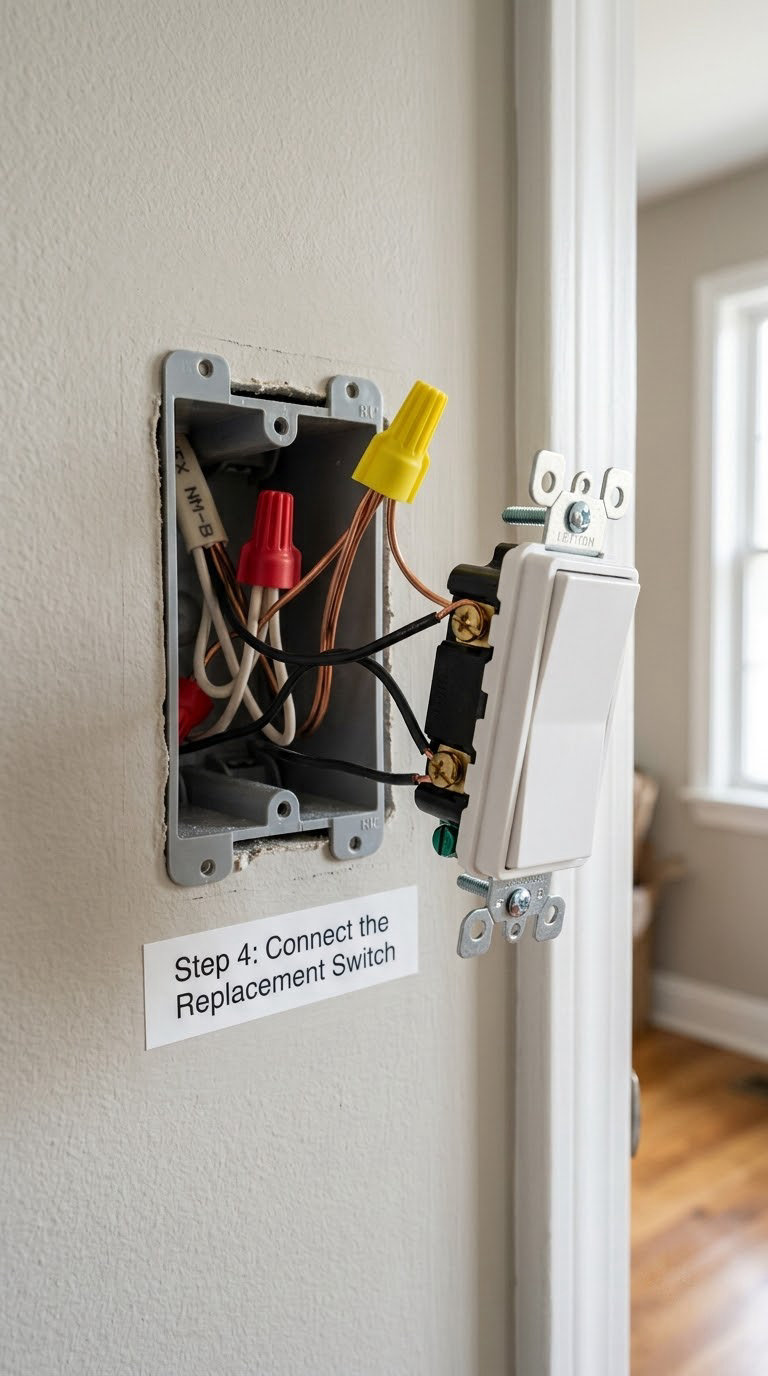
Loosen each terminal screw and remove the old conductors one at a time, keeping the photo handy. Strip about 3/4 inch of insulation from each conductor, leaving the copper clean and bright, with no nicks in the strands. Avoid a strip depth that cuts into the conductor itself; if you nick the wire, cut it back and strip again.
Land the ground conductor on the green ground screw first, the one that is almost always at the top of the device. Wrap it clockwise so the strands stay under the screw as you tighten, and the screw body clamps the insulation rather than the copper. If your box has no ground wire at all, leave the green screw empty and tape it off, and understand that you have a box that predates current grounding requirements.
Then land the two hot conductors on the two brass terminal screws. On a single-pole switch the order genuinely does not matter, which surprises people who expect the arrangement to be fussy. Wrap clockwise, tighten until firm, and tug each conductor gently to confirm nothing pulls free. If your device has push-in back-wire slots as well as side screws, the side screws are the better choice: back-wire push-ins are a common source of intermittent failures and browned switch plates over months, and that slow burn is exactly the risk you are trying to remove by replacing the switch.
Cap any white conductors that you did not land, using a listed connector and leaving no bare copper showing outside it. Neatly arrange the conductors so they fold into the box without being pinched behind the switch body. A crowded box with the switch forced against a wire is how a good connection gets crushed.
Check: no bare copper visible outside a connector or under a terminal clamp, every screw tight, and the conductors sit inside the box with a little room to spare.
Step 5: Reinstall the Switch and Test It
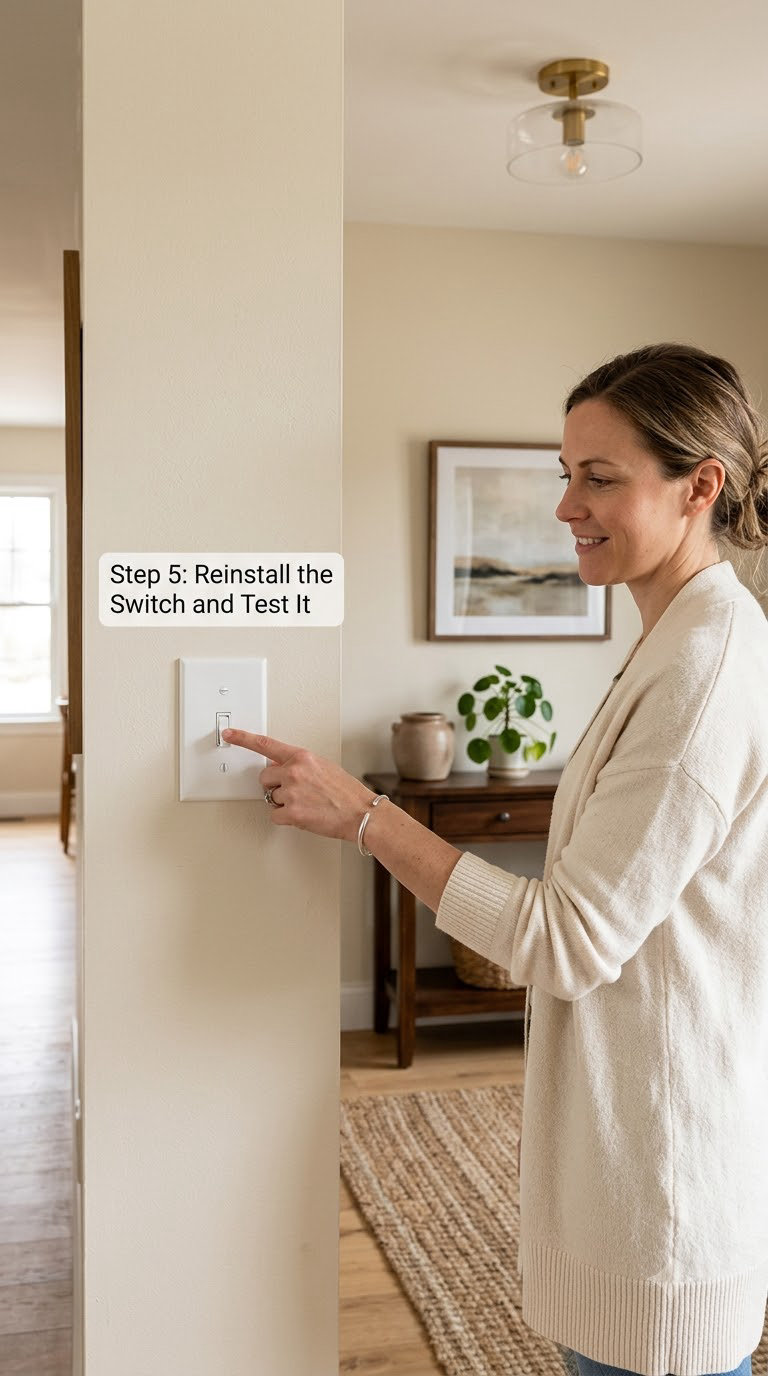
Fold the conductors into the box, align the switch body with the box ears and tighten the mounting screws until the device is snug and level. Do not overtighten; you can crush the box or crack the device housing, and a switch that is tight enough not to move is tight enough. If the screw holes turn freely, stop and add a switch extender ring rather than cranking harder.
Fit the cover plate, restore the breaker, and wait a few seconds. Then test the switch from a normal standing position with dry hands, not with your face near the wall. The light should come on and stay on, and the switch should feel solid rather than loose or crunchy.
Give the switch a minute of use, then touch the faceplate. Any warmth beyond a faint trace, any buzzing, any flicker that a fresh bulb does not fix, or a breaker that trips again means power off first and investigate before trying anything else. If the breaker holds and the light behaves, clean up and remove the tape from the breaker when you are done labelling.
Check: light works from the switch, plate is level, no warmth, no buzz, breaker stays on, and the cover plate is fully reattached with both screws.
Common Mistakes to Avoid
Almost every callout I have seen on DIY forums traces back to one of these. Each has a straightforward fix.
- Relying on the wall switch. It does not de-energize the box. Fix: breaker off, then tester on every conductor.
- Not verifying the tester. Fix: prove it detects voltage on a known-live circuit before you trust a negative result.
- Buying a single-pole for a three-way location. Fix: count the terminal screws and the conductors in the box before shopping.
- Losing the ground. Fix: ground to the green screw first, and confirm the bond holds when you tug it.
- Wrapping counterclockwise. The strands push out from under the screw as you tighten. Fix: always wrap clockwise so the tightening motion draws the wire in.
- Relying on push-in back-wires. Fix: use the side screws. A loose back-wire can arc, brown the plate, and fail later with no warning.
- Leaving a conductor too long or under-tightened. Fix: 1/2 to 3/4 inch of stripped copper, no bare copper outside a connector, and a firm tug test on every terminal.
One more deserves its own line, because it panics people: if a neighbouring outlet on the same circuit stops working after your swap, a single loose connection under one terminal screw is the usual explanation. Power off, retest, and recheck each connection in turn before assuming something bigger is wrong.
When to Call a Pro
Call a licensed electrician, and stop before you start, if any of these are true. There is no penalty for calling early, and the cost of a short visit is far below the cost of a shock or a fire.
- The tester still shows voltage with the breaker off. That points to mislabelled panels, a shared circuit or multi-panel homes, and it needs a proper circuit map.
- Aluminum or cloth-insulated wiring. Aluminum branch conductors need listed connectors and specific anti-oxidant treatment, and mixing them with ordinary connectors on a copper device is how connections fail hot.
- Any sign of heat. Scorching on the device, a browned cover plate, a burnt smell, crackling or buzzing when the switch is toggled. Arcing damage means replacing the device and checking the wiring, not just the switch.
- More conductors than you understand. Three or more hots with multiple wire nuts usually means a multi-switch run, and a smart-switch circuit with a neutral present is a different job again.
- Outdoor, damp-location or garage boxes. These need weatherproof covers, in-use rated devices and correct box fill, and the surface is often where the failures start.
- A breaker panel you are wary of. Federal Pacific, Zinsco and Challenger panels have well-documented failure histories, and work around them belongs with a professional who can evaluate the whole panel.
- Uncertified switches. Unlisted imported devices are not worth any saving in a box you are about to close up.
- Any permit question. Rules on when a permit is required vary, and an electrician handles the filing.
Maintenance
A new switch wants almost nothing, which is the point. A quick check each year or two is enough.
- Tighten a loose cover plate with the breaker off. A rattling plate eventually works the screws loose enough to strip a head.
- Look for heat and discoloration around the plate and the device body. Any warmth beyond a faint trace, or any browning on the inside of the plate, means power off and investigate.
- Clean the accessible dust from inside the plate gap with the breaker off and a dry cloth. Keep liquid out of the box entirely.
- Replace a cracked or discoloured device rather than leaving it. Brittle plastic around the terminals is where arcing starts.
- Test GFCI and AFCI devices monthly if the switch serves one, using the test button on the face, and confirm downstream outlets still trip when they should.
- Change dimmer bulbs to a dimmable type that matches the dimmer. Incompatible bulbs cause flicker and hum, and they are one of the reasons a dimmer is blamed for a wiring fault that is not there.
If you are planning a bigger electrical project while the box is open, our guide to smart light switch kits is worth a look, and the same breaker-first discipline applies to the other jobs in this category, including how to replace a two-handle shower valve and how to swap an air conditioner filter.
Frequently Asked Questions
Do I need to turn off the wall switch before replacing a light switch?
No, and it is not enough. The wall switch only stops current from flowing to the light; the hot conductor inside the box stays energized. Always turn off the circuit breaker that supplies the switch, then confirm with a properly rated voltage tester that every conductor is dead before you touch anything.
Can I replace a light switch without turning off the electricity?
No. Opening a switch plate or touching wiring while the circuit is live risks serious shock, burns or electrocution, and the wall switch does not de-energize the terminals. Shut off the correct breaker, verify with a tester you have confirmed works, and stop immediately if the tester shows any voltage or gives an unclear result.
How do I know which wires connect to a replacement light switch?
On a standard single-pole switch, the bare or green ground goes to the green screw, and the two hot conductors go to the two brass terminal screws in either order. To identify the hot side in a dead box, touch one meter lead to the ground and the other to each terminal, or match your wiring to the photo you took before disconnecting anything.
What if the wires in my switch box are aluminum?
Do not connect aluminum wiring to a copper replacement switch with ordinary wire connectors. Aluminum branch wiring, common in homes from the 1960s and early 1970s, needs listed connectors rated for aluminum-copper, anti-oxidant treatment, and usually a licensed electrician. The right fix is often a pigtail so only listed connectors touch each conductor.
My new switch has a green ground screw but my old one didn’t. What do I do?
If the box has a bare or green ground conductor, land it on the green screw. If there is no ground wire at all, leave the green screw empty, tape it off so it cannot contact anything, and understand that the box predates current grounding requirements. Bringing a ground into an ungrounded box is work for a licensed electrician.
Why does the light not work after I replaced the switch?
Most often a hot conductor is landed on the wrong terminal in a three-way setup, or a screw is not tight enough to clamp the copper. Check the breaker stayed on, retest each terminal with a meter against the ground, and tug each conductor to confirm it is secure. In a three-way box, the common terminal must carry the common wire.
Start with the breaker, not the wall switch. Find the circuit, label it, and prove with a tester that every conductor in the box is dead before you touch a single wire.
Then match the replacement to what is already there, keep the ground connected, wrap every conductor clockwise and tighten it properly, and take a photo before you disconnect anything. If anything in the box looks old, aluminum, scorched or unfamiliar, stop there and call a licensed electrician. It is a short list, and the one call worth making before you buy a single part.