
How to Repair Water Damaged Drywall Ceiling (October 2026)
Learning how to repair water damaged drywall ceiling comes down to four things in order: stop the water, dry the cavity completely, cut out every compromised inch, then patch and finish. Miss the first step and the repair fails within a season.
That is the honest answer, and it is the order most online guides get wrong. Half of them start with the saw. By then the stain is already soaking the insulation and the paper face of the drywall has lost most of its strength.
Contents
Winter is when most people find these stains: a frozen supply line gives way in an attic, a roof shingle lifts in a storm, or a shower valve weeps into the ceiling below. I had a pipe burst in a Texas attic in February and the stain covered maybe a third of one ceiling. We dried it, kept most of the drywall, and replaced only what was soft.
Everything below assumes a small, stable leak that has already stopped. A sagging ceiling or an active drip is a different job with a different set of risks.
Time: 2 to 4 days of drying, plus 3 to 5 days of compound curing between coats · Difficulty: Moderate DIY · Skill level: Careful beginner with a helper
Last updated: October 2026
Tools and Materials
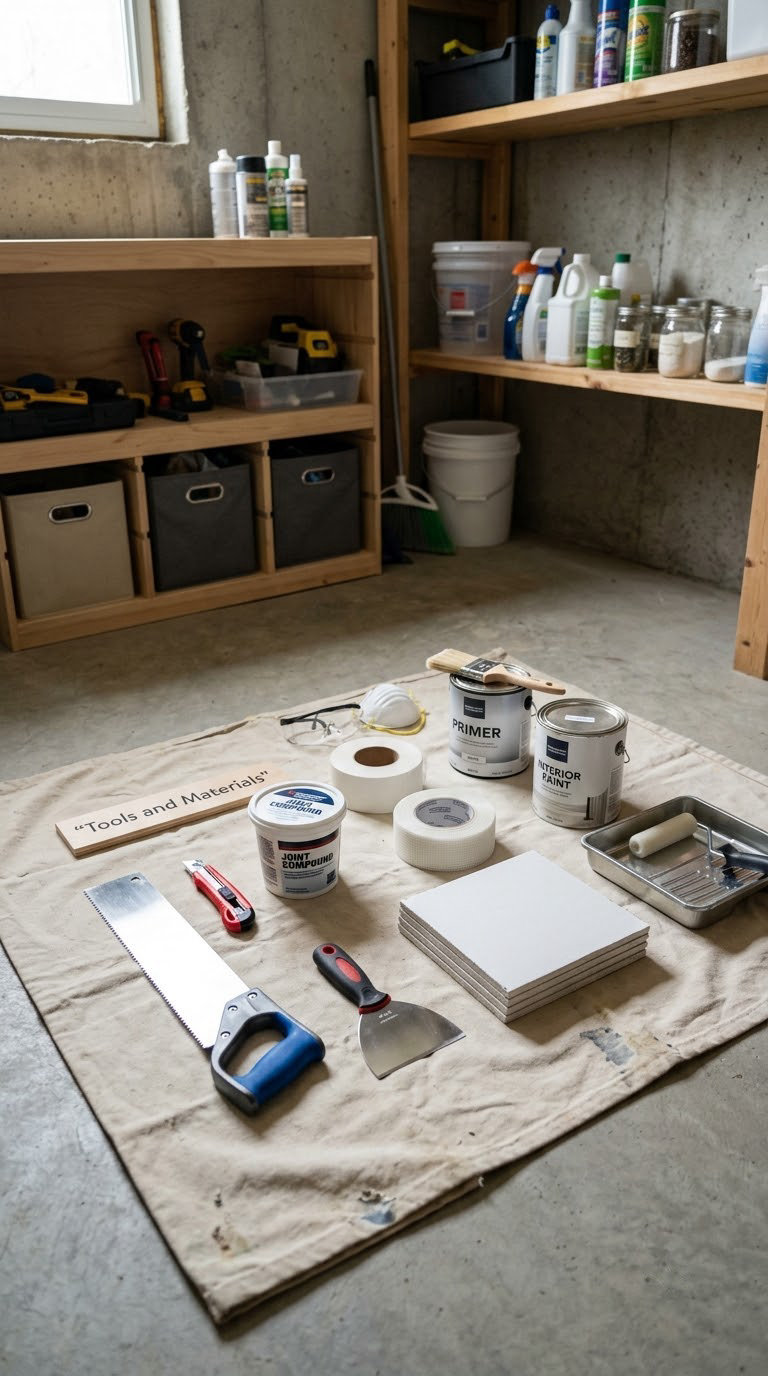
The tool list for this job is short, and most homeowners already own half of it. If you are buying rather than borrowing, a basic drywall kit covers the cutting and finishing tools in one purchase.
If you do not have a kit yet, these drywall tool kits cover the cutting, taping and sanding tools this repair needs.
- Drywall saw or a reciprocating saw with a drywall blade for the opening
- Utility knife for trimming tape and the paper face
- Framing square and a pencil or chalk line for square cuts
- 4-inch and 12-inch drywall knives — one to lay tape, one to feather
- Drywall screws, 1-1/4 inch, plus a drill driver
- Safety glasses, work gloves, a dust mask or respirator, and a step ladder
- Drop cloth, a bucket, and a shop vac for cleanup
- Moisture meter if you want a number instead of a guess
- Box fan or a dehumidifier for drying the cavity
For materials, buy the patch before you cut, because ceiling thickness is not standard everywhere.
- Drywall sheet or patch piece matching the existing ceiling thickness — most ceilings are 1/2 inch (12.7 mm), some are 5/8 inch (15.9 mm). Measure or check an exposed edge before buying
- 2×4 or 1×3 backing boards if no ceiling joist lands inside your cut, roughly 12 inches (30 cm) longer than the opening
- Paper drywall tape for the seams — it holds up better than mesh on a ceiling joint
- Setting-type joint compound, about a 2-gallon (7.6 L) pail for a patch up to 2 square feet, plus a smaller tub for touch-ups
- Stain-blocking primer or a pigmented shellac-based sealer, one gallon
- Ceiling paint in the existing colour, usually a gallon (3.8 L) is enough
- Fine-grit sandpaper or a sanding sponge, 150 to 220 grit
Before You Start
Take ten minutes here and the repair goes smoothly. Photograph the stain from several angles, then photograph any wet insulation and the plumbing or roof area above, before you touch anything. Adjusters want documentation of the original condition, and it is impossible to photograph a hole you already cut. Advice from people who have filed claims is blunt about this: document first, demolish second.
Next, work out where the water came from. A stain directly under a bathroom or upstairs shower usually means plumbing or a failed waterproofing membrane. A stain under a roof edge after heavy rain points to shingles or flashing. A stain that grows when the air conditioning runs is condensation drip. A stain in a room with no plumbing above and no roof above it is almost always coming from a neighbouring unit or an exterior wall leak working inward.
Shape gives it away. A stain that is wider at the outside and narrows inward came through the roof deck or wall. A stain with a defined dark ring and dry interior usually grew outward from a slow drip. When a leak only shows up in dry weather, run a garden hose over the suspect roof area in stages for fifteen minutes and watch the ceiling from below.
Safety next. If a light fixture, smoke detector or ceiling fan sits inside or near the stained area, turn the breaker off at the box and confirm it is dead with a tester before you reach up there. Never touch wiring that has been wet, and if wiring was submerged more than about 24 hours, have an electrician replace it rather than drying it out.
Ventilate the room and, if you can, open the cavity to the attic or the floor above so air moves through. Keep people out from under a sagging section; wet drywall is heavy and unsupported board can drop without warning.
Finally, decide repair versus replace before you buy anything. Press the stained area firmly with a screwdriver handle. If it is firm and springs back, you may be able to patch and paint. If it pushes through, feels spongy, crumbles, or bulges, that material has to come out. Mold changes the answer completely: black, green or grey speckling, fuzzy growth, or a musty smell that returns when the area gets damp means stop and read the mold section below.
Working overhead with a full ladder and a bucket is awkward. If you have a lot of ceiling to do, [drywall stilts](https://www.rosenberryrooms.com/best-drywall-stilts/) take some of that frustration away, though they are not for everyone.
Step-by-Step Instructions
Step 1: Find and Stop the Water Source
The repair only holds if the water stops. Repairing a wet ceiling is like patching a hole in a bucket.
For a plumbing leak, shut the water off at the main or the fixture supply valve and repair the joint, the wax ring, or the supply line. A toilet that sweats or drips at the base needs the wax ring replaced, which is a plumber job unless you have done it before. For a roof or flashing leak, that is a roofer’s work above the ceiling line, and many warranties exclude damage caused by water that ran a long way before anyone noticed.
Make a temporary protection plan before you remove any drywall: a bucket under the active drip, a tarp over furniture, and the ceiling opened up so you can see whether it is still running.
Step 2: Dry the Ceiling and Repair the Cause
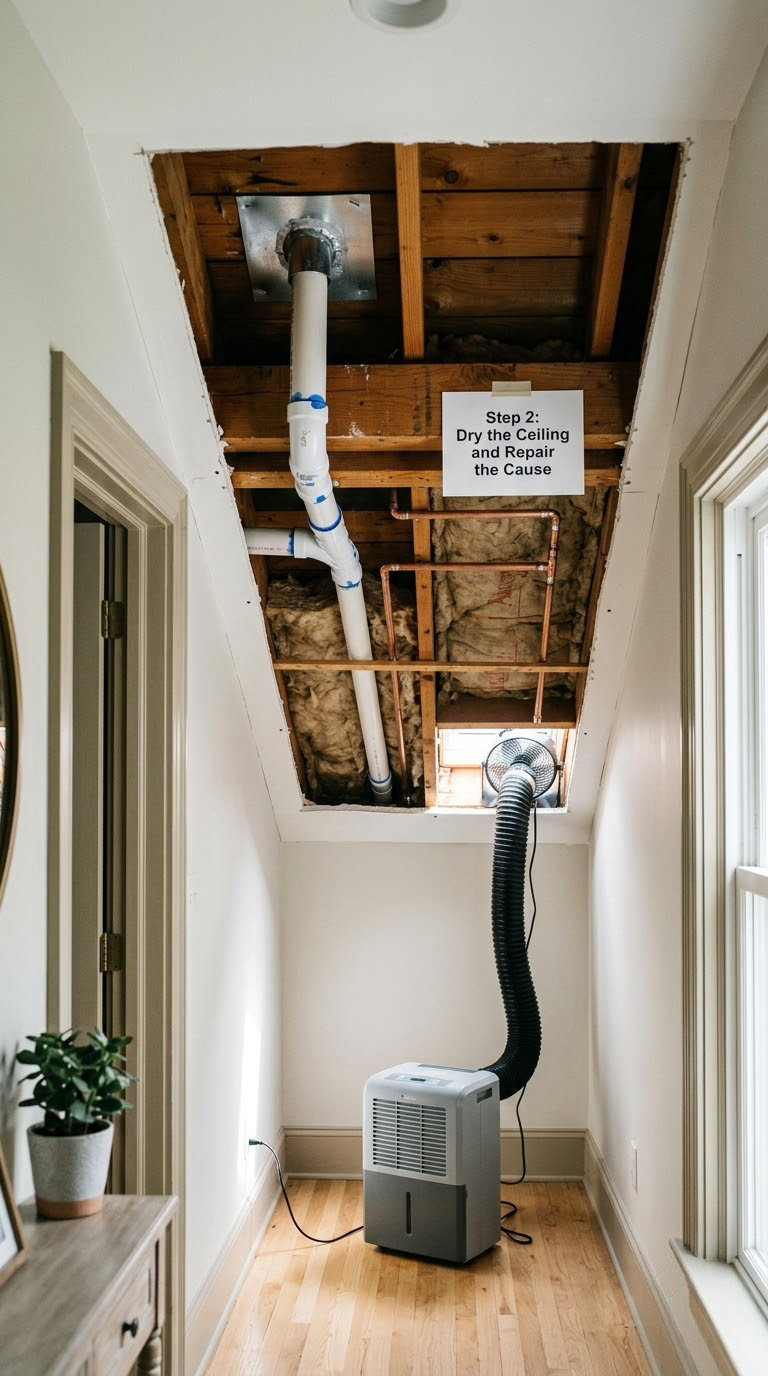
Drying is the step people rush, and it is where most repeat failures come from. Damp drywall will not accept paint, the stain bleeds straight back through, and mold that starts now is mold you will meet again next year.
Pull out wet insulation with gloves and a respirator. Wet fiberglass batts lose their loft and pick up weight, and once saturated they rarely recover. If the batts were soaked rather than dampened, replace them; if they only got misted, they may dry fine laid back in place. In a bathroom or shower-adjacent ceiling, use mold-resistant board for the patch instead.
Set a box fan in the cavity and a dehumidifier in the room, then run both continuously. On low ceilings, a quiet circulating fan moves air without adding much moisture — these [low profile ceiling fan options](https://www.rosenberryrooms.com/best-low-profile-ceiling-fans-for-low-ceilings/) are worth a look if the room is under eight feet.
Homeowners on the drywall forums use a four-day window as their practical rule of thumb, and that matches what restoration guidance suggests: 24 to 48 hours of forced air to stop mold, and a few days for framing to dry through.
How do you know when it is done? Press a moisture meter to several points in the cavity and to the framing. Drywall and wood generally read below about 12 percent, and most repair guides treat that as safe to close up. Without a meter, the fallback is firm to the touch with no cool or damp feeling and no odor when you put your face near the opening.
Step 3: Cut Out the Damaged Drywall
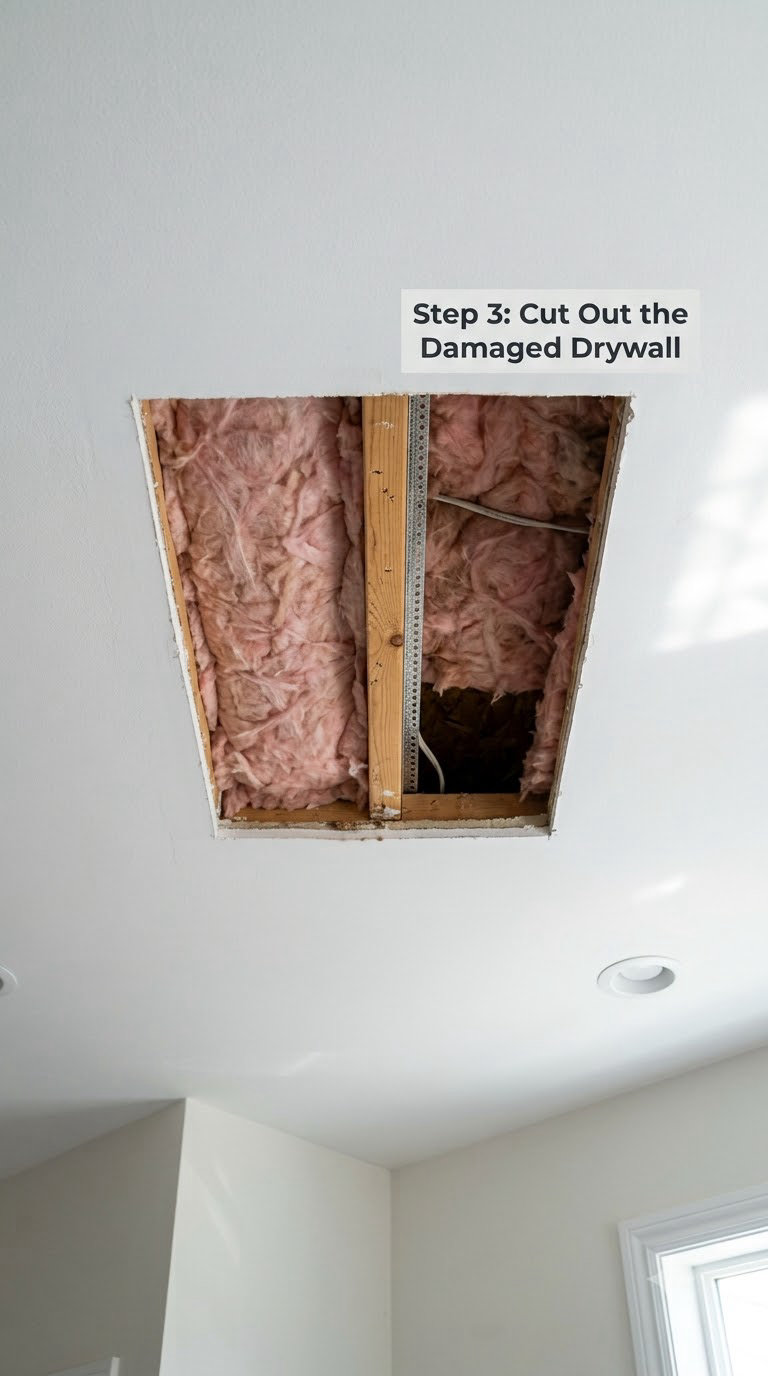
Cut square, and cut generously enough to reach sound material. The stain is almost always smaller than the soft area behind it, so mark the outer boundary by pressing the ceiling and following every soft edge, not just the discoloration.
Score the outline with a utility knife, then cut along it with a drywall saw. Cut in straight runs between corners rather than following curves. If the area is larger than about 2 square feet (0.2 square metres), extend the cut to the nearest ceiling joists on two sides so you have solid framing to screw into.
Work slowly near pipes and wires. Keep one hand and your saw clear of anything crossing the cavity, and never cut upward into a joist you have not located first.
Step 4: Patch the Opening
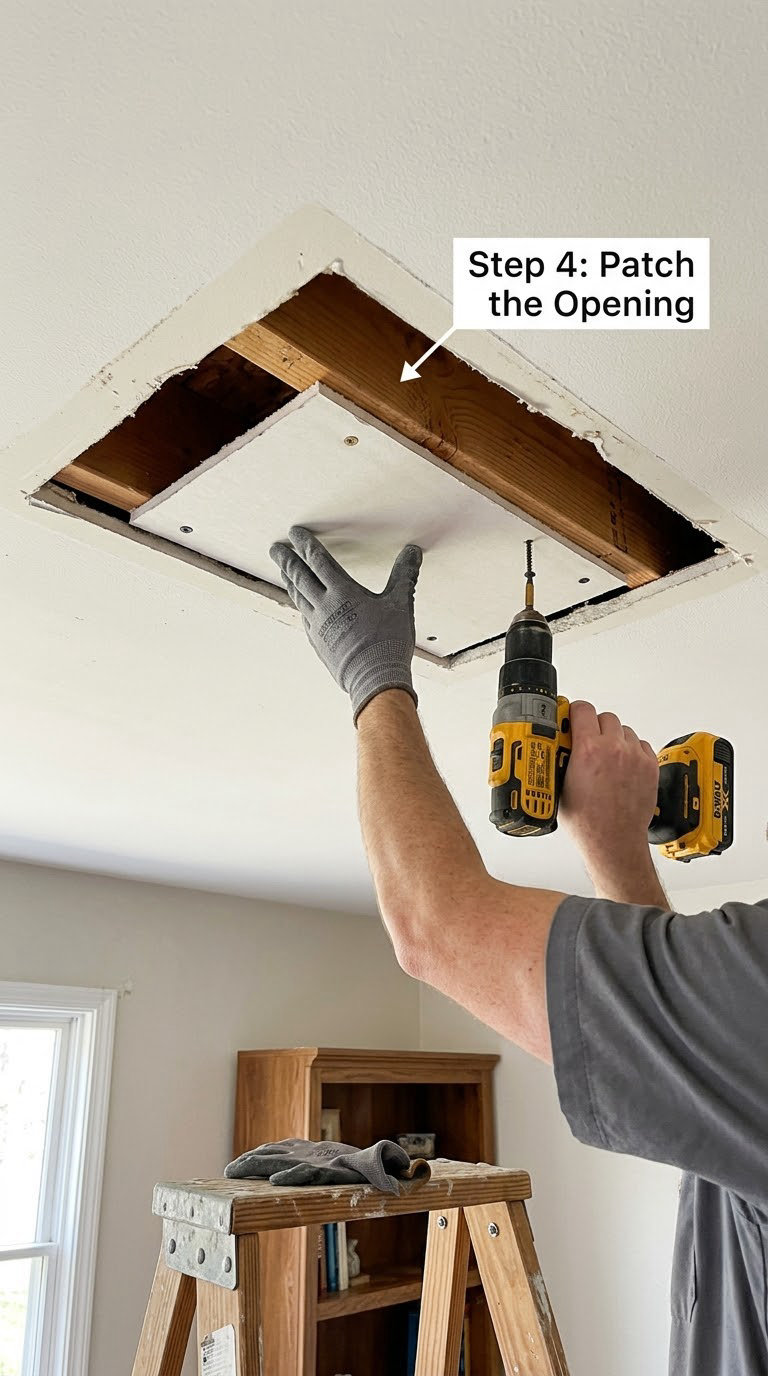
Ceilings are joisted from above, which is why this step goes wrong so often. Most people cut a neat hole with no joist anywhere near it and then wonder what to screw the patch to.
If a joist crosses your opening, screw straight into it. If not, screw 2×4 or 1×3 backing boards to the sides of the joists or to the solid ceiling above, running them at least 6 inches (15 cm) past the opening on each side so both the old and the new sheet have something to bite into.
Cut your patch 1/8 inch (3 mm) smaller than the opening on each side so it drops in without binding, then dry-lay it before fastening. Set it flush with the surrounding ceiling and drive drywall screws every 8 to 12 inches (20 to 30 cm) and at the ends. Recess the screw heads just below the paper without tearing it — a proud screw head will tent the compound and telegraph through the paint every time.
Step 5: Apply Joint Compound and Drywall Tape
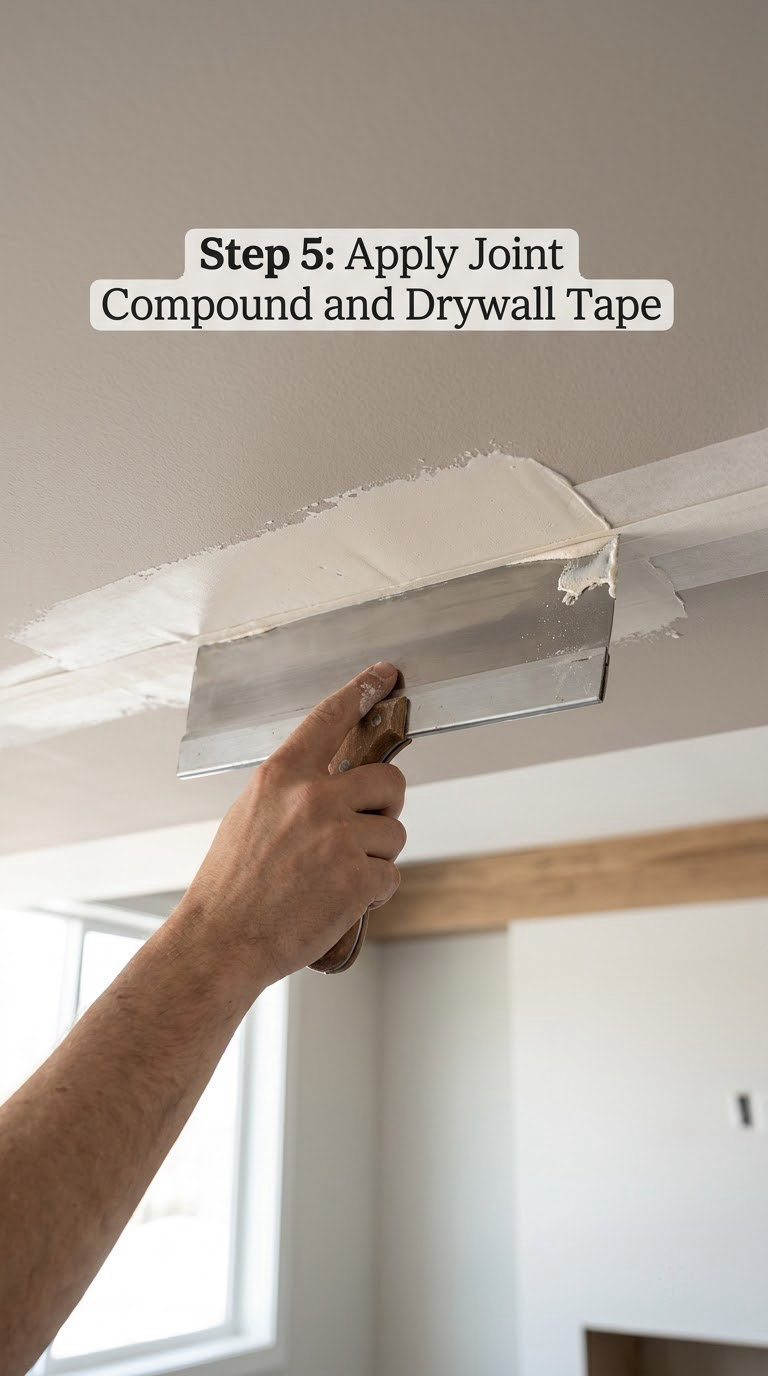
Paper tape on the seams, thin coats, and patience. That is the whole formula.
Pre-fill the gap between the patch and the old drywall with setting-type compound, let it harden, then bed the tape into a wet first coat with a 4-inch knife. Paper tape resists the sagging that fiberglass mesh suffers on a ceiling joint, which is why most finishers still use it overhead.
Scrape the coat flat, let it harden, and skim it with a 12-inch knife held at a slight angle so the edges feather out roughly 8 to 10 inches (20 to 25 cm) beyond the patch. Every coat thinner than the last, and each one allowed to dry completely.
Setting-type compound hardens in about 45 to 90 minutes depending on temperature and humidity, and you can top it up the same day. All-purpose takes 24 hours per coat. Work two sides of the patch before moving on, so you are not feathering over a seam you just disturbed.
Step 6: Sand, Prime, and Paint
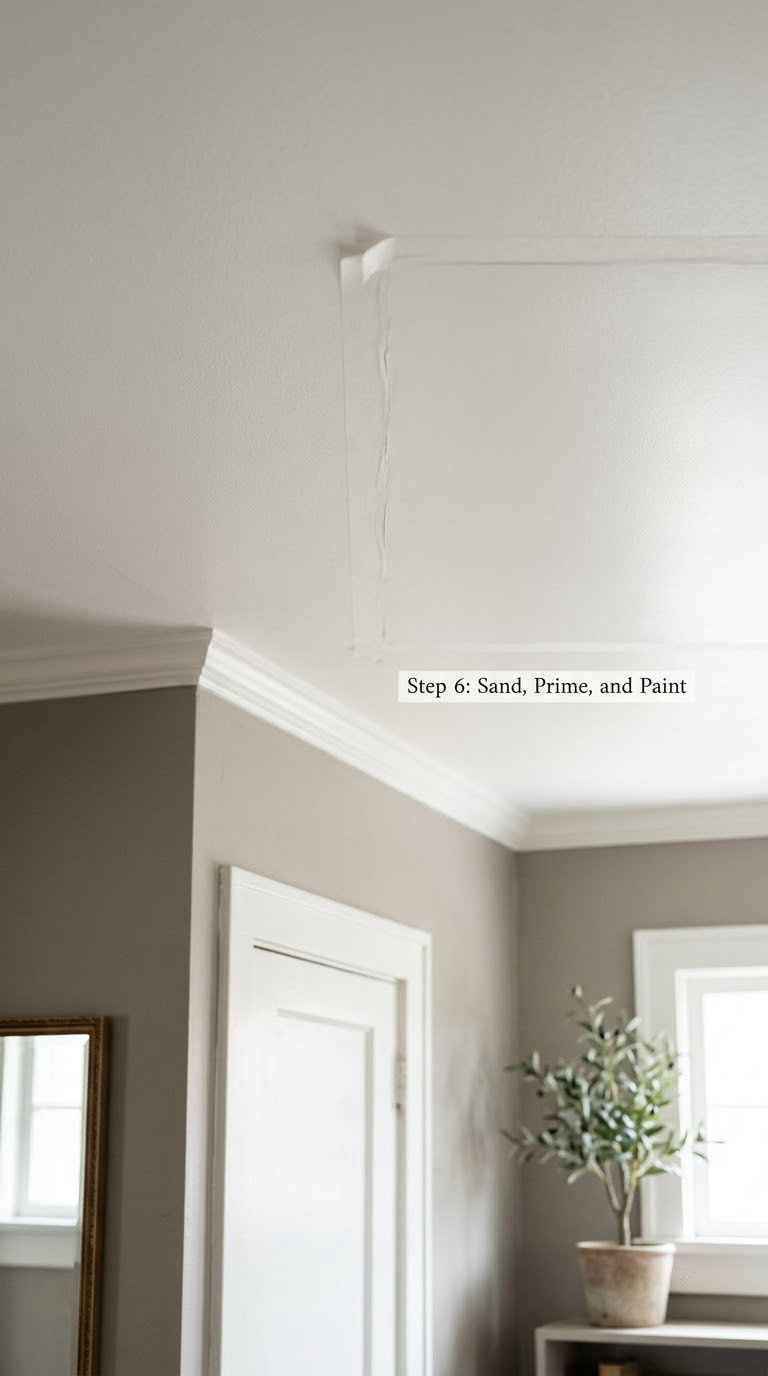
Sand each dried coat with 150 to 220 grit, using light even pressure. Sand just enough to remove ridges. Over-sanding is the most common way a beginner ruins a good patch, because it exposes the tape edge and leaves a low spot that shows under raking light.
Turn off the lights and sweep a flashlight across the repair from an angle. Any shadow you can see will show in the paint. Check the screw heads too — a recurring pop means they were not recessed far enough and need one more pass of compound.
Vacuum the dust with the shop vac, not a broom, then roll on a stain-blocking or pigmented shellac-based sealer. Paint alone will not hold; the stain bleeds back through within days. Can you just paint over a water-damaged ceiling? Only if it is bone dry and mold-free, and even then only over a stain-blocking primer.
Repaint the full ceiling rather than just the patch, because sheen differences show up as a rectangle under daylight. Cut in along the walls and roll the field, two coats, letting the first dry fully.
If your ceiling has popcorn, Artex or knockdown texture, the flat patch will look wrong no matter how well it is finished. Once the repair is painted and dry, apply a texture match with a hopper gun or a paint roller and a stiff-bristle stipple brush — these [texture spray gun options](https://www.rosenberryrooms.com/best-texture-spray-guns-for-drywall-and-ceilings/) cover both techniques. Match the existing texture in a closet or a hidden corner before touching the repair.
Common Mistakes to Avoid
Almost every failed patch traces back to one of these.
- Patching before the leak is fixed. You will do the whole job twice.
- Closing up damp framing. Trapped moisture behind drywall becomes mold, and you will not see it until it is serious.
- Leaving wet insulation in place. Wet batts lose their R-value and rarely dry out fully.
- Cutting out too little. Cutting a small neat hole around the stain leaves wet material behind it. Follow the softness, not the colour.
- Using all-purpose compound for a first ceiling coat. Setting-type compound hardens so you can build up quickly and holds better overhead.
- Sanding through the paper. Once the paper face is gone, the patch absorbs paint differently and stains for good.
- Over-sanding the tape edge. Sand until the transitions disappear, not until they are gone.
- Leaving screw heads proud. They telegraph through every coat you add later.
- Painting over the stain without a sealer. This is the most expensive mistake in time, because you repaint twice.
- Skipping the documentation photos. If you are filing a claim, the evidence disappears the moment the drywall comes down.
When to Call a Pro
Some parts of this job are not worth doing yourself, and some are genuinely not legal to do yourself.
- Plumbing you cannot isolate. If the shutoff valve does not stop the flow, a plumber replaces it.
- Any electrical involvement. Wiring near a wet fixture, a breaker that keeps tripping, or wiring submerged more than about 24 hours goes to a licensed electrician. Wet wiring is not a DIY item.
- A sagging ceiling. If the board has dropped away from the joists, joist or rafter ends may be softened. Patching hides the symptom and leaves the structure failing.
- Mold covering more than about 10 square feet (1 square metre), or mold in an attic or wall cavity. Remediation crews contain the area, and insurers often require them.
- Roof or flashing repairs above the ceiling, anything over the second storey, or work that needs a ladder on a steep pitch.
- Damage from a burst or frozen supply line affecting more than one room.
Permits usually come into play for structural work, electrical changes, and repairs in some flood-prone jurisdictions, so check locally before you start if any of the above applies.
On cost, the materials for a small patch are modest and the work is mostly your time. Contractors generally quote drywall repair per square foot, and the labour is several times the material cost, so a small stain repaired early is far cheaper than a soaked ceiling you let sit for a season.
Maintenance
A repaired ceiling is not a finished job until you have watched it through a season. Check it after heavy rain, after any plumbing work upstairs, and at the change of each season.
Look for the same warning signs you saw the first time: a new brown or yellow spot, a soft spot that catches a fingernail, bubbling or peeling paint, or a paint blister that opens when you press it. Stand in the room with the lights off and look at the ceiling at a shallow angle, because a bulge catches the light long before it is visible head-on.
Run a hand along any line you patched and press gently where the screws are. If the seam cracks again within a year, something is still moving — usually a joist that flexes, or drywall that was closed up slightly damp.
In a bathroom or shower area, run the exhaust fan during and for twenty minutes after every shower. Condensation is the most common cause of repeat staining in those rooms, and ventilation fixes it before any drywall work is needed.
A [smart water leak detector](https://www.rosenberryrooms.com/best-smart-water-leak-detectors-for-basements/) is worth adding near the area you repaired if the source was plumbing. It tells you about the next one while the drywall is still cheap to save.
Frequently Asked Questions
Can I repair a water-damaged drywall ceiling myself?
A small, stable repair is fine for a confident DIYer once the water source is fixed, the ceiling is not sagging, and there is no electrical, structural or extensive mold damage. You will need a ladder, a drywall saw, joint compound, tape and three dry days between coats. If the board is soft over more than a couple of square feet, or the leak is still active, hand it to a contractor.
How long should a water-damaged ceiling dry before repairing?
Dry until the drywall and framing are firm with no damp feeling, not for a fixed number of days. Run a fan and a dehumidifier continuously and check with a moisture meter, aiming for readings below about 12 percent. Most people dry three to four days this way, and mold can begin in damp drywall within 24 to 48 hours, so err toward waiting.
Can you just paint over a water-damaged ceiling?
Only if the area is completely dry, firm and free of mold, and even then you need a stain-blocking or pigmented shellac-based sealer first. Regular paint lets the stain bleed back through within days, and you end up stripping and repainting. If the drywall is soft, spongy or bulges, paint is not the answer and the material has to come out.
Does the ceiling need to be replaced after water damage?
Only the compromised part does. Press the stained area with a screwdriver handle: firm and springy means you can seal and repaint it, while soft, crumbly, badly browned or sagging drywall has to be cut out back to the ceiling joists and replaced. Moldy drywall must go regardless of how it feels, and a sagging ceiling usually signals damaged framing.
Can mold grow on water-damaged drywall?
Yes. Drywall is porous and paper-faced, so mold can start within 24 to 48 hours of staying damp. That does not mean every water stain is mold: brown staining with no odor is usually just a stain, while black, green or grey speckling, fuzzy growth or a musty smell means mold. Clean small areas with a mold-killing product and a respirator, and call remediation for anything larger.
Will insurance cover water damage in a ceiling?
Sudden covered perils such as a burst pipe or a storm are typically covered, while slow leaks, gradual damage and mold are commonly excluded. Photograph the stain, the wet insulation and the source from several angles before you remove anything, and keep damaged material if the adjuster asks for it. Many mold claims are denied, so ask about mold coverage specifically.
Conclusion
The first action is never the saw. Find the source of the water, fix it, and let the cavity dry properly until the drywall reads firm and dry. Everything after that is ordinary finishing work.
From there, the sequence is short: press the stain to find the soft edges, cut a square opening back to sound drywall and onto framing, fit and screw a patch of matching thickness, bed paper tape in thin coats of setting-type compound, sand lightly, seal with a stain-blocking primer, and repaint the whole ceiling.
Then keep an eye on it through the next storm and the next season. A new stain or a crack along the seam means the source is still there, and that is much cheaper to find while the ceiling is still just drywall.
