20 Narrow Hallway Decorating Ideas Made Easy (October 2026)
A narrow hallway does three things well already: it guides you from one room to the next, keeps shoes and coats off the living room floor, and gives you the first impression of the house. What it usually does badly is feel like a corridor you walk through fast. These 20 narrow hallway decorating ideas fix that without moving a wall, replacing flooring, or cutting a single hole you have to patch later. Most of them work in a 3-foot-wide apartment passage and look even better in a 4- or 5-foot ranch hallway.
The trick in any tight corridor comes down to three levers: use the vertical wall, keep furniture slim enough that the walkway stays clear, and layer warm light instead of relying on one overhead bulb. October is a good month to start, because you get the whole entry sorted before the extra guests arrive in December.
Contents
Every idea below includes the measurement that actually matters, a realistic cost range in US dollars, a difficulty call, and a time estimate. Costs vary a lot by region and by what you already own, so treat them as a starting point, not a quote. If you want the broader picture first, this hallway decor roundup for every hallway shape is worth a look before you shop.
20 Narrow Hallway Decorating Ideas at a Glance
Match the ideas to your hallway width, your budget, and how much free time you actually have this month.
| Idea | Cost | Difficulty | Time |
|---|---|---|---|
| 1. Narrow console table | 90 to 300 dollars | Easy DIY | 1 to 2 hours |
| 2. Large horizontal mirror | 60 to 250 dollars | Easy DIY | 1 hour |
| 3. Wall-mounted shelf | 20 to 80 dollars | Easy DIY | 30 to 60 minutes |
| 4. Oversized wall art | 40 to 200 dollars | Easy DIY | 45 minutes |
| 5. Ceiling and wall color | 80 to 250 dollars | Moderate DIY | One weekend |
| 6. Statement light fixture | 70 to 350 dollars | Hire a pro | Half a day |
| 7. Built-in-style storage run | 150 to 600 dollars | Moderate DIY | One weekend |
| 8. Decorative runner | 50 to 250 dollars | Easy DIY | 10 minutes |
| 9. Vertical display frames | 30 to 150 dollars | Easy DIY | 45 minutes |
| 10. Slim bench seat | 80 to 300 dollars | Easy DIY | 1 hour |
| 11. Hooks or compact rail | 15 to 90 dollars | Easy DIY | 45 minutes |
| 12. Wall sconces | 90 to 400 dollars | Hire a pro | Half a day |
| 13. Color-coordinated gallery wall | 70 to 300 dollars | Easy DIY | 2 to 3 hours |
| 14. Narrow floor lamp | 40 to 160 dollars | Easy DIY | 10 minutes |
| 15. Patterned or textured wall finish | 50 to 400 dollars | Moderate DIY | One weekend |
| 16. Decorative drop zone | 25 to 150 dollars | Easy DIY | 1 hour |
| 17. Small statement rug | 40 to 200 dollars | Easy DIY | 10 minutes |
| 18. Greenery without floor space | 30 to 200 dollars | Easy DIY | 1 to 2 hours |
| 19. Refinish or paint a door | 40 to 200 dollars | Moderate DIY | One weekend |
| 20. Gallery corridor | 200 to 900 dollars | Moderate DIY | Two weekends |
1. Use a Narrow Console Table
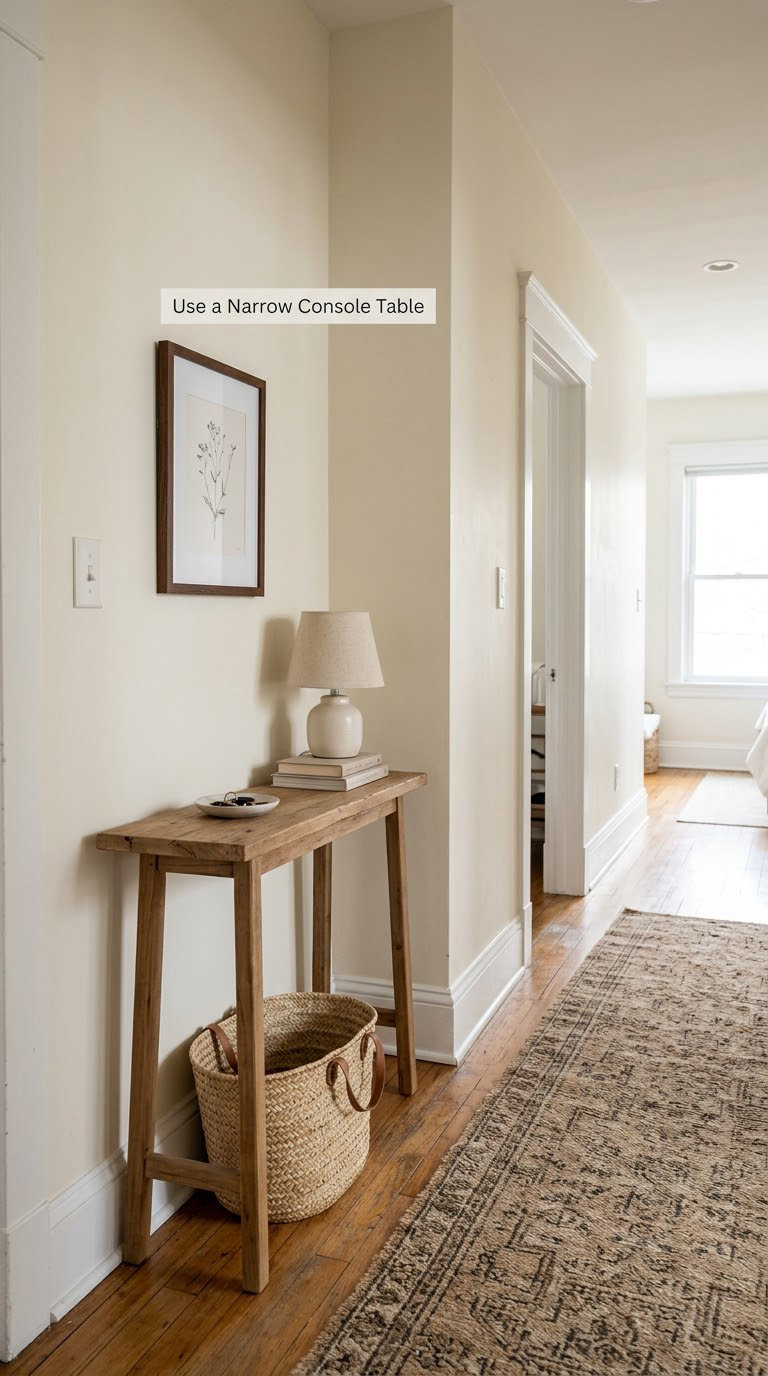
A slim console is the single most useful thing you can put in a narrow hallway because it gives you a landing surface for keys without giving up the walkway. The dimension that matters is depth: buy something 7 to 10 inches deep, and the rest of the width goes to the wall instead of the passage.
How to do it: Measure your hallway at the narrowest point and subtract 36 inches, which is the minimum comfortable walkway. Choose a console 30 to 32 inches tall so it lines up roughly with your door hardware. Place it against the longest uninterrupted wall, not across an attic access door or a heat register. Keep the styling to three items: a lamp, one framed piece, and a low basket. Anchor tall pieces to the wall with a small furniture strap if the console is top-heavy.
Cost: 90 to 300 dollars for a wood console, or 20 to 40 dollars for a thrifted one with a refinishing kit. Difficulty: Easy DIY. Time: 1 to 2 hours including wall prep and styling.
Good to know: Skip the console entirely if your walkway measures under 36 inches. A 4 inch deep wall shelf gives you the same drop zone without any floor footprint, which matters most in a 3 foot wide apartment hall.
2. Hang a Large Horizontal Mirror
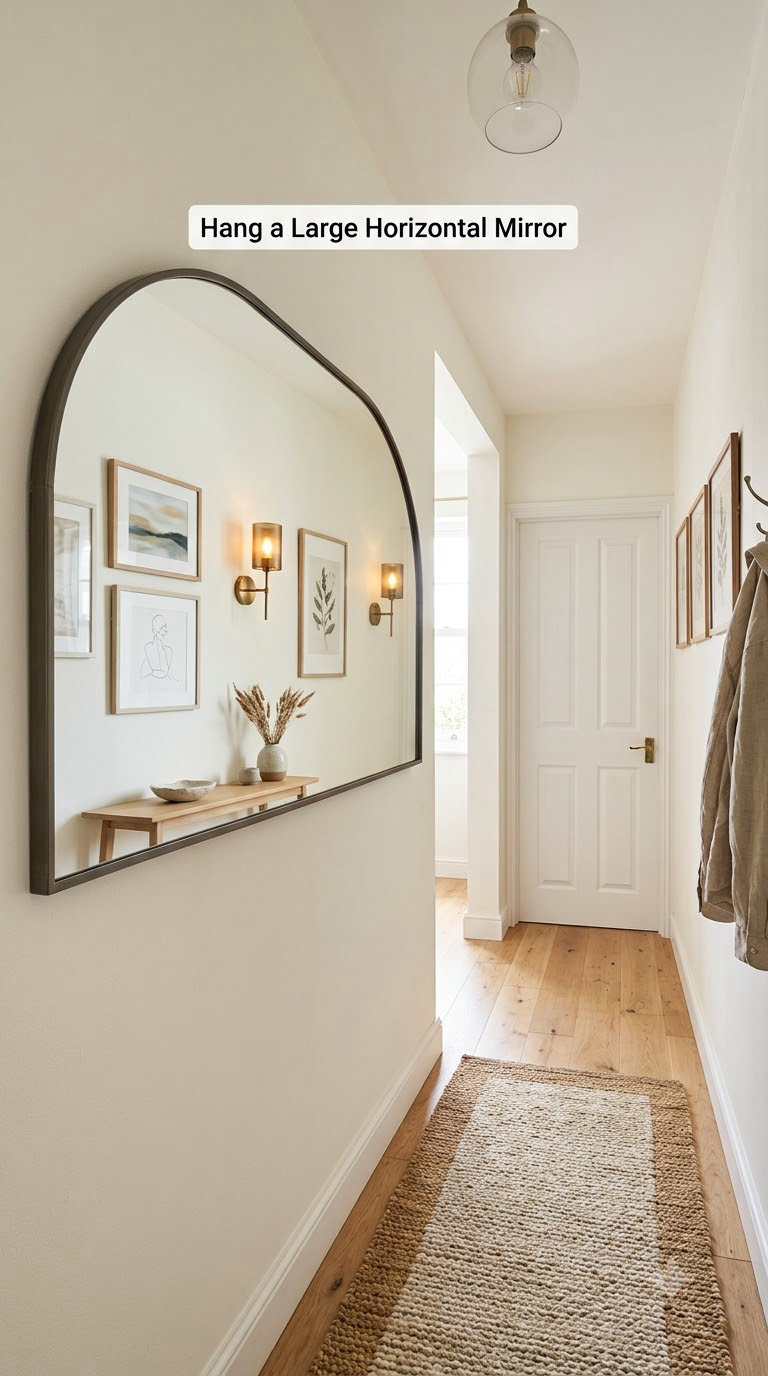
A wide mirror is the cheapest trick for making a narrow hallway look wider, because it reflects the opposite wall and doubles the light bouncing around the corridor. Horizontal beats vertical here, since the width of the glass is what sells the illusion.
How to do it: Size the mirror at roughly two-thirds of the wall width, so a 36 inch wide mirror suits a 54 inch wall section. Hang the bottom edge 6 to 8 inches above the floor, or align the mirror top with the door trim for a cleaner line. Two D-rings and a French cleat handle drywall anchors, but screw into a stud wherever you can. Angle it very slightly downward if the reflection lands mostly on ceiling.
Cost: 60 to 250 dollars depending on frame. Difficulty: Easy DIY. Time: About 1 hour, less if you already have a stud finder and a level.
Good to know: Leaning a floor mirror in a 3 foot hall eats 8 to 10 inches of walking room, so wall-mount it instead. If you rent, removable mirror clings exist for a lighter option, though they never hang as solidly as a cleat.
3. Add a Narrow Wall-Mounted Shelf
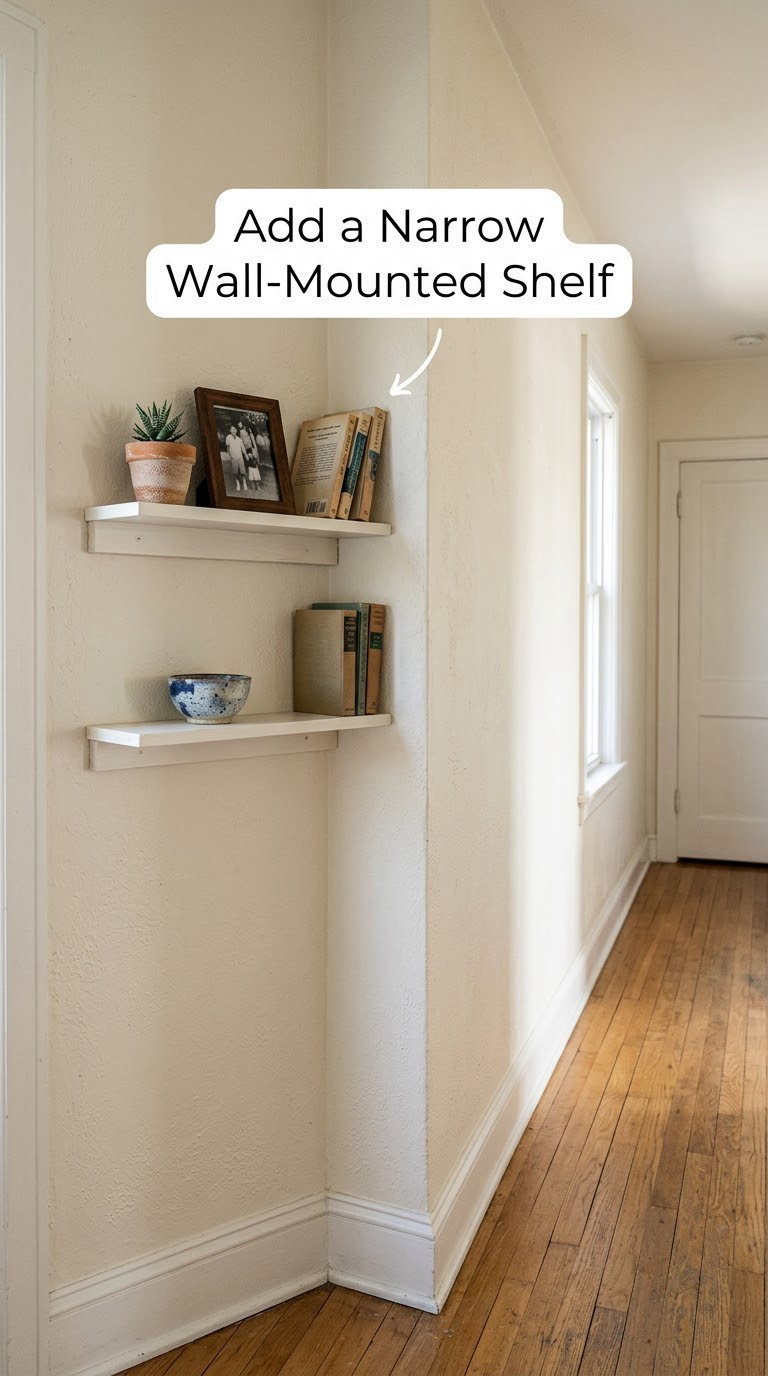
Shallow floating shelves give you display space in a corridor where floor furniture is impossible. A 4 to 6 inch deep shelf can hold a plant, a small bowl, and a stack of books while projecting almost nothing into the path.
How to do it: Keep shelf depth at 6 inches or less. Mount the first shelf 54 to 60 inches above the floor so nothing overhead gets head-bumped. Space a second shelf 12 to 18 inches above the first to avoid that crowded shelf-and-picture look. Load each shelf with three objects at most, grouped on one side rather than spread edge to edge. Use toggle anchors rated for the load in drywall, or screw straight into studs.
Cost: 20 to 80 dollars per shelf, plus anchors. Difficulty: Easy DIY. Time: 30 to 60 minutes per shelf.
Good to know: Heavier objects belong on the lowest shelf of the pair. And if you have a baseboard heater along that wall, keep the bottom shelf 6 inches clear of the unit’s top vent.
4. Use Oversized Wall Art
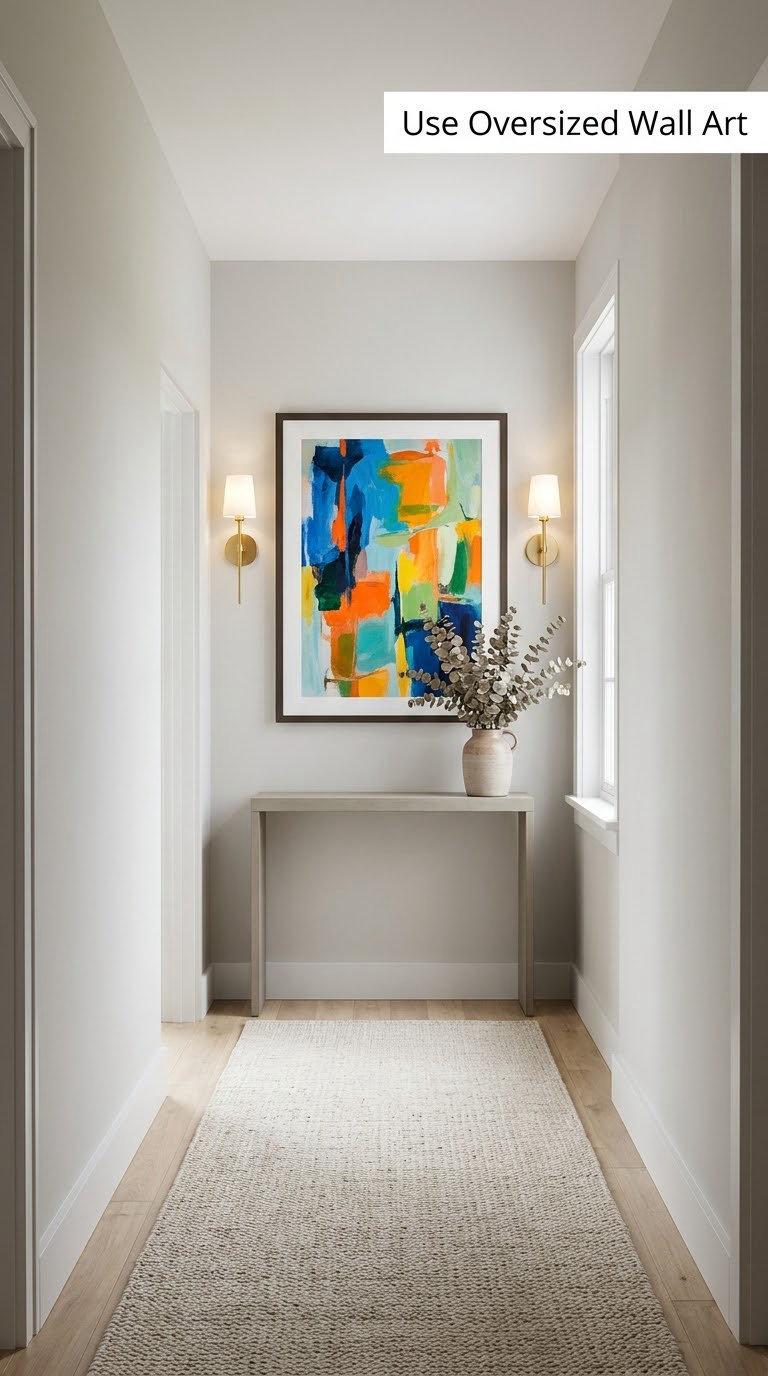
One substantial piece of art reads far better in a tight corridor than a cluster of small ones, because a large uninterrupted shape makes the wall feel composed instead of busy. This is the fastest fix for a hallway that looks unfinished.
How to do it: Choose a piece about two-thirds of the wall width, so 24 by 36 inches on a 36 inch wall section works well. Center it at 57 inches from the floor, which is standard eye level for most adults. Hang it with a French cleat or two D-rings on a level line rather than a picture hook. Keep the frame a simple wood, black, or thin metal profile so it does not fight the narrow proportion of the wall.
Cost: 40 to 200 dollars for a print and frame. Difficulty: Easy DIY. Time: 45 minutes including framing.
Good to know: A very busy pattern in a windowless hall competes with low light and looks murkier. Pick something with a large field of color and a simple shape if the corridor gets no daylight.
5. Maximize Ceiling and Wall Color
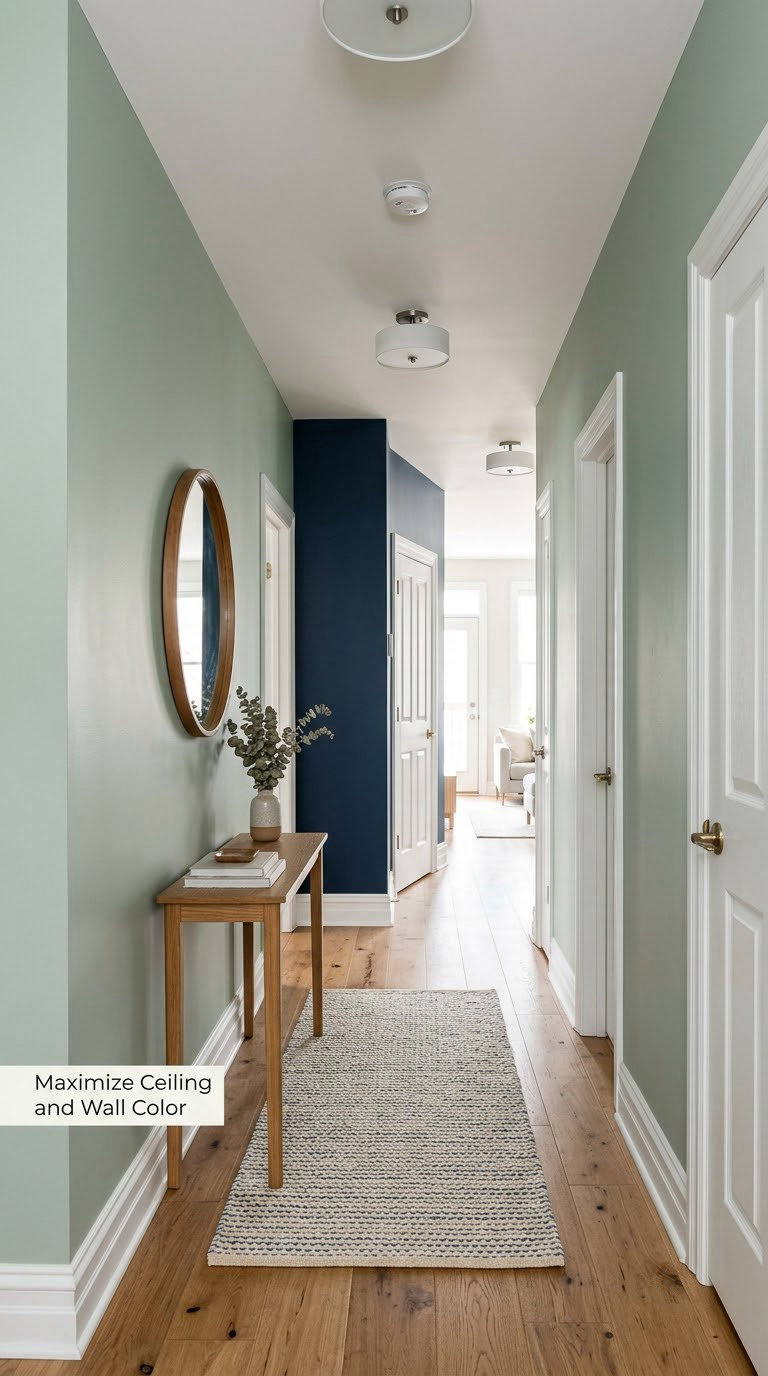
Color is the cheapest way to change the mood of a hallway, and the ceiling is the surface most people forget. A crisp white ceiling against warm walls reads as more height; a color-blocked end wall gives the corridor a destination instead of letting it fade out.
How to do it: Pick a light neutral with a hint of warmth, then use a true white on the ceiling. Paint walls in a satin sheen and the ceiling in matte, since matte bounces more light back into the room. Cut in your edges first, roll the middle, and allow 2 to 4 hours between coats. One gallon covers roughly 350 to 400 square feet, so a 4 by 20 foot corridor usually needs two gallons for two coats.
Cost: 80 to 250 dollars for paint, rollers, and a drop cloth. Difficulty: Moderate DIY. Time: One weekend including dry time.
Good to know: If you rent, skip the ceiling and use large peel-and-stick panels in a soft tone on one accent wall instead. Dark paint only works in a wide hall that gets natural light, so check it at 9 am and again at dusk before committing.
6. Install a Statement Light Fixture
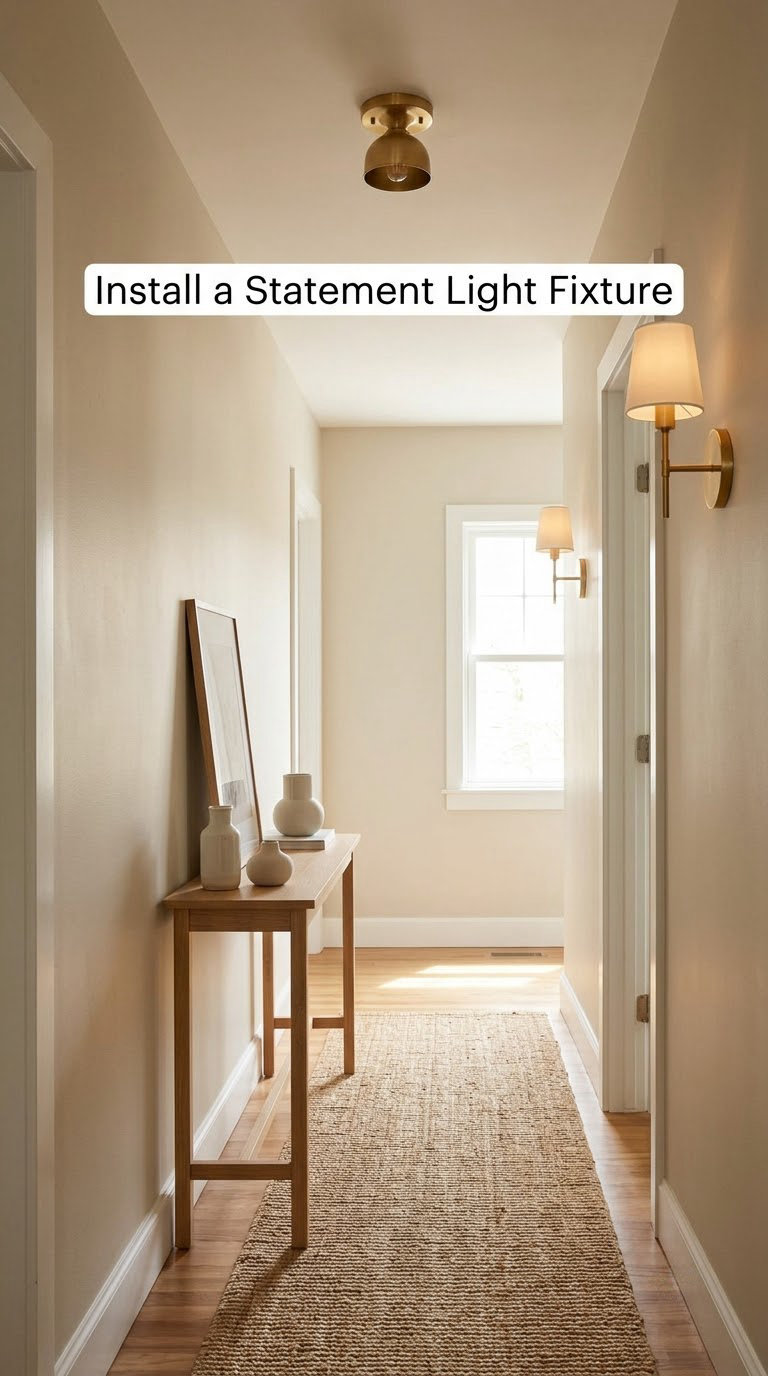
Most dark hallways are a lighting problem, not a paint problem. A single dated bulb in a bare socket makes a narrow corridor feel like a closet, and replacing the fixture is the change people notice first.
How to do it: A semi-flush mount works better than a long pendant in a low ceiling. Keep the bottom of the fixture at least 72 inches above the floor, and check head clearance if the hall serves a staircase. For a windowless corridor, target 12 to 15 lumens per square foot at 2700K to 3000K, which reads warm without looking yellow. Any fixture over 50 pounds, or any work at the box, needs a licensed electrician and a permit in most jurisdictions.
Cost: 70 to 350 dollars for the fixture, plus 100 to 250 dollars for an electrician. Difficulty: Hire a pro. Time: Half a day, mostly waiting.
Good to know: Turn the power off at the breaker and confirm with a non-contact voltage tester before you touch anything, even for a swap. If you want a zero-wiring change, plug-in sconces give you the same layered look on a duplex.
7. Create a Built-In-Style Storage Run
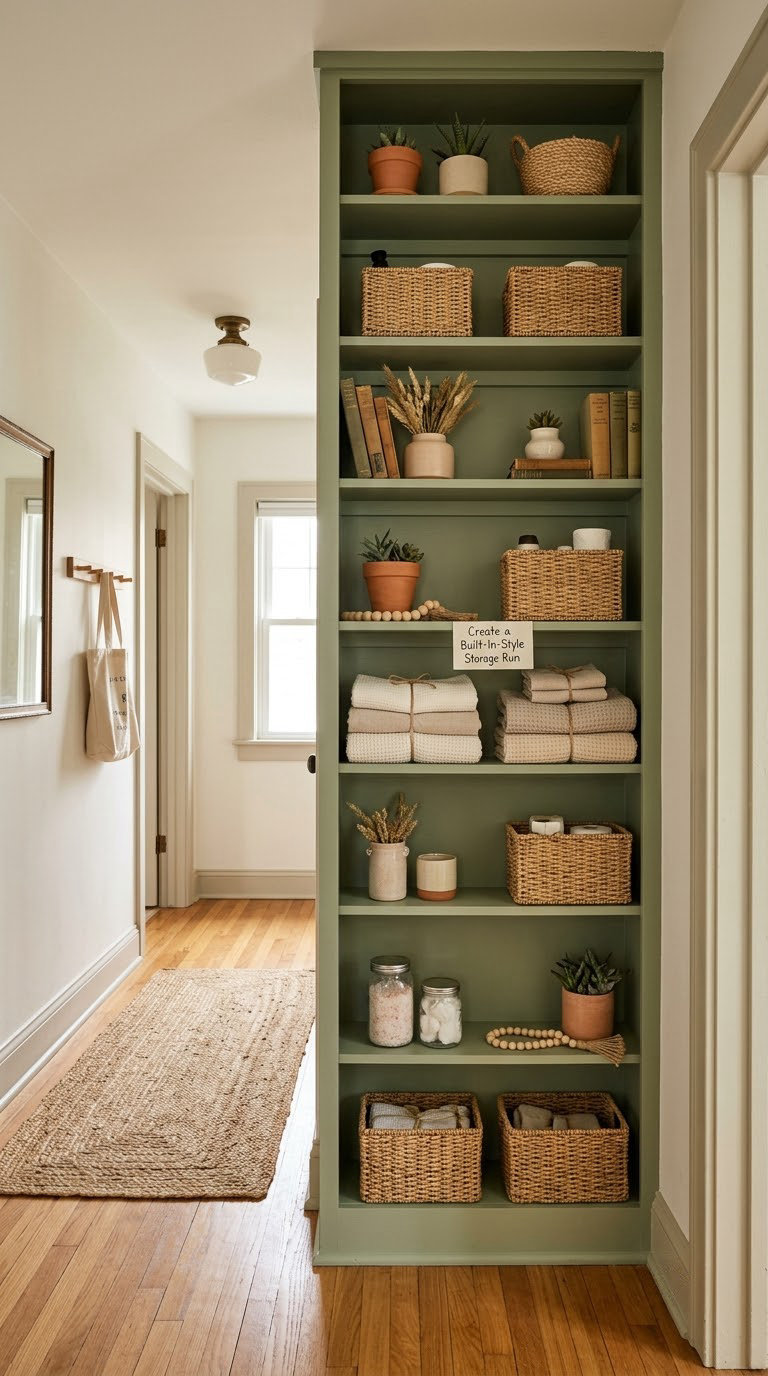
Shallow shelving disguised as built-in millwork turns the dead wall of a long hallway into real storage. Painted the same color as the wall, a set of 4 inch deep boxes reads as architecture rather than furniture.
How to do it: Build or buy boxes no deeper than 4 inches, then set vertical dividers 12 to 14 inches apart so baskets fit. Paint everything the wall color with a satin finish so the boxes disappear into the surface. Anchor the top and bottom rails into studs, or the whole run will walk away from the wall over time. Leave a 36 inch walkway in front, and skip a section if your clearance is tight. Add a wall plug for a small lamp or a charging shelf if the hall doubles as a phone graveyard.
Cost: 150 to 600 dollars for materials. Difficulty: Moderate DIY. Time: One weekend for a 6 foot run.
Good to know: Renter alternative: three separate wall-mounted ledges at staggered heights do the same job with no paint and no studs. Keep the lowest shelf clear if there is a baseboard heater on that wall, and check that nothing blocks a closet or attic door.
8. Add a Decorative Runner
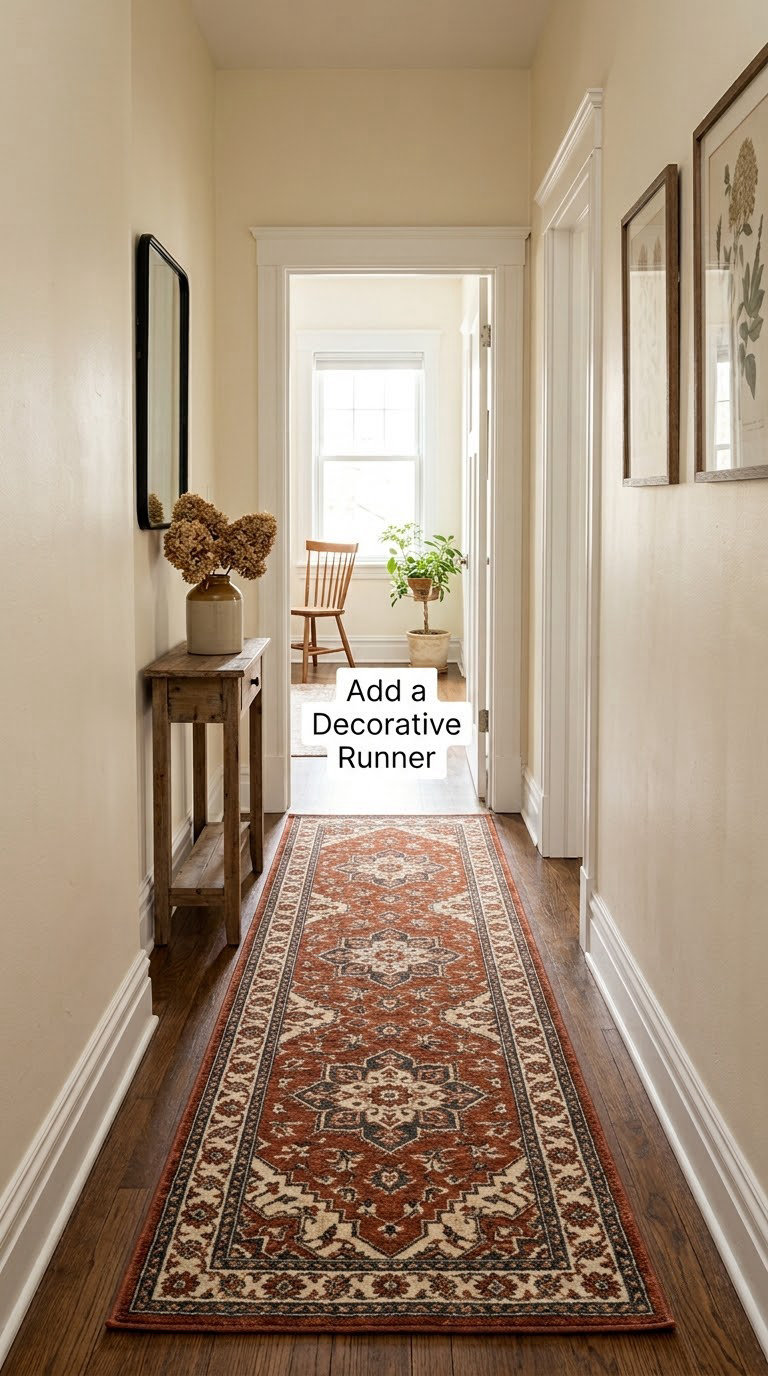
A runner is the fastest way to add color, softness, and a sense of intention to a hard-floored corridor. It also gives the eye a line to follow, which makes the space read longer.
How to do it: Choose a runner 2 to 3 feet wide and leave 3 to 6 inches of exposed floor along each side. Anything wider than 3 feet swallows a narrow hallway. Pick a low pile, under half an inch, so it stays flat under foot traffic and does not catch a door swing. Always lay a rug pad underneath; it stops the runner from migrating and protects the floor underneath. Pick a pattern with a repeating motif if you plan to extend it later, since matching two different runners end to end is tough.
Cost: 50 to 250 dollars, pad included. Difficulty: Easy DIY. Time: 10 minutes.
Good to know: Do not run the rug under a door that opens into the hall without checking the swing. A too-short runner reads as an accident, while a 10 foot length that runs wall to wall makes a 3 foot wide corridor look tight again.
9. Use Vertical Display Frames
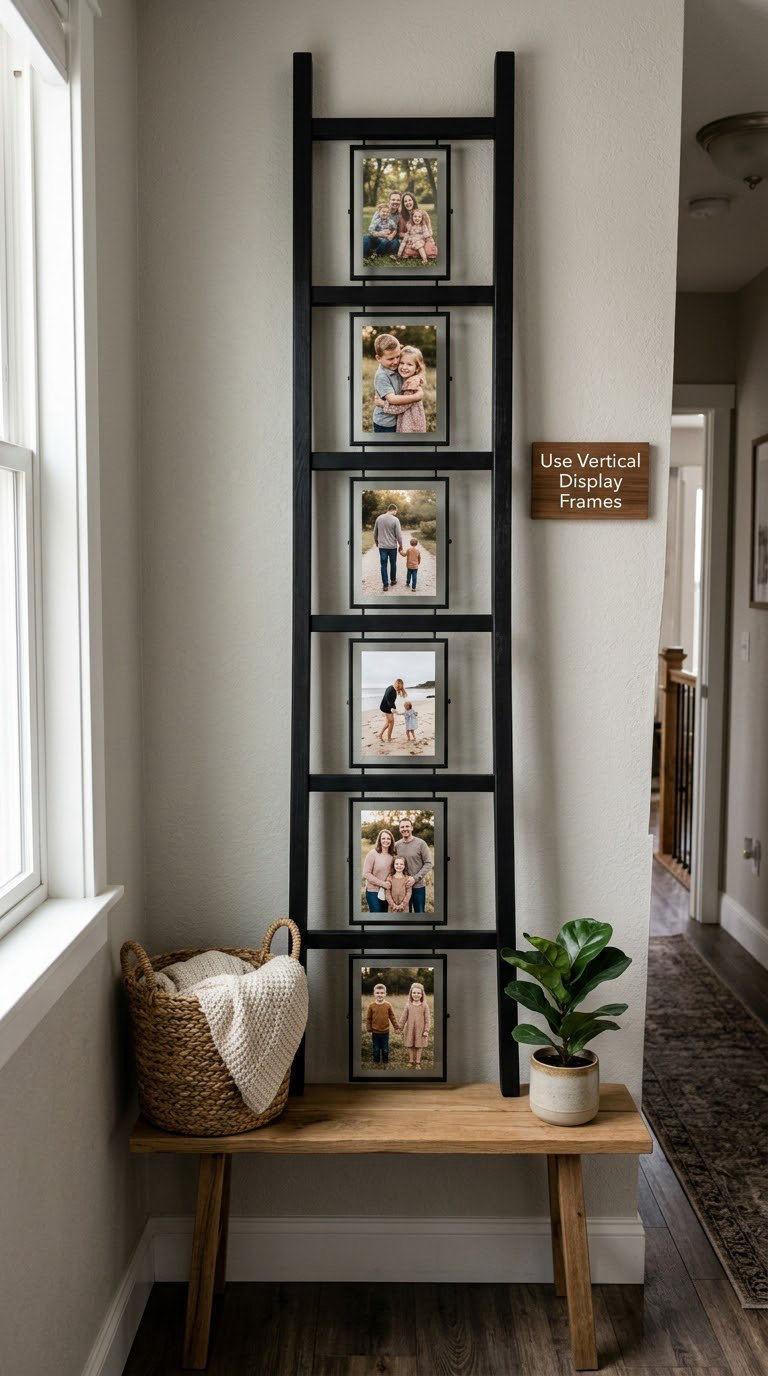
A ladder-style display frame or a narrow grid gives you a dozen photo spots inside the footprint of one frame, which solves the crowded-wall problem in a corridor that cannot spare width.
How to do it: Look for a frame 12 to 18 inches wide and 4 to 6 feet tall so the vertical line reinforces the corridor. Hang the center at 57 to 60 inches from the floor. Use a level, a pencil, and a stud finder to mark a plumb line before you place a single clip. Load the clips loosely first, stand back from the doorway, and adjust spacing until the arrangement reads as one shape. Keep to a consistent set of frame colors, or the wall turns busy.
Cost: 30 to 150 dollars for the frame and clips. Difficulty: Easy DIY. Time: 45 minutes.
Good to know: Family photos tend to drift out of sync as the group grows. Set a reminder to reprint the whole set every few years rather than adding one odd frame at a time.
10. Style a Slim Bench Seat
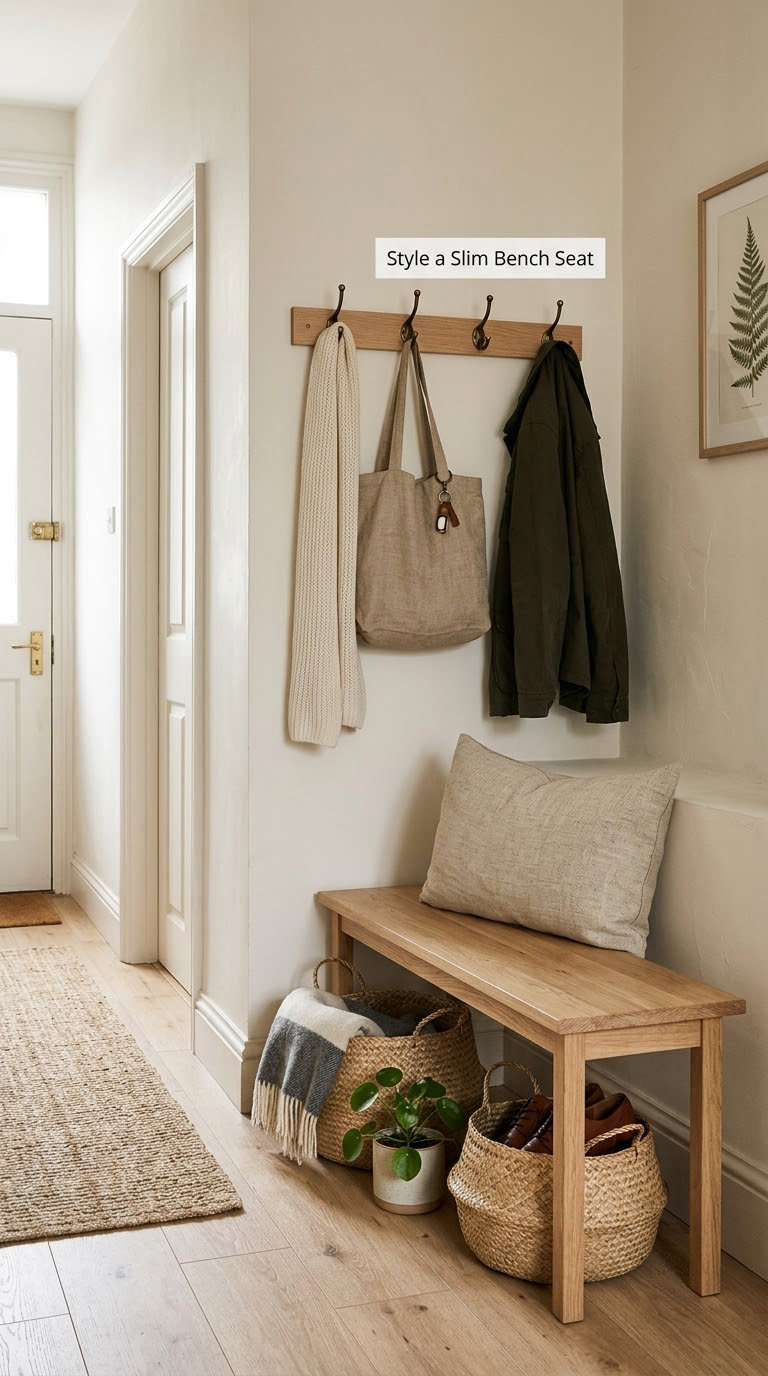
A slim bench gives a narrow hallway somewhere to sit while shoes come off, and the space underneath becomes the storage. Choose depth over width here, because depth is what projects into the walkway.
How to do it: Buy a bench 12 to 14 inches deep and 30 to 34 inches tall, 36 to 40 inches long. Sit at the wide end of the hall where there is a bit more elbow room, and keep 36 inches of clear path in front. Slide two woven baskets underneath, slightly pushed in so the bench reads as one piece. Add a removable cushion rather than an upholstered seat so you can wash it and swap the color with the season.
Cost: 80 to 300 dollars for the bench, plus 20 to 50 dollars for a cushion. Difficulty: Easy DIY. Time: 1 hour including basket placement.
Good to know: Check that the bench does not sit in front of a heat register or block a closet door. In a 3 foot wide hall, a bench replaces a console rather than joining one, and it is a better choice when you have small kids.
11. Add Hooks or a Compact Rail
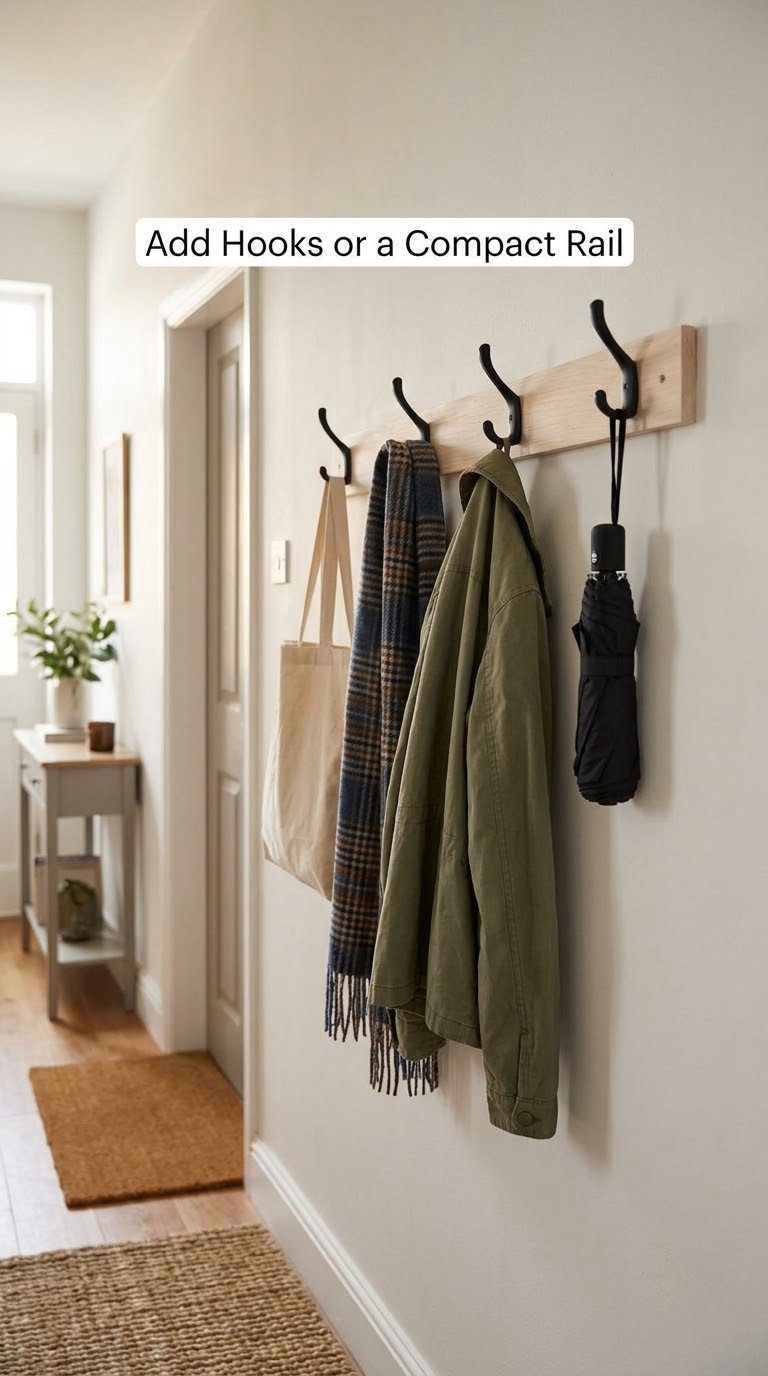
A hook rail takes coats, bags, and keys off the floor, which is the fastest way to make a cramped entry look organized. A slim rail on the wall uses vertical space that a closet in a narrow hall would waste.
How to do it: Mount hooks at 60 to 66 inches above the floor for adults, 48 to 54 inches for a kids’ hallway. Space them 6 to 8 inches apart so coats do not overlap. Screw into studs wherever possible, especially for a rail carrying bags; drywall anchors alone will sag over time. Choose single hooks over double pegs in a tight hall, because a peg sticking out 3 inches is enough to catch a shoulder. Put the umbrella hook lowest and nearest the floor if you have one.
Cost: 15 to 40 dollars for a rail with hooks, or 10 to 30 dollars for individual hooks. Difficulty: Easy DIY. Time: 45 minutes.
Good to know: Renting? Command strips rated for weight work for tote bags and scarves, and they come off cleanly with a hair dryer and a little rubbing alcohol. Skip them for anything heavy.
12. Layer Lighting with Wall Sconces
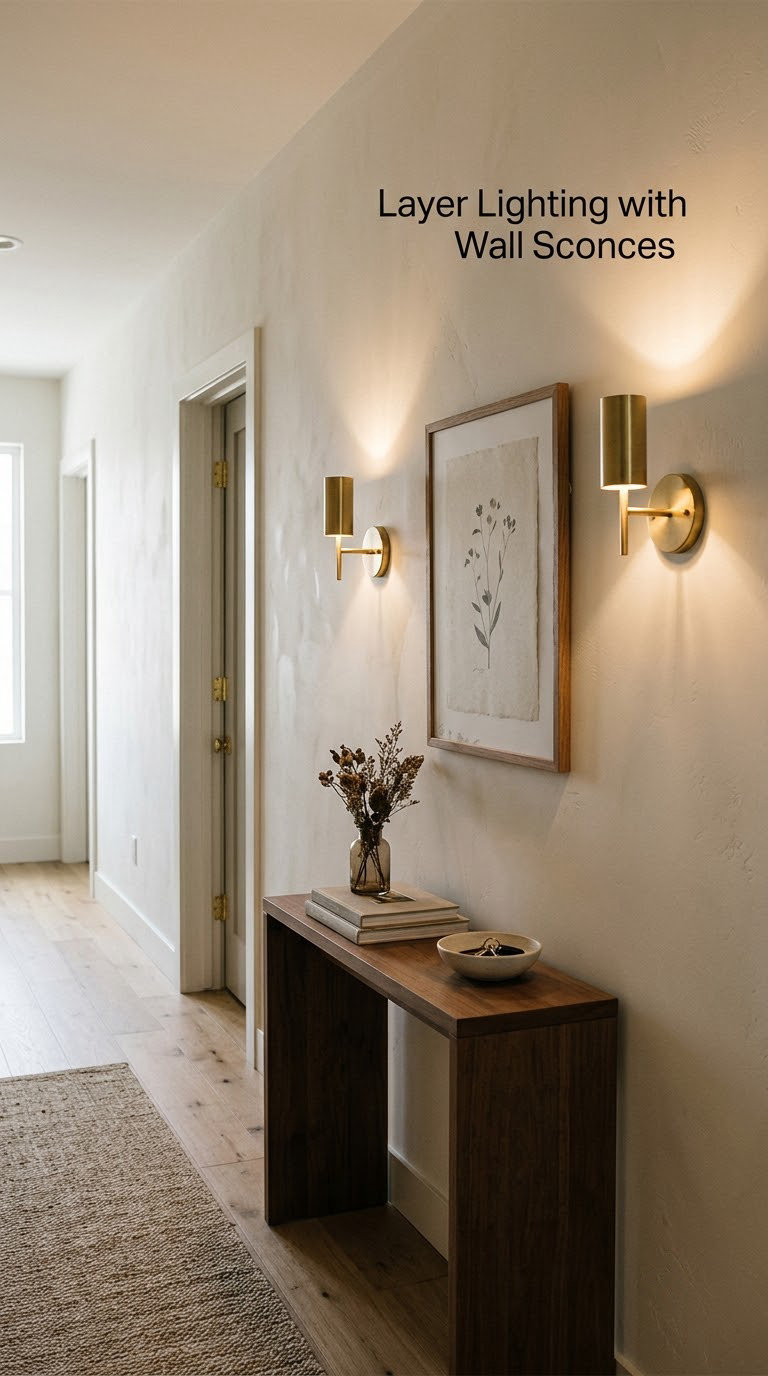
Sconces solve the two problems a single ceiling bulb creates: a dark corridor and a flat, uninteresting wall. They throw light up and down, so the wall itself becomes the light source, which flatters paint, art, and texture.
How to do it: Space sconces 6 to 8 feet apart along the hall and alternate walls if the corridor is long. Mount the backplate so the shade center sits 66 to 72 inches above the floor, and check protrusion so nobody catches a shoulder. Running a new electrical box is not a renter job, so budget for a licensed electrician and check whether a permit applies in your area. Use 2700K LED bulbs at roughly 400 to 600 lumens each for a residential hall.
Cost: 90 to 400 dollars for a pair, plus electrician time. Difficulty: Hire a pro. Time: Half a day for two sconces.
Good to know: If the wiring is not there, hardwired look-alikes that plug into an existing outlet cost 30 to 60 dollars a side and install in about 15 minutes. In a 3 foot wide hall, choose a shade diameter under 5 inches.
13. Create a Color-Coordinated Gallery Wall
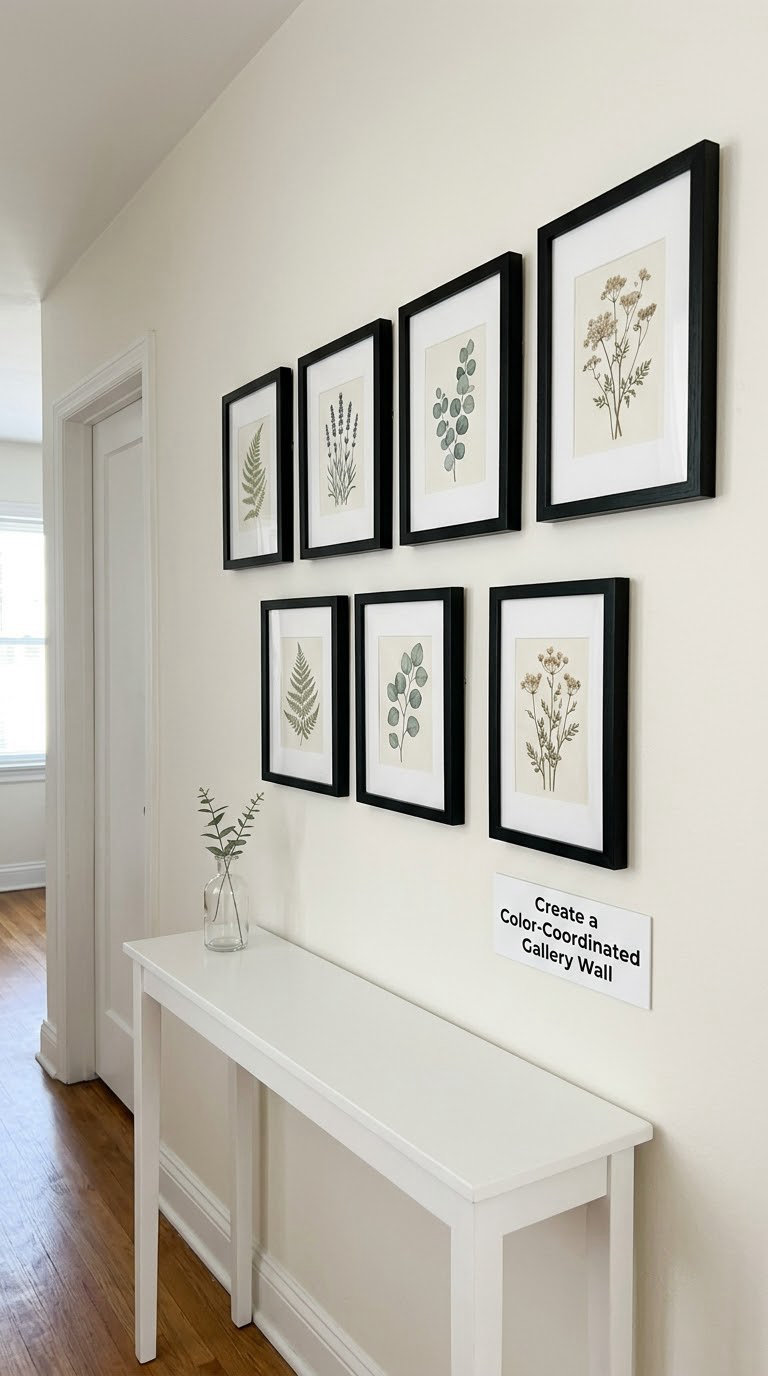
A gallery wall lets you display a collection you already own instead of buying one large piece. The trick is coordination: same frame finish, controlled spacing, and a tight palette of one or two colors.
How to do it: Lay out paper templates of every frame on the floor or tape the shapes to the wall, then shift them until the block feels balanced. Leave 2 to 3 inches of consistent spacing between frames, and center the whole arrangement at 57 inches from the floor. Keep the total block narrower than the wall section, or the corridor will feel pinched. Buy all frames in one finish rather than mixing wood, black, and gold, which is the single most common reason gallery walls look messy.
Cost: 70 to 300 dollars for frames, prints, and hanging hardware. Difficulty: Easy DIY. Time: 2 to 3 hours including the layout phase.
Good to know: For a family hallway, designate one frame as the rotating slot so the wall stays a set rather than a pile. In a low-light hall, choose light-matted prints with a matte finish so they do not glare under a sconce.
14. Use a Narrow Floor Lamp
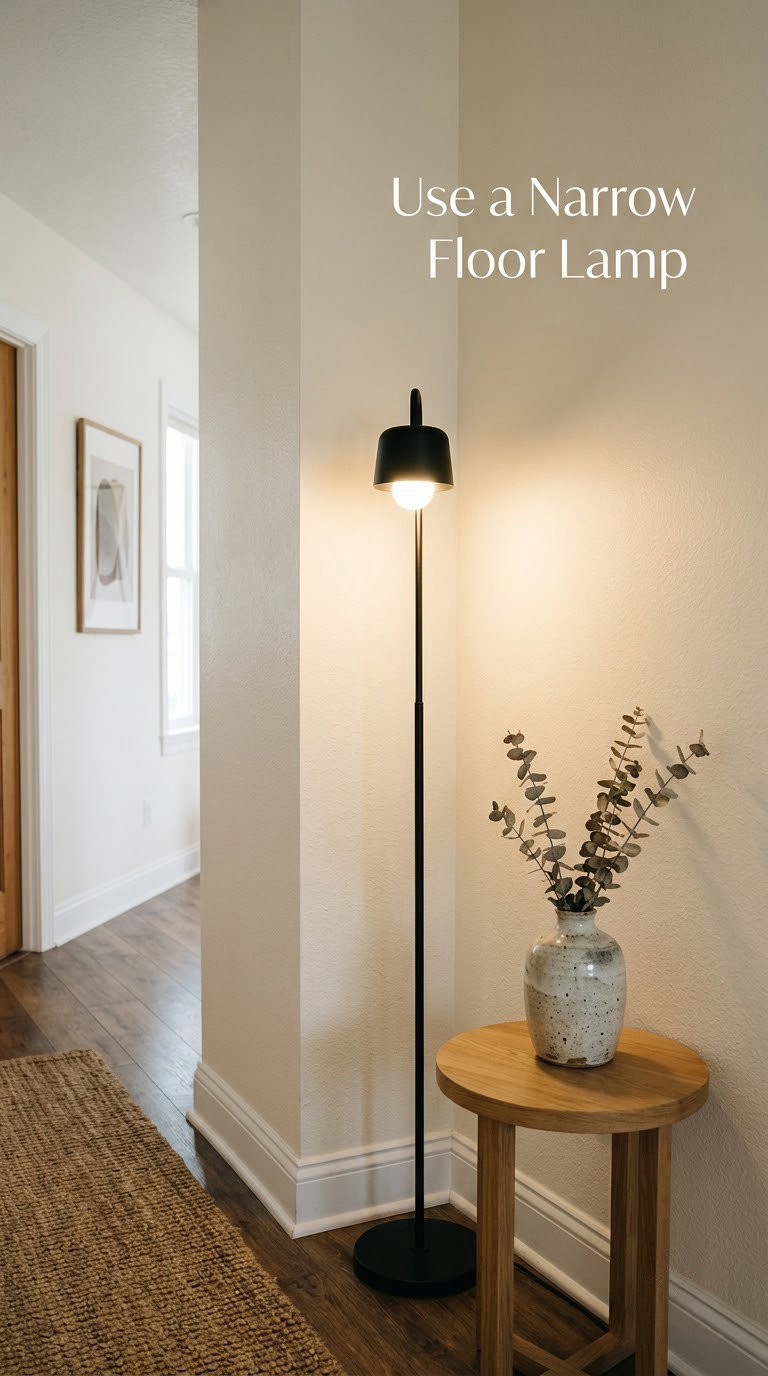
A slim floor lamp adds height to a corridor where everything else sits low, and it warms up a dead corner without a single wall hole. It is also the one lighting idea a renter can do in ten minutes.
How to do it: Choose a base no wider than 8 to 10 inches, ideally weighted, so a passing shoulder does not tip it. Standard arcs top out around 5 feet tall, which suits an 8 foot ceiling. Use a 40 to 60 watt equivalent bulb at 2700K. Place the lamp in a corner where the wall meets the ceiling line so the base disappears into the shadow, and confirm there is an outlet within reach. Push it tight against the wall and you keep the walkway.
Cost: 40 to 160 dollars. Difficulty: Easy DIY. Time: 10 minutes.
Good to know: In a hallway with a baseboard heater, keep at least 12 inches of clearance from the unit. Cord covers along the baseboard are worth the extra step if the outlet is more than a few feet away.
15. Add a Patterned or Textured Wall Finish
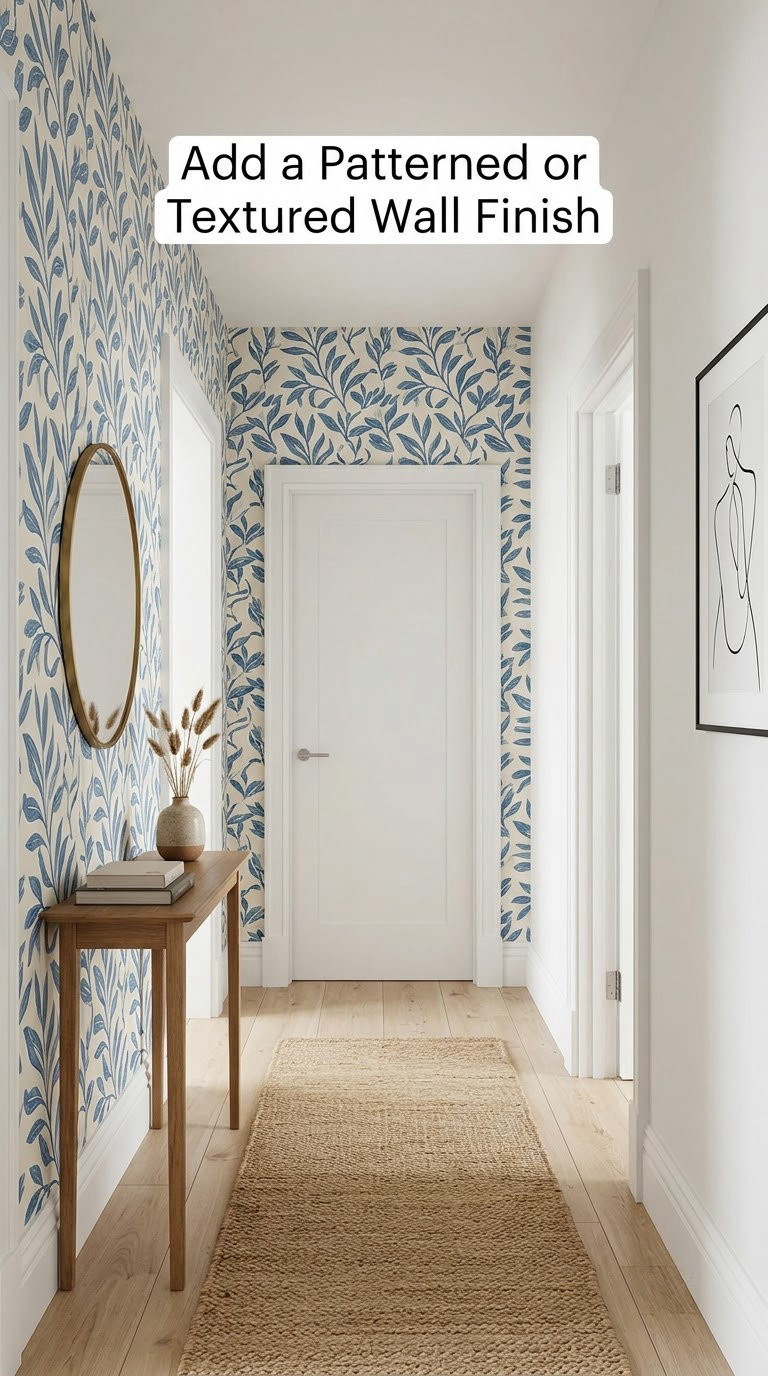
Texture is what keeps a narrow hallway from looking like a tunnel. Peel-and-stick wallpaper, woven wall covering, and paint effects add a surface story without the mess of a full renovation.
How to do it: Wipe the wall with a degreaser and let it dry fully; adhesive fails on dust and shiny spots. Wait at least 7 days after painting before applying peel-and-stick. Peel panels work best applied in a staggered pattern from the middle of the wall outward, and each panel typically covers 10 to 20 square feet depending on the roll. Buy extra width for narrow corners, since seams show fast on a small surface. Cut around outlets with a sharp utility knife and re-seat the flap around the plate.
Cost: 50 to 200 dollars for peel-and-stick, or 150 to 400 dollars for woven wall covering. Difficulty: Moderate DIY. Time: One weekend for a 4 by 8 foot accent wall.
Good to know: A busy pattern makes a hallway feel shorter, so scale the print to the wall, not to your taste. If the panel does not peel off cleanly in a rental, spot-test a hidden corner with a hair dryer first.
16. Create a Decorative Drop Zone
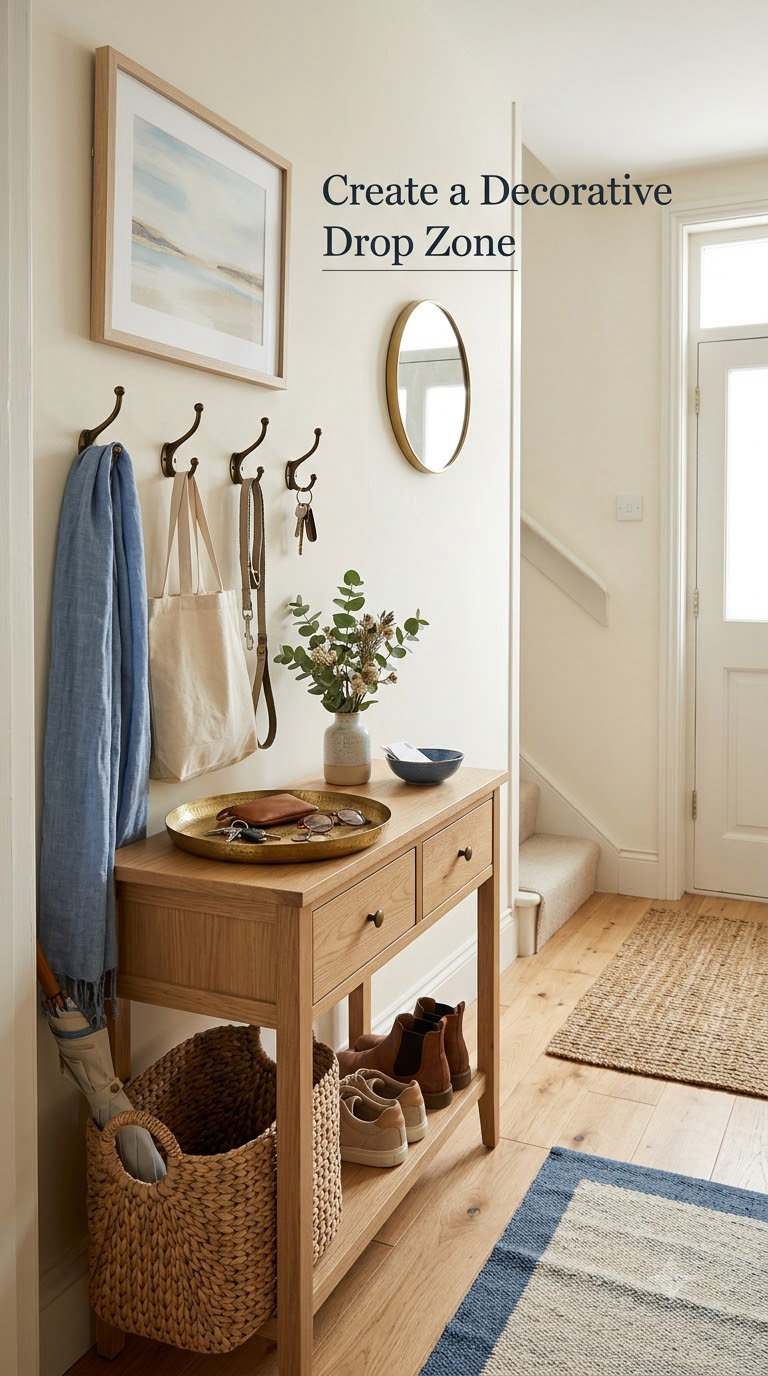
A drop zone gives the daily pile a designed home instead of letting it migrate to the kitchen table. In a narrow hall the whole trick is grouping: fewer objects, arranged deliberately, on a small surface.
How to do it: Pick one landing spot, usually the console or a 5 to 7 inch deep cabinet, and clear it completely. Use a shallow tray, 8 by 12 inches or so, for keys, mail, and a dog leash. Add one small bowl for the things that scatter, like loose change or sunglasses. Pair it with a wall hook 6 inches above the surface for the bag that never makes it to a hook. Keep the total footprint inside a 5 by 12 inch zone so the walkway stays open.
Cost: 25 to 150 dollars. Difficulty: Easy DIY. Time: 1 hour.
Good to know: Two drop zones in one hall means the mess doubles. Pick the spot closest to the front door, and empty it every evening so it stays a landing point rather than a storage unit.
17. Use a Small Statement Rug or Runner
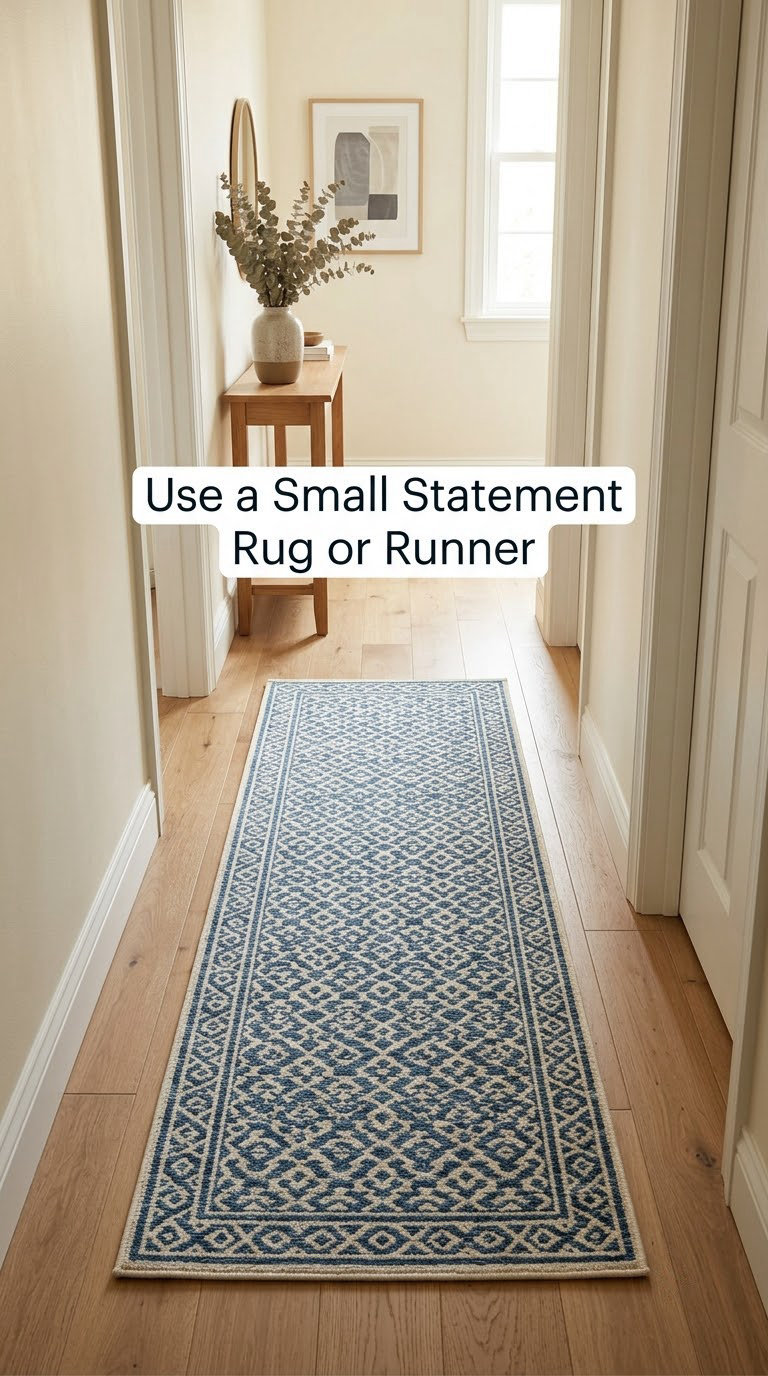
A short accent rug anchors the entry and adds a color moment without trying to run the length of the corridor. Where a full runner defines the whole route, an accent rug marks the pause point, which is usually where shoes come off.
How to do it: Size it to leave 3 to 6 inches of exposed floor on each side, so a 2 by 6 foot rug works in a 3 foot wide hall. Choose a washable, low-pile construction, under half an inch, for the traffic zone near the door. Rotate the rug a quarter turn when the pile wears in the middle. If you need a longer run, a 2.5 by 8 foot piece covers most entries and apartments.
Cost: 40 to 200 dollars. Difficulty: Easy DIY. Time: 10 minutes.
Good to know: Too short a rug reads as a mistake, and a round rug narrows a corridor visually. If you have a rug already, cutting and binding two matching pieces gives you a custom length for far less than a new one.
18. Display Greenery Without Taking Floor Space
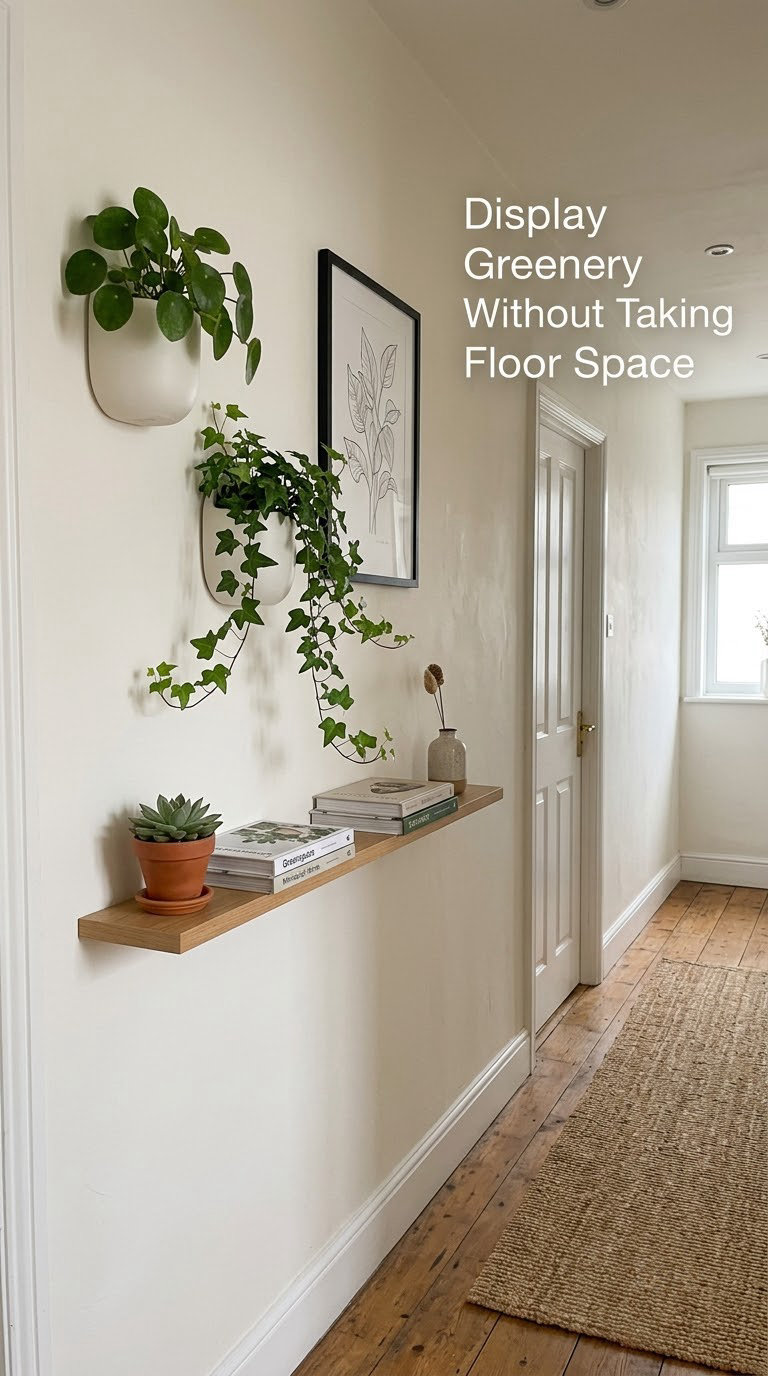
Greenery softens a hard corridor, but a floor plant in a 3 foot wide hall is a trip hazard and a dust collector. Wall planters and shelf plants give you the same effect without touching the walkway.
How to do it: Use 8 to 12 inch wall planters, staggered 12 to 18 inches apart rather than lined up in a row. Mount them into studs or use masonry-appropriate anchors, and never hang a planter from drywall alone. For light matching, a windowless hall suits pothos, ZZ plant, or a faux stem, all of which tolerate low light and a missed watering. Check the weight of the soil when wet, because saturated soil is heavier than the pot when empty. If you want a real floor plant, choose a slim upright like a ZZ or a snake plant and put it in the corner, not the path.
Cost: 30 to 90 dollars per wall planter, plus plants. Difficulty: Easy DIY. Time: 1 to 2 hours for a pair.
Good to know: Water wall planters in the sink, not over the floor, and let them drain fully first. Faux eucalyptus is the one shortcut that genuinely works here, since the real plant drops leaves in a low-light hall within a month.
19. Refinish or Paint an Existing Door
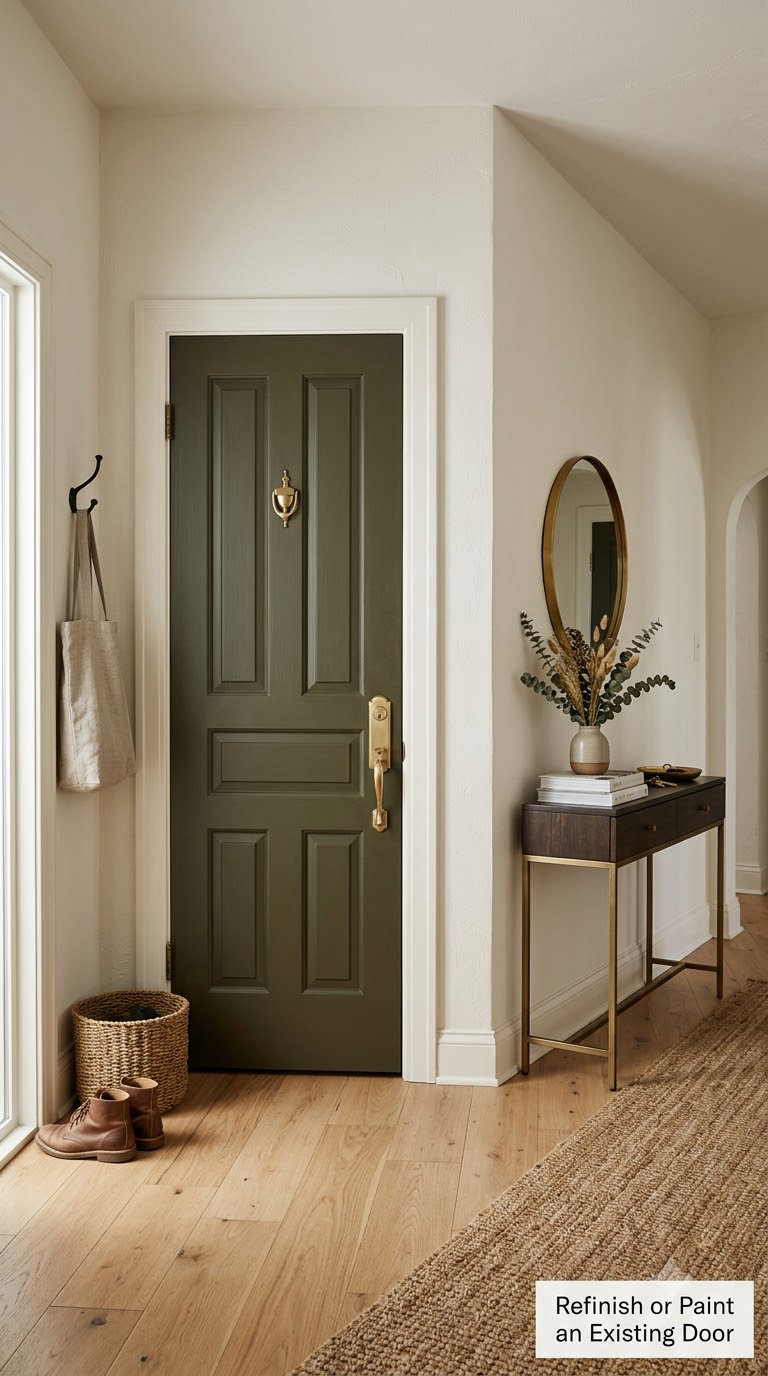
The door at the end of a hallway is the first thing guests see, so it carries more weight than its square footage suggests. A color change and new hardware turn a builder-grade door into the hall’s focal point for the price of a gallon of paint.
How to do it: Sand with 120 to 150 grit to scuff the existing finish, then wipe with a tack cloth and prime. Brush the edges and panel grooves first, then roll the flat areas, and let each coat dry 4 hours before the next. Two primer coats and two finish coats hold up far better than one of each on a door that gets touched daily. Swap the knob and lever plate at the same time, and reinstall the hardware 24 to 48 hours after the final coat so the paint does not stick to the metal. If the door swings toward you, check the swing before you paint so you know which side faces the hall.
Cost: 40 to 120 dollars for paint and prep, plus 30 to 80 dollars for hardware. Difficulty: Moderate DIY. Time: One weekend including dry time.
Good to know: Renting means leaving the door color as is, so make the focal point elsewhere, with a mirror or one large frame. Painting trim and doors the same color as the wall is the classic move for making a narrow hall feel wider.
20. Create a Gallery Corridor
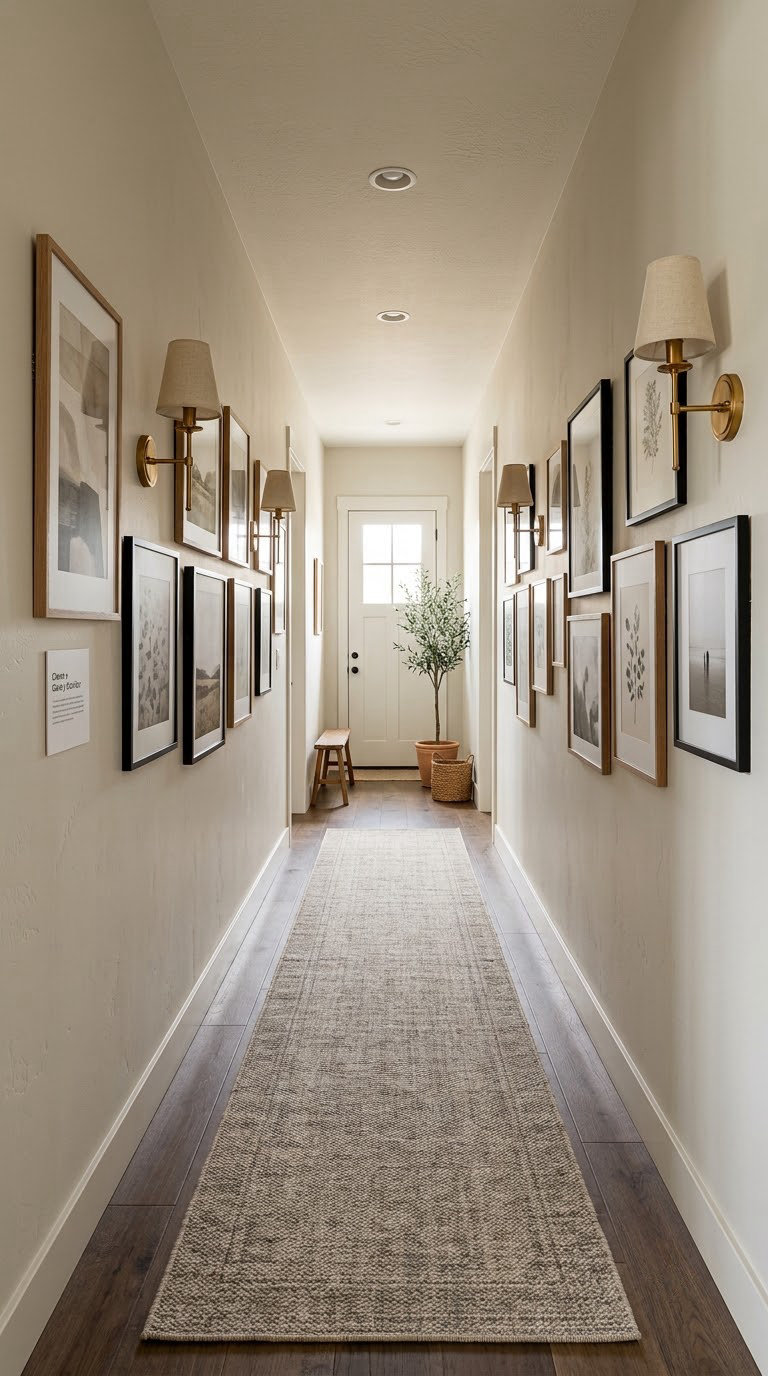
The last idea ties the rest together. A gallery corridor treats the hallway as a sequence rather than a single spot, and it is what turns a passage into a designed transition between rooms.
How to do it: Repeat a pair, a sconce with a frame beneath it or a frame with a small object on a shelf below, every 6 to 8 feet along the corridor. Alternate walls so the rhythm reads as you walk, and end with one hero piece at the far end, usually a large mirror or an oversized print. Keep the runner continuous underneath and the palette to three colors. Add a seasonal accent, a garland in winter, greenery in spring, or a small stack of books in autumn, and the whole corridor changes without repainting anything.
Cost: 200 to 900 dollars for the full treatment. Difficulty: Moderate DIY. Time: Two weekends, with a few hours between paint and hanging.
Good to know: The hallway should be the last thing you style, because it reflects everything in the rooms it connects. If you are also rethinking the entry itself, the front porch decorating ideas for a small entry carry the same palette outside.
Planning Tips for Decorating a Narrow Hallway
A narrow hallway works best when you decide the constraints before you pick anything. Here is how to plan narrow hallway decorating ideas so nothing gets bought twice or hung twice.
How to plan narrow hallway decorating ideas without overspending
- Measure the width in three places. Walls are rarely straight, and a hallway that measures 40 inches at one end may measure 36 at another. Use the narrowest number for every clearance calculation, and write it on the wall with a pencil before you shop.
- Protect a 36 inch walkway. That is the minimum for two people to pass without turning sideways. Anything that projects more than 4 inches into the path, such as a sconce, a basket, or a door handle, needs to be measured before installation.
- Check the obstructions first. Baseboard heaters, attic access doors, sliding closet doors, smoke detector placement, and light switches will rule out whole wall sections. Find them before you pick artwork, not after.
- Keep a 10 to 15 percent budget buffer. Wall repair, extra primer, a longer runner than you measured, and a second coat you did not plan for all add up. The buffer is what keeps a refresh from turning into a redo.
- Buy light first, then color. Paint and art look completely different at 4000K versus 2700K. Put in warm bulbs before you commit to a wall color, and take a photo of the corridor at 9 am and again at dusk.
- Work in the right order. Patch and paint, then wait 48 hours, then hang anything, then style the surfaces. And order of operations beats speed: I have stripped a set of hooks off a wall I had just painted because I got the order backwards.
- Build one base scheme and swap the accents. A permanent runner, one frame finish, and a single light fixture let you restyle the corridor for a new season by changing three objects. The seasonal mantel decorating ideas work on the same swap logic if you want the method elsewhere in the house.
If you rent, most of this list still works. Adhesive hooks, peel-and-stick panels, a floor lamp, a runner, and a large mirror cover seven of the twenty ideas with no paint and no studs.
Frequently Asked Questions
How do you make a skinny hallway look wider?
Use vertical lines, a large mirror, and continuous flooring to stretch the corridor. Hang one wide mirror at least two-thirds the wall width, run a runner the full length with 3 to 6 inches of exposed floor at each side, and keep wall color light with a white ceiling. Avoid wide furniture that eats into the walkway and avoid many small frames, which make the wall look busy rather than open.
What are some good paint ideas for a narrow hallway?
Paint the walls a light warm neutral and the ceiling a true white in matte finish, which bounces light back into the corridor. Contrast the trim and baseboards in the same white to blur the edges of the room. If the hall has no natural light, add one deeper accent wall at the far end to give the eye somewhere to land. Always test a sample in the evening before committing to a full gallon.
What color paint makes a hallway look bigger?
Light, low-contrast colors make a hallway feel wider because the wall and trim stop reading as separate planes. Warm off-whites, soft greys, and pale sage all work, paired with white ceiling and trim. A dark hallway can handle one moody accent wall if it is at the end of the corridor rather than on both sides. Deep tones on all four walls tend to close the space in.
What to put on a wall in a small hallway?
One large piece of art beats a cluster of small ones in a tight corridor. Aim for a print about two-thirds of the wall width, centered at 57 inches from the floor, and keep the frame profile simple. If you want to display many items, use a single vertical ladder frame or a coordinated gallery wall with 2 to 3 inches of even spacing. Shallow wall shelves are another option when floor space is not available.
How do you light a hallway with no windows?
Replace the single overhead bulb with warm LEDs at 2700K to 3000K and aim for 12 to 15 lumens per square foot of floor. Add a pair of wall sconces spaced 6 to 8 feet apart so light washes the wall rather than shining down into an empty corridor. A light-toned ceiling finish and a mirror at the far end bounce what light you have further down the hall.
What size rug fits in a narrow hallway?
Choose a runner 2 to 3 feet wide and leave 3 to 6 inches of exposed floor along each side, so a 2 by 6 foot rug works in a 3 foot wide corridor. Keep the pile under half an inch for the traffic zone, and always use a rug pad underneath. For a shorter entry, a 2 by 5 or 2.5 by 8 foot piece works, and a washable material saves headaches.
Start with the lighting and the mirror. Those two changes fix the two things people complain about most in a narrow hallway, a dim corridor and a blank wall, and together they cost less than a single weekend of decorating elsewhere in the house. Then add storage, either a rail or a console, so the floor stays clear. Paint and the gallery corridor can come later, once you know how the space is actually used. For more hallway inspiration beyond these 20 narrow hallway decorating ideas, browse our complete hallway decor guide.