
How to Paint Concrete Basement Floors: Easy DIY Guide 2026
The best coating for a concrete basement floor is a two-part epoxy floor coating, because the resin and hardener react into a hard, moisture-resistant film that chemically bonds to the concrete instead of sitting on top of it. Acrylic latex concrete paint is the cheaper, easier DIY option when the slab is genuinely dry.
That is the whole decision in two sentences. Everything after it is the work: testing the slab for moisture, opening up the surface so paint has something to grip, repairing cracks, and then laying down thin, even coats with enough cure time between them. Get the prep wrong and the finish peels off in sheets within a year, which is the single most common basement-floor complaint from people who have done it before.
Contents
Most jobs run a weekend. The floor needs to be clear for two to three days, and you need a way out that does not cross the wet coating.
Time: 2 to 3 days plus 5 to 7 days of curing · Cost: one to two coating kits, primer, sealer and basic prep tools for a 300 sq ft basement · Difficulty: Moderate DIY · Skill level: Careful prep work, simple rolling technique
Tools and Materials for How to Paint Concrete Basement Floors
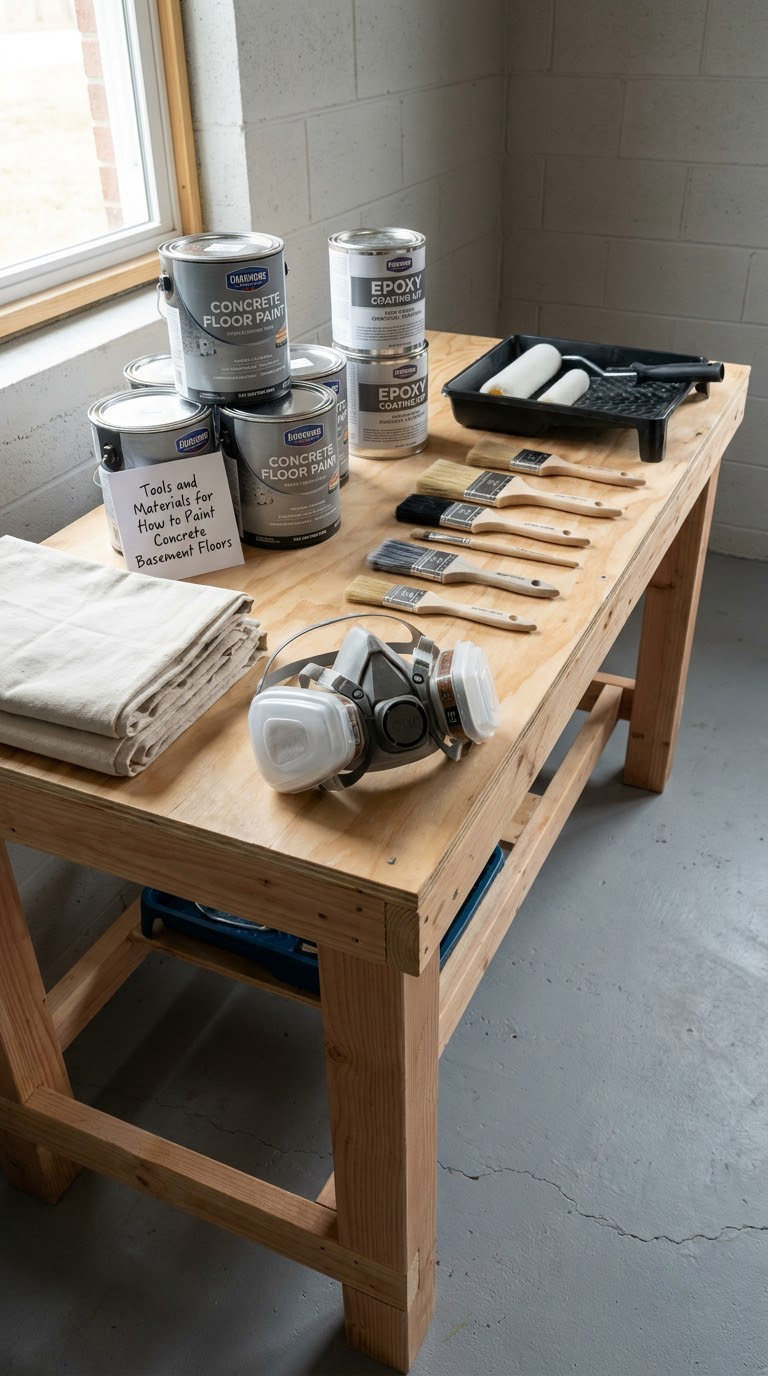
Most of what you need is a short hardware-store list. A few items are worth picking up carefully because a cheap version shows up later as peeling paint.
Tools
- Angle grinder with a diamond cup wheel, or a handheld concrete grinder for grinding sharp edges and stripping an old coating
- Wet/dry vacuum or a shop vac to clear dust before coating
- Pressure washer, or a stiff nylon brush and concrete degreaser if the floor is only dusty
- 3/8 inch nap roller and a roller extension pole for the floor field
- 2 inch angled brush for cutting in along the edges of the slab
- Plastic paint tray and a paddle mixer or drill mixer attachment for two-part epoxy
- Notched trowel for the patching compound
- Tape measure, chalk line and painter’s tape for marking the walls
- Moisture meter, and a roll of plastic sheeting plus duct tape for the plastic sheet test
- Fan or dehumidifier for airflow during application and cure
Materials
- Concrete degreaser or a concrete cleaner, plus a mildew cleaner if there has been any dampness
- Concrete patch compound for small holes and spalled edges, and a matching color patching compound if the floor is light
- Flexible concrete sealant for cracks that still move, plus backer rod for wider ones
- Concrete etching solution, or an angle grinder and a diamond cup wheel as the non-acid alternative
- Masonry primer, or a moisture vapor barrier primer for a slightly damp slab
- Two-part epoxy floor kit, or acrylic latex concrete paint rated for floors and basements
- Optional anti-slip additive mixed into the final coat, and a masonry sealer or clear urethane topcoat
- Duct tape, and heavy drop cloths or cardboard to protect the stairs and walls
Quantities are straightforward once you measure. A 300 sq ft floor needs about 1.5 to 2 gallons of coating for two coats over bare, etched concrete, so buy in whole kits and check the stated coverage on the label.
| Basement floor size | Coating for two coats | Primer |
|---|---|---|
| 150 sq ft | 1 gallon | 1 quart |
| 300 sq ft | 1.5 to 2 gallons | 1 gallon |
| 500 sq ft | 2.5 to 3 gallons | 1.5 gallons |
| 800 sq ft | 4 gallons | 2 gallons |
Add half a gallon for a third coat or for a heavier texture if the floor is rough. If you are grinding rather than etching, budget an extra diamond cup wheel, they wear down.
Before You Start: Check the Slab, Ventilate and Clear the Room
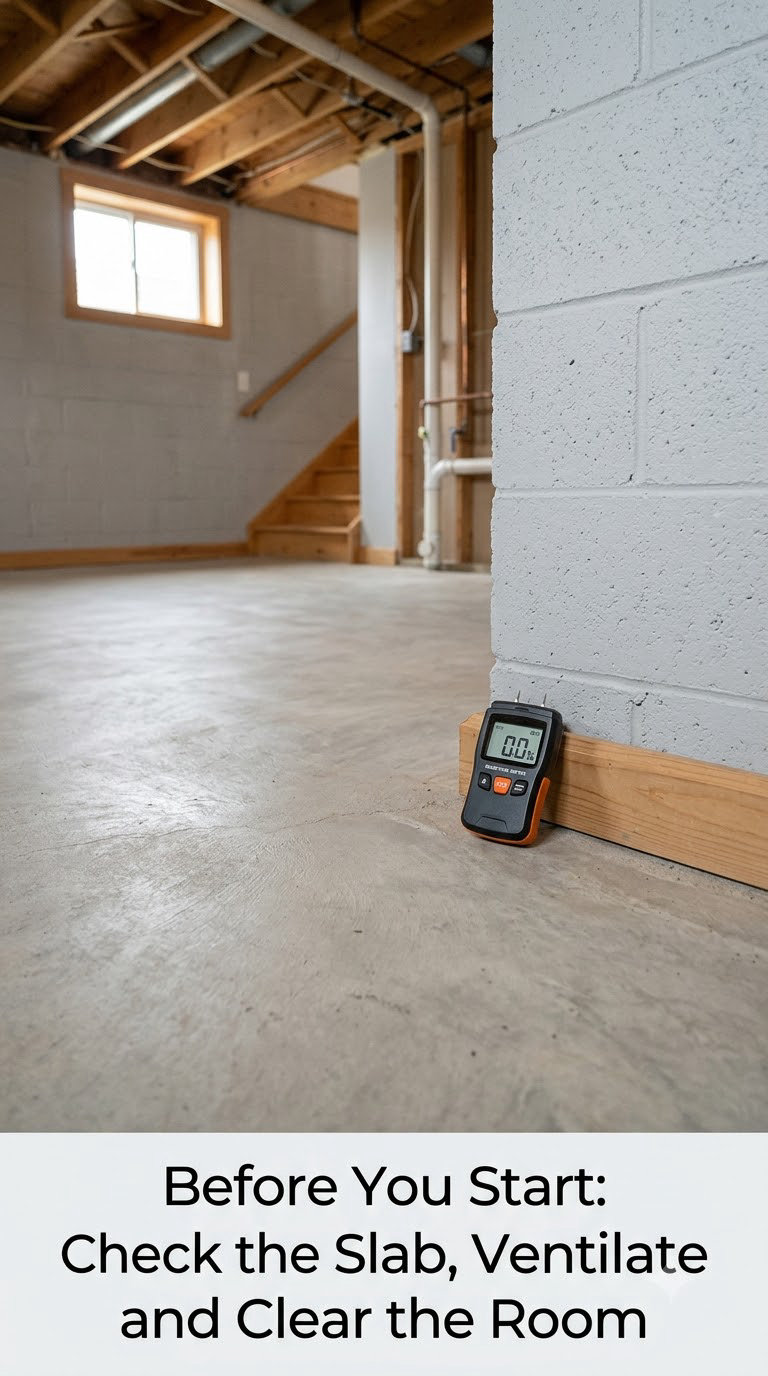
Do not buy coating until the slab passes a moisture test. Paint traps water in the concrete, and trapped water lifts the film off. This one test decides whether you use a regular masonry primer or a moisture vapor barrier primer, so it is worth the 24 hours.
The plastic sheet test
- Sweep or vacuum the floor, then let it dry for a few hours.
- Tape 12 by 12 inch (30 by 30 cm) squares of plastic sheeting to the slab in several spots, including corners, along foundation walls and near a sump if there is one.
- Leave them for 24 hours, then peel them up.
Read the result like this. Beading water or a visibly damp patch means water is moving through the slab, fix the water source before painting. A faint haze with no beads is the common, workable result. Fully dry and powdery means you can go with masonry primer.
During the same day, walk the floor looking for cracks, spalling (flaking or crumbling concrete), chalky white salt deposits and any standing water. Efflorescence, that white powdery bloom, is a symptom rather than a stain, it means water is passing through the slab and carrying dissolved salts to the surface. You cannot paint over it and call it fixed, the salt pushes the coating off from underneath.
For safety, wear eye protection, chemical-resistant gloves, a respirator with an organic vapor cartridge for epoxy and acid, and boots with good traction on a wet floor. Our picks for footwear are in this roundup of work boots for concrete floors. Run a fan or dehumidifier to move air, keep a window or door open if the weather is dry, and never work in a closed basement with epoxy fumes in it.
If the home was built before 1978 and the floor already carries a coating or adhesive, treat it as a possible lead or asbestos material. Grinding it without testing puts dangerous dust in the air. This is a stop-and-call-a-pro situation, and the EPA and local health departments both publish guidance for testing.
Move everything you can out of the room, and plan how you will get back out. Coating the stairs and a path to a door last is the habit experienced painters pick up fast, once.
Step-by-Step: How to Paint a Concrete Basement Floor
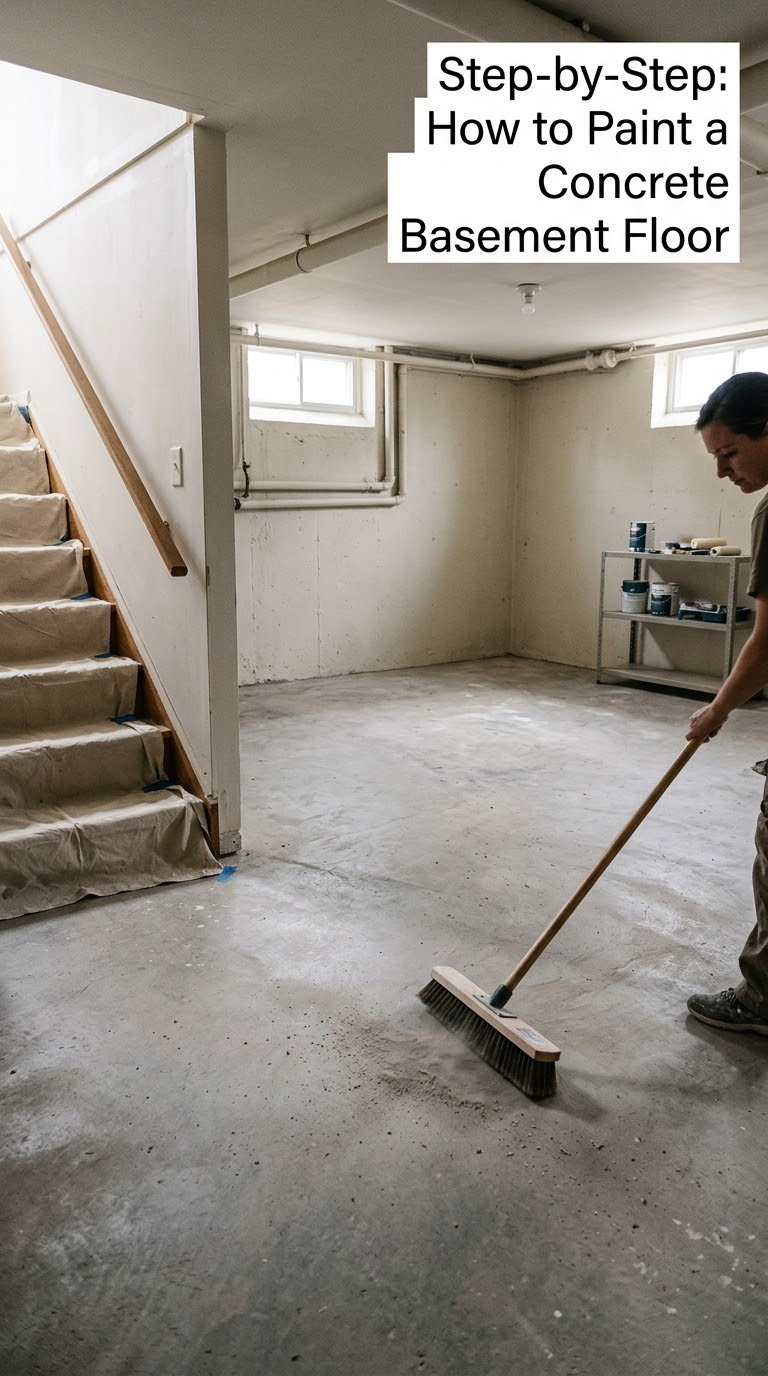
Step 1: Clear and Inspect the Basement
Take out shelving, cardboard boxes, appliances and anything else that sits on the floor. Set aside the items you still need on cardboard or in sealed bins so nothing damp sits on bare concrete later.
Sweep the slab, then vacuum it. Look for three things: cracks that are moving, spalled areas where the surface crumbles under a fingernail, and previous paint from an earlier owner. Tap-tape the moving cracks; if it breaks, it needs a flexible sealant, not a patch.
Set the ventilation going now so the room is drawing air while you work.
Step 2: Repair Cracks and Surface Damage
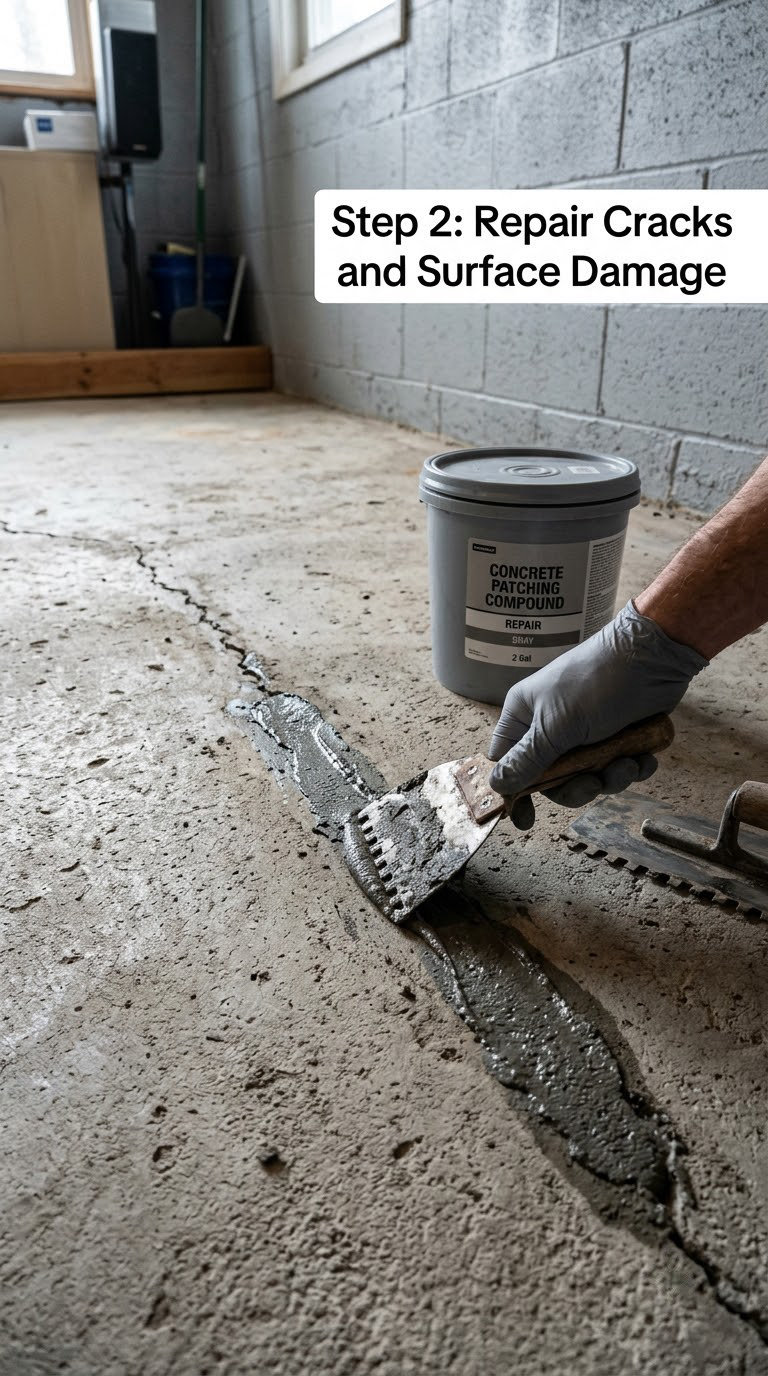
Chisel out loose concrete and sawdust from any hole, then clean the area with a brush and vacuum. Fill small holes and spalled edges with concrete patch compound, trowel it flush, and let it harden, usually 24 to 48 hours.
For cracks, a rule of thumb from the concrete trade is that cracks wider than 1/8 inch (3 mm) get routed out and filled with a flexible concrete sealant, while anything moving underfoot goes to a professional. A hairline crack in a stable slab is a weekend job. A crack that runs the length of the wall, or one where the wall and floor separate, is structural, and painting over it hides a real problem.
Grind sharp edges with the diamond cup wheel so nobody catches a toe on them later. Do not paint over spalling, that is the coating’s failure point, it is already detaching.
Step 3: Clean and Etch the Concrete
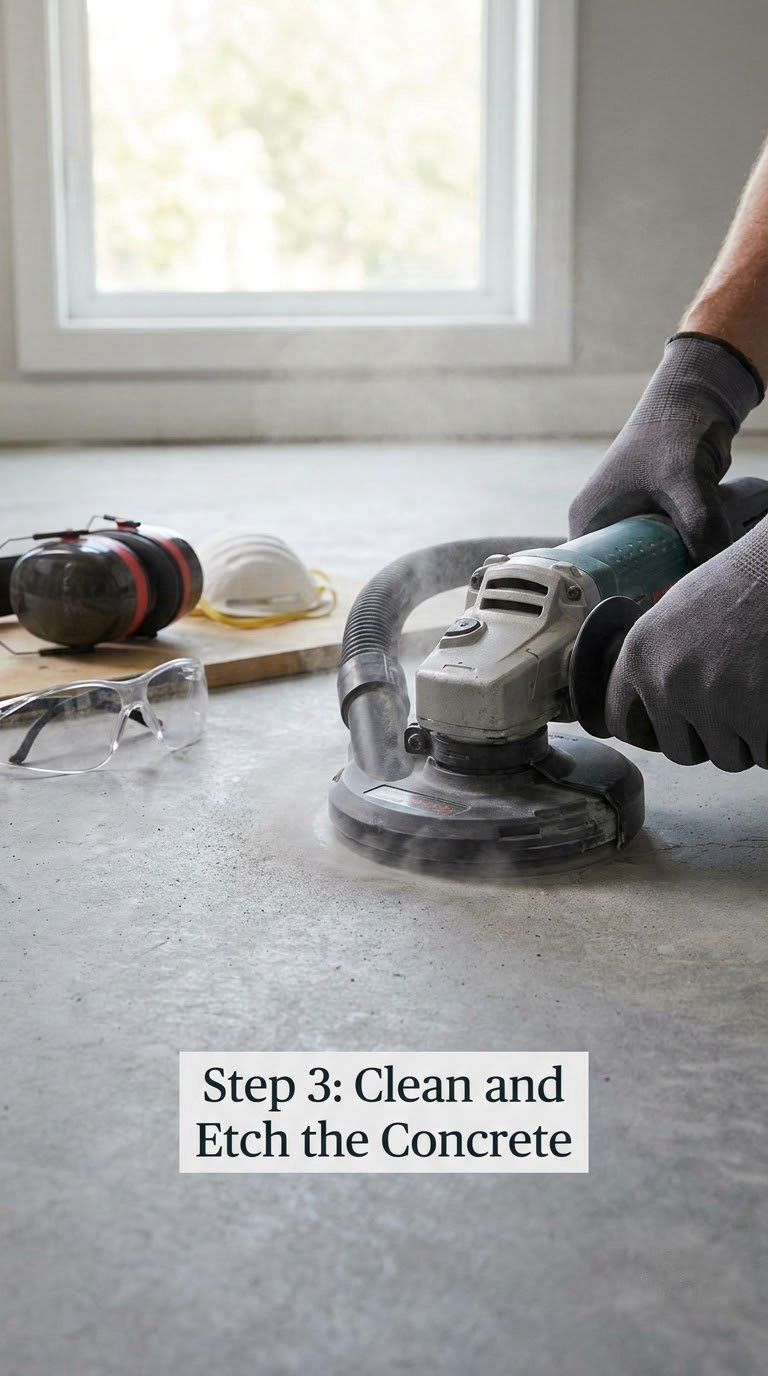
Clean first, because etching a dirty floor just seals the dirt into it. Degrease the slab, let it dry fully, then scrub any remaining mildew spots with a mildew cleaner. Rinse if you used a cleaner, and wait until the slab is dry to the touch.
Now open the pores. Concrete is porous, and coating needs either penetration or a roughened surface to hold onto. An etching solution does this fastest: apply it, scrub with a stiff brush, rinse thoroughly and let the slab dry, which often takes a day or two. Always add acid to water, never water to acid, and wear gloves and eye protection.
If you would rather not handle acid, grind the whole floor with a diamond cup wheel instead. It is dustier and slower, but it leaves a mechanical tooth that epoxy grips well, and a grinder is a good tool to have anyway for a second job. Our picks for the job are in this roundup of concrete grinders for floors.
Vacuum thoroughly, twice, with the grain of the surface. A cordless vacuum rated for concrete dust makes the difference between a clean job and a coat of embedded grit. If water beads on the surface after wetting, the concrete is still too dense and needs more etching or grinding.
Step 4: Apply Primer or Basecoat
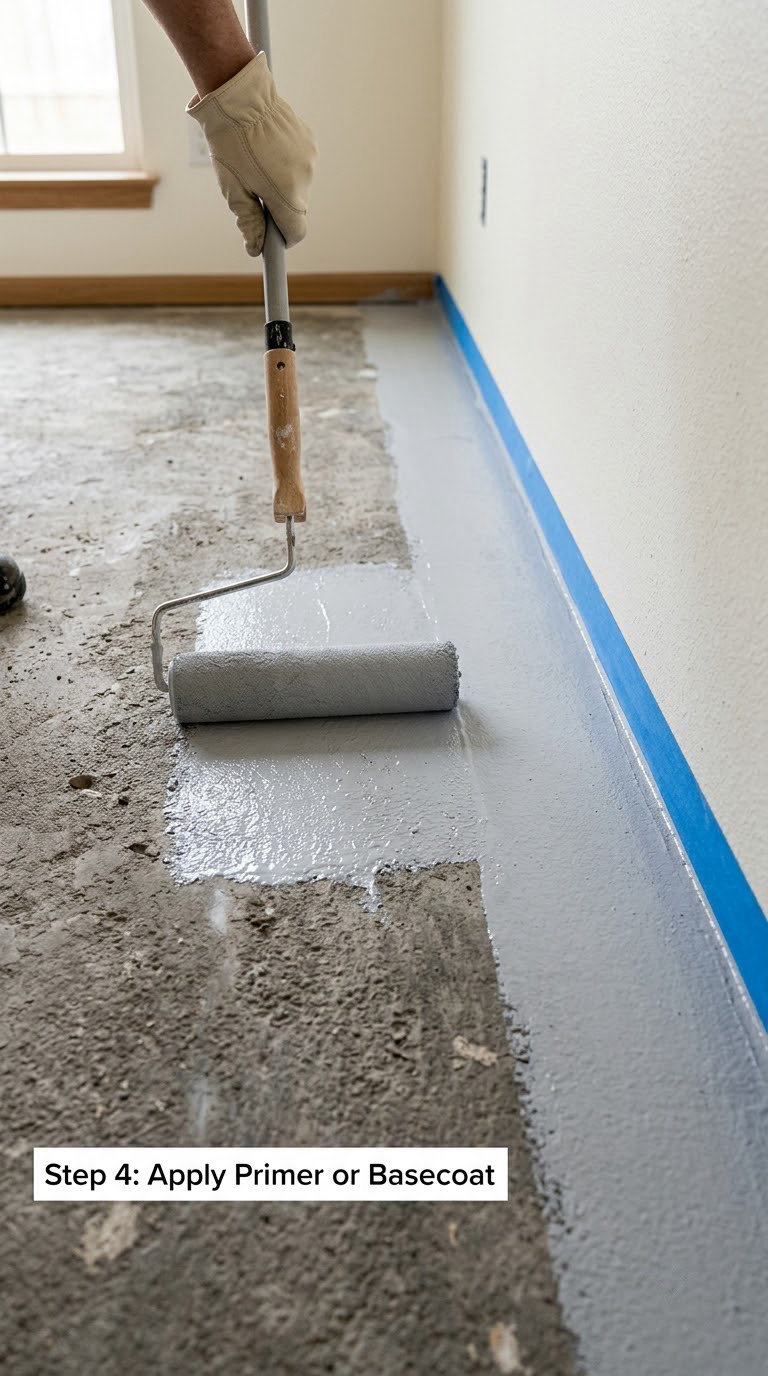
Cut in along the walls, base of stairs and around posts with a 2 inch angled brush, then roll the field with a 3/8 inch nap roller and an extension pole. Pour the primer into a tray rather than straight onto the slab, it keeps the nap loaded and cuts drips.
Use masonry primer on a dry slab and moisture vapor barrier primer when the plastic sheet test came back faintly damp. Many acrylic floor paints are self-priming, so check the label before buying a separate primer; if it is, apply the first coat at a thinner spread rate instead.
Spread it thin. A heavy coat dries on top while wet underneath, and that is how you get cured-but-delaminating patches. Follow the wet edge and work back into it before the roller starts to set up, and lap marks show up as shiny streaks that never blend out.
Let primer dry for the time on the label, commonly 4 to 24 hours, until it is uniformly colored with no tack. If the slab was freshly poured, wait about 28 days before coating it, and check the moisture test again right before you start.
Step 5: Paint the Concrete Basement Floor
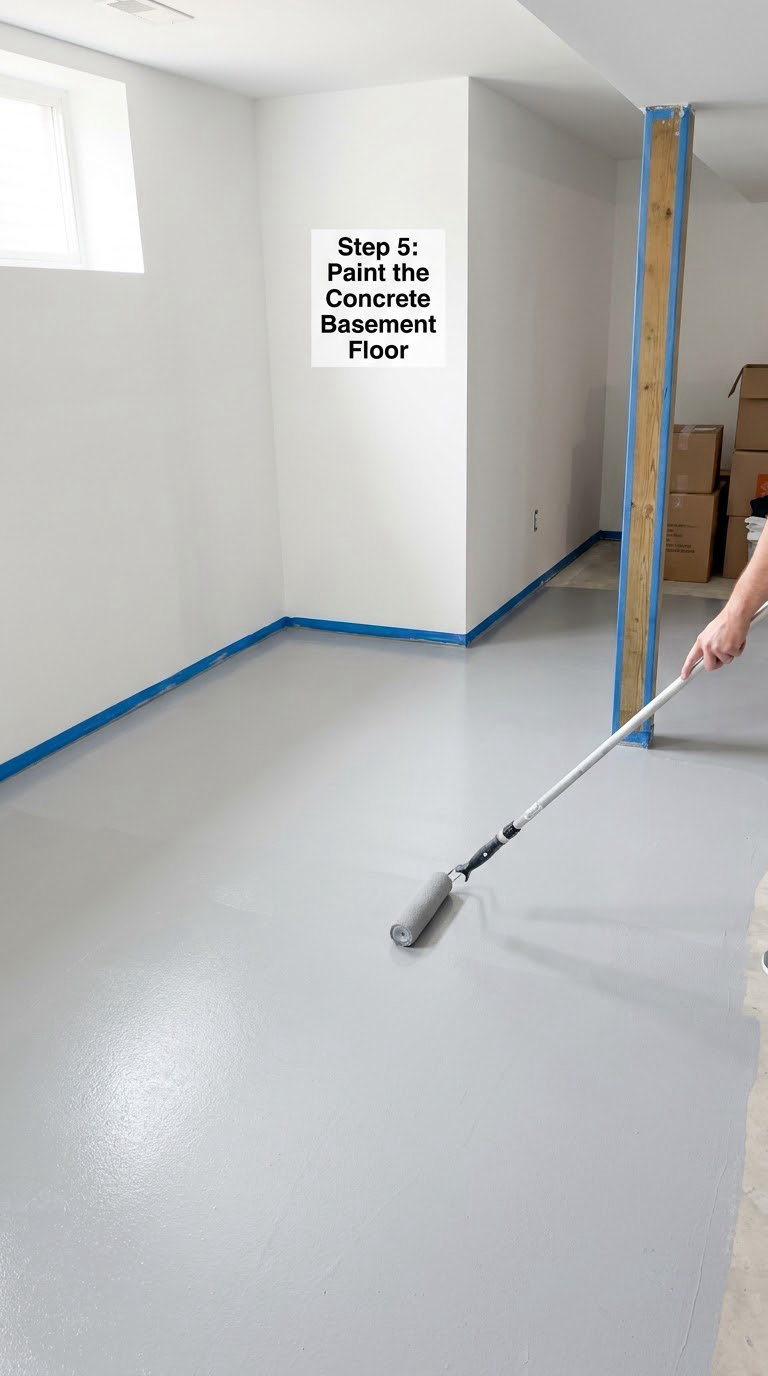
Box the coating. Stir each can and start from the container with the oldest date, because a batch mixed from two different lots of a tinted product can dry a shade apart. If you are using two-part epoxy, mix resin and hardener exactly as directed, and only mix what you can spread in the stated working time, usually 20 to 40 minutes, because the chemical reaction starts the moment they meet.
Cut in the perimeter, then roll the middle, starting at the wall farthest from your exit. Work in strips about 4 feet (1.2 m) wide, keeping a wet edge and rolling each strip before the previous one skins over.
Box the first few feet of every strip with a dry brush to knock off the roller texture. A lap mark is not a defect, it is a visible line between a wet and a half-dry section, and the only cure is working fast enough to keep the whole edge wet.
Two thin coats beat one thick one, always. Recoat inside the window on the label, often 4 to 24 hours, and if the first coat is tacky or soft, wait longer and add more airflow rather than adding the next coat early.
| Coating | Touch dry | Foot traffic | Full cure | Typical lifespan |
|---|---|---|---|---|
| Acrylic latex concrete paint | 2 to 4 hours | 24 to 48 hours | 7 days | 2 to 5 years |
| Two-part epoxy floor coating | 6 to 12 hours | 24 to 72 hours | 7 to 14 days | 10 to 20 years |
| Polyurethane or polyaspartic topcoat | 2 to 6 hours | 12 to 24 hours | 7 days | added wear layer |
Temperature matters as much as time. Most coatings need the slab and the air at or above 50F (10C), and applying below that stretches drying time well past the label. Cold basements cure slowly, so a dehumidifier and a fan help more than people expect.
Step 6: Seal, Cure and Reinstall the Room
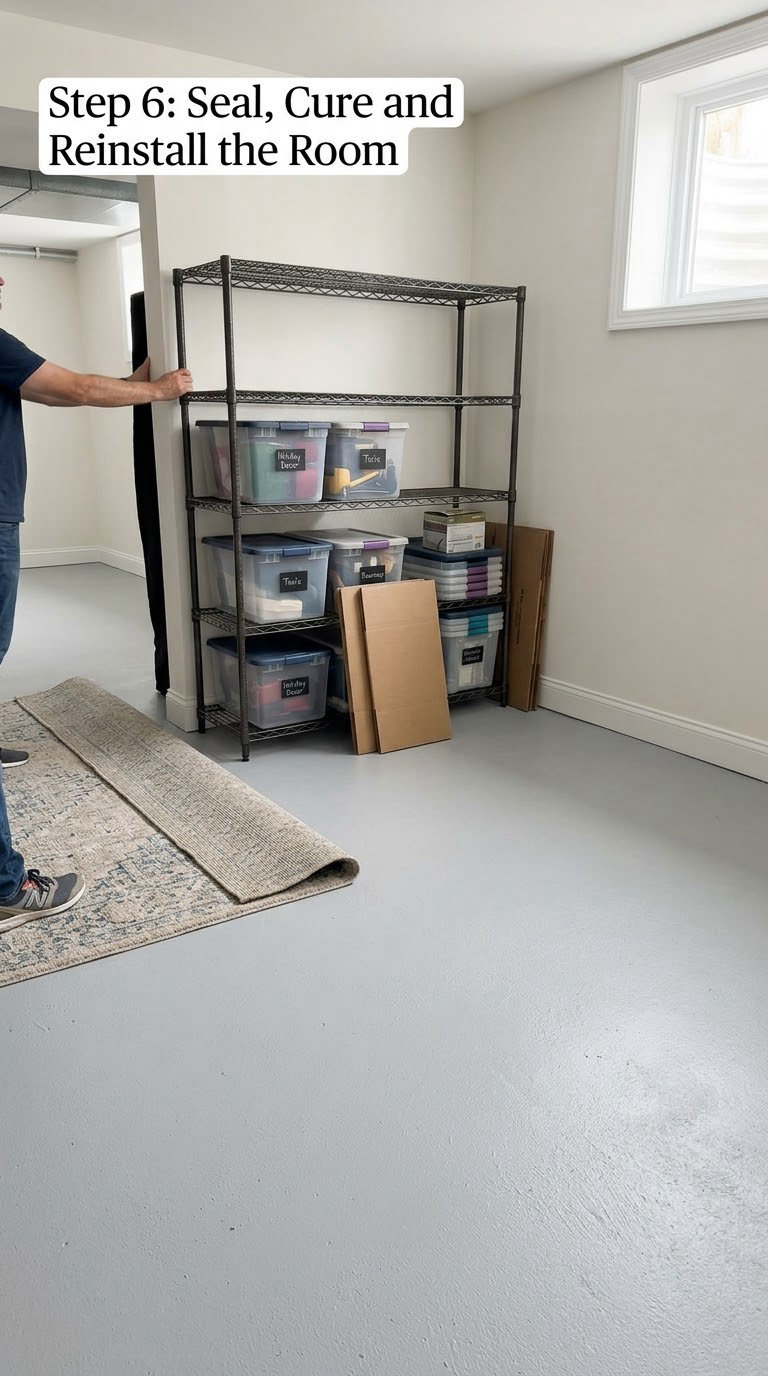
A sealer or clear topcoat is optional but sensible where the floor takes traffic from a mudroom, laundry or workshop. A penetrating masonry sealer keeps the slab from absorbing stains; a clear urethane or polyaspartic coat adds a washable wear layer over epoxy. The exception is a solid concrete stain, which most people leave alone or top with a matte clear finish. Match the topcoat to the coating underneath, because a urethane over an incompatible base can lift and turn yellow.
Now wait. Keep foot traffic off for 24 to 48 hours, keep shelving and rugs off for 72 hours, and do not park a workbench or a weight of shelving on the floor for a week. Moving furniture back too early is the most common way to leave permanent impressions in a finish that looked cured.
Run a fan and the dehumidifier for the first 48 hours, then keep humidity in the 40 to 60 percent range year-round with a dehumidifier if the basement tends to damp up. Paint is not waterproofing. It will not fix hydrostatic pressure or a leaking wall, it only makes the surface easier to live with, and a professional coating company can address the water first.
Common Mistakes to Avoid When Painting Concrete Basement Floors
Most peeling floors come from a short list of fixable mistakes. Run through these before you mix anything.
- Painting over damp concrete. This is the big one. If the plastic sheet test shows water, no coating will hold. Fix the source, or use a moisture vapor barrier primer and accept a shorter lifespan.
- Skipping preparation. Paint applied to dusty, laitance-covered concrete peels because it bonds to a powder layer that wipes off. Vacuum after grinding, then vacuum again.
- Using ordinary interior wall paint. Wall latex has no abrasion resistance and no water resistance. It scuffs to dust in months under foot traffic.
- Rolling on too heavily. Thick coats trap solvent and cure soft. Thin coats, more of them, a better result.
- Painting over efflorescence. White powdery salt deposits push the film off from below. Address the water, scrub the salts, dry the slab, then coat.
- Ignoring temperature and humidity. Below 50F (10C) or above roughly 80 percent humidity, coatings cure slowly and peel. Ventilate, dehumidify, and wait.
- Rushing the cure. Furniture returned at 12 hours leaves dents that never come out. Follow the timeline above, not your enthusiasm.
- Painting over an unknown previous coating. If the previous owner’s paint is loose, sand it or grind it off and use a bonding primer. Painting over an unknown asbestos-containing mastic or lead paint is not a DIY job at all.
Two bonus notes. Do not mix a two-part epoxy batch and then try to save the rest, the reaction finishes in the pail either way. And keep the roller in the wet paint, not in the tray with a skin forming on it, that skin is what creates the orange-peel and lap texture.
When to Call a Pro Instead of Painting the Floor
Some basements need water problems solved before a floor can be coated. A reputable foundation or waterproofing contractor is the right call when any of these show up.
- Water entering through cracks, seams or a wall base, or standing water after heavy rain
- Recurring dampness that leaves a smell, drips or visible mold, rather than a one-time damp patch
- Cracks wider than 1/8 inch (3 mm) that run diagonally, step across the floor, or have been repaired and reopened before
- Bulging, heaving or spalling that is progressing, or a floor that has sunk
- Suspected radon, since a paint job is not a radon mitigation, and testing is cheap and quick
- Any home where the previous coating might contain lead or asbestos mastic, which needs licensed testing and abatement
Exterior waterproofing, drainage and foundation work typically need permits and licensed trades. Paint is a finish, and it can never substitute for keeping water out of the slab.
Maintenance for a Painted Concrete Basement Floor
A good epoxy floor mainly needs restraint, not scrubbing. Sweep or vacuum grit regularly, because grit dragged under shoes acts like sandpaper and wears the finish, and mop with a neutral cleaner rather than anything acidic, which dulls gloss and etches epoxy.
Keep humidity between 40 and 60 percent. Peeling that appears along a wall base or in a corner is almost always a moisture signal, and addressing it early costs a fan and a dehumidifier instead of a full recoat.
Place protective mats or felt pads under shelving legs and heavy furniture, and use a ramp-style coaster set for bins so you are not dragging plastic across cured epoxy every time you pull something out. Wipe spills of oil, paint thinner or battery acid promptly, because those chemicals will stain a floor that is otherwise fine.
Inspect once or twice a year by walking the perimeter and looking for a chalky halo, lifting edges or new hairline cracks. Small scuffs get touched up with the same coating lightly sanded back. Peeling patches that go deeper than the coating mean going back to the prep stage, so grind the loose coating off, vacuum, and start again with a bonding primer.
Frequently Asked Questions
What type of paint is best for a concrete basement floor?
A two-part epoxy floor coating lasts longest, typically 10 to 20 years, because resin and hardener react into a hard film that chemically bonds to the concrete. Acrylic latex concrete paint rated for floors is easier for a beginner and lasts 2 to 5 years. Both need a clean, etched slab and a good primer underneath.
How long should a concrete basement floor dry before painting?
Newly poured concrete needs about 28 days before you coat it. For an existing slab, run the plastic sheet test: tape 12 inch squares on the floor and leave them 24 hours. If water beads under the sheet, dry it out further or use a moisture vapor barrier primer. You also want the slab at least 50F (10C) and the air dry.
Do I need epoxy paint for my basement floor?
Not always. Epoxy is the right choice for a workshop, gym, laundry or playroom where you want long life and easy cleaning. If the basement stays dry and you are on a weekend, an acrylic latex concrete floor paint is much simpler to apply and forgiving to fix. Whichever you use, the prep work is the same.
Can I paint over a stained or previously painted concrete floor?
Stains from rust, oil or damp can usually be covered, though heavy oil staining needs a degreaser and a blocking primer or the stain will reappear. Previously painted floors are trickier: if the old paint is sound, scuff-sand it, vacuum, and roll on a bonding primer. If it is loose or flaking, grind it off, since coating over it traps the failure.
How many coats of paint should I put on a concrete basement floor?
Two thin coats, no matter what the product says. Bare etched concrete needs both, because the first coat seals the surface and the second is the one you see. A third is worth it on a rough slab or a high-traffic room. Applying one heavy coat instead dries unevenly and stays soft underneath.
How soon can I place furniture on a painted basement floor?
Wait 24 to 48 hours for foot traffic, 72 hours before moving shelving and rugs back, and about a week before setting heavy items like a workbench on the floor. Full cure is 7 to 14 days depending on the coating, and a cool, damp basement stretches that timeline. Use pads under everything when it does go back.
Start with the plastic sheet test this week, before you buy anything. It costs a few dollars of sheeting and 24 hours of waiting, and it is the one step that tells you whether the floor is ready for epoxy or whether you need to fix water first. If the sheet comes up dry, order your primer and coating, block out a weekend, and protect the stairs last.
