How to Replace a Bathroom Sink Faucet: Easy DIY Guide 2026
Yes — most people can swap a bathroom faucet themselves in 45 to 90 minutes with a basin wrench, an adjustable wrench and a bucket. Learning how to replace a bathroom sink faucet is mostly about the order of the steps: shut the water off, undo the supply lines, the lift rod and the two mounting nuts underneath, lift the old faucet out, drop the new one in, tighten and test. The only hard part is getting the old hardware off if it has rusted solid.
A dripping faucet is easy to ignore for months, and then the water stain under the cabinet spreads into the particle board. Swapping the fixture takes one evening and the same tools you would use to fix a loose towel bar.
Contents
Time: 45-90 minutes for a straight swap, closer to two hours if the mounting hardware is corroded · Cost: parts-level money compared with a plumber’s service call · Difficulty: Beginner to intermediate · Skill level: Anyone comfortable with a wrench
If you want the shortest possible path, here is the whole process on one screen:
- Shut off the water — close both angle stops, open the faucet to release pressure, place a bucket under the drain.
- Disconnect the supplies — loosen the hot and cold nuts with an adjustable wrench while holding the shank steady.
- Undo the drain link — pop the lift rod off its strap and pull the rod out of the drain body.
- Remove the mounting nuts — back the nuts out from underneath and lift the faucet straight up.
- Clean the deck — scrape off old caulk or putty and wipe the sink holes dry.
- Install the new faucet — set the gasket or putty, feed the shanks through, hand-tighten the nuts.
- Reconnect and test — attach the supply lines, remove the aerator, turn the water back on slowly and check every connection with a paper towel.
Tools and Materials
A faucet swap needs fewer tools than most people expect. If you own a basin wrench, you already have most of it.
Tools
- Adjustable wrench, 8 inch — for supply line nuts and the drain tailpiece
- Basin wrench — for the mounting nuts in tight corners under the sink
- Phillips and flat-blade screwdrivers — for handle screws and the lift rod strap
- Channel-lock pliers — backup grip for stubborn couplings
- Putty knife or plastic scraper — for old caulk and putty
- Bucket, about 2 gallons, and a few old towels
- Flashlight or headlamp and safety glasses
Materials
- The new faucet, matched to your hole configuration and drain
- 2 new braided stainless supply lines, 3/8 inch compression (or the size your angle stops need)
- 1 roll PTFE plumber’s tape, 1/2 inch wide
- Plumber’s putty, only if the new faucet has no rubber gasket
- Silicone sealant if you want to caulk the faucet base to the sink
- Flash paper or paper towels for the leak test
Take a photo of the plumbing under the sink before you touch anything. If something does not go back together the way you remember it, the photo is your reference.
Before You Start: Identify Your Faucet Configuration
Not every faucet fits every sink. Count your holes and measure the spread before you buy anything, because a mismatch usually means returning the fixture and starting over. This is the part of how to replace a bathroom sink faucet that people skip, and it is the part that turns an evening job into a weekend one.
| Configuration | Holes | Spread | What fits |
|---|---|---|---|
| Single hole | 1 | n/a | Single-hole faucet only |
| Centerset | 3 | 4 inch | 4 inch centerset, or a single-handle faucet with escutcheons |
| Widespread | 3 | 8 inch | Widespread or split-set faucet |
Measure from the center of the left hole to the center of the right hole, not edge to edge. A new single-handle faucet can cover a 4 inch centerset or an 8 inch widespread because its escutcheons hide the outer holes — that is how people upgrade a dated two-handle faucet without drilling.
Check the drain too. A pop-up faucet needs a drain body with a lift rod, an open drain has no plug at all, and a grid drain is fixed in place. Drain sizing varies by sink, so it is worth checking bathroom sink drain sizes before you buy a faucet with a pop-up. If the two do not match, the new faucet is fine — the drain is the part to swap.
Now find your shut-off valves, the angle stops on the hot and cold lines under the sink. Close both handles clockwise until they stop. If a valve will not turn, or there is no valve at all, do not force it — read the section on calling a pro below before you go further.
Set a bucket under the drain, fold a towel on the counter, put on safety glasses and lay everything out where you can see it from under the sink. Expect a few more drips for a minute after shutoff as the lines empty; that is normal, not a sign something went wrong.
Step-by-Step Instructions
Step 1: Shut Off the Water and Prepare the Sink
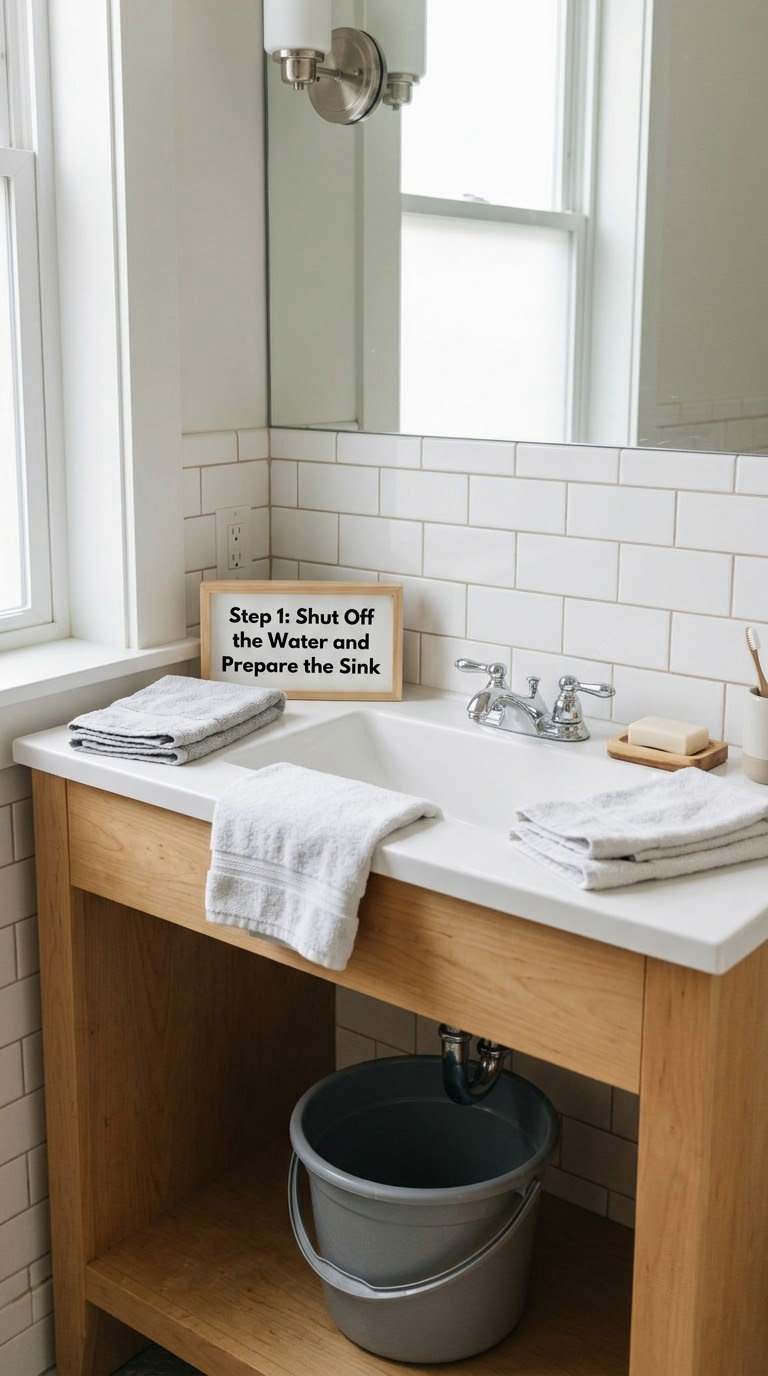
Close both angle stops, then open the faucet handles to the cold position to relieve pressure in the lines. Plug the drain with a washcloth so a dropped tool does not disappear down the pipe.
Unscrew the drain stopper. If the old faucet has a lift rod, it comes off later — for now, just clear the way. Wipe the sink deck dry and lay a folded towel over the countertop so parts do not scratch the surface.
How to tell it is right: after a minute with the faucet open, only a slow drip should come from the spout. A steady stream means a valve is not fully closed.
Step 2: Remove the Old Faucet
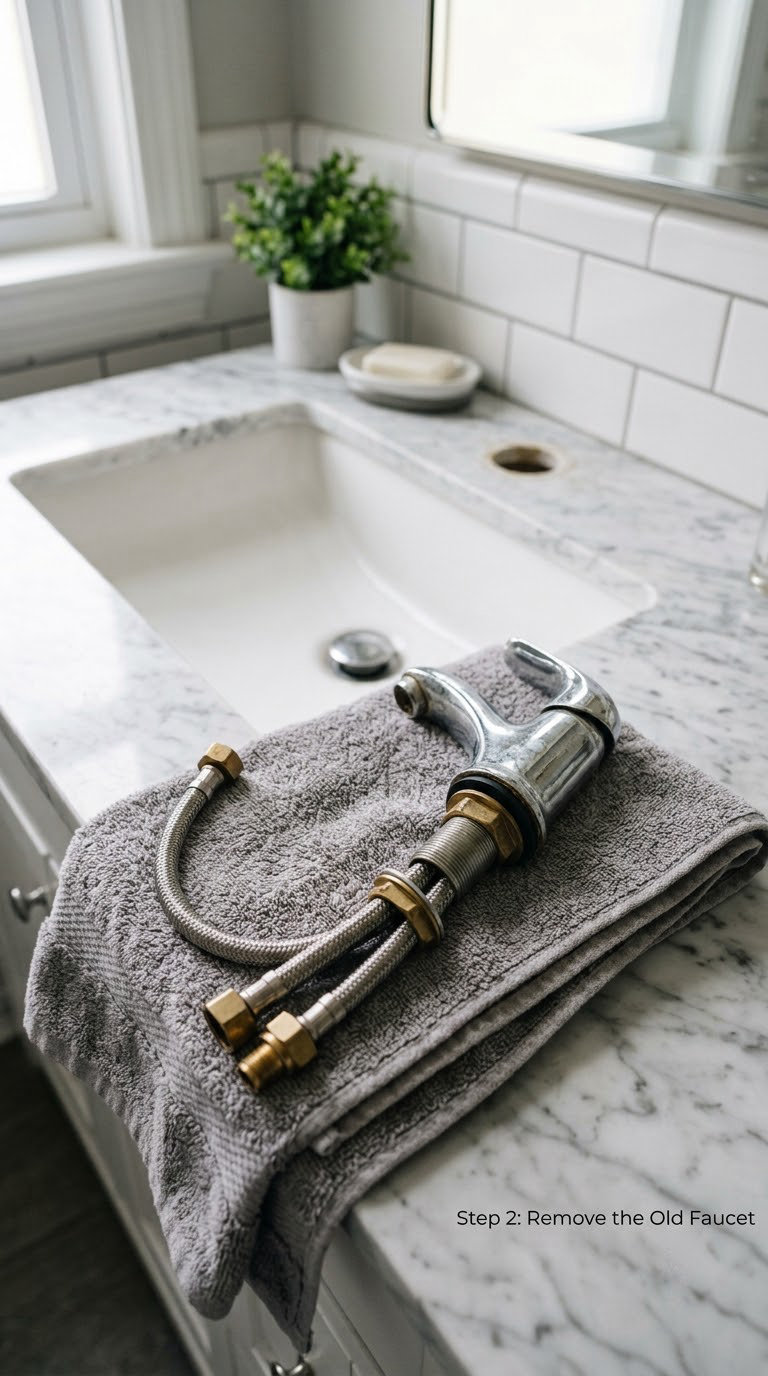
Start with the drain. On a pop-up assembly, pull the lift rod up off the strap on the drain body, then unscrew the ball rod or lift rod from the underside of the faucet. Feed the rod down through the hole in the drain body and pull it out from above.
Next, the supply lines. Hold the shank just behind the nut with one wrench and turn the nut with the other, turning counterclockwise. If water is your only tool for a corroded nut, spray penetrating oil, wait 10 minutes and try again. Do not use a hose clamp as a wrench; it crushes the nut and guarantees a leak later.
Back the two mounting nuts out from underneath, turning counterclockwise, and lower the faucet. If a nut will not budge, tap the back of the wrench handle lightly with a mallet to break the corrosion, then try again. Never pry against the sink or the supply shanks — that is how a crack in a porcelain basin happens.
Inspect what comes off. Brittle, flattened or green-stained supply lines get replaced, not reused. If you are dealing with a loose faucet rather than a full change-out, you may be able to fix a loose bathroom sink faucet with new mounting nuts alone.
Check: the old faucet should lift out in one piece with the gasket or putty still on the underside. If a chunk of sink deck comes with it, the putty had hardened into the porcelain and go gently with a plastic scraper.
Step 3: Check the Sink and Install the New Faucet
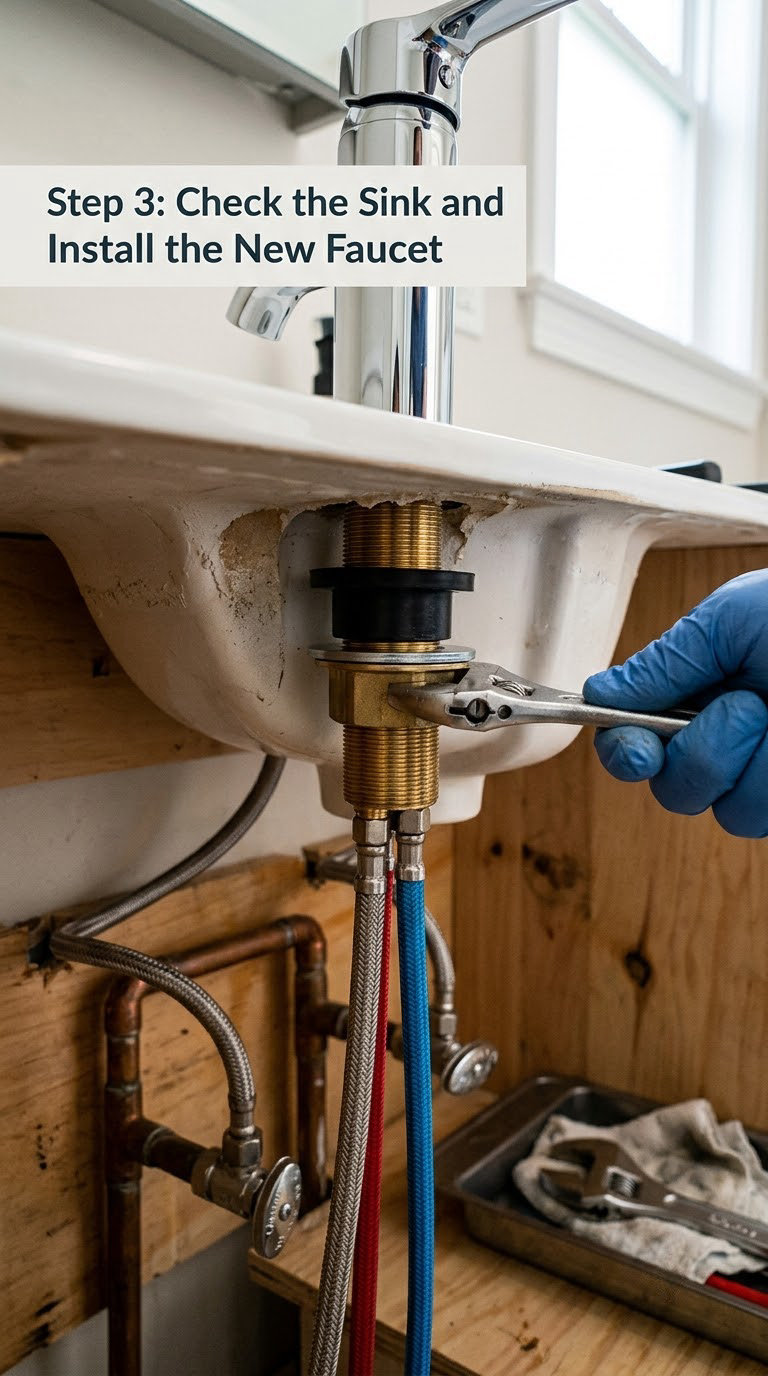
Scrape away old caulk, hardened putty or wax from the sink deck with a putty knife, then wipe the surface with a damp cloth and let it dry. If there is a hard water ring or silicone residue, a little mineral spirits on a rag lifts it.
Check the new faucet before it goes in. Confirm the shank spacing matches your holes, and check whether it comes with a rubber gasket on the underside. If it does, skip the putty — putty plus gasket is a common cause of a new faucet leaking at the base.
Apply a thin rope of plumber’s putty only if the faucet has no gasket. Otherwise fit the supplied rubber gasket, or a thin bead of silicone if you prefer to caulk the base permanently. Feed both shanks straight up through the hole or holes and rest the body on the deck with a cloth underneath so you do not scratch it while you work blind.
Check: the faucet body should sit flat and level, with the spout centred over the drain and the handle clear of the backsplash.
Step 4: Secure the Faucet and Connect Water
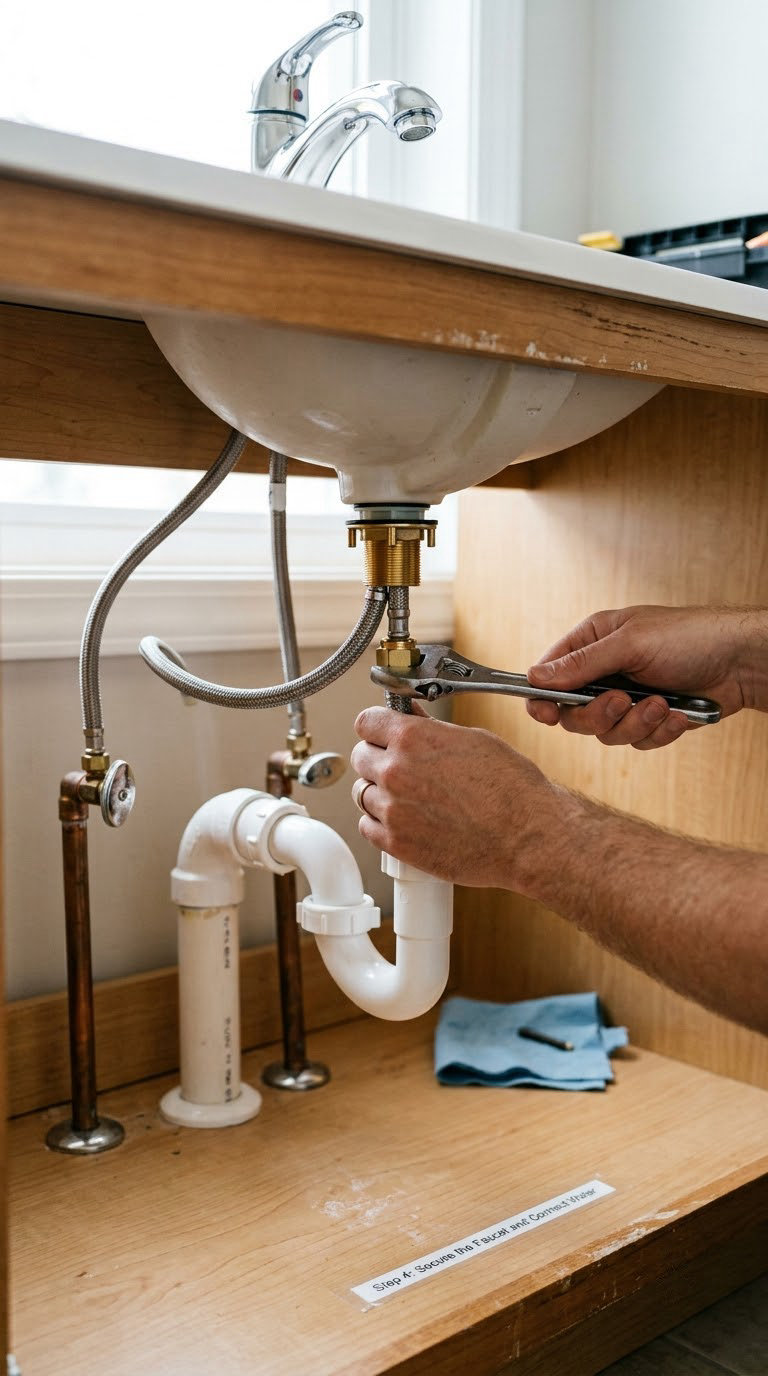
Thread the washers and mounting nuts onto the shanks from below and tighten them by hand first. Then snug each nut a quarter turn at a time, alternating sides, until the body stops rocking. Tight, not crushed — if you feel the sink deck flex, you have gone too far.
Wrap PTFE plumber’s tape around the threads of each angle stop, one and a half turns in the direction of the thread. Hand-tighten the new braided supply lines onto the stops and the faucet shanks, then finish with the adjustable wrench and a quarter turn. Marking which faucet shank is hot and which is cold keeps you from reversing them.
If you disturbed the drain, put the lift rod back on the strap, slide the rod through the drain body, tighten the nut underneath and confirm the stopper lifts smoothly. If your old hose is stretched or kinked, this is the moment to swap it — see our picks for bathroom faucet hoses.
Check: with both valves still closed, the faucet should not drip at all. Any water now is coming from a fitting you did not tighten.
Step 5: Turn On the Water and Test for Leaks
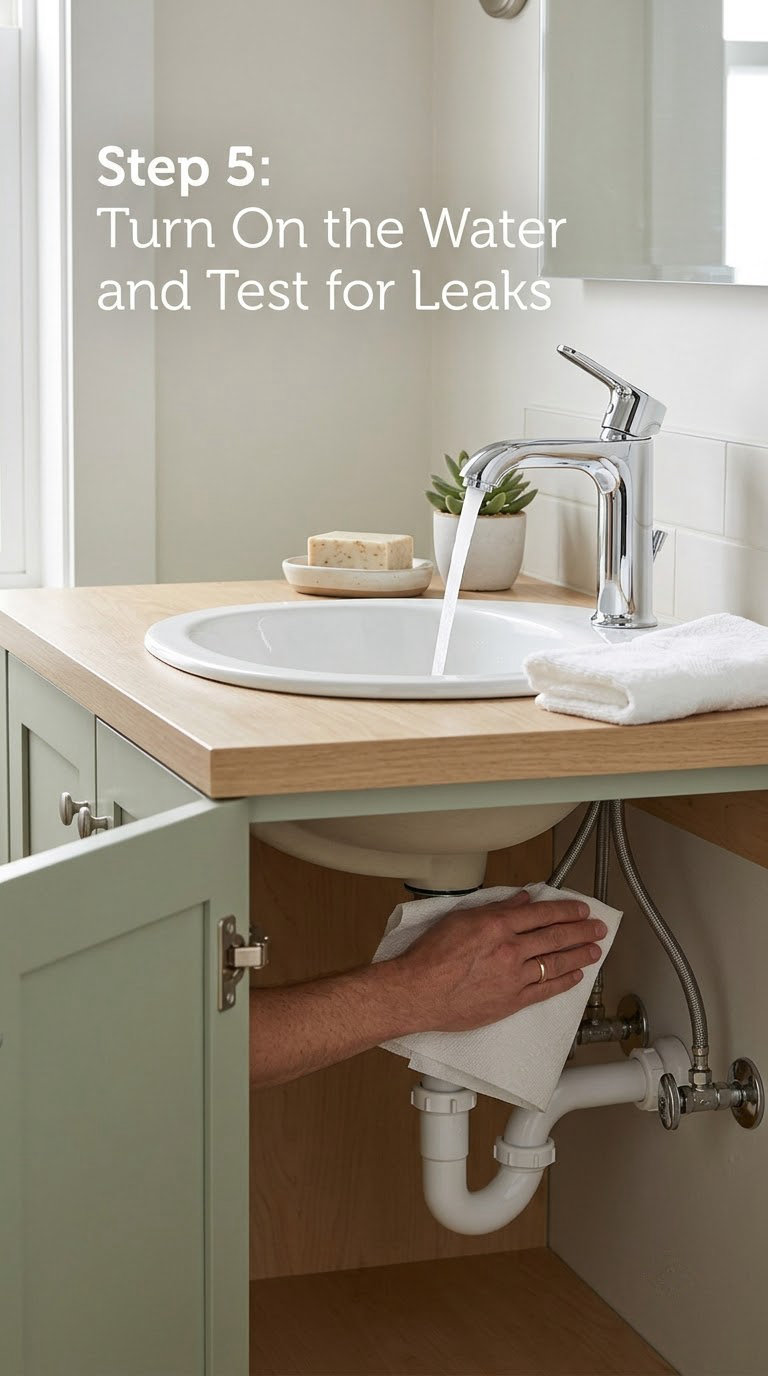
Open the hot and cold valves slowly, one at a time, a quarter turn every few seconds. Fast opening sends pressure spikes through the new joints. Then remove the aerator from the spout, run the hot and cold for a full minute to flush out debris, and screw the aerator back on by hand.
Now the leak check, which is the part of how to replace a bathroom sink faucet that decides whether you keep the tools in the bin. Run the faucet at full flow with both handles open, then work each side down the line with a dry paper towel: the supply line nuts, the base of the faucet, the drain tailpiece and the lift rod strap. Feel the paper towel rather than trusting your eyes — a connection can dampen for several minutes before a drip forms.
Close the faucet, run it again, and check once more. A steady drip from the spout with the handles closed means the cartridge or a washer needs attention, not more wrenching on the connections.
Check: no dampness on the paper towel after five minutes of operation, and the water drains freely with the stopper up and down.
Common Mistakes to Avoid When Replacing a Bathroom Sink Faucet
- Buying a faucet that does not match the holes. Measure the spread from centre to centre before you order, not after.
- Overtightening the supply nuts. Copper and older brass threads strip easily. Snug is enough; the washer does the sealing.
- Using putty on a faucet that has a rubber gasket. The gasket cannot seal, so the water pushes straight out at the base.
- Forgetting to relieve pressure. Water still in the lines sprays when a nut comes off. Open the faucet and let it drain first.
- Reusing old supply lines. Experienced DIYers replace them every time, because the failure happens later, behind a wall or inside a cabinet.
- Skipping the leak test because it looks dry. Give every connection five minutes of running water before you close the cabinet.
- Forcing a seized nut with the wrong wrench. A strap wrench or basin wrench grips where an adjustable wrench chews the corners off.
- Reusing a mismatched drain. A pop-up assembly will not open a grid or open drain correctly, and the rod jams.
When to Call a Pro
Stop and call a licensed plumber when the problem is not the faucet itself. You want help if an angle stop will not turn or shears off, if the supply lines are corroded through and crumbling as you touch them, or if there are no shut-off valves under the sink at all and you would have to shut off the whole house to work on it.
Call a pro for leaks you cannot reach from inside the cabinet, for galvanized or lead pipe that needs cutting, and for any work that opens the wall behind the sink. Permits and inspection come into play when plumbing is relocated or a new shut-off is added, and that is licensed work in most jurisdictions.
Plumbers on the forums are consistent about the line where the cost-benefit tips: the moment the supply lines or angle stops are the problem, the swap stops being a beginner job. A stuck angle stop is the moment I would stop reaching for a wrench and pick up the phone.
Maintenance
Wipe the faucet weekly with a soft microfibre cloth and a mild dish soap solution, then dry it. Abrasive pads, bleach and alcohol-based cleaners will haze chrome and dull brushed nickel in a few uses.
For white mineral spots, soak a cloth in white vinegar and leave it on the spout for 15 minutes, then rinse. Use a vinegar-based descaler for heavy buildup and stay away from the aerator threads. If your home has hard water, a monthly soak keeps the aerator from cutting flow down.
Check the supply connections twice a year while you are cleaning the sink. Look for corrosion, bulging or dampness on the cabinet floor. A stiff handle or a faucet that drifts out of position is usually a failing cartridge, and replacing it early is far cheaper than letting it freeze the mechanism.
If an adapter is needed for an unusual thread or a legacy two-handle conversion, our guide to bathroom faucet adapters covers the common fittings.
Frequently Asked Questions
Can I replace a bathroom sink faucet myself?
Yes, most people can. If you can shut the water off, use a basin wrench and an adjustable wrench, and are willing to replace the supply lines while the sink is apart, this is a beginner job. A straightforward swap takes 45 to 90 minutes. Allow closer to two hours if the mounting nuts or supply lines are corroded, which is the part most likely to need a plumber.
How do I know which bathroom sink faucet will fit?
Count the holes in the sink deck and measure the centre-to-centre spread. One hole takes a single-hole faucet. Three holes at 4 inch apart take a centerset, and three holes at 8 inch apart take a widespread faucet. A single-handle faucet with escutcheons can cover either spread, which is how you upgrade a two-handle sink without drilling.
What tools do I need to remove a bathroom faucet?
You need an adjustable wrench, a basin wrench for the mounting nuts, screwdrivers for the handle screws and lift rod strap, and a putty knife for old caulk. A bucket and old towels catch the water, and a flashlight and safety glasses make working under the sink much easier. Most of these are basic household tools.
Why is my new bathroom faucet leaking?
Check four spots in order: the supply line nuts, the faucet base seal, the drain tailpiece and the lift rod strap. A base leak usually means plumber’s putty was used over a rubber gasket. A dripping spout with the handles closed points to the cartridge or washer. If the leak appears only at the base and only when the faucet runs, reseat the base seal.
Should I replace the water supply lines when changing a faucet?
Yes, if there is any chance to do it. Supply lines are cheap, and the failure happens later when a brittle line cracks inside a cabinet or behind a wall. Replace them if they are older than about ten years, visibly corroded, flattened at the nut, or seized to the angle stop. New braided lines also make the next faucet swap far easier.
When should I call a plumber instead of replacing the faucet?
Call a plumber when the angle stops will not turn, the supply lines crumble as you touch them, there are no working shut-off valves under the sink, or the leak is inside the wall where you cannot reach it. Work that involves cutting galvanized pipe, adding a new valve, or opening the wall is licensed work in most areas and usually needs a permit.
Conclusion
Start by measuring your sink holes and confirming the drain type — that one check prevents the most common failed project. Then shut off both angle stops, relieve the pressure, and take the old hardware apart slowly with the right wrench. Once the new faucet is in, run it for a full minute and press a dry paper towel to every connection before you close the cabinet door. That is how to replace a bathroom sink faucet without calling anyone back the next morning.