How to Repair a Scratched Hardwood Floor: No Sanding Needed 2026
To repair a scratched hardwood floor, match the method to how deep the damage goes. A mark that only catches in the protective finish needs colour and sheen restored, while a gouge that opens the raw wood underneath needs filling, sanding, stain and a seal.
Most scratches fall into the first two groups, and both are a short afternoon of work. I would rather fix a scratch than sand a floor, mostly because sanding takes the finish off everything around it and there is no putting that back.
Contents
Time: 20 minutes to 1.5 hours for surface scratches, 1 to 3 hours for gouges, half a day for a board swap · Cost: Low for touch-ups, moderate for filler and finish, a rental sander plus supplies for a full room · Difficulty: Easy to moderate · Skill level: Beginner for Steps 1 to 3, confident beginner for Steps 4 to 6
Before anything else, work out what finish you are dealing with and grab a hardwood-safe cleaner you can trust. My picks are in the best hardwood floor cleaners and polish round-up.
Tools and Materials
Everything below is sized for repairs up to a few boards. You are not buying a full refinishing kit.
- Bright flashlight or work light for raking the floor at a low angle
- Microfiber cloths, 3 or 4 clean ones
- Soft-bristle brush or vacuum with a hard floor head
- Wood floor cleaner, hardwood-safe formula
- Small paint brush, 1 to 2 inch wide
- Painter’s tape, low tack, 1 inch roll
- Rubber gloves, safety glasses, N95 or similar dust mask for sanding
- Shop towel or tack cloth
- Touch-up marker or stain pen in a matching tone and sheen
- Wax filler stick for scratches that catch a fingernail
- Wood filler or wood putty, colour matched, for gouges
- Putty knife, 1 inch and 4 inch
- Fine sanding sheets at 150, 180 and 220 grit, plus a small sanding block
- Wood stain and a matching clear topcoat in satin, gloss or matte
- Matching replacement board, one spare, for Step 6
- Utility knife, pry bar and a wood shim for board removal
Before You Start
Find your floor’s finish first, because it decides everything that follows. Look at the end of a board, under a rug or where a baseboard was never painted. A factory finish such as aluminum oxide is nearly as hard as the wood itself and will not take a wax stick well. An oil or wax finish drinks colour and can look blotchy if you use anything but a product made for it.
Run a drop of water on an out-of-the-way board and leave it for an hour. If the wood swells and roughens, it is unfinished or oil-waxed, and any solvent-based product can bite. If nothing happens, you have a film finish and more freedom.
Tape the perimeter of the work area with painter’s tape, and lay a drop cloth if you will sand. Keep pets out of the room, open a window, and put on the mask before you pick up sandpaper. Never mix a hardwood cleaner with bleach or ammonia.
Check the flooring manufacturer’s care sheet before buying anything. If the floor is under warranty, some finishes only accept manufacturer-approved repair products.
Before You Start tip: test your chosen product in a closet corner or under a piece of furniture that rarely moves. Give it the full cure time listed on the label, then look at it in daylight.
Step-by-Step Instructions: How to Repair a Scratch by Depth
Step 1: Identify the Floor Finish and Type of Scratch
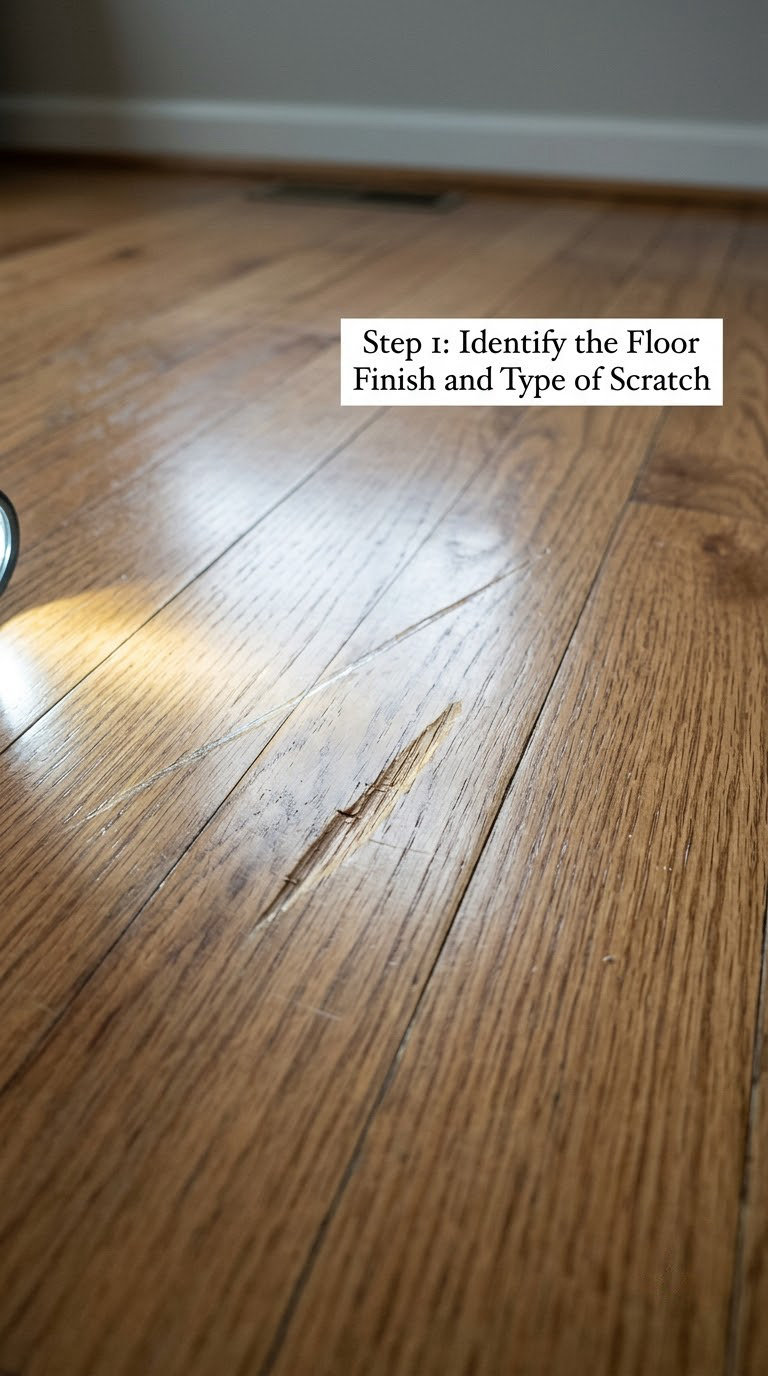
Run your fingernail across the mark. If the nail glides over it with no catch, the finish is still intact and you are looking at a surface scratch. If the nail drops into a groove, the scratch has cut through the finish and into the wood.
A white or pale scratch is usually the finish itself, disturbed rather than removed. Those are the easiest to hide because there is no bare wood to colour. A dark line usually means the stain layer or raw wood is exposed.
Kneel down and shine the light across the floor at a low angle. What you are checking is whether the groove catches a fingernail, whether bare wood is lighter than the stain around it, and whether any board edge is lifting or chipped.
Step 2: Clean and Prepare the Damaged Area
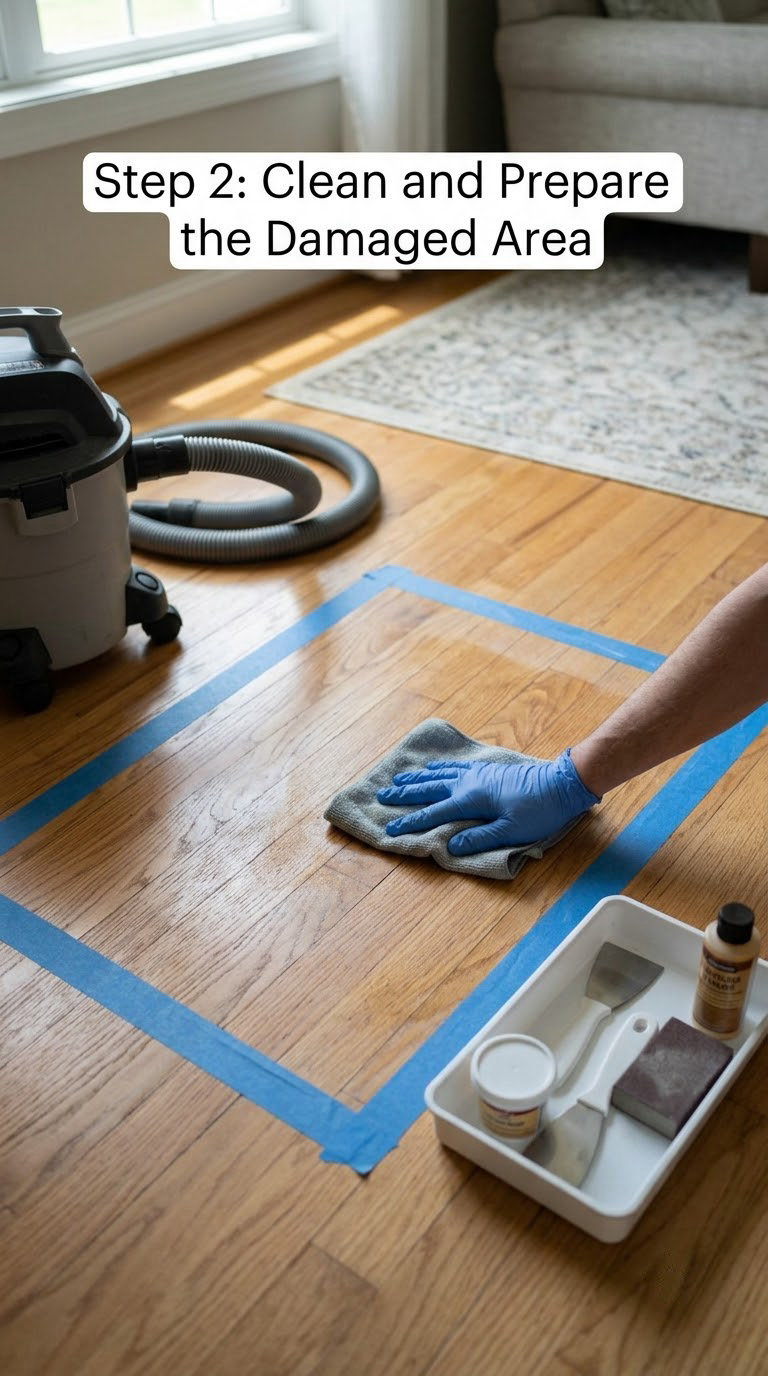
Vacuum the boards around the damage first, using a hard floor head or the brush attachment. Grit left under a buffing cloth will scratch the finish while you are trying to fix a scratch, which is how people make a small mark into a long smear.
Wipe the area with a damp microfiber cloth and a hardwood-safe cleaner, then dry it fully. Give it 15 to 30 minutes in good airflow, or speed it with a fan on low. The repair product will not bond to a damp board, and moisture trapped under a wax or filler fill lifts it later.
Tape a border about half an inch outside the damage so you catch any stray drips, and test the product in the hidden corner. Do not soak the wood, and skip acetone, mineral spirits and paint thinner unless the floor is completely unfinished.
Step 3: Repair a Light Surface Scratch With Wax or Marker
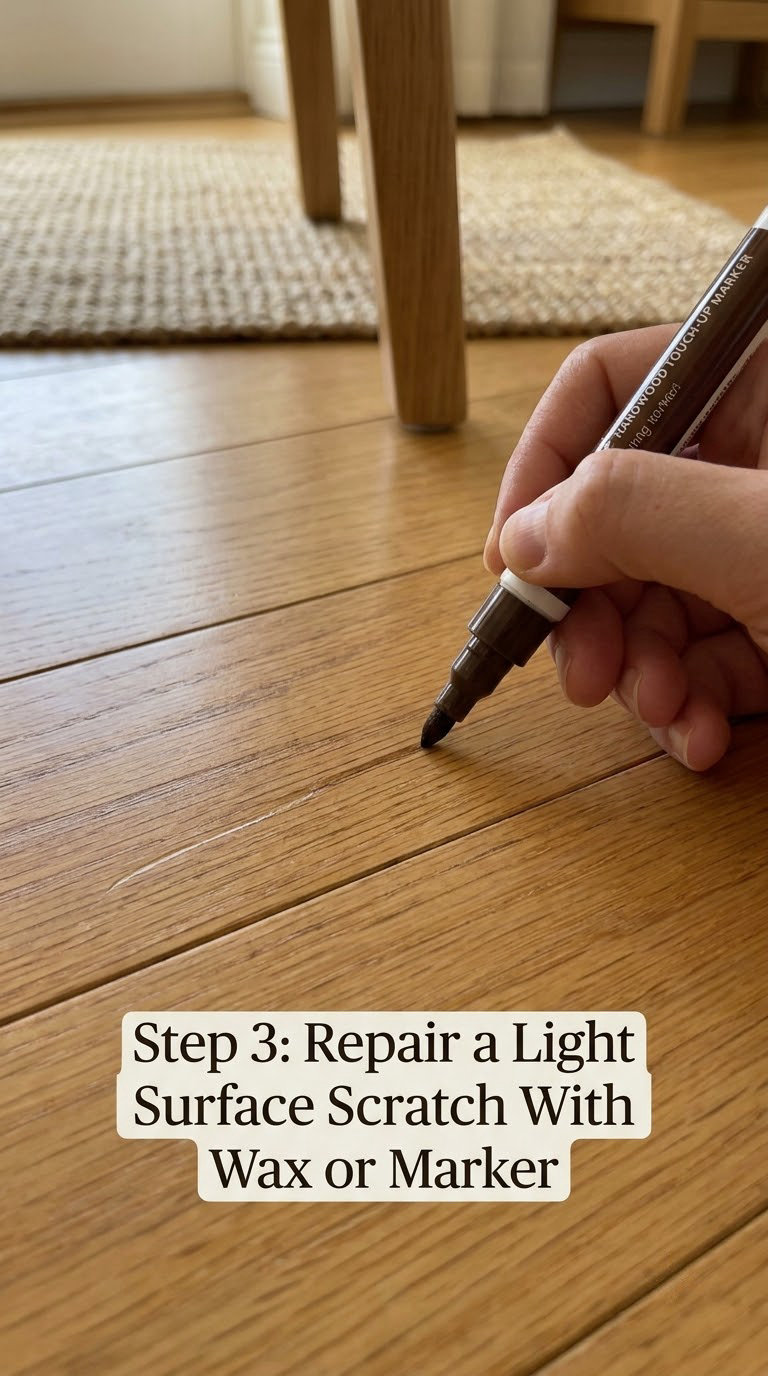
A light surface scratch takes a colour-matched touch-up marker or a wax filler stick, applied along the grain and buffed off. Nothing else is needed when the wood underneath is untouched.
- Pick the tone and sheen that match, and go one shade lighter rather than darker, since repair products usually absorb deeper than the floor.
- Wipe the scratch with the cloth to lift any dust, then work the product along the grain in short strokes, not across it.
- Feather the product over the scratch rather than scrubbing it in, and let it settle for the 30 to 60 seconds the label gives.
- Wipe away excess with a clean microfiber cloth straight away, before it dries into a film.
- Buff with circular motions for about a minute, then check in raking light from the window.
- Add a second thin coat only if the line still shows.
You know it is right when the scratch disappears at a grazing angle and leaves no glossier halo than the plank around it. A dent is different: the fibres are crushed, not removed. Set a damp towel over the mark and press a hot iron for a few seconds, repeating until the fibres lift. That one moves dented wood more often than any product.
Step 4: Level a Small Gouge With Sanding
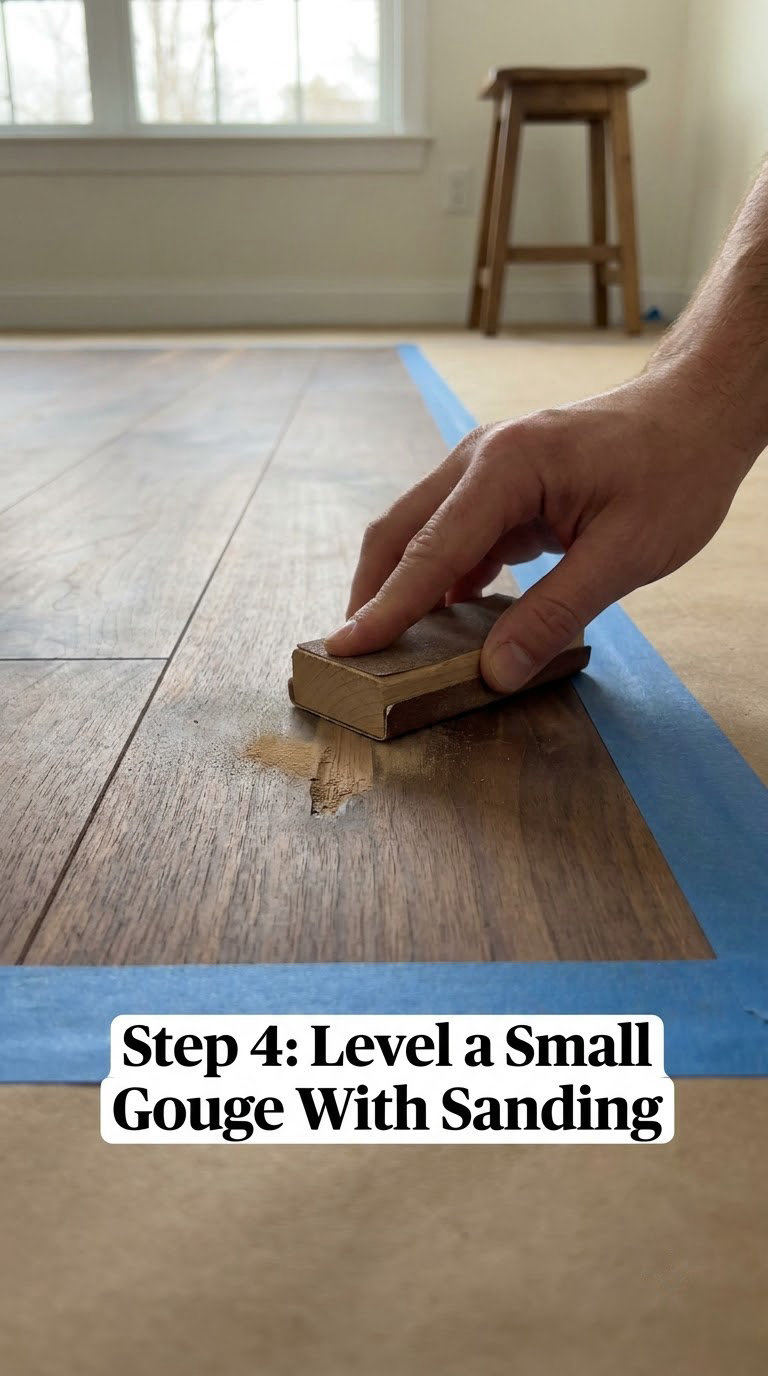
Sand a localized gouge with 150 to 220 grit paper, following the grain and staying inside the damaged area. The goal is a flat patch, not a new floor.
- Start at 150 grit on the bare wood only, using a small sanding block so you can feel what is happening under your hand.
- Move with the grain in slow strokes. Cross-grain strokes leave swirl marks that show immediately under finish.
- Feather the edge outward about half an inch into sound finish so there is no lip to catch light.
- Move up to 180 grit, then 220 grit, until the patch feels level with the surrounding board.
- Vacuum with a brush nozzle, then wipe with a tack cloth until the surface is completely dust free.
Check by raking a light across the area and running a fingertip over it. If you can still feel a dip, keep feathering. On engineered hardwood, stop as soon as you see the pale veneer layers under the top veneer, and move on to board replacement instead. That is the point of no return for sanding.
Step 5: Apply Stain and the Correct Matching Finish
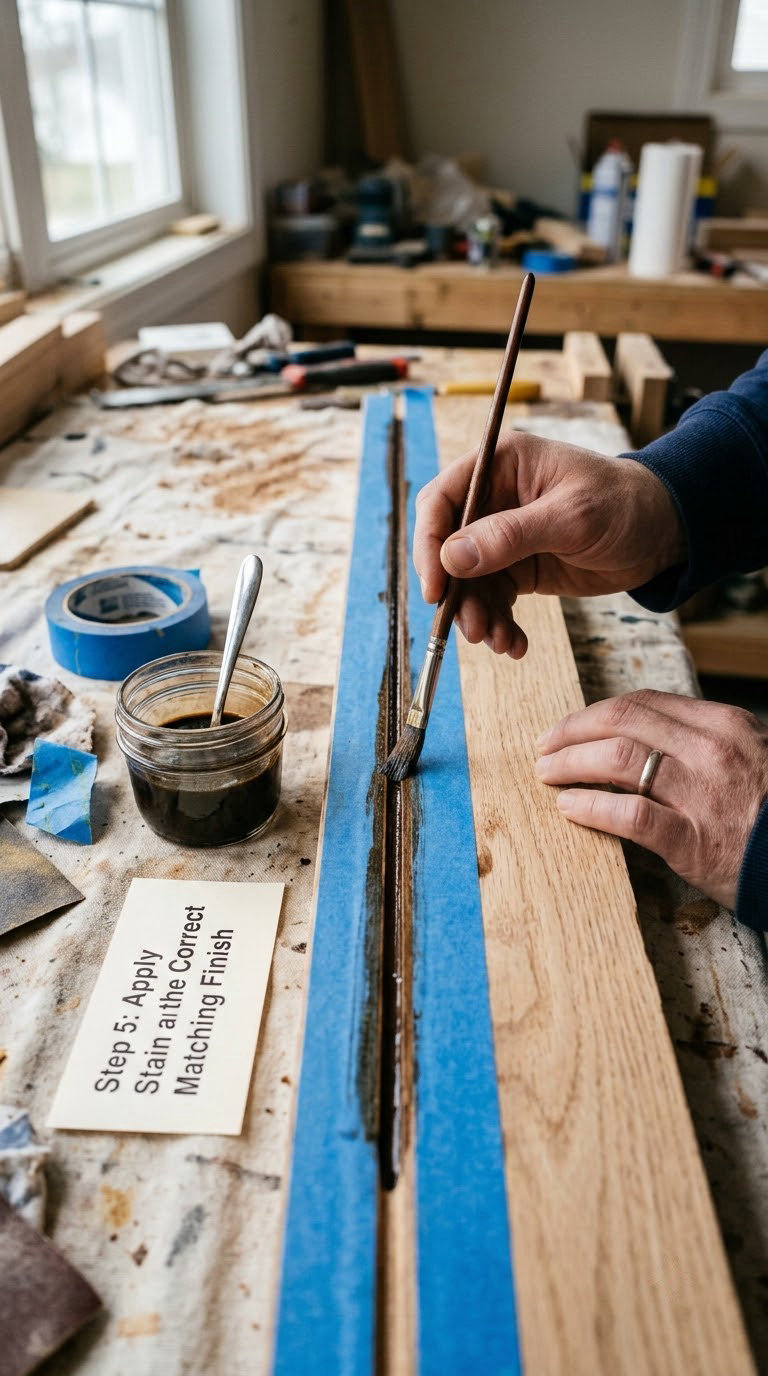
Once the gouge is level, put the colour back with a thin stain coat and seal it with the finish that matches your floor. Skipping the seal is what makes most DIY repairs look like a scar.
- Test the stain on an offcut or the hidden corner, and wait the full dry time before judging it.
- Apply stain with a small brush along the grain, one thin coat, and let it soak in for 15 to 30 minutes as the label states.
- Wipe off stain that has not absorbed, then apply a second thin coat if the patch still reads lighter than the floor.
- Seal with a water-based polyurethane in the same sheen as the floor, satin, gloss or matte, and feather the new coat over the old finish at the edge.
- Leave the recoat window open for 4 to 6 hours, then keep foot traffic off for 24 hours and let the full cure run to about 7 days.
Follow the floor’s finish type, not your preference. Wax belongs on a waxed floor, and wax will not adhere over a cured polyurethane film. On an oiled floor, use only what the maker allows and never seal over it with water-based poly.
Step 6: Replace a Severely Damaged Board
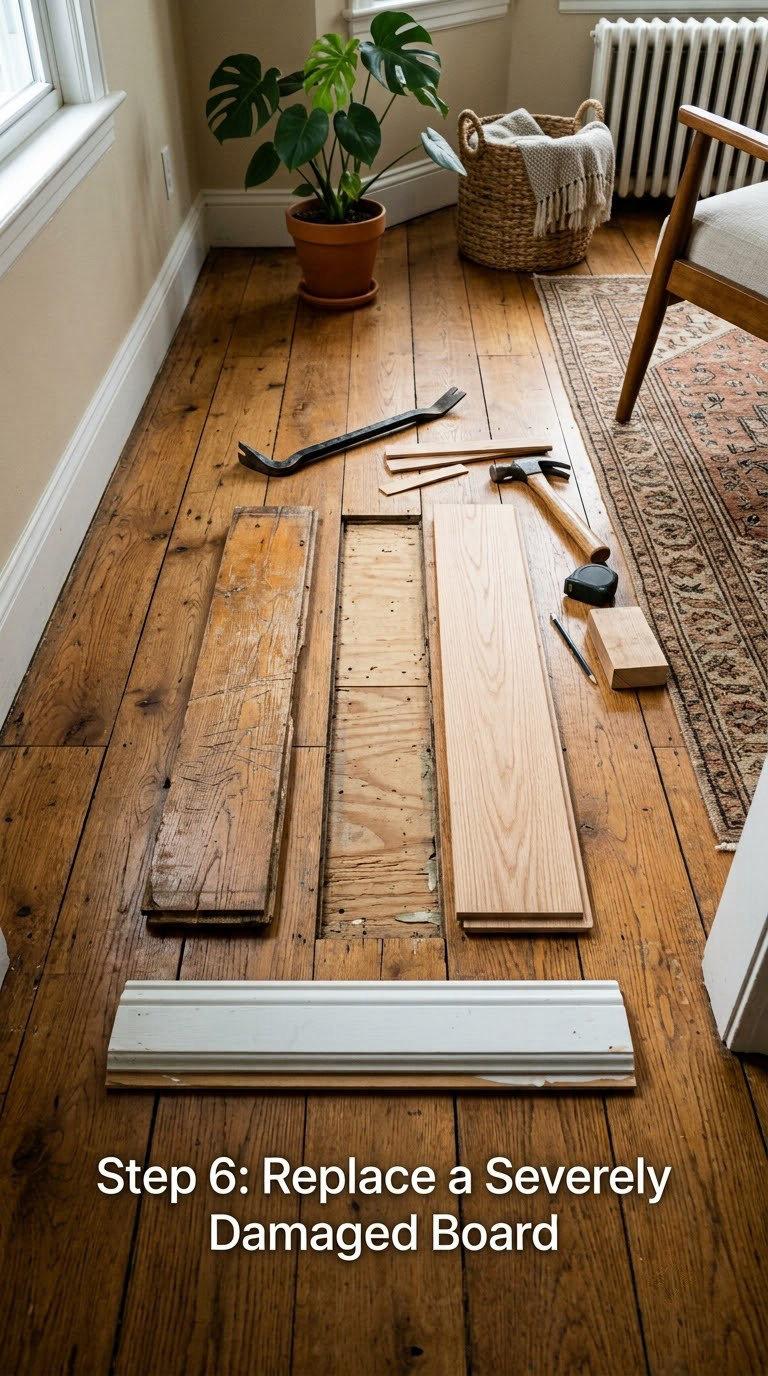
Replace the board when the gouge is deep, the edges are broken or the finish is torn loose. No amount of filler makes a split edge disappear.
- Find a spare board from a closet, a leftover box or a new piece that matches in species, finish, sheen and tone.
- Mark the two ends of the damaged board with tape before you pull anything, so you know the direction it went back in.
- Cut down the middle of the board with a flush-cutting blade, then break out both halves.
- Pull nails or staples from the joist below, and lift the board out rather than prying against the good neighbours.
- Set the new board on the same joist, work toward the wall so you keep room to angle it in, and nail or staple through the tongue.
- Fit the last board, reinstall the baseboard and thresholds, and touch up the cut ends if they sit proud.
Half a day covers a single board including drying time. Replacing a board in engineered hardwood is often the better answer than sanding, since a thin veneer has nothing left to give you.
Step 7: Blend, Inspect, and Let the Repair Cure
Blending means checking, not rubbing. Wipe away any dried excess with a soft cloth rather than scrubbing it, then look at the repair in the same light the room usually uses. Raking light at night shows what daylight hides.
Keep traffic off the patch for 24 hours and wait out the full cure listed on the finish before you judge it. Some people buff a cured spot lightly with a soft cloth to knock the sheen down, which is fine, but never rub across the repair with a wet mop early on.
If one repair still stands out after curing, the problem is usually colour rather than technique, and the fix is another thinner coat rather than more sanding. If several boards now look wrong next to each other, a full recoat or refinish by a professional will blend everything at once.
Common Mistakes to Avoid
- Repairing an oiled floor as if it were waxed. Colour soaks in and dries patchy. Identify the finish first, then use only a product made for it.
- Working over grit. Vacuum before you buff, every time, or you will scratch the good boards around the mark.
- Skipping the seal coat. Stain or filler alone absorbs traffic and wears off within months in a hallway. Seal it.
- Soaking bare wood. Water lifts grain and stains dark. Damp cloth, then full drying.
- Sanding across the grain. It cuts swirl marks that show under finish. Follow the board.
- Using too much product. Thick wax, marker or filler spreads past the scratch and reads as a blotch. Thin coats, wiped back immediately.
- Prying against neighbouring boards. Lift the damaged board straight up, or you have made two repairs instead of one.
- Relying on WD-40, a melamine foam eraser or vinegar and olive oil. WD-40 leaves an oily film that traps dust and dulls the sheen. A melamine foam pad is abrasive and will abrade the finish to a matte halo. Vinegar is acidic and etches the coating. On r/howto people report the oil and vinegar mix making a scratch look better for a week, then going patchy as the acid keeps working. Walnut and almond balms help a surface mark by adding oil to the finish, but they will not fill a groove, and repeat applications darken the spot.
When to Call a Pro
Hire a floor refinisher when the damage is wider than one board, when the boards themselves are moving, or when the floor is worth protecting as an investment. Widespread wear across a hallway or kitchen, several deep gouges, lifted or cupped boards and a warped subfloor all belong to a professional with an orbital sander and a dust control plan.
Call someone rather than experimenting if the floor is unfinished, of unknown finish, or old enough that a repair could not blend. Valuable antique or reclaimed wood deserves the same caution, since a dark aged floor is notoriously hard to colour-match. Several owners on r/woodworking tried multiple brands on a 150-year-old oak floor and never got a match.
Factory finishes such as aluminum oxide are a pro job too. The repair products sold for retail do not bond to them, and the realistic options are board replacement or a full recoat by a contractor. If you are renting, patch, buff and photograph the damage before you move out, which is far cheaper and faster than arguing over a refinishing bill after the fact.
Maintenance
The best repair is the one you never need. Put felt pads under every furniture leg, and lift sofas, tables and appliances rather than dragging them across the floor. Keep soft-soled slippers by the door, and a mat at each entrance to catch grit before it reaches the boards.
Sweep or vacuum grit out of the traffic lanes more often than feels necessary, since sand under a chair leg is the usual cause of the deep gouges people end up replacing boards for. If you want a vacuum that handles hard floors without beating up the finish, my best cordless vacuums for hardwood floors round-up covers the floor-head and suction differences that matter. Mop only with a barely damp cloth, never a soaked mop, and keep grit out of the mop water.
Trim pet nails every few weeks, wipe spills right away, and refresh entrance mats seasonally. On waxed or oiled floors follow the maker’s product rules, including any re-oiling schedule; on factory finishes, stay with a pH-neutral cleaner such as the options in the hardwood floor cleaners under 100 dollars round-up.
Frequently Asked Questions
Can you repair scratches in hardwood floors without refinishing the whole floor?
Yes, for almost every scratch short of a broken board. A mark that stops in the finish takes a colour-matched touch-up marker or a wax filler stick, buffed with a microfiber cloth. A gouge into raw wood takes filler, light sanding with 150 to 220 grit, a spot stain and a matching clear topcoat. Replace the board only when the edges are broken, the finish is torn loose, or the patch will not blend.
Is wax or a touch-up marker better for a scratched hardwood floor?
Use a marker when the scratch stays in the finish and the wood underneath is untouched. A marker restores colour and sheen and will not build up. Use a wax filler stick when a fingernail catches in a groove but no bare wood is open, because the wax fills and levels the mark. Wax fills in busy hallways wear down within months, so plan a top-up or a matching topcoat.
Can you sand scratches out of engineered hardwood flooring?
Only very lightly. Engineered boards carry a thin hardwood veneer over plywood, and sanding removes it permanently. Start at 150 grit, stay on bare wood, and feather no more than half an inch into the sound finish. Stop as soon as you see the pale veneer layers underneath, and replace the board instead. Sanding all the way through an engineered board means a full floor replacement.
How do I match a touch-up product to my hardwood floor?
Take the colour from an area that is not in direct sun, and test in a closet corner or under furniture that stays put. Choose one shade lighter than the floor, because repair products usually absorb darker than they look in the tube. Apply thin coats along the grain and let each one dry fully. If the patch reads dark, wipe and go lighter; if it reads chalky, a matching topcoat in the right sheen usually closes the gap.
Should I replace the board if the scratch exposes bare wood?
Not automatically. Exposed wood means the scratch is deep, but if the surrounding finish is still sound you can fill, sand lightly, stain and seal it. Replace the board when the edges are chipped or lifted, the finish is torn loose around the mark, the veneer is visible on an engineered floor, or no amount of matching makes the patch invisible. Mark both board ends with tape before removal so the replacement goes back in the right direction.
How long should I stay off a repaired hardwood floor?
Keep foot traffic off a touched-up spot for 24 hours and avoid water for several days. A wax or marker repair feels dry in minutes but is soft underneath for a while. After filler, stain and topcoat, the recoat window is typically 4 to 6 hours, walking is fine after 24 hours, and the finish reaches full cure in about 7 days. Always follow the cure time printed on your product.
Start with the fingernail test. If your nail glides over the mark, a touch-up marker and a buff will make it disappear in about twenty minutes. If it catches, buy a wax filler stick in your floor’s tone, and if bare wood is open, add filler, light sanding and a matching topcoat. Save the board swap and the sander for damage you can reach with your thumb.