How to Paint Over Wallpaper Without Removing It: Guide (2026)
You can paint over wallpaper without removing it as long as the paper is clean, firmly attached, and not peeling. Where that condition fails, strip the loose paper or patch it back down first. The whole job is prep, prime, then roll two thin coats — a weekend of careful work instead of a week of scraping.
I have painted over a lot of 1970s woodchip that had no business staying on a wall, and the finish holds up for years as long as the paper underneath is sealed properly. The failures I have seen all trace back to the same shortcut: latex primer straight onto old glue.
Contents
Time: one full day plus a drying day for a standard 12 by 12 foot room · Cost: one gallon of primer and two gallons of finish coat for the same room · Difficulty: moderate DIY · Skill level: patient beginner
If you are choosing the color first, my paint color ideas roundup is worth a look before you buy anything.
Tools and Materials
Most of what you need is already in a garage or a closet. The list below is sized for one average bedroom or living room, roughly 350 square feet of wall surface.
Required
- 2.5 inch angled sash brush for cutting in around trim, plus a 1 inch brush for tight corners behind radiators and fixtures.
- 9 inch roller frame and 3/8 inch nap cover. The short nap lays paint down flat and hides wallpaper texture better than a thick pile. A small 4 inch roller for edges and short walls.
- Plastic tray and a 5 gallon bucket grid so you can mix paint without spills on the floor.
- Oil-based or shellac-based primer in one gallon for a 350 square foot room. Shellac dries in about an hour; oil-based usually needs 3 to 4 hours before recoating.
- Two gallons of interior latex or acrylic paint. One gallon covers roughly 350 square feet in one coat, so two gallons gives you the two coats plus a little left for touch-ups.
- PVA wallpaper paste or construction adhesive and a small putty knife for lifting seams.
- Spackle or setting-type joint compound, a 6 to 8 inch flexible putty knife, and a 220 grit sanding sponge or sanding block.
- Painter’s tape and a plastic dust sheet to protect the floor.
- Degreaser or TSP substitute for kitchen and bathroom walls.
Optional but useful
- Painter’s pyramid or a sturdy step ladder if the wall is over 7 feet tall. Rolling a wall from the top down saves your shoulders.
- Handheld vacuum or tack cloth to pull sanding dust off the wall and out of the room.
- Fan pointed at the wall to move air and speed drying.
- Stiff nylon brush for cleaning dust out of the wallpaper texture before priming.
- Extension pole on the roller frame for walls you do not want to ladder.
Scale these quantities by wall area, not room count. A 12 by 15 foot room has closer to 450 square feet of wall, so plan a third more primer and paint. If you want to skip hand-mixing, our guides to paint mixer attachments for drills and paint sprayers for walls both come down to this: work the primer in thoroughly, because the topcoat bonds to the primer film, not to the paper.
Before You Start
Protect yourself. Wear eye protection when you sand or cut, nitrile gloves when you handle primer or adhesive, and a N95 respirator if you are working with oil-based primer or if you have asthma. Open windows and run an exhaust fan, then leave the room closed for several hours after an oil-based coat goes on. People with sensitivity to fumes usually need a full 24 hours before moving back in.
Clear the room. Push furniture to the center and cover it with a plastic sheet. Remove outlet and switch covers, and fill the screw holes later. If you are working near a light switch or an outlet, switch off the breaker for that circuit while you are near the box and tape over the openings so paint does not wick into them.
Decide whether the paper is worth keeping. Look at the whole wall in raking light, not just the part you want to paint. Then check each condition:
- Firmly attached? Press the flat of your hand on several spots. If the paper moves, creases, or sounds hollow over large areas, painting over it is a losing proposition.
- Clean and free of stains? Old grease, nicotine, and water marks will telegraph through paint. Treat them before you prime, not after.
- Smooth? Raised texture, embossed patterns, and woodchip relief will show through no matter how many coats you apply.
- Old adhesive still active? Paper more than 20 years old is fine as long as it is tight. Old paper is not automatically a problem.
Watch for the types that usually should come off. Peel-and-stick vinyl comes down by hand in minutes, and fighting it under paint is silly. Vinyl-coated wallpaper in a shower or tub surround is designed to be wet, so remove it. Textured wallpaper can be painted but you should accept a faint pattern in raking light.
Spot test. Pick a closet corner or behind the sofa, apply one coat of primer and one of finish coat, and wait 24 hours. Check adhesion by pressing a coin into the edge and by looking for a pattern under oblique light. If the paper peels with the coin, stop and strip or line the whole wall.
One more thing: painting a room like this almost never needs a permit. If you uncover wiring that is not in a box, a plumbing leak, or a structural crack, stop and bring in a licensed trade before you go further.
Step-by-Step Instructions
Step 1: Inspect the Wallpaper Before You Paint Over It
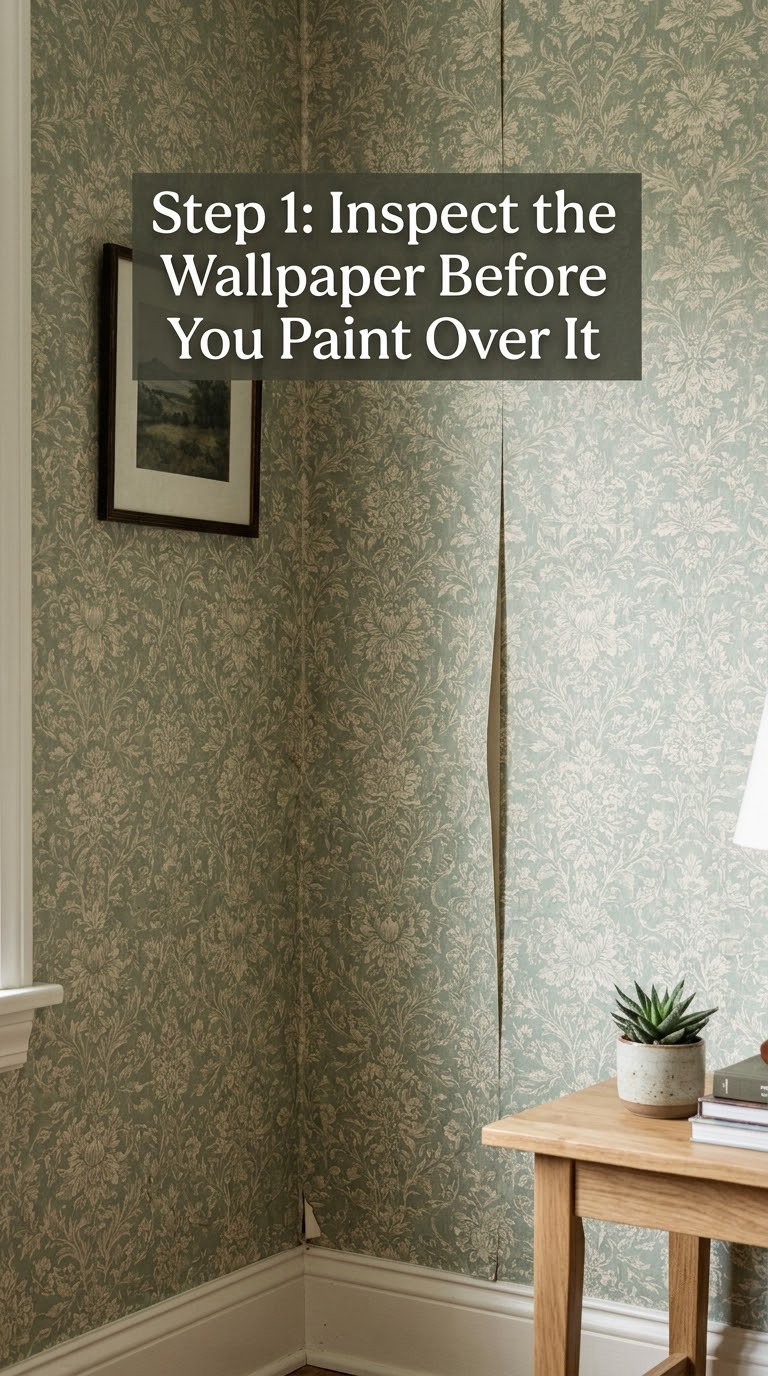
Walk the wall and mark every defect before you pick up a tool. Use a pencil so the marks sit under the paint later. Mark lifted seams, bubbles, tears, nail holes, picture hook holes, glossier patches where the paper was protected from sunlight, and any sticky areas where adhesive has squeezed out and collected dust.
Run the flat of your hand along each seam. A seam that is proud of the surface will show through as a line no matter how much paint goes on, so those get sanded down. A seam that is loose will peel off with the topcoat, so those get glued down.
Intact paper that is firmly bonded all the way across is exactly what you want to find. Homebuyers working through older floor-to-ceiling wallpaper often treat it as the thing standing between them and a finished room, and most of the time painting over it is the sane call. If a section lifts when you press it, that section gets cut out in Step 2.
Step 2: Repair Loose Seams, Holes, and Damaged Edges
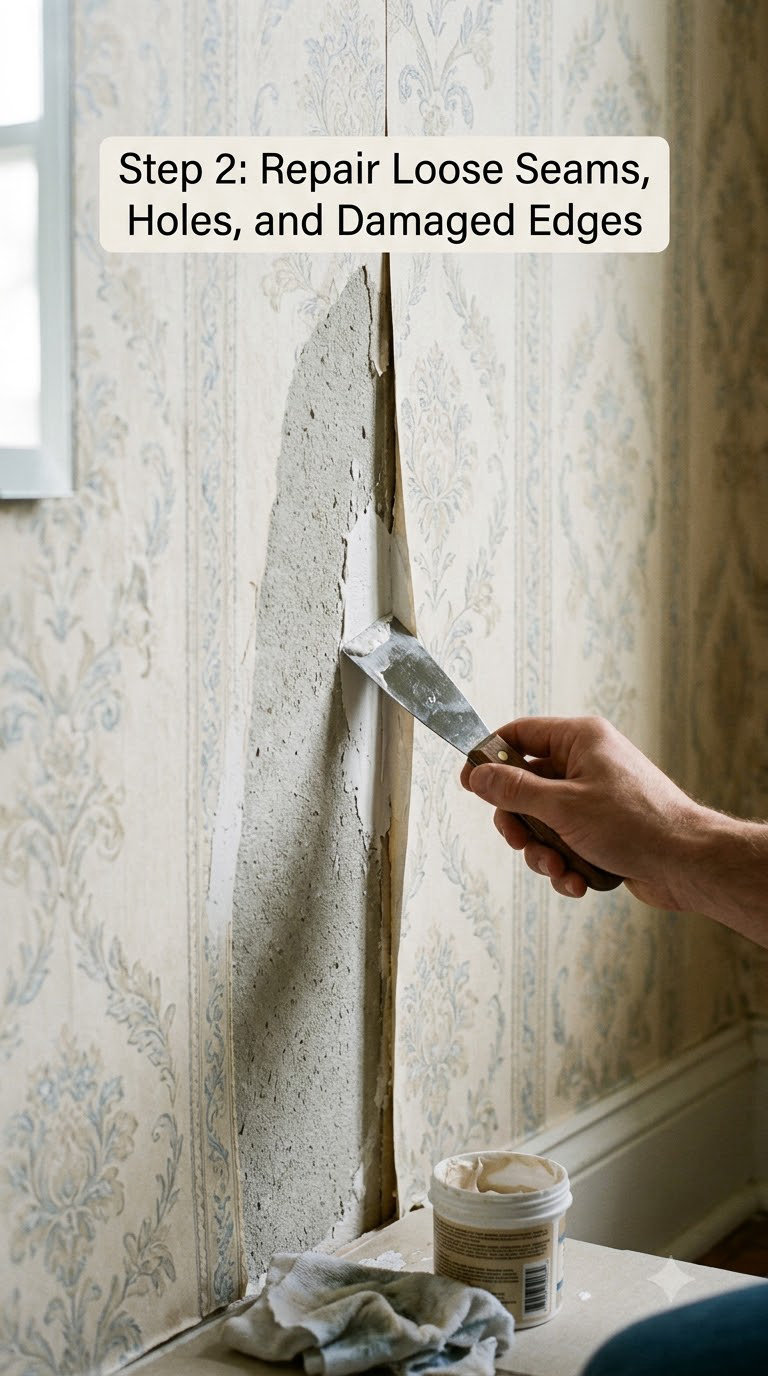
Lift and reglue. Ease a loose edge up with the putty knife, run a bead of PVA paste or construction adhesive along the back, press the paper flat, and roll it with a wallpaper roller or a paint roller. Leave it 4 to 6 hours or overnight.
Cut out what will not stick. If the adhesive keeps letting go after a second attempt, score the paper lightly along the damaged edge with a utility knife and peel it back until you hit paper that stays put. Fill the exposed drywall.
Fill holes and cracks. Press lightweight spackle into nail holes with the putty knife, and use setting-type compound for bigger gaps or crumbling plaster. Skim over seams with a thin coat so the compound sits slightly proud, then let it dry. Setting-type compound hardens in about 30 to 60 minutes; lightweight spackle needs 1 to 2 hours. Sand with 220 grit until your hand glides across the patch with no ridge.
Test with a fingernail and a light. If you can feel a bump, sand it a little more. Raised seams and proud patches are the number one reason a wallpaper wall still looks like a wallpaper wall under paint.
At this point, if more than a third of the wall has needed cutting and patching, removing the rest and starting on bare drywall will give you a better wall for less effort. There is no prize for stubbornness here.
Step 3: Clean and Sand Before You Paint Over Wallpaper
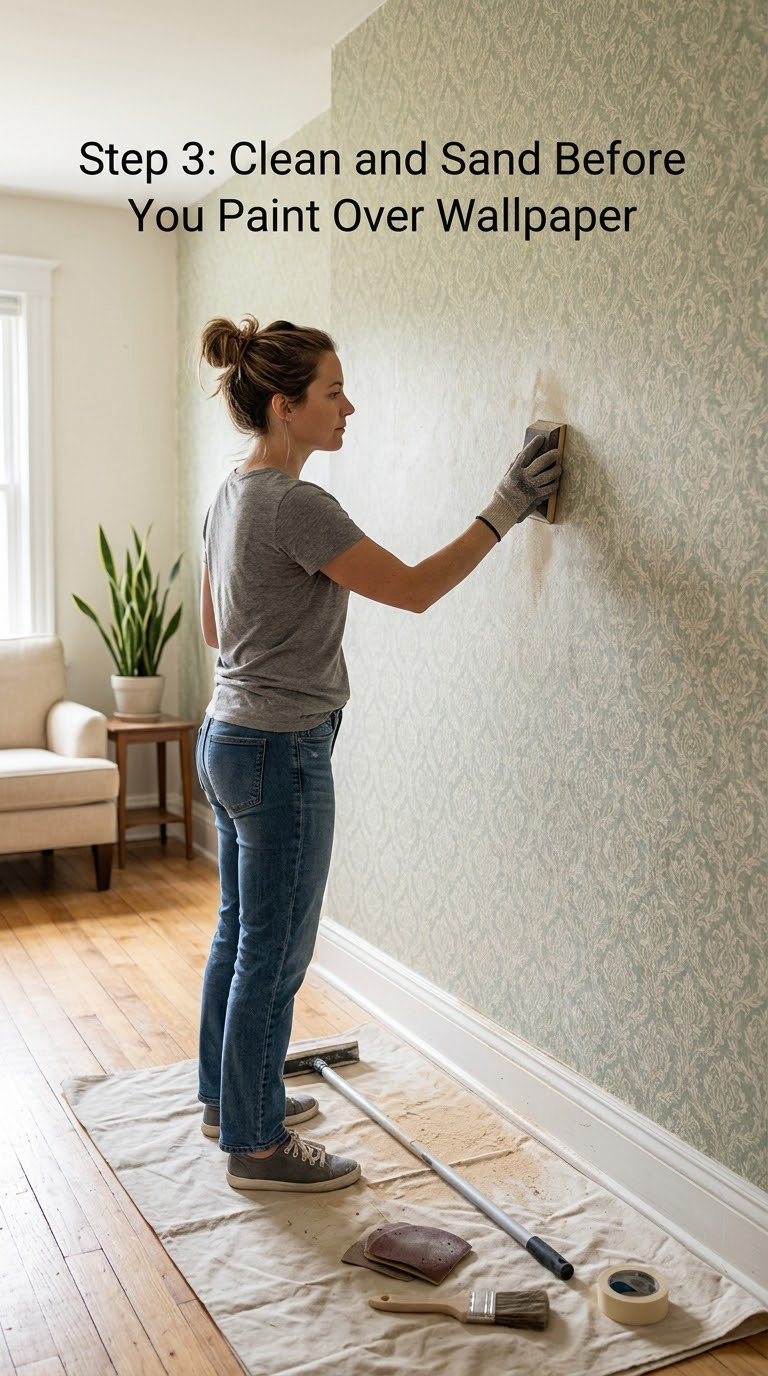
Mix a degreaser with warm water according to the label and wipe the wall down with a damp sponge. This removes nicotine film, kitchen grease, and the dust that has worked into embossed texture. Change the sponge face often, or you will be re-depositing what you just lifted.
Dry the wall fully, then sand. Use a 120 to 150 grit sanding sponge to knock glossy spots down to a uniform matte sheen, and 220 grit over patched areas. Sand with the light so you can see what is happening. Work in long strokes and keep the sponge flat.
Stop before you hit paper. If the wall was papered over bare drywall with no separate backing, it sands almost like cardboard and you can cut through in one pass. If you see the grey board underneath, move to a different spot.
Vacuum the wall with the nozzle held against the surface, then wipe with a tack cloth or a clean damp rag. Press a finger across the wall. If it comes away dusty, clean it again. Grit left on the wall rolls into the primer and shows up as sandy specks in the finish coat.
Step 4: Apply the Right Primer or Wall Conditioner
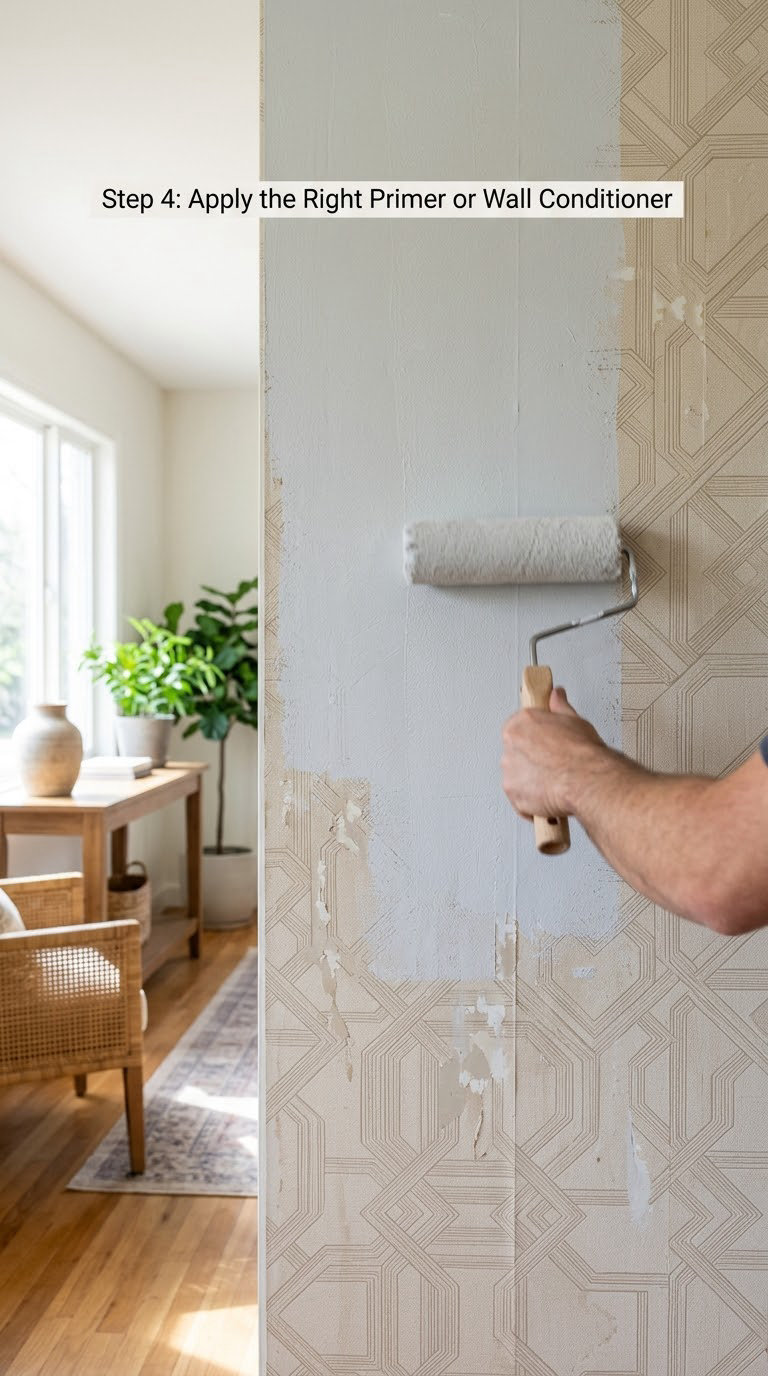
This is the step that decides whether the job lasts a month or a decade. Use an oil-based or shellac-based primer rated for wallpaper, and never a water-based or latex primer. Water wets the old adhesive under the paper, the glue goes soft again, and the topcoat drags the wallpaper off the wall within months.
Shellac-based primers such as BIN dry fastest and seal the toughest stains, with a recoat window of about an hour. Oil-based primers smell strongly during application but are gentler once dry, and they usually want 3 to 4 hours before you roll paint. Check the label on your exact product, because dry times vary by temperature, humidity, and how porous the wall is.
For a bold or dark color, tint the primer to something close to your finish color so each coat hides more of the one underneath. If you are going from a dark wallpaper to a light color, a heavier-bodied stain-blocking primer saves you a coat.
Cut in the edges with a brush, then roll the field in even passes. Keep the coat thin and even rather than thick. Let it dry to the touch with no tack, then check for missed spots by looking across the wall at a shallow angle. A shiny patch means thin coverage; go over it again before you paint.
Step 5: Cut In the Edges and Paint the First Coat
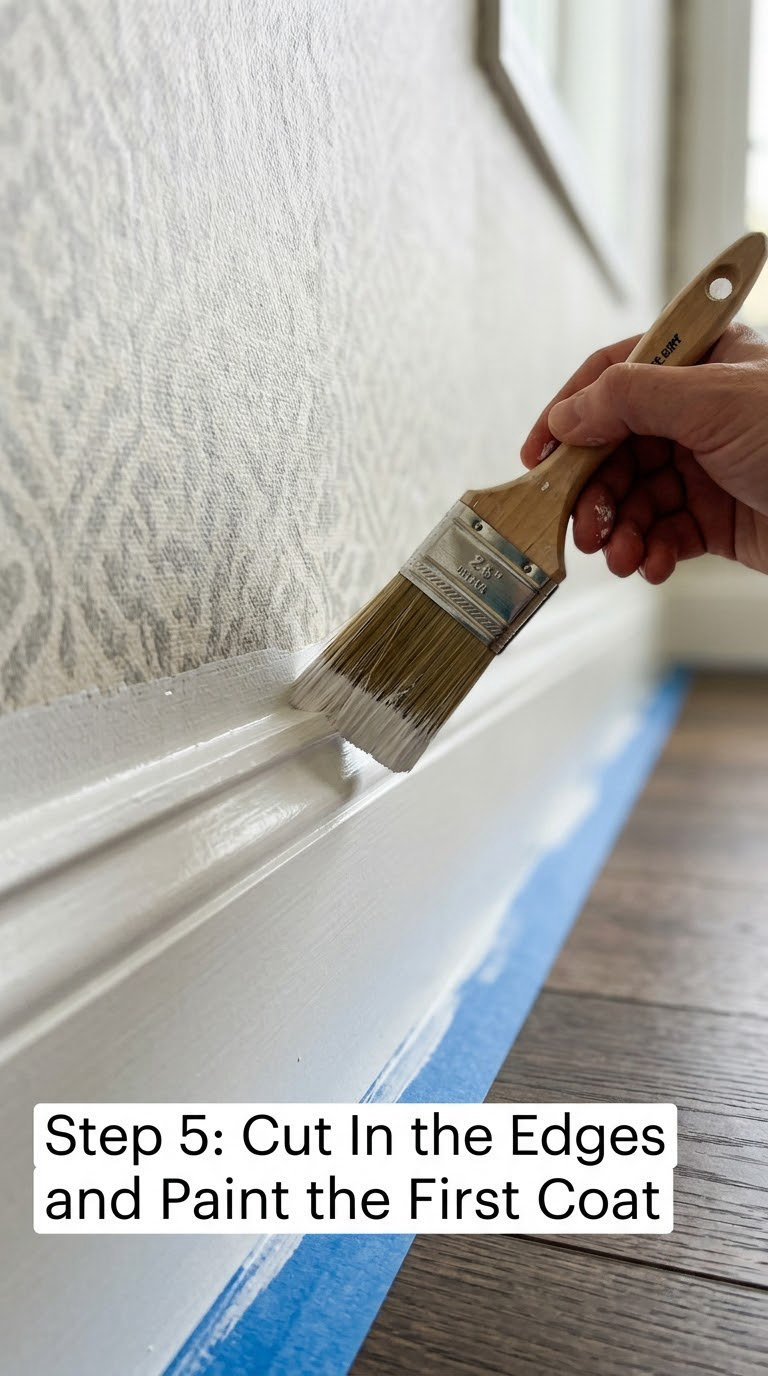
Load the angled brush about a third of the way up the bristles and tap off the excess. On a 12 by 12 foot room the first cut-in band should be about 2 inches wide; wider than that and you will spend the whole coat blending brush marks into roller marks.
Start at the top corner and pull the brush along the ceiling line in one steady stroke. Push down to the baseboard on the next pass. Work your way around the room, then do the vertical lines at corners, behind radiators, around window casings, and behind anything mounted on the wall.
Now roll the field. Load the 9 inch roller evenly and start 3 to 4 inches away from your cut-in line. Roll a W across the wall, then fill in the gaps with vertical passes that barely touch the roller, and finish each pass with a single stroke downward so the paint levels out. Light pressure keeps texture from being stamped in.
Work in 3 by 3 foot sections and stay ahead of your wet edge. The first coat over wallpaper is a coat of color, not a coat of coverage. Let it dry the full time listed on the can, which is usually 2 to 4 hours, and longer if the room is cool or humid. If it still feels tacky in the morning, wait.
Step 6: Roll the Final Coats for an Even Finish
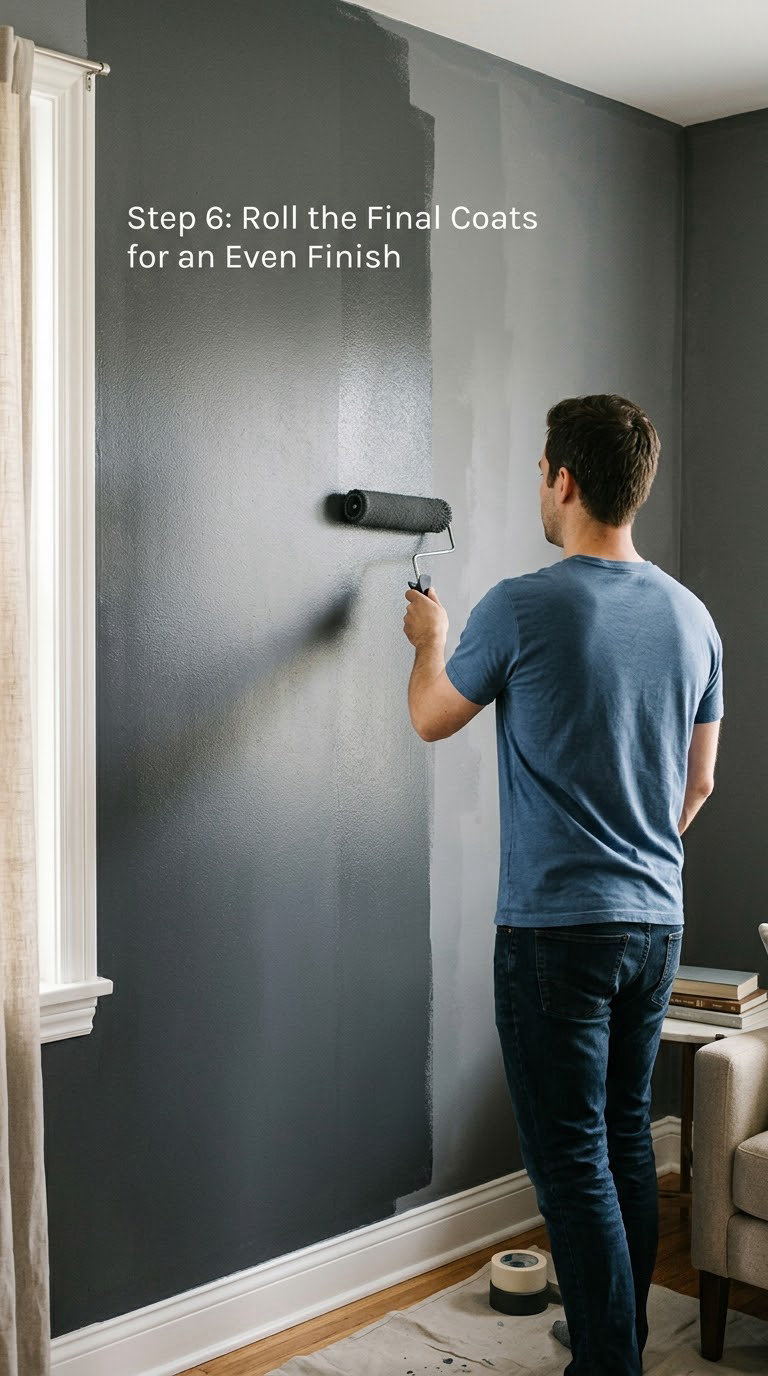
Second coat goes on the same way: cut in first, then roll in W passes, feathering each pass so the edge of the drying paint does not dry before the roller reaches it. Watch for lap marks, the faint shiny stripes that form when a pass overlaps paint that has started to dry. Fix them by rolling over the stripe while the rest of the wall is still wet.
On textured wallpaper, a third coat of the same finish helps more than a thicker second coat. Two thin coats always beat one thick one. If you want the pattern to disappear entirely, flat matte or eggshell is kinder to an uneven surface than satin, which picks out every bump and roller track.
Take the roller off the wall when you finish a section and let the coating level before the next one. Keep airflow moving through the room. Wait the manufacturer’s full recoat window before the next coat, and treat the longer cure time separately from the recoat time.
When the wall is dry, walk it with a flashlight held flat against the surface and look across it at an angle. High spots show as shadows and low spots show as bright patches. Mark them, and touch them up the next morning when the wall is fully dry and the touch-up will blend.
Step 7: Clean Up and Let the Paint Cure
Rinse your roller and brushes in the sink before the paint sets, then wash them with the paint shown on the label. Wipe the tray liner and drop cloth while they are still damp. If you want the leftover paint for future touch-ups, strain it through a mesh bag and store it sealed with a lid that seals to the rim. Otherwise, take it to a household hazardous waste site, which is where oil-based primer belongs.
Put the outlet covers back on once the paint is firm to the touch. Push the furniture back a day later rather than right away, so nothing scuffs a wall that is dry but not hard.
Three different times matter here. Surface dry means you can brush a hand across it with no transfer, usually 30 to 60 minutes. Recoat ready is the window your next coat needs. Fully cured is when the finish hardens enough to scrub and take normal knocks, and latex paint typically needs 2 to 4 weeks for that.
Common Mistakes When You Paint Over Wallpaper Without Removing It
Painting over loose seams. Lifted edges lift off with the topcoat. The fix is to press every lifted seam down with adhesive before priming, and cut out paper that refuses to stay. Repair first, always.
Using latex or water-based primer. This is the expensive mistake, because it softens the adhesive under the paper and the finish peels off in sheets within months. Oil-based or shellac-based primer, applied in one continuous coat with no bare patches, prevents it.
Painting over active stains. Water marks, grease, and nicotine bleed through latex paint no matter how many coats you add. Cover them with a stain-blocking primer and check them after it dries before moving on.
Sanding through the paper. Once you reach drywall, the finish has a hole in it. Sand with light pressure, keep the sponge flat, and change your approach if you see grey board.
Choosing satin or gloss paint. High sheen makes every seam, patch, and roller track look worse than matte. On wallpaper, matte or eggshell hides more.
Rolling the second coat too soon. Painting over a tacky coat lifts the first one and leaves lap marks. Respect the can, and add longer in cold or damp rooms.
Pressing the roller hard. Pressure flattens wet paint into the texture and stamps the nap pattern into the surface. Use light, even pressure and let the roller do the work.
One more worth naming: skipping the spot test. Ten minutes in a corner saves you a full wall that peels in November.
When to Call a Pro
Some wallpaper is hiding a bigger problem than ugly. Bring in a pro when any of these show up.
- Loose vinyl across most of the wall. If more than a third of the paper has lifted, stripping or lining is often faster and cheaper than repairing.
- Recurring moisture. Damp basements, exterior wall seepage, and a failed exhaust fan in a shower will destroy any painted surface, wallpaper or not. Fix the moisture first.
- Mold, or a musty smell that returns after cleaning. Handling black mold has its own safety protocol.
- Bulging, cracked, or crumbling substrate. Soft plaster, crumbling brick, or a hollow-sounding wall needs repair before it can hold paint.
- Paper of unknown age. Wallpaper from before 1980 may contain asbestos in the backing, and older textured coatings can be lead-based. Test before you sand.
- Tall or awkward rooms. Anything where a ladder is not safe, or a hallway where you cannot fully contain the dust, is worth paying for.
A pro painter should diagnose the wall before quoting. Permits come into play if you uncover unboxed wiring, plumbing, gas lines, or structural damage during the job, and those go to a licensed trade. A paint job over sound drywall is not a permitted job in most places.
Maintenance
Clean the finished wall gently. A soft cloth with warm water and a drop of dish soap handles most marks; skip the abrasive sponges and the ammonia-based cleaners. Wash one small spot first, because a strong cleaner can dull a matte finish.
Order your touch-ups by size. Small scuffs get the brush, then a full roller coat over the section so the sheen matches. Never spot-roll only the mark, because a small glossy dot on a matte wall reads like a defect.
Give the seams a look after a seasonal cycle, in the month when humidity swings hardest. A seam that lifts in winter usually means heat and dry air pulling on the adhesive. Press it back down with a light coat of adhesive and repaint over the repair before it becomes a flap.
Keep the paint can with a label in the basement and write down the brand, color name, finish, and date. Two gallons of leftover paint is worth more than a closet shelf, and matching a scuff in three years is nearly impossible without it.
For a fresh look later, our winter wallpaper ideas roundup works just as well for choosing a pattern to keep unpainted in a bedroom.
Frequently Asked Questions
What type of paint should I use when painting over wallpaper?
Use an oil-based or shellac-based primer rated for wallpaper first, then any good quality interior latex or acrylic topcoat in matte or eggshell. The primer does the sealing work, so the topcoat can be ordinary latex. Skip satin and gloss, because their sheen highlights seams and roller marks that matte hides. Two thin coats will always look better than one thick coat.
Can you paint over textured or popcorn wallpaper without removing it?
Yes, but the texture will still show through under raking light no matter how many coats you apply. You can flatten it partly by knocking the high points down with 120 to 150 grit, filling the deep pits, and adding a third thin coat. If the pattern is embossed or woodchip and the light hits it directly, removal is the only way to a truly flat wall.
What if the wallpaper is peeling or coming loose?
Do not prime or paint over it while it is lifting, because the finish will pull the paper away with it. Cut the loose paper back to where it stays firmly attached, re-glue any edges that lift but hold, and patch the exposed drywall underneath. Once every loose edge is gone and the bare areas are filled and sanded, prime the whole wall so the repaired and original areas dry together.
Can I paint over wallpaper in a bathroom or kitchen?
Only where the paper is not vinyl-coated and the room has a working exhaust fan. Vinyl wallpaper in a tub or shower surround is designed to be wet, so remove it. For other bathroom walls, fix any moisture source, use a stain-blocking primer, and choose paint labelled for kitchens and bathrooms. In a kitchen, degrease thoroughly first so grease does not telegraph through the finish.
Will paint over wallpaper last as long as paint on bare drywall?
It will last most of a normal repaint cycle, typically several years, but it is not the same as paint on drywall. The finish sits on a sealed paper layer rather than on gypsum, so heavy impacts can knock through to the paper and any future repair is harder. Plan on touching up seams as they lift and treat the wall as a surface you maintain, not one you forget.
Start with the smallest area you can hide and test the whole sequence there: repair, prime, two coats, wait a day. If that patch holds and the wallpaper type suits painting, you have your answer for the room. If the paper lifts or the pattern shouts through no matter what, strip it or line it instead.