How to Repair a Leaking Shower Pan: Stop Water Damage (2026)
A shower pan leak is almost never just a shower problem. It is a floor and framing problem, because the pan is the only waterproof layer between your bathroom and the plywood underneath it. A slow drip at the curb joint can soak that plywood and breed mold in a closet downstairs within a season.
How to repair a leaking shower pan depends entirely on where the water is getting out. Some failures are a cheap tube of caulk and an afternoon. Others mean the waterproofing under the tile has failed and the only honest fix is to remove the pan and curb. This guide walks through telling those two situations apart before you buy anything.
Contents
Time: 2-4 hours for diagnosis and minor sealing, 3-7 days for a full pan rebuild · Cost: Minor sealants are inexpensive; a pan, curb and membrane rebuild is a mid-range project that varies widely by region and by who does the work · Difficulty: Moderate DIY for seals, drains and membranes · Skill level: Steady hands and patience for Tier 1 and 2; a licensed plumber or tile setter for anything structural or behind a wall
How to Repair a Leaking Shower Pan by Leak Type
A shower pan, also called a shower base, is the sloped waterproof floor of the enclosure that collects water and directs it to the drain. Leaks fall into three groups: a failed caulk or grout joint at the curb, a failed drain or weep hole, or broken waterproofing under the tile. The first two are do-able fixes. The third is a tear-out job.
Tile and grout are not waterproof. They are a wear surface sitting on top of a membrane or a sloped mortar bed. When people say the shower is leaking, they often mean that hidden layer has let go, and no amount of regrouting will change that.
The four places a shower pan actually leaks
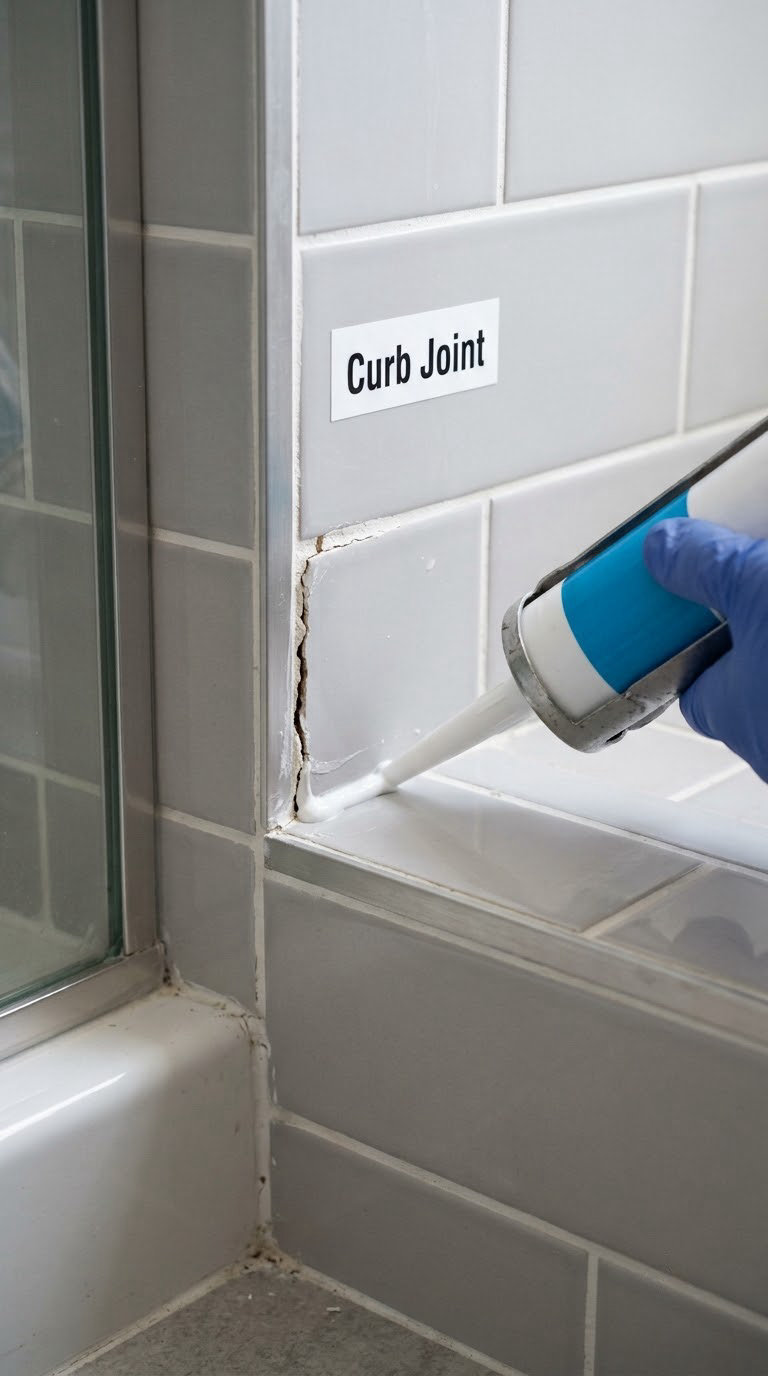
The curb-to-wall joint. The raised threshold edge of the pan meets the wall on three sides. That caulk line cracks with age and with house movement, and it is the most common and most fixable leak in the whole job.
The drain. Water seeps around the drain flange or the rubber gasket under it. You see a puddle ring around the drain or a drip landing on the subfloor below.
The weep hole. Every pan has a tiny opening in the drain flange area that lets trapped water escape instead of sitting against the subfloor. When hair and soap scum clog it, the water has nowhere to go.
The membrane or pan body. Water gets through the waterproofing layer, up through the tile, and out wherever it can. This one shows up as damp framing, a stained ceiling below, or a floor that flexes underfoot.
How to diagnose before you repair
Do the flood test first. It costs nothing but a plug and a free evening, and it settles arguments between plumbers faster than any other step.
- Plug the drain. Set a rubber plug or a flat rubber mat weighted with a clean cup over the drain opening. Fill the pan with 1 to 2 inches of water.
- Mark the water line. Run masking tape along the inside of the curb and draw a line with a permanent marker right at the surface. Check again after 30 minutes to confirm it is not simply seeping past the plug.
- Wait 8 to 24 hours, then look. Come back with a flashlight and check your mark. Then go look underneath: the ceiling below, the crawl space, or the basement joists directly beneath the pan.
A drop in the level means the water is leaving the pan through the pan, the drain, or the membrane. If the level holds, the leak is coming from somewhere else entirely and you have saved yourself a teardown.
Plumbers flood test for exactly this reason. In the Reddit threads on leaking pans, owners say the flood test is the fastest way to get a definitive answer, and having documented proof matters later if a builder warranty or an insurance claim is involved.
Rule out the leak that is not the pan
Before touching a single tube of caulk, check the four things people blame on the pan constantly.
- The valve. Water pooling around the handle or seeping out from behind the escutcheon is the shower valve, not the floor.
- The supply lines. A drip at the wall below the handle, often only visible when the shower runs, is a flexible supply connection.
- The shower arm. A leak at the joint where the arm screws into the wall drips down the wall and lands in the pan, which makes it look like a pan leak.
- A slow drain. If water backs up and sits for a few minutes after you shower, the pan is fine and the drain is clogged.
Here is the giveaway. If water appears while the faucet is running and nowhere near the drain, suspect the valve, the arm, or the supply lines. If water appears only at the drain or only at the curb, it is the pan.
Tools and Materials
Most of what you need for a seal or drain repair comes in one trip to the hardware store. Buy more sealant than you think you need, because one continuous bead beats three patched ones.
Tools
- Rubber drain plug or flat rubber mat, 1
- Paper towels and masking tape, 1 roll each
- Caulk removal tool or plastic scraper, 1
- Grout saw or oscillating tool with a grout blade, 1
- Utility knife, 1
- Pry bar, 9 inch, 1 (for trim and threshold pieces only)
- Adjustable wrench and a 4-inch screwdriver, 1 each
- Drill with bits if the drain flange is rusted in place, 1
- Paintbrush, 2 inch, 1 (for membrane coats)
- Notebook and marker for marking the water line, 1
- Shop towels and a bucket, 1 each
- Fan or dehumidifier for drying, 1
Materials
- 100 percent silicone kitchen and bath sealant, 2 to 4 tubes for a standard 36 by 36 inch pan
- Neutral cure silicone for areas near finished surfaces, 1 tube
- Polyurethane or hybrid sealant for corners that move, 1 tube as an alternative
- Pre-formed waterproofing pan or sheet membrane for over-tile repair, enough for the pan floor plus 8 inches up each wall
- Rubber drain gasket matched to your drain, 1 to 2
- Matching grout and grout sealer for cracked joints, 1 box and 1 bottle
- Primer required by your chosen sealant, 1 can
- Tile spacers and thin set if any edge tile comes up, 1 bag and 1 box
- Bonding shower pan silicone for setting a liner, 1 tube
Use 100 percent silicone, not latex or acrylic caulk. It is the only type that stays flexible in a wet zone and does not wash out of the joint in a couple of seasons. Buy the mildew-resistant formula for bathrooms.
Before You Start
Cut the water off at the valve inside the shower, or at the main if there is no local shutoff. Open the faucet to relieve pressure so nothing sprays when you loosen a fitting.
Clear the shower of everything that moves: shower door, curtain rod, towel bar, shampoo, and any loose trim. If you are removing a curb or a threshold, the frameless glass usually has to come out first, and rebuilding that curb to the exact original height matters more than you would expect. Off by a sixteenth of an inch and the glass will not sit properly again.
Wear eye protection and gloves. Open a window or run the exhaust fan, and keep the fan running for the full cure, not just while you work. Sealant fumes in a closed stall are unpleasant and the cure slows down badly in damp air.
Protect the tub, the floor outside the stall, and the vanity with a drop cloth. If a piece of tile or the shower door looks marginal, take a photo before you start so you know exactly how it went back.
Is this job permit-worthy?
Resealing joints, regrouting, and replacing a gasket need no permit. Anything that moves the drain line, cuts framing, changes plumbing inside a wall, or rebuilds the pan slope usually does, depending on your local code. If your shower sits on a second floor and the ceiling below shows water, get a plumber involved before you start cutting.
One safety note worth repeating. If the shower floor feels soft or springy underfoot, stop using the shower. That movement means the subfloor or joists below may be compromised, and no repair should go on top of it until somebody has looked underneath.
Step-by-Step Instructions
Step 1: Identify the Leak Source
Dry the shower completely, then place dry paper towels around the suspected joints, under the drain, and along the curb base. Run the shower for ten minutes, then look at the towels. The one with a wet ring tells you where to start.
Run the flood test from the earlier section to confirm. Then inspect the drain flange for standing water and a mildewy smell, and check the curb line for a caulk bead that has pulled away from the tile or from the wall.
If the paper towels stay dry but water still shows up downstairs, cut a small inspection opening in the drywall in the ceiling below, about 4 by 6 inches, directly under the drain. Owners on the forums recommend exactly this when the ceiling below is already stained and you cannot see where the water is coming from. Patch that hole properly afterward.
You now have one of three jobs: reseal a joint, reseal the drain, or deal with failed waterproofing. Steps 3 through 6 branch by which one it is.
Step 2: Shut Off Water and Protect the Area
Shut off the shower supply valve and open the faucet to drop the pressure. Verify the water is off by running the hot side for a few seconds before you open anything.
Remove the shower door or curtain, and set towel racks and any trim within reach of the work area on a towel. Lay the drop cloth. If you are working over an existing pan rather than tearing it out, move every bottle out of the way that you would hate to find full of silicone.
Step 3: Remove Damaged Sealant or Surface Material
Pull the old caulk with the removal tool, working in long steady strokes rather than short chops. A razor blade held flat against the joint shaves off stubborn residue without gouging the tile face.
For grout, run the grout saw along the joint and rake out the old material. Follow the joint the whole way. A half-cleaned joint is the reason a new bead of sealant peels off in six months.
If the drain flange is rusted in place, a drain flange cutter or a drill with a carbide bit will free it. Be careful around it, because that is where the plumbing connections live.
The rule here is to remove only what failed. Sound waterproofing under the surrounding tile is doing its job, and tearing up good material to get at a small drip is how a small repair turns into a two-week project. When you hit soft substrate, stop and reassess.
Step 4: Clean and Dry the Repair Area
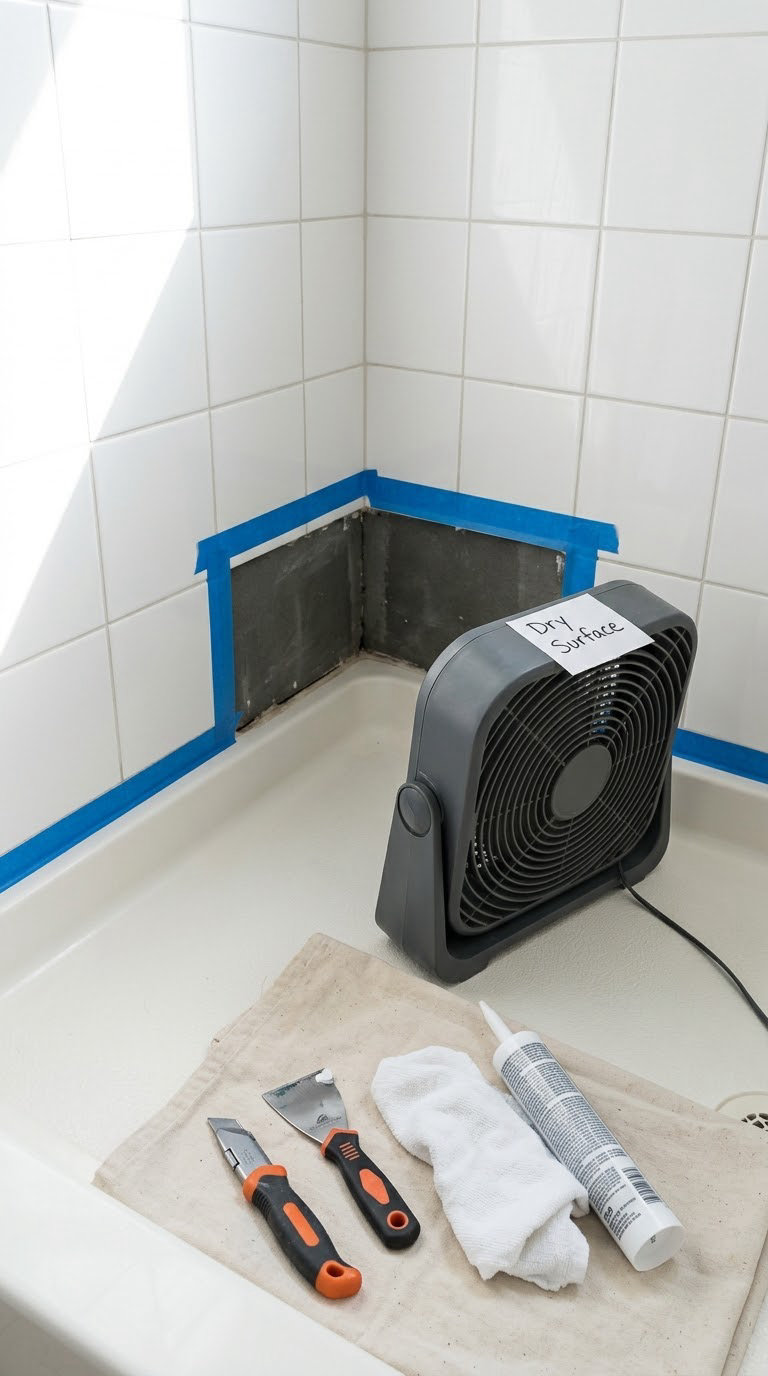
Scrub away soap scum, old caulk film, and mildew with a bathroom cleaner, then rinse with clean water. Wipe the joint down with a denatured alcohol wipe on the last pass to cut any oily film.
Now check the substrate. Press a finger into the area beside the joint. Firm means go ahead. Soft, spongy, or crumbly means the water has already gotten into the backer board or the mortar bed, and sealing over it will trap the moisture instead of stopping it.
Dry everything thoroughly. A fan and a dehumidifier for a few hours beats a hair dryer, and heat from a heat gun near wiring or finishes is a fire risk. When you are resealing a drain, the flange face has to be bone dry or the gasket will not seat.
Step 5: Repair the Drain or Leaking Joint
For a curb leak, the fix is straightforward. Lay a continuous bead of 100 percent silicone along the clean joint, slightly thicker than the old bead was. If the joint is deeper than the bead will fill, back it with a removable foam rod first so you are not laying a hollow tube of sealant across the gap.
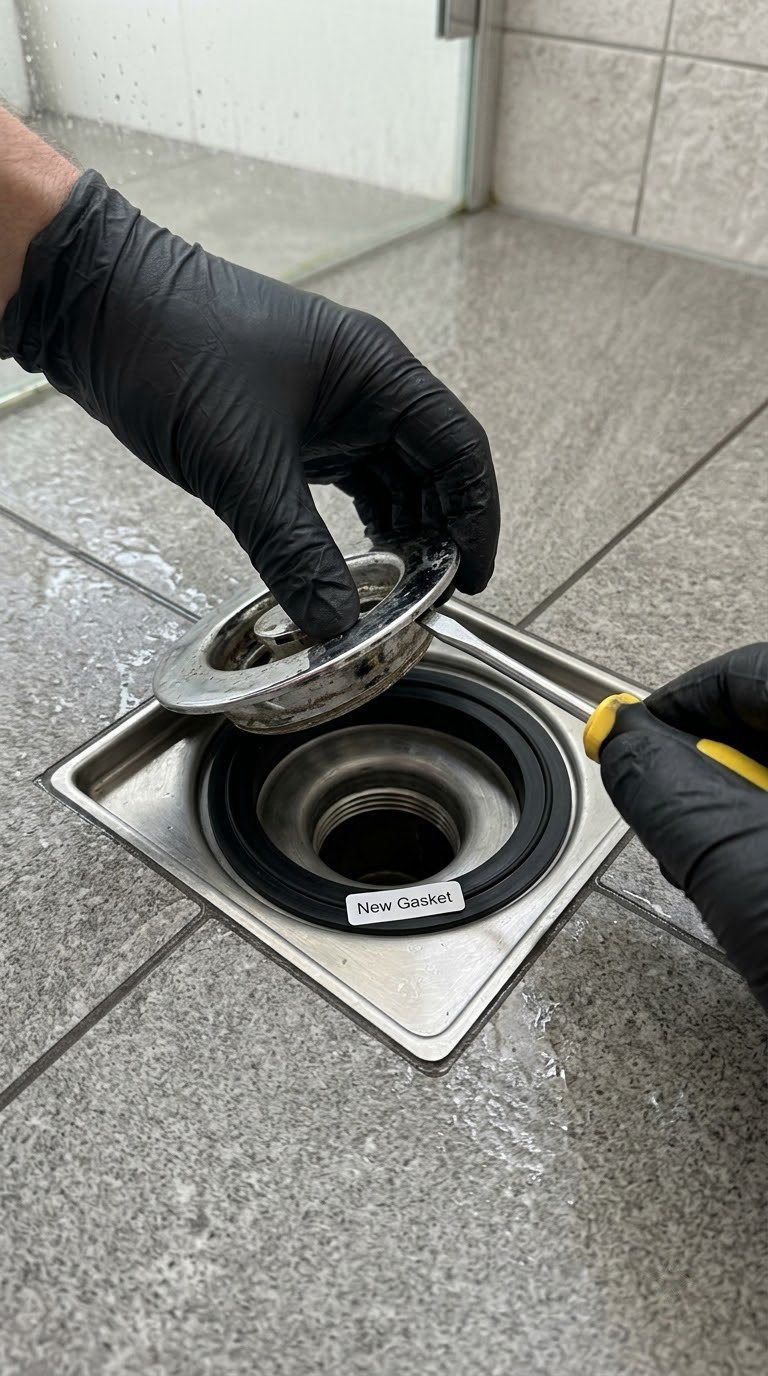
For a drain leak, replace the rubber gasket under the drain assembly with one matched to your drain size. Many gaskets come as a rubber or neoprene ring under the flange that a plumber tightens evenly from the top. Follow the gasket in a figure-eight pattern rather than cranking one side, and stop when it is snug, not torqued.
Flush the weep hole with water, then clear it with a thin piece of wire or a small bottle brush while you are in there. If the drain still leaks after a new gasket, the problem is the bonding layer under the flange, which means the drain assembly comes out, the old mortar gets cleaned off, and the flange is re-bedded in fresh pan mortar or a thinned waterproofing slurry and allowed to cure before reinstalling.
For a cracked fiberglass or acrylic pan, be honest with yourself here. Patch kits sold for these are fiberglass mat and resin, and the DIY version usually involves drilling around the crack and spraying expanding foam underneath as a filler. It stops a hairline leak. It does not restore a structural single unit, and it fails again within a year or two. If you compare materials before deciding, our Swanstone versus cast iron shower pan comparison covers how the different pan materials crack and age.
When the membrane under the tile has failed, no sealant reaches it. That path means removing the pan, the curb, and the bottom two rows of wall tile, patching any soft subfloor, and rebuilding the pan with a fresh waterproofing layer. It is a weekend project for someone comfortable with a trowel, and it is the one tier worth hiring a tile setter for. If the pan is being replaced rather than patched, our shower panel systems buying guide is a useful look at the prefab route.
Step 6: Seal the Leaking Shower Pan with Membrane or Sealant
Tool the bead with a wet finger or a damp sponge, pressing it into the joint so it bonds on both surfaces. Tool in one direction and pull away. A second light pass in the opposite direction flattens the ridges and sheds water better.
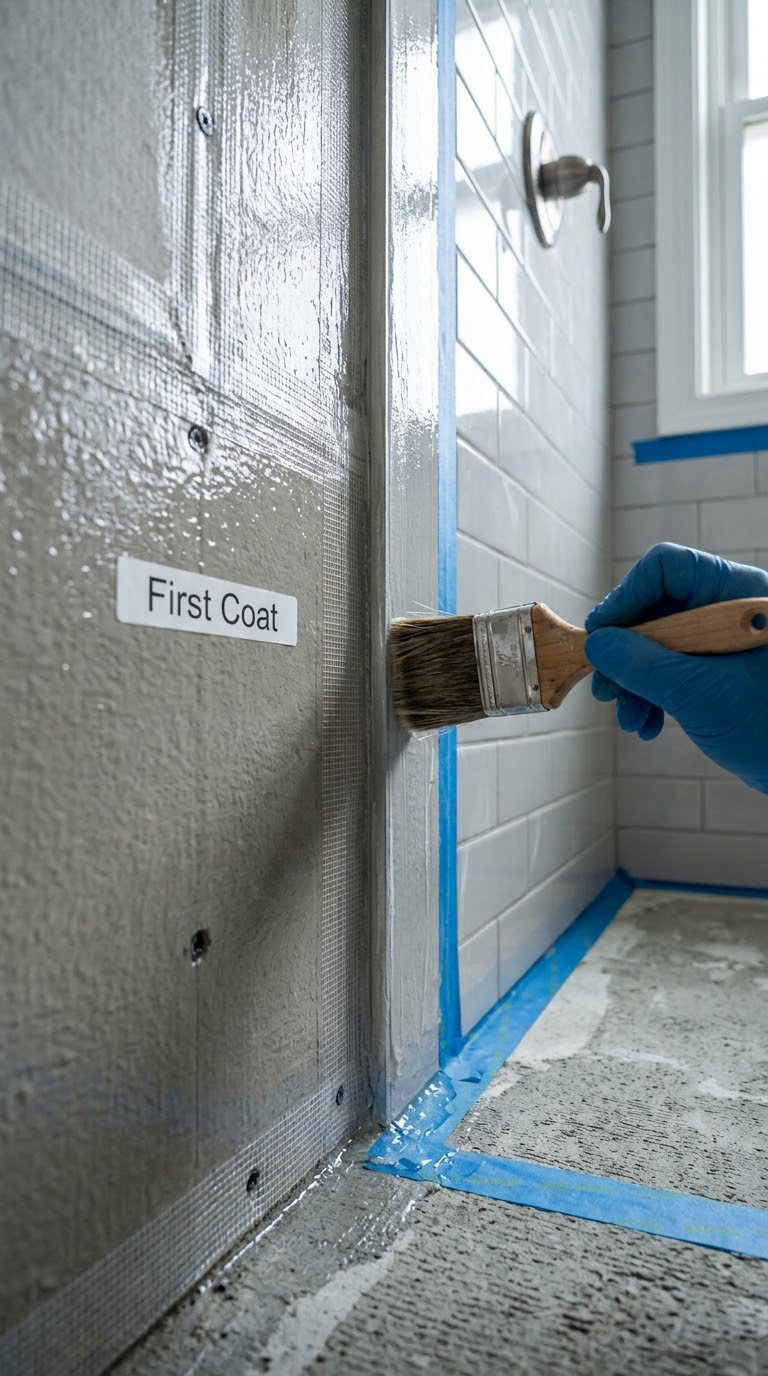
For an over-tile membrane repair, work in thin, even coats instead of one heavy one. A loaded brush at the pan-to-wall corner is where the water actually goes, so pay attention there. Follow the coverage rate and overlap width printed on your product. Membrane that is too thin leaks; membrane applied over damp grout peels off later.
Let each coat dry to the touch before the next, usually one to four hours depending on temperature and humidity. Thicker is not better here, because a heavy coat traps solvent in the middle and cures soft underneath.
Do not paint over existing caulk. That is the same situation as a previous owner painted a membrane over the tile and now nobody knows what is under there. If you find a coating already on the pan that you did not put there, that is a good reason to have a tile setter look at what is underneath before adding another layer.
Step 7: Let the Repair Cure and Test the Shower
Give silicone 24 hours before water hits it, and 48 hours in a cool or humid room. Membranes typically need 24 to 72 hours, always more than the dry-to-the-touch time on the label, which is not the same as cured.
Reinstall the trim and tile as needed, replace the door, and leave the fan running during the cure. Then repeat the flood test: plug the drain, add 1 to 2 inches, mark the line, and check it after 24 hours.
Run the shower for a full ten minutes with paper towels at the curb base, around the drain, and in the ceiling below if there is one. Dry towels mean the repair held.
Common Mistakes to Avoid
Repairing the wrong leak. A pan that holds water perfectly still can leak from the shower arm dripping down the wall. Ten minutes of diagnosis saves a weekend.
Sealing over damp material. Silicone needs a dry substrate to bond. Press it onto a damp backer board and it will peel off in strips.
Using incompatible products. Do not put latex caulk over polyurethane, or a cementitious repair mortar over a cured membrane. Check what is already in the joint.
Skipping primer. Many sealants and membranes require primer on porous backer board. The label says so, and skipping it is the reason people say the product did not work.
Disturbing sound waterproofing. Chasing a leak under tile means tearing up the layer that is keeping the rest of the shower dry.
Testing too soon. A leak that reappears the day after a repair was not a failed repair. It was a sealant that had not cured.
Leaving the shower door closed. A closed stall traps humidity and slows the cure. Ventilation is part of the job.
When to Call a Pro
Call a plumber if the leak is coming from the valve, the shower arm, or a supply line inside the wall, or if the flood test holds level and water still appears below. Plumbing inside a wall is not a sealant job.
Call a tile setter or a general contractor when the waterproofing under the tile has failed, when the floor flexes or sounds hollow, when the substrate is soft, or when the work involves re-plumbing the drain.
Stop using the shower and get someone out there quickly when you see a stained or sagging ceiling below, widespread mold growth in an adjacent closet or bedroom, or a musty odor that shows up in a room with no source. Water travels. What you see below is rarely where it started. If a bathtub or other fixture is putting water into that same space, our guide to bathtub water reaching the basement covers how that damage travels.
Before you sign anything, ask whether the leak was documented with a flood test, get three written quotes, and confirm the contractor is licensed, bonded and insured. Homeowner insurance generally responds to sudden or accidental events such as a pipe failure, not to a pan that slowly failed over years, so keep your own photos and dates. A home warranty plan may cover plumbing parts and nothing about water damage.
Maintenance
Run the shower with the door open and the fan on for fifteen minutes after every use. Standing humidity in a closed stall is what breaks grout and sealant in the first place.
Look at the curb caulk line twice a year. Run a dry finger along it, and any place it feels rough, hard, or separated from the tile is where water is starting. Catching it at the hairline stage means re-caulking one joint. Waiting means the water has already been moving behind the tile.
Clear the drain and the weep hole every few months. Pull the drain strainer and rinse it under the tap, and run water into the weep hole to confirm it still drains. Hair and soap scum are the whole reason it stopped working.
Watch the ceiling below and the closet wall for the first six months after any repair. A faint new stain, a musty smell, or floor that feels different underfoot means call someone before you shower again.
Frequently Asked Questions
Can I repair a leaking shower pan myself?
Usually yes, if the water is coming through a joint, the caulk line at the curb, the grout, or the drain gasket. Those are cleaning, drying and sealing jobs that take a few hours. If the waterproofing under the tile has failed, the substrate is soft, or the floor moves underfoot, it is a tear-out job and you want a licensed tile setter or plumber involved.
Why is my shower leaking even when the faucet is off?
Because the water is coming out of the pan itself rather than through the fixtures. A failed caulk line at the curb, a worn drain gasket, a clogged weep hole, or broken waterproofing under the tile will all leak whether or not a single drop of water falls from the showerhead.
How long should shower pan sealant cure before using the shower?
Give 100 percent silicone at least 24 hours, and 48 hours in a cool or damp room. Membrane products usually need 24 to 72 hours. Dry to the touch is not the same as cured, and running water early is the most common reason a new seal fails in the first week.
Should I remove tile to repair a leaking shower pan?
Start without removing tile. Re-caulking the curb, regrouting cracked joints, replacing the drain gasket, and coating the existing tile with a waterproofing membrane all work over the current surface. Tile comes off only when the waterproofing underneath has failed, because that layer cannot be reached any other way.
What is the difference between a shower pan leak and a drain leak?
A drain leak is water seeping around the drain flange or its rubber gasket, and it shows as a puddle ring around the drain or a drip right below it. A pan leak is water escaping through the pan material, the curb joint, or the waterproofing layer, which usually appears at the curb base, the wall junction, or on the ceiling below.
When does a leaking shower pan require replacement instead of repair?
Replace it when the substrate is soft or crumbly, the floor deflects underfoot, the waterproofing membrane under the tile has failed, or the pan itself is cracked through. Fiberglass and acrylic pan patch kits stop a hairline leak for a while but do not restore a structural single unit. Repeated repairs on the same pan usually cost more than one proper rebuild.
Start With a Flood Test, Not a Tube of Caulk
The single most useful thing you can do is spend one evening learning whether the water is actually leaving the pan. Plug the drain, add 1 to 2 inches of water, mark the line with tape, and check it again in the morning. Everything after that is a branch: reseal the joints, replace the drain gasket, or plan a rebuild.
If you do nothing else, stop using the shower if the floor feels soft or the ceiling below shows a stain. Water already in the framing will not wait for a convenient weekend.