
How to Paint Bathroom Tile Walls That Last: Proven Method 2026
You can paint bathroom tile walls that last, but only if you treat the job as a coating system rather than a coat of color. Clean ceramic or porcelain, scuff the glaze, prime with a bonding primer approved for non-porous surfaces, then roll two thin coats of a moisture-resistant finish. Skip any one of those and you will be scraping peels off the wall in a year.
Time: Two to four days including cure · Cost: Low hundreds in materials for a tub surround · Difficulty: Moderate DIY · Skill level: Beginner with patience
Contents
Most peeling tile paint has nothing to do with the brand on the can. It sits on soap scum, or it was rolled over an unsanded glaze that had nothing to grip, or somebody ran the shower at it two days in. Preparation decides the outcome, and the paint only decides how much scrubbing the finish can take.
Painting tile also has honest limits. A well-prepped bathroom wall usually holds three to five years before it needs attention, a shower wall one to three, and a floor one to three because foot traffic grinds through anything softer than the tile underneath. Tile itself lasts decades. Paint is a refresh you will repeat, not a permanent repair, and it is worth doing only when the tile is structurally sound.
Tools and Materials
Gather everything before you start, because halfway through a bathroom with the fixtures masked you do not want to leave for a supply run.
- Prep: trisodium phosphate or a phosphate-free substitute, a stiff nylon brush, a grout saw or grout rake, a vacuum with a brush head, non-abrasive pads, and a tack cloth
- Repair: premixed grout or a grout-and-caulk cartridge matched to your existing grout colour, 100 percent silicone kitchen and bath caulk, a tile repair epoxy for chips, and a small putty knife
- Surface prep: 400-grit wet/dry sandpaper or a sanding sponge, a dust mask, and a shop vacuum or brush to catch the grit
- Painting: a 2.5 inch angled sash brush for cut-in and grout lines, a 3/8 inch nap roller on a frame for the field, a roller tray lined with a plastic bag, and a paint grid if you are mixing a two-part epoxy
- Protection: painter’s tape, plastic sheeting or a canvas drop cloth, and a utility knife for cutting tape runs
- Ventilation and safety: goggles, nitrile gloves, an N95 or P100 respirator for sanding and for any epoxy work, a box fan for air movement, and a dehumidifier if the room cannot be dried
- Finish: a bonding primer labelled for non-porous surfaces or tile, plus a mildew-resistant satin or semi-gloss latex, one-part epoxy, or two-part epoxy rated for wet rooms
Total coverage math is simple. A typical tub surround has 70 to 90 square feet (6.5 to 8.4 square metres) of wall. Most tile paint covers 350 to 400 square feet per gallon per coat, and two-part epoxy systems in the small tins cover less, roughly 100 to 110 square feet for two coats. Buy for two coats plus 10 percent for touch-ups.
Before You Start
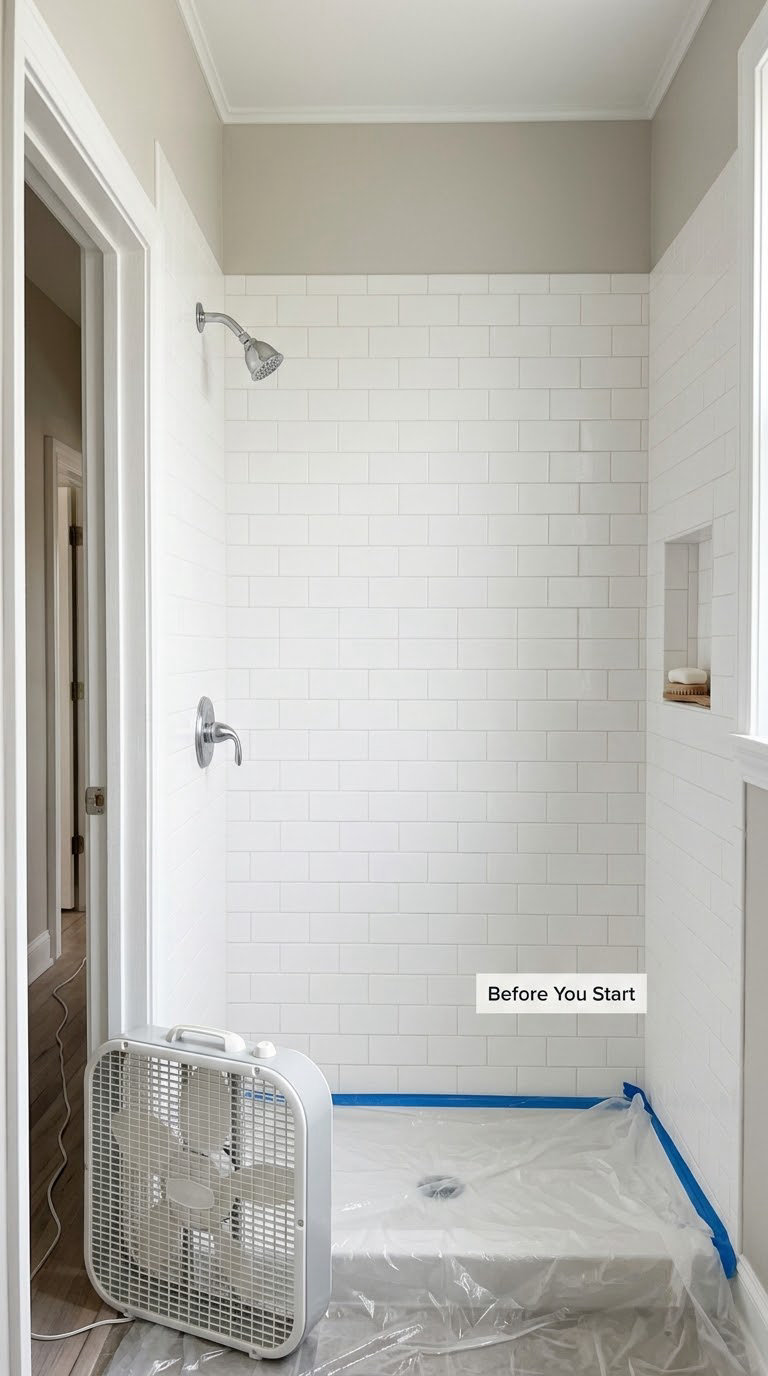
Not all tile can be painted, and knowing which kind you have takes two minutes. Ceramic and porcelain are the straightforward cases. Natural stone such as marble, slate and travertine works only with a masonry acrylic system and a pH-neutral cleaner, because acidic strippers eat the stone. Unglazed quarry tile is porous and accepts paint readily. Glass mosaic and heavily textured surfaces will hold paint but hide it badly in the low spots.
Now press on the tile. If any tile moves, sounds hollow when tapped, or has a soft substrate behind it, stop and deal with that first. Paint will not hold a loose tile, and it will not fix a leak. If you find mould, rot, or a damp backer board, that is a repair job, not a painting job.
Kill power to anything you will be near. Fixtures stay in place and get masked, not removed, unless you are dealing with heavy mould behind them. Open the window, set up the fan to move air out of the room rather than stirring it, and keep the respirator on when sanding or when mixing epoxy.
Pick a colour with the fixtures already installed in mind. Warm whites fight with almond and bone trim in ways that read badly under bathroom lighting, and it is far easier to check than to repaint. We pulled together options in our guide to paint colors for an almond or bone bathroom.
Finally, be honest about whether painting is right at all. If the tile is dated but solid, in a rental, in a half bath, or above a backsplash, painting makes sense. If you have a busy shared shower taking daily soaking from several people, or the house is about to be listed, replace the tile instead. You can see how the tools compare in our roundup of tile wet saws for bathroom renovations if you have decided replacement is the better path.
Step-by-Step Instructions: How to Paint Bathroom Tile Walls That Last
Step 1: Protect the Bathroom and Clean the Tile
Mask first. Tape the tub lip, the faucet base, the valve covers, the light switch plate and the door frame, then run plastic sheeting over the floor and up the wall edges behind the fixtures. Do not tape over loose old caulk, because you will pull it off later with the tape.
Clean with trisodium phosphate mixed hot, or a phosphate-free substitute if the drain runs to older plumbing. Work it in with a stiff nylon brush and let it sit five to ten minutes. Soap scum and skin oils are the single most common reason paint slides off later, and they sit in the grout lines more than on the tile faces.
Scrub grout lines separately, then rinse thoroughly and dry the wall with a fan and a dehumidifier. The check is simple: lay a dry paper towel on the grout for an hour. If it picks up moisture, you are not ready yet.
Step 2: Repair Grout, Caulk, and Surface Imperfections
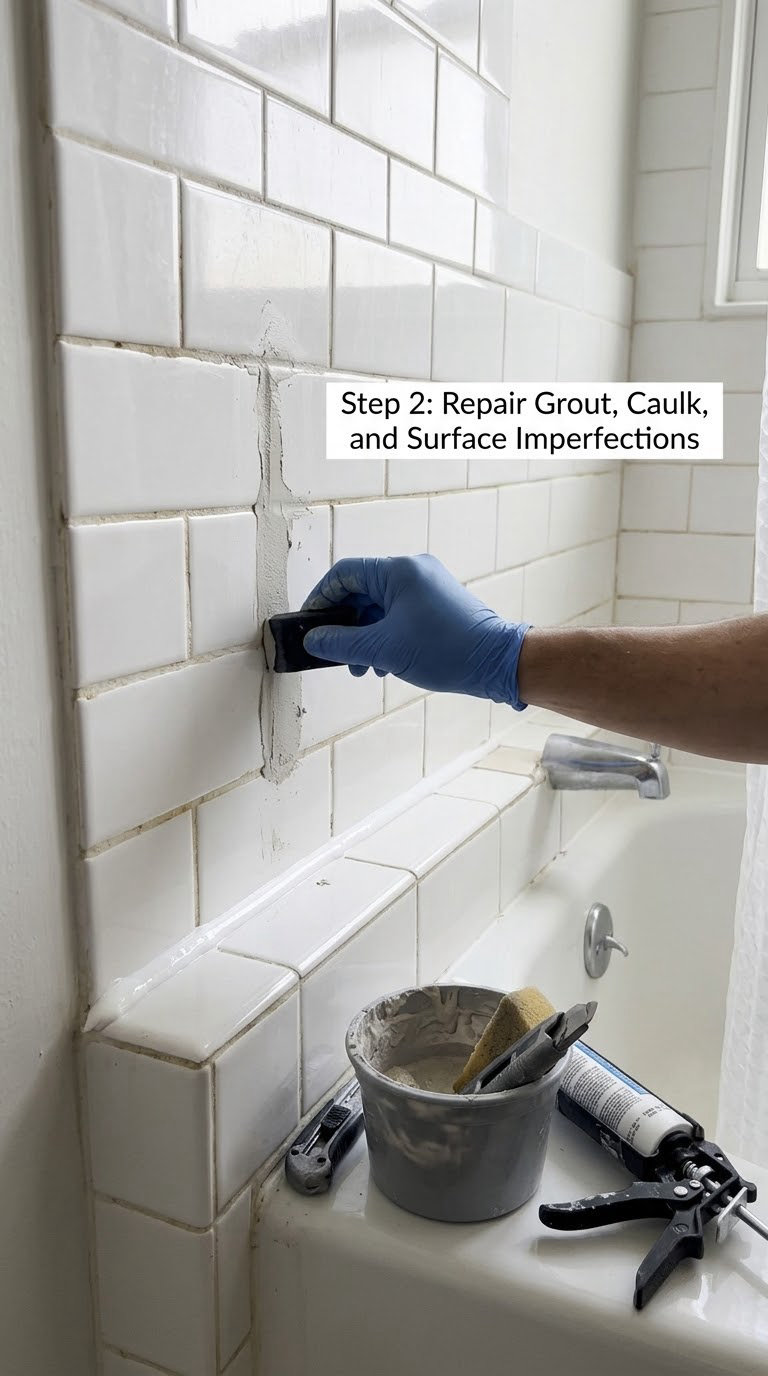
Rake out any cracked or crumbling grout with a grout saw, brush the dust out, and fill with premixed grout or grout caulk in a matching colour. Let it dry for 24 to 72 hours depending on the product, because grout that is still damp will lift any coating you put over it.
Cut out failed caulk with a caulk removal tool or a stiff knife, clean the joint, and lay a continuous bead of 100 percent silicone kitchen and bath caulk. Tool it smooth and let it cure as directed before anything else touches the wall.
Fill chips and gouges with a two-part tile repair epoxy, pressing the colour-matched filler into the spot and grinding it flush once it sets. Everything you add here has to cure harder than the topcoat will, or the repair pops out later as a ring around the chip.
Step 3: Scuff-Sand the Tile and Edges
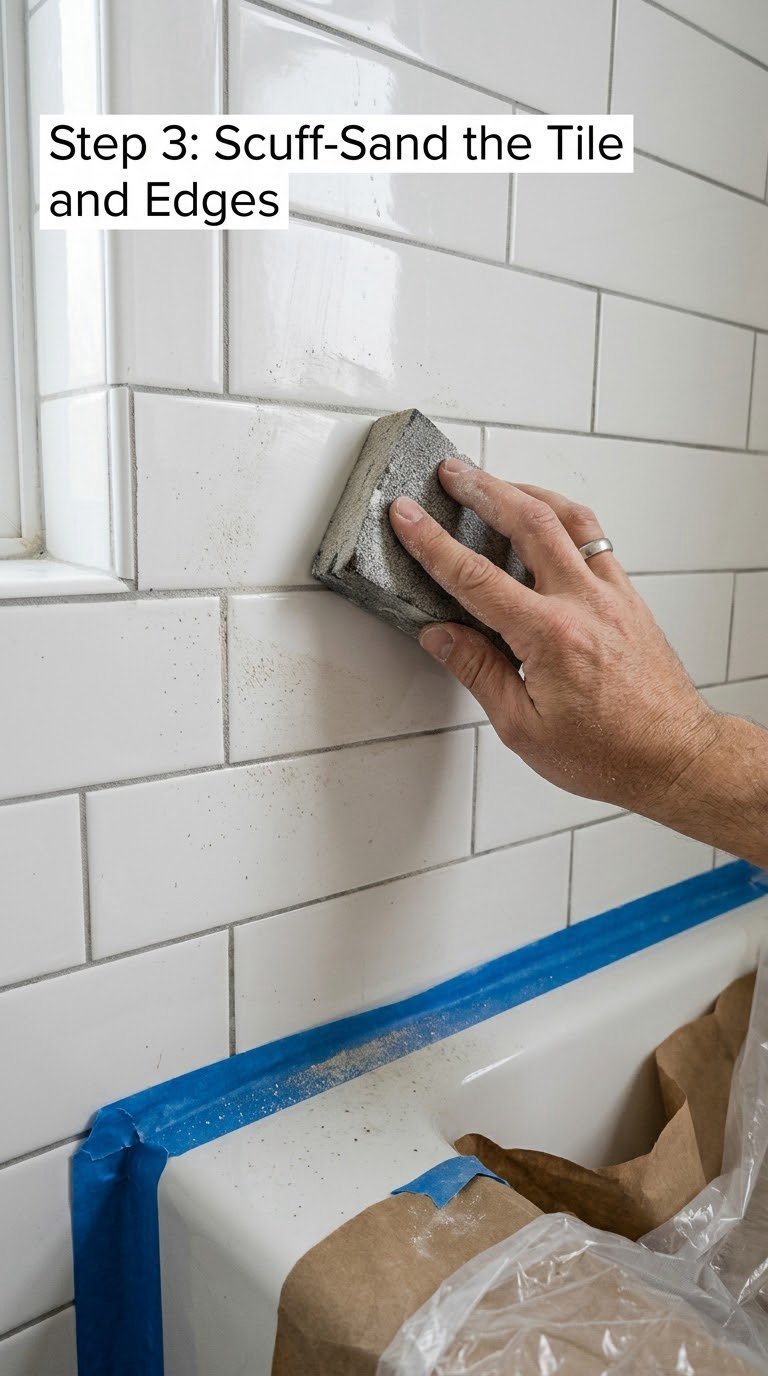
Glazed tile is non-porous and shiny by design, which means paint has nothing to hold onto. Take the shine off with 400-grit wet/dry sandpaper or a sanding sponge, working in two directions until the surface reads matte and uniform. Feather the edges where tile meets drywall so the new coating does not end on a hard line.
Work with the respirator on, keep the dust down with a wet sponge or a shop vacuum held close, and remember that the goal is dull, not gouged. A glazed edge that has been cut back too far creates a groove that collects water. You want to stop at first dull.
Vacuum everything, then wipe the wall with a tack cloth. Run a clean finger along a joint. If it picks up white grit, go over it again; embedded dust is a bond breaker that no primer will rescue.
Step 4: Mask and Prime for a Lasting Finish
Re-check your masking and add tape where the new wall meets the tub lip and the ceiling. On non-porous ceramic and porcelain, use a bonding or adhesion primer explicitly approved for tile and gloss surfaces. On natural stone, use a masonry primer instead, matched to whether the stone is lighter or darker than your topcoat.
Cut the primer in along grout lines and edges with your angled brush, then roll the field with light even pressure. The primer should look slightly darker than the tile when wet and even with no pooled lines. Skip the grout and you will see bare joints show through the finish on coat one.
Let the primer cure for the full time on the can before the topcoat, typically 4 to 24 hours. The check is a fingernail: if the primer dents or lifts, wait longer. Going on early is the most common cause of the peeling I get asked about.
Step 5: Paint the Bathroom Tile Walls
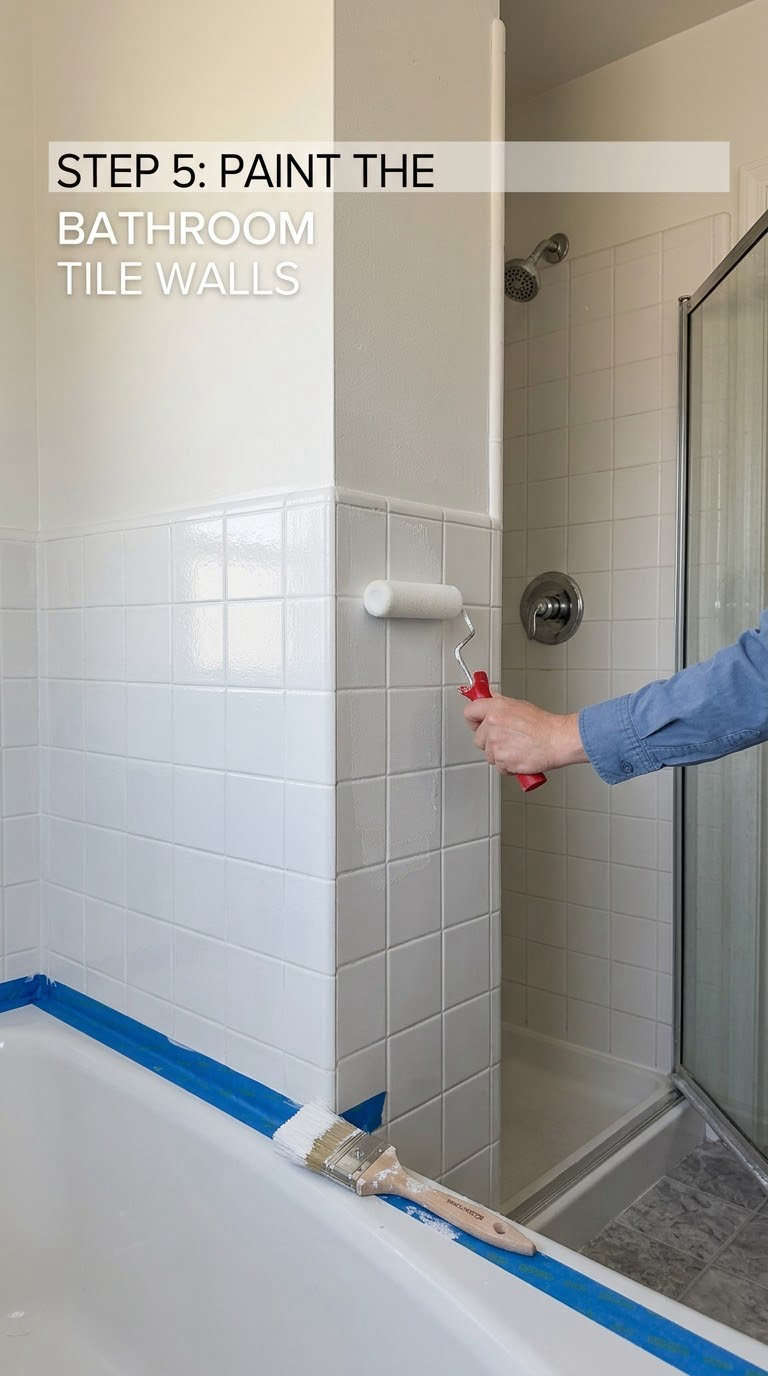
Start at the top. Cut in along the ceiling line, the tub lip, the outside corners and every grout line with the 2.5 inch brush, then roll the field immediately while the cut-in edge is still wet. That wet edge is what keeps a lap line from forming.
Load the roller lightly and lay the paint off in a W pattern, then roll lightly in one direction to level it out. A foam roller is comfortable on flat glossy tile but it will not reach a deep grout joint, so keep the brush nearby for the lines. If you are wondering about sprayers, our comparison of the best paint sprayers for walls and ceilings covers where they help in a room this size, and where the overspray cost is not worth it.
Keep a wet edge moving and do not go back over a section that has started to skin over. Two thin coats beat one heavy one, always. Use a fresh brush and roller for coat two, and only load the tray for the section you are painting so nothing sits in the tray.
Follow the pot life on a two-part epoxy kit without exception. Once the resin and hardener are mixed you typically have 30 to 90 minutes before the material gells, so mix smaller batches rather than the whole kit.
Step 6: Let the Paint Cure and Finish the Edges
Timing matters more here than any other step, because almost everyone puts water on the wall too early. Use the can’s numbers as the floor and the table below as the shape of the curve.
| Stage | Typical range | What it means |
|---|---|---|
| Touch-dry | 1 to 4 hours | Surface feels dry but still marks if you lean on it |
| Recoat window | 4 to 24 hours | Minimum wait before the next coat, longer in a cold or humid room |
| Light use | 48 hours | Doors, foot traffic, normal living |
| Water exposure | 72 hours minimum, up to 7 days | Shower or tub water, following the product’s stated window |
| Full cure | 2 to 4 weeks, some systems 30 days | Full chemical and scrub resistance, and when touch-ups blend in |
Remove tape while the final coat is still slightly soft, pulling it at a shallow angle so it does not lift the edge it was holding. Pulling it later risks a strip of paint coming up with it.
Then inspect the whole wall in daylight with the lights off, looking along the surface rather than straight at it. Side light reveals the lap lines and missed grout that overhead light hides. Touch up any bare joint, let it blend, and keep the shower dry until the cure window closes.
Common Mistakes to Avoid
Why Painted Bathroom Tile Peels
- Painting over soap scum or hard water film. It looks clean and it is not. Degrease, rinse and dry properly before anything else touches the tile.
- Skipping the scuff-sand on glossy glaze. This is the number one cause of failure. A bonding primer helps enormously, but a mechanical key is what keeps the film attached through a wet season.
- Using a bonding primer and then rushing the topcoat. Primer that has not cured dents and peels with the first coat pulled across it.
- Water exposure too soon. Paint dry to the touch is still soft. Passing a fingernail across it should mark nothing before you call it ready.
- Reusing the brush or roller on coat two. A used brush carries dust and skin oils back onto a cured surface. Always start fresh.
- Coating damp grout or fresh caulk. Trapped moisture under a film causes delamination weeks later, usually in one bad patch that spreads outward.
- One heavy coat instead of two thin ones. A thick coat dries at the surface while the underside stays soft, then it lets go in sheets.
Painting over already painted tile needs its own method. Sand the sound areas back to a matte finish, feather the edges of every loose patch, spot prime the bare glaze, and treat anything that flexes or lifts in sheets as a strip-back job. You can paint over old paint that is sound; you cannot paint over paint that has already failed, because whatever moisture ruined the first coat is still there.
When to Call a Pro
Some conditions are not a weekend project, and painting over them only hides the problem for another season.
- Water damage or mould. Mold that has grown behind tile means the substrate is wet and the vent or the plumbing is failing. Get the source fixed first, then remediate, then paint.
- Structural substrate repair. Soft backer board, a sagging wall, or a floor that moves underfoot needs a trade, not a coating.
- Loose tile or hollow-sounding tile. When a tap on the wall returns a dead sound, the mortar has let go. That is a teardown job.
- Electrical near wet areas. Anything involving rewiring, new fixtures, or moving receptacles in a wet location belongs to a licensed electrician and may require a permit.
- Lead paint in a home built before 1978. Do not sand anything until the house has been tested by a certified lead inspector.
- An imminent resale. Buyers read painted tile as a cover for old material. Replacing it is the better investment if the sale is within a year.
Maintenance
Cleaning habits decide whether three years becomes five. Use a non-abrasive, pH-neutral bathroom cleaner and a soft cloth or sponge, and stay away from grout scrubbers, scouring powders and anything with grit in it. Those cut the topcoat, not just the dirt.
Wipe splashes as they happen rather than letting shampoo and toothpaste sit. Keep the fan running for 20 minutes after a shower, and squeegee the wall if your room holds humidity. If you painted a shower, a monthly check of the caulk lines and grout joints catches the first hairline crack before water gets behind it.
Small chips are easy to hide. Sand the spot lightly, clean it, spot prime if the chip reached bare glaze, and roll on a thin coat of the same finish, feathering the edge. Blend it within a day or two of the original coat while the colours still match, and let it cure with the rest.
If you are refreshing the tub surround rather than the walls, the same system works with a few differences in prep. Our how to paint bathtub tile guide walks through the roll-over-the-lip sequence and the extra cure time the tub needs.
Frequently Asked Questions
Is painting over bathroom tiles a good idea?
Yes, when the tile is ceramic or porcelain and structurally sound. Painting is a good idea if you want a colour change without a demolition, and if you accept a three to five year lifespan on a wall instead of the decades tile itself would have lasted. It is a poor idea on a heavily used shower floor, over loose tile, or where water is already getting behind the surface.
What kind of paint will stick to bathroom tile?
Use a bonding primer approved for non-porous surfaces, then a mildew-resistant satin or semi-gloss latex, a one-part epoxy, or a two-part epoxy rated for wet rooms. Two-part epoxy is the most chemical and abrasion resistant, but it has a short pot life once mixed. Natural stone needs a masonry acrylic system instead, and acrylic cleaner only.
How long after painting tile can you shower?
Treat 72 hours as the minimum for any water on a painted shower, and follow the product window if it is longer. Full cure takes two to four weeks, and some two-part systems call out 30 days. Dry to the touch means nothing here; put a fingernail across the finish and if it marks, the wall is not ready.
Why is my painted bathroom tile peeling?
In order of frequency: the glaze was never scuff-sanded, the surface was painted over soap scum or skin oils, the coating went on before the primer cured, or water hit the wall before it was cured. Deep grout lines that a foam roller never reached also leave bare patches that later fail. Sanding, degreasing and real cure times prevent all four.
Can you paint over already painted tiles?
Yes, if the existing coating is sound and still adhered. Sand it back to a matte finish, feather the edges of any flaking areas, spot prime where the sand went back to bare glaze, and roll two fresh coats. Paint that lifts in sheets means the underlying moisture problem is still present, and no amount of recoating fixes that.
How long does painted tile last in a bathroom?
A well-prepared wall usually holds three to five years, a shower wall one to three years, and a floor one to three years because of foot traffic. Dry, low-use rooms last longest. Scrubbing with abrasive cleaners shortens that considerably, and cleaning with a pH-neutral product and soft cloth buys you the most time per coat.
Start with the cleanest possible wall and the longest cure window you can give it. Degrease the grout, scuff the glaze to matte, prime for non-porous surfaces, roll two thin coats, and leave the shower dry for 72 hours and the room dry for a month.
