
20 Pantry Organization Ideas for Small Kitchens (October 2026)
Twenty pantry organization ideas for small kitchens, ranked by how much usable shelf space each one actually gives back. The trick in a tight pantry is rarely buying more storage. It is using the wall, the door, the corner, and the air above the cans you already own.
Most small pantries fail for the same three reasons: everything gets dumped on one shelf, half of it disappears into the back where nobody can see it, and the same box of pasta gets bought twice in one month. The fixes below are cheap, reversible, and mostly renter-friendly.
Contents
20 Pantry Organization Ideas for Small Kitchens at a Glance
Every idea in this list is broken down below with a cost range, a difficulty level and a realistic time estimate. Costs are typical US ranges and shift a lot by region.
| Idea | Cost (USD) | Difficulty | Time |
|---|---|---|---|
| 1. Pantry zones by food type | 20 to 100 | Easy DIY | 1 to 2 hours |
| 2. Wall-mounted shelves | 40 to 250 | Moderate DIY | Half a weekend |
| 3. Adjustable shelf risers | 15 to 60 | Easy DIY | 30 minutes |
| 4. Narrow pull-out organizers | 35 to 180 | Moderate DIY | 1 to 3 hours |
| 5. Inside-of-door storage | 15 to 90 | Easy DIY | 45 minutes |
| 6. Pantry inventory system | 5 to 40 | Easy DIY | 1 hour |
| 7. Clear labeled bins | 20 to 100 | Easy DIY | 2 to 3 hours |
| 8. Two-tier lazy susans | 20 to 75 | Easy DIY | 30 minutes |
| 9. Stackable slide-out trays | 25 to 120 | Moderate DIY | 1 to 2 hours |
| 10. Over-the-door pantry rack | 20 to 75 | Easy DIY | 30 minutes |
| 11. Pull-out recycling and trash bins | 25 to 160 | Moderate DIY | 2 to 4 hours |
| 12. Nested containers and dividers | 15 to 100 | Easy DIY | 1 to 2 hours |
| 13. Shelf liners and easy cleaning | 15 to 75 | Easy DIY | 45 minutes |
| 14. Two-tier corner organizer | 25 to 100 | Easy DIY | 45 minutes |
| 15. Hooks under shelves | 10 to 50 | Easy DIY | 30 minutes |
| 16. Upper-cabinet baskets | 20 to 120 | Easy DIY | 1 hour |
| 17. Slim rolling cart | 30 to 150 | Easy DIY | 1 hour |
| 18. Dedicated spice cabinet | 20 to 100 | Easy DIY | 1 to 2 hours |
| 19. Shelf guard fence | 10 to 45 | Easy DIY | 20 minutes |
| 20. Portable overflow bin | 15 to 70 | Easy DIY | 45 minutes |
1. Create Pantry Zones by Food Type
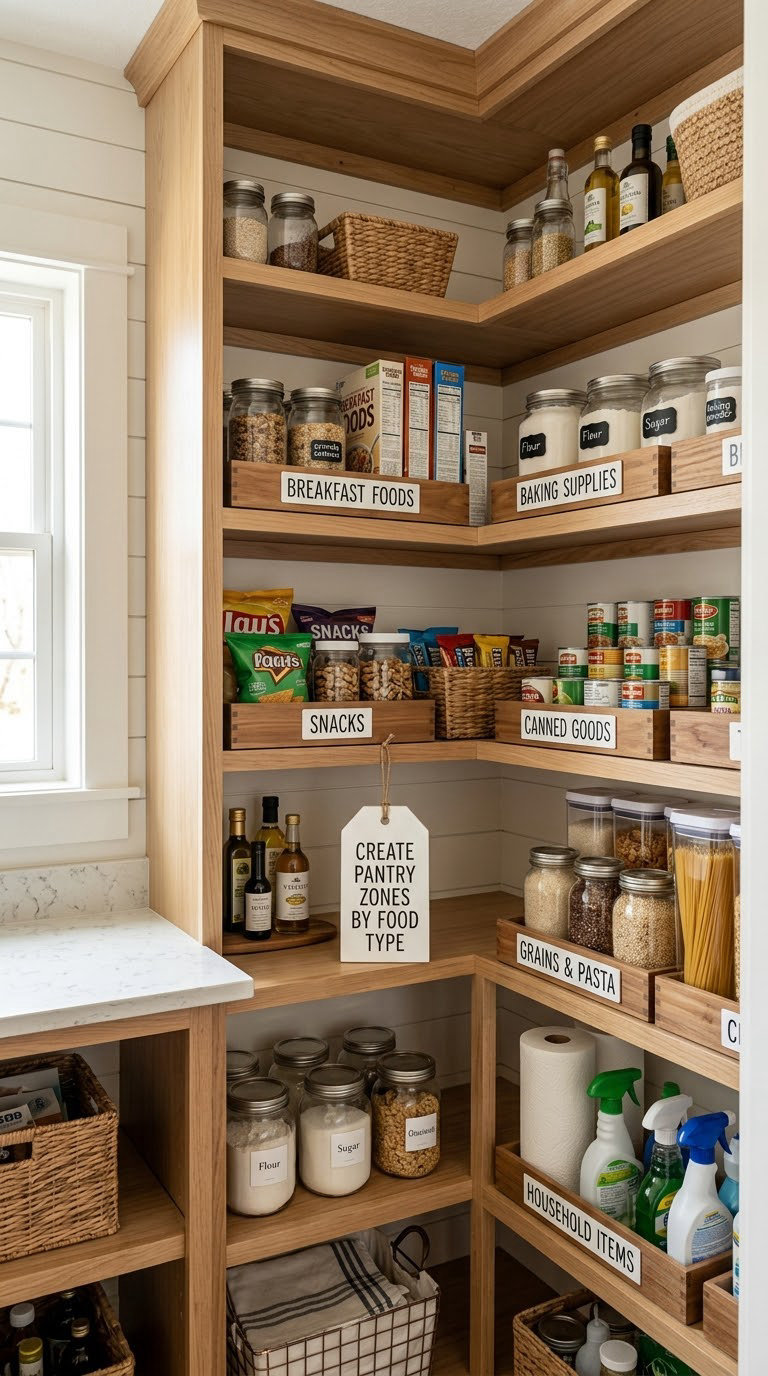
Zoning is the single change with the biggest payoff, and it costs nothing but a decision. Group breakfast goods, baking supplies, snacks, canned goods, and household extras into separate labeled zones, and searching stops. Each zone should live on one shelf level, not spread across the pantry.
How to do it:
- Pull everything out and sort into five piles: breakfast, baking, snacks, canned, household.
- Place the zone you use daily at eye level, roughly 44 to 60 inches (112 to 152 cm) off the floor.
- Use 12- to 18-inch (30 to 46 cm) bins so one bin equals one type of food.
- Label the front face of each bin, not the shelf edge, so the label travels with the food.
- Keep one zone per shelf and leave an empty shelf for overflow.
Cost: 20 to 100 USD. Difficulty: Easy DIY. Time: 1 to 2 hours.
Good to know: If you cannot drill, free zones work just as well. A row of labeled baskets on the floor counts, and so does a dedicated cabinet for snacks. Zone names on a strip of card stock taped to the shelf front cost nothing.
2. Add Vertical Storage with Wall-Mounted Shelves
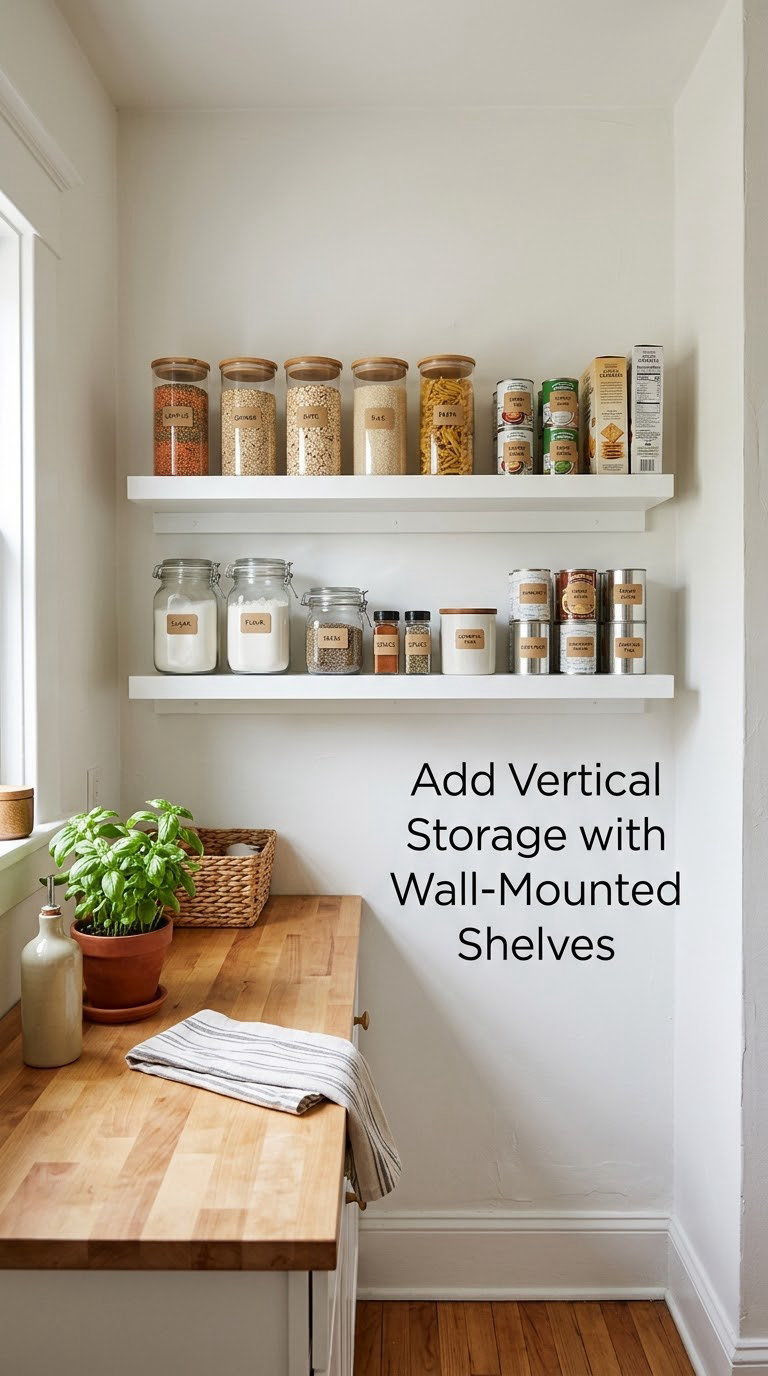
Wall-mounted shelves turn the empty band of wall above a counter or a small appliance into storage, without touching your floor or counter area. In a small kitchen that band is often the biggest unused surface you own.
How to do it:
- Measure the wall width and check the shelf depth against the depth of the items you plan to store. Eight to ten inches (20 to 25 cm) fits tins and jars.
- Tap for studs and mount into two studs, not drywall anchors alone, for anything heavier than five pounds.
- Keep a two-inch (5 cm) gap above a backsplash and six inches (15 cm) clear of any range hood or heat source.
- Anchor brackets at the back and one near each end so the shelf cannot tip forward.
- Load heavier goods at the bottom and lighter packets on top.
Cost: 40 to 250 USD. Difficulty: Moderate DIY. Time: half a weekend including drying and patching.
Good to know: Never mount over electrical outlets, plumbing, or gas lines, and stop before you reach anything electrical or structural. If you rent or the wall is tiled, use adhesive and tension-loaded shelving rated for the load instead of a drill.
3. Double Shelf Capacity with Adjustable Risers
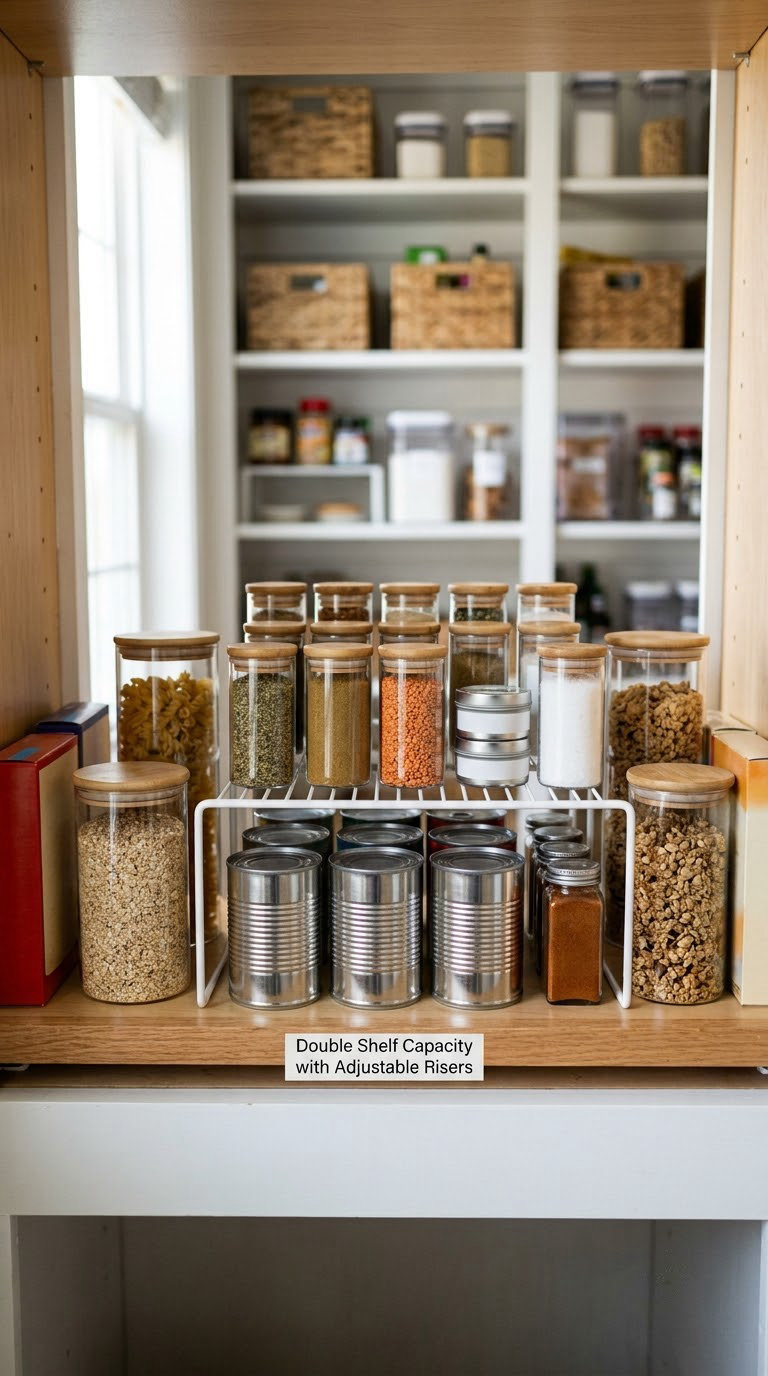
Shelf risers create a second storage level out of the dead air above short cans and squat jars. They are the cheapest way to add a tier without touching the cabinet itself.
How to do it:
- Measure the tallest item you want on top and buy risers to match. Typical riser heights run 3 to 6 inches (8 to 15 cm).
- Stand the riser at the back of the shelf so the front edge of the upper tier lines up near the front lip.
- Put tall bottles on the base shelf and short cans on the riser, so nothing hides behind a 12-inch (30 cm) olive oil bottle.
- Work from the most-used items to the rarest, and keep the front row the one you reach for.
- Slide the riser until the upper tier is flush with the shelf front, then load the heaviest cans at the back of the upper tier.
Cost: 15 to 60 USD. Difficulty: Easy DIY. Time: 30 minutes.
Good to know: Risers tip on wire shelves if you load only the front. Leave the back leg of the riser fully supported, and skip them entirely on sagging or uneven shelf boards.
4. Install Narrow Pull-Out Pantry Organizers
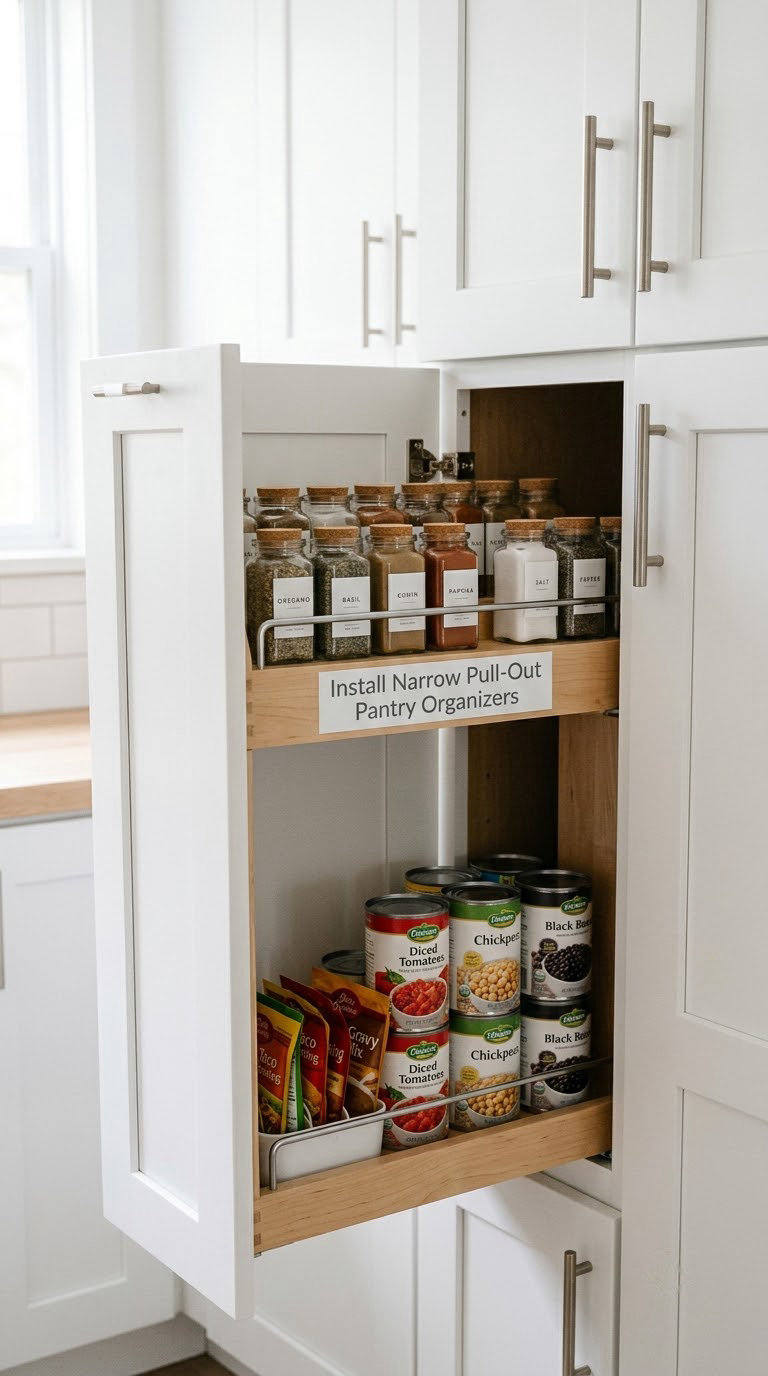
Slim two-tier pull-outs convert a narrow cabinet gap into accessible tiered storage for cans, spice jars and packets. They are especially useful in the gap beside a refrigerator or in a cabinet wedged against a wall.
How to do it:
- Measure the cabinet opening at the top, middle and bottom. The narrowest measurement is the one that matters.
- Subtract one inch (2.5 cm) from that figure for the frame and slide clearance.
- Slide the unit in empty, then load the lower tier with canned goods and the upper tier with packets and spice jars.
- Check the swing: if the door or an adjacent drawer hits the frame, mount the organizer higher.
- Add a small label on the front edge of each tier so you know what is on the second level.
Cost: 35 to 180 USD. Difficulty: Moderate DIY. Time: 1 to 3 hours.
Good to know: Weight decides how low the unit must hang. Heavy cans belong on the base shelf. If you cannot drill, tension-rod and tension-mount versions hold the same weight with zero holes.
5. Use the Inside of Cabinet Doors
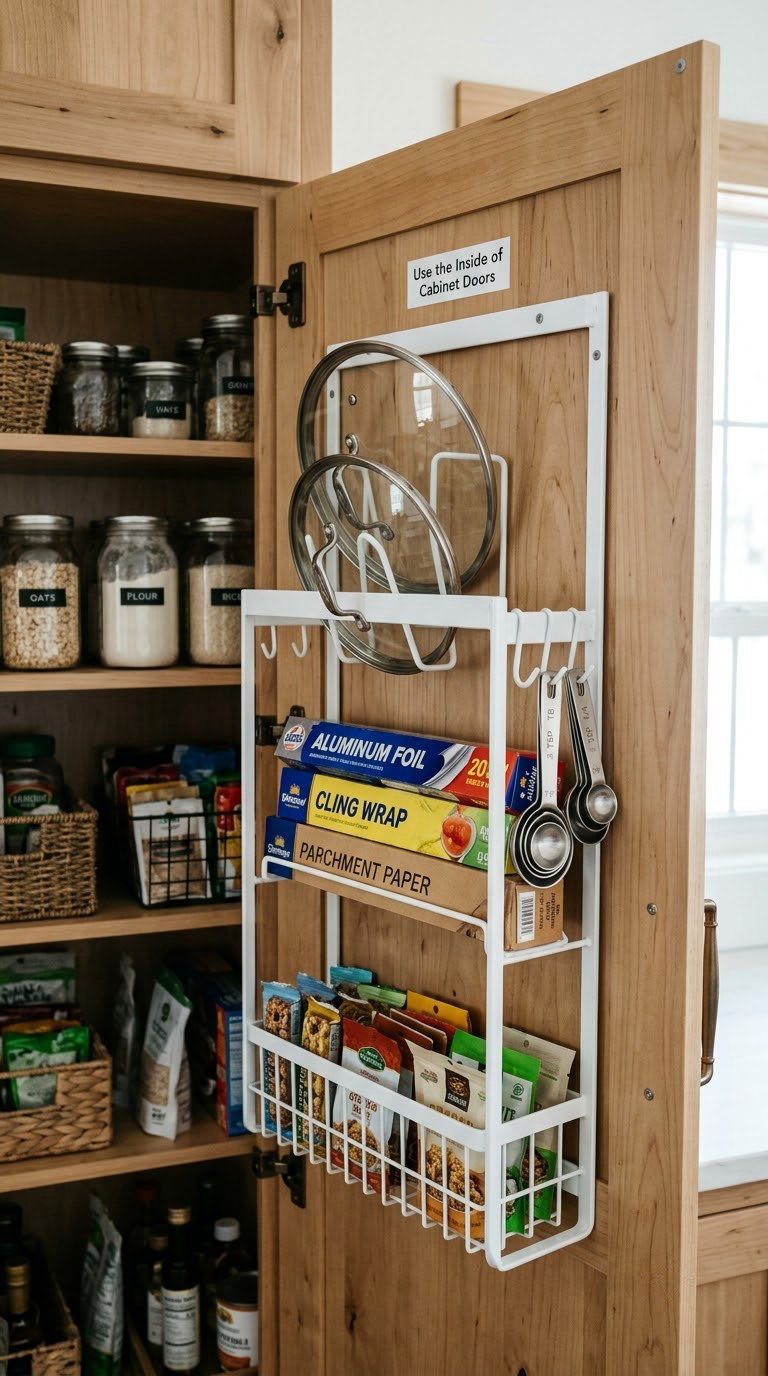
A door is a flat surface nobody counts. Slim racks, hook strips and caddies turn the inside of a cabinet door into storage for lids, food wraps, measuring tools and small cleaning supplies.
How to do it:
- Open the door fully and measure the clear inner face, then subtract one inch (2.5 cm) for the hinge side.
- Check clearance: nothing mounted on the door can stop the door from closing, and nothing can hit a shelf edge.
- Fit racks on the upper half for lids and wraps, and shallow caddies on the lower half for packets.
- Adhesive hooks are fine for light items under five pounds; screw-in racks hold anything heavier.
- Test the door swing three times before you commit to placement.
Cost: 15 to 90 USD. Difficulty: Easy DIY. Time: 45 minutes.
Good to know: Adhesive strips pull paint off cheap cabinet finishes. In a rental, use removable command hooks or a tension-mounted over-the-door rack instead of anything glued or screwed.
6. Build a Pantry Inventory System
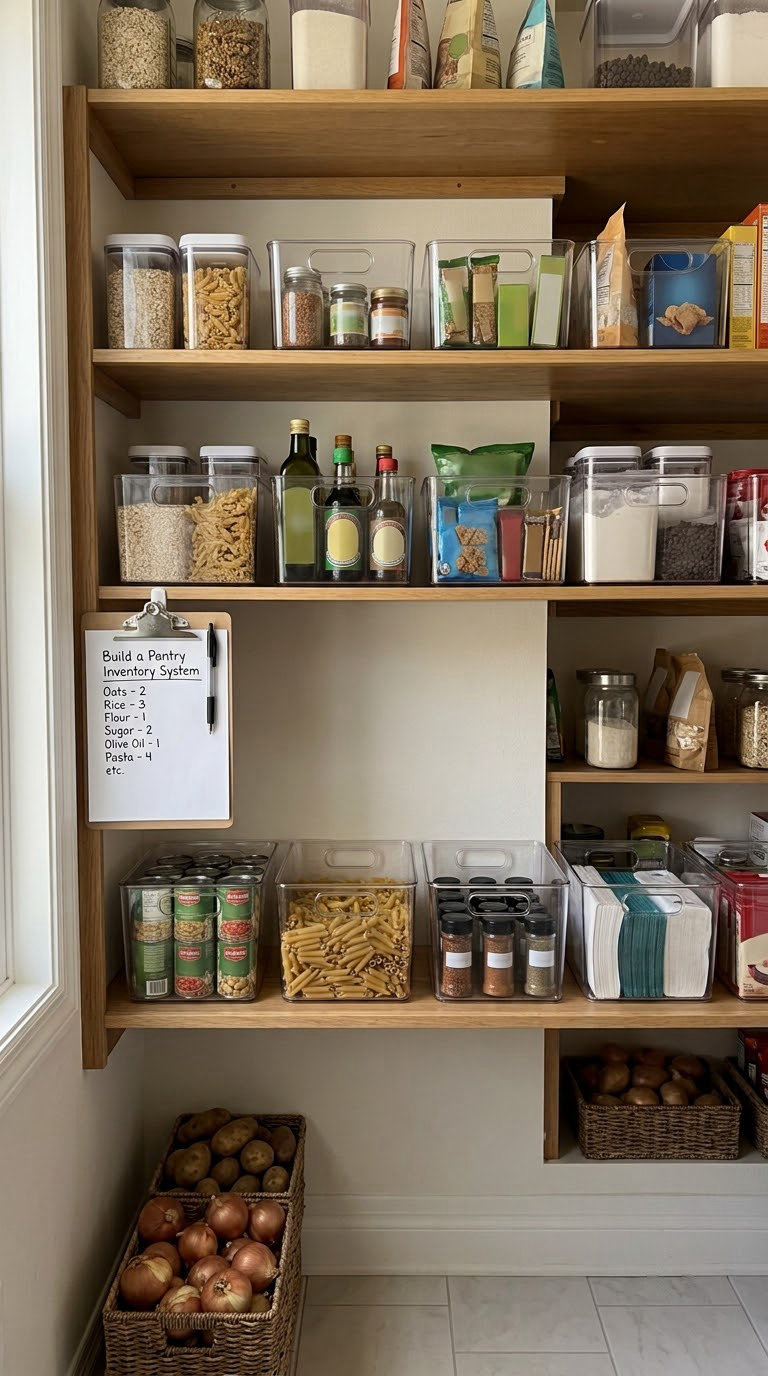
A pantry list stops duplicate purchases and expired food, and it costs about as much as a clipboard. This is the idea that keeps the other nineteen working six months later instead of two weeks.
How to do it:
- Write down every category, not every item: grains, sauces, snacks, baking, canned, household.
- Next to each category, note how many you should have on hand. Two boxes of pasta, one jar of sesame oil.
- Set a shopping threshold: when one remains, it goes on the list.
- Hang the list on the inside of the pantry door and update it as you put things away.
- Do a date check once a month: anything past its date leaves the pantry that day.
Cost: 5 to 40 USD. Difficulty: Easy DIY. Time: 1 hour to set up, 10 minutes a month after that.
Good to know: Skip the app if you will not open it. An index card in a plastic frame on the door works just as well, and a dry-erase surface you can wipe monthly is the fastest version.
7. Group Small Items in Clear, Labeled Bins
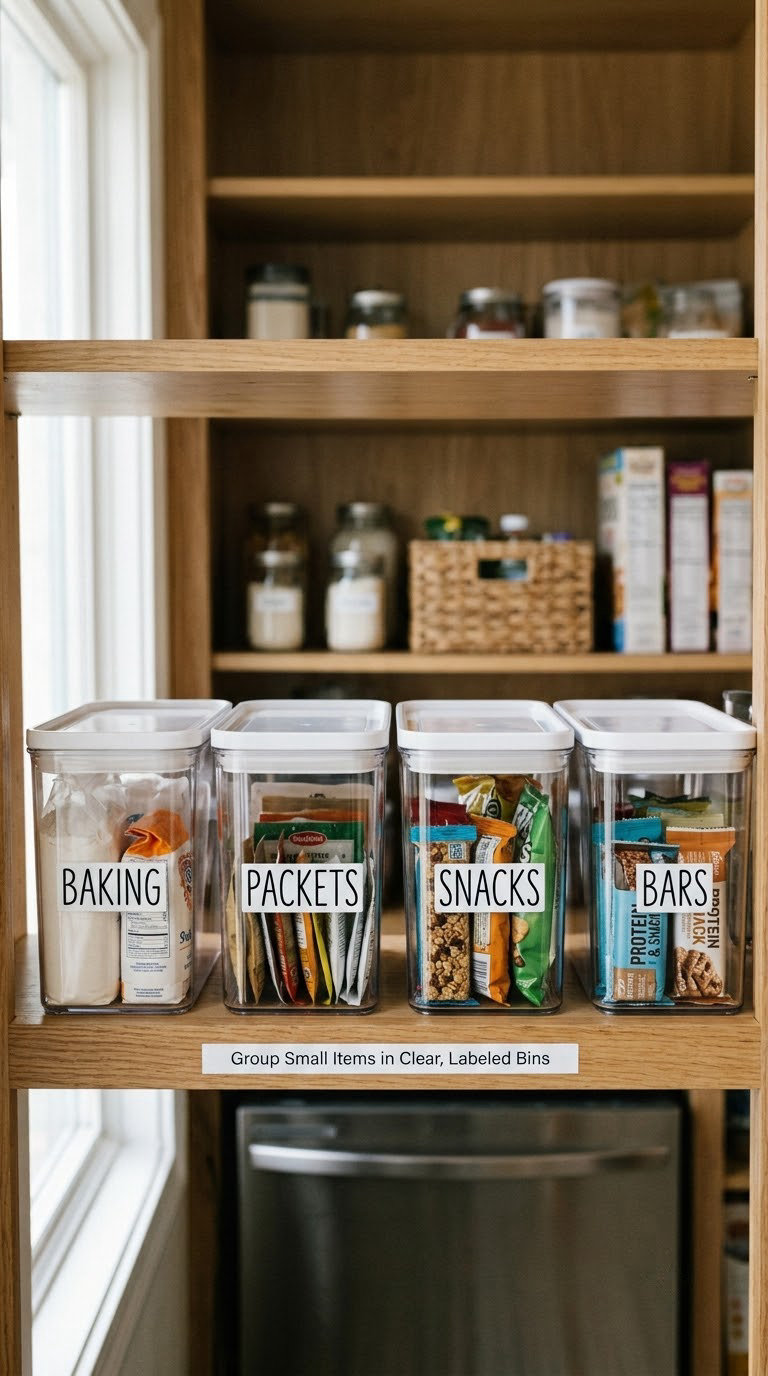
Loose packets are what makes a small pantry look and feel chaotic. Clear uniform bins contain snack bags, bars, packets and baking supplies, and you can see what is inside without pulling anything out.
How to do it:
- Measure the shelf width and depth first, then buy bins to that footprint rather than to a set size.
- Group by task, not by brand: snacks for the kids, bars for the gym, packets for lunches.
- Fit the whole bin on the shelf with room to lift it out, roughly one inch (2.5 cm) of finger clearance.
- Label the front face and keep a spare of each label on the bin itself.
- Fill each bin only two-thirds full so you can see the last item inside.
Cost: 20 to 100 USD. Difficulty: Easy DIY. Time: 2 to 3 hours including sorting.
Good to know: If your pantry is warm or ventilated, clear plastic beats airtight lids, because condensation and damp get trapped in sealed containers. Buying bins one at a time on sale also beats a mismatched set.
8. Turn Dead Corners with Lazy Susans
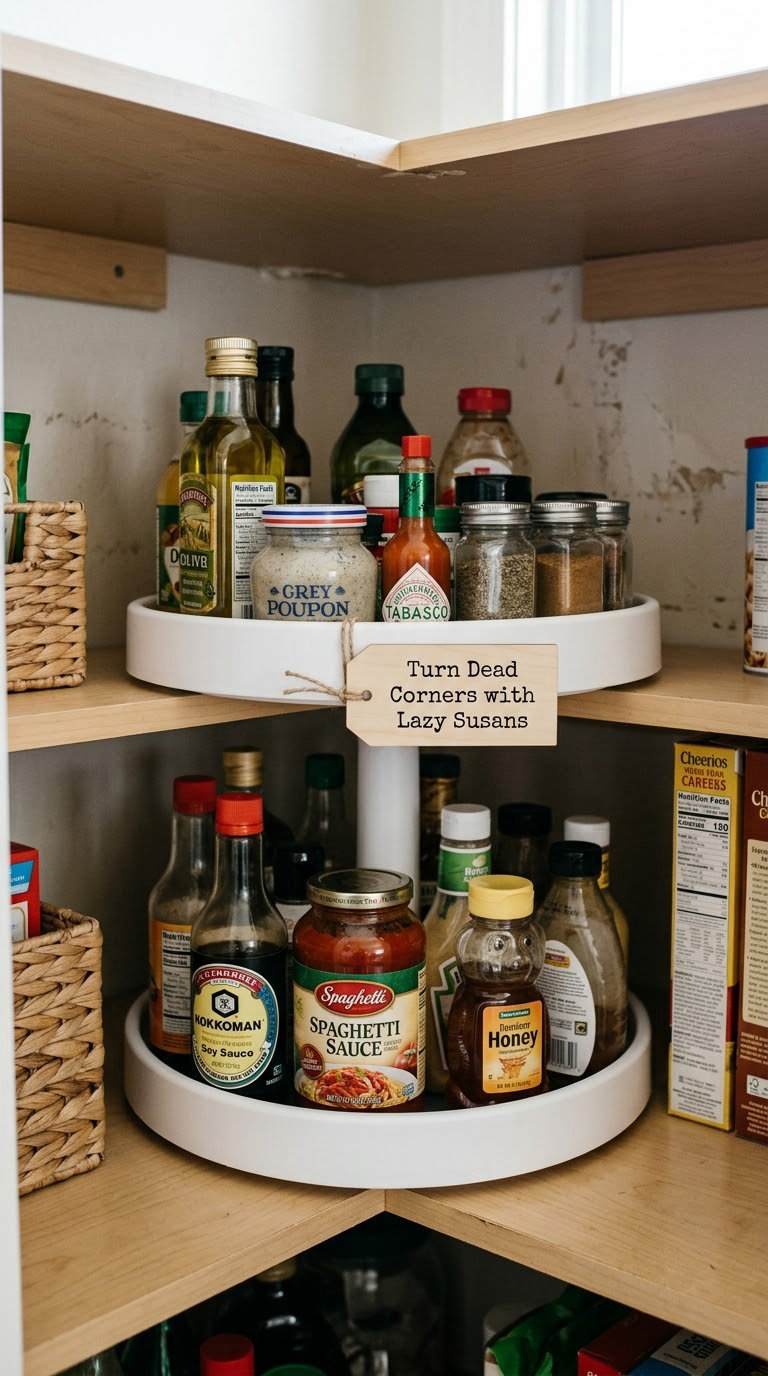
A deep, curved cabinet loses everything in the back. A two-tier lazy susan keeps bottles and jars grouped in a circle that spins toward you, so nothing is buried.
How to do it:
- Measure the cabinet’s usable diameter at the back wall, where the curve flattens, not at the door opening.
- Leave a two-inch (5 cm) gap on each side so you can spin the top tier.
- Load the lower tier with taller, heavier items first, then the upper tier with shorter ones.
- Group one type per section: sauces together, breakfast jars together, condiments together.
- Turn the top tier one rotation a week and restock as you go.
Cost: 20 to 75 USD. Difficulty: Easy DIY. Time: 30 minutes.
Good to know: Weight matters more than size. Check the listed capacity and keep glass jars off the upper tier, where a dropped weight can crack the tier below. Adhesive and tension-mounted versions work in cabinets you cannot drill.
9. Create Drawer-Style Access with Stackable Slide-Out Trays
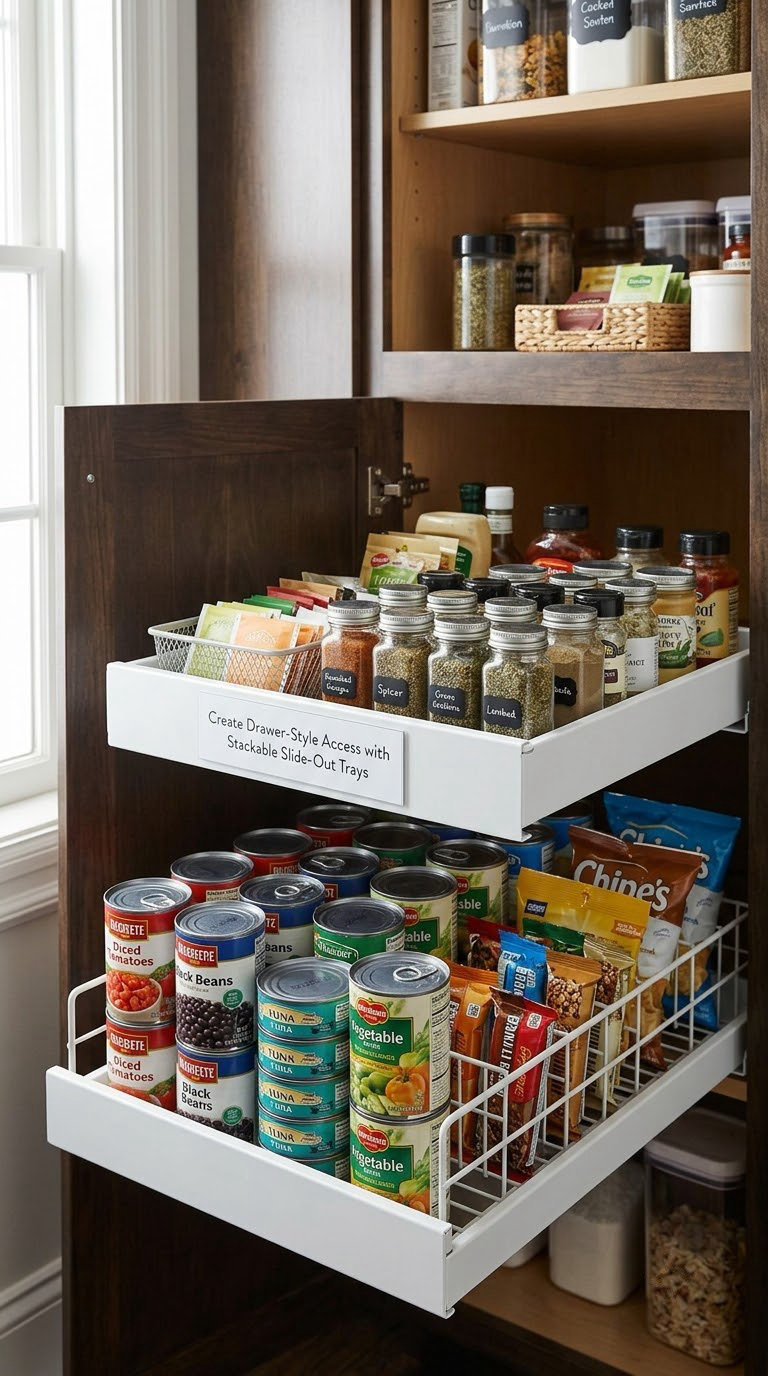
Slide-out trays expose the contents of a deep shelf without pulling everything to the front. Once a tray is out, you can see every label in it, which is the whole point.
How to do it:
- Measure cabinet depth and buy trays that leave at least one inch (2.5 cm) at the back so they can clear the rail.
- Set the height so the tray lip stops at the shelf front and nothing overhangs more than half an inch.
- Load heavier canned goods on the lowest tray and lighter packets above.
- Slide trays to equal depth so the front row lines up.
- Add a strip of painter’s tape on the tray edge with the contents written on it.
Cost: 25 to 120 USD. Difficulty: Moderate DIY. Time: 1 to 2 hours.
Good to know: Overhang is the usual failure. If the tray sticks out past the cabinet face, it will get hit by the door, and in a galley kitchen that can block the walkway entirely.
10. Hang an Over-the-Door Pantry Rack
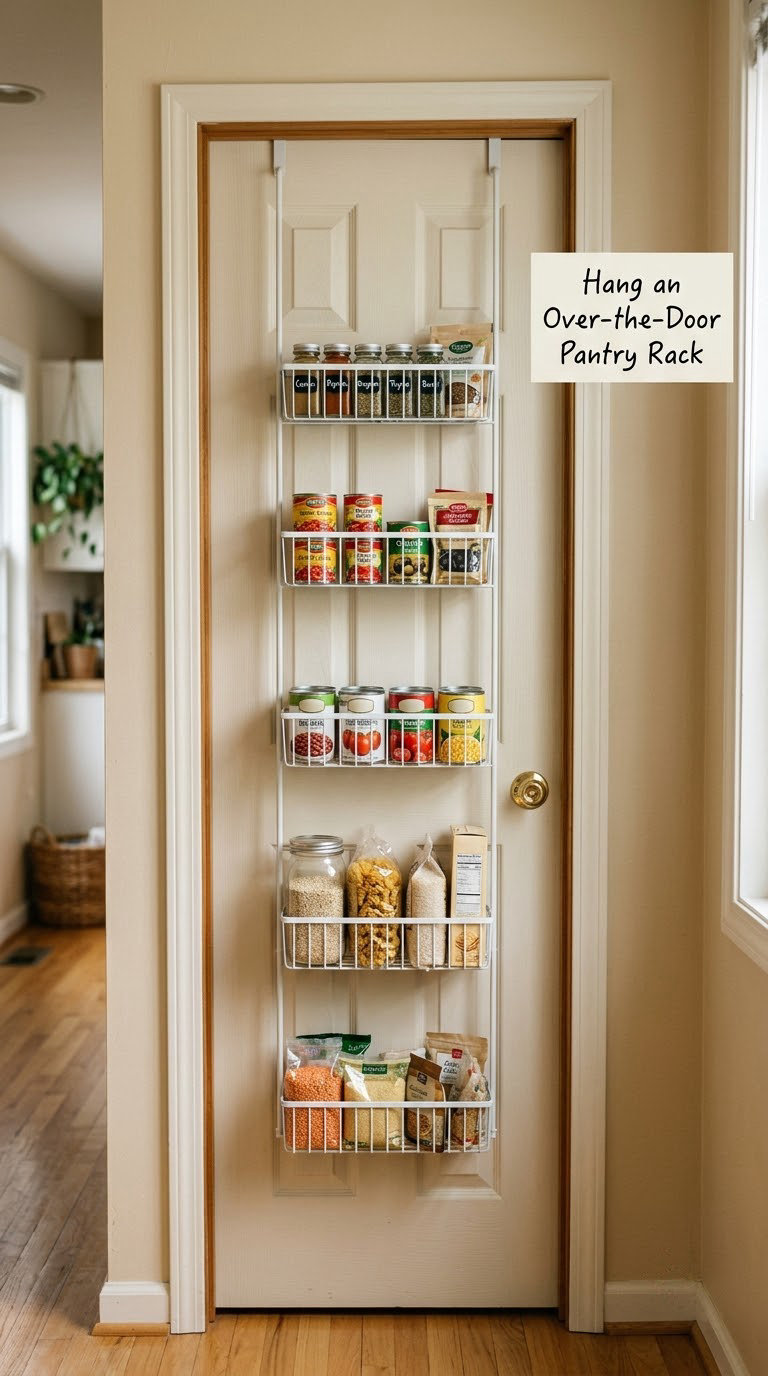
A slim over-the-door rack adds real storage for lightweight cans, spices and dry goods without using any floor space at all. It works on almost any pantry door, including one that swings into a tight kitchen.
How to do it:
- Measure the door thickness at the top, middle and bottom, then subtract half an inch (1.3 cm) for the hook gap.
- Check clearance between the rack pockets and the shelves behind the door. Most need three inches (8 cm).
- Hang it and let the door rest closed for an hour before loading, so the weight settles.
- Keep cans and dry goods on the rack; leave anything glass or heavy on a real shelf.
- Leave the top pocket empty so the hook mechanism stays accessible.
Cost: 20 to 75 USD. Difficulty: Easy DIY. Time: 30 minutes.
Good to know: Ventilation matters. Over-the-door storage is fine for dry goods and sealed cans, but not for anything damp, and not for items that need cool temperatures. A no-drill tension-hook version removes the screw holes entirely.
11. Pull Out Recycling and Trash Bins
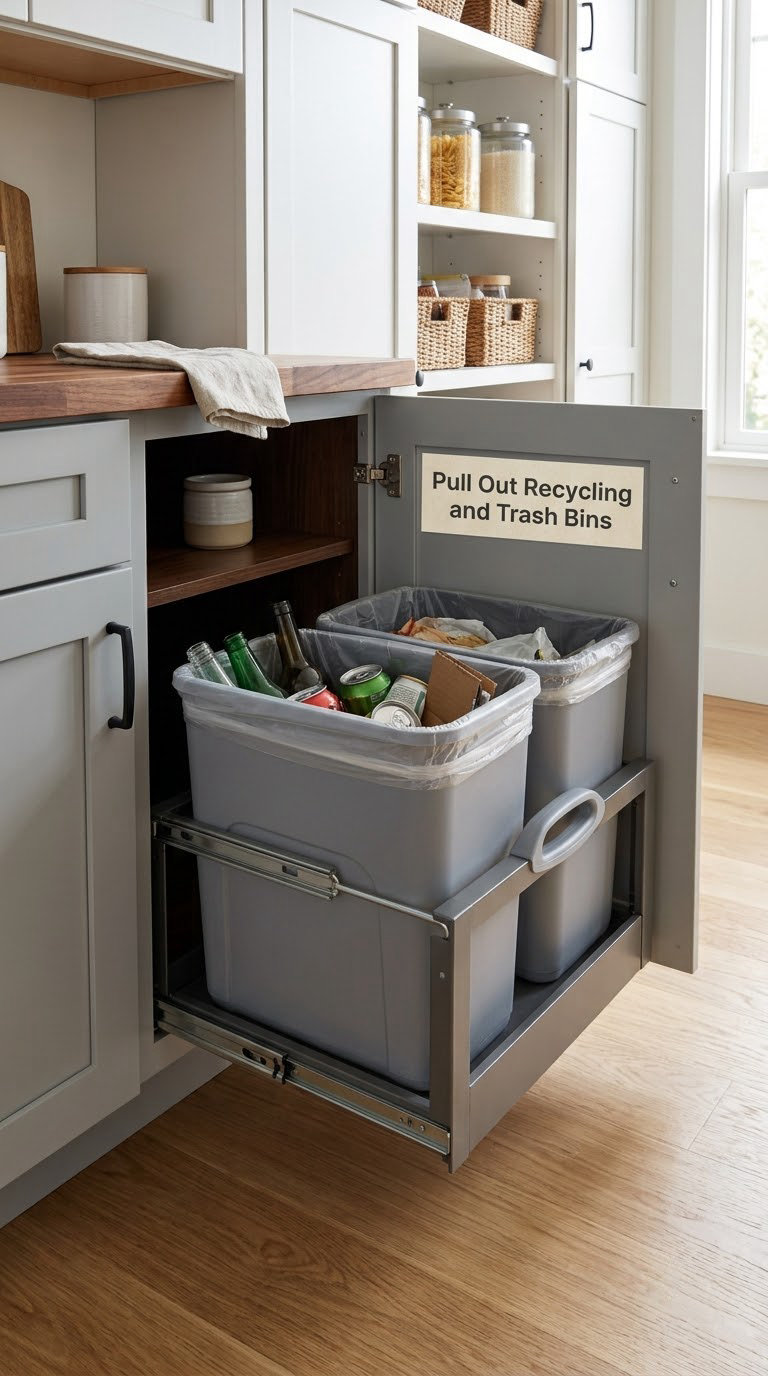
Slim pull-out or tilt-out containers separate waste without eating the cabinet floor space it used to sit on. That freed floor area goes straight back to your food.
How to do it:
- Measure the cabinet width, height and the depth needed to pull the bin out, usually 18 to 22 inches (46 to 56 cm).
- Fit the bins side by side, heaviest and recycling on the frame side.
- Line the bins and label the front lip of each with a color word, not just an icon.
- Leave one inch (2.5 cm) of clearance on each side for the slides to move.
- Keep the floor of the cabinet clear so you can pull a bin out without dragging a bin behind it.
Cost: 25 to 160 USD. Difficulty: Moderate DIY. Time: 2 to 4 hours, plus a dry fit before you finalize.
Good to know: Under-sink cabinets often have a drain or supply pipe in the upper back corner, so check the clearance beneath it before you buy. A bin that blocks airflow there will smell within a week.
12. Store Food Containers with Nesting and Dividers
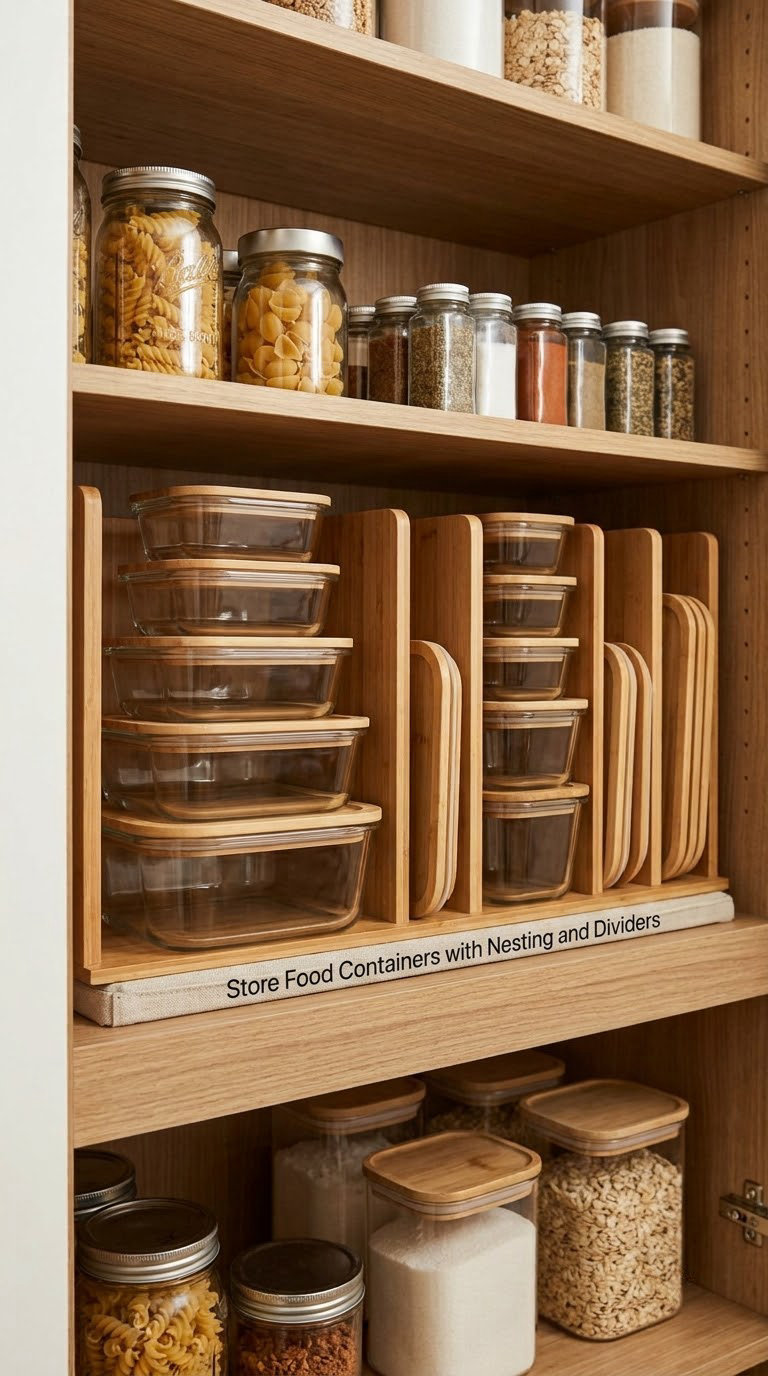
Nesting reusable containers, a lid organizer and vertical dividers reclaim cabinet space and kill the mismatched-lid drawer that eats a whole shelf. This is one of the fastest visible wins in a small kitchen.
How to do it:
- Keep only containers you actually use. Match them into three or four nesting sizes.
- Stand lids upright in a divider rack so each one is visible from the front.
- Store glass containers on the lowest shelf with a small mat or liner under the stack.
- Group plastic and glass separately, because they nest at different heights.
- Label the shelf edge with the sizes you keep there so returns go back to the right stack.
Cost: 15 to 100 USD. Difficulty: Easy DIY. Time: 1 to 2 hours.
Good to know: The cheapest version of this idea costs nothing: keep the containers you already own, drop the ones without lids, and use a vertical divider made from a cut piece of cardboard. Plastic lids warp in heat, so store them away from the oven wall.
13. Protect Shelf Liners and Simplify Cleaning
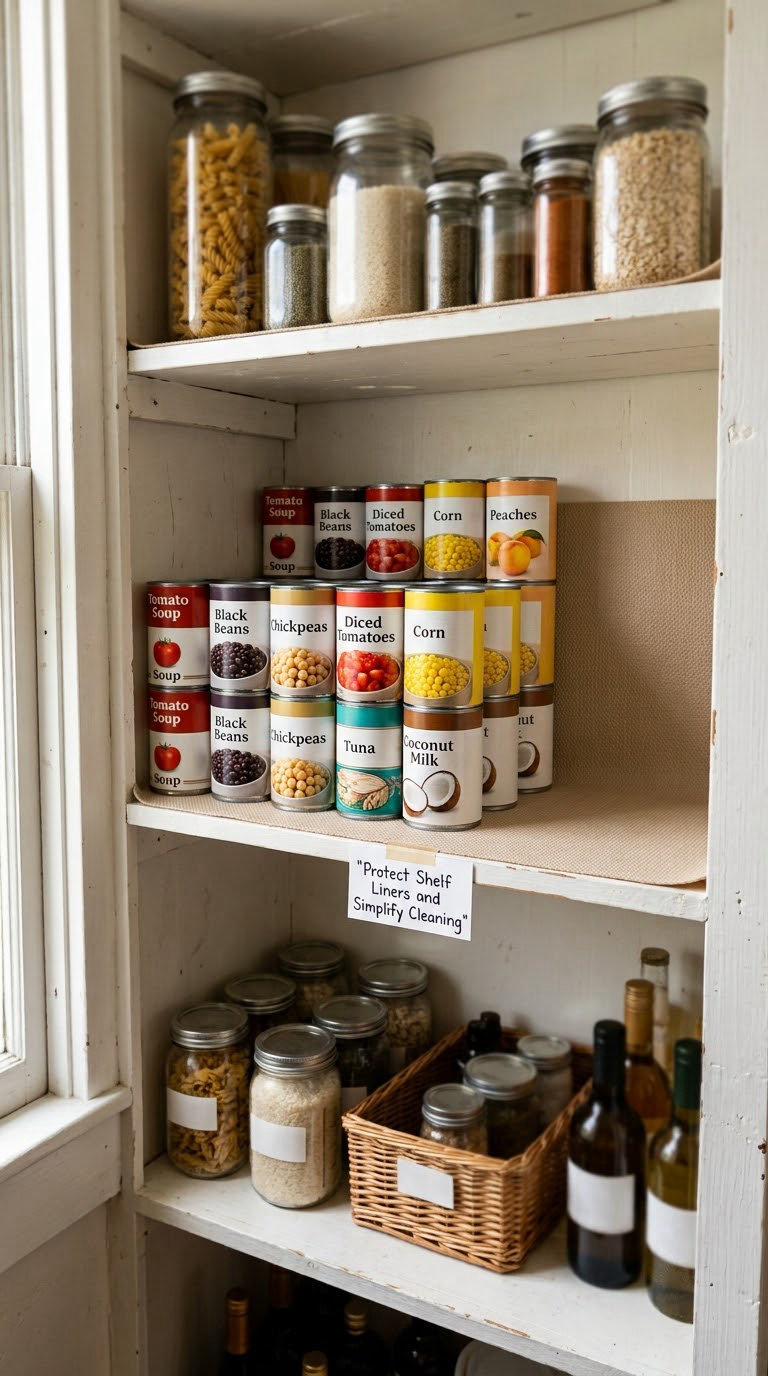
Washable, non-slip shelf liners protect cabinet bases, define zones and make cleanup a two-minute job instead of a Saturday. On wire shelves they also stop cardboard boxes from tipping.
How to do it:
- Measure each shelf and cut liners to fit with a quarter inch (6 mm) overlap at the edges.
- Choose a non-slip backing so liners stay put when you pull a bin out.
- Lay the liner so the front edge tucks under the shelf lip and stays invisible.
- Change the liner color per zone if you like: one for baking, one for canned, one for snacks.
- Wash liners in a sink or dishwasher every month, then hang to dry flat.
Cost: 15 to 75 USD. Difficulty: Easy DIY. Time: 45 minutes.
Good to know: A smooth rubber mat with no grip is worse than nothing because glass slides on it. Only use food-safe adhesives near food, and never cover a shelf vent or radiator grate with a liner.
14. Use a Two-Tier Corner Organizer
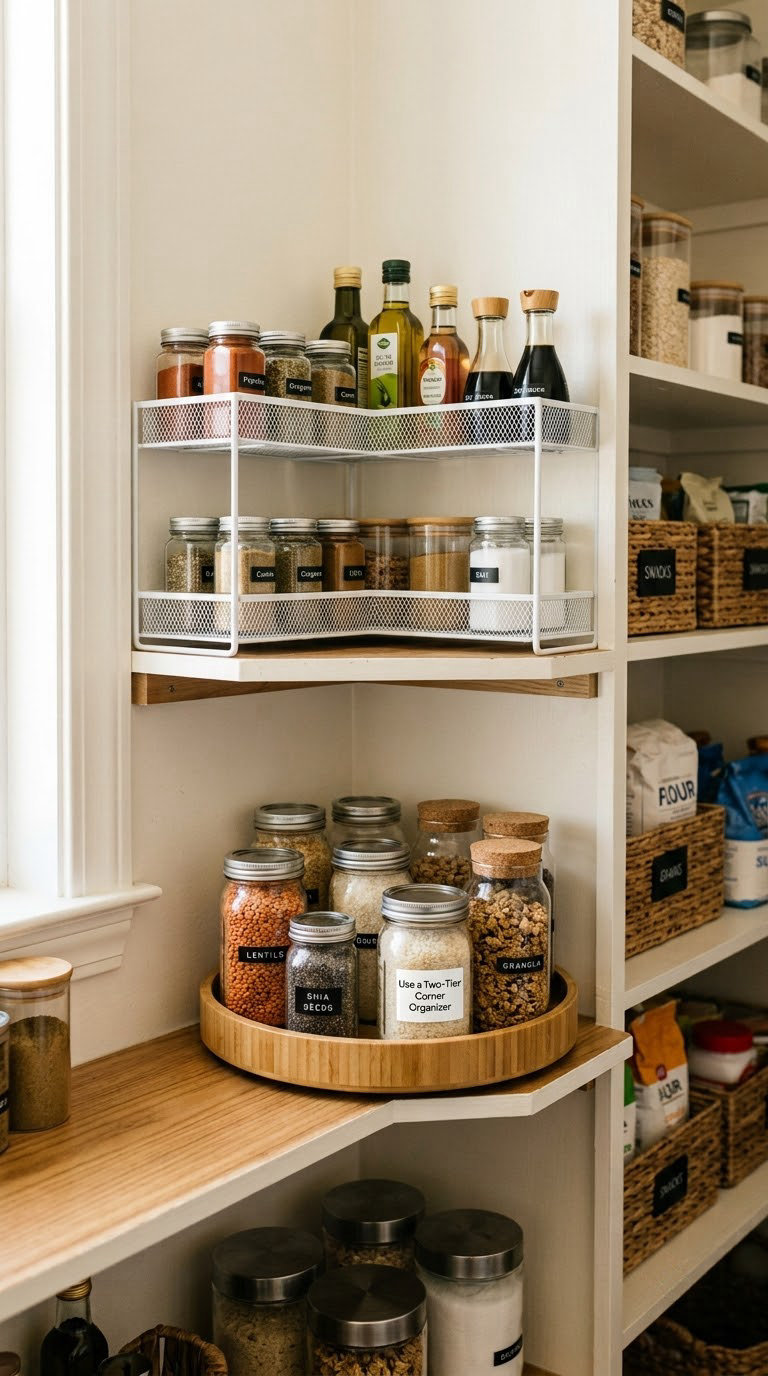
A corner shelf unit stacks storage above a lazy Susan or inside an awkward blind corner where a normal shelf cannot go. It turns the least usable square foot in the pantry into two levels.
How to do it:
- Measure the corner diagonally, not across the front, and buy to the diagonal figure.
- Check the weight limit printed on the unit, usually printed near the base.
- Place the unit on the lowest shelf first, then build upward.
- Keep taller bottles on the lower tier and shorter jars on top so labels stay visible.
- Leave one corner section empty so the unit stays light enough to spin or pull out.
Cost: 25 to 100 USD. Difficulty: Easy DIY. Time: 45 minutes.
Good to know: Right-handed and left-handed versions exist because the tiers angle differently. Check which side your door hinges on before you order, and use a tension-loaded corner unit if you cannot drill.
15. Add Hooks Under Shelves and Cabinets
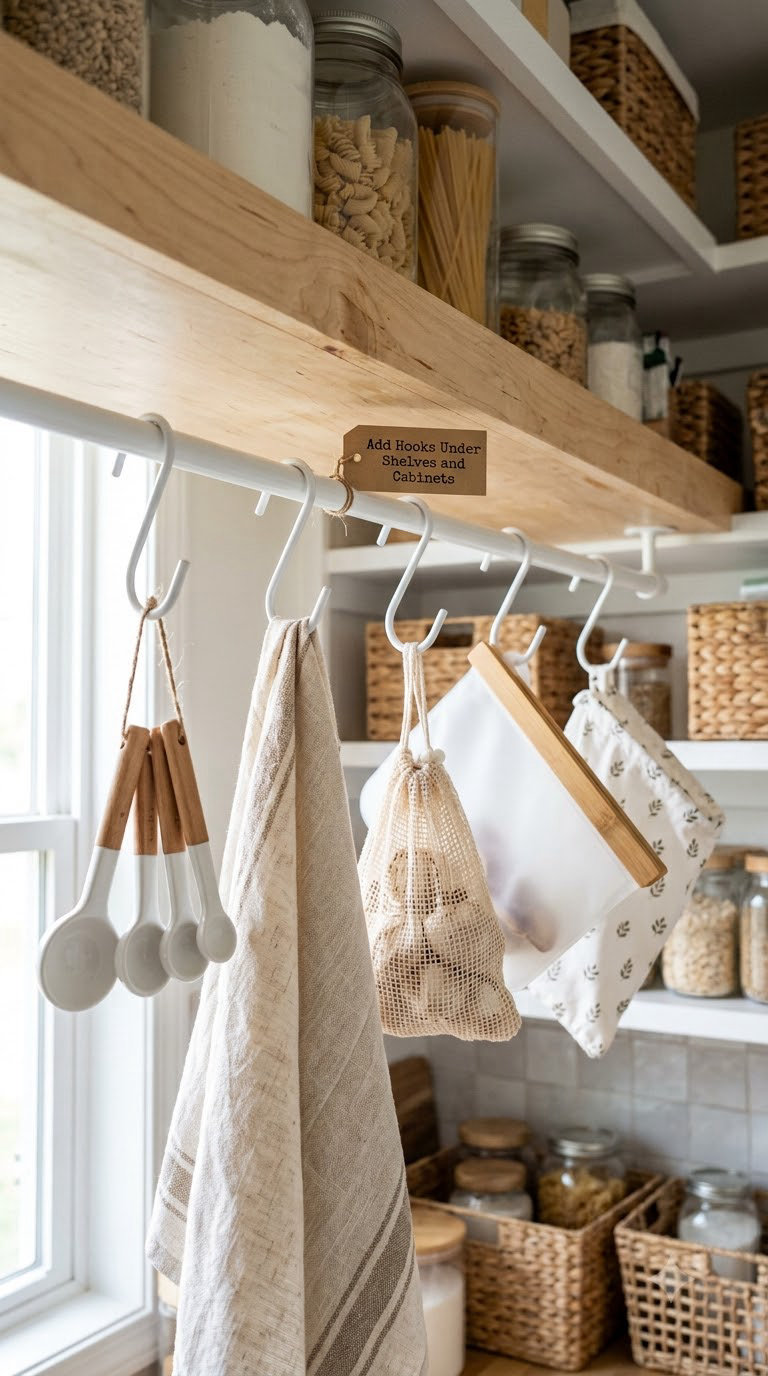
Low-profile S-hooks or mounted hooks use the empty band under a shelf for measuring tools, towels, reusable bags and small utensils. It costs almost nothing and takes almost no time.
How to do it:
- Measure the gap under the shelf: four inches (10 cm) of clearance is comfortable for most tools.
- Place hooks near the front edge so the item hangs within reach, not at the back.
- Limit each hook to a few pounds, and never hang anything you need to pull down with one hand and heavy.
- Space hooks three inches (8 cm) apart so towels and bags do not bunch.
- Test the fit with the cabinet door open before drilling.
Cost: 10 to 50 USD. Difficulty: Easy DIY. Time: 30 minutes.
Good to know: Overloading hooks on a particleboard shelf is how shelves sag. Keep to the load limit and stay under three items per hook. Removable adhesive hooks are the renter version.
16. Add Upper-Cabinet Baskets for Overflow Storage
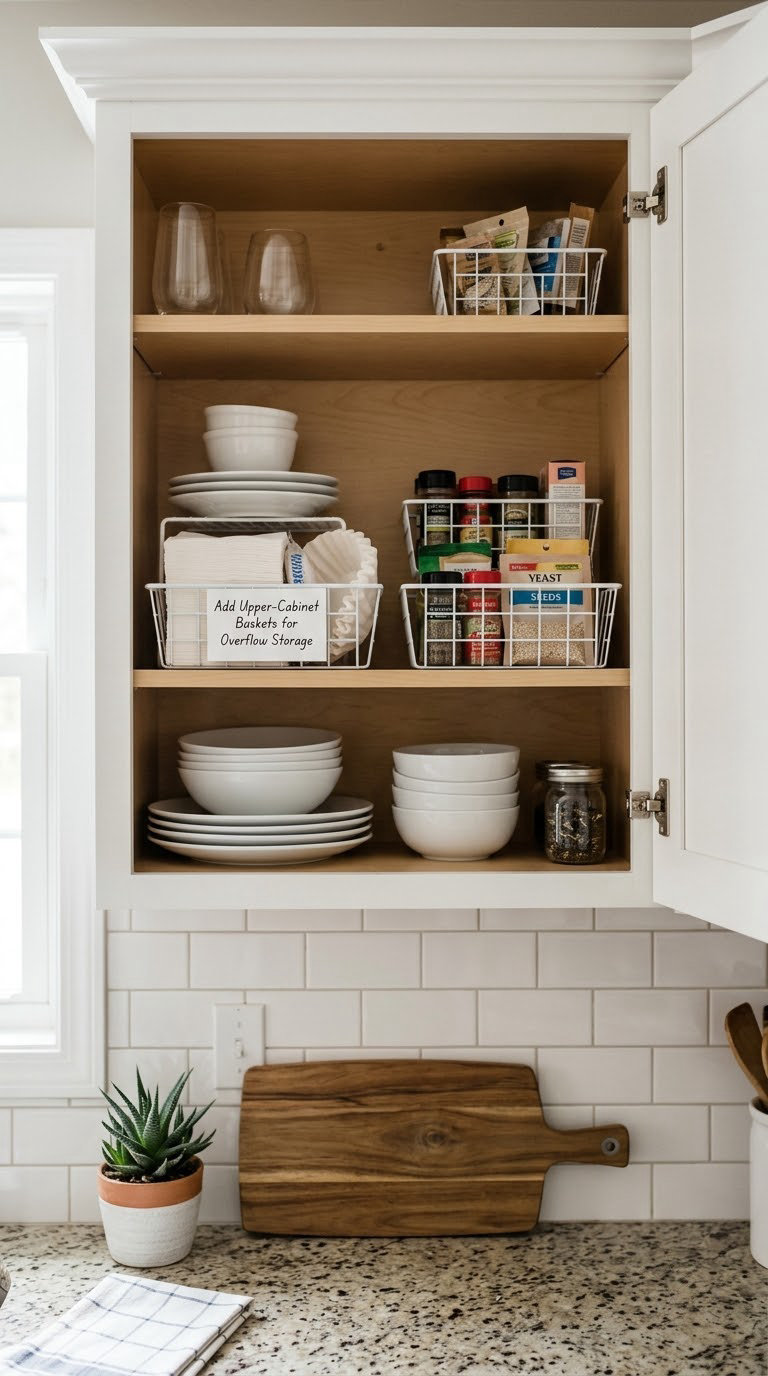
Shallow wire baskets create a dedicated overflow zone for low-use dishes, paper goods and lightweight food packages. They keep odd shapes contained without needing new cabinetry.
How to do it:
- Measure the upper cabinet shelf and the height between the shelf and the shelf above. Eight to ten inches (20 to 25 cm) is the usual sweet spot.
- Match basket depth to the shelf so nothing sticks past the door face.
- Put paper towels, napkins and lightweight packaging in one basket, spare dishes in another.
- Leave the front lip of each basket uncovered so you can see the top item without lifting the whole basket.
- Keep the heaviest items on the bottom shelf of that cabinet, never in an upper basket.
Cost: 20 to 120 USD. Difficulty: Easy DIY. Time: 1 hour.
Good to know: Wire baskets are for light things only. Glass plates and stoneware in an upper cabinet are a falling hazard, and a full basket can swing when the door shuts, so leave a little weight in it.
17. Park a Slim Rolling Cart in the Pantry
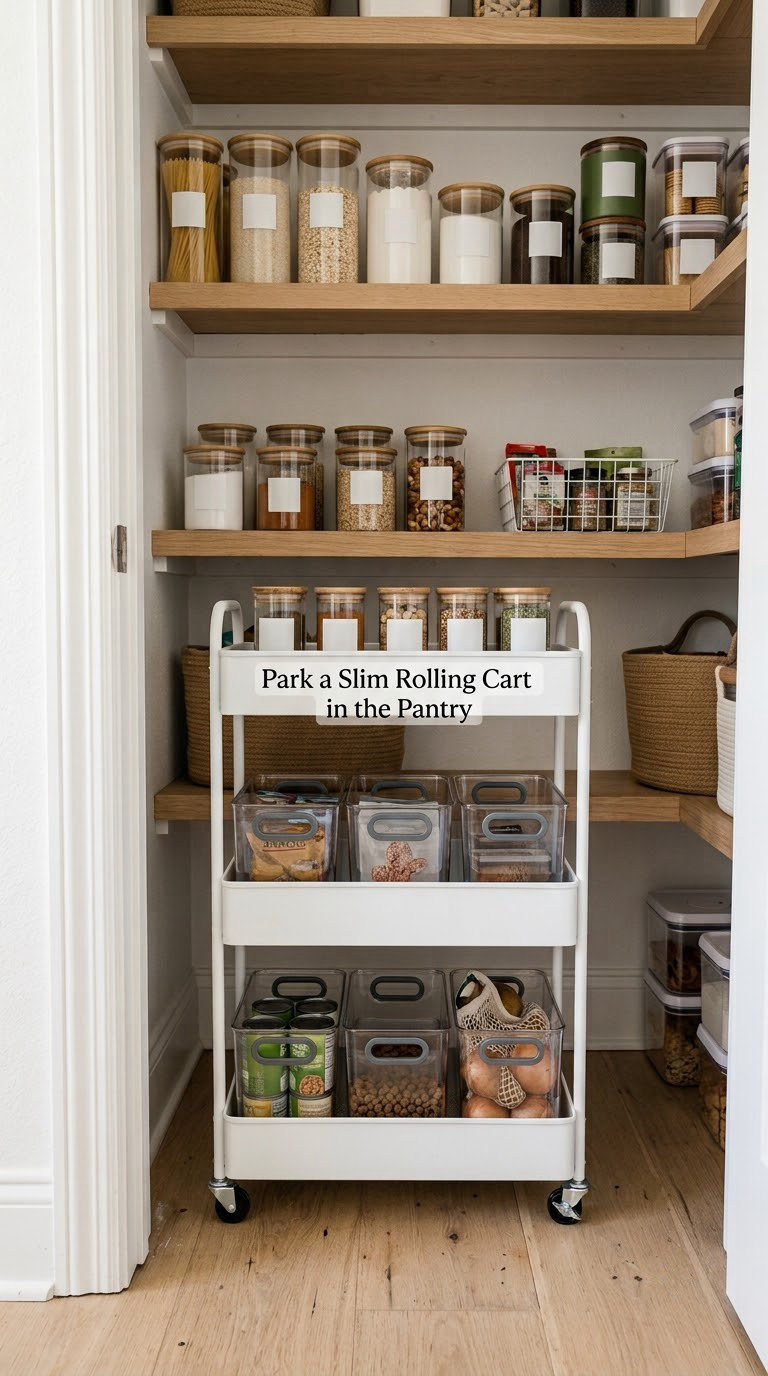
A narrow rolling cart creates mobile storage, gives you floor-level shelves that are easy to clean underneath, and lets you take everything out at once for a wipe-down. In a 15-inch (38 cm) gap beside a refrigerator, it is the difference between usable and not.
How to do it:
- Measure the gap width and leave one inch (2.5 cm) of clearance on each side.
- Check caster spacing so the cart rolls flat instead of wobbling.
- Load heavy cans on the bottom shelf and light packets on top.
- Roll it out from the wall and clean the floor beneath instead of reaching under the shelves.
- Use the top surface as a landing zone for groceries you have not put away yet.
Cost: 30 to 150 USD. Difficulty: Easy DIY. Time: 1 hour.
Good to know: Measure the doorway, not just the gap, or the cart will not get into the pantry at all. In a rental or a home with mobility needs, a fixed shelving unit is steadier than a cart on casters.
18. Dedicate a Narrow Cabinet to Spices
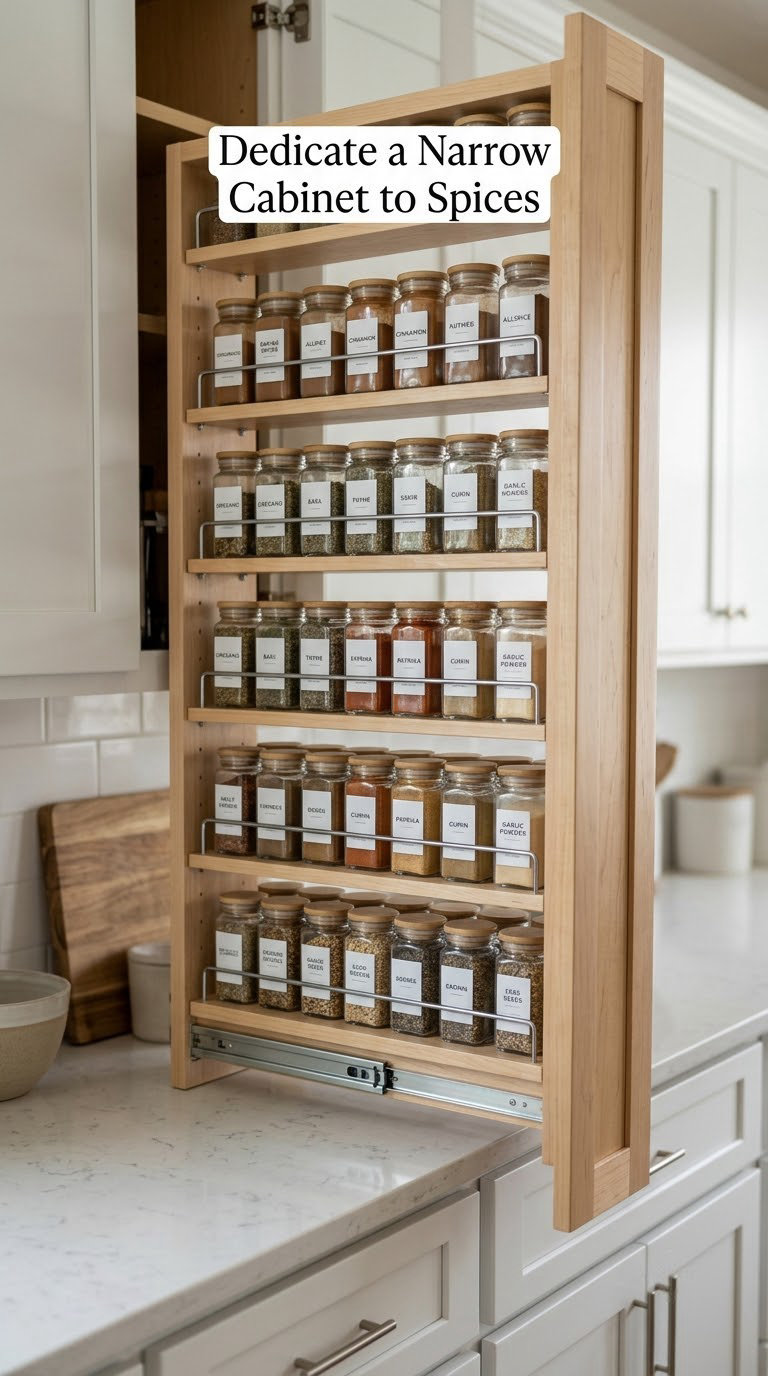
Spices take over a shelf because nobody wants them mixed in with the cereal. Pull-out racks, door racks or tiered trays turn a narrow cabinet into a dedicated spice station you can actually see.
How to do it:
- Measure the cabinet opening and the shelf spacing between the rails before buying a rack.
- Keep spices away from the range and any window. Light and heat fade them faster than age does.
- Group by type: baking spices together, savory spices together, grill blends together.
- Write the open date on the jar base with a paint pen, not the lid, because lids get swapped.
- Discard anything past six months after opening if the aroma has faded.
Cost: 20 to 100 USD. Difficulty: Easy DIY. Time: 1 to 2 hours.
Good to know: A narrow cabinet works fine with a tiered tray instead of an installed rack, which makes it fully renter-friendly. Glass jars in a pull-out tray can tip, so fill them no more than two-thirds full.
19. Use a Shelf Guard to Create a Front Fence
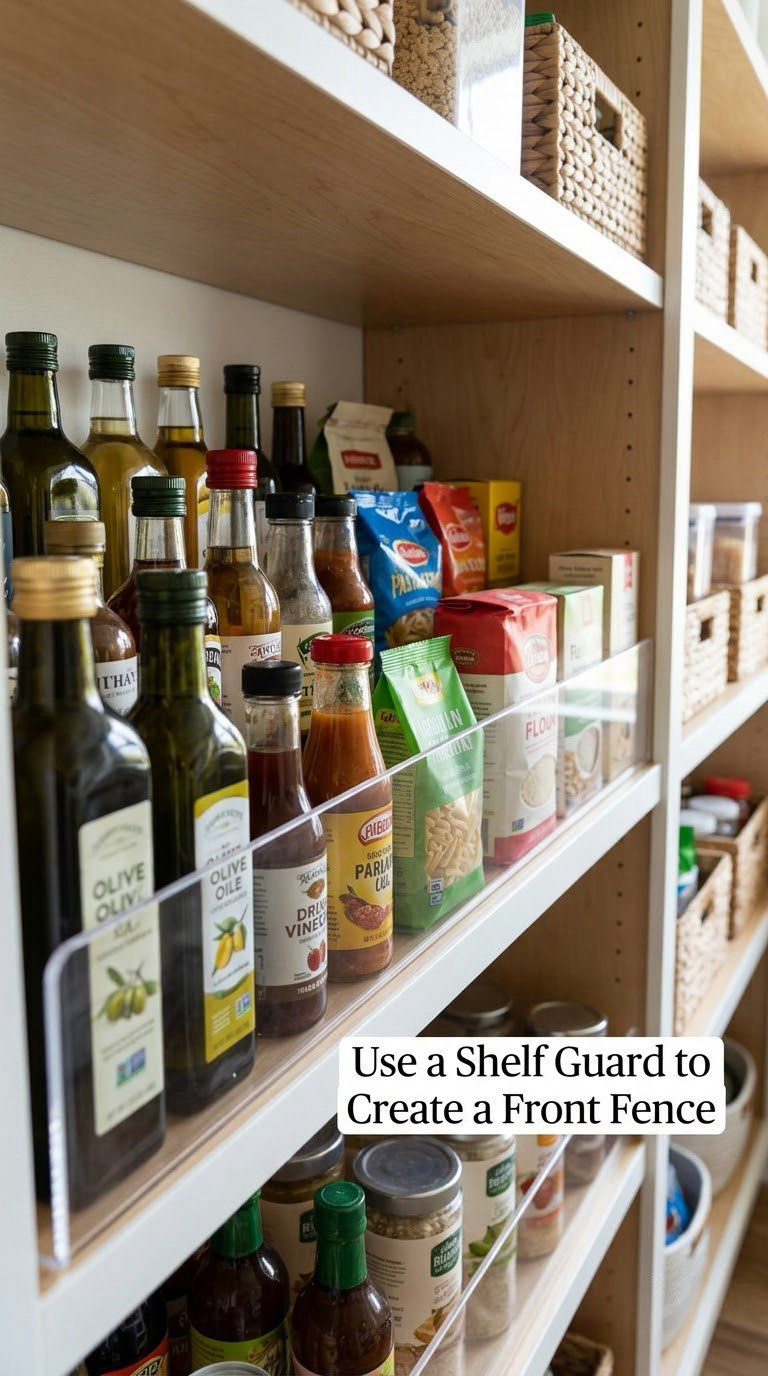
A shelf guard keeps bottles, jars and packets upright and visible at the front of a deep shelf, so nothing rolls off and nothing gets lost behind the rest.
How to do it:
- Measure the shelf width and choose a guard at least one inch (2.5 cm) narrower than the opening.
- Clip or mount it at the front lip, roughly two inches (5 cm) high, so the contents stay visible.
- Line tall bottles along the back of the guard so short packets can sit in front.
- Leave a small gap at one end for sliding items in and out.
- Use an airtight guard only in a cool pantry, and a ventilated one anywhere warm.
Cost: 10 to 45 USD. Difficulty: Easy DIY. Time: 20 minutes.
Good to know: A fully enclosed guard traps condensation in a humid pantry, which is how cereal gets stale and metal lids go rusty. Keep a ventilated version if the kitchen runs warm or the pantry has no window.
20. Move Rarely Used Items to a Portable Overflow Bin
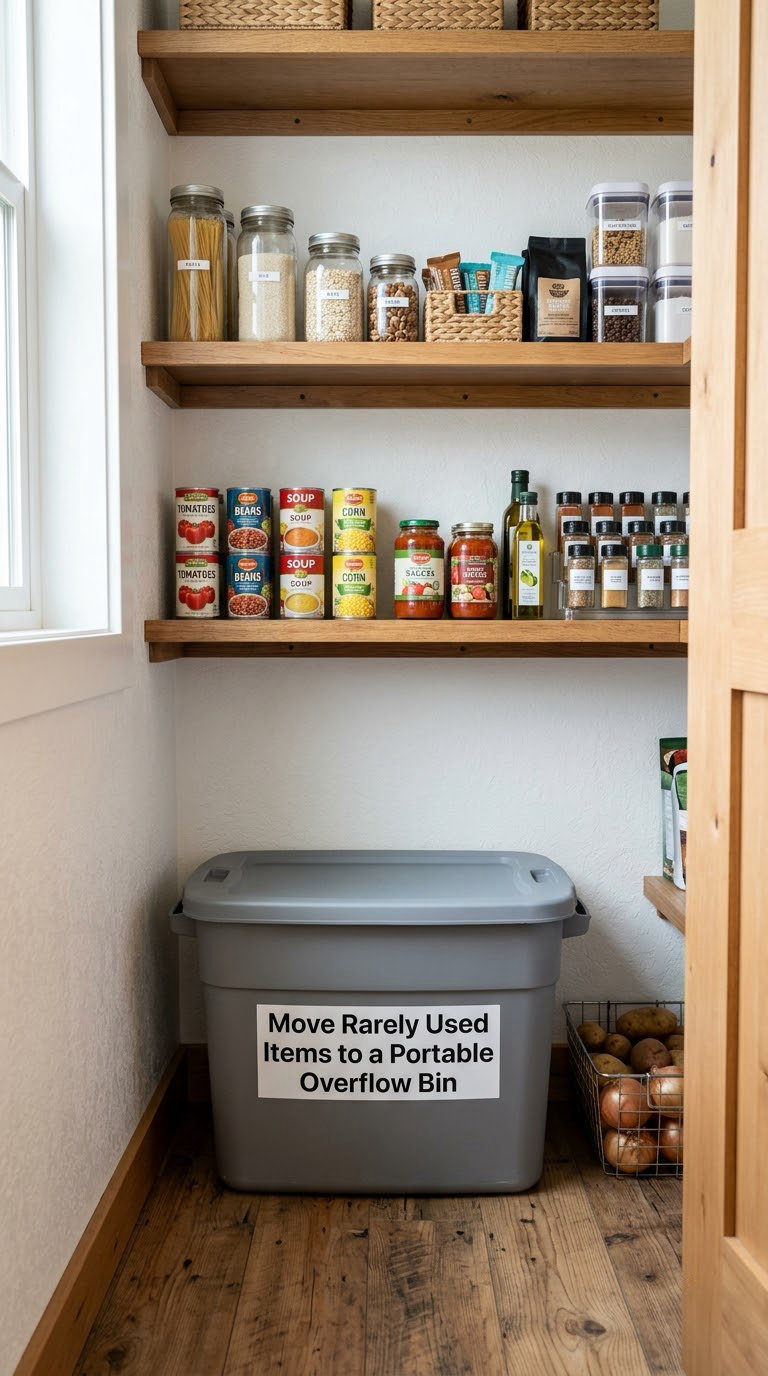
A lidded, labeled overflow container keeps occasional and seasonal goods in one removable unit, so the working pantry stays small and focused. It is the idea that stops you from overfilling the shelves you just organized.
How to do it:
- Pick a breathable container for dry goods, and an airtight one only for humid items like dried beans.
- Label the front with the category and the season, such as “holiday baking, November to January”.
- Fill no more than three-quarters full so the lid closes without force.
- Park it on the floor in one corner or under the lowest shelf.
- Swap its contents when the season changes and check dates on the way in.
Cost: 15 to 70 USD. Difficulty: Easy DIY. Time: 45 minutes.
Good to know: If your pantry has no floor clearance, this becomes the shelf-level version: a single lidded bin on the lowest shelf holds the overflow and slides out when you need it. Avoid airtight plastic for anything that still holds moisture.
Planning Tips
Measure before you buy anything
Write down the opening width at the top, middle and bottom of your pantry, plus shelf depth and the door swing. The narrowest measurement is the one that decides what fits, and shoppers who skip it end up with organizers that wobble or doors that will not close. If you are still narrowing down the hardware itself, our buyer’s reviews of pantry organization systems cover the standing options.
Clear and sort before purchasing. Pull everything out, discard anything expired, and group into zones first. It is tempting to buy bins during the tidy-up, but you cannot size a bin for a zone you have not defined.
Buy versatile pieces before specialist pieces. Uniform clear bins and a set of risers will do more in most small pantries than any single specialty tool, and they work in every zone later.
Hold back 10 to 15 percent of your budget. Most pantry refreshes need one extra shelf, one more label strip, or a bin that is slightly wider than expected. Planning on spending exactly what you budgeted is how a Saturday becomes a Sunday.
Check weight limits and clearance specs on anything mounted or hung. Loaded risers, over-the-door racks and upper baskets have published limits, and a slim pantry with heavy glass goods will find them fast.
Work in this order: zones first, then vertical space, then containers, then labels. Storage bought before the zones exist ends up rearranged twice. For kitchens with no pantry closet at all, start with pantry-free kitchen storage ideas instead of forcing these ideas onto a cabinet.
Frequently Asked Questions
What is the best pantry organization method for a small kitchen?
Zones first, then vertical space, then uniform containers. Group food into five categories, put the daily-use zone at eye level, add one level of vertical storage with risers or wall shelves, and decant only what fits a matching container. That sequence fixes the real problem, which is that nothing in a small pantry has an assigned home.
How do I organize a pantry that has no shelves?
Create shelves with floor-to-ceiling tension poles, over-the-door racks, wall-mounted brackets and a slim rolling cart. Work from the wall outward: mount two shallow shelves, hang a door rack on the back of the door, then park a cart in the gap beside the appliance. Keep the heaviest items at the bottom and the lightest at eye level.
What containers are best for a small pantry?
Clear, uniform containers are the most useful, because you can see contents and stack them straight. Match every container to the same width and depth so shelves stay tidy. Choose airtight lids for dry grains and baking goods, and skip sealed lids in a warm or ventilated pantry where condensation gets trapped. Buy sizes to fit your shelf, not to a set.
How do I keep pantry items from falling off shelves?
Most falls come from unrestrained sliding, not weak shelves. Add a shelf guard or front fence at the shelf lip, and place tall bottles along the back wall so short items stop them. On wire shelves, cut a non-slip liner to size so boxes and jars have something to grip. Check that any riser sits flat on the full shelf width too.
Are adhesive pantry organizers safe and renter-friendly?
They are renter-friendly as long as you limit them to light items, generally under five pounds. Adhesive strips can lift cheap cabinet paint or leave residue, so test a hidden corner first and wait 24 hours before loading them. For heavier loads or fragile surfaces, use tension-mounted hooks, tension poles and over-door racks instead of glue.
These pantry organization ideas for small kitchens work best in order. Start tonight by measuring the opening at the top, middle and bottom of your pantry, then empty one shelf and sort it into two zones. Buy one thing that solves that shelf, live with it a week, and only then decide what to add next. That order keeps a small kitchen working without a remodel, a big bill, or a weekend you did not have. If your space needs something more structural, our guide to custom pantry systems with pull-out shelving covers what those upgrades really change.
