How to Replace a Toilet Flapper: Easy DIY Guide 2026
A toilet that runs all night, refills on its own, or seeps water into the bowl without being flushed is almost always telling you the same thing: the flapper inside the tank has warped and no longer seals. Knowing how to replace a toilet flapper takes about half an hour, costs a few dollars for the part, and needs nothing more exotic than pliers and a sponge. The whole job is five moves: shut off the water, drain the tank, unclip the old flapper, snap in the new one, set the chain slack. Do that and the hissing stops for good.
Time: 20-40 minutes · Cost: a few dollars for the flapper, plus a towel and a little patience · Difficulty: Easy DIY · Skill level: no plumbing experience needed
Contents
Before you buy anything, though, spend five minutes confirming the flapper is the culprit. A worn flapper is the number one cause of a running toilet, but leaking tank bolts and a tired fill valve look similar from the outside. I’ve wasted a whole afternoon once by replacing a perfectly good flapper on a toilet that was leaking from the tank bolts instead. Ten minutes of diagnosis saves that.
Tools and Materials for How to Replace a Toilet Flapper
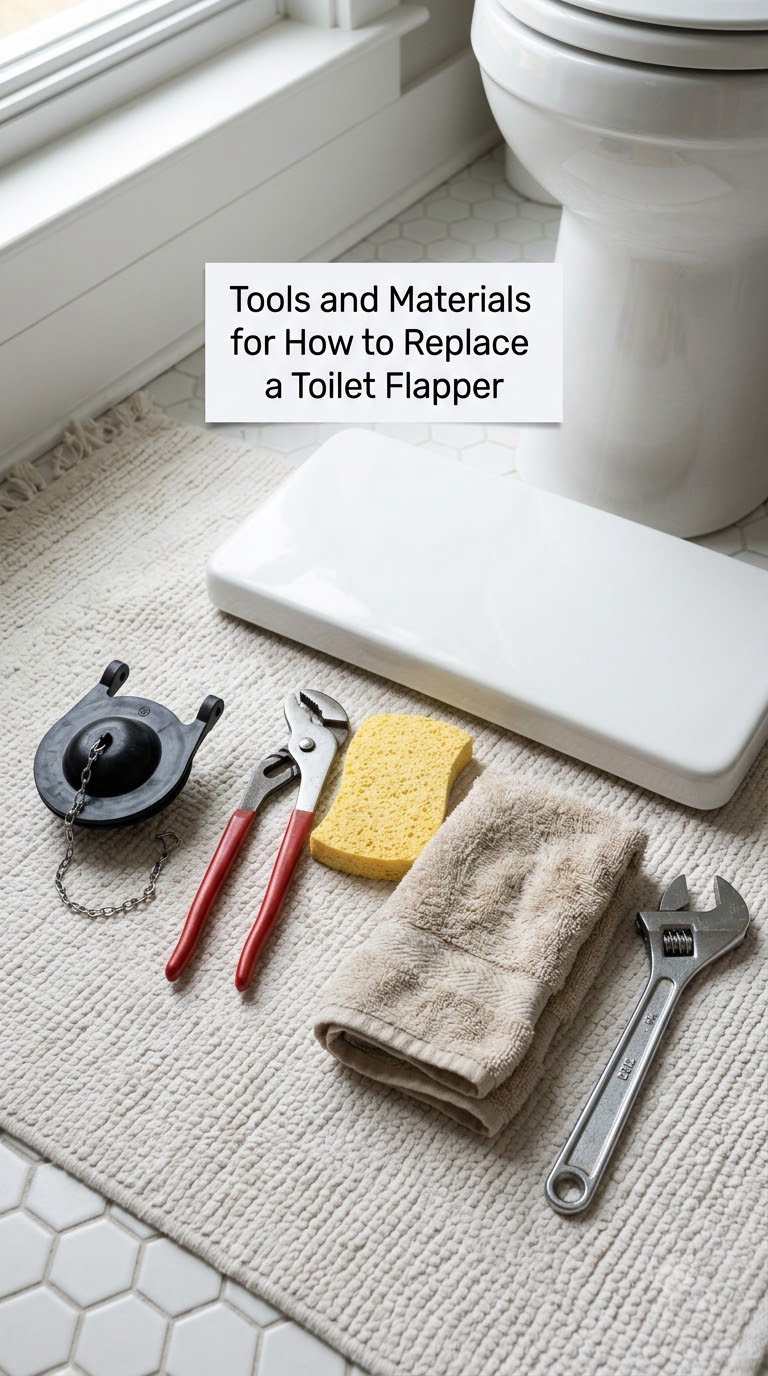
You need very little. The part is one small rubber or plastic piece, and the tools are the same ones you use for almost any household fix.
- The replacement flapper itself — match the size and mounting style to your flush valve before you buy (see Step 2).
- Adjustable pliers or a pair of needle-nose pliers — one pair is enough, for lifting the chain off the tank lever arm.
- A small adjustable wrench — only if your flush valve has a nut-style retainer or an old brass locknut.
- Two old towels and a sponge — the tank always holds more water than you expect, and the floor is vinyl or tile.
- A flashlight — the flush valve sits at the back of the tank in a genuinely dark space under most lids.
- Optional: a bottle of white vinegar for cleaning a scaled valve seat, a soft toothbrush, and a permanent marker for noting the flapper’s orientation before removal.
If you want to see a real 2 inch flapper up close before shopping, we covered one in our write-up on Lydia’s 2 inch toilet flapper review. Part numbers matter far more than brand names here.
Before You Start
Three things to confirm: that the flapper is the leak, that you know what type you are dealing with, and that you can work without flooding the floor.
Test whether the flapper is really the problem. Put a few drops of food colouring or a squirt of dye into the tank and leave it for an hour. If coloured water appears in the bowl without anyone flushing, the flapper is passing water and that is your answer. If the bowl stays clear, the leak is coming from the tank-to-bowl bolts, the fill valve overflow tube, or the bowl itself, and swapping the flapper will not help.
Know the two mounting styles. Most modern toilets have two small vertical mounting posts (also called flush valve arms) on either side of the overflow tube, and the flapper clips onto them. Older toilets have no posts at all — just a rectangular overflow pipe, and the flapper has to slide down over it. Look at the centre of the tank before you remove anything, because it decides which flapper you need.
Protect the floor and plan for the water. Lay a folded towel on the floor behind the tank. Turn the water supply valve on the wall behind and beside the toilet clockwise until it stops, then flush and hold the handle down to dump most of the tank. Sponge out the last inch or so by hand, or use a small cup. If the handle stick or the flush valve lever springs back hard, lift the lever arm and tie it to the handle with a bit of string.
Gloves are a good idea here. Old rubber flappers often shed grit and mineral scale, and nobody wants that on their hands.
Step-by-Step Instructions
Work in this order and do not skip the final test. Half of a botched flapper job is not the swap itself but stopping before the seal is actually proven.
Step 1: Turn Off the Water and Drain the Tank
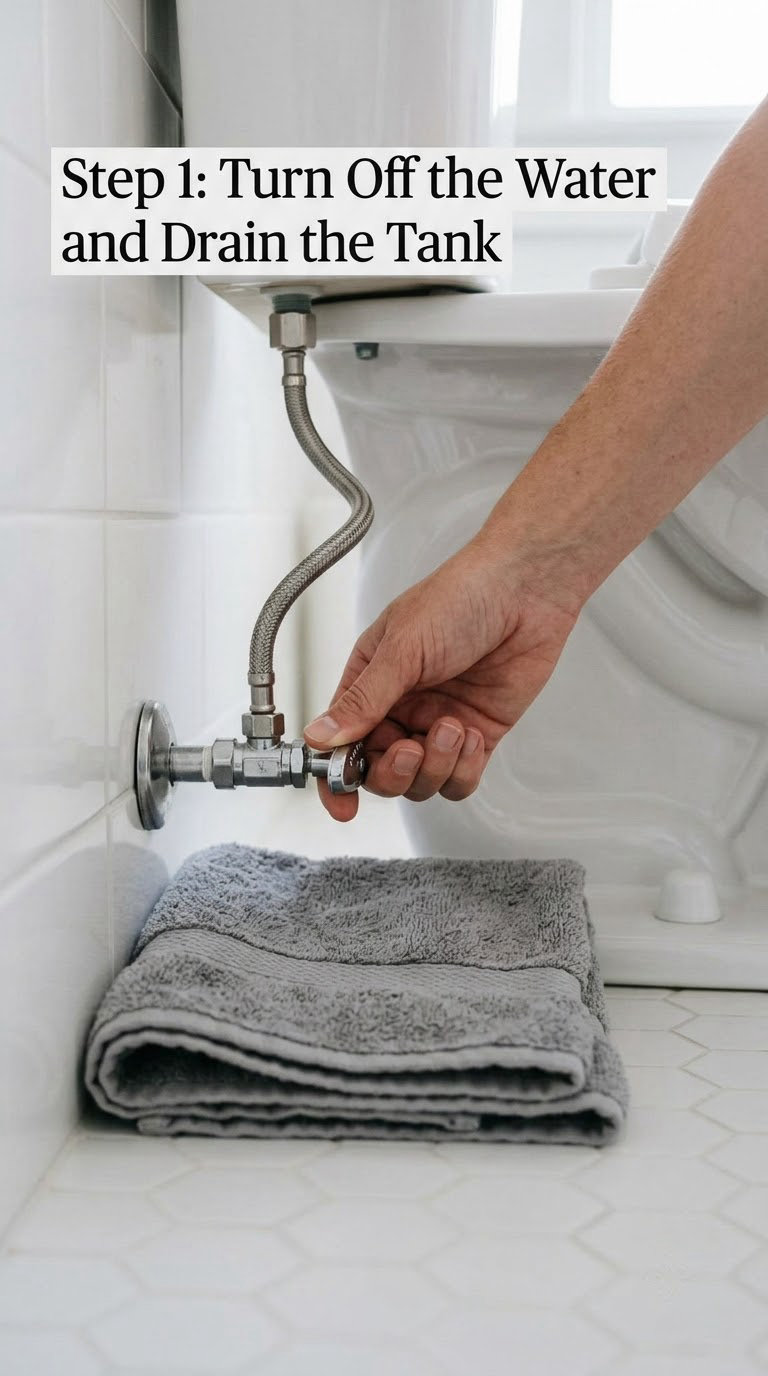
The shut-off valve sits on the wall behind the toilet, roughly 8-10 inches above the floor, on the left side on most installs. Turn it clockwise until it stops; you will feel it seat against the incoming line.
Flush the toilet and hold the handle down for a good ten seconds so the siphon clears the tank. Then sponge or scoop out what is left in the bottom. A shallow layer of water is fine, but if you are removing the whole flush valve you want the tank genuinely dry.
Take the tank lid off and set it somewhere padded, not on the tile. Ceramic lids chip easily if they get knocked, and that chip will show forever.
Step 2: Identify the Correct Replacement Flapper
With the tank drained you can see the flush valve clearly. Measure the old flapper across its widest point with a ruler or tape measure:
- Old flapper measures about 3 inches across — you need a 2 inch flapper.
- Old flapper measures about 4 inches across — you need a 3 inch flapper.
- Flapper slides onto a rectangular overflow pipe with no posts — you need a pipe-adaptor-ring style flapper or an adjustable flapper with the ring attached.
- Posts are present but spaced widely — look for a flapper sold as universal or adjustable-fit rather than a fixed 2 inch or 3 inch.
Getting this wrong is the number one reason a new flapper leaks on day one. A 3 inch flapper hanging over a 2 inch opening cannot seat flat, so it either rocks or never closes. If you know the brand, check the manufacturer’s parts list first — Kohler, American Standard, Crane and TOTO all publish compatible part numbers, and many of their older models use a style you will not find under a generic listing.
While the tank is open, look at the valve seat — the smooth ring the flapper closes against. If it is crusty, chipped or gritty, wipe it with a damp rag and a little vinegar now. A clean seat is often the whole reason a replacement flapper starts sealing properly.
Step 3: How to Replace a Toilet Flapper
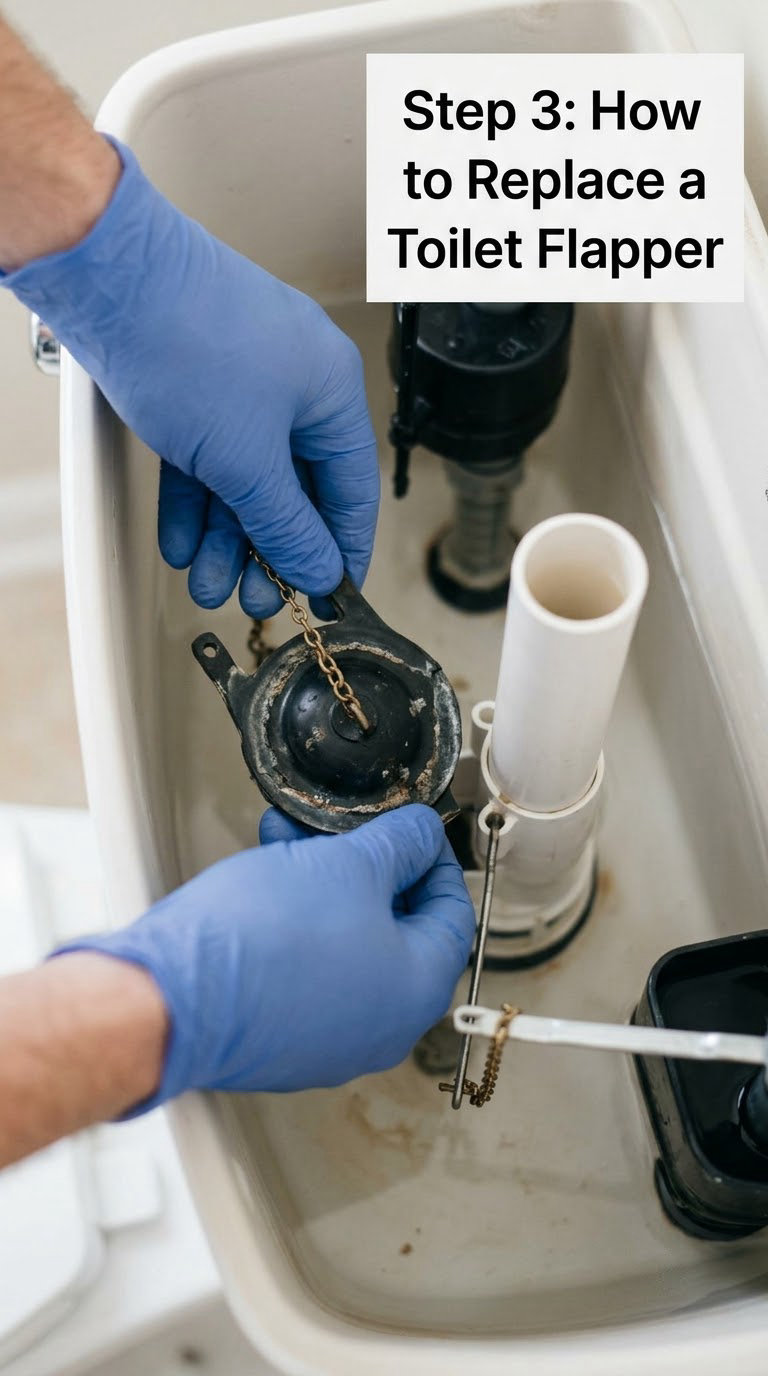
Before you pull anything off, mark which way the flapper faces with a permanent marker or a scratch on the tank wall. Two-inch flappers usually fit either way, but three-inch ones are shaped so the bulb sits centred in the flush hole, and getting it backwards costs you another teardown.
Disconnect the chain from the tank lever arm first. Most chains clip onto a small hole or stud on the arm; some simply hook over it. Lift the clip off with pliers or your fingertips.
Now release the flapper. On a post-mounted flush valve, squeeze the two ears inward and lift the flapper straight up off both posts at once. It should come away with a light pull. On a pipe-mounted flush valve, unhook the ears from the sides of the overflow pipe, then slide the flapper upward and off the top.
If the ears are stiff, brittle or fused with scale and will not release, do not lever hard against the ceramic. Work a thin flat screwdriver or a butter knife under each ear in turn while wiggling the frame, or soak the area with vinegar for ten minutes and try again. A cracked flush valve turns a fifteen-minute job into a full replacement.
Step 4: Attach the Flapper and Lift Chain
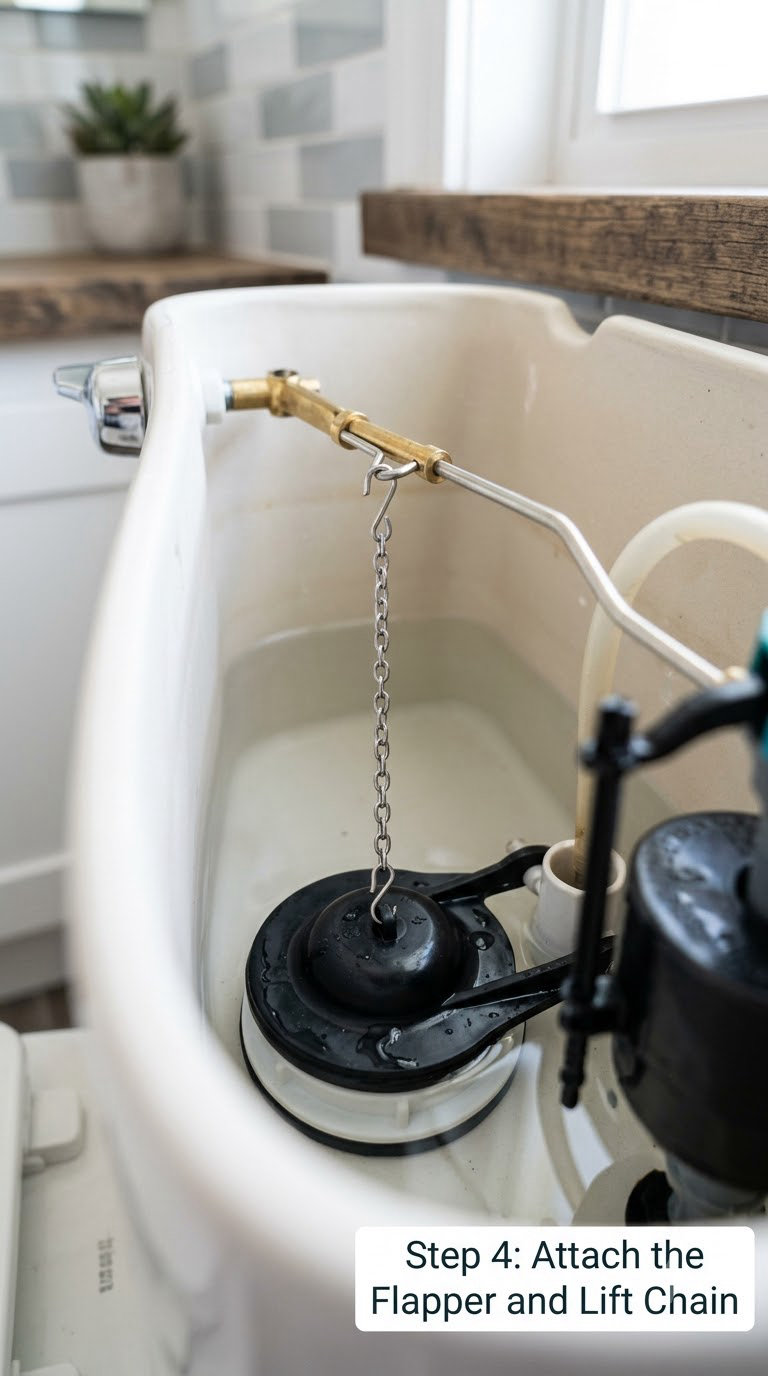
Seat the new flapper squarely over the flush valve opening. On a post-mounted valve, line up the clips with both posts and push down evenly until you feel or hear them snap into place. On a pipe-mounted valve, hook the ears around the overflow pipe and slide down until the frame rests on the flush valve shoulders.
The flapper should sit level and centred, with the rubber bulb dropping straight into the flush hole. If it leans to one side, pull it off and start again rather than forcing it.
Reconnect the chain to the lever arm. Leave roughly half an inch of slack, about one or two links, so the flapper can lift clear of the seat on a flush but still be pulled shut when the arm drops. Too tight and the flapper sits slightly open, so the toilet runs forever with a brand-new part installed. Too loose and the flapper fails to lift, leaving you with a weak flush and a chain slapping the tank wall.
If your new flapper has a float band instead of a fixed frame, set it before you turn the water on: fill the tank to the level it normally sits at, mark the waterline on the overflow tube with a pencil, then adjust the band so its top edge lines up with that mark. That mark is what tells the flapper it is time to close.
Step 5: Refill the Tank and Check the Flap
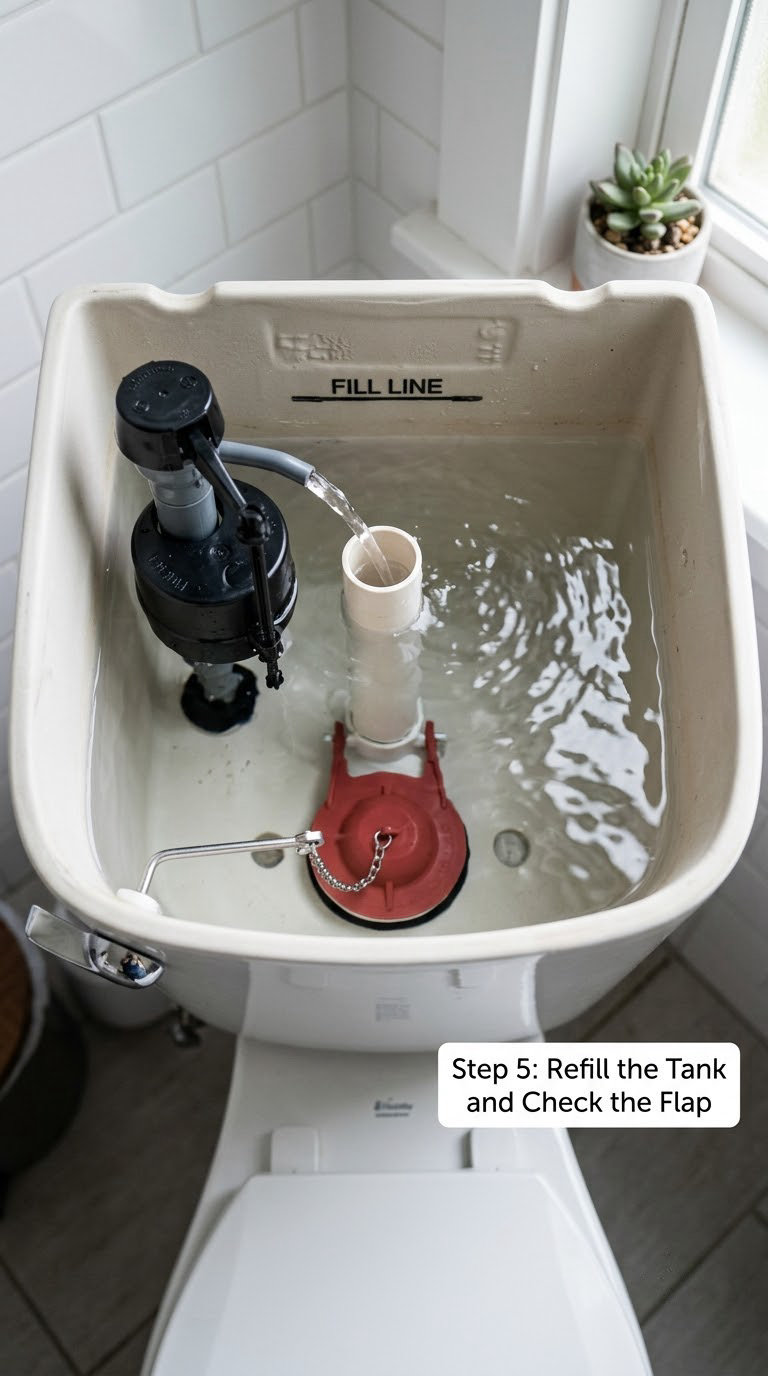
Turn the water supply valve counterclockwise until it opens fully and let the tank fill. It takes a minute or two on most valves, longer on older ballcocks.
Watch the flapper while it refills. It should float up on the rising water and come to rest against the overflow tube, with the bulb hanging over the flush hole. Then push the lever down and flush. The flapper should lift, let the water through, swing back down and seat completely in a second or two.
If it lifts halfway and drops back without flushing, the chain is too tight or the flapper is catching on the flush valve shoulders. Re-check the seating before moving anything else.
Step 6: Test for Leaks and Recheck the Seal
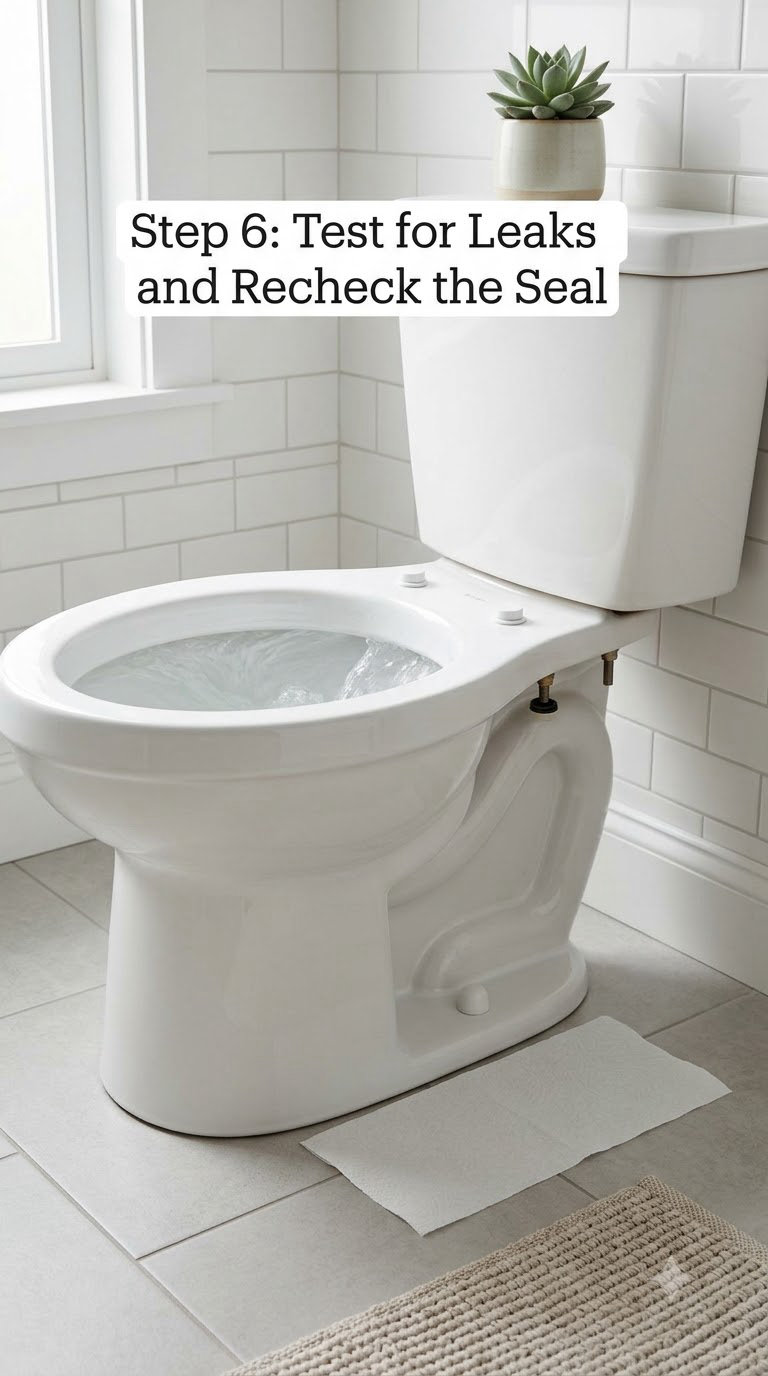
Fold a dry paper towel and slide it under where the tank meets the bowl, then under the tank-to-bowl bolts. Flush twice, watching the whole time.
After each cycle, let the toilet sit for a few minutes. A towel that stays bone dry means no weeping at the bolts or the tank joint. Put colour into the tank again if you want certainty about the flapper itself, and give it an hour.
Listen too. A faint hiss that stops the moment the flapper seats is normal during filling. A hiss that continues for more than a minute after the tank is full means water is escaping past the flapper and you have a seating, sizing or chain problem to sort out.
Common Mistakes to Avoid
- Wrong size flapper. A flapper sized larger than the flush hole cannot seal flat. Measure first; guessing is the top cause of repeat failures.
- Flapper mounted sideways. With the tank full, look straight down at the bulb. It needs to hang centred in the flush hole, not resting against the valve wall.
- Chain too tight. This is the mistake that leaves a new flapper leaking immediately. Always leave half an inch of slack.
- Chain too loose. The flapper will not lift properly and you get a weak flush with the chain rattling in an empty tank.
- Retaining clips not fully engaged. Push until you hear the snap. A flapper working loose in the tank is how people flood a bathroom floor overnight.
- Overtightening the shut-off valve. Old angle stops crack if you force them. Hand-tight plus a quarter turn is plenty.
- Skipping the repeated flush test. One flush proves very little. Two flushes plus a dry-towel check is the minimum, and colour in the tank is the only way to rule out a slow seep.
- Replacing the flapper on a dirty seat. If the valve seat is scaled, clean it before fitting the new part or it will leak no matter how good the flapper is.
When to Call a Pro
A few situations are genuinely beyond a beginner job, and calling out early is cheaper than a water-damaged floor:
- The shut-off valve will not turn or leaks. Without a working shut-off you cannot do this safely, and replacing a corroded angle stop is a plumber’s job.
- The tank or bowl is cracked. Hairline cracks around the tank bolts or at the base need a replacement, not a repair.
- The flush valve is badly corroded or broken. Older brass valves crumble when you try to unclip a flapper. Replacing the whole valve assembly is the sensible move at that point, and plumbers do it routinely.
- You replaced the flapper and it still runs. Two or three failed attempts means something else is wrong, or the valve itself needs replacing.
- The leak is in the wall or floor. Water staining that keeps growing after a new flapper points at a supply line, a wax ring, or a slab leak. That is not a DIY afternoon.
Roughly speaking, a plumber’s visit for a flapper swap is billed as a minimum service charge plus a modest labour rate, typically running into the low hundreds of dollars depending on your region, and much more if the valve has to go too.
Maintenance
Once it is installed, a few habits keep the next flapper in place longer:
- Look inside the tank a couple of times a year. Lift the lid while the toilet is running. If the water level sits below the marked fill line, the flapper is passing water.
- Keep the valve seat clean. Wipe the flapper bulb and the mating surface with a damp rag during routine cleaning. Grit and hard-water scale stop a good rubber seal from seating.
- Skip in-tank cleaning tablets. Chlorine drop-ins sitting in the tank attack rubber directly and shorten flapper life dramatically. Use a brush or a tablet that goes in the bowl instead.
- Replace a flapper that feels hard or looks warped. A flapper that no longer flexes easily, or that has gone shiny and flat, will leak eventually even if it still looks intact.
- Replace the whole flush valve assembly if yours is old. If your toilet predates the mid-1990s, the flapper alone may solve it. If it keeps going, an assembly swap costs modestly more than the flapper and gives you a new valve at the same time.
Hard water and treated well water both shorten flapper life, which is why high-quality rubber flappers are worth buying over the cheapest bin option. Some generic ones soften and warp inside a year.
Frequently Asked Questions
How much does it cost to replace a toilet flapper?
The part itself runs from a few dollars for a basic flapper to around fifteen for a well-made one or an adjustable model. Tools and towels are things most households already own. A plumber will charge a minimum service fee plus labour, which often lands in the low hundreds depending on your region, so doing it yourself is the obvious saving.
Can I use an adjustable toilet flapper instead of an exact replacement?
Yes, and for an unfamiliar or non-standard flush valve it is often the safer bet. Adjustable models can span both two and three inch valves, and some include a pipe-adaptor ring for older toilets with no mounting posts. Match the diameter range to your flush valve and set the float band against a pencil mark at your normal tank level before you finish.
Why does my new toilet flapper keep falling or leaking?
Four causes cover most cases: the flapper is the wrong size for the flush hole, it is seated at an angle instead of flat, the chain is too tight and holds it slightly open, or the valve seat underneath is dirty or scaled. Clean the seat with a rag, recentre the flapper, and add about half an inch of chain slack. If it still weeps, the valve seat itself may be damaged.
How long should it take to replace a toilet flapper?
Allow twenty to forty minutes for most toilets, with no experience required. Shutting off and draining the tank takes five minutes, the swap itself is under ten once you can see the valve, and the flush testing takes the rest. Old toilets with corroded brass valves or a seized shut-off valve can stretch that to an afternoon.
Is a running toilet always caused by the flapper?
No. A flapper that no longer seals is the most common reason, but a stuck or faulty fill valve, a float set too high, or a flapper chain jammed against the overflow tube can produce the same symptom. Dye test the tank: if coloured water reaches the bowl with no flush, the fault is at the flapper or the fill valve, not the bolts or the bowl.
Should I replace the whole flush valve if the flapper leaks?
Only if the valve itself is damaged. If the overflow tube is cracked, the mounting posts are broken or badly corroded, or the flapper keeps failing on an older toilet, replacing the complete flush valve assembly costs modestly more than a flapper and solves both problems at once. For a sound valve on a newer toilet, a flapper alone is usually enough.
Conclusion
Start at the wall. Turn the water supply valve clockwise until it stops, flush the tank dry, and lift the lid. While it is open, look at the centre of the flush valve and measure the old flapper across so you know whether to buy a 2 inch or 3 inch part, and whether yours clips onto posts or slides onto an overflow pipe. Those two observations decide everything else. Swap the flapper, set the chain with half an inch of slack, flush twice, and check that paper towel under the tank when you are done.
If you are planning a bigger bathroom job while you are in there, our guide to replacing a toilet seat with hidden bolts covers the other job that benefits from an empty tank, and basement toilet venting explains the drain-side problems that no flapper will ever fix.