20 Kids Room Storage Ideas for Small Rooms (2026 Edition)
These 20 kids room storage ideas for small rooms all share one principle: add storage above the floor, not beside it. In an 8-by-10 bedroom, the walls, the space under the bed, the back of the door and the corners hold storage nobody is using yet, which is exactly the space a small room needs.
Most parents I talk to don’t need more square footage. They need somewhere for the Legos, the winter coats and the basketball to go so the floor stays clear. The ideas below cover walls, corners, closets, under-bed space and multi-purpose furniture, and each one lists a realistic US cost, how hard it is to install and how long it takes.
Contents
October is a good time for this. Rooms get reorganized when the weather turns and school gear comes out, so you can sort summer clothes out and make room for boots and jackets. Start with a 60-second setup before you buy anything:
- Measure the walls you plan to use, then measure again. Most small rooms have one long blank wall and two useless ones.
- Declutter by category first. Pull everything out of one closet shelf at a time and decide what stays in the room.
- Set your kid-height zone. Storage a child aged 3 to 7 can reach unaided sits roughly 24 to 40 inches off the floor.
- Decide what gets closed storage and what gets open bins. Daily toys belong in visible containers, not lidded tubs.
All costs below are US dollars and vary by region and by whether you build or buy. DIY and second-hand sourcing make a real difference in a small budget.
20 Kids Room Storage Ideas for Small Rooms at a Glance
This table gives you the whole list before the details, so you can match ideas to your room and your weekend. Costs are realistic US ranges and shift with your region.
| Idea | Cost | Difficulty | Time |
|---|---|---|---|
| Vertical wall storage | 20 to 90 USD | Moderate DIY | 2 to 4 hours |
| Low cube storage bench | 60 to 200 USD | Easy DIY | 1 to 2 hours |
| Under-bed rolling bins | 40 to 120 USD | Easy DIY | 30 to 60 minutes |
| Slim storage stool | 40 to 130 USD | Easy DIY | 30 minutes |
| Over-the-door organizer | 15 to 45 USD | Easy DIY | 10 minutes |
| Labeled toy cubby system | 50 to 180 USD | Easy DIY | 1 to 2 hours |
| Narrow rolling carts | 30 to 90 USD | Easy DIY | 20 minutes |
| Wall pegboard | 20 to 70 USD | Moderate DIY | 1 to 2 hours |
| Ladder-style shelving | 50 to 160 USD | Easy DIY | 1 hour |
| Fold-down desk | 80 to 260 USD | Moderate DIY | 2 to 4 hours |
| Window sill bins | 10 to 35 USD | Easy DIY | 20 minutes |
| Closet door organizer | 20 to 60 USD | Easy DIY | 10 minutes |
| Toy rotation bins | 30 to 90 USD | Easy DIY | 1 weekend |
| Corner shelving | 40 to 150 USD | Moderate DIY | 2 to 3 hours |
| Rolling library cart | 40 to 140 USD | Easy DIY | 30 minutes |
| Lower closet rod | 15 to 60 USD | Moderate DIY | 1 to 2 hours |
| Drawer organizers | 10 to 60 USD | Easy DIY | 1 hour |
| Wall book pockets | 20 to 70 USD | Easy DIY | 1 hour |
| Floor basket zone | 30 to 120 USD | Easy DIY | 1 hour |
| Storage ottoman | 80 to 300 USD | Easy DIY | 30 minutes |
1. Use Vertical Wall Storage for Toys and Books
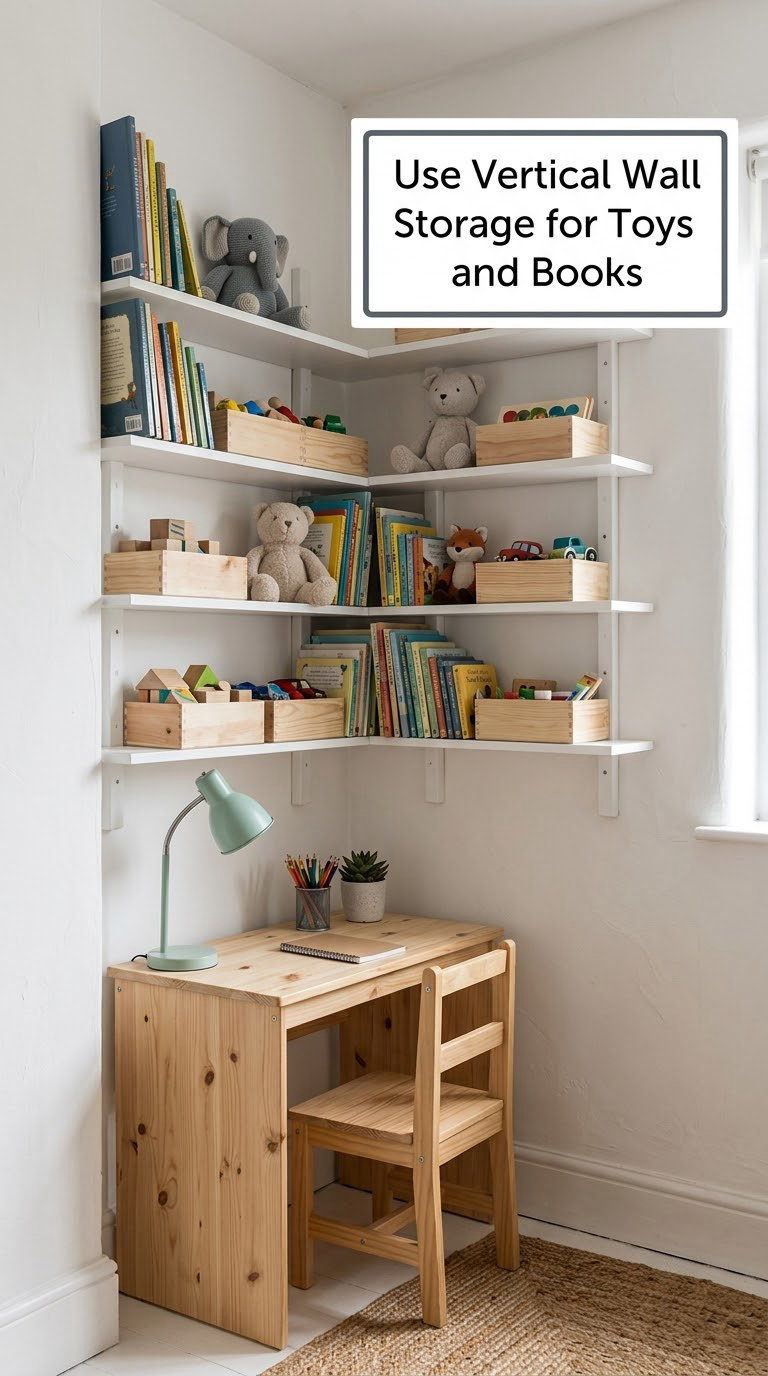
Vertical wall storage takes storage off the floor and puts it where a small room has room to spare. A narrow floating shelf or picture ledge 8 to 12 inches deep holds books, blocks and lightweight toys while the floor below stays walkable.
How to do it:
- Measure the clear wall width, then choose shelves 24 to 36 inches wide so two fit side by side.
- Mark stud locations with a detector and fasten into studs wherever you can. Hollow-wall anchors rated for the load are fine between them.
- Space shelves 10 to 12 inches apart vertically. That fits most picture books upright.
- Keep the lowest shelf between 24 and 30 inches off the floor so a child can reach it safely.
- Load light items low and heavier baskets high near the wall.
Cost: 20 to 90 USD for two or three shelves plus hardware, or about 15 USD in pine boards if you build simple ledges yourself. Difficulty: Moderate DIY. Time: 2 to 4 hours including drying and leveling.
Good to know: Anchor every shelf into a stud or a rated anchor. An unanchored shelf at a child’s shoulder height is a real tipping risk. Renters can use tension rod shelves that clamp between floor and ceiling with no holes at all.
2. Install a Low Cube Storage Bench
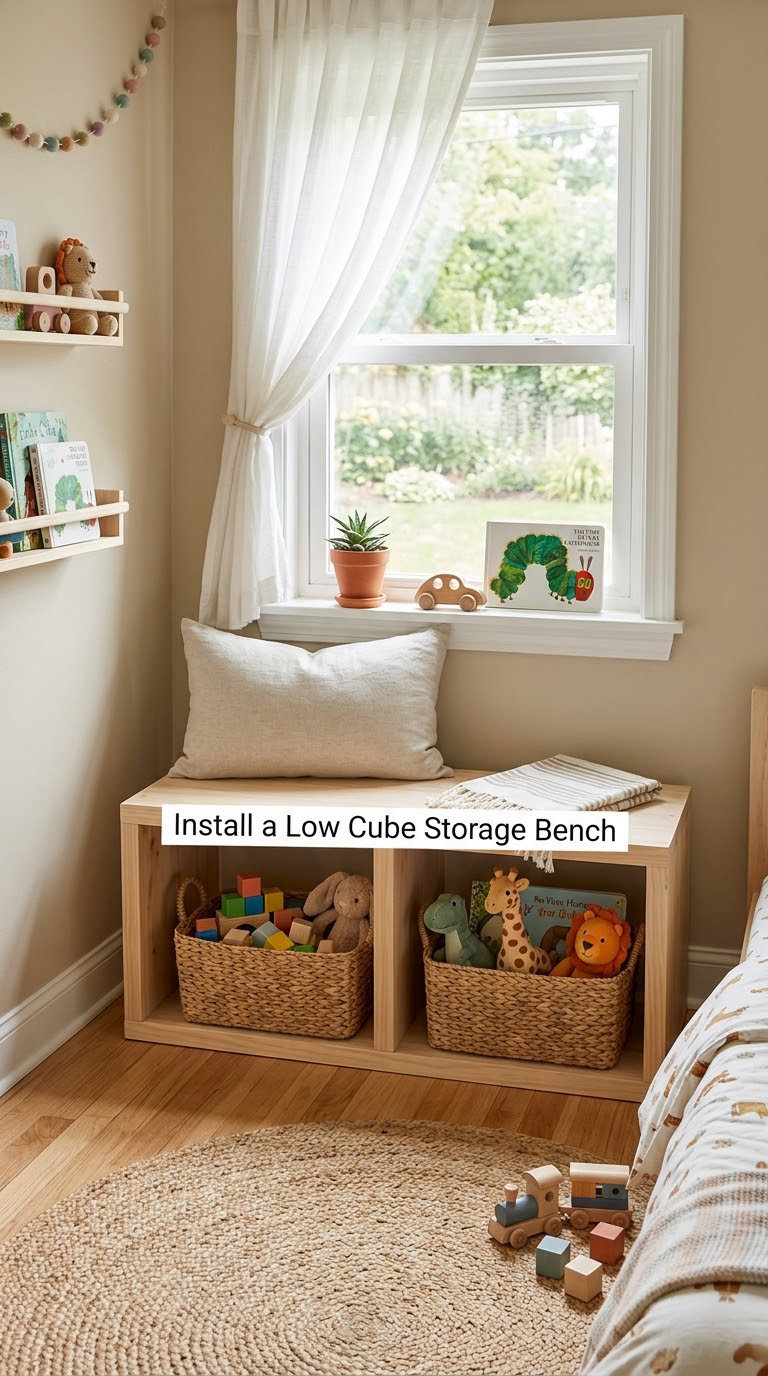
A cube bench does three jobs in a small kids room: it stores toys, it doubles as a seat, and it gives a place to sit while shoes go on. Six cubes at roughly 14 inches each fit most standard 11 by 11 inch baskets, and a cushion on top turns the whole thing into a window perch.
How to do it:
- Measure the wall gap first. Leave 2 inches of clearance on each side so baskets can slide in.
- Build from 3/4 inch plywood or buy a flat-pack unit, typically 30 to 36 inches wide and 15 to 18 inches tall.
- Fit baskets sized to the cube opening, usually 11 by 11 by 11 inches, so nothing sticks out.
- Anchor the unit to the wall with a strap if it sits above finished floor with kids running past.
- Limit each cube to about 15 pounds of toys so the frame stays square.
Cost: 60 to 200 USD built or bought. Difficulty: Easy DIY. Time: 1 to 2 hours plus an afternoon of sanding if you paint it.
Good to know: A bench at the foot of the bed narrows circulation fast. Place it against the longest wall or in a corner, never across a walkway. Second-hand locking school lockers work well here too if your child is over five.
3. Add Under-Bed Rolling Storage Bins
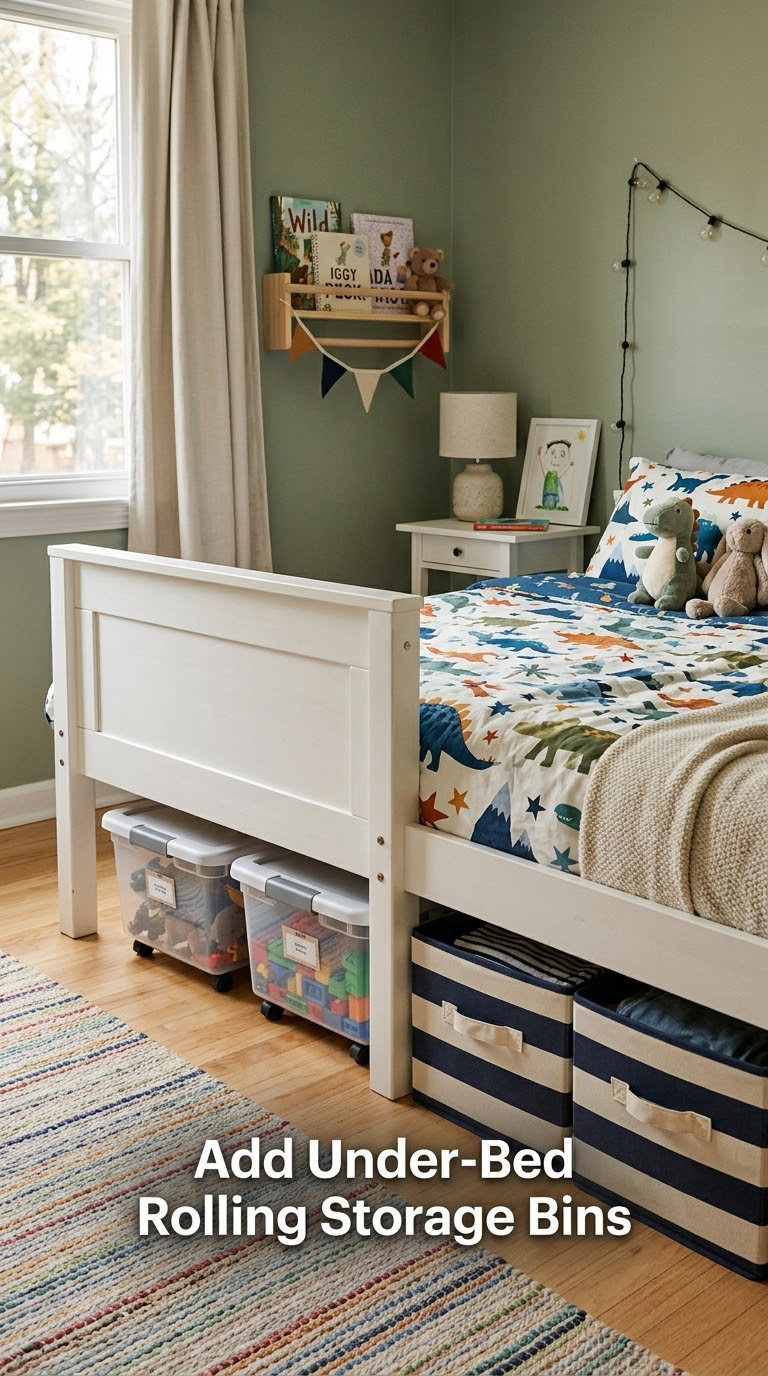
Under-bed rolling bins turn the single biggest dead zone in a small bedroom into usable storage. A standard twin frame with a 6 to 8 inch clearance swallows about 20 to 30 cubic feet, which is a parking space for off-season clothing, blankets and big toys.
How to do it:
- Slide a broom handle under the frame and mark the clearance height. Most low-profile bins need 8 inches minimum.
- Choose bins 4 to 6 inches shorter than that clearance so they slide without scraping.
- Add casters or a pull strap so a child can pull a bin out alone.
- Label the front face with picture labels if your child cannot read yet.
- Vacuum under the bed every few months and check for dust build-up on the frame underside.
Skip anything heavy, anything that pulls in dust, and anything a child might drag into the walkway.
- Avoid dense seasonal items like winter coats, because they crush the bin.
- Avoid food and anything with liquid, which attracts pests under a bed.
- Avoid sharp tools, small batteries and loose cords.
Cost: 40 to 120 USD for four rolling bins. Difficulty: Easy DIY. Time: 30 to 60 minutes.
Good to know: Leave a 2 inch gap at the end of the bed so nothing blocks airflow, and don’t slide bins under a bed that sits against an exterior wall. If your bed has a slatted base, a frame-mounted drawer rail gives the same space with no clearance guessing.
4. Replace Bedside Tables with Slim Storage Stools
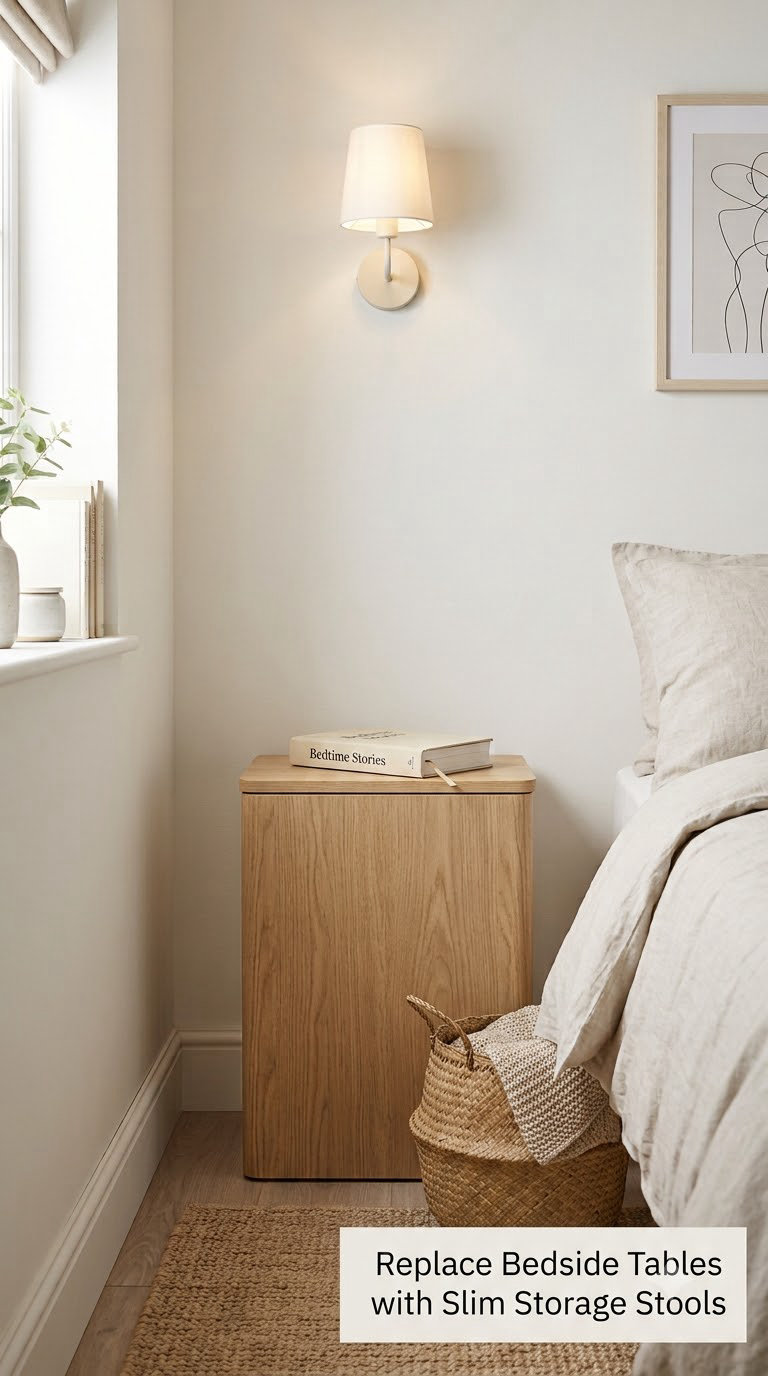
A slim storage stool fits where a bedside table never could. Look for one 12 to 14 inches wide with a lift-top or pull-drawer, which gives a surface for a lamp and water plus a hidden spot for a charger and a night-light.
How to do it:
- Measure the gap between the bed and the wall. Under 14 inches, a stool is the only thing that fits.
- Check top clearance of 14 to 16 inches if a lamp goes there, and 20 inches if a small bookshelf stacks on it.
- Fit one shallow basket or tray inside for the clutter that collects on a bedside table.
- Pick a stool with non-slip feet, since a light one slides when a child climbs on it.
Cost: 40 to 130 USD. Difficulty: Easy DIY. Time: 30 minutes.
Good to know: A water cup on top plus a lamp is two objects. The moment you add a stack of books, you have rebuilt a nightstand and lost the space advantage. Keep the top to two items or use it for a tray instead.
5. Use Over-the-Door Organizers for Small Rooms
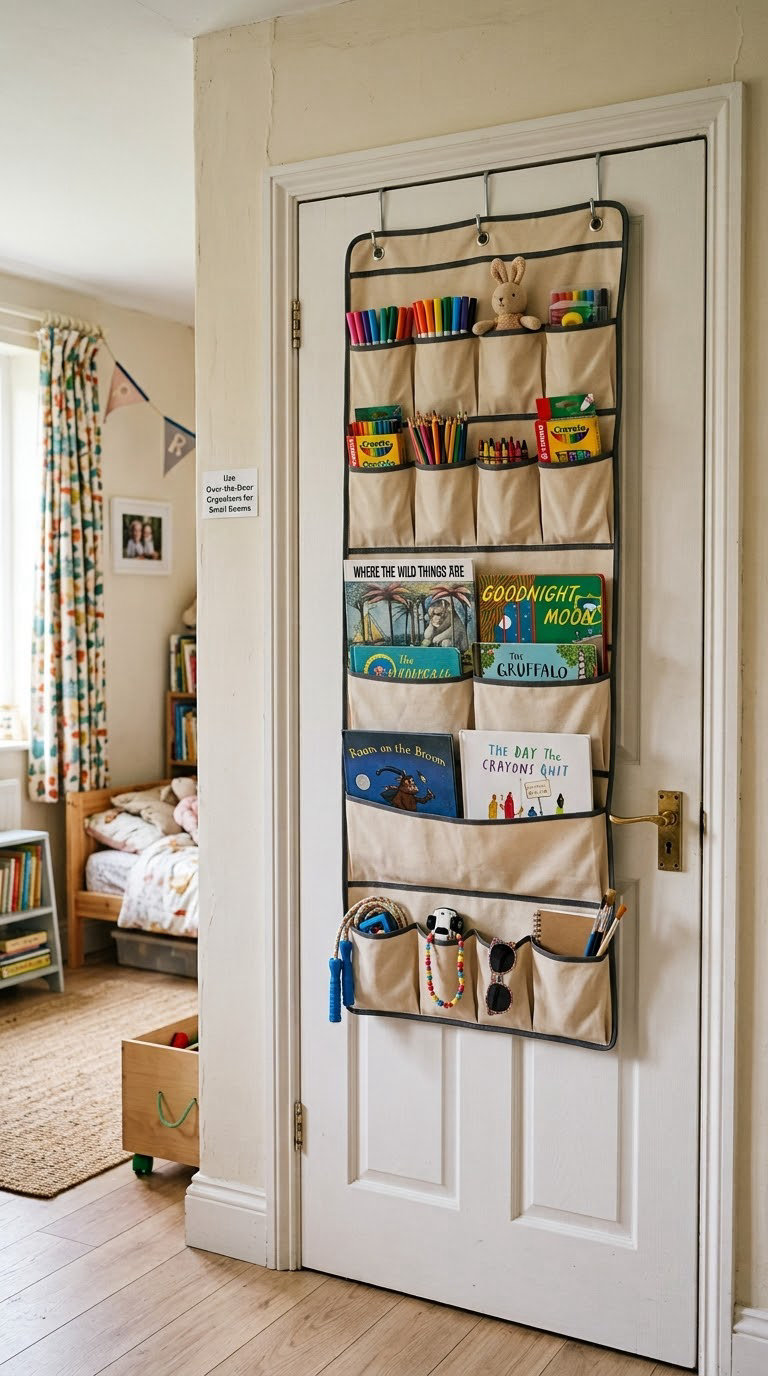
Over-the-door organizers add storage to a surface most families ignore entirely. Parents on organizing forums call the shoe-pocket style the highest-value item in a tiny room, since the pockets hold underwear, socks, craft supplies and small toys in one place.
How to do it:
- Measure door thickness, typically 1.375 to 1.75 inches, and buy a organizer that matches or has adjustable hooks.
- Check the top gap. You need about 1 inch of clearance above the door to slide the organizer on.
- Hang the heaviest pockets at the bottom to keep the unit from tipping forward on the door.
- Keep total weight under 15 pounds if the organizer hangs from the door top.
- Test the door swing before you commit.
Cost: 15 to 45 USD. Difficulty: Easy DIY. Time: 10 minutes.
Good to know: Organizers on a door that swings against a dresser will crash every time. If your closet door and room door face each other, skip the closet door version and use an over-the-door unit on the main room door only. Scissor hooks need a child-proof backing so nothing sharp sits at four feet.
6. Create a Labeled Toy Cubby System
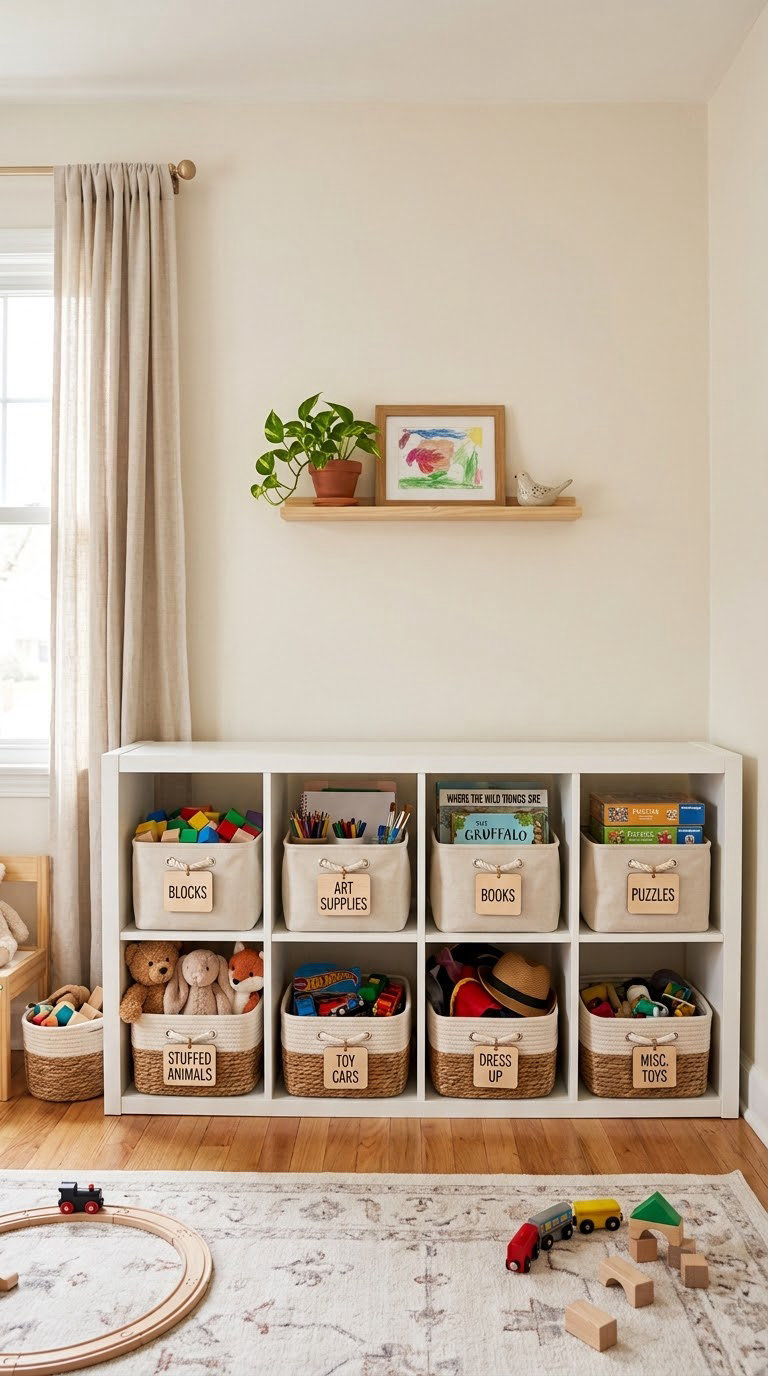
A labeled toy cubby system gives every toy a named home, which is the difference between a room that resets itself and one that never does. Five or six open cubes at 11 inch openings hold labeled bins sized to fit, so a pre-reader can match the picture on the bin to the contents.
How to do it:
- Set the daily-toy cube height between 12 and 30 inches off the floor, within easy reach of a 3 to 7 year old.
- Label the front of each bin with both a word and a picture of what belongs there.
- Color-code by type, such as blue for building toys and green for pretend play, so sorting stays consistent.
- Cap each bin at roughly two-thirds full. An overstuffed bin is the reason a system collapses.
- Keep bulky items below 36 inches where they can be lifted out one-handed.
Cost: 50 to 180 USD. Difficulty: Easy DIY. Time: 1 to 2 hours for labeling.
Good to know: Decorative baskets without labels cause arguments because kids cannot tell where things belong. Clear-front or open-front bins win here, since kids need to see what is inside before they commit to a bin. Skip a full unit above 40 inches unless it holds seasonal items only.
7. Add Narrow Rolling Carts for Flexible Storage
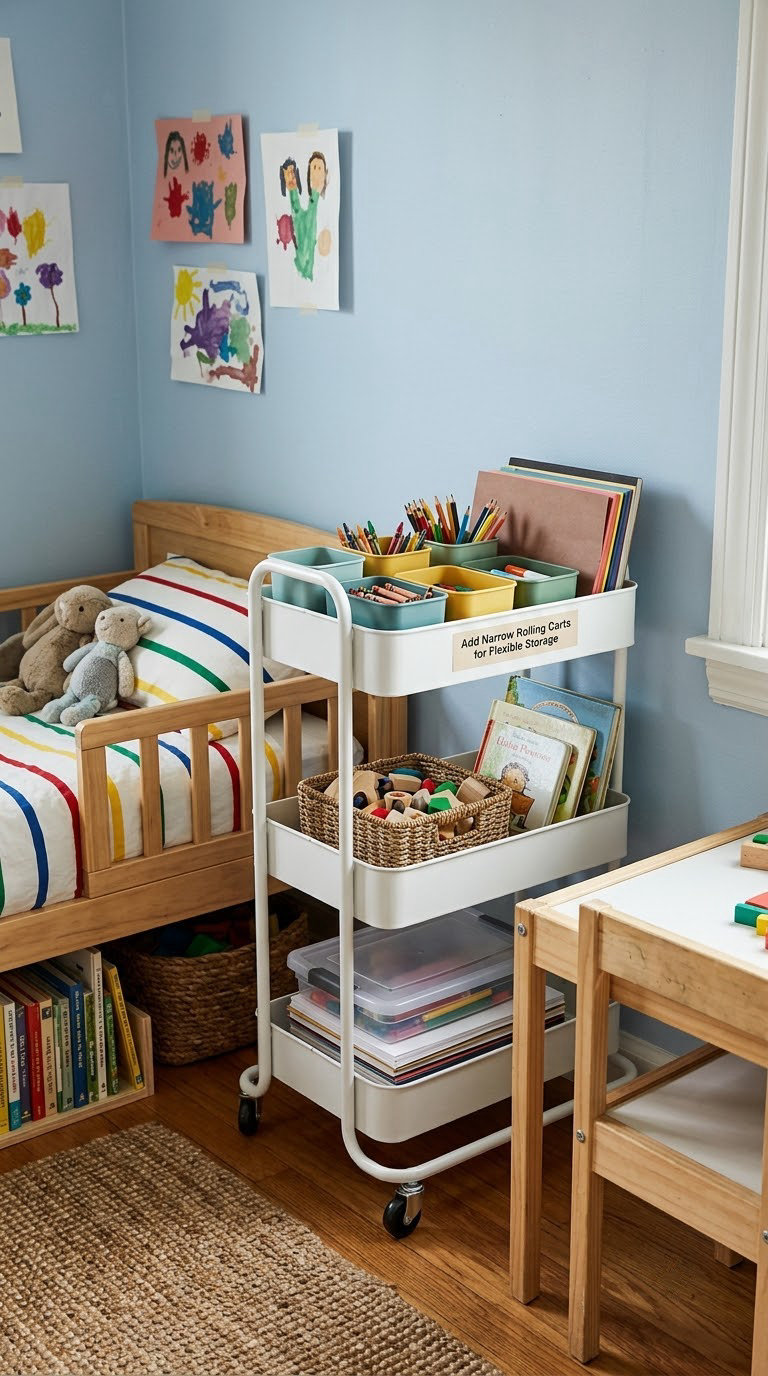
A narrow rolling cart stores art supplies during the week and art supplies on wheels the rest of the time. Width matters more than anything else here, and 10 to 15 inches fits the gap beside a bed or a dresser without cutting into circulation.
How to do it:
- Measure the narrowest gap you want the cart to pass through and buy to that width minus 1 inch.
- Choose swivel casters for tight turns, or locking casters if it holds weight.
- Use the top surface. A cart top at 30 to 34 inches doubles as a side table or art staging surface.
- Line baskets inside with a tall lip so paper and markers do not slide out when the cart moves.
Cost: 30 to 90 USD. Difficulty: Easy DIY. Time: 20 minutes.
Good to know: Carts in a narrow room become trip hazards if you park them mid-floor. Pick a permanent parking spot against a wall, and mark it with a piece of tape on the floor so a tired adult puts the cart back too.
8. Hang a Pegboard for Art and Accessory Storage
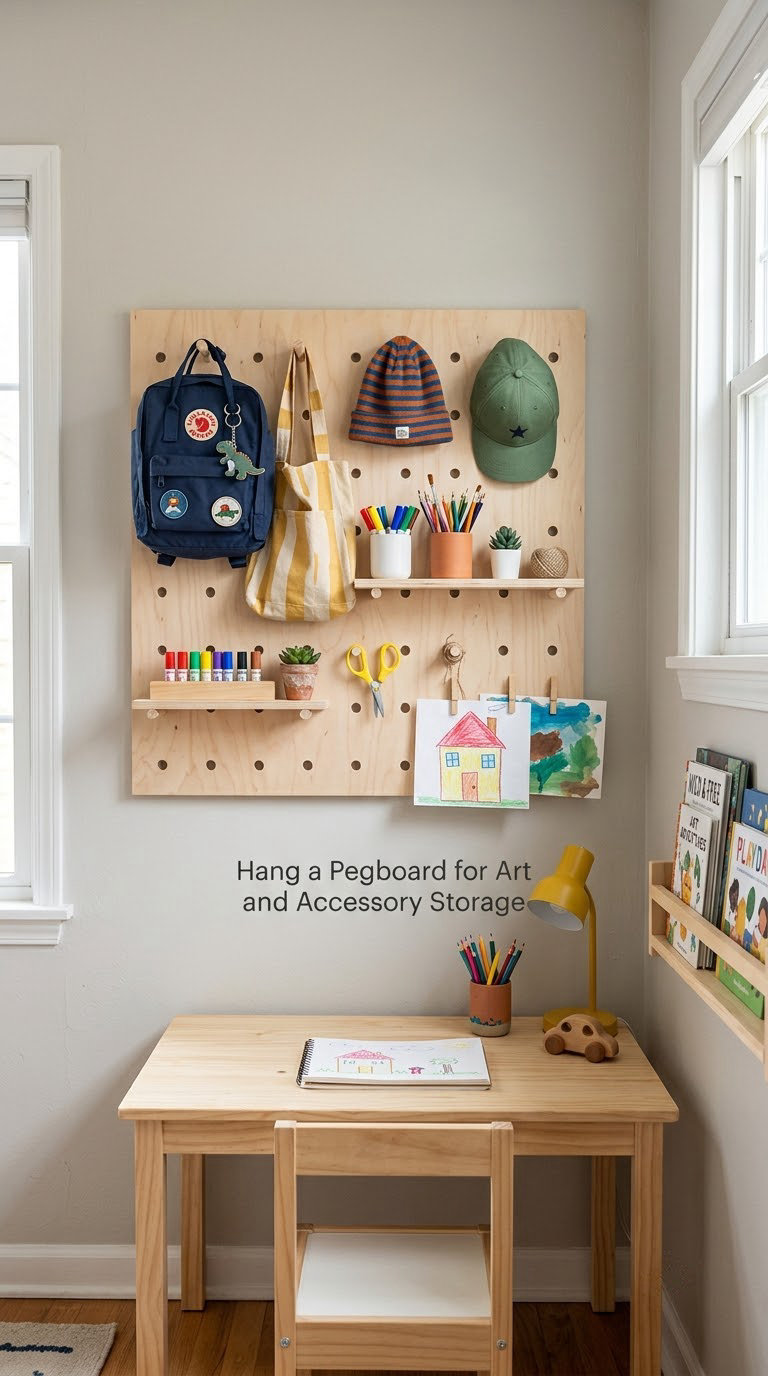
A pegboard turns a bare wall into an adjustable organizer where every item is visible and reachable. Pegboard appears in every top-ranking article on this topic because it holds scissors, headphones, hats, backpacks and art supplies without a single shelf taking up depth.
How to do it:
- Cut a panel to fit the wall: 24 by 48 inches covers most small rooms without crowding.
- Space holes 1 inch apart and fit hooks sized to the hole spacing of the board you bought.
- Mount into studs or into a distribution of rated anchors, spacing them every 8 to 12 inches.
- Set the working zone between 30 and 48 inches off the floor, above a desk but below a child’s jumping height.
- Paint the board before installing, then outline the hook positions in paint pen so order comes back after a reshuffle.
Cost: 20 to 70 USD for board, hooks and fasteners. Difficulty: Moderate DIY. Time: 1 to 2 hours.
Good to know: Leave the lower edge 36 inches off the floor so knees do not catch it, and skip the lowest row for anything breakable. Renters can hang a fabric grid with hooks on a tension rod or use a no-stud adhesive panel rated for light loads.
9. Use Ladder-Style Shelving for Corner Space
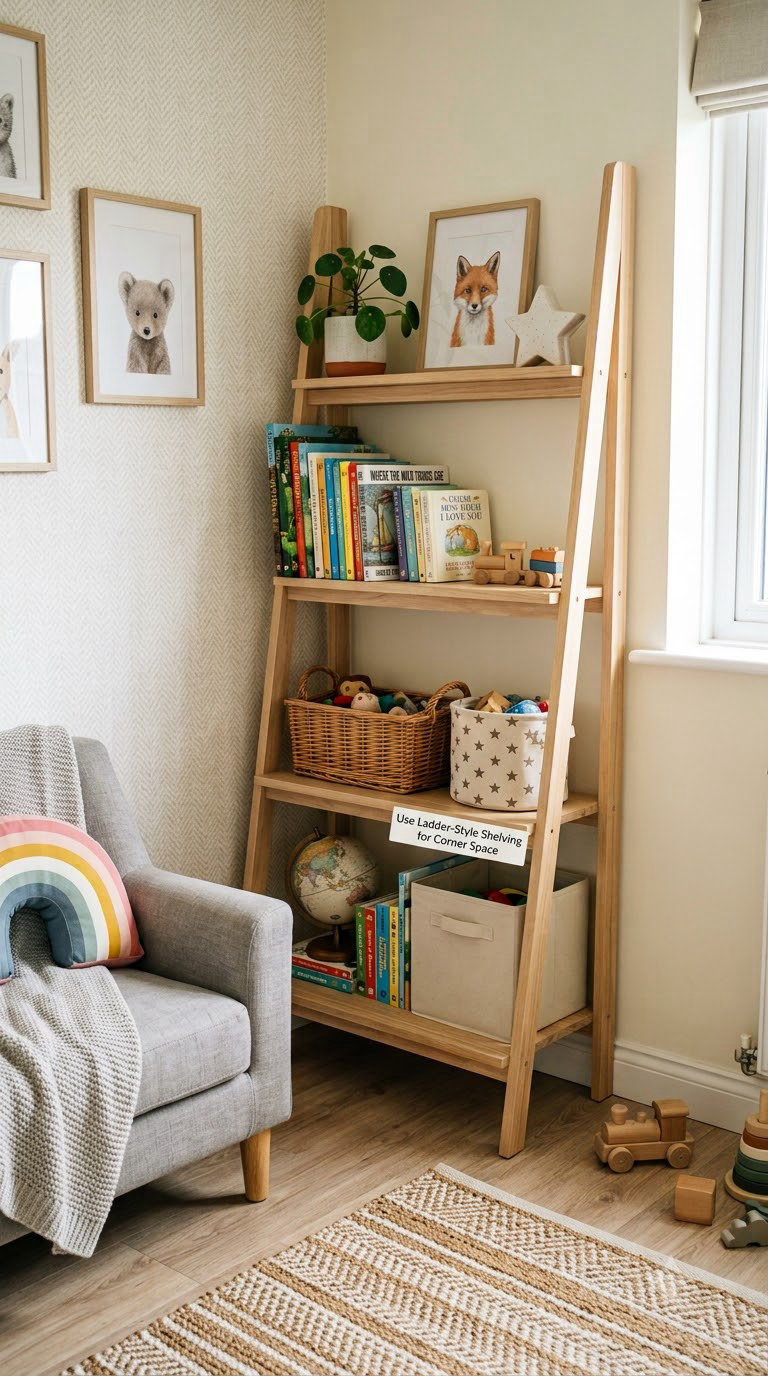
A leaning ladder shelf adds storage while keeping sightlines open, which matters when you want a corner to read as floor rather than furniture. The footprint is roughly 12 to 16 inches deep, less than most bookcases, so a narrow corner still keeps a walkway.
How to do it:
- Measure the corner wall angle. Two 90 degree walls suit a corner unit, while an open angle needs a standard ladder shelf.
- Space shelves 10 to 13 inches apart so chapter books stand upright.
- Place the heaviest baskets on the lowest step, no higher than 24 inches.
- Anchor the top of the ladder to the wall to stop it sliding out.
- Keep the front lip of each shelf clear so books cannot slide off the rake.
Cost: 50 to 160 USD. Difficulty: Easy DIY. Time: 1 hour to assemble.
Good to know: Ladder shelves are display first, storage second. Loaded with heavy baskets they tip, so treat them as the home for books, framed art and light decor, and put the bulkier toy weight on a low cube unit instead.
10. Install a Fold-Down Desk with Drawer Storage
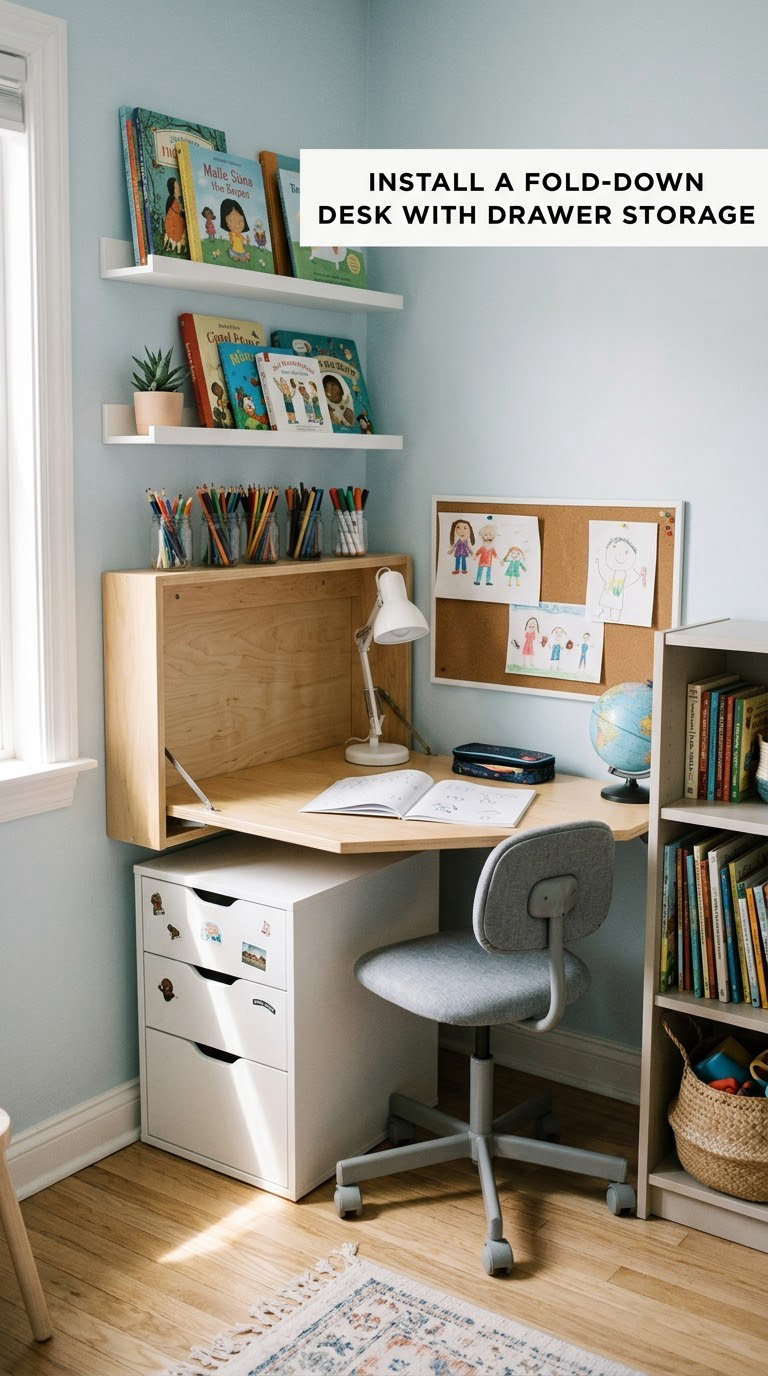
A fold-down desk gives a child a homework surface that disappears when play starts. Add a shallow drawer or a two-cupby shelf underneath and the piece does double duty as the school-supply station too.
How to do it:
- Set desk height between 22 and 25 inches for a child aged 5 to 10.
- Check the swing. A closed desk needs about 16 inches of clear space in front of it when open.
- Plan knee space of at least 18 inches wide and 12 inches deep.
- Anchor the bracket into studs, not just drywall, since the load is a child leaning on it.
- Keep the wall clear above the desk by 8 inches so a lamp fits without hitting shelves.
Cost: 80 to 260 USD. Difficulty: Moderate DIY. Time: 2 to 4 hours.
Good to know: Never site a fold-down desk on a door, a window or over an electrical outlet. If you are not comfortable with a stud finder and a level, this is the one idea on the list worth paying a handyman for.
11. Use Window Sill Bins for Lightweight Storage
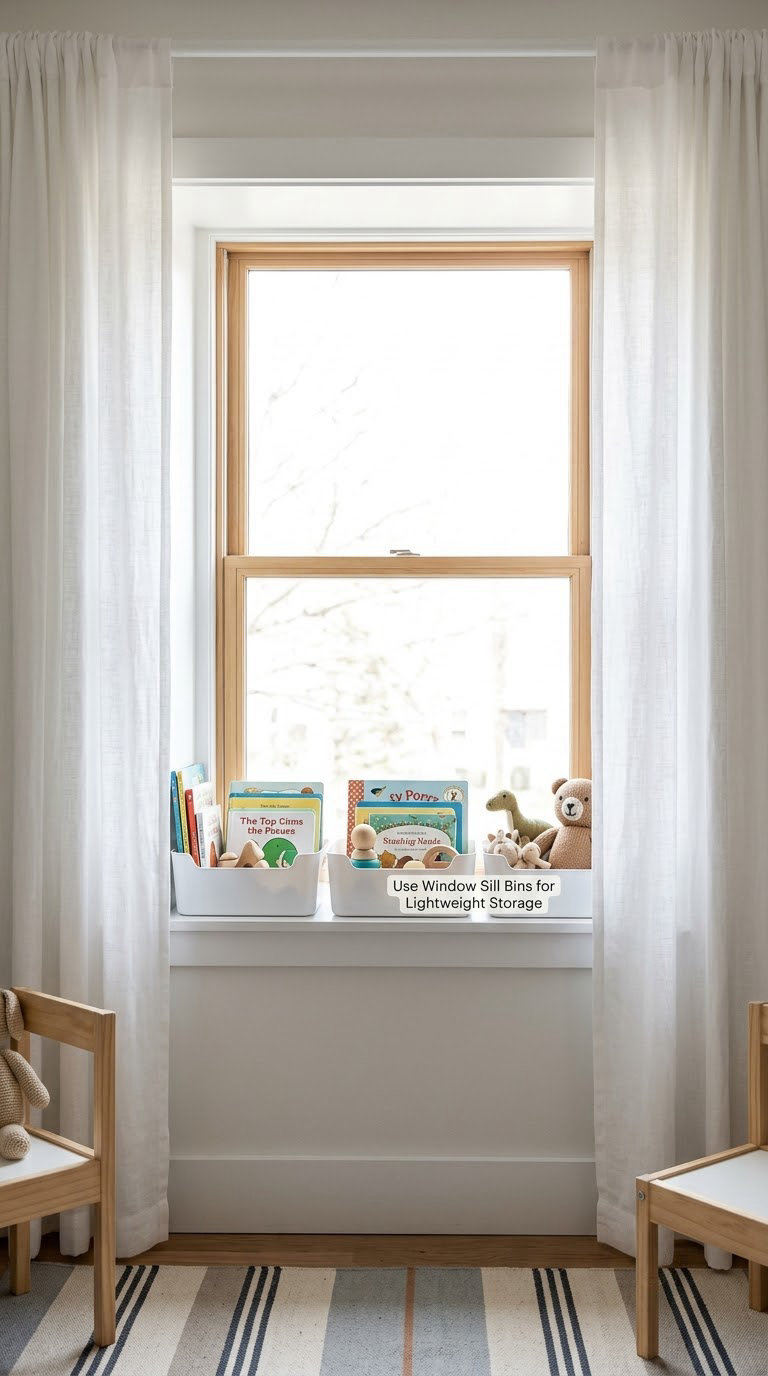
Window sills are flat, unused and often the widest single surface in a small room. Shallow bins turn a sill into a book stop, a catchall for small toys and a drop zone for things that would otherwise land on the floor.
How to do it:
- Measure sill depth. Bins deeper than 5 inches block the light and collect dust on the sill edge.
- Choose open-front or shallow crates so a child can see the contents.
- Keep total bin weight light, about 5 pounds per bin, since sills are not designed for point loads.
- Set bins at least 2 inches back from the front edge.
- Use a liner mat underneath so paint and glitter do not stain the paint or the sill.
Cost: 10 to 35 USD. Difficulty: Easy DIY. Time: 20 minutes.
Good to know: Sunlight fades book covers and fades fabric colors, so paperbacks near a south-facing window want a light-filtering curtain. Skip the sill entirely if the window opens down and the bins get in the way of the sash.
12. Add a Closet Door Organizer for Clothes and Accessories
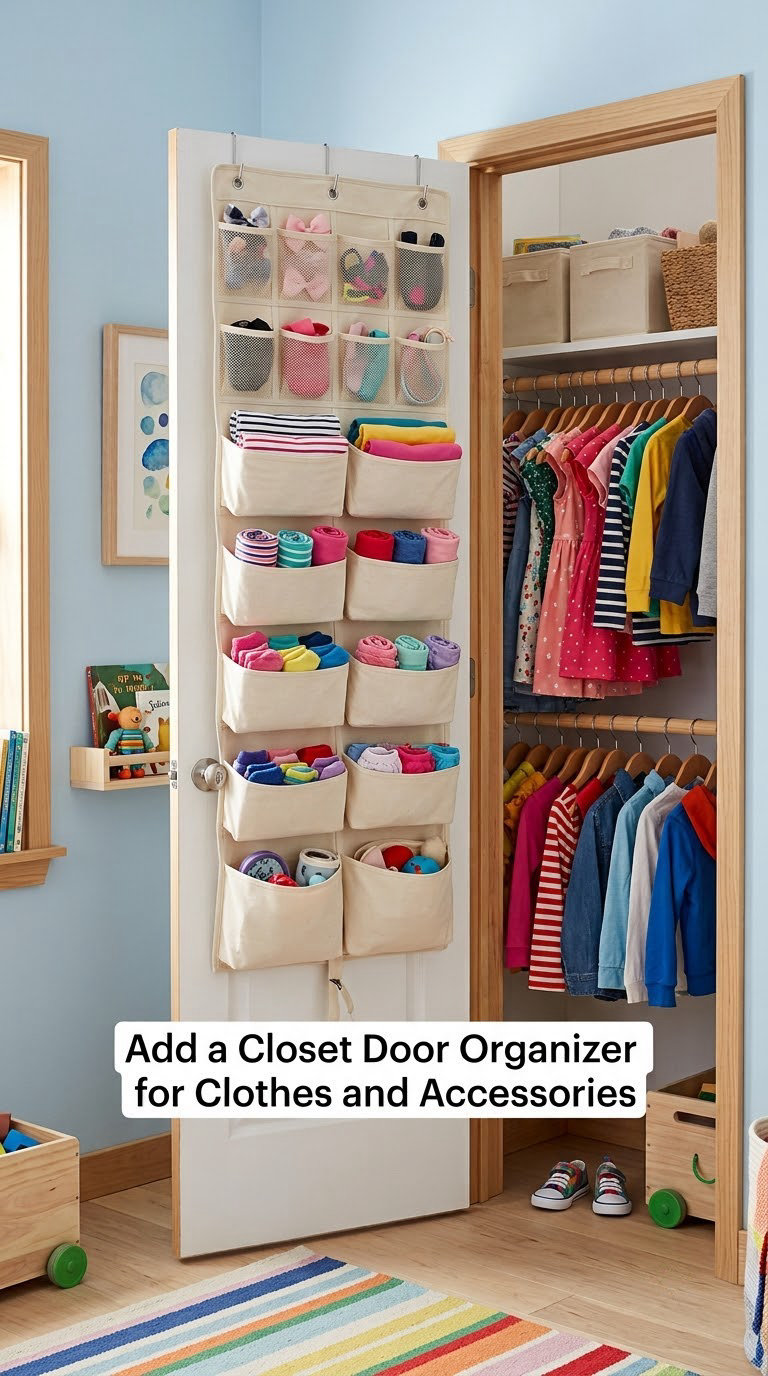
Slim hanging organizers turn the back of a closet door into storage for the small clothing that never fits on a hanger. In rooms where the closet is tiny or missing entirely, this is often the only closet you have, which is why it comes up so often in parent forums.
How to do it:
- Measure door thickness and the inside face width, then pick a slim organizer that hangs over the top.
- Leave about 4 inches between the organizer and the door frame so the door closes.
- Fill the top pockets with lightweight items such as socks, underwear, accessories and soft toys.
- Use the lower shelves for folded clothes in stacks no more than 6 inches tall.
- Add one label per pocket so the whole thing resets in a minute.
Cost: 20 to 60 USD. Difficulty: Easy DIY. Time: 10 minutes.
Good to know: Check for folding or bi-fold closet doors, which pinch small fingers. If your closet doors fold, take them off their tracks or replace them with a roller door, then the organizer becomes safe to use at full height.
13. Build a Toy Rotation Bin System
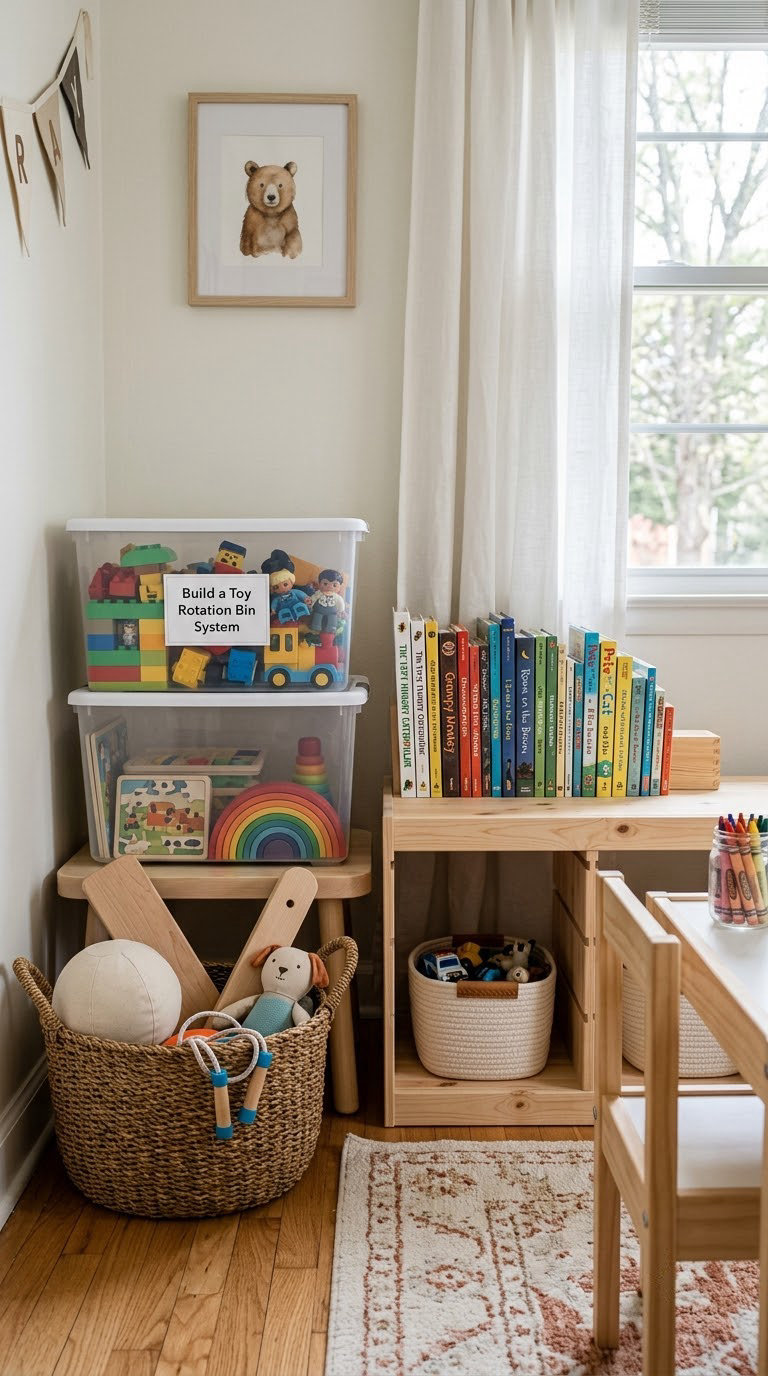
Toy rotation is the one storage idea that reduces the amount of storage you need. Splitting toys into active, alternate and seasonal groups means a child sees a fraction of their collection at a time, and the clutter problem shrinks before any shelf goes up.
How to do it:
- Sort into three groups: out now, next up, and seasonal or too-big.
- Keep the active group to what fits two open bins or one shelf section.
- Store the rotate group high or out of the room, in a lidded bin in a closet or a garage shelf.
- Swap on a fixed rhythm, most often a Friday evening reset, and mark the swap day on the calendar.
- Donate or pass on whatever has not been touched in two rotation cycles.
Cost: 30 to 90 USD for two to four bins. Difficulty: Easy DIY. Time: 1 weekend to sort, 20 minutes per swap.
Good to know: The rule that keeps it working is simple: nothing stays visible that did not get touched this week. Parents who run a strict one-in-one-out habit find the rotation self-maintains, and the ones who skip the swap end up with two full “alternate” bins.
14. Use Corner Shelving for Books and Display
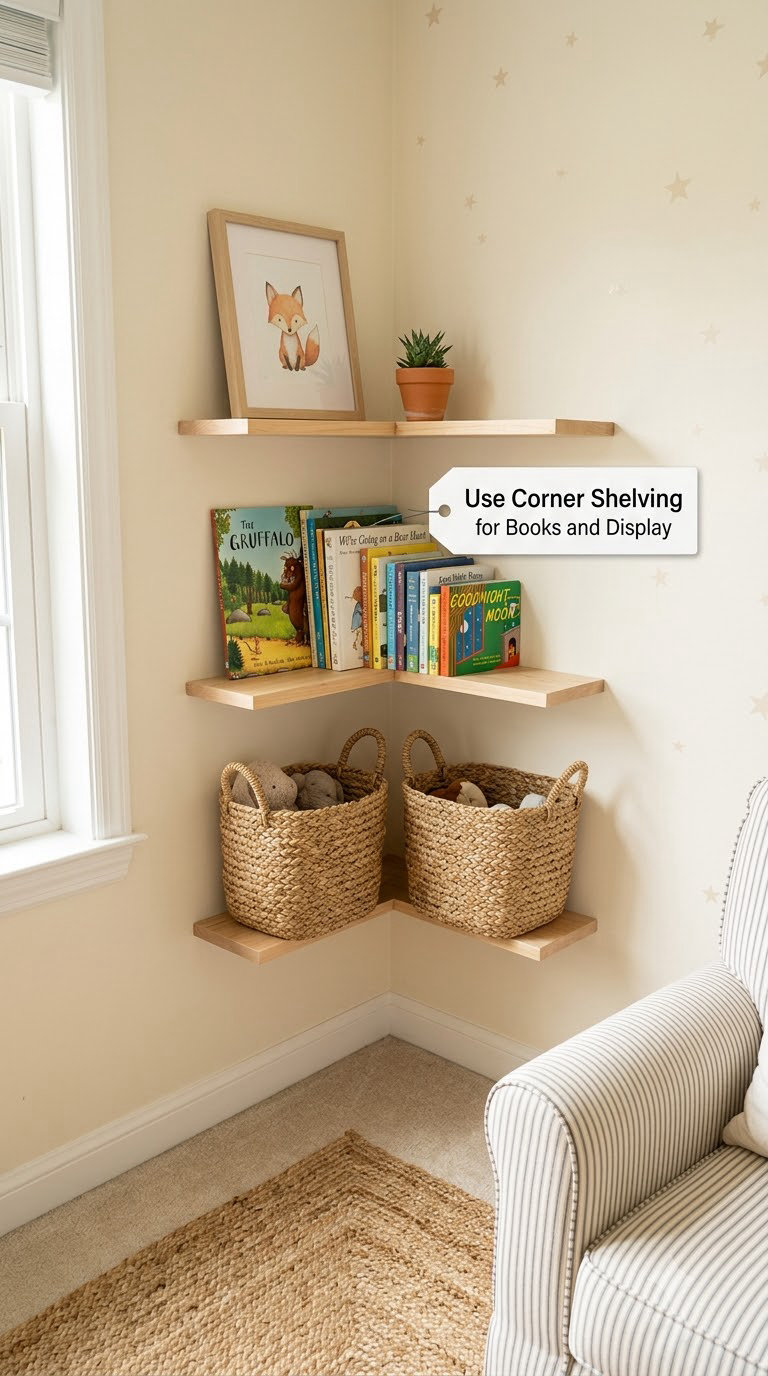
Corner shelving turns the angle where two walls meet into storage that does not project into the walking path. For a book collection that needs vertical room, this is often the difference between a bookcase and a stack on the floor.
How to do it:
- Measure both walls at floor level and check the corner is square, using a level against each wall.
- Choose a unit 10 to 14 inches deep so it stays out of the walkway.
- Set shelf spacing at 10 to 13 inches for picture books, 14 inches for board books.
- Anchor the unit into at least two studs using a wall strap at the top.
- Pad the front vertical edge with a corner guard if the unit stands in a play path.
Cost: 40 to 150 USD. Difficulty: Moderate DIY. Time: 2 to 3 hours including anchoring.
Good to know: Corner units are narrow, so a shelf 9 inches wide holds about eight picture books face out. It works better as a display surface with baskets below than as the room’s main book storage.
15. Add a Rolling Library Cart for Books
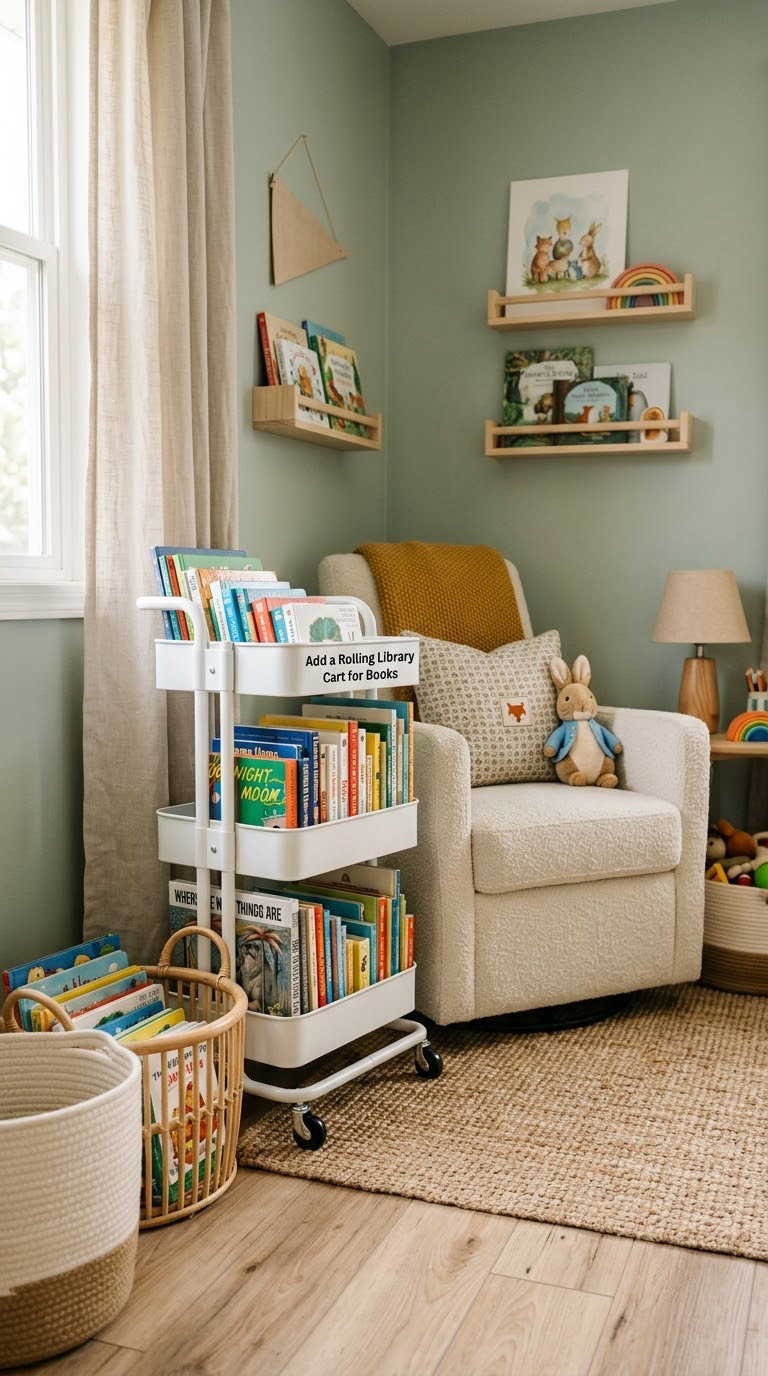
A rolling library cart keeps books visible and lets a child choose without asking, which is the whole point in a room where a bookshelf sits behind a door. It also moves to wherever reading happens this week, so the cart earns its footprint.
How to do it:
- Pick a cart 10 to 14 inches wide with three shelves, each holding about 25 picture books face out.
- Choose a shelf depth of 8 to 10 inches so books stand without falling forward.
- Test load: keep each shelf under 25 pounds and keep the heaviest books low.
- Lock the casters once it is parked next to the reading chair or the bed.
- Leave 14 inches of walkway between the cart and the bed for a child to pass.
Cost: 40 to 140 USD. Difficulty: Easy DIY. Time: 30 minutes.
Good to know: A cart in the middle of a tiny room is a trip hazard during a game of roughhousing. Park it against a wall or inside the reading nook and treat that spot as its home.
16. Hang a Closet Rod Lower for Children’s Clothes
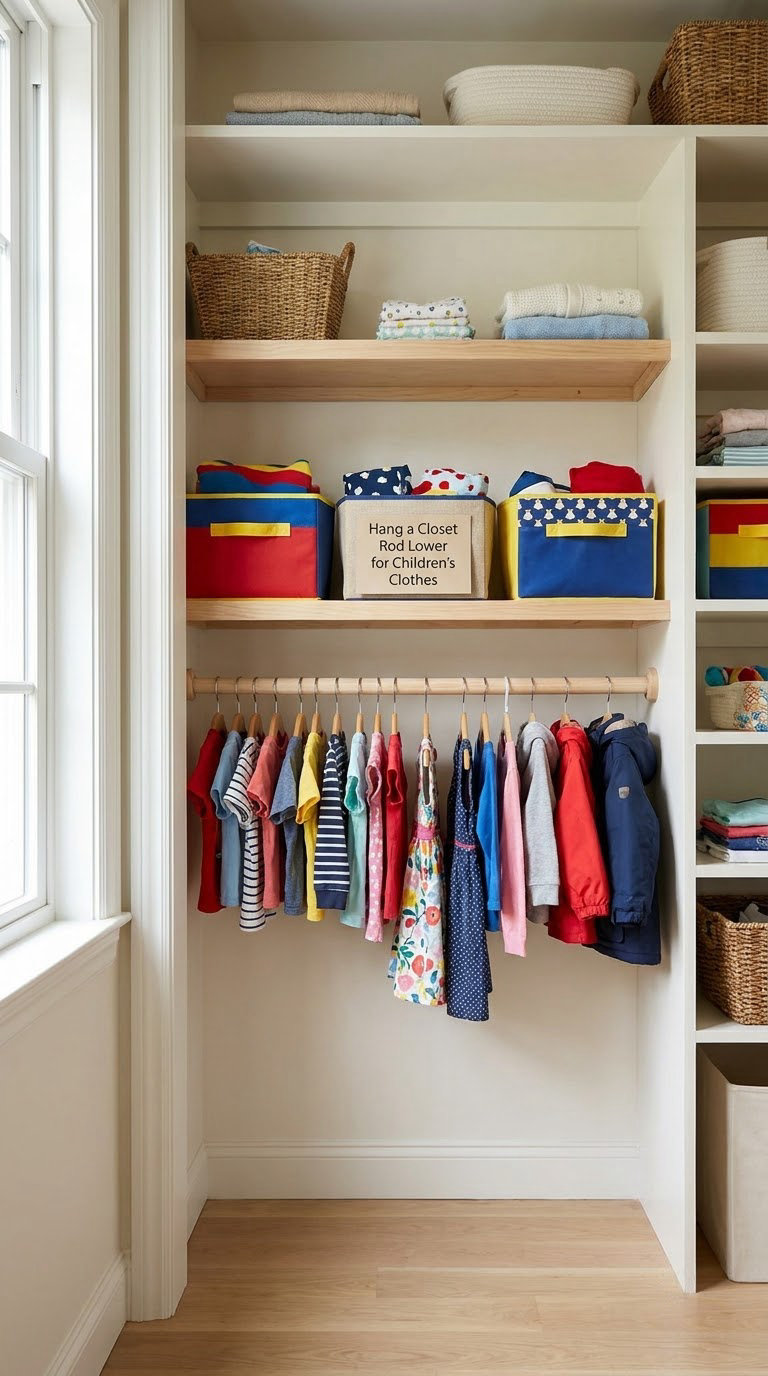
A lower closet rod puts clothes inside a child’s reach, which kills the floor pile and the daily help request at the same time. In small rooms, it is often the difference between a closet that works and a closet that becomes a chair for clothes.
How to do it:
- Set the lower rod at 40 to 44 inches off the floor for a child aged 4 to 8.
- Space hangers 2 to 3 inches apart on the lower rod, and 1.5 to 2 inches on the upper rod.
- Leave 12 inches of vertical clearance between rods so long garments hang straight.
- Use short hangers for kids’ clothes, which reduces crowding and lets more fit on a short run.
- Fit the rod into the closet side panels with screws, not adhesive hooks, and add a small lip stop at each end.
Cost: 15 to 60 USD for a rod, brackets and a pack of hangers. Difficulty: Moderate DIY. Time: 1 to 2 hours.
Good to know: Bulky jeans, sweatshirts and winter coats are what actually fill a kid’s closet. Hang those on the upper rod and fold them into a bin or onto lower cubbies, or the lower rod fills with the same oversized items within a week.
17. Use Drawer Organizers for Small Items and Clothing
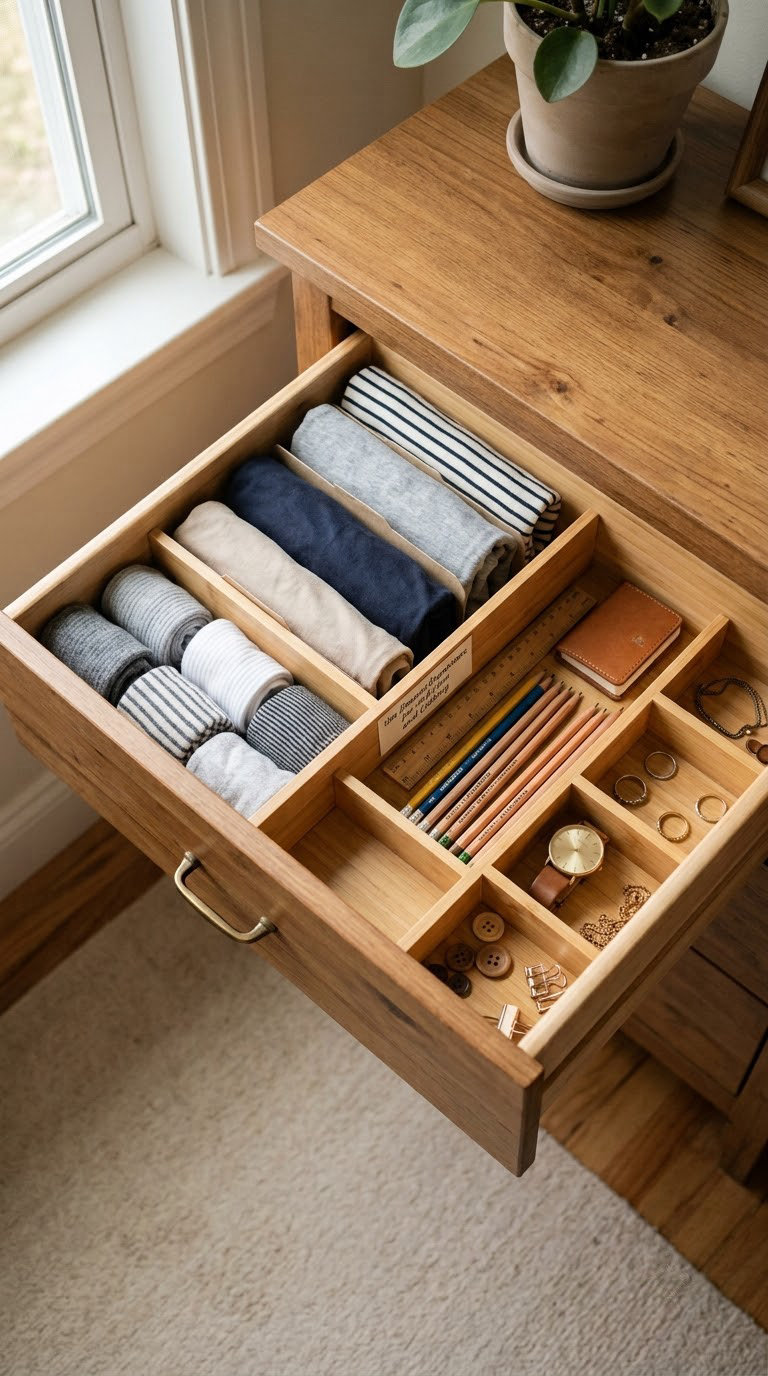
Drawer organizers make furniture you already own hold noticeably more, at the lowest cost of any idea here. Adjustable dividers or shallow trays turn one deep drawer into three or four labelled compartments.
How to do it:
- Measure the inside width, depth and height of the drawer, then subtract a quarter inch on width and depth.
- Pick a divider height 1 to 2 inches under the drawer wall so the drawer still closes.
- Use shallow trays for socks and underwear, and taller cells for rolled jeans and leggings.
- Add one long thin cell per drawer for pencils, hair ties, or dress-up accessories.
- Label the front of each cell on removable tape rather than permanent marker.
Cost: 10 to 60 USD. Difficulty: Easy DIY. Time: 1 hour per drawer.
Good to know: Measure the drawer from inside, not from the dresser front, and check for a center support bar that cuts usable width in half. If a drawer has no bottom and slides on rails, buy a shallow tray that rests on the rails rather than a rigid box.
18. Install a Wall-Mounted Book Pocket Display
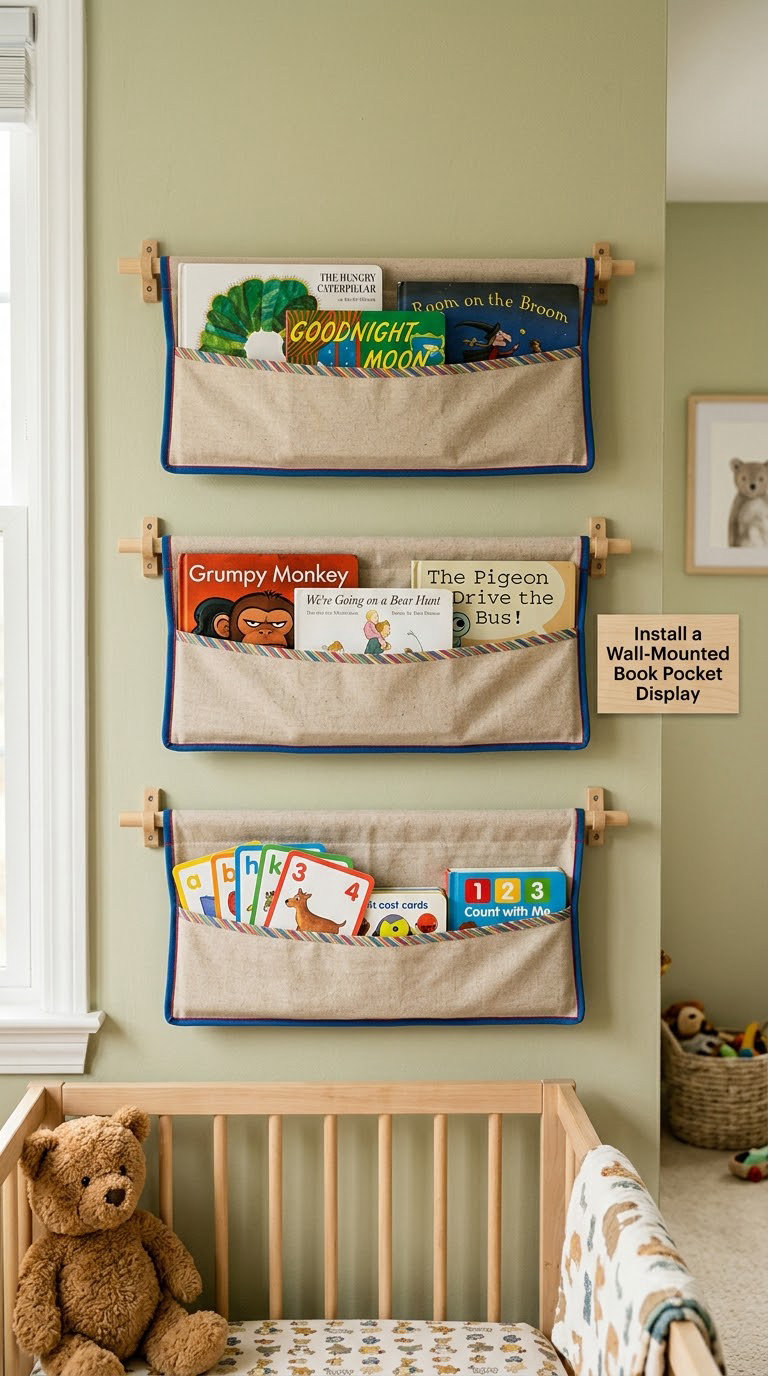
Wall-mounted book pockets display picture books face out, which is how young children pick books, and they keep current titles off the floor. Three fabric pockets stacked vertically add display space roughly 8 inches deep.
How to do it:
- Choose pockets with a depth of 5 to 7 inches so they hold a standard paperback without bowing the cover.
- Space pockets 12 to 14 inches apart vertically.
- Mount the top pocket between 30 and 40 inches off the floor so a child can pull a book out one-handed.
- Use rounded or padded edges if the corner sits beside a play path.
- Rotate books weekly and pull out the ones nobody has picked in a month.
Cost: 20 to 70 USD for three pockets. Difficulty: Easy DIY. Time: 1 hour.
Good to know: Pockets loaded with board books look good and fall straight out, because board books are wider than slots. Check the pocket width against your thickest book before you mount anything.
19. Create a Hidden Floor Storage Zone with Baskets
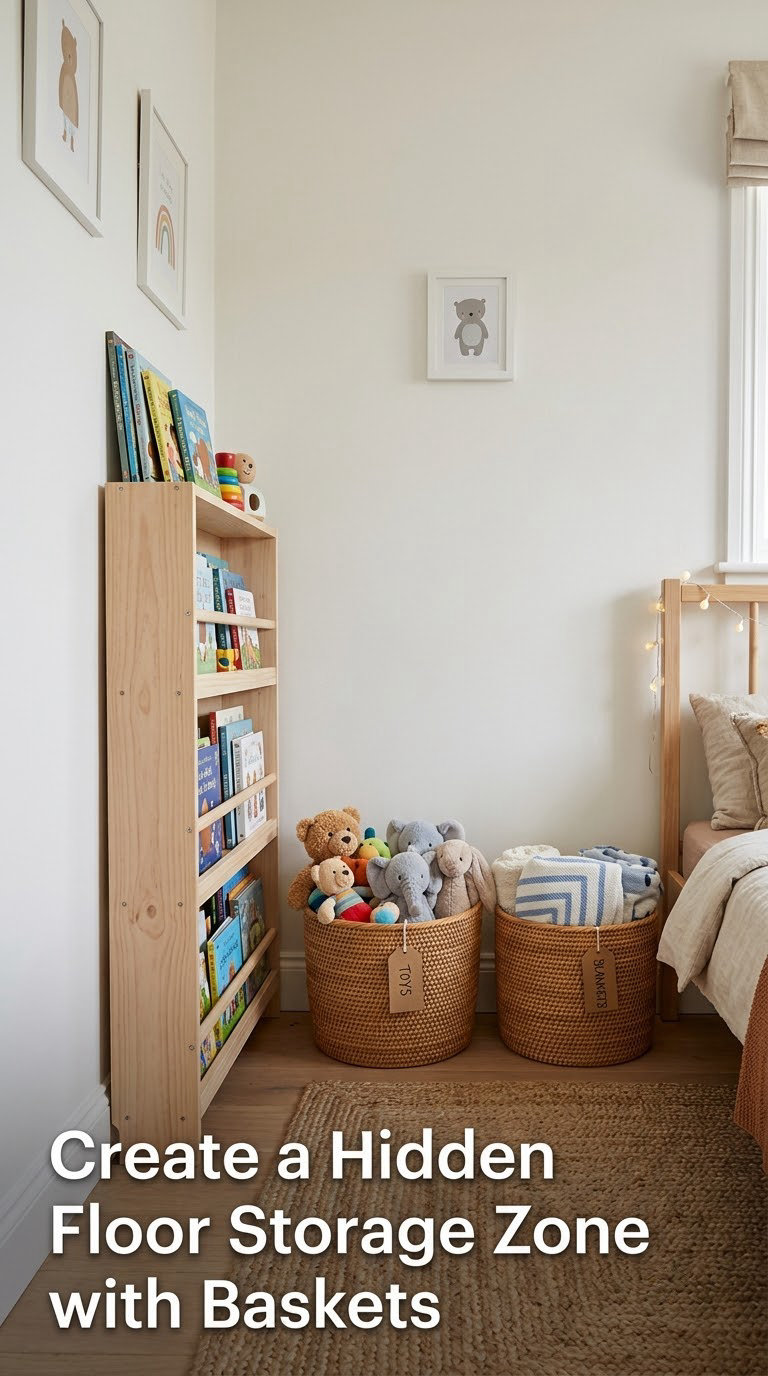
Two matching baskets turn an open floor corner into a storage zone instead of a drop zone. Uniform containers read as intentional furniture, which is why woven baskets work where a pile of mismatched tubs reads as clutter.
How to do it:
- Measure the corner and pick baskets that fit with 2 inches of clearance on each side.
- Choose one size for both baskets so the pair reads as a set and they can stack if the corner changes.
- Assign one basket per category, such as plush toys and dress-up clothes, and label the front.
- Use wheeled bases instead if you need to pull them daily for under-bed storage.
- Keep the zone clear of the walkway and at least 12 inches back from the door swing.
Cost: 30 to 120 USD for two baskets. Difficulty: Easy DIY. Time: 1 hour.
Good to know: Woven baskets with handles are decorative but show contents less well than open-front bins. If your child is under six and cannot read labels, pick something open-front so the assignment is visible, and accept a slightly less tidy look.
20. Use Multi-Purpose Storage Ottomans
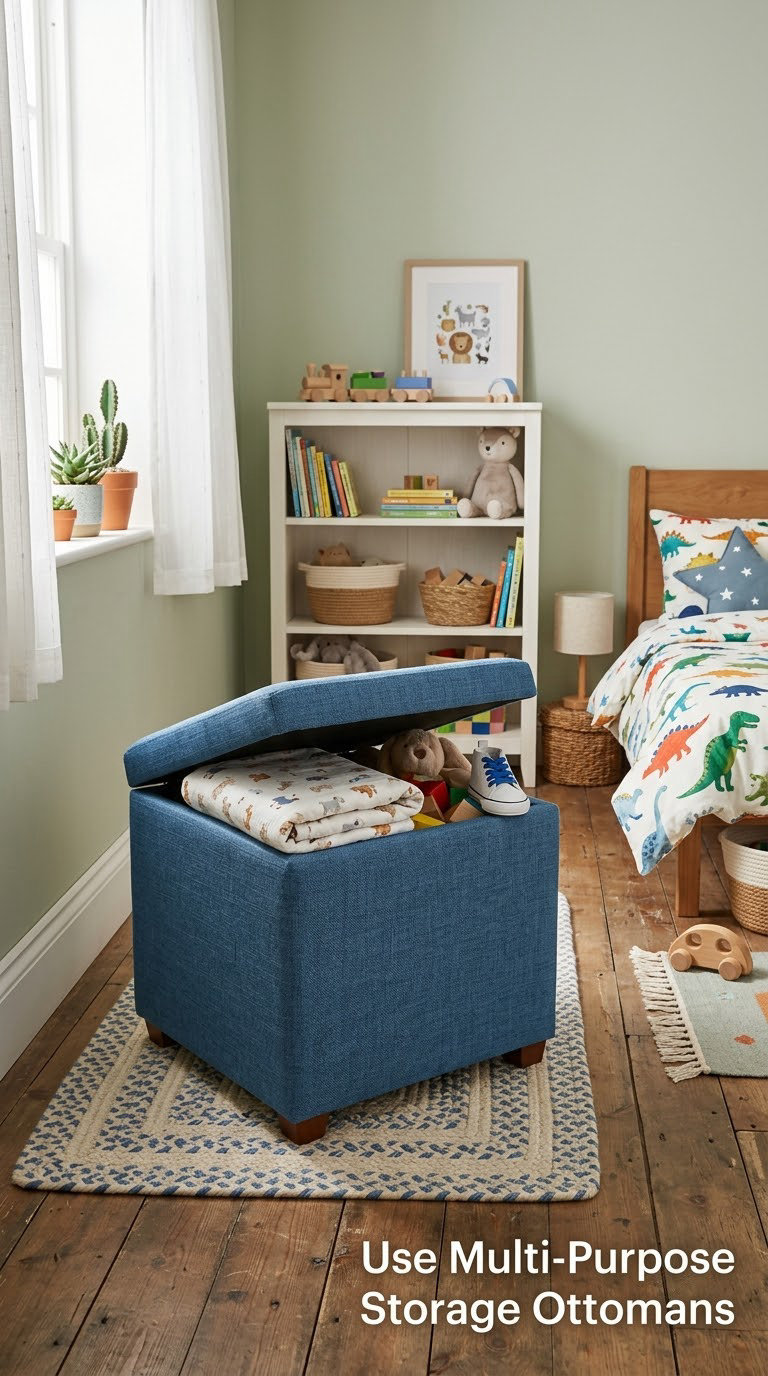
A storage ottoman gives you a seat, a table surface and a place to hide toys in the same 18 by 18 inches of floor. In a room where every piece of furniture has to earn its spot, that is hard to argue with.
How to do it:
- Check the opening mechanism. A lift-top hinge stays open on its own; a loose lid does not, and gets left on the floor.
- Pick a seat height of 14 to 16 inches, which doubles as a step stool for a young child.
- Look for a stated load capacity of 250 pounds or more if a child will jump on it.
- Choose removable or washable upholstery, since spills happen.
- Fill it with soft, light items such as blankets, plush toys and dress-up costumes.
Cost: 80 to 300 USD. Difficulty: Easy DIY. Time: 30 minutes.
Good to know: Skip anything with a spring hinge near a child’s fingers, and check that the frame is solid rather than a fabric shell over cardboard. Flip or rotate it occasionally so one side does not wear out first.
Planning Tips for Small Kids Room Storage
Most of the ideas above work better with a bit of order behind them. These are the planning steps worth doing before anything shows up in a cart.
- Measure twice. Record every wall width, the closet interior, the door swing and the space under the bed. A pencil sketch of the room with real numbers beats an estimate every time.
- Map circulation. Walk the room from door to bed and bed to desk. Any idea that narrows a path by more than 14 inches gets moved or skipped.
- Prioritize vertical and concealed storage. In a room under 80 square feet, adding a wall system beats adding floor furniture, because it does not compete for walking space.
- Coordinate purchases. A bin that does not fit its cube is a bin on the floor, and a hook at the wrong height is a hook nobody uses.
- Keep a 10 to 15 percent budget buffer. Wall anchors, extra labels, mounting plates and paint add up faster than most people expect.
- Order the work. Measure first, then install, then label, then sort, then reset the room. Labeling before the sorting finishes means redoing labels.
How to Plan Kids Room Storage in a Small Room
A workable sequence takes about an hour and prevents most of the common rework. Measure the room and sketch it to scale, including door swings and window positions. Then take everything out of one category at a time, usually clothes, and decide what leaves the room. Next, choose your kid-height zone between 24 and 40 inches and put the daily-use storage there before anything higher goes up.
Test the layout with painter’s tape on the floor before you commit to furniture footprints. Photograph each wall, then order only what fits the taped outline. Install the storage first and label it last, and give the room one reset day a week to keep the system from drifting back.
The same measure-first approach works elsewhere in the house. Our food storage room ideas and Fourth of July kids room ideas both start from the room’s real dimensions rather than a showroom photo.
Frequently Asked Questions
What are the best storage ideas for a very small kids room?
Start with the dead zones rather than new furniture. Under-bed rolling bins, an over-the-door organizer and wall-mounted shelves together add capacity without taking a single inch of walkway. In rooms under 80 square feet, vertical and concealed storage beat almost every floor-standing piece. Add one low cubby at kid height for daily toys so the rest of the room can stay closed.
What should I never store under a bed?
Skip anything heavy, dusty, sharp or spillable. Avoid dense winter coats and heavy blankets that crush other items, food and liquids that attract pests, loose batteries, cords, tools and cleaning chemicals. Keep fabric bins sealed and lift them out to vacuum under the bed every few months. Leave a couple of inches of clearance at the end of the bed so airflow is not blocked.
How do I organize a small kids room with no closet?
Treat the walls and doors as the closet. An over-the-door organizer handles socks and small clothes, a lower wall rod or hooks at child height take jackets, and a labeled cubby or rolling cart handles clothes by season. Narrow rolling carts are the most flexible option because they move between the room and the laundry. Plan on capacity for clothing only, since a room without a closet cannot absorb much more.
What is the best storage system for a child’s room?
No single system wins everywhere, but the one that survives longest combines three container types: open-front labeled bins for daily toys, lidded bins for seasonal items, and one hidden container such as an ottoman or bench for overflow. Labeling matters more than the brand. Picture labels for pre-readers and word labels once children can read them are what keep a room resetting itself.
How do I keep a small kids room tidy after the setup?
Run a five-minute reset at the same time every day, usually right before dinner, and use a basket near the door as a drop zone so nothing starts on the floor. Rotate toys on a fixed schedule so only a fraction of the collection is out at once. Cap every bin at two-thirds full and label the front. A weekly swap plus a monthly donation bag beats constant nagging.
What kids room storage ideas work if I am renting?
Favor tension and over-door solutions: tension rod shelves, over-the-door organizers, drawer dividers, rolling carts, labeled bins and a lower closet rod screwed into the closet panels rather than the wall. If you want shelves, use adhesive panels rated for light loads and keep the load modest. Anchor everything you do drill into, and take photos before you start so you can patch and fill the holes when you move out.
Conclusion
Start with the two ideas that cost the least and demand the least: labeled cubbies at kid height and rolling bins under the bed. Then walk the room and add vertical storage wherever a blank wall exists. Measure before you buy, anchor everything taller than a child’s shoulder, and give the system one reset a week so the room stays a room instead of becoming storage with a bed in it.