How to Replace a Door Knob and Lock: Easy Steps (October 2026)
Yes, you can replace a door knob and lock yourself on almost any standard interior door. If your bore is the normal 2-1/8 inch and the backset is 2-3/8 or 2-3/4 inch, the job is 30 to 60 minutes with a screwdriver and a tape measure.
Learning how to replace a door knob and lock is one of those skills that pays for itself the first time a knob goes loose and nobody has to wait days for a handyman. It also matters after a move, when matching every lock to one key means the previous owner cannot walk in.
Contents
Time: 30-60 minutes per door · Cost: one lockset plus a few dollars of screws and supplies · Difficulty: Easy DIY · Skill level: beginner, as long as you measure before you buy
Tools and Materials
Everything here is ordinary. Nothing on this list needs a special bit or a specialty tool.
- Phillips head screwdriver, 2 inch and 6 inch shafts (2)
- Power drill with a Phillips bit, optional but faster on long screws (1)
- Tape measure, 25 foot or longer, a steel rule also works (1)
- Needle-nose pliers for the small retaining clips on rose plates (1)
- Utility knife or thin pry bar for lifting a snap-on cover plate (1)
- Pencil and masking tape for marking the backset (1)
For the hardware itself, measure first, then buy. Most jobs need very little.
- Complete lockset: latch, two knobs, spindle, rose plates, strike plate (1)
- Phillips #2 screws, 1 inch and 2-1/4 inch lengths, so the long ones stop short of the spindle
- Wood glue and a matching touch-up marker or paint pen, for stripped holes
- Wood putty or a wood filler stick, plus a 1/8 inch drill bit for repairs
- Silicone-based lubricant for the latch bolt, optional
- Masking tape and a scrap cloth to protect the finish
Before You Start
Most failures happen before a single screw comes out, and almost all of them trace back to buying the wrong backset or not knowing what kind of lock you have.
Work out which lock you actually have
Look at the edge of the door. A standard tubular lock has a rectangular plate about 1 inch tall by 2-1/4 inches wide holding a spring-loaded latch bolt, and the knob sits in a round hole on the door face. A mortise lock is different: it is a rectangular lockbox recessed into a deep pocket in the door edge, held by two screws, and the faceplate is narrow and long.
If the edge plate is wide and the knob comes off as a single unit, you have a tubular lock. If you see a deep rectangular pocket and screws driven into the edge, stop and read the mortise notes further down, because that job takes longer and needs a different approach.
Confirm the three measurements
The bore diameter is the hole through the door face. On almost every modern interior door it measures 2-1/8 inch. The backset is the distance from the door edge to the center of that bore, and it comes in two common sizes: 2-3/8 inch and 2-3/4 inch. Door thickness needs to be at least 1-3/8 inch for standard hardware.
Measure the backset with the old knob removed so the tape reaches the center of the hole. Write it on masking tape stuck to the door face, not in your phone where you will lose it in five minutes.
Decide rekey or full replacement
You only need new keys, not new hardware, if the existing lock body works fine. A rekeyable cylinder lets a locksmith or, with the right tool, a homeowner swap the pins inside and cut a new key without taking the lock out of the door. Replace the whole lockset when the mechanism is worn, the finish is pitted, or the screws have chewed the wood.
Protect the door and check the job scope
Tape a cloth over the surface you are working near and prop the door so it cannot swing shut on your fingers. This is hardware work only. If the task has turned into reshaping the door, cutting a new pocket, dealing with wiring, or fitting a certified high-security or smart lock on an exterior entry door, that is where a licensed trade takes over.
Keyed entry, privacy knob, or something electronic
An exterior or entry-side door wants a keyed knob or a deadbolt. A bathroom or bedroom door wants a privacy push-button knob, which locks from the inside and releases with no key. If you are weighing keypad or fingerprint options instead, I compared the best keyless door locks before deciding.
How to Replace a Door Knob and Lock: Step-by-Step Instructions
Five steps, in order. Take them slowly the first time and the second door takes half as long.
Step 1: Remove the Existing Door Knob and Lock
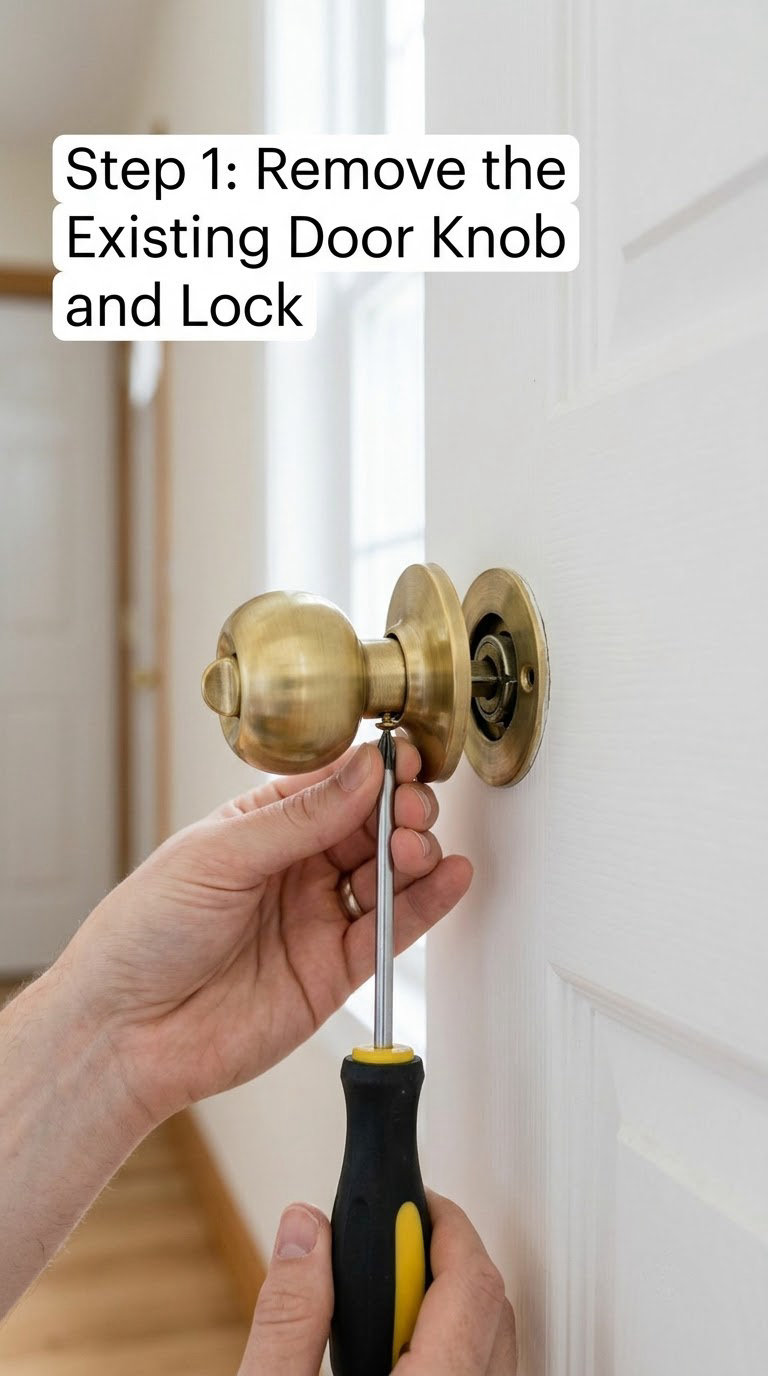
Open the door and wedge it so it stays put. On the inside of the door, look for two screws near the rose plate. Unscrew them and pull the inside knob straight off; the outside knob, spindle and latch usually follow as one assembly.
If your knob has no visible screws
This is the most common snag on older doors, and it comes up constantly on DIY forums. There are three hiding places. First, a decorative rose plate may be snapped or glued over the screw holes; lift it with a thin pry bar or utility knife at the edge and work around the perimeter. Second, some knobs have no face screws at all and are held by a set screw on the side or underside of the neck; that is the small hole you locate by running a finger along the collar below the knob while turning it. Third, the screws can sit under a separate decorative cover ring on the interior side only.
Back the set screw out fully with a small Phillips bit before you pull. If the knob still will not slide off, it is gripping the spindle: have someone hold the outside knob while you rotate the inside knob in the opposite direction and pull straight out. A thin screwdriver shimmed into the spindle opening on the latch side also breaks the grip on stubborn old hardware.
Pull the latch and both plates
With the knob off, the latch, spindle and rose plates usually lift out of the bore together. If the latch stays in the door, it is held by two screws through the edge faceplate. Remove those, then slide the latch out. Pry the old faceplate loose with a thin screwdriver if paint has sealed it, and take the old strike plate off the jamb the same way.
Count the screws and check the door edge for scuffs before you go further. If you find a screw that will not turn, stop and read the Common Mistakes section below before applying more force.
Step 2: Measure the Door and Choose a Compatible Replacement
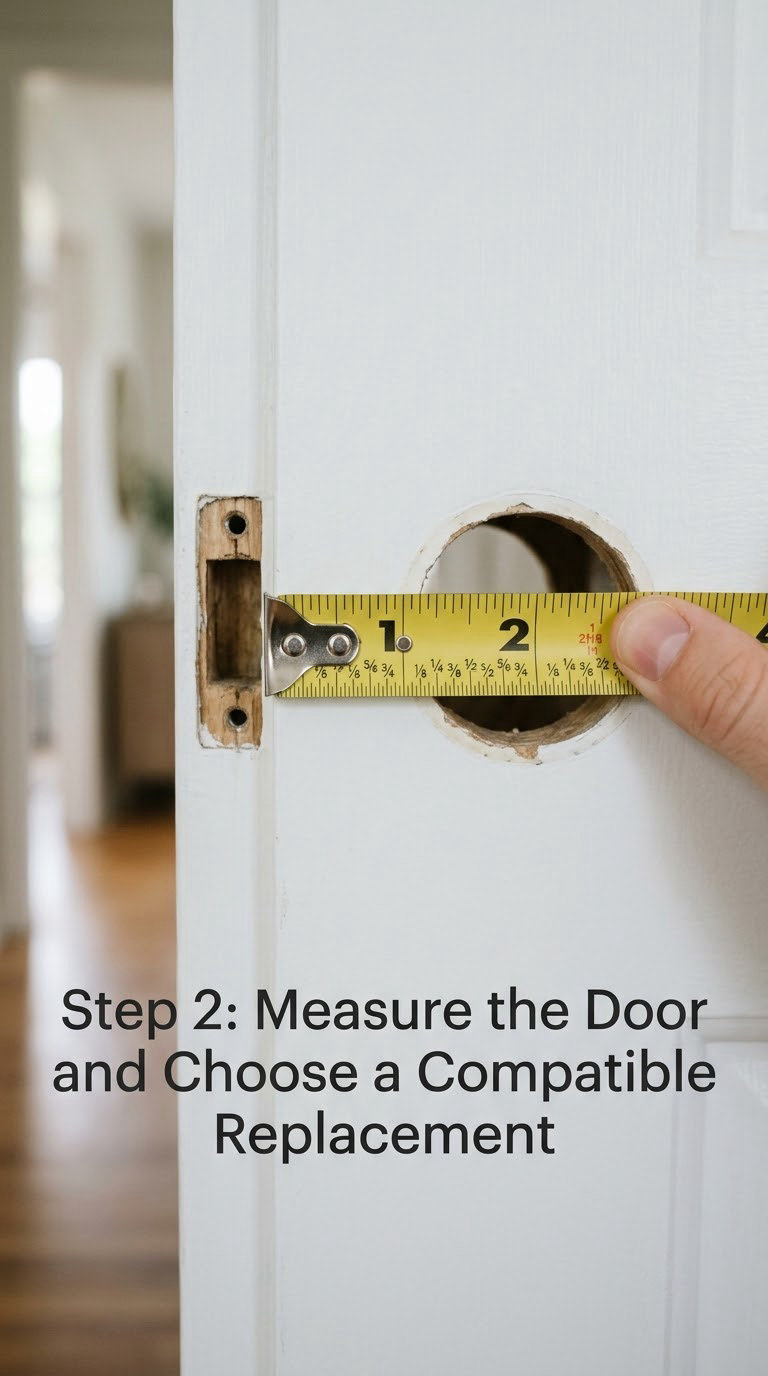
Compare three numbers against the new lockset before it goes anywhere near the door: the 2-1/8 inch bore diameter, the backset you measured from the edge, and the door thickness. If the bore is snug rather than loose, that is normal. If the new backset does not match the old one, the latch will sit proud of the door edge and never line up with the strike.
Older doors occasionally have a 1 inch bore, and pre-1970 solid-core doors sometimes have no hole at all. Those cases need an adaptor sleeve or a new bore cut, which is a bigger job. Confirm the latch throw fits your door thickness as well: a standard latch is built for a door up to 1-3/4 inch thick.
Match the handing too. A knob and latch set is reversible for most swing directions, but the spindle and tailpiece must be oriented so the latch retracts when you turn the inside knob.
Step 3: Install the New Latch or Lock Mechanism
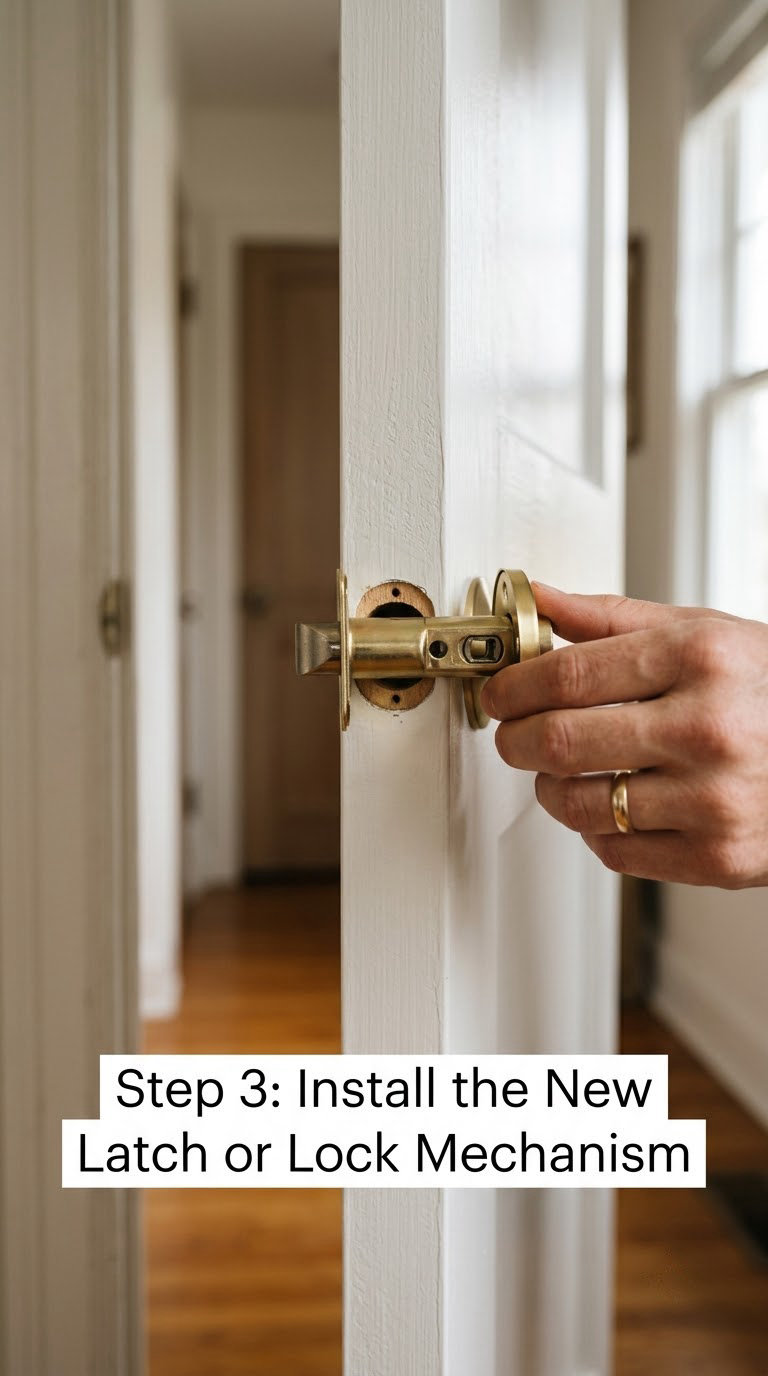
Slide the new latch into the bore with the spindle opening between the two halves of the latch. Put the tapered side, the slanted face on the latch bolt, toward the side you push the door to close it. Get this backwards and the door simply will not latch.
Seat the faceplate flush against the door edge and drive the two screws. Keep the plate square by holding it flat while the first screw goes in, then snug the second. The latch should sit flush with the edge and retract fully with no interference from the faceplate screws.
For a mortise lock the sequence changes: the lockbox drops into the edge pocket with the tailpiece toward the knob side, the faceplate fastens to the door edge, and the key cylinder is held by a set screw on the jamb side. Removing an old mortise cylinder is the reverse: back out that jamb-side set screw, remove the thumb turn, and the cylinder spins loose and lifts out.
Step 4: Attach the New Knob and Lock Hardware
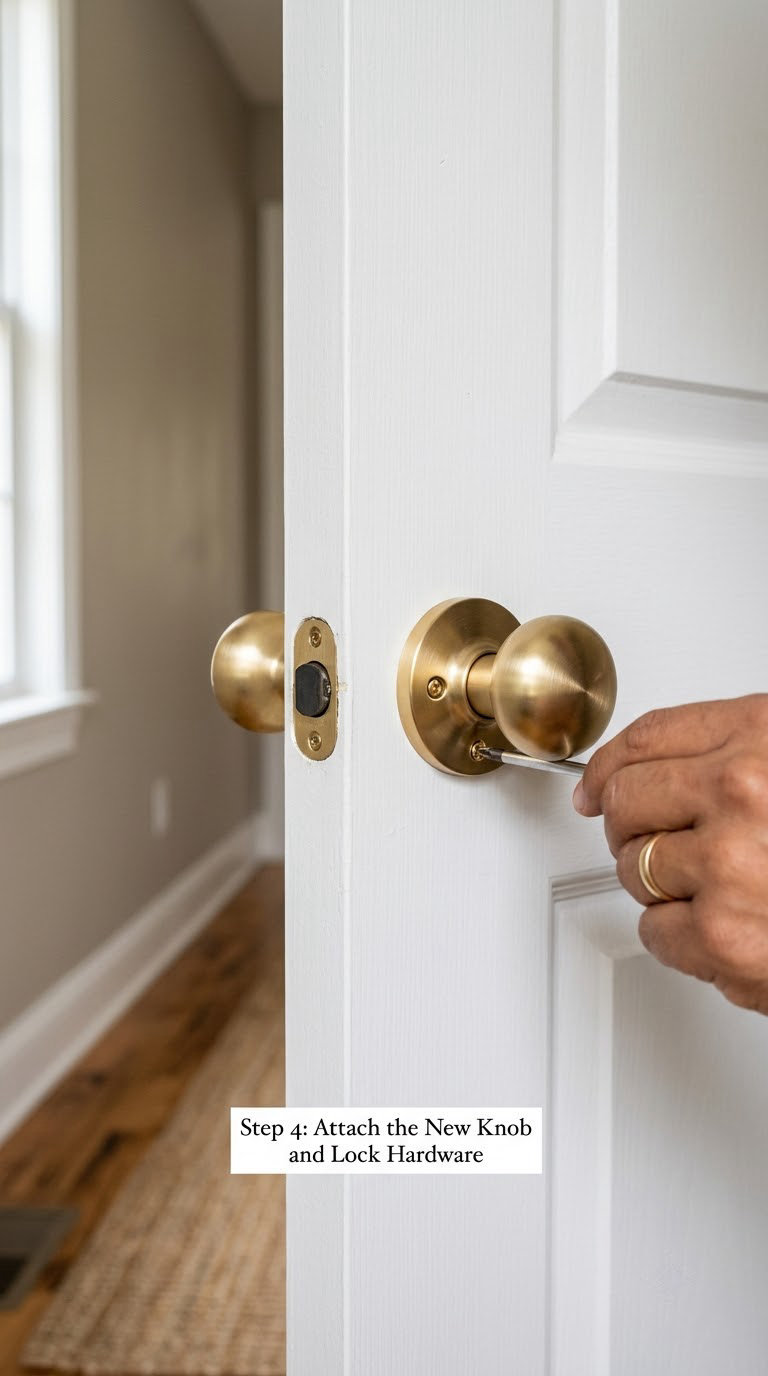
Set the latch in the bore with the bevel facing the strike, then drop one rose plate over the spindle and align it. Slide the spindle through the latch so it drives both halves evenly; the long flat end of the spindle or the tailpiece must engage the latch mechanism, not slip past it.
Push the inside knob on until it seats against the rose, then secure it with the two retaining screws or the plastic clips. Those clips are tough to snap by hand, so use needle-nose pliers and push until you hear them click. Seat the outside knob the same way, then work the knob back and forth to confirm the spindle engages before you tighten anything further.
Stop the long screws about a quarter inch shy of the spindle. Screws that are too long punch through the door face and can split the wood or damage the hardware on the far side. You can compare keyless entry hardware later, but the mechanical basics stay the same.
Step 5: Test and Adjust the Lock
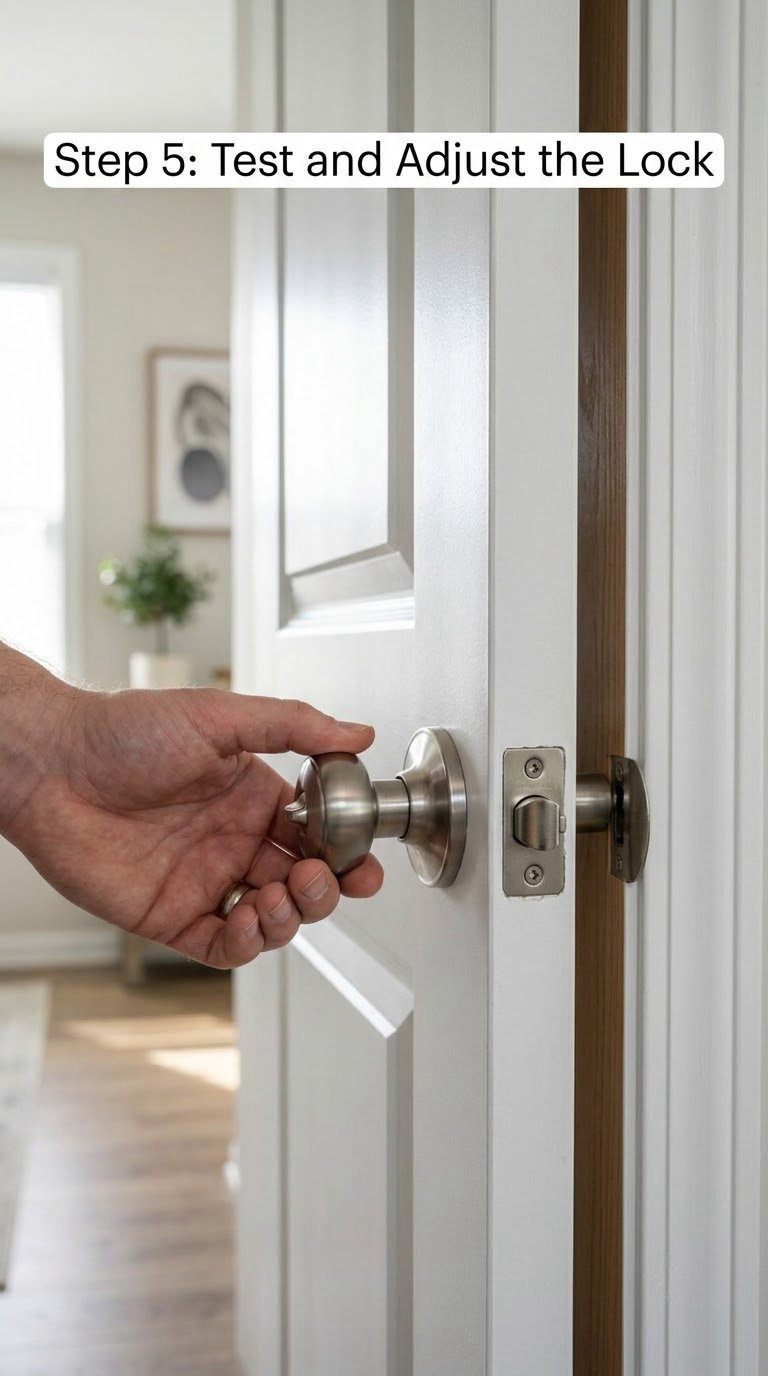
Keep the door open while you test. Turn the knob slowly from both sides, then push and pull the latch by hand to confirm it springs fully into and out of the strike plate. The latch should extend on its own with no help, and the knob should turn without any wobble.
Close the door and check the gap between door and jamb, roughly 1/8 inch, which is about the width of a nickel. If the latch catches on the strike before it lines up, loosen the strike plate screws, nudge it slightly toward the hinge side or away from it as needed, and retighten. If the latch hits the faceplate, back the faceplate screws out a quarter turn and reseat the latch so it sits square.
Lock and unlock from outside with the key, then test the thumb turn or push button from inside. Test twice more over the following days, because doors settle as the season changes.
Common Mistakes to Avoid
- Buying the wrong backset. Measure from the door edge to the center of the bore before ordering. A mismatch is the single most reported failure and means returning the whole lockset.
- Installing the latch backwards. The tapered side of the latch bolt faces the side you push the door to close it. Reversed, the door will not latch at all.
- Using screws that are too long. Long screws driven hard can split the door face or protrude through the rose on the other side. Keep 1 inch screws on thin doors and 2-1/4 inch only where the manufacturer calls for it.
- Overtightening. Snug is enough. Stripped, chewed screw heads in the rose plate are the most common repair job I get asked about.
- Misaligning the spindle. If the knob spins without moving the latch, the spindle or tailpiece is not seated in the latch. Take the knob off and reseat it rather than tightening harder.
- Forcing a stuck screw. Paint and rust are the usual reasons. Score the head, add a drop of penetrating oil, wait 10 minutes, then try again with steady pressure.
- Damaging the door finish. Masking tape under every screwdriver head and pry point costs nothing and saves a chip you cannot blend out.
- Forgetting to align the strike. Even a new latch will bind if the strike plate is off by a few degrees. Adjust it before you tighten the latch screws down.
When to Call a Pro
Hire a locksmith or handyman when the work crosses into territory where a mistake has real consequences or where the rules say it must.
- A cylinder or lock that is seized, or antique and historically significant hardware that has no modern replacement parts
- Mortise lock conversion where the edge pocket must be cut deeper or the lockbox has to be rebuilt
- Smart lock installation on an exterior entry door, especially where the bore is not exactly 2-1/8 inch and the lock calibrates to a tight fit
- Damaged or rotten door edges, split stiles, or a frame that needs planing or rehanging before hardware will line up
- Fire-rated or egress doors in multi-unit buildings, where hardware spec is set by the building and local rules
- Rental units where the lease requires a licensed contractor to change hardware
For connected entry hardware, read our notes on smart door locks with cameras before booking anyone, so you know which questions to ask.
Maintenance
A few minutes once a year keeps new hardware feeling new. Check that the retaining screws are still snug by turning the knob, not by driving the screwdriver harder; the rose plate should not wobble at all.
Put a small amount of silicone lubricant on the latch bolt where it meets the strike, twice a year, more often if the door is exposed to salt air or freezing weather. Keep graphite or a dry lubricant in the keyway and stay away from penetrating spray there, which draws grit into the cylinder. Wipe the finish with a damp cloth and dry it, since oils from hands etch some finishes over time.
If the door starts rubbing or catching, check the latch alignment before blaming the lock. Most sticking is a shifted door, not a failed mechanism. And after buying a home, rekey or replace every exterior lock the same week you get the keys, not after the first lost key.
Frequently Asked Questions
Can I replace a door knob myself?
Almost certainly yes. A standard tubular lockset on an interior or entry door needs a Phillips screwdriver, a tape measure and about 30 to 60 minutes. The only real test is whether your bore measures 2-1/8 inch and your backset is 2-3/8 or 2-3/4 inch. Doors with a mortise lock, a solid wood edge that needs reshaping, or a required fire-rated hardware spec are the exceptions worth handing to a pro.
How long does it take to replace a door knob and lock?
Plan on 30 to 60 minutes for a standard interior door once you have the new hardware in hand. Add 15 minutes if you are removing a snap-on rose plate or freeing a painted-over screw, and another 20 minutes if the strike plate needs relocating. Matching several doors to one key takes longer, because each lock is rekeyed or replaced individually.
How do I remove a door knob with no visible screws?
Look for a decorative cover plate first and pry it off at the edge with a thin screwdriver or utility knife, working slowly around the edge. If there is no face screw at all, the knob is held by a set screw on the side or underside of the neck. Find it by feeling along the collar while turning the knob, then back it out fully before pulling. If it still grips, counter-rotate both knobs with a helper.
What size backset do I need and how do I measure it?
Remove the old knob, then measure from the door edge to the center of the bore hole. You will find either 2-3/8 inch or 2-3/4 inch, and both are common. Write the number on masking tape before you go shopping. Also check the bore itself, which should measure 2-1/8 inch, and confirm your door is at least 1-3/8 inch thick for standard hardware.
Should I rekey or replace the lock?
Rekey if the lock still turns smoothly, the latch retracts cleanly and you only want keys the previous owner cannot use. A rekeyable cylinder swaps the internal pins and cuts a new key without removing hardware from the door. Replace the entire lockset when the knob is loose or spins, the latch sticks, the finish is pitted, or the screw holes are chewed. Replace everything if you are upgrading an entry door for security.
How do I know if my door has a mortise lock?
Remove the knob and look at the door edge. A mortise lock sits in a deep rectangular pocket and is held by two screws, with a narrow long faceplate and a visible cylinder. A standard tubular lock instead has a shallow wide plate about 1 inch tall and a latch that springs out of a round bore in the door face. Mortise locks take longer, need a different cylinder removal method, and are rarely worth converting to a modern tubular design.
What to Do First
Take the knob off and measure the backset before anything else. That single number decides whether your afternoon is smooth or whether you are standing in a hardware aisle at dusk holding the wrong lockset.
Once the measurement is written on tape and matched to a new lockset, the rest is removal, install, align the strike, and test the lock with the door open until the latch throws cleanly. How to replace a door knob and lock is genuinely a beginner job, and the same afternoon you can move on to the next door in the house.
Updated for October 2026.