How to Fix Uneven Drywall Seams: Easy Repair Guide 2026
An uneven drywall seam is a joint between two sheets where the edges sit at different heights, leaving a hump, ridge, or sunken valley that catches light and shows through paint. To fix uneven drywall seams, prefill the low spots, embed tape over the joint, then wide-float the whole area with a 12-14 inch knife feathered out 10-12 inches per side so the transition becomes a slow slope instead of a bump.
The mistake almost everyone makes is adding more compound on top of the hump. That thickens the ridge instead of flattening it. Removing the high spot first, then building a wide gradual transition, is what actually makes the wall disappear under paint.
Contents
This matters more in the fall and winter, when nobody has the windows open and every raking light from a ceiling fixture picks out defects across the whole room. A wall that looked fine in July can look terrible in November.
Time: 2-3 days spread over a week, mostly drying · Cost: modest, a quart of compound, a short length of tape and one sanding pass · Difficulty: moderate DIY, patience-heavy rather than skill-heavy · Skill level: first-timer friendly with slow, thin coats
Tools and Materials
You need three knife widths, not one. Most beginners try to fix a 20-inch-wide problem with a 6-inch putty knife and end up building a steeper bump than the one they started with.
- 6 inch (15 cm) taping knife for scraping loose compound, cutting a shallow V-groove in a gap, and prefilling depressions.
- 10-12 inch (25-30 cm) knife for embedding tape and for the second skim coat on a narrow joint.
- 12-14 inch (30-35 cm) finishing knife for the wide float and the feathered edge. This is the tool that hides the seam.
- Mud pan to hold your working mix, plus a hawk if you are working overhead on a ceiling.
- Utility knife for trimming tape and scraping failed mud off the paper.
- 4 foot (1.2 m) straightedge and a pencil for finding high spots before you mix anything.
- 120-150 grit sanding sponge for shaping, then 180-220 grit for the final pass.
- Pole sander or hand sanding block if the seam is above shoulder height.
- Vacuum with a hose attachment and a damp rag for dust removal before priming.
- Drywall primer and the paint you already use on that wall.
For materials:
- Fast-setting joint compound (hot mud, sold as 20, 45 or 90 minute setting compound) for prefilling gaps and deep depressions. It sets by chemical reaction rather than evaporation, so it works in a cold basement where all-purpose mud will not dry for days.
- All-purpose or lightweight all-purpose joint compound for the tape coat and the wide float. It sands smoother and feathers more easily than heavy-weight mud.
- Topping or finish compound for the last skim coat. A lightweight topping coat is noticeably easier to sand than base coat and shrinks less as it cures.
- Paper drywall tape for flat and butt joints, and always for inside corners.
- Fiberglass mesh tape for patch repairs and small areas where you are not embedding continuous paper.
- Setting-type patch powder or spackle for filling screw holes and small nicks, not for whole seams.
Drying times vary more than most guides admit. Fast-setting compound is workable for 20, 45 or 90 minutes depending on the label, and is sandable as soon as it is hard. All-purpose and lightweight compound need 18 to 24 hours per coat in normal indoor conditions, longer in cold or humid rooms. Coat thickness matters more than air temperature: a thick coat holds moisture in the middle long after the edges look dry.
Before You Start
Clear the room. Move furniture at least 3 feet (0.9 m) from the wall, and cover the floor with a drop cloth. Joint compound dust gets everywhere, and you do not want to clean it off a bookshelf twice.
Wear a dust mask or respirator when sanding and eye protection when mixing. Open a window or run a fan across the room while you mix, since the wet dust off a sanding sponge is fine enough to stay suspended for a while.
Then diagnose before you touch anything. Lay your straightedge across the seam in several places and rock it gently. Rocking means a hump; a gap that the edge of the straightedge drops into means a depression. Do the same test under raking light: turn off the ceiling fixture, open a blind, and let daylight cross the wall at a shallow angle. Every real defect jumps out.
Check for moisture and movement. Stain the area with a moisture meter or press a dry paper towel firmly into the joint; if it feels damp or the towel pulls moisture, find and stop the leak before you compound anything. New cracks in a pattern that follows the framing, or a wall that flexes when you press on it, mean the movement is still happening.
Know when to stop with a small repair. If the compound is loose enough to flake off in sheets, the paper facing is torn, tape is pulling away from the gypsum, or a whole wall has the same defect along every stud line, you are looking at a re-tape job or a panel replacement, not a touch-up. Those are covered further down.
Step-by-Step Instructions: How to Fix Uneven Drywall Seams
Six steps, in order. Rushing between any two of them is what produces ridges, and a ridge you create now will still be there under paint in a month.
Step 1: Diagnose Why the Drywall Seam Is Uneven
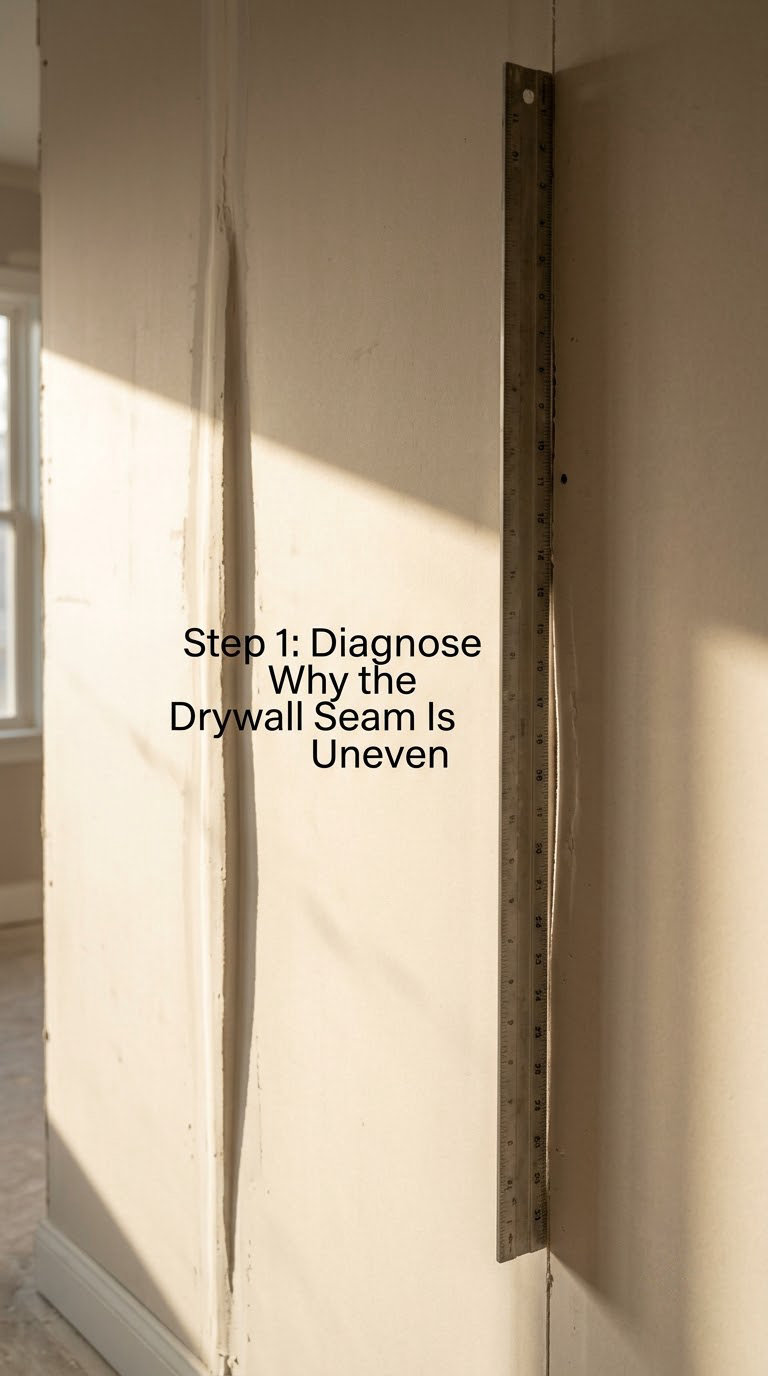
Classify the defect before you pick up a knife, because the direction of the fix reverses depending on what you find. A hump goes down, a depression goes up, and a gap gets filled first.
- Ridge or hump: compound stands proud of the wall, or one drywall edge sits higher than the other. The fix is to shave or sand the high spot back to flush, then rebuild the transition.
- Sunken seam or depression: the joint sits below the surrounding wall, often because the mud shrank as it dried or sheets were set too far apart. The fix is to prefill and build up.
- Visible gap between sheets: an open slot you can see daylight or framing through. Prefill it, because tape cannot bridge a hole.
- Cracked or bubbled tape: a raised line, a soft lump, or a bubble under the paper. Cut it out and redo that section.
- Pops and missing fasteners: screw heads slightly below the paper surface, or a screw that rusted and bled a brown stain. Drive them back to a shallow dimple, don’t over-tighten.
- Moisture-related failure: brown staining, soft paper, or a musty smell. Fix the source first, always.
Run your fingernail or the straightedge across the seam and note where the high spots are with a pencil. Marking them takes a minute and saves a wasted coat later.
Step 2: Remove Loose Compound and Repair the Joint
Mark a sharp line around every sound edge of the failed compound, then score it with the utility knife. Peel it off in sheets rather than chipping it, and stop wherever the paper is intact. Torn paper is what lets tape pull loose later.
Remove protruding or loose screws and drive remaining proud ones in until the head sits just below the paper surface, in a shallow dimple rather than a cone. Fill each dimple with setting-type patch material and let it set.
Press on the wall. If it flexes, sounds hollow, or moves under your palm, stop and look at the framing behind it. A bowed stud or uneven blocking in older homes is the usual root cause of joints that keep reappearing after several coats, and no amount of mud fixes a moving substrate.
For a gap wider than about 1/4 inch (6 mm), cut a shallow V-shaped channel along it with the utility knife. A V-groove gives the prefill something to key into instead of bridging across air. For cracks, run paper tape along the joint, not mesh; mesh resists impact poorly and paper holds a tighter, more reliable crease.
Step 3: Apply the First Layer of Joint Compound
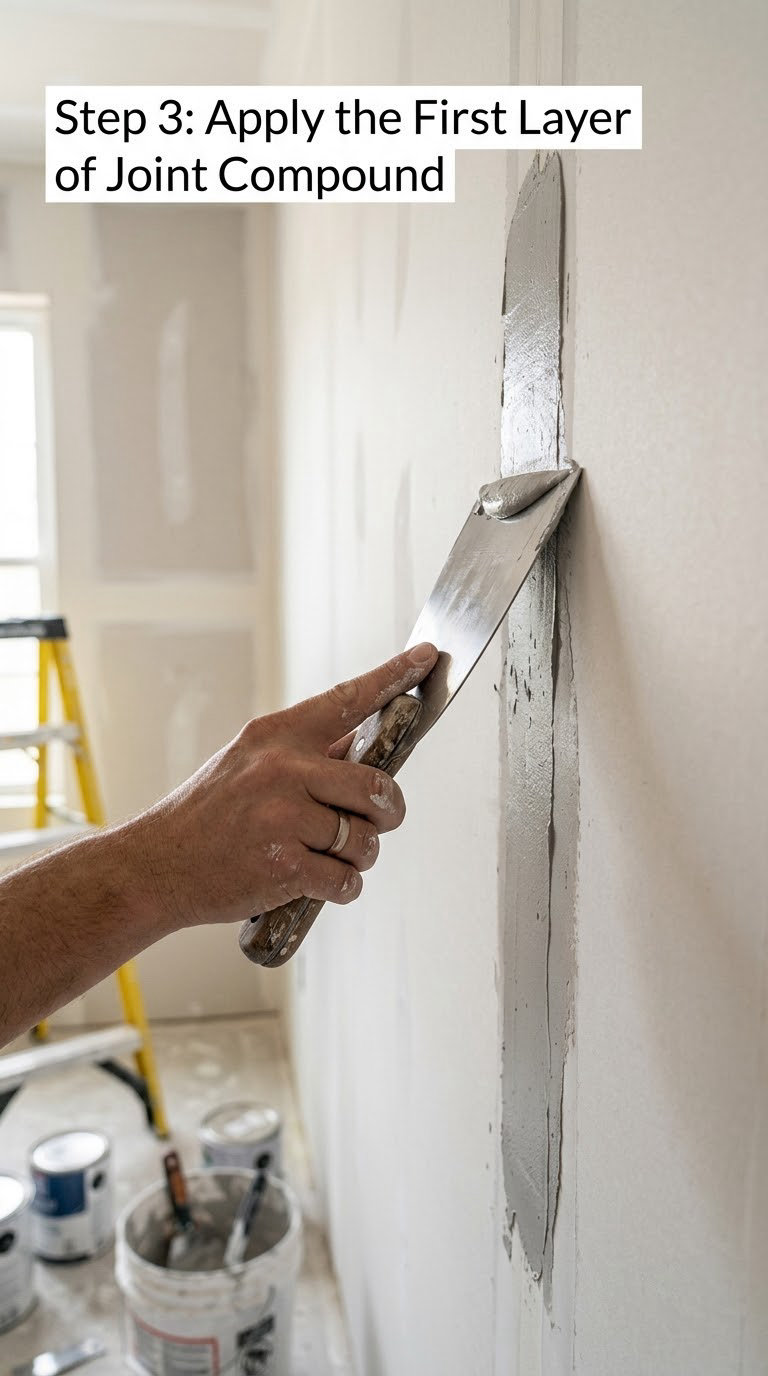
Mix hot mud to the consistency the label specifies, usually about the thickness of soft cookie dough. If you stir in water until it flows like thin cream, it will shrink and hollow as it sets. Keep the working mix on a mud pan and a hawk rather than in the bucket.
Load the 6 inch knife and draw it down the joint at roughly a 30-degree angle, pressing firmly enough to push compound into the groove and squeeze the air out. Leave a thin coat that covers the gap completely. Let it dry fully, usually 30 minutes to a few hours depending on the setting time.
Once it is hard, scrape off any high spots with the knife edge rather than a sanding tool. A burr left at this stage becomes a ridge you will chase for three more coats.
Spread a thin bed of all-purpose compound over the joint with the 10-12 inch knife, lay the tape in, and wipe the blade down the tape at about 30 degrees to press out excess mud from underneath. Leave roughly 1/8 to 1/4 inch (3-6 mm) of compound over the tape; starving the tape is the classic reason seams crack later.
Step 4: Let the First Coat Dry and Sand the Edges
Wait for the whole coat, not just the edges. Press a fingernail into an inconspicuous spot; if it dents, keep waiting. All-purpose compound needs 18 to 24 hours per coat at normal room temperature, and longer in a cold or humid space. Setting-type compound needs only as long as its label says.
Sand lightly with a 120-150 grit sponge, working the feathered edge from the joint outward. Keep the whole wall flat: a curved, dished repair is as visible as a ridge. Sand only enough to knock down edges, then wipe with a slightly damp rag to see the true surface.
The standard for this stage is simple. Run a straightedge across the wall; it should touch continuously, not rock. Look at the wall from a shallow angle under raking light and any remaining ridge will throw a shadow. Fix what you see now rather than after priming.
Step 5: Add Additional Thin Coats and Feathering
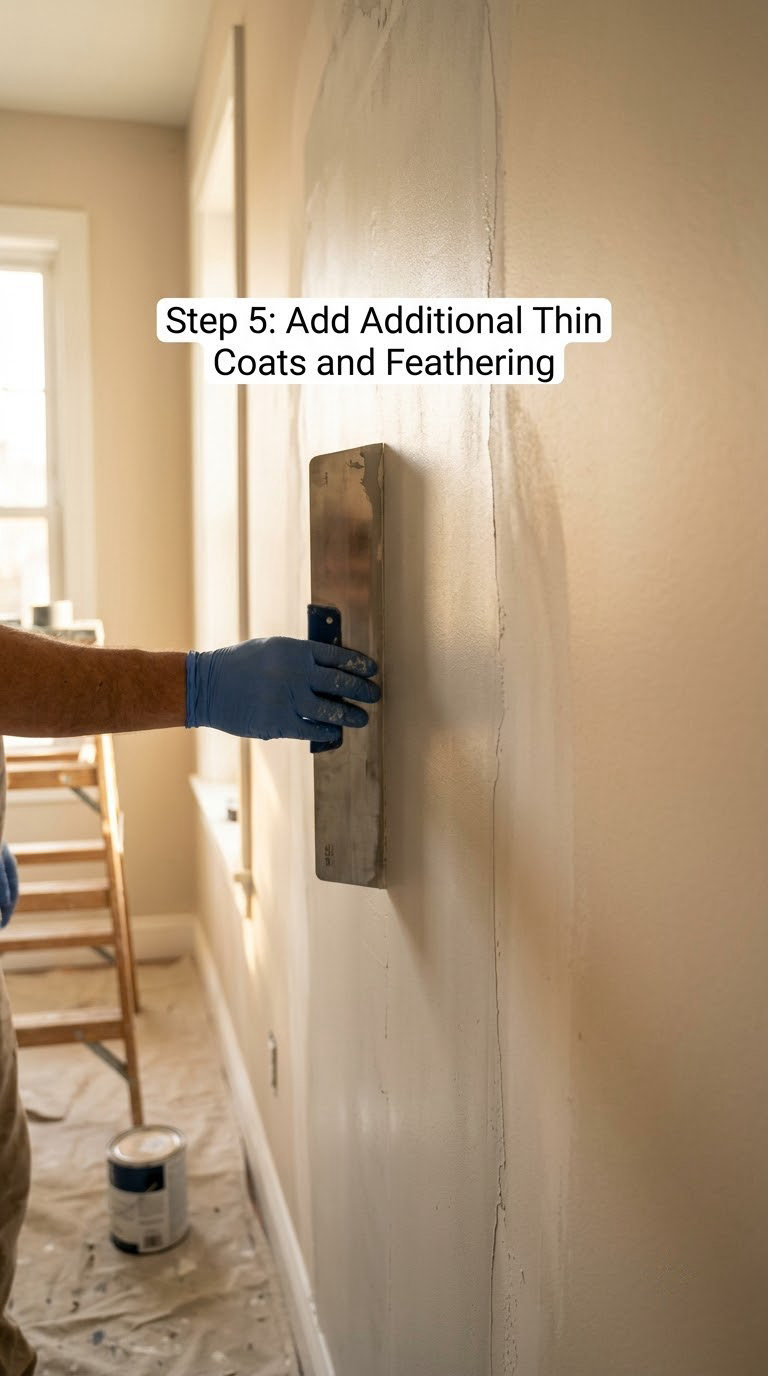
Skim the whole seam area with the 12-14 inch knife, loading very little compound. Hold the blade almost flat and pull it along the joint so the compound spreads in a thin layer that thins toward nothing at the edges.
Feather the compound out 10-12 inches (25-30 cm) on each side of the joint, which gives a total transition 20-24 inches (50-60 cm) wide. A narrow transition is a steep transition, and a steep transition is a visible ridge. This single habit separates a repair that disappears from one that telegraphs under paint.
Each coat should be thinner than the last. If you sand a groove, skim it again rather than trying to fill it with a thicker coat. On ceilings, apply slightly heavier coats since gravity pulls the material down and hollows a skim, but feather them even wider and work in sections you can comfortably reach.
On inside corners, use paper tape and the three-coat corner method instead: embed tape in the corner, let it dry, then build up the corner with two narrow fillet coats that round it slightly and sand the ridge back out. Mesh tape in an inside corner will crack no matter how many coats go over it.
Step 6: Prime and Paint the Repaired Seam
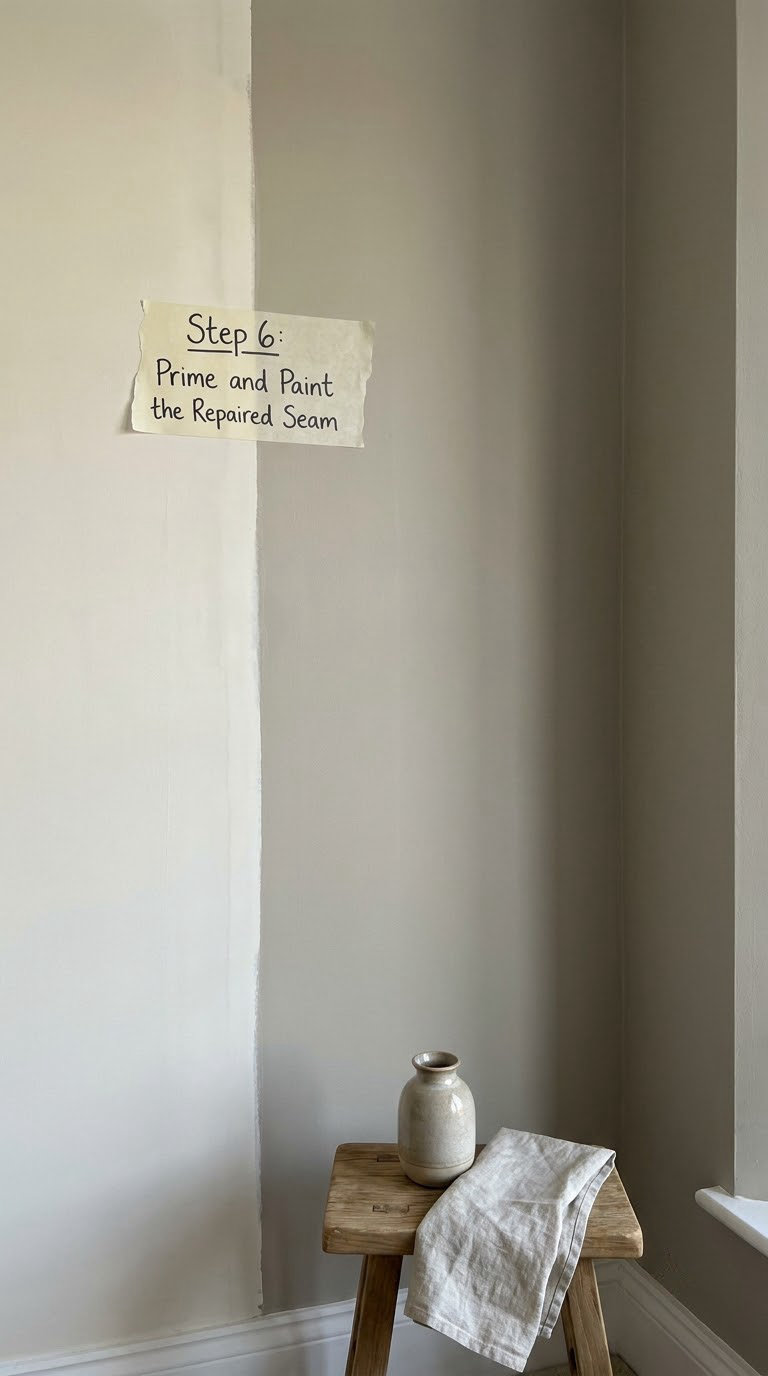
Sand the final coat with 180-220 grit and wipe the surface down with a damp rag, followed by a vacuum. Paint applied over sanding dust bonds weakly and can peel back when you press a hand against the wall.
Prime first if the compound is thicker than a skim coat, if you used hot mud for prefills, or if the wall will get flat or eggshell paint. Primer equalizes the absorbency of mud and paper so the finish coat dries evenly. If you are sticking with flat paint over new mud, prime even more generously; flat sheen shows every transition.
Cut in with a brush along the repaired area, then roll the rest so the repair and the surrounding wall are coated in the same pass. Let the whole wall dry before judging the result. Paint hides a lot, but a proud ridge or a hollow seam often reappears once the finish dries and cures.
Common Mistakes to Avoid
- Adding mud on top of a hump. This makes the hump worse, and it is the most common self-inflicted loop. Sand or shave the high spot down to flush first, then let a thin coat rebuild the transition.
- Sanding before the coat is fully dry. Wet mud gums up the paper, clogs the paper, and tears the surface. Check a hidden spot with a fingernail rather than trusting the dry-looking edge.
- Feathering over a bare gap. You cannot feather compound over a hole. Cut the V-groove, prefill, let it set, then tape and float.
- Overfilling in one pass. Thick coats shrink as they dry and reopen the crack days later. Thin coats, more of them.
- Skipping primer. Unprimed mud drinks the first coat of finish differently than the surrounding paper and leaves a visible patch.
- Painting over trapped dust. Vacuum, then damp-wipe. A sheen difference shows up weeks later as peeling.
- Rushing the feather width. Six inches of feather is not twelve. Widen the transition before you add another coat instead of stacking more mud in the same narrow band.
- Using mesh tape on inside corners. It will crack. Paper tape with the three-coat corner method is the fix.
If you already have a hump you created earlier, dampen it with a spray bottle, let it soften for a few minutes, and sand it down before rebuilding the transition. That is faster than adding more compound to a defect you made yesterday.
When to Call a Pro
Some drywall problems are not cosmetic, and mudding over them wastes material and time. Get a drywall finisher or structural contractor when any of these show up.
- The wall moves. A wall that flexes, sounds hollow, or bulges means the framing or the panel behind it is compromised.
- Cracks run diagonally. Cracks that follow a stair-step pattern through the paint usually indicate structural movement rather than joint compound failure.
- Mold is present. Dark spotting with a musty smell means the repair is worthless until the moisture and the mold are addressed.
- An active leak exists. Any ongoing leak must be repaired at the source before new compound goes on.
- Joints keep failing. If the same seam has been repaired twice and reopens, the cause is framing, blocking or panel thickness, not mud.
- Backing is missing over large areas. Wide sections with no stud or no support behind them need framing repair or drywall replacement.
- Severe water damage has swollen or delaminated the gypsum panels. Those sheets get replaced, not mudded.
For a homeowner judgment call: one small seam on one wall is a weekend. Six failing seams across a house are a different job, and a pro can often knock out more wall in a day than a beginner can mud properly.
Maintenance
Keep indoor relative humidity between about 30 and 50 percent with a dehumidifier in humid seasons and a humidifier in dry winter air. Joint compound fails fastest when it is driven by repeated swings between wet and dry.
Deal with leaks the week they start, not the season they become a stain. A single fast fix is far cheaper than re-taping a seam after a year of slow moisture.
Avoid heavy impacts near joints. Doorknob handles on quiet hardware and a felt bumper on furniture legs prevent the sharp local hits that pop screws and crack tape.
Walk the walls with raking light once a year, usually when the sun is lowest, and touch up scuffs before the paint has a year of hard washing baked into it. Small touch-ups blend far better into a clean, recently painted surface.
When you do start a repair, our guide to drywall tool kits covers the knife and pan combination most beginners are missing. Working overhead on a ceiling, and you will need proper footing rather than a chair; our notes on drywall stilts cover that.
Frequently Asked Questions
Should I use paper tape or mesh for an uneven drywall seam?
Use paper tape on flat and butt joints and always on inside corners. It creases tightly and resists the cracking that shows up later. Fiberglass mesh tape is easier on small patch repairs and areas you cannot embed continuous paper into, but it will crack on an inside corner no matter how many coats go over it. On an uneven seam caused by framing, fix the framing first, then tape as normal.
How long should I let drywall compound dry before sanding or painting?
All-purpose and lightweight joint compound usually need 18 to 24 hours per coat at normal indoor temperature, and longer in cold or humid rooms. Fast-setting compound is sandable as soon as it is hard, following the setting time printed on the label. Test an inconspicuous spot with a fingernail: if it dents, it is still wet. Coat thickness matters more than air temperature, so thin coats dry fastest.
Can I fix uneven drywall seams on a textured wall without ruining the texture?
Yes, but only by feathering the repair into the existing texture rather than stopping at the joint edge. Lay the final skim coat out past the joint about as far as the texture pattern is wide, then knock the wet coat back with a sponge or texture tool to match the surrounding pattern. Repair a small area at a time, and let each section cure before moving to the next.
Why is my repaired drywall seam still visible after painting?
Usually one of three things: the coat was sanded too aggressively leaving a hollow, the seam was feathered too narrowly to hide the transition, or the repair was primed differently from the rest of the wall. Paint on a flat surface exaggerates both ridges and dips under raking light. Sand with 180-220 grit, skim any groove with a thin coat, and prime the whole wall before the finish coat.
Do I need to prime drywall compound before painting?
Yes, whenever the new compound is thicker than a skim coat, you used fast-setting compound for prefills, or the wall will take flat or eggshell paint. Primer levels the absorbency so the finish coat dries at the same rate over mud and paper. A stain-resistant primer also blocks rust bleeding from old screws and blocks water stains, which otherwise reappear through the finish.
When is a drywall seam bad enough to replace the entire panel?
Replace the panel when the drywall paper is torn or delaminated across a large area, the gypsum is swollen, crumbling or soft, the sheet flexes or moves when pressed, or there is no backing behind a wide section. Mold, an unresolved leak, and severe water damage all fall in this group. Mud is a coating system. It cannot rebuild a sheet that has lost its backing or its integrity.
Start by laying a straightedge across the seam and finding out whether you are dealing with a hump or a hollow. Shave the high spots down to flush, prefill every depression with fast-setting compound, then build the finish with thin wide-floating coats feathered 10-12 inches to each side. That gradual transition is the whole trick, and it takes patience rather than skill.