How to Repair a Broken Window Pane: DIY Steps (October 2026)
How to repair a broken window pane comes down to swapping the glass and keeping the frame. A single-pane window in wood, vinyl or aluminum can usually be reglazed by a confident beginner in an afternoon. A sealed double-pane unit is different: both panes come out together as one sealed assembly, so that job belongs to a glass shop.
A pane cracked by a baseball, a nail through the frame during a renovation, or a stone thrown off the driveway all leave you with the same decision. This guide covers the full single-pane walkthrough, the three frame types, and the cases where a professional call is the cheaper, safer move.
Contents
Time: 2 to 4 hours of work, plus drying time before the window opens · Cost: one pane of glass and a few glazing materials, a small fraction of replacing the whole window · Difficulty: moderate DIY · Skill level: careful beginner with basic hand tools
Tools and Materials
Gather everything before you pull the sash. Most of the frustration with this job comes from stopping halfway through to find a putty knife in the garage.
Hand tools
- Safety goggles — wraparound style, plus ear protection if the pane drops while you work
- Cut-resistant gloves with a leather or rubberized palm; thin nitrile gloves do nothing for glass
- Tape measure, 25 foot (7.5 m) length for larger openings
- Putty knife or 1 inch (25 mm) scraper for scraping old glazing
- Utility knife with fresh blades for cutting glazing tape or plastic film
- Pry bar or flat bar, 8 to 12 inch, for lifting a stuck sash or bead — protect the frame with cardboard
- Screwdriver or cordless driver for sash hardware and stop mouldings
- Two suction cups for handling the new pane, one on each face near the middle
- Shop vacuum with a hose attachment for shard pickup
- Stiff nylon brush, lint-free rags and isopropyl alcohol for cleaning the rabbet
- Painter’s tape, 2 inch (50 mm) roll
Materials
- Annealed single-pane glass, cut to your measurements. Most residential panes are 1/8 inch (3 mm); older or storm-rated panes are often 1/4 inch (6 mm)
- Two setting blocks for a wood sash — small rubber or neoprene blocks that sit in the bottom rabbet corners
- Glazing putty or glazing compound, 1 to 2 pints, for wood frames
- 1/4 inch (6 mm) glazing points, about 8 to 10 per pane, for wood frames
- Double-sided glazing tape in 1/16 inch (1.5 mm) thickness for vinyl frames
- 100 percent silicone glass bedding, one 10 ounce tube covers roughly 10 linear feet (3 m) of 1/4 inch bead
- Replacement glazing bead, vinyl strip or stop moulding to match the profile of your frame
- Exterior wood filler, primer and paint if the frame is wood and you cut into the paint
Before You Start
Identify the window before you buy anything
Put a hand flat on the glass and look at the edge. A single-pane window has one sheet of glass and a rabbet cut into the sash or frame, usually about 1/4 inch (6 mm) deep. A double-pane unit has two sheets separated by a spacer and a sealed gas or air gap — you will see a grey or black band along the broken edge.
That band is the tell. If you see a spacer, the whole sealed unit has to be replaced, and a glass company cutting a new unit to size usually quotes a fraction of what a full window swap costs.
Work out whether the glass is tempered or annealed
Look at the fragments still in the opening. Annealed glass breaks into long, jagged, sharp shards with edges you can catch a fingertip on. Tempered or laminated safety glass crumbles into small, dull, pebble-like pieces. If the shards look chunky and blunt, the original was safety glass and you cannot cut it — you will need a replacement unit of the same specification.
Protect yourself and the room
Tape an X across the broken area with painter’s tape before you touch anything. The tape holds the loose shards in place and keeps fingers out of the cracks. Work in gloves and goggles, clear the area below, and vacuum rather than sweep — sweeping throws glass across the floor.
Over-garage and stairwell windows are a different problem. Work from an interior scaffold or a platform that is fully inside the opening, never a ladder with a sash in one hand. Anything above the first floor needs a second person and a plan before you start.
Cover the opening while the glass is on order
Custom glass can take days to a couple of weeks. Do not leave an open hole. From the inside, clear the frame, then cover it with heavy cardboard or exterior plywood cut to overlap the opening by 4 inches (100 mm) on every side, and fasten the board from the interior with screws driven into the surrounding casing. A storm door, a fitted tarp or taped rigid plastic works in a pinch — the goal is rain, wind and pets kept out.
If someone broke in and the damage includes a broken lock or frame member, photograph everything before you clean up and call your insurer. Homeowner policies generally treat glass damage as part of the dwelling coverage, but break-in repairs may need to go through the property claim.
Check for permit, egress and lead paint triggers
A single-pane replacement in a standard window is not a permitted job in most jurisdictions. It becomes one when you touch the exterior elevation of the home, alter a fire-rated or emergency-egress window, or work on a historic property with its own review requirements.
In a home built before 1978, assume the frame paint may contain lead. Do not sand or scrape painted frames until a test comes back clean, and treat any paint that is flaking or being disturbed as lead paint until proven otherwise.
Step-by-Step Instructions
This walkthrough covers a single-pane window. Where the securing method changes by frame type, Step 4 branches three ways.
Step 1: Inspect and Measure the Window Opening
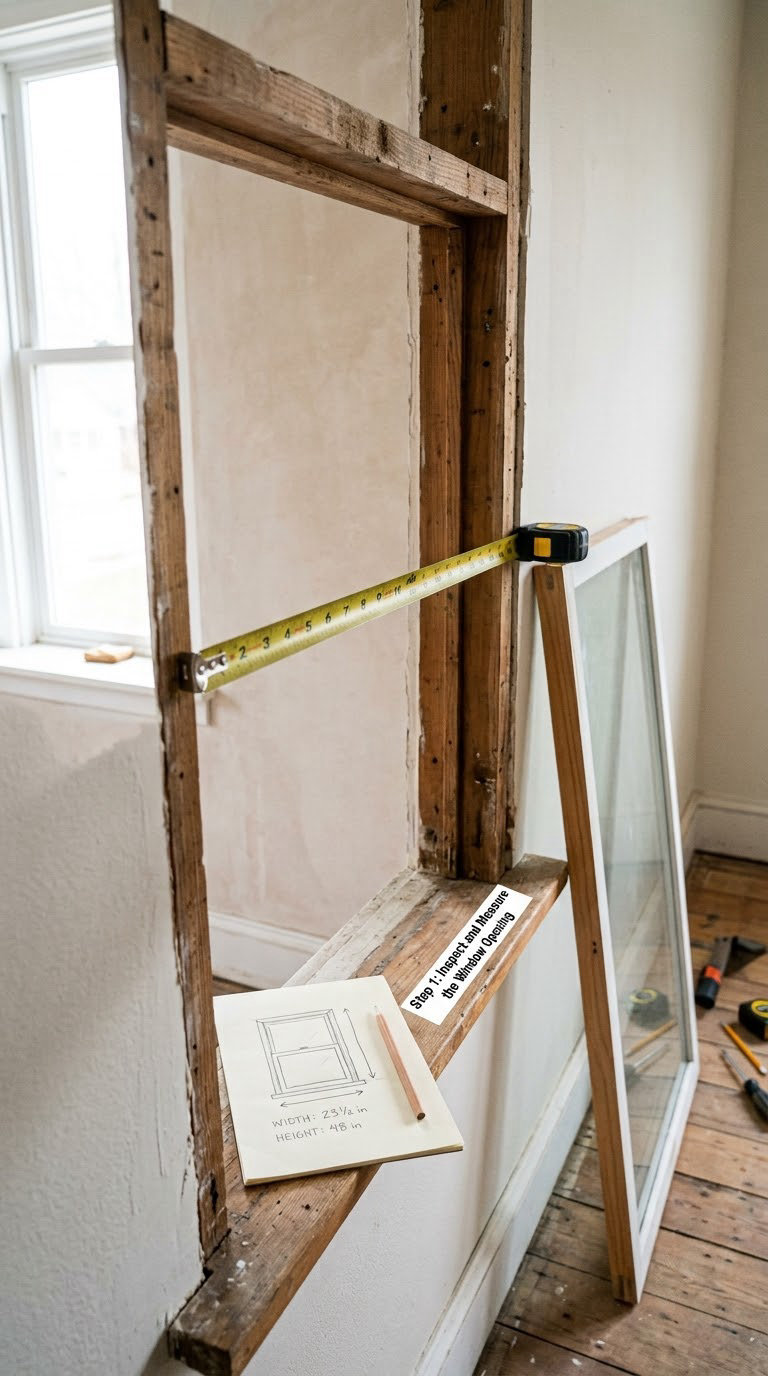
Measure the opening rather than the old glass. Old glass often sits loose and its edges can be chipped, so it makes a poor template.
Take three width readings — top, middle and bottom — and three height readings — left, middle and right. Write down the smallest of each. Frames are rarely square, and the small figure is the one that has to fit.
Now subtract the clearance for thermal expansion. The frame moves with temperature and humidity, so glass sized dead-on will eventually crack at a corner or push its seal loose.
Order the pane 1/8 inch (3 mm) smaller than the opening on both width and height. The rabbet is normally 1/4 inch (6 mm) deep, so that clearance still leaves roughly 1/8 inch (3 mm) of glass sitting on the frame all the way round.
Write the final figures on the sash with a pencil or masking tape while you are at the window. Give the numbers to a glass shop as decimal inches or millimetres, and ask whether they can cut it while you wait.
Step 2: Remove the Sash, Glass, and Old Glazing Material
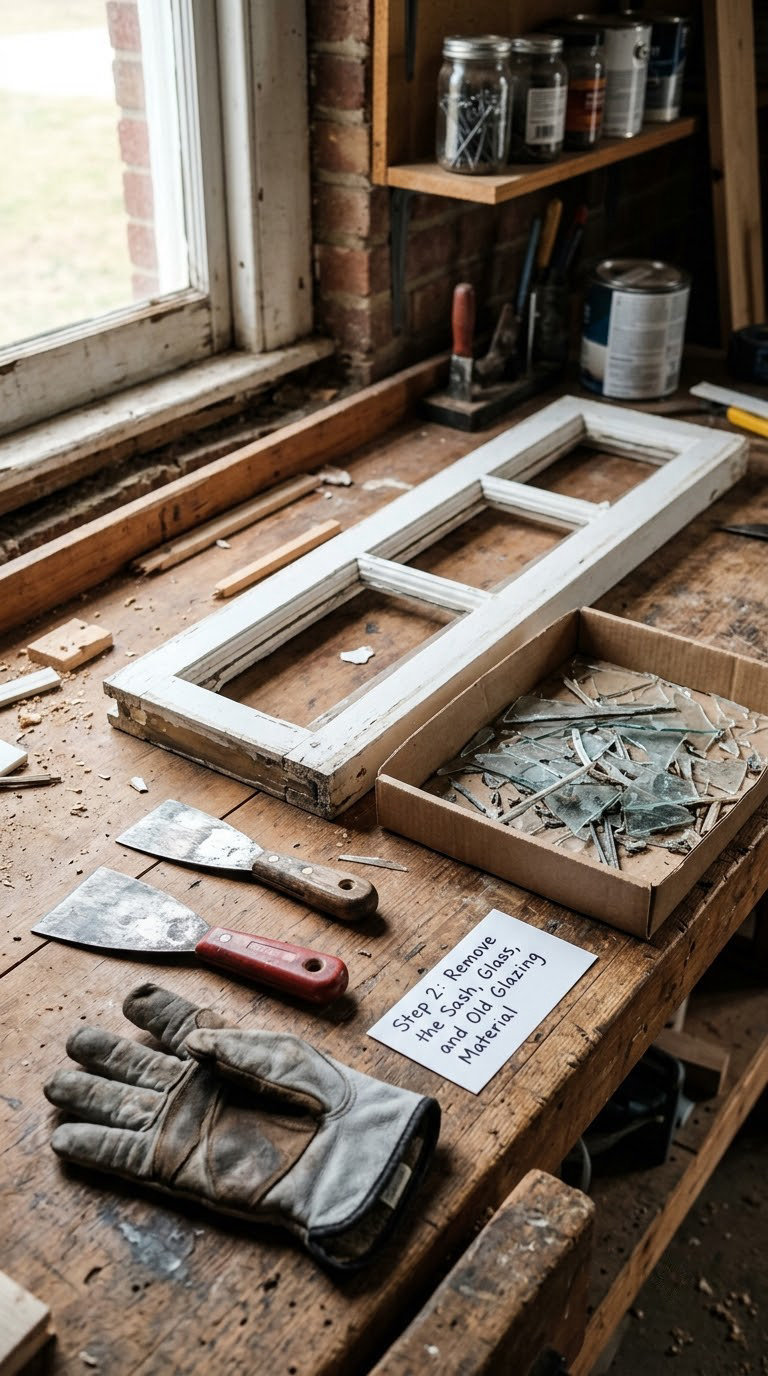
Take the sash out if the window allows it. It is much easier to work flat on a bench than wedged in the frame. For a double-hung, lift the lower sash free of its parting channel and slide it out of the jamb. On a slider, lift the sash out of the bottom track. On a casement, release the hinge pins or unscrew the hinges at the frame.
With the sash flat, tape an X across any remaining cracked glass and score it with a utility knife where the tape crosses the break. Lift the largest pieces out with gloves on and put each one straight into a cardboard tray or thick bag. Never carry loose shards in your hand.
Remove the old glazing next:
- Wood frames: chop out hardened putty with a putty knife and a light hammer, then pull out glazing points with pliers, working from the corners inward
- Vinyl frames: peel out double-sided glazing tape or cut it away with a utility knife
- Aluminum frames: pry the glazing bead off with a pry bar, starting at a corner, wrapped in cardboard to protect the finish
Scrape the rabbet down to bare wood or bare metal. Vacuum everything, then wipe the channel with isopropyl alcohol so dust and old putty oil do not hold the new seal away from the frame.
Step 3: Cut and Fit the Replacement Glass
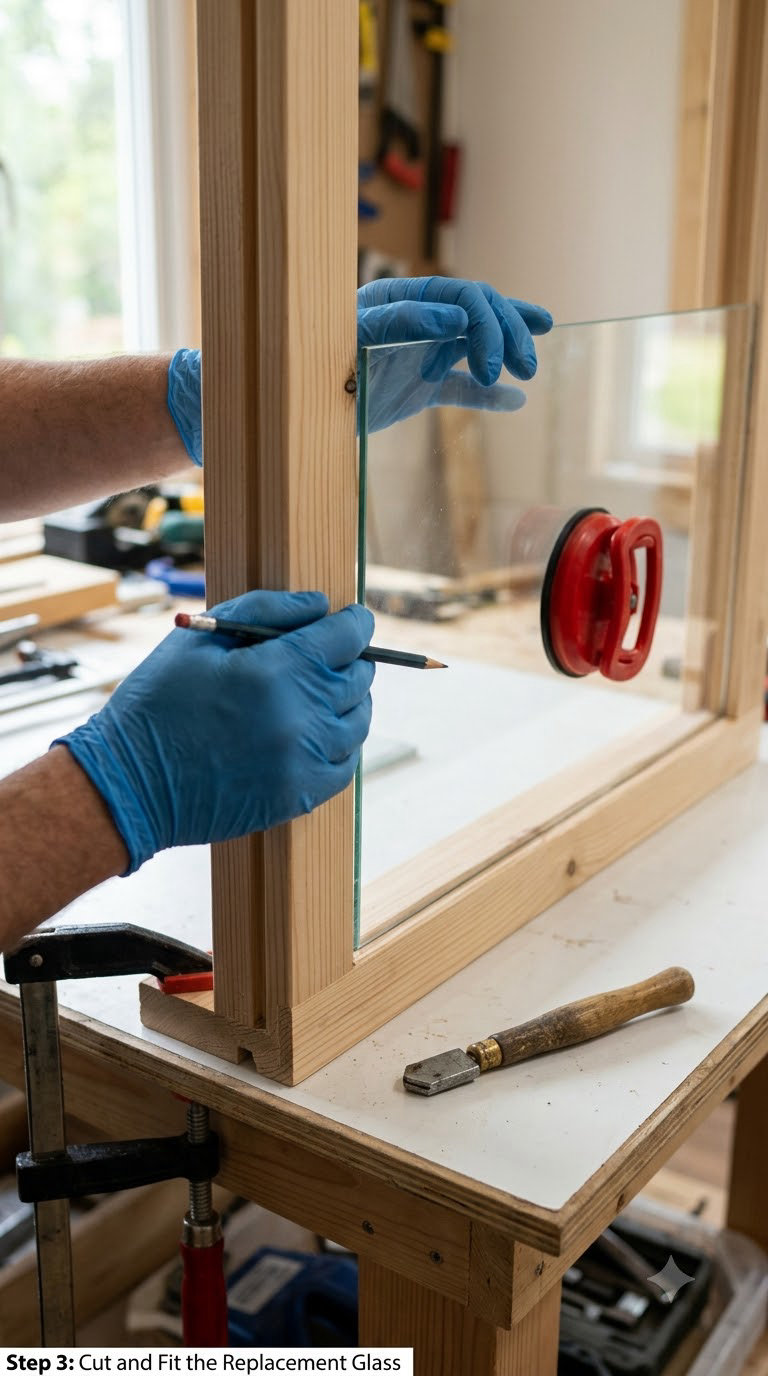
Match the thickness of the old pane. Single-pane residential glass is most often 1/8 inch (3 mm); 1/4 inch (6 mm) is heavier, more common in storm doors and older sash, and will not drop into a 1/8 inch channel.
Annealed glass can be cut with a glass cutter on a flat, clean surface under a straightedge. Score one confident pass from edge to edge, snap it along the line, and sand or rub the cut edges until they are dull to the touch. Tempered and laminated glass cannot be cut at all — those come from a supplier pre-cut to size.
Drop the pane into the opening dry before you apply any sealant. It should sit with a consistent gap all the way round and rock only slightly. If it binds, take it out and shave a quarter inch — do not force it, because the corner will chip and the edge will never be smooth.
Use the suction cups to lift it back out and set it upright somewhere out of traffic until you need it.
Step 4: Set the Glass and Secure It
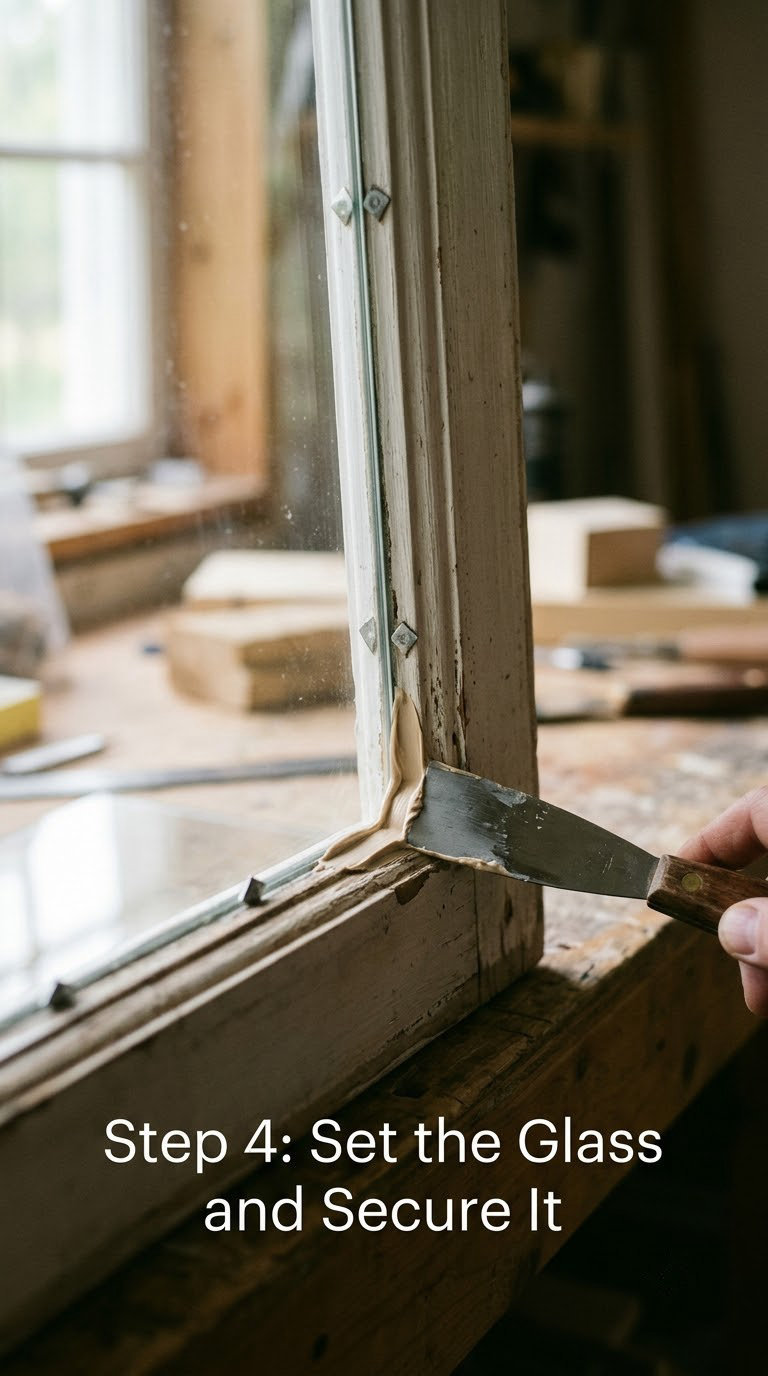
Set the pane with even pressure from the centre outward, using the suction cups. Push gently. Excess pressure on the middle of a sheet can bow it, and a bowed pane looks wrong and fails at the seal.
For a wood frame: run a bed of glazing putty along the rabbet, lay two setting blocks in the bottom corners, press the glass down into it until it sits about 1/16 inch (1.5 mm) below the frame face, then roll the glass gently to make sure it is level. Push one glazing point every 6 inches (150 mm) around the perimeter, sliding each point in at a slight angle so it locks against the glass. Skim off the putty that squeezes out and shape the remaining bead with a clean putty knife at about a 30 degree angle.
For a vinyl frame: apply double-sided glazing tape in the channel, pressing it down with a roller or the back of the knife so the adhesive bed is continuous with no bubbles. Peel back a corner of the liner, set the pane on the tape, pull the liner out the rest of the way as the glass settles, then press the glazing bead or vinyl strip back into the channel.
For an aluminum frame: run a continuous bead of 100 percent silicone glass bedding along the channel and lay the glass into it. Set it down so the bead compresses, then refit the glazing bead and tape or screw it back on. Be sure the bead profile matches the channel — a mitred stop moulding from a different system will not seat.
Do not press the glass toward the inside of the frame. Setting blocks or the silicone bed should carry the weight, and forcing the pane against the flange causes uneven stress.
Step 5: Allow the Repair to Dry and Reinstall the Window
Give the sealant time before you touch anything. Putty and glazing compound go from workable to skin-over in a few hours and hard enough to paint in about three to seven days depending on the bead thickness and the room temperature. Silicone skins in 30 minutes and is generally safe to handle after 24 hours, though it takes closer to 48 hours to fully cure. Airtight seal matters more than speed here.
During that window, paint wood frames once the putty is firm to the touch. Paint will stick to cured putty but not to putty that is still soft, and it stops moisture getting behind the bead.
Refit the sash, rehang it, and run it up and down a few times. Check for glass that catches on the frame channel as the sash moves — that means the pane is slightly proud in one spot and needs a tiny bit more clearance. On a double-hung, confirm the sash still closes and engages its latch before you call it done.
Common Mistakes to Avoid
- Measuring only one edge. Measure top, middle and bottom, then use the smallest reading. A frame that is off by a quarter inch (6 mm) will not accept a pane cut from a single number.
- Skipping the 1/8 inch (3 mm) clearance. Glass cut to the exact opening size cracks at a corner when the frame expands.
- Using the wrong thickness. A 1/4 inch (6 mm) pane in a 1/8 inch (3 mm) channel will not seat, and a 1/8 inch pane in a 1/4 inch channel rattles and breaks at the points.
- Skipping the X of tape. That tape is what keeps the remaining shards together while you work. Bare-handed removal is how people end up in emergency care.
- Scraping the rabbet too hard. Light, repeated strokes with the knife held flat. Digging into the wood leaves a groove that stops the pane seating evenly.
- Uneven beads of putty or silicone. A thin gap at one corner is where water gets in. Run a continuous bead and keep the thickness even all the way round.
- Pressing too hard in the middle. A hand on the centre of the glass bows it. Support the pane with suction cups and push from the edges.
- Trying to repair one side of a sealed double-pane unit. The intact pane has to come out with the broken one. Cutting the bed and lifting one sheet breaks the seal and voids the fix.
When to Call a Pro
Some jobs are cheaper to hand over than to get wrong. Book a glazier or a window company when any of these apply.
- Sealed double or triple pane units. The spacer, gas fill and seal are manufactured as one piece. A shop cuts a replacement unit to size; it cannot be rebuilt in a home workshop.
- Tempered or laminated glass. It cannot be cut, and tempered panes carry a safety stamp you may need code compliance for on doors, baths and floors.
- Panes above roughly 20 square feet (1.9 m²), or any odd shape. Large sheets need proper support at home, and curved or patterned glass has to be ordered.
- Structural frame damage. Rot in the jamb, a cracked mullion or a sagging frame has to be repaired before glass goes back in, otherwise the new pane breaks too.
- Historic or highly detailed sashes. Original profiles, muntin clips and glazing details are worth more than the glass in them.
- Suspected lead paint. Disturbing old coatings needs testing and sometimes a certified contractor.
- Egress windows and permitted work. Emergency escape openings and any exterior elevation change can require a permit and inspection.
- Third-floor and higher openings. Fall risk turns a two-hour job into a reason to hire out.
Maintenance
Walk past a reglazed window twice a year, in spring and autumn, and run your fingernail along the glazing bead. Cracks in the putty bead, a lifted bead or a silicone edge that has gone hard and shiny are all early warnings. Catching a failed bead in year two is a putty knife job; catching it in year eight usually means the sash has swollen and the glass has to come out again.
Watch the paint on wood frames. When a bead of putty is exposed, moisture gets behind it and the paint on the rabbet edge starts to peel. Paint the rabbet edge on the same cycle as the frame.
Clean the glass with a soft cloth and a mild cleaner diluted in water. Keep abrasive pads and ammonia-based products away from the new seal, and never clean the inside face of a double-pane unit through the open sash — a seal failure there cannot be cleaned up.
Condensation between the panes of a double-pane unit is fogging, not a cleaning job, and it signals a failed seal. Fog that spreads, a visible spacer streak or a white haze around the edge all mean the unit is finished and needs replacing as a unit.
Warning signs worth acting on: a pane that taps loose in the wind, a sash that no longer closes on its latch, or a bead that is visibly separating from the glass. If the glass is large and you would rather not handle it twice, an automated cleaner suited to large panes is covered in our robotic window cleaners for large panes roundup.
Frequently Asked Questions
Can you replace just one pane of glass in a window?
Yes, if the window is a single-pane unit with glass set into a rabbet on the sash or frame. You can buy a single cut-to-size pane and reglaze it in place. A sealed double-pane unit is different: both panes are bonded to a spacer and come out together, so the whole unit must be ordered and replaced as one piece.
Can you replace just one panel on a window?
For glass panels, yes. That is the whole point of reglazing: you keep the sash, frame, hardware and interior trim and swap only the glass. Hardware store staff often push a complete window unit because that is what they stock, but a local glass shop will cut a single pane to your measurements, usually while you wait.
Can a broken window pane be repaired?
The glass itself cannot be repaired. A cracked or shattered pane is always replaced, but replacing the pane is not the same as replacing the window. As long as the frame, sash and hardware are sound, a new pane cut to size costs a small fraction of a new window and the surrounding trim and finishes stay untouched.
How to fix a glass window without replacing it?
Keep the frame and reglaze it. Tape an X over the damaged area, remove the sash if it lifts out, lift out the shards, scrape away all old putty, points, tape or glazing bead, then set a new pane sized 1/8 inch (3 mm) smaller than the opening and secure it with glazing points, double-sided tape or silicone depending on the frame material.
How much does it cost to replace a pane of glass in a window?
The cost follows three things: glass type, pane size and who does the work. Annealed single-pane glass is the least expensive and is what most older windows use. Tempered or laminated glass and any sealed double-pane unit cost more because they must be custom made. A glass-only job is a fraction of replacing the whole window, and it disturbs far less of the house.
Does homeowners insurance cover broken window glass?
Most homeowner policies treat broken glass as part of the dwelling coverage rather than a separate category, so a single damaged pane is generally covered. The differences come down to cause. Accidental damage, storm damage and break-ins are usually handled, while damage from deferred maintenance or work you did yourself can be disputed. Photograph everything before you clean up and ask your agent directly.
Start by covering the opening so rain and wind stay out, then look at the broken edge. If there is a spacer between two sheets of glass, call a glass shop and order the sealed unit. If it is one sheet of annealed glass in a rabbet, tape it, measure the opening in three places in both directions, and order the pane 1/8 inch (3 mm) smaller. That is how to repair a broken window pane properly, and it takes most of an afternoon plus drying time.