
How to Repair a Cracked Concrete Step: Easy DIY Guide 2026
A cracked concrete step is usually a surface problem rather than a structural one, and most can be patched in an afternoon. How to repair a cracked concrete step comes down to one decision: match the material to the width and cause of the crack. A narrow crack takes a flexible filler, while a wider one needs patching mortar with mesh reinforcement.
Left alone, that crack takes on water. Water freezes, expands, and starts breaking the edges of the step apart, which is how a hairline line turns into a chipped corner and then a crumbling trip hazard by the second winter.
Contents
Time: 2 to 4 hours of work, plus 24 to 72 hours of cure time before foot traffic · Cost: one tub of patching compound, a handful of basic tools and an optional sealer · Difficulty: moderate DIY · Skill level: beginner-friendly, as long as you read the bag before you mix
Tools and Materials
Buy for the damage you actually have, not the damage you imagine. For one step with a crack running across the tread and a chipped nose, the list below is enough. Measure the damaged area first, then add 10 to 15 percent for waste and spillage. A decent wrench set for home repair covers the odd anchor bolt or handrail bracket you will inevitably meet on the way to the step.
Materials
- Concrete patching compound (polymer-modified, for cracks wider than 1/8 inch or 3 mm): one 10 lb (4.5 kg) pail covers roughly 0.5 to 0.75 sq ft (0.05 to 0.07 sq m) at a 1/4 inch (6 mm) lift, so one pail handles most single-step jobs.
- Elastomeric masonry crack sealant for hairline cracks under 1/8 inch (3 mm): one 10 oz (283 g) tube covers about 25 linear feet (7.6 m) of a narrow joint.
- Fiberglass reinforcing mesh or galvanized repair wire: one 9 by 12 inch (23 by 30 cm) sheet if the crack runs more than about 12 inches (30 cm) or the edge chunk is more than 2 inches (5 cm) across.
- Concrete bonding adhesive if your patching mortar calls for one, or if the substrate is unusually dense or smooth.
- Concrete sealer, one gallon (3.8 L), for sealing the whole step after the patch cures. It is the single best thing you can do to keep water out next winter.
- Masking tape and a plastic sheet to protect the riser, siding and door frame below.
Tools
- Wire brush and stiff nylon scrub brush
- Small hammer and cold chisel or a 7 inch angle grinder for concrete with a masonry wheel, for cutting loose concrete out
- Shop vac or a leaf blower to clear dust
- Measuring tape or a straightedge, plus a level and a marker to mark the crack ends
- Margin trowel, finishing trowel and a wood float
- Buckets, a mixing paddle or a square-head shovel, and a hose for dampening the surface
- Safety glasses, nitrile gloves, a dust mask for grinding and ear protection if you use a grinder
Before You Start
Put a barrier in place before you pick up a tool. Tape off the area, keep people off the step, and put a sign or a chair on the other side so nobody tests your fresh patch with a heel.
Wear eye protection and gloves. If you angle-grind or chisel, add a dust mask and hearing protection, and grind outdoors or with a fan pulling air across the work, because concrete dust is a respiratory irritant.
Pick a day that is not freezing and not hot. Most patching mortars want temperatures between about 50 and 85 F (10 to 30 C), and any rain within the first 24 hours will wash a patch off the step.
Finally, check whether your municipality treats step and stoop work as a permit item. Most places only require a permit for structural or load-bearing changes, full-width replacement, or work that changes the height or opening of the entry. A surface patch normally does not need one, but a rebuilt step or a new handrail usually does.
Step 1: Inspect the Crack and Decide Whether It Is Safe to Repair
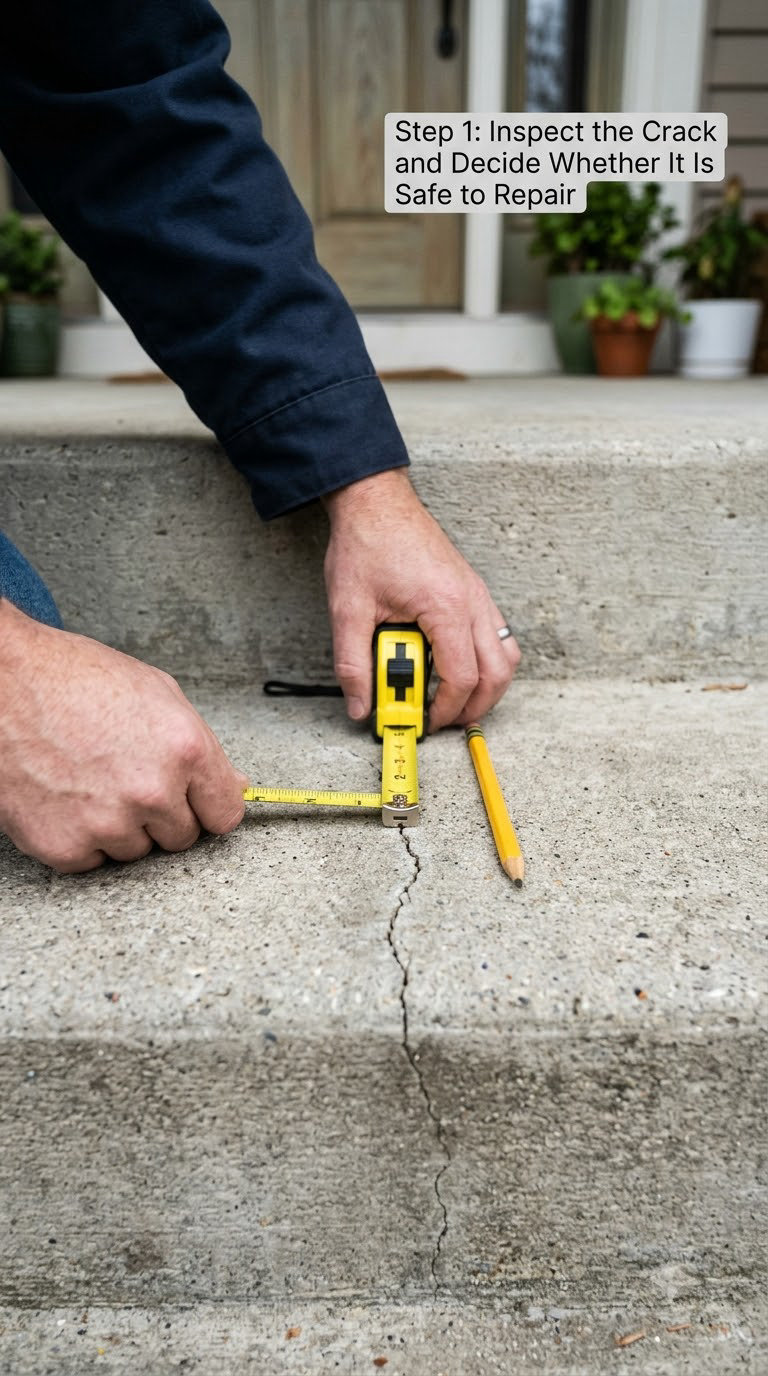
Mark both ends of the crack with a pencil and measure its width at the widest point. A crack under 1/8 inch (3 mm) that runs in one direction is a shrinkage or hairline crack, and it is straightforward to repair.
Next, lay a straightedge across the step and look for daylight under it, and set a level on the tread from side to side. A tilt or a rocking motion means the step itself is settling, and no patch will hold until that is dealt with. Run your thumb along the crack. If you can feel a step or ledge in it, the damage runs through the full depth of the slab.
Watch the step for a few weeks if you are unsure, and mark the crack ends with tape so you can tell whether it is growing. Hairline cracks that stay put are cosmetic. Cracks that widen past 1/4 inch (6 mm), sit between two pieces that no longer line up, or come with a corner that moves under your foot are structural, and that is your cue to stop and call someone.
Step 2: Clean and Prepare the Damaged Concrete
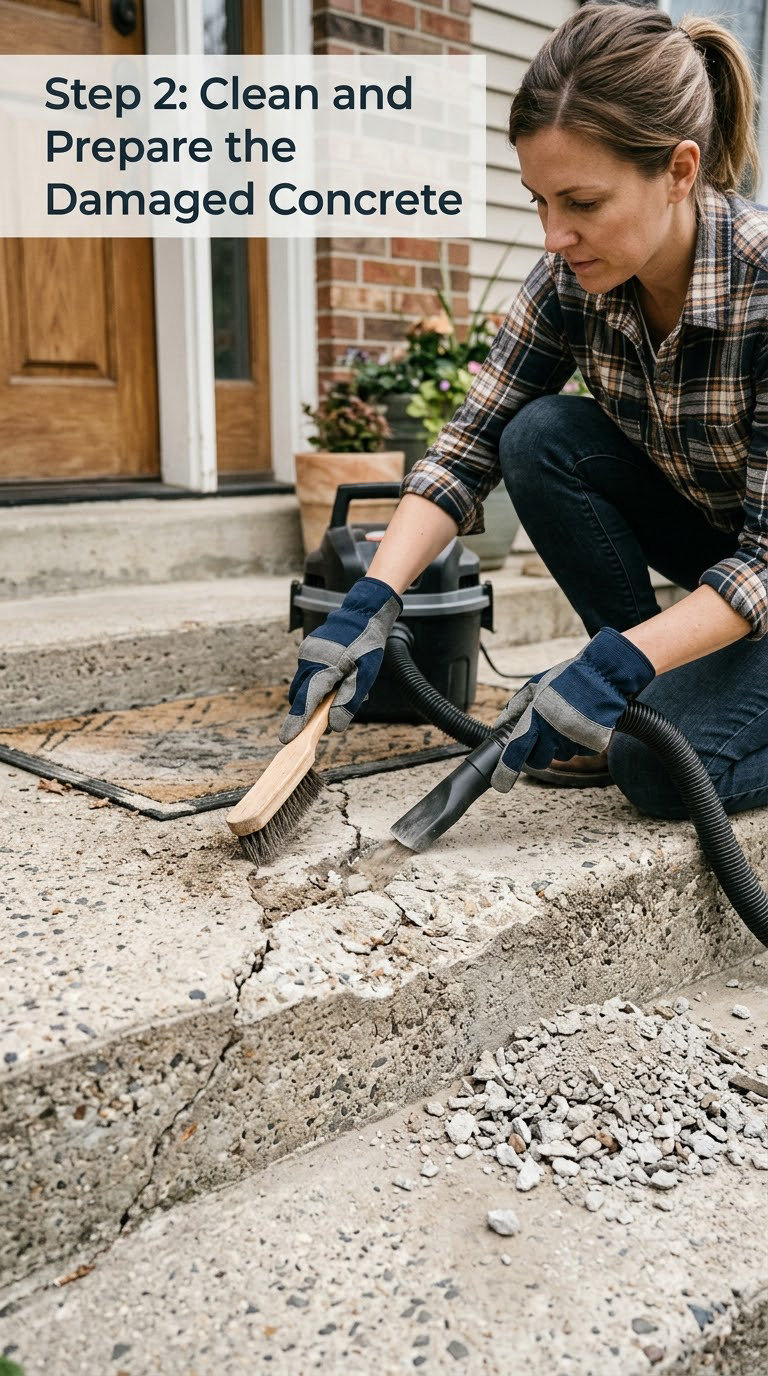
Chisel or grind out every loose, crumbly piece until you hit concrete that is solid all the way through. Stop when the sound changes from hollow to solid, which usually happens within 1/4 inch (6 mm) of good material.
Then scrub the crack and the surrounding 2 inches (5 cm) with a wire brush and vacuum the dust off. Any powder left behind becomes a weak layer between the old step and the new patch, and that layer is exactly where the repair peels off later.
Roughen the surface where the new material meets the old, especially on the sides of the crack. Feathered edges on hairline work are fine, but a wider repair needs square shoulders so the patch has something to sit against.
Dampen the prepared area and let it go from wet to the back of a few seconds when you press a wet sponge against it. Concrete will not bond to a dry, thirsty surface, and it will draw water out of a patch applied to bone-dry concrete, leaving weak, crumbly edges.
Tape off the riser and anything below before you mix. It is far easier than grinding stray mortar off a door frame later.
Step 3: Cut and Fit Reinforcement for Wider Cracks
Skip reinforcement on hairline cracks. It adds work and buys you nothing where there is no spalling to hold back.
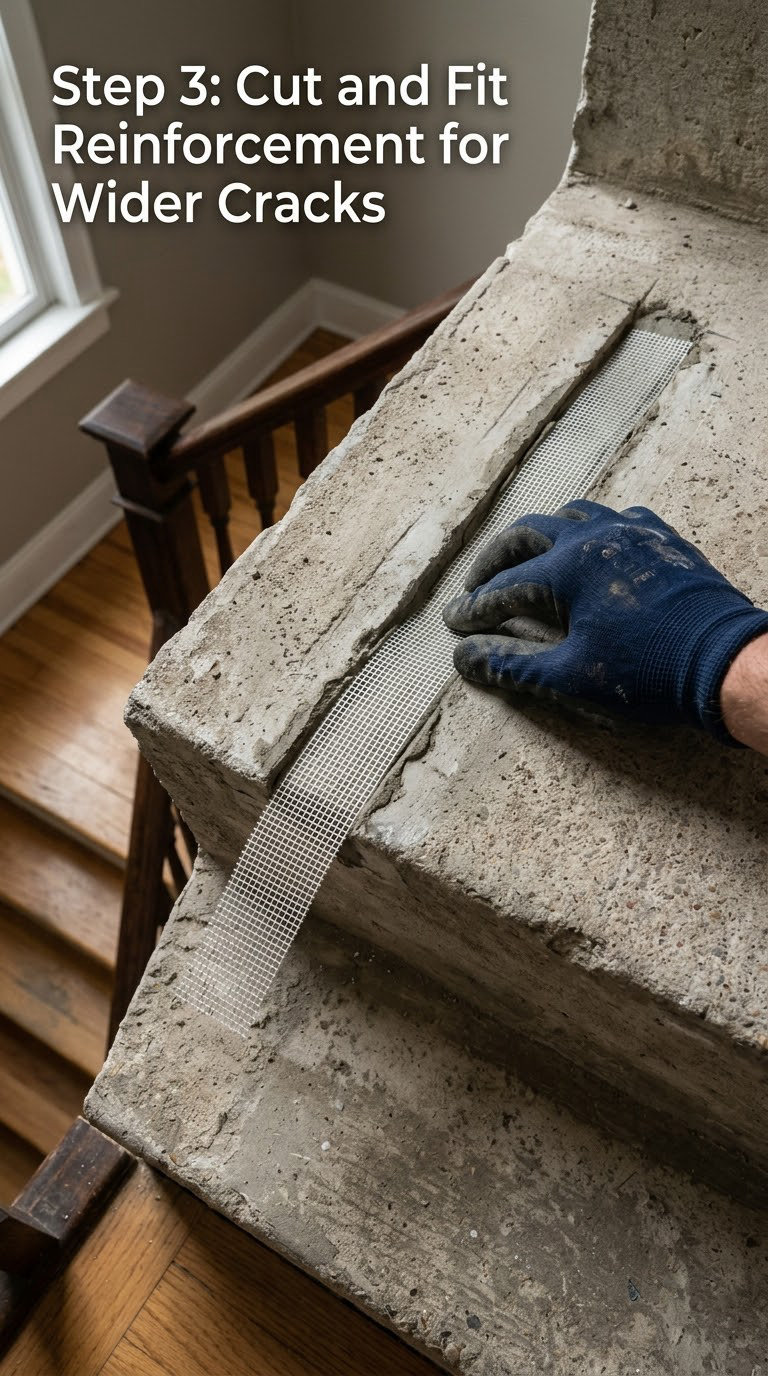
For a crack wider than 1/4 inch (6 mm), or a missing chunk on the edge of the tread, cut a piece of fiberglass mesh or repair wire so it runs about 6 inches (15 cm) past the damage on both sides. Cut to size with tin snips or an angle grinder with a metal cutoff wheel, and wear gloves and eye protection when cutting wire mesh.
Set the reinforcement so its middle sits about 3/8 inch (10 mm) below the finished surface, then hold it in place with a few pebbles of mortar, a strip of stiff wire, or the patch material itself if you are packing the repair in layers. Nobody is expecting a masonry screw here. A light scuff of the mesh into wet mortar is enough, and most of the strongest repairs doing the rounds on home repair forums are screw-free and form-free.
If the chunk is bigger than about 2 inches (5 cm) across on the nose of the step, build a simple form from a 1 by 2 (2.5 by 5 cm) board braced with a paver, and coat the inside with cooking oil so the mortar releases. A cardboard form with wax paper taped to it works just as well for a one-time repair.
Step 4: Mix and Apply the Concrete Patching Compound
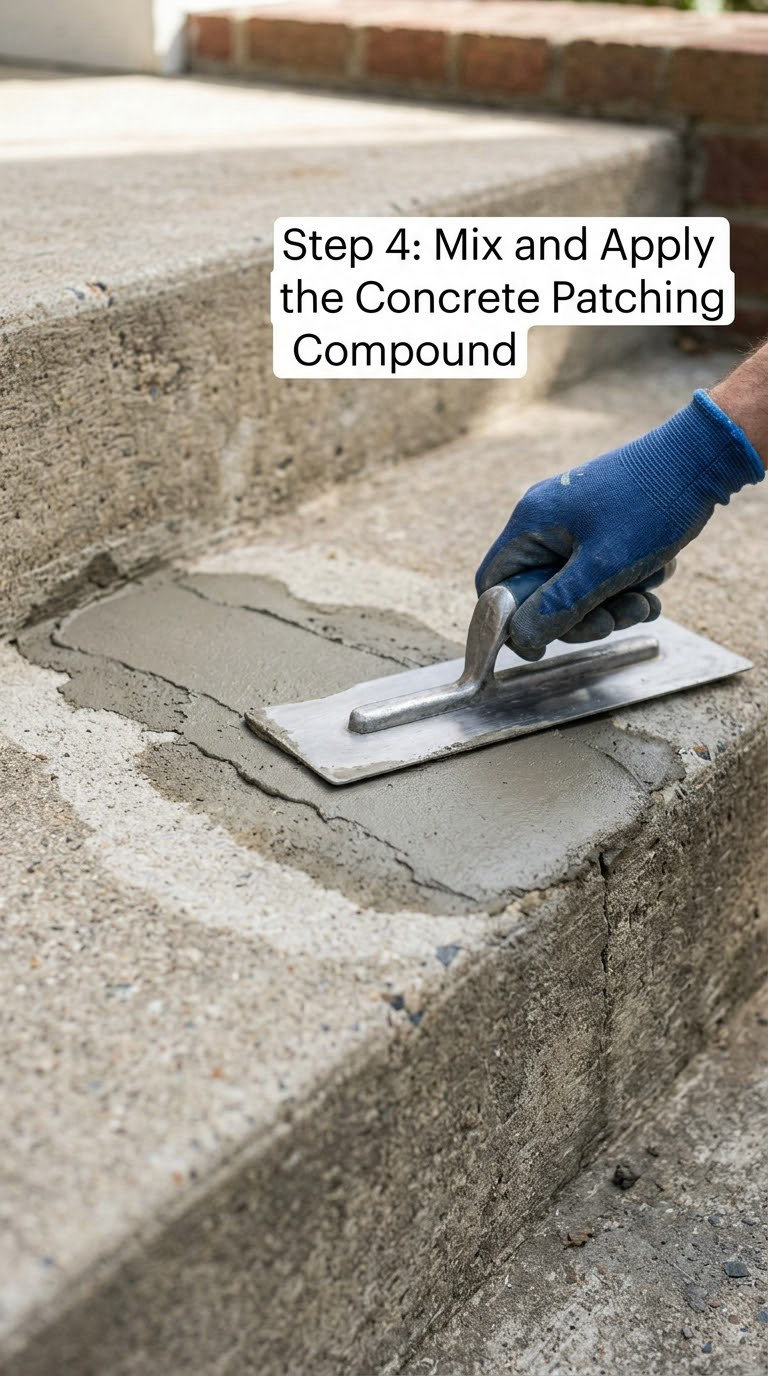
Add water to the dry powder in the bucket and mix with a paddle, following the water line on the bag. Stop at a consistency like thick pancake batter. It should mound when you tilt the bucket and stay where you put it, without running off the edge.
Wait about five minutes after the first mix, then stir again. Many polymer-modified mortars need that second mix after the cement starts hydrating, and skipping it is one of the most common reasons patches crumble a few months later.
Scoop the material onto the damp crack with a margin trowel and press it firmly into place with the tip. Push the mesh down into the material as you go. Work in lifts of about 1/4 inch (6 mm) rather than one thick glob, and let each layer stiffen for 20 to 30 minutes before you add the next, if the void is deeper than half an inch (12 mm).
Strike the top off flush with the original tread and let a little material gather at the nose of the step so you can shape it afterward. Straighten the front face with the edge of the trowel while the material is still soft, so the riser line stays a clean straight edge.
Step 5: Shape, Smooth, and Cure the Repair
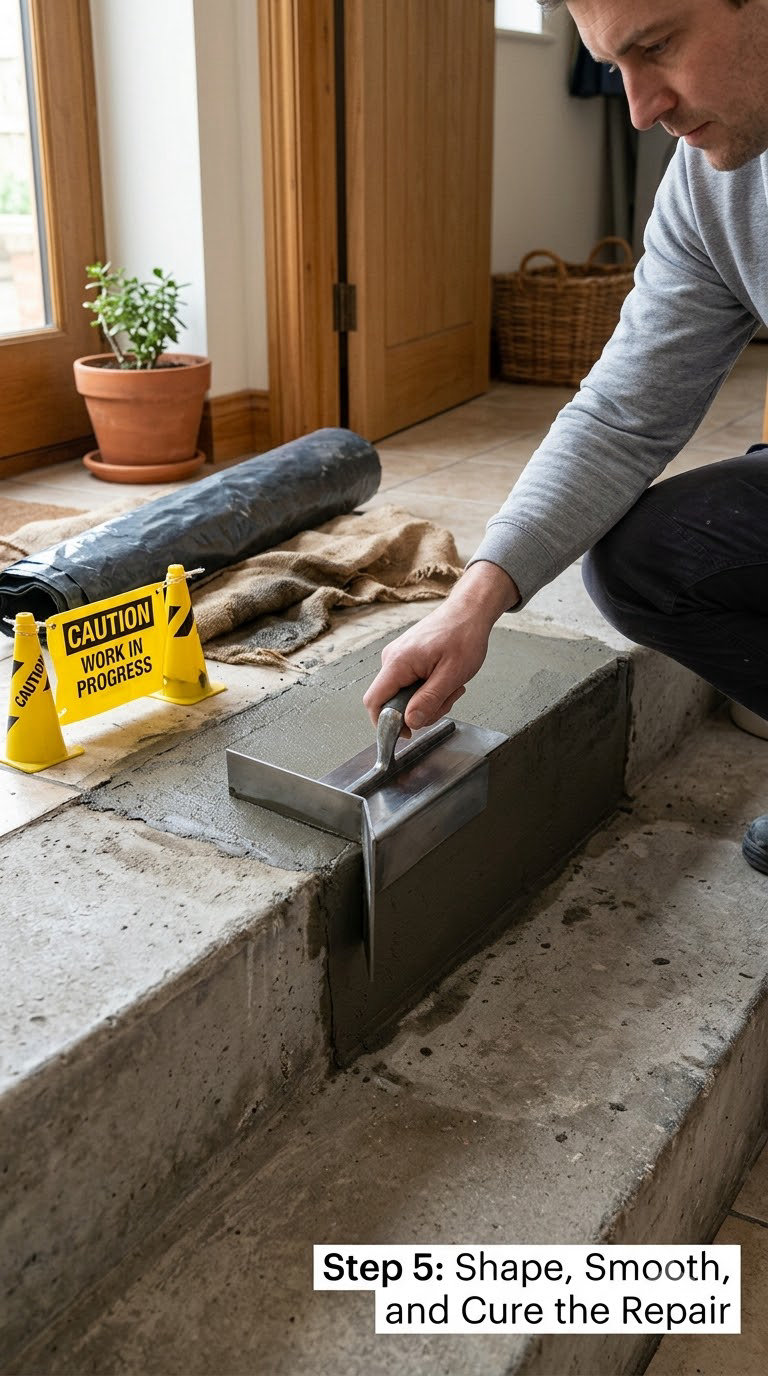
Once the surface water sheen goes away, float the patch lightly with a wood float and skim off any high spots. Do not over-smooth it. A patch polished flat becomes the slickest part of the step the first time it rains, and a slip hazard is a worse problem than the crack you started with.
Then roughen the patched area lightly with a stiff brush, or leave it slightly textured, so the finish grips a shoe sole.
Keep people, pets, salt and rain off the repair for the full cure time on the bag. Most of these mortars accept foot traffic in about 24 hours and reach full strength around 28 days. Cover the step loosely with a plastic sheet if rain is likely, but prop the edges so the sheet never touches the wet patch.
Do not add extra water later to darken or re-wet the surface. That is what turns a sound patch into a dusty one. If you want the patch to look closer to the old concrete, wait until it is fully cured and work on it dry.
Step 6: Seal and Check the Finished Step
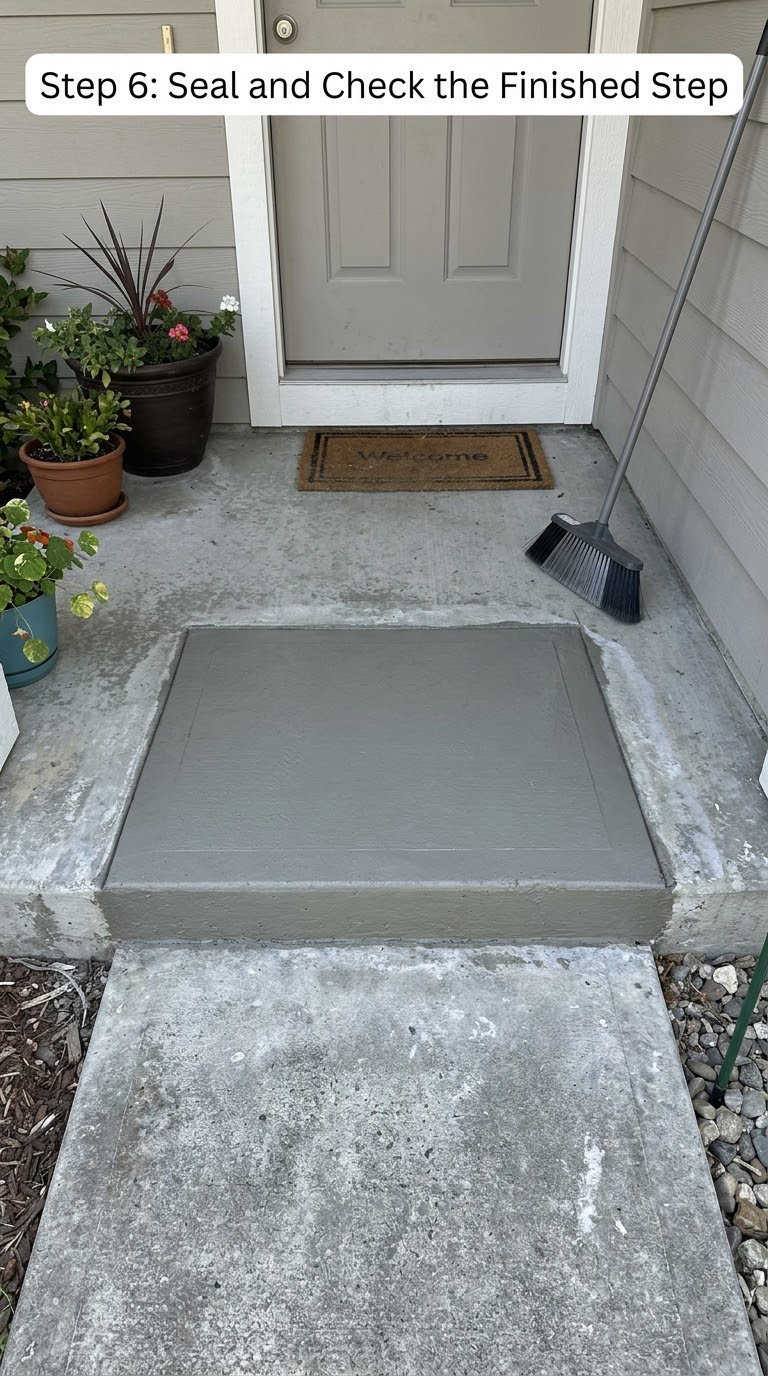
Seal the whole step, not just the patch. Penetrating concrete sealer goes on after the mortar has cured for its stated period, usually 7 to 28 days, and two thin coats beat one heavy coat. Sealing is what stops the water that started the problem in the first place.
Run a finger along the repair. Any pocket of air, void or shrinkage gap along the edge means that area did not bond, and it is worth cutting out and refilling while the tooling is still fresh rather than living with it.
Test the step with a firm heel press before you trust it with a full load, then walk it normally for the first few days. A repaired step should feel like the same piece of concrete as the rest of the stair. If it rings hollow under a knock or flexes under weight, the bond is incomplete and the repair needs to come out.
Expect the patch to be a slightly different shade from aged concrete. Nobody matches twenty-year-old gray exactly, and chasing a perfect match with stain usually leaves a patch that is darker than the rest.
Common Mistakes to Avoid
- Patching a crack that is still moving. If the step tilts or the crack is widening, the patch fails and the new crack appears next to it. Fix the movement first.
- Leaving dust in the crack. Vacuum or blow it out. A thin powder layer is a bond breaker.
- Applying to a dry step. Dampen it first and let the surface go to the back of a few seconds when you press a sponge against it.
- Pushing on one thick layer. Anything deeper than about 1/2 inch (12 mm) goes in as lifts with a set time between them.
- Adding water after the mix stiffens. Do not retemper after the set starts. Mix a fresh small batch instead.
- Walking on it the same day. Even the fast-set mortars want roughly 24 hours before foot traffic and much longer before you park anything heavy on the step.
- Over-smoothing the patch. Leave some texture so the surface is not slick when wet.
- Skipping the sealer. An unsealed repair soaks up water, which is the entire mechanism that caused the crack.
When to Call a Pro
Get a concrete contractor involved when the step itself has moved. A tread that tilts, a riser that is no longer plumb, or a slab that rocks when you step on it means settlement under the step, and that is footing work rather than patching.
Call someone else when the crack runs through the full depth of the slab, when the two sides no longer line up, or when it is wider than about 1/4 inch (6 mm) and still growing. Exposed or rusting reinforcing steel is another sign to stop.
Hand it over if a previous repair has already failed twice, if the step is carrying a load-bearing wall or an upper porch, or if the repair touches handrail anchors, guardrails or anything attached to the framing above. Those carry code and permit requirements in most jurisdictions.
Ask for a repair quote and a replacement quote side by side. Owners in home repair forums keep running into contractors who quote a full tear-out for damage that a mason could patch in an afternoon, and the honest comparison of the two numbers settles the question quickly.
Maintenance
Sweep leaves and grit off the step a few times a year. Grit underfoot is what wears a patch down, and wet leaves sitting on concrete hold moisture against it all winter.
Watch the drainage. A step that holds a puddle at the repair line will keep feeding water into the crack, and if water runs off your roof or gutters onto the steps, redirect it away.
Stay away from de-icing salt on the patch if you can. Salt is the reason so many entryway steps flake in the first place, and use a magnesium chloride or potassium chloride product in the months after you repair it.
Reseal the step every two to three years, or whenever water stops beading on the surface. Check the crack ends twice a year with the pencil marks you made earlier, and re-inspect before the first hard freeze of 2026. A patch that is still tight after a full winter is going to keep working.
Frequently Asked Questions
Can I repair a cracked concrete step myself?
Most cracked steps can be patched by a first-time DIYer with a trowel, a wire brush and a tub of polymer-modified patching compound. Repair it yourself when the crack is under a quarter inch wide, the step does not tilt or rock, and no reinforcing steel is showing. Hire a contractor if the whole slab has settled, the two sides of the crack are displaced, or the step carries a load-bearing wall or handrail.
How long should a patched concrete step cure before walking on it?
Wait about 24 hours before foot traffic on most fast-setting patching mortars, and 48 to 72 hours on standard ones. Full strength takes around 28 days, so avoid parking heavy planters, bicycles or vehicles on the repair while it gains strength. Keep rain, salt and foot traffic off it until then, and check the bag for the exact times of the product you bought.
What is the best material for filling a crack in a concrete step?
Use elastomeric masonry crack sealant for hairline cracks under 1/8 inch. For wider cracks, chips and missing edge chunks, use a polymer-modified concrete patching mortar, adding fiberglass mesh or repair wire when the gap is over a quarter inch. Two-part epoxy is the choice for rebuilding vertical corners and riser edges, because it grips smooth faces and hardens faster than mortar.
Should I use wire mesh or fiberglass reinforcement for a step crack?
Reinforcement matters only when there is a void to hold closed, so skip it on hairline cracks. For a chip larger than about 2 inches, a gap wider than a quarter inch, or a crack that is crumbling at the edges, cut mesh or repair wire 6 inches past the damage and set it about 3/8 inch below the finished surface. Anchoring screws into the step is rarely needed for a surface repair.
Can I paint a repaired concrete step?
Yes, once the mortar has fully cured, usually after about 28 days, and after any sealer has been removed. Pressure-wash or acid-etch the surface so the coating has something to grip, and follow the paint manufacturer instructions on moisture content. Masonry paint and elastomeric coatings move with the concrete better than ordinary exterior paint, which cracks over a patch.
When does a cracked step indicate a structural or safety problem?
It is structural when the step tilts or rocks, when the crack runs the full depth of the slab, when its two sides are offset, or when it is wider than a quarter inch and still growing. Treat crumbling concrete that sheds grit underfoot as a hazard too. Mark the crack ends, watch for change over a few weeks, and get a concrete contractor out if you see any of these signs.
If you only do one thing this weekend, mark the crack ends and press a straightedge across the tread. That single check tells you whether the rest of this guide applies to your step or whether you need a footing problem solved by someone else.
