
How to Repair a Hole in Vinyl Flooring the Easy Way (October 2026)
A dog door, a dropped appliance foot, a nail pulled out of a stud — most holes in vinyl flooring show up the same way, and most of them are fixable in an afternoon. How to repair a hole in vinyl flooring comes down to two jobs: fill in a small puncture, or cut out the damage and glue in a matching piece. Punctures up to the size of a quarter take filler and finish. Anything larger needs a patch cut from spare flooring.
Vinyl is forgiving in one big way. Because it is thin and flexible, a well-cut patch drops into a damaged spot almost invisibly, and a filler repair on a smooth sheet floor can be nearly invisible from standing height. The catch is color matching on printed patterns, and I will get to that below.
Contents
Time: 30 minutes for a small hole, 1 to 2 hours for a patch replacement · Cost: A single repair kit plus adhesive, which varies by region · Difficulty: Easy DIY to Moderate DIY · Skill level: Beginner with a utility knife and patience
Fall is the busy season for this one. After a summer of patio work and dragged furniture, plenty of people find gouges right when they want the floor looking good for the holidays.
Tools and Materials
You do not need specialty equipment for any of the methods below. Everything on this list is something you probably already own or can pick up in one trip.
Tools
- Utility knife with fresh blades, plus spare blades (blades dull fast on vinyl)
- Steel ruler or straight edge, 12 to 24 inches
- Pencil, masking tape and painter’s tape
- Putty knife or plastic spreader, 2 to 4 inches wide
- Notched trowel for sheet vinyl adhesive (a 1/8-inch notch lays down enough for a patch this size)
- Rubber floor roller or a solid flat block for pressing the patch down
- Fine sandpaper, 180 to 220 grit, and a coarse pad such as P320 for scuffed areas
- Hair dryer on low, for speeding up filler and finish drying
- Safety glasses and cut-resistant gloves
- Wet vacuum or shop vac, if the hole exposes the subfloor and grit needs clearing
Materials
- Color-matched vinyl repair filler powder or a vinyl repair paste (one kit covers several small holes over the years)
- Floor bond, the clear liquid that saturates the filler powder
- Clear acrylic floor finish for the final seal
- Flooring-safe adhesive for sheet vinyl or LVP — a vinyl flooring adhesive, not a general-purpose construction adhesive
- Matching offcut or a spare plank or tile, ideally from the same batch as the original floor
- Seam sealer if the repair sits along a seam
- Touch-up wax stick for deep scratches that are not holes but often come with them
- Masking tape, a damp cloth, and a small vacuum or broom
Two habits make this much easier. Keep a spare plank or a 12-inch square of leftover flooring somewhere out of the way from the day you install it — the pattern match goes from guesswork to obvious. And if you plan to work on LVP at some point, our guide to 9 best vinyl plank flooring installation kits for DIYers covers the tools that overlap with this job.
Before You Start
Every repair starts with an honest look at the floor. Knowing what you are dealing with saves you from cutting a replacement piece for a floor that only needed filler.
Identify the flooring type. Sheet vinyl comes up in rolls and has a printed pattern with a felt or backing layer, and it usually has a cushioned feel underfoot. LVP and LVT are rigid planks or tiles with a click-lock or glue-down installation and a repeating wood or stone pattern. If you can see a straight seam every 5 to 7 inches, you are looking at plank. If the pattern runs continuously across the room with no plank ends, it is sheet.
Inspect the damage. Push on the edges around the hole with a flat tool. Solid vinyl means the patch will hold. If the core underneath is crumbly, wet, or rotted, patching the surface is a temporary cover on a bigger problem.
Clean and dry the area. Vacuum out any debris, wipe the surface with a damp cloth and a little mild floor cleaner, and let it dry fully. Adhesive will not bond to wax, polish or damp vinyl.
Protect the workspace. Lay down a clean cloth or a piece of cardboard, tape off the baseboards, and move furniture rather than sliding it. If you are near a cabinet toe kick, plan for the patch to be visible from one direction only — that is normal and unavoidable.
Pick the least invasive method. Small puncture under a quarter: filler and finish. Hole larger than that, tear, or missing section: patch replacement. Old flooring with a lifting edge: re-bond the whole sheet, not just the hole. If you are not sure which floor you own, the 8 best vinyl plank flooring sets we reviewed go into how plank construction and wear layers differ from sheet goods, which tells you what your patch needs to match.
Step-by-Step Instructions
The steps below cover all three floor types. Steps 1 and 2 are universal. Step 3 changes for LVP and tile, since those come in discrete pieces, and Step 5 changes for sheet vinyl, which is fully bonded.
Step 1: Identify the Flooring and Damage
Look at the hole from the side. A puncture through the wear layer only, with the backing intact, is a filler job. A tear that runs back to a seam or to a wall is a patch job. A lifted edge or a section where the vinyl has peeled off the subfloor needs the whole area re-bonded, not a small patch.
Measure twice here, because your cut line depends on it. Measure the damaged area, then measure one surrounding plank or tile width in each direction. That extra width is your allowance for pattern matching and trimming.
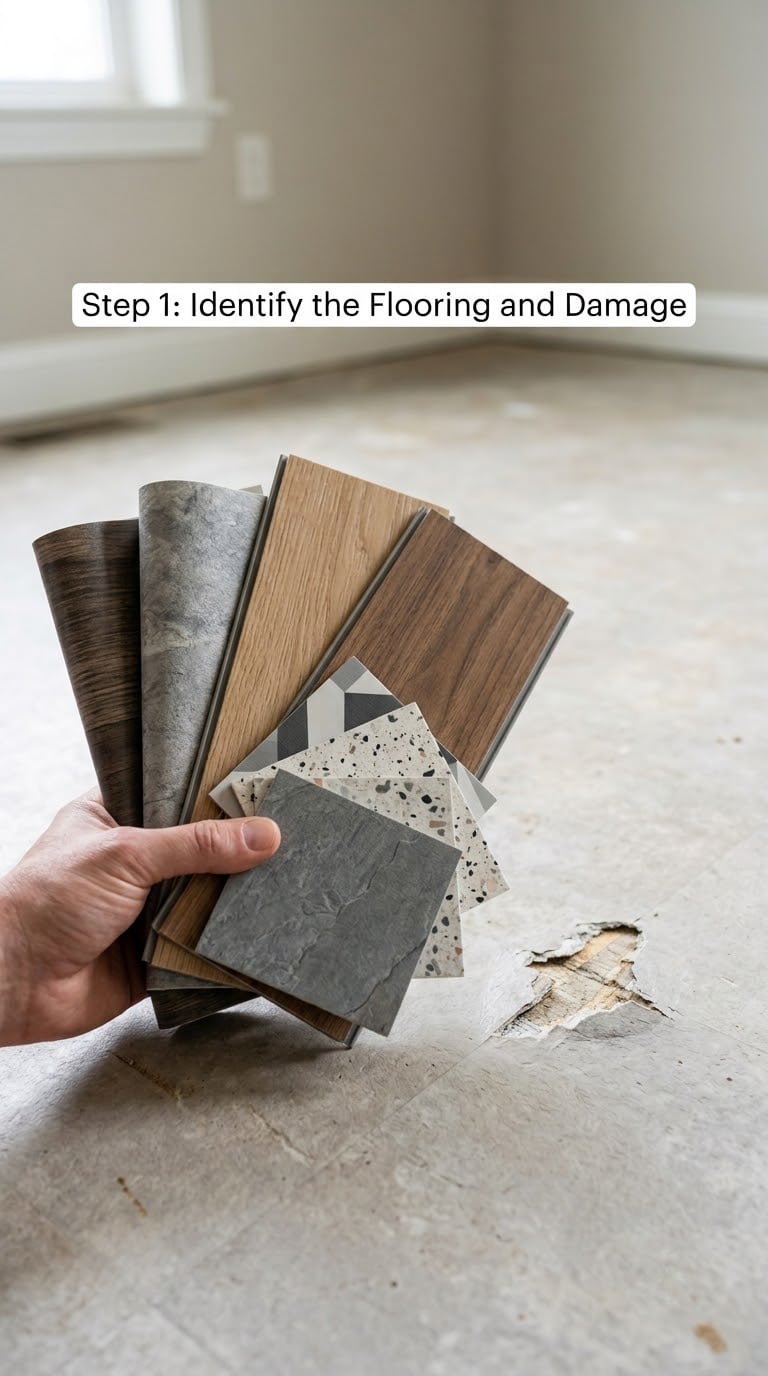
Note the wear direction while you are still on your knees looking at it. Plank and tile floors have a grain direction, and a patch installed against it is obvious from across the room even when the color matches perfectly.
Step 2: Clean and Prepare the Damaged Area
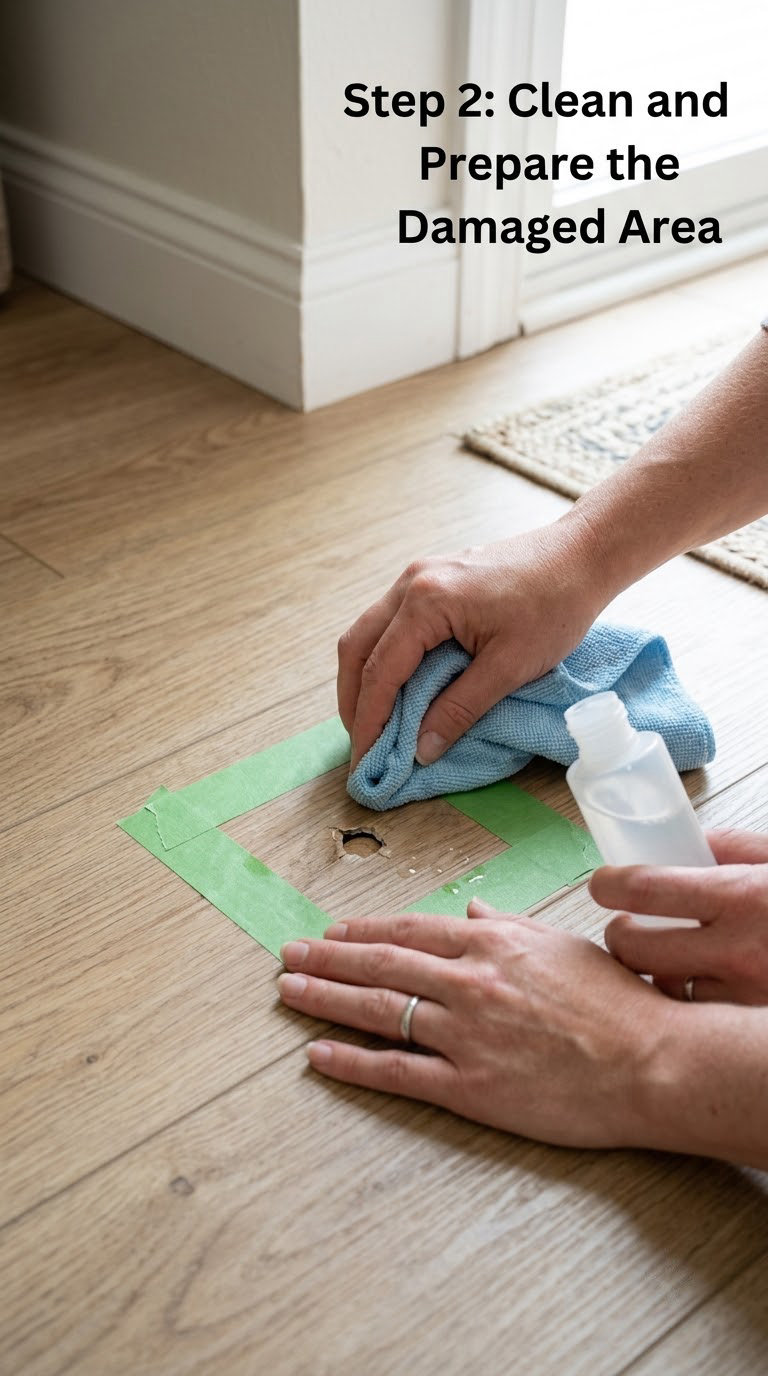
Mask off the sound vinyl around the damage with painter’s tape. It keeps cleaner off the good surface and gives you a clean edge to cut against later.
Scrape out any loose vinyl or old adhesive inside the hole with the putty knife. Vacuum the cavity so dust is not trapped under the patch, then wipe it with a damp cloth and let it dry. If the subfloor is damp, a wet-dry vacuum clears grit and standing water from the cavity. Water under vinyl causes adhesive to release and the floor to cup, so fix that first.
Step 3: Choose and Cut the Matching Repair Piece
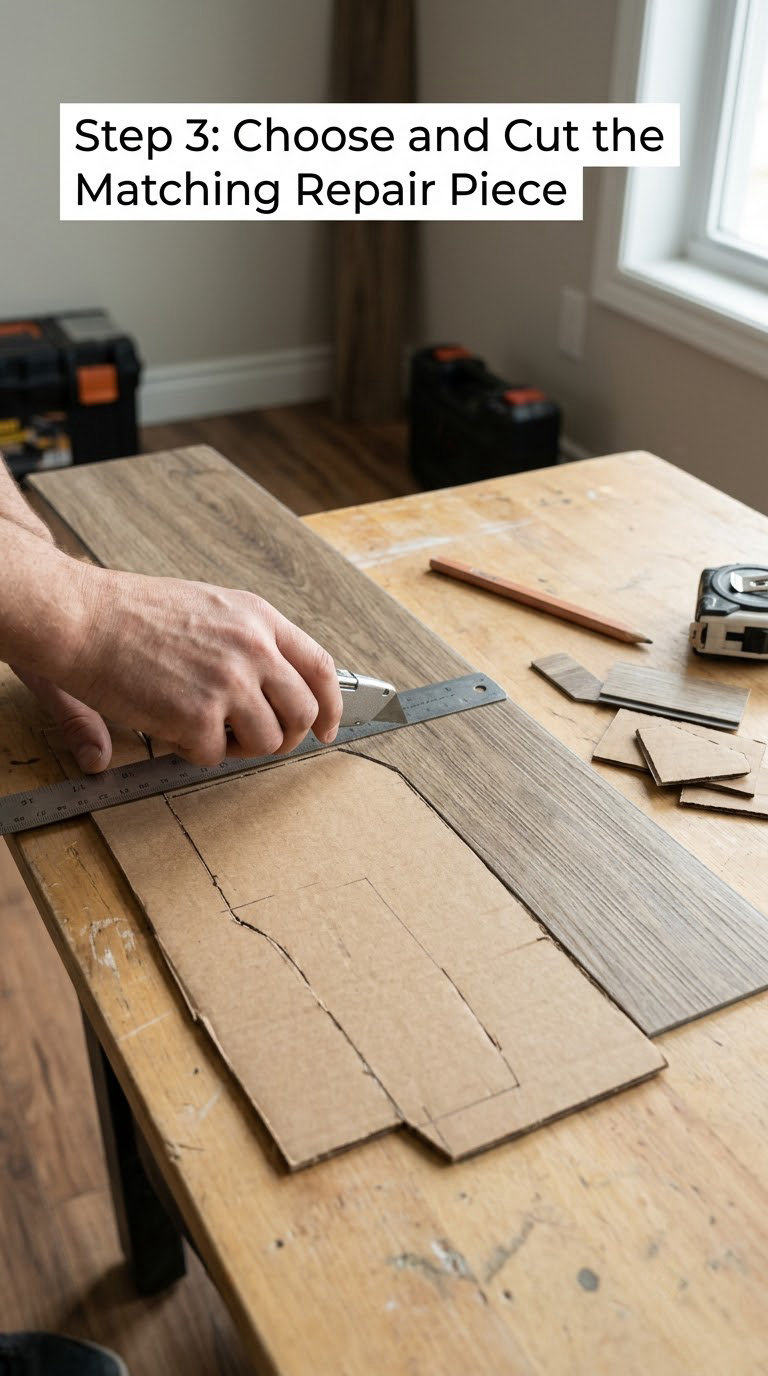
Use leftover flooring from the original install if you have it. Same batch matters, because dye lots shift between production runs and a close match from a different run reads as a lighter rectangle from above.
Trace the damaged area onto a paper template, add 1 inch on each side, and cut the template. For LVP or LVT, lay the template over the top of the flooring and score the plank edges with a sharp utility knife, pressing hard enough to cut the wear layer in one pass. Change the blade after every two or three cuts. Cutting into the flooring instead of into the spare piece is the most common avoidable mistake here.
For sheet vinyl, lay the spare piece over the hole with the pattern running in the same direction, mark the outline, and cut only the spare. Replace the blade often; a dull blade drags and crushes the edge instead of slicing it.
Step 4: Fit the Patch or Replacement Piece
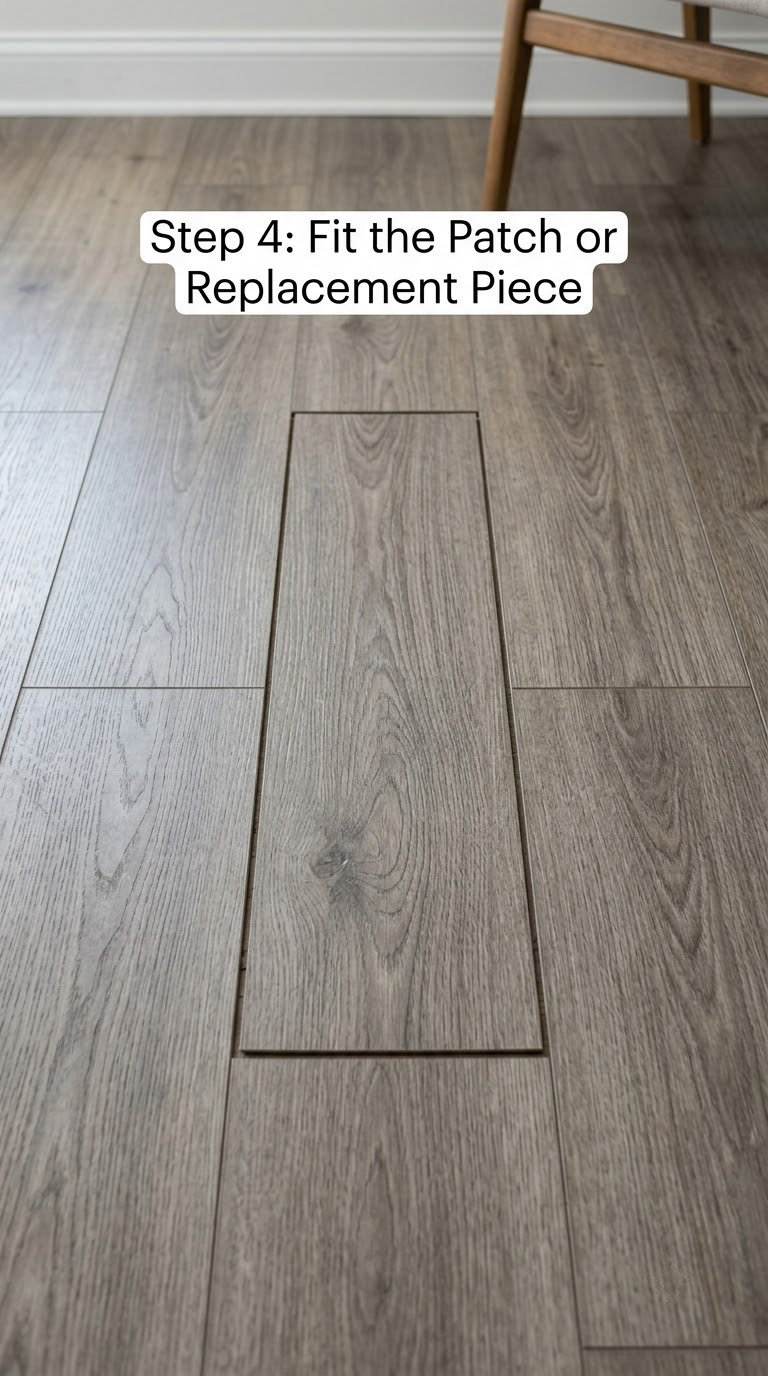
Dry-fit first. Set the piece in place without adhesive and check three things: the grain or pattern direction matches, the joint lines line up with the surrounding ones, and the piece sits flat when you press down on it.
If it rocks, the subfloor is uneven there rather than the patch being wrong. Trim the high spot on the subfloor with a scraper and try again. If the piece is a tight fit, do not force it. A repair edge sitting 1/16-inch proud is far better than a snapped plank or a torn seam next to it.
Step 5: Apply Adhesive and Set the Repair
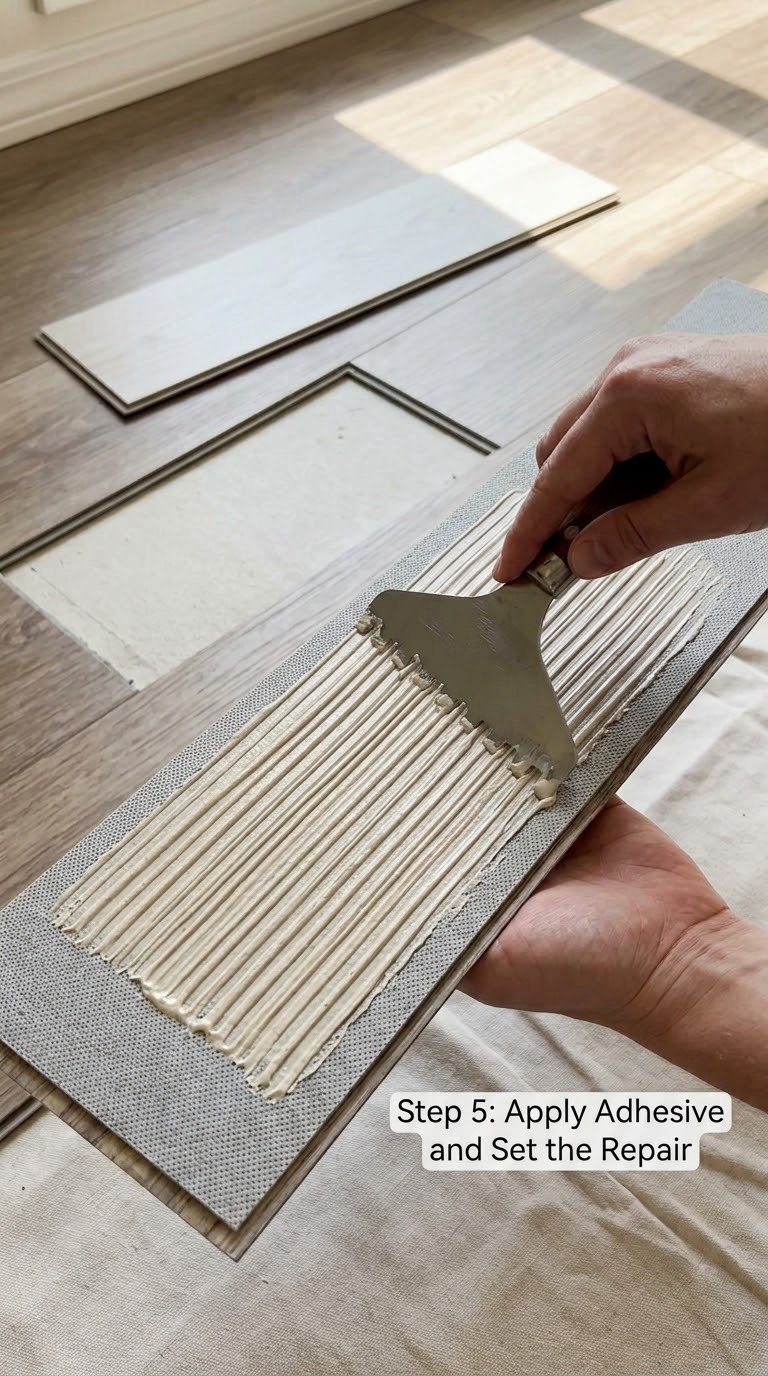
For a perimeter or edge repair on sheet vinyl, a bead of adhesive along the seam is enough. For a full patch, spread a thin bed with the notched trowel, roughly 1/8 inch, covering the whole underside. Follow the open time printed on the adhesive, which is typically 10 to 30 minutes before you lay the piece in. Laying too early traps solvent and the patch never grabs.
Set the piece, press it down with a rubber roller or a flat block, and run the block across the whole surface to push out air pockets. For sheet vinyl, follow with a heavier roller or the face of a hardwood block. Keep foot traffic off it for 12 to 24 hours. Furniture can go back after the adhesive has cured, usually 24 to 72 hours, following the product instructions.
If you are only filling a puncture, the filler and finish work the same way: press the powder into the hole, saturate it with floor bond until it stays wet, let it dry 2 to 4 hours, sand it flush, then apply one thin coat of clear acrylic finish and let that dry another 2 to 4 hours. A hair dryer on low cuts both times roughly in half.
Step 6: Finish and Check the Repair
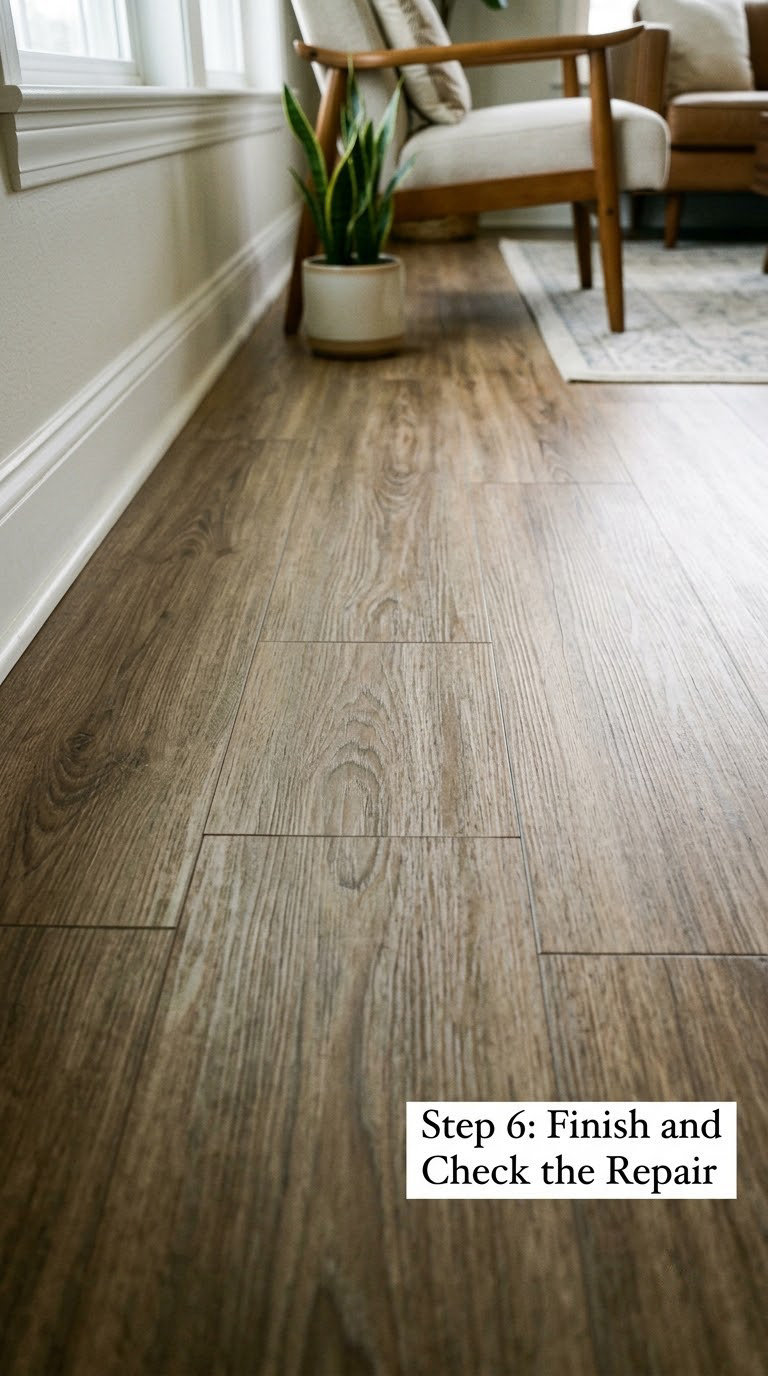
Trim any excess adhesive that squeezed out of the seam with a utility knife held at a shallow angle, then wipe the seam with a barely damp cloth before it cures. Run seam sealer along the joint if the patch sits on a sheet vinyl seam.
Walk on it with a soft sole, not a hard heel, and look at the repair from standing height and from a kneeling height. Standing height tells you whether the pattern reads. Kneeling height tells you whether the edge is flush. Both together tell you whether the job is done.
If the color reads slightly off after everything cures, a second thin coat of finish often blends the edge better than scrubbing at it. For a wood-grain plank that still looks wrong, the honest fix is a whole-plank swap rather than more finish, because a rotated grain is hard to hide.
Common Mistakes to Avoid
Almost every failed vinyl repair comes from one of these seven things. Each has a simple fix.
- Patching over dirt, wax or moisture. The bond fails in weeks and the patch peels up. Fix: scrape, vacuum, wipe with a damp cloth and let it dry fully first.
- Using household glue. Super glue and construction adhesive embrittles vinyl and stains the surface. Fix: use a vinyl flooring adhesive or a repair kit filler, nothing else.
- Mismatching the pattern. A rotated grain or a wrong-direction plank is more obvious than a color difference. Fix: lay the piece in place and check direction before you apply anything.
- Cutting the fit too tight. A patch cut to the exact hole size leaves no room for adjustment and no seam. Fix: cut 1 inch larger than the damaged area.
- Skipping the subfloor check. A soft or wet core makes every patch fail. Fix: press a flat tool against the area around the hole and look for give or dampness.
- Walking on it too soon. Foot traffic before the adhesive grabs is the number one reason patches shift. Fix: wait 12 to 24 hours, longer before replacing furniture.
- Cutting the flooring instead of the spare. A dull blade wanders off the line. Fix: score the existing floor edges first, change blades often, and keep a fresh one for the actual cut.
When to Call a Pro
Some jobs are not a weekend project. Book a flooring pro when any of these show up.
- The subfloor is rotten, soft, or has visible mold, especially in a basement or bathroom.
- Water damage spread across more than a few square feet, or flooding that saturated the underlayment.
- Missing areas larger than a plank or tile with no spare material to match from.
- Seams or edges under permanent cabinetry and appliances, where the finish line has to be invisible.
- Flooring installed before the 1980s that may contain asbestos. Do not sand, cut or scrape it — have it tested first.
- Damage near wiring, plumbing or a heating element, where removing floor covering means working around live systems.
- Work that needs a permit or code compliance, such as structural subfloor repair or changing the floor assembly in a wet area.
On larger commercial jobs, the finish line is welded rather than glued. Our write-up on 10 best vinyl welding guns for commercial flooring explains what that involves and why a residential patch does not need it.
Maintenance
The repair is only half the job. A few habits keep a patched floor from failing again.
Put felt pads under every furniture leg that sits on vinyl, and lift furniture rather than dragging it. Casters are the usual culprit in living rooms, and hardened plastic pads on rolling chairs work better than the felt ones that flatten out. Place a walk-off mat at the entry to catch grit, because grit under a chair caster is what grinds a wear layer down.
Clean with a pH-neutral vinyl-safe product and a damp mop. Avoid vinegar at full strength, abrasive scrubbers and any cleaner with solvents; they dull the finish and make the repaired area look different from the surrounding floor. If the floor has an acrylic finish, add a fresh coat every few years rather than letting it wear through in traffic lanes.
Check seams twice a year, especially in January and July when indoor humidity swings. Lift the edge of the patch with a fingernail; if it moves at all, re-bond it while the adhesive is still workable. Pet claw punctures are worth a quick look too, since they usually show up in clusters rather than one at a time.
Frequently Asked Questions
Can you repair a hole in vinyl flooring?
Yes. Holes up to about a quarter inch across can be filled with color-matched filler powder saturated with floor bond, sanded flush and sealed with acrylic finish. Larger holes need the damaged section cut out and a matching patch glued in. Both methods work on sheet vinyl, LVP and vinyl tile, as long as the subfloor underneath is sound and dry.
Can you patch a hole in vinyl flooring with no spare flooring left?
You can, but expect a visible color difference. Buy a plank or sheet of the closest match from a flooring supplier and ask whether they can color-match from a photo or a physical chip of the original floor. Some suppliers will send samples. A patch with a slightly different tone usually reads better than a filler repair on a printed pattern.
What adhesive should I use to repair vinyl flooring?
Use a vinyl flooring adhesive, or the adhesive recommended by the flooring manufacturer. Construction adhesive, super glue and general-purpose glue can embrittle and stain vinyl. For a perimeter or edge repair a bead of seam adhesive is enough. For a full patch, spread a thin bed with a notched trowel and respect the open time printed on the can.
How long does a vinyl floor patch take to dry?
Keep foot traffic off the repair for 12 to 24 hours, and leave furniture off for 24 to 72 hours, following the adhesive instructions. A filler repair on a small hole needs about 2 to 4 hours to dry, then the same again for the acrylic finish. A hair dryer on low roughly halves both drying times.
Can I use super glue or Gorilla Glue to fix vinyl flooring?
No. Cyanoacrylate glues and expanding foams make vinyl brittle, and expanding glue can lift the surrounding flooring as it cures. They also stain. Stick to a vinyl repair filler for small punctures and a vinyl flooring adhesive for patches, and open a window when using adhesive because the fumes need ventilation.
Can a tear in vinyl flooring be repaired?
Yes, if the tear has not pulled a seam apart. Trim loose threads, clean the area and bond a piece of matching vinyl over the tear from underneath for best results. If the tear runs along a seam, cut back to solid material on both sides and seam a new piece in, then seal the joint with seam sealer.
Conclusion
Figure out what your floor is made of first, because that decides everything else. Clean the area properly, find a matching piece from the same batch if you can, then choose the least invasive method that will hold: filler for a puncture, a glued patch for anything larger.
Before you start, press on the subfloor around the damage. If it is soft, damp or crumbly, stop and fix that first. How to repair a hole in vinyl flooring is a straightforward job on a sound floor, and a wasted afternoon on a wet one.
