
How to Install a Bidet Seat on a Toilet: Easy DIY Guide 2026
Learning how to install a bidet seat on a toilet is mostly plumbing prep work: shut off the water, fit a T-valve on the supply line, bolt a mounting plate over the seat holes, connect the hose, then push the seat on until it clicks. Most first-timers finish in 45 to 90 minutes with hand tools.
You are not replacing the toilet or running new drain lines. The seat bolts straight to the same two holes your current seat uses, and the water comes off the supply line already feeding the tank. If your toilet has an accessible shut-off valve and the seat fits the bowl, you can do the whole job yourself.
Contents
Time: 45 to 90 minutes for a first-timer, plus an overnight leak check before you trust it. Cost: the seat and, if your model does not include one, a 7/8 inch T-valve and braided hose; plumber and electrician charges vary widely by region. Difficulty: Beginner to Moderate DIY. Skill level: Comfortable with a screwdriver, adjustable wrench and a tape measure.
Tools and Materials
Most seats ship with everything the hardware side needs. The list below is what you gather before you start.
- Adjustable wrench or 8 inch slip-joint pliers for the supply line and T-valve nuts. Pliers that grip the flats of a nut work better than ones that catch the ridges.
- Flathead and Phillips screwdrivers for the seat bolts and the mounting plate. Use a hand screwdriver on the plastic seat bolts; a drill strips them.
- Tape measure for bolt spacing and rear clearance behind the tank.
- Small cup or bucket and old towels to catch drips when you open the supply line.
- Flashlight if the shut-off valve sits in a dark corner behind the bowl.
- Cleaning gloves and safety glasses for the tank and bowl work.
- Scrub brush or microfiber cloth and a bathroom-safe cleaner for the mounting surface.
And the parts, some of which are in the box:
- The bidet seat itself, with its mounting plate or catch plate, two mounting bolts, plastic nuts and washers.
- A 7/8 inch T-valve, also called a branch valve or tee fitting, if the seat does not include one. Most do.
- A braided stainless supply hose if your existing line is old, corrugated or too short.
- Plumber’s tape (PTFE tape) for any threaded male-to-male joint you touch.
- An optional in-line water filter if your area has hard water and the seat supports one.
- A GFCI-protected receptacle within cord reach for an electric seat. Cords run about 42 to just under 48 inches on most models.
Before You Start
The first five minutes decide whether this is a Saturday morning job or a plumber’s visit. Work through these checks before you open the toolbox.
Find and test the shut-off valve. It is the small oval handle or lever on the water line coming out of the floor behind and to the left of the bowl. Turn it clockwise until it stops, then flush. If the bowl does not refill, you found the right one. If you cannot identify it confidently, stop and call a plumber. Guessing at a valve you cannot find costs far more than the service call would have.
Check the bowl shape and bolt spacing. Most seats fit both round and elongated bowls, but the seat must match the bowl. Measure the distance between the centers of the two seat holes, typically 5.5 inches, and compare it to the mounting plate range printed in the manual. Read our guide to whether you can install a bidet on any toilet if you have a skirted base or a wall-hung bowl, because both change the job.
Measure rear clearance. Electric seats are tall at the back. You usually need 2 to 3 inches between the tank and the wall, and the tank lid must clear the seat’s raised rear housing. If the lid sits down on the tank lip, the seat may not fit under it.
Check the power situation. Plug-in seats need a GFCI-protected receptacle, the kind with test and reset buttons, and they need cord management so the cord cannot be pulled or sit in water. Hardwired models need a new circuit and an electrician. Skip the electrical part entirely with a non-electric seat.
Protect the floor and your hands. Lay a towel where you will work, put on gloves, and keep a flashlight handy. If the work crosses into new wiring, a new outlet, or relocating a supply line, check whether your municipality requires a permit, and use a licensed electrician or plumber for that part.
If you want the mechanical background first, our piece on how a bidet toilet seat actually works explains where the water comes from and what the T-valve does.
Step-by-Step Instructions for Installing a Bidet Seat
Step 1: Check Compatibility and Measure the Toilet
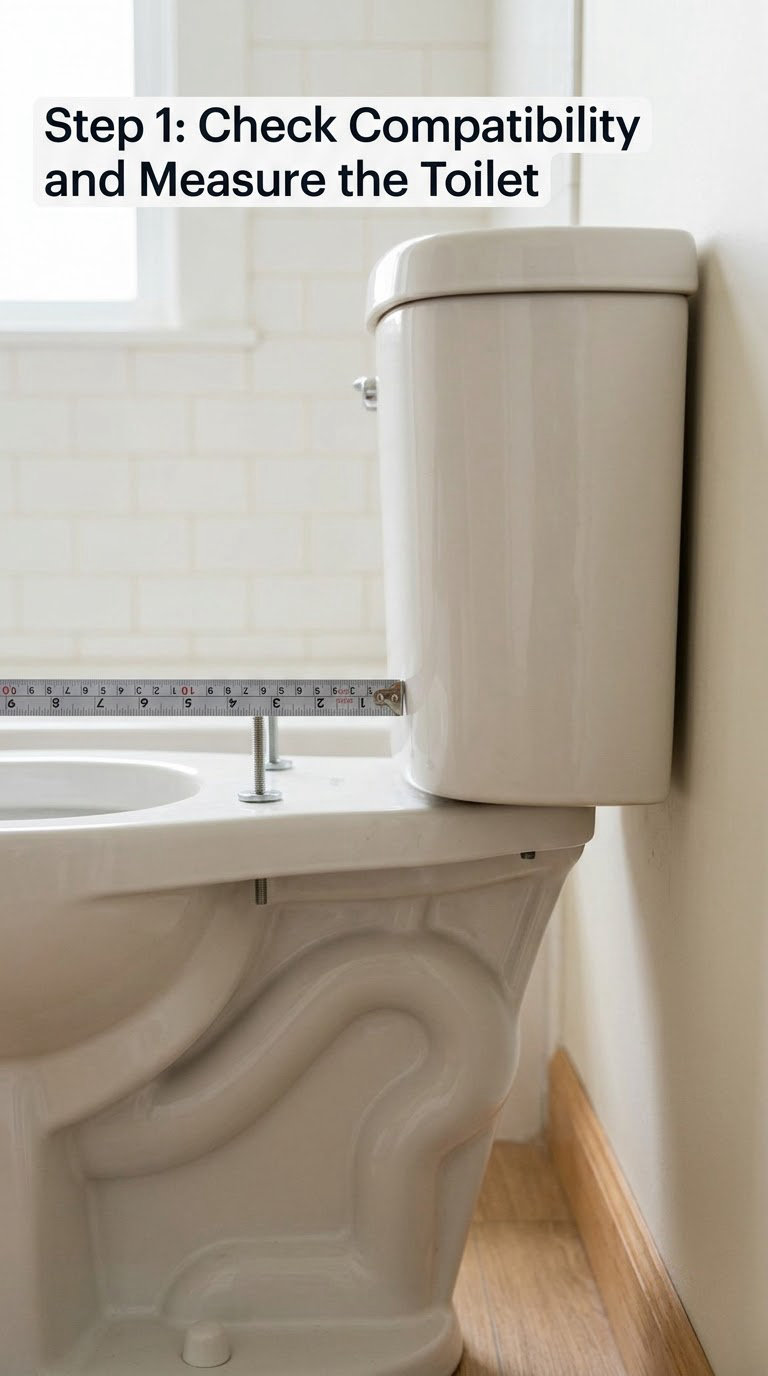
Pull the manual out before you unbox anything. It lists a bolt spacing range, bowl shapes, and a rear clearance figure for your specific model.
- Measure center to center across the two seat holes and write the number down.
- Confirm the manual’s range covers that measurement.
- Measure from the back of the bowl to the tank or wall for the rear clearance figure.
- Locate the receptacle and measure the distance to the toilet centre if you are buying an electric seat.
If any measurement falls outside the manual’s range, stop here and look at an adapter seat or a different model rather than forcing the hardware.
Step 2: Turn Off the Water and Prepare the Bowl
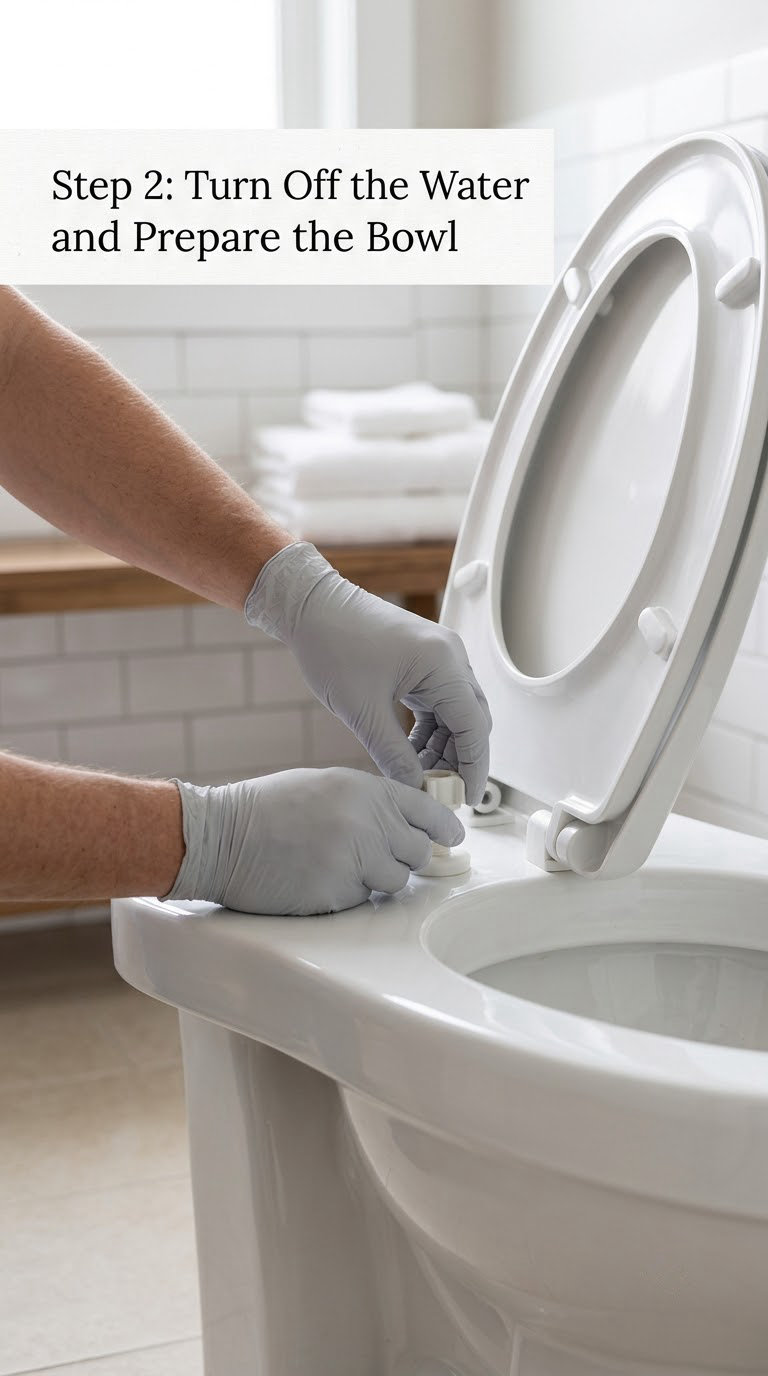
- Flush the toilet, then turn the shut-off valve clockwise until it stops.
- Lift the tank lid, flush again, and let the tank drain into the bowl.
- Unbolt the existing seat: loosen the nuts under the bowl, lift the bolts straight up, and take the seat and lid off.
- Scrub the bolt holes and the rim where the seat sat, then dry everything.
Put a towel under the tank base now, before anything is disconnected. Dry the mounting surface because a wet ceramic surface makes the plate slip as you tighten it.
Step 3: Mount the Bidet Seat Brackets
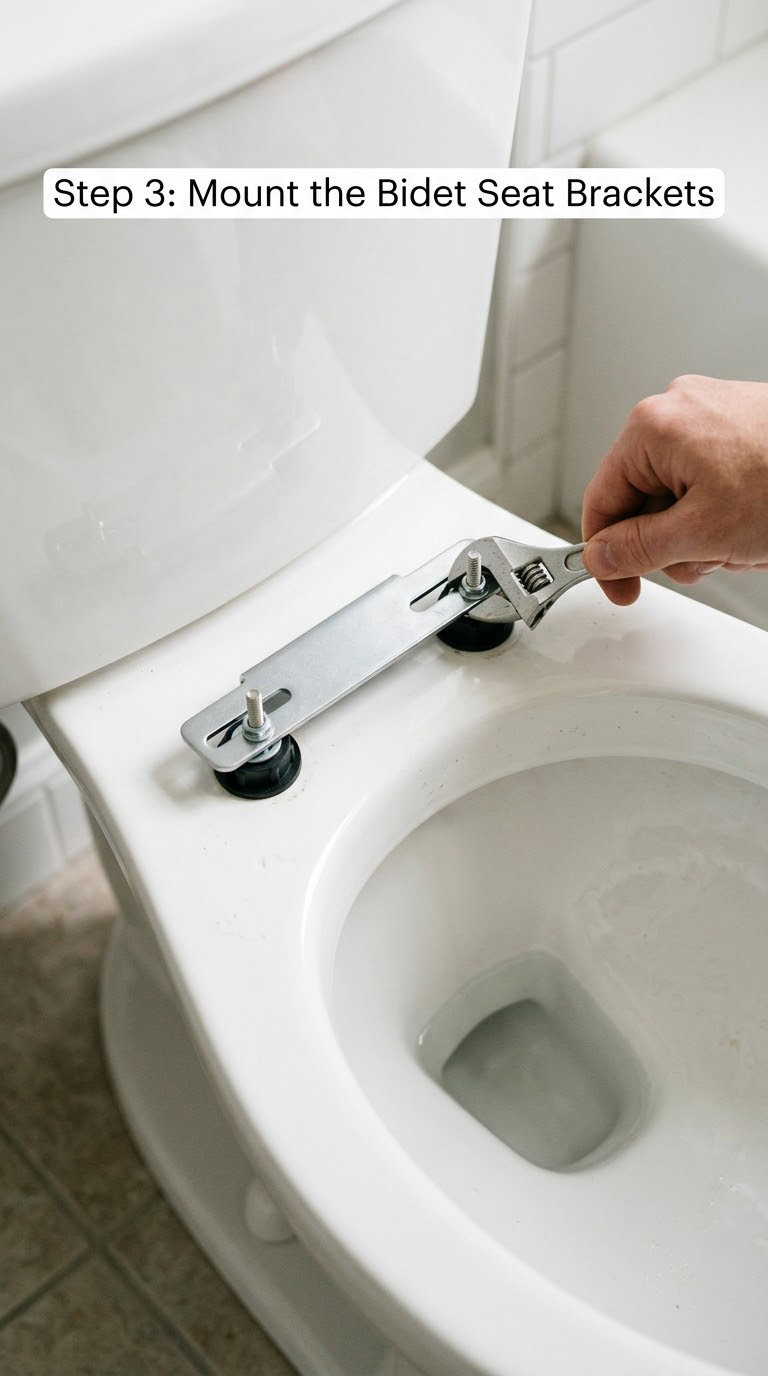
The mounting plate fastens to the same holes your old seat used. Some plates slide forward and back to suit different spacing, so set it before you tighten anything.
- Drop a rubber washer into each hole, then insert the supplied bolts from above.
- Feed the bolts through the plate and thread the plastic nuts underneath by hand.
- Tighten alternately, a quarter turn at a time on each side, until the plate is snug and level.
- If your model includes rubber bumpers or a felt pad, fit them now.
Stop the moment it is snug. Overtightening on porcelain is how bowls crack, and the plastic nuts strip long before the bolts do.
Step 4: Connect the Bidet Water Supply
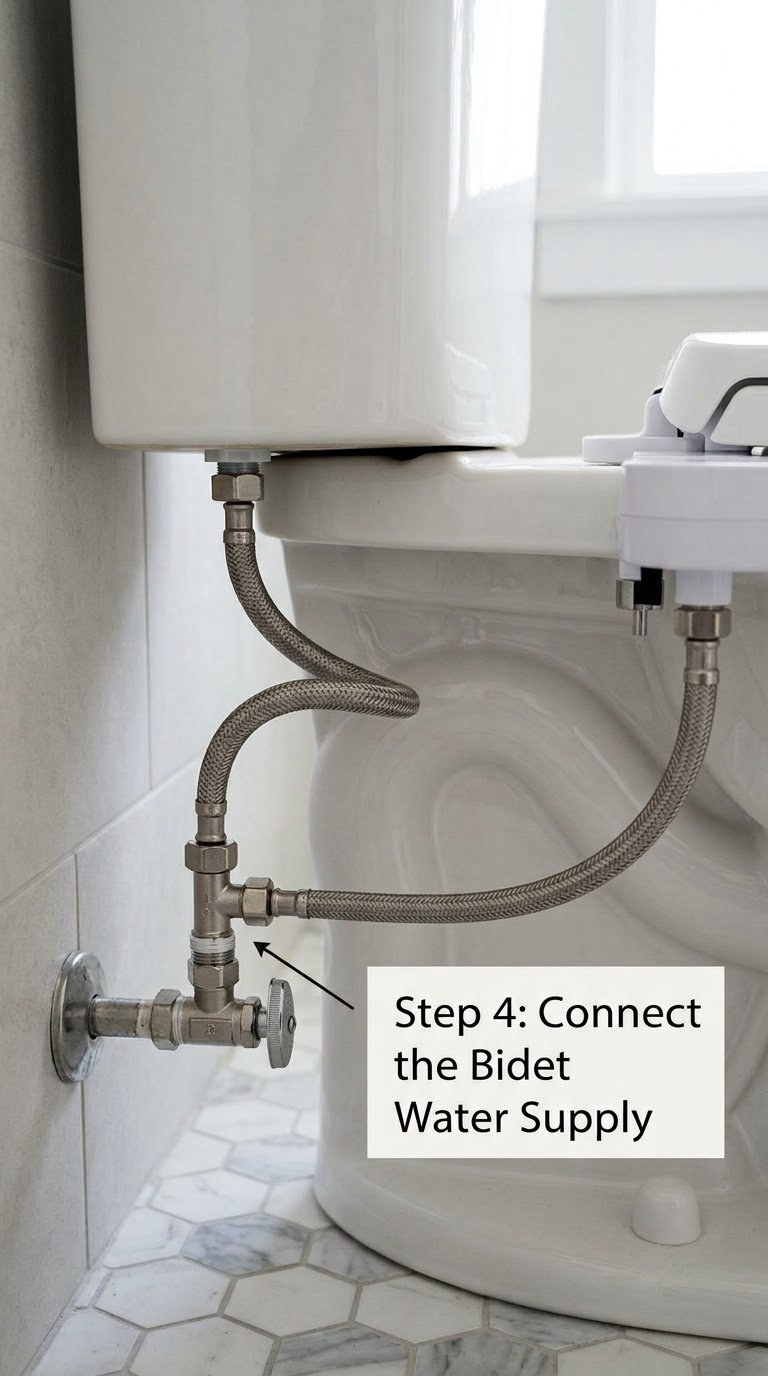
The T-valve splits one supply line into two: one leg continues to the tank, the other feeds the seat. Get the orientation right and everything else is straightforward.
- Place a towel or bucket under the connection, then loosen the nut attaching the flexible supply hose to the tank’s fill valve.
- Wrap two or three wraps of plumber’s tape on the tank’s male thread if you disturbed it.
- Screw the T-valve onto the tank valve first, then connect the vertical run to your shut-off valve.
- Only then attach the perpendicular leg to the seat’s inlet hose, checking that the tank leg faces the tank and the side leg faces the seat.
- Hand-tighten every nut, then snug with the wrench a quarter turn past finger tight.
Connect the two straight runs before the leg sticking out to the seat. Doing the awkward leg first makes the fitting hard to align and easy to cross-thread.
If you already have a hand-held sprayer on a hose, you can usually tee the seat onto that same T-valve. Two hoses on one tee is fine as long as the valve is a proper 7/8 inch tee and both connections are made with their washers seated.
Step 5: Seat the Unit and Set Up Any Power Connection
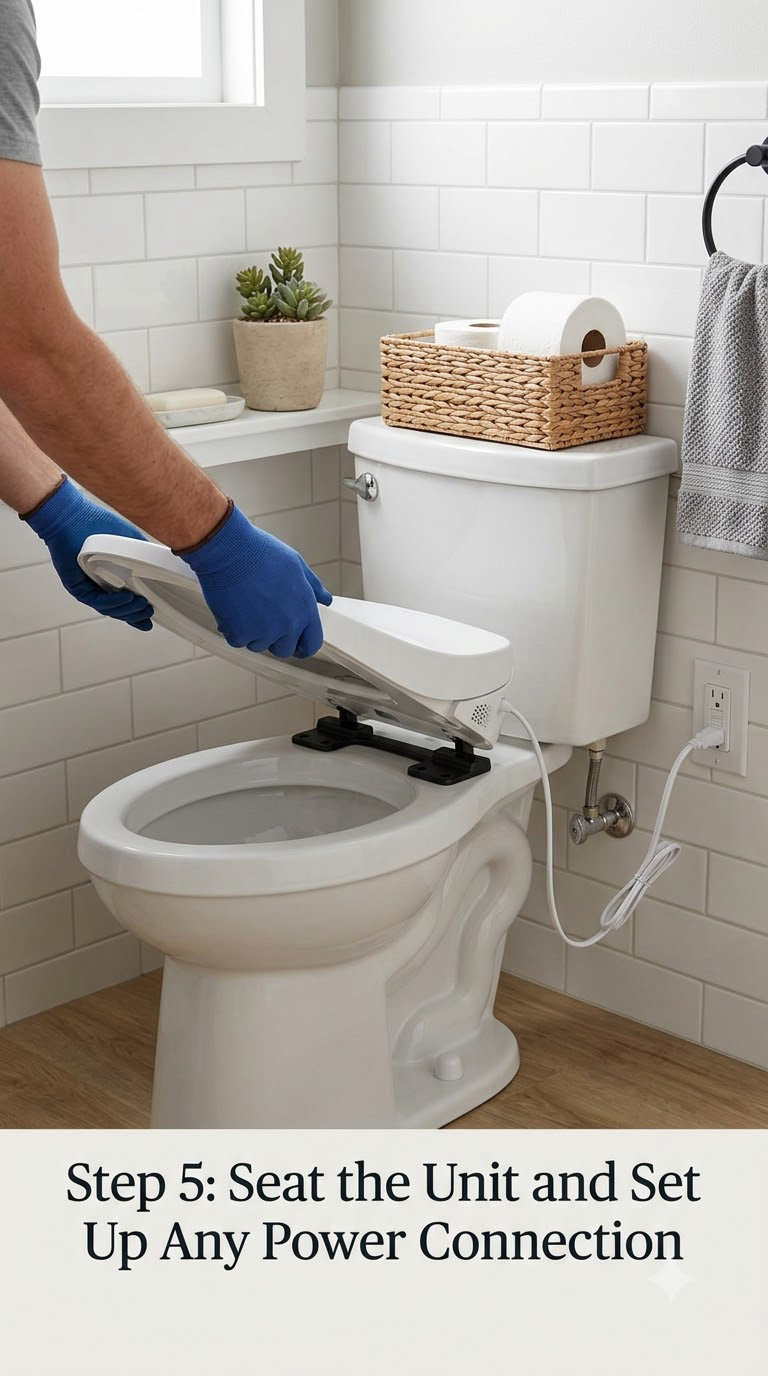
- Align the seat’s channels with the mounting plate and slide it back until you feel or hear it lock.
- Wiggle the seat gently. If it shifts, lift it off, recentre the plate, and try again.
- Fit the filter, if your model takes one, at the seat’s inlet before the final connection.
- For a plug-in seat, plug it into a GFCI-protected receptacle and route the cord behind the toilet so it cannot be pulled or stepped on.
Press the test button on the receptacle, then reset. If the seat powers up, the protection is working. For a hardwired model, the circuit work and any new outlet belong to a licensed electrician, and it must be finished and inspected before the seat goes in the water.
Step 6: Test for Leaks and Check Every Function
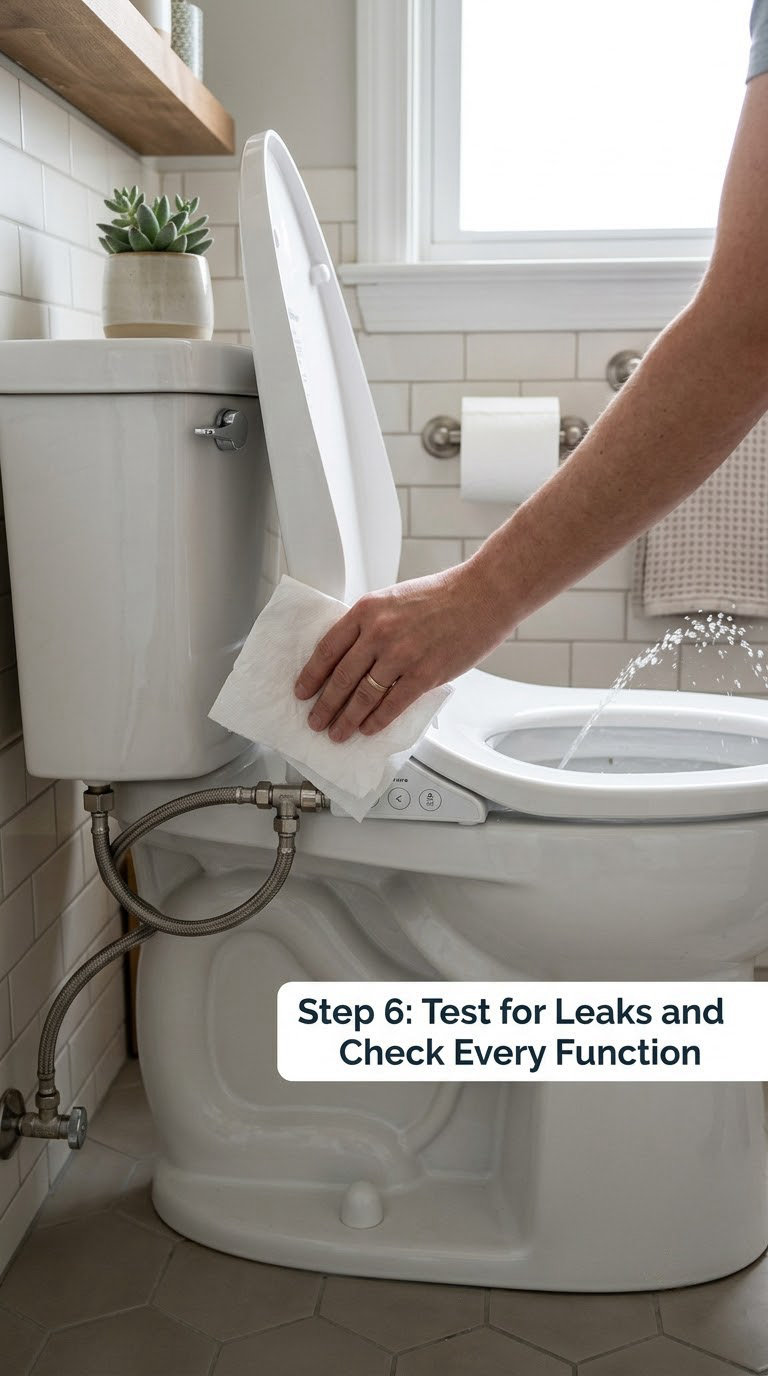
- Turn the shut-off valve back on slowly, a quarter turn at a time, and let pressure build.
- Wipe every connection dry with a paper towel, wait five minutes, then check again. A damp towel shows a weeping joint.
- Flush the toilet a few times and watch the tank fill speed; it should match how it ran before.
- Run the spray, the nozzle position adjustment, the pressure settings, and the warm water or air dryer on your specific model.
Shut the water off again to fix anything that drips. Leave it overnight and re-check in the morning, because slow leaks show up as a bead, not a stream.
Common Mistakes to Avoid
- Forcing a seat that does not fit. Bolt spacing and rear clearance are fixed. Fix: measure first, follow the manual’s range.
- Overtightening the mounting bolts. Porcelain cracks; plastic nuts strip. Fix: snug by hand plus a quarter turn.
- Using a drill on the plastic seat bolts. Fix: hand screwdriver only.
- Dry threads or a missing washer. Fix: wrap plumber’s tape on male threads and confirm the rubber gasket sits flat at every hose end.
- Kinking the supply hose. A tight bend behind the bowl stresses the fitting. Fix: a gentle curve, no pinch.
- One-sided tightening. Fix: alternate sides evenly.
- Connecting the T-valve in the wrong direction. Fix: both straight runs first, bidet leg last.
- An unsecured power cord or an unprotected outlet. Fix: GFCI-protected receptacle, cord routed out of the way.
- Skipping the leak check. Fix: wipe dry, wait, recheck, and look again the next morning.
- Rushing the filter or nozzle settings. A cartridge installed backwards or a nozzle blocked by debris causes weak spray. Fix: fit it per the manual and rinse the nozzle regularly.
When to Call a Pro
Some situations are not DIY jobs. Hire a plumber if there is no accessible shut-off valve, if the supply line is hidden behind a wall or a removable panel, if you would have to drill or relocate plumbing, or if the toilet is skirted and the bolts and supply are concealed. Replace a stop valve that is old or corroded rather than reusing it.
Call a licensed electrician for a hardwired seat, a new outlet, a new circuit, or any wiring work in a damp room. Most jurisdictions require a permit for new bathroom circuits.
Stop using the seat if water keeps running, a connection stays wet after tightening, or you see any water near the plug. Close the shut-off valve and get it sorted before the next use.
Maintenance
Unplug the seat or switch off its breaker before cleaning it. Wipe the body with a soft damp cloth and a mild bathroom cleaner, and stay away from bleach, ammonia, abrasive pads and anything that could craze the plastic.
Pull the nozzle out under running water and rinse it weekly. If your model takes a cartridge filter, follow the manufacturer’s replacement interval rather than a fixed calendar, and note that hard water shortens it. Check the hose connections every few months while the supply is on and the floor is dry underneath.
Before a long absence, shut off the supply behind the toilet and unplug the seat. Our comparison of a handheld sprayer versus a toilet seat bidet is worth a read if you are weighing both in one bathroom.
Frequently Asked Questions
Can I install a bidet seat on any toilet?
Most standard floor-mounted toilets take a bidet seat with no changes, because the seat uses the same two bolt holes your current seat uses. The exceptions are skirted toilets with a concealed base, wall-hung bowls, and very compact models where the tank leaves no rear clearance. Measure bolt spacing and the gap behind the bowl before you buy.
How do I know if a bidet seat will fit my toilet?
Check four numbers against the manual. Measure the seat bolt spacing centre to centre, the bowl shape (round or elongated), the clearance between the bowl and the tank or wall, and the distance from the toilet to your receptacle. Electric seats need noticeably more rear room than non-electric ones, so check that figure before the seat arrives.
Does a bidet seat need a plumber to install it?
No, if your toilet has an accessible shut-off valve and the seat fits. You are adding a tee fitting to a supply line you can reach, which is a beginner-level job. Call a plumber when there is no valve, the supply is concealed behind a wall or skirt, the valve is corroded, or the work means drilling or relocating any pipe.
Can I use a bidet seat without electricity?
Yes. A non-electric seat draws cold water only and has no cord, no heater and no dryer, so the whole install is plumbing. An electric seat with an instant warm water heater needs a GFCI-protected outlet within cord reach, which is typically about 42 to just under 48 inches. A hardwired model needs a new circuit from a licensed electrician.
Why is water leaking from my bidet seat?
Leaks almost always trace to a joint: a hose nut that was only finger tight, a washer that sat crooked or got left out, a dry threaded connection that needed plumber’s tape, or a hose kinked behind the bowl. Close the shut-off valve, relieve the pressure, then check each connection one at a time, replacing washers rather than stacking more tape.
Can I install a bidet seat in a rental?
In most places, yes, and it is a reversible change because nothing about the toilet itself is altered. Check your lease first, and tell your landlord in writing before you start. Photograph the finished install, keep every part so you can remove it in about fifteen minutes, and never touch wiring unless the landlord approves it in writing.
Start with the shut-off valve test, not the box. Confirm you can identify and close the water, check the seat’s fitment numbers against your bowl, then work through the six steps in order and leave the floor dry overnight before you trust the connection.
