How to Paint a Wall Two Different Colors With a Clean Line 2026
A two-tone wall is one wall, two colors, and one dead-straight line between them. Getting that line clean comes down to three things: how you mark it, whether you seal the edge of your tape, and when you pull the tape off. Get those right and the job is genuinely easy, even on your first attempt.
This guide covers how to paint a wall two different colors with a clean line from tape selection through to touch-ups, plus what to do when the line bleeds anyway. Along the way I explain which color goes on first, why sealing the tape edge is the step people skip, and the freehand fallback for walls where tape refuses to grip.
Contents
Time: 4 to 6 hours across two days, plus 24 to 48 hours of drying. · Cost: one sample pot plus one gallon of the second color, a 2 inch angled brush, a 9 inch roller, and about 60 feet (18 m) of tape. · Difficulty: Easy DIY. · Skill level: Beginner, with patience for the edges.
Tools and Materials
You can paint a two-color wall with very little, but these are the items that make the difference between a straight line and a wobble.
Essential
- Low-tack painter’s tape, 1.5 inch (38 mm) wide for a horizontal split, 2 inch (51 mm) if you are masking a corner or an uneven surface. Buy a roll designed for painted surfaces rather than general masking tape.
- 2 inch (5 cm) angled sash brush for cutting in along trim, the ceiling line, and the taped edge.
- 9 inch (23 cm) roller with a 3/8 inch nap, plus a roller frame and a plastic paint tray. Shorter nap on smooth drywall, longer nap on textured walls.
- Two colors of paint in the same finish, ideally the same brand and product line so the sheens match.
- Canvas or plastic drop cloth, painter’s plastic sheeting for furniture, and a tack cloth or clean cloth for wiping the wall.
- Pencil, 4 foot (1.2 m) spirit level or laser level, and a measuring tape for marking the dividing line.
Helpful but not essential
- Chalk line reel for walls longer than about 10 feet (3 m), where a level alone tends to drift.
- Small putty knife and paint scraper for lifting a dried bleed before you repair it.
- Painter’s tape applicator if you are masking a whole room, though a thumb is faster on a single wall.
- Step ladder rated for indoor use, a dust mask, and nitrile gloves.
Before You Start
Most disappointing two-tone walls fail in the hour before painting starts. Fifteen minutes of preparation prevents almost every complaint I have seen on r/paint and r/homerenovations.
- Protect your eyes and hands. Safety glasses when you are cutting in near the ceiling line, gloves if you are handling older paint.
- Ventilate. Open windows and doors, and run a fan to move air out of the room while you paint.
- Move and cover. Push furniture to the center of the room, drape it in plastic sheeting, and lay the drop cloth across the floor and any baseboards you are not masking.
- Clean the wall. Wash with warm water and a mild cleaner, then wipe with a tack cloth. Dust and grease are the usual reason paint peels off the tape later.
- Check the surface is sound. Press firmly on a few spots. If paint flakes, the paper layer lifts, or the wall feels spongy, repair and prime before you tape anything.
- Check paint compatibility. If the existing color is oil-based and your new paint is latex, patch and prime first or the new coat will peel later.
- Sample both colors. Buy sample pots and brush a 12 by 12 inch (30 by 30 cm) square of each on a hidden corner. Let them dry fully — wet paint is always darker and more saturated than the dried finish.
- Know your drying times. Latex paint is normally touch-dry in 1 to 2 hours and recoatable after 4 hours. Let the base coat cure 24 to 48 hours before you tape, so the tape has a firm surface to grip.
While you are choosing, it helps to browse our guides to the best white paint colors and to soothing paint colors for bedrooms if your split is a light-over-light scheme, where the line has to do all the work.
Step-by-Step Instructions: How to Paint a Wall Two Different Colors With a Clean Line
Six steps, in this order. The order matters: painting the first color first and taping second is what makes the second coat’s edge crisp.
Step 1: Prepare the Wall and Work Area
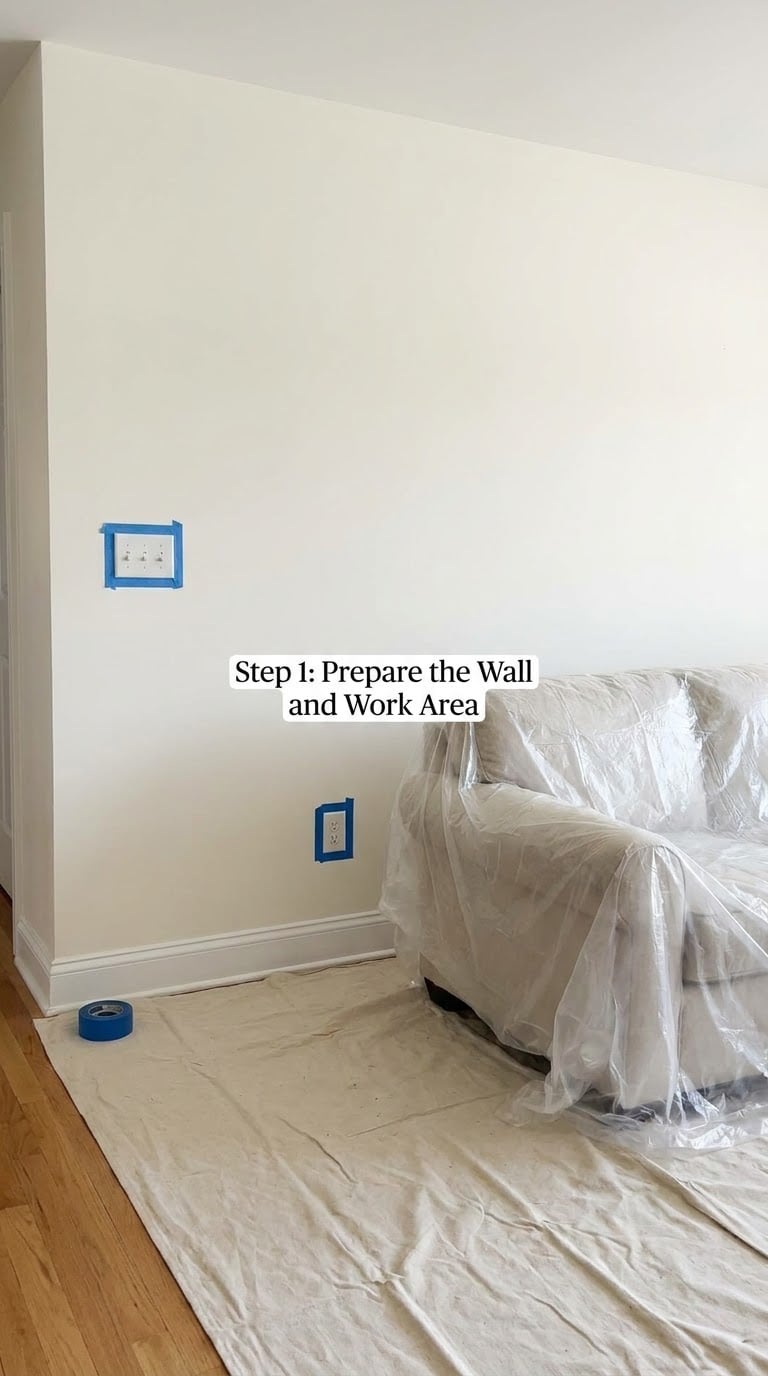
Clear everything at least 3 feet (90 cm) away from the wall so you can move without dragging a sleeve through wet paint. Wash the wall, let it dry completely, and check that the two paints and your tape are compatible with the existing finish.
Mask any outlet covers and switch plates with tape pressed flat at the edges. A saturated, slightly damp wall grips tape better than a bone-dry one, so mist the very top of the wall lightly if you can.
How to tell it’s right: the wall is dry to the touch, sound under pressure, and there is no furniture within arm’s reach of it.
Step 2: Measure and Mark the Color Line
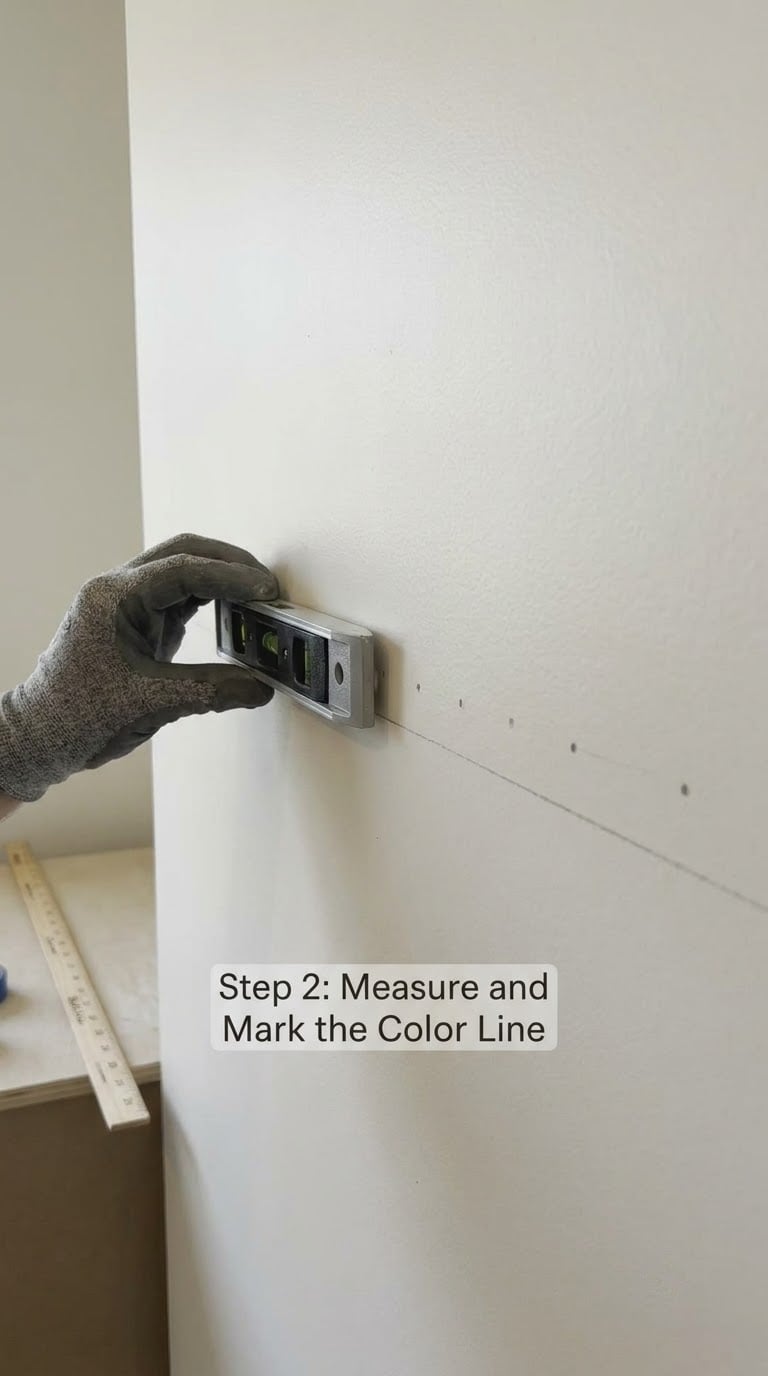
Decide the height before you mark anything. Around 47 to 48 inches (120 cm) from the floor is a common split, but align yours with a headboard, a chair rail, the bottom of kitchen cabinets, or the edge of a staircase. In a bedroom, matching the line to the top of the headboard reads as deliberate rather than random.
Mark with a pencil first, never a pen, which can bleed through the primer. Set the level at one end, mark, then move it along the wall marking every 2 feet (60 cm). Step back and sight down the line from an angle — a wall can look flat head-on and reveal a curve from across the room.
On a wall longer than 10 feet (3 m), snap a chalk line instead. Both marks and line should meet the trim or corner cleanly, so decide now which side the tape goes on. If you are painting a vertical split, use the level straight up and mark from the ceiling down instead.
Step 3: Apply Low-Tack Painter’s Tape
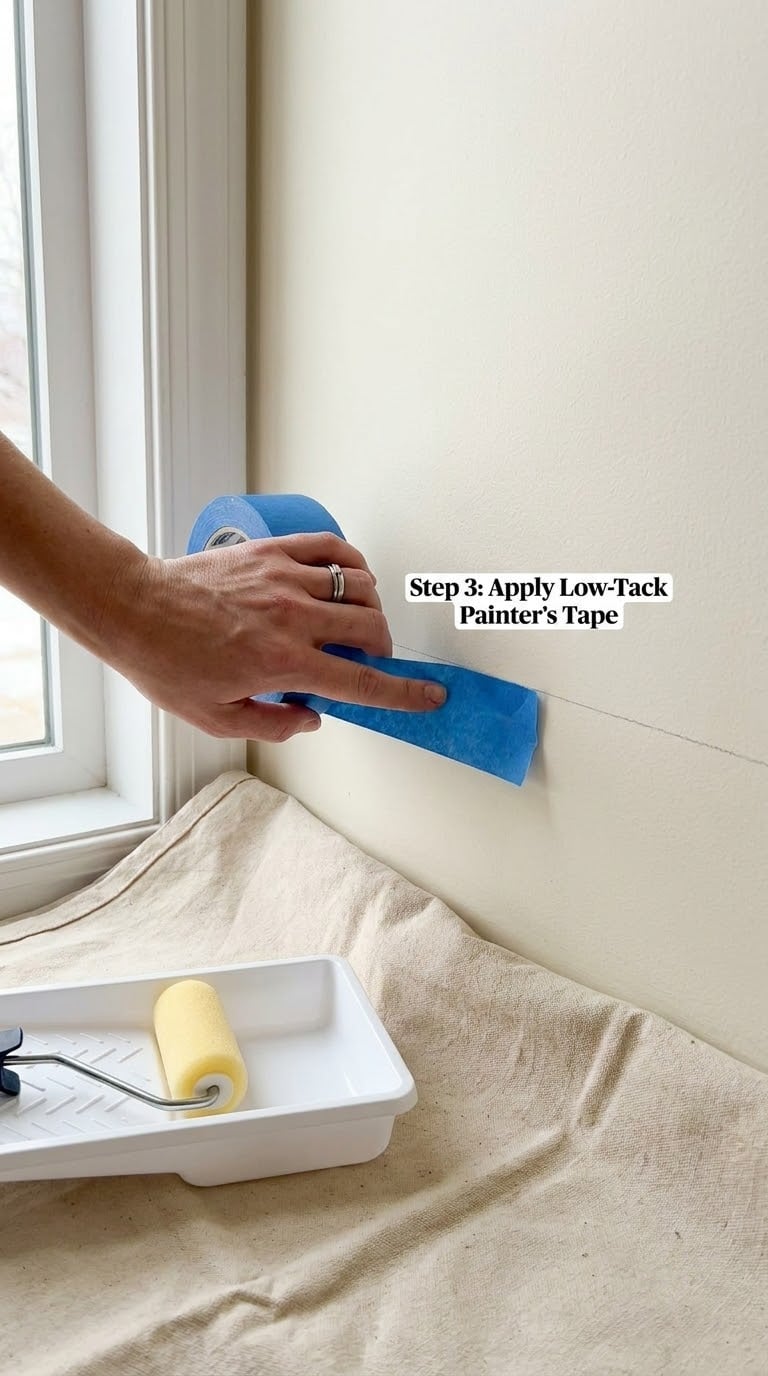
Run the tape along the pencil marks in short 3 foot (90 cm) sections rather than one long strip. Long tape stretches as you press it, and a stretched strip pulls away from the wall as soon as it dries, which is where ragged edges come from.
Press only the edge that will form the clean line, and press it down firmly with your thumb. Overlapping the strips by about 1 inch (25 mm) is fine. Do not fold the tape back on itself and do not stretch it.
Some painters on r/paint go over the tape once with a damp cloth to improve adhesion. Wipe the wall with a clean damp cloth first, let it dry, then press the tape onto the slightly tacky surface. Measure the finished line at both ends and in the middle; it should be within an eighth of an inch (3 mm) of your mark.
Step 4: Paint the First Color Up to the Tape
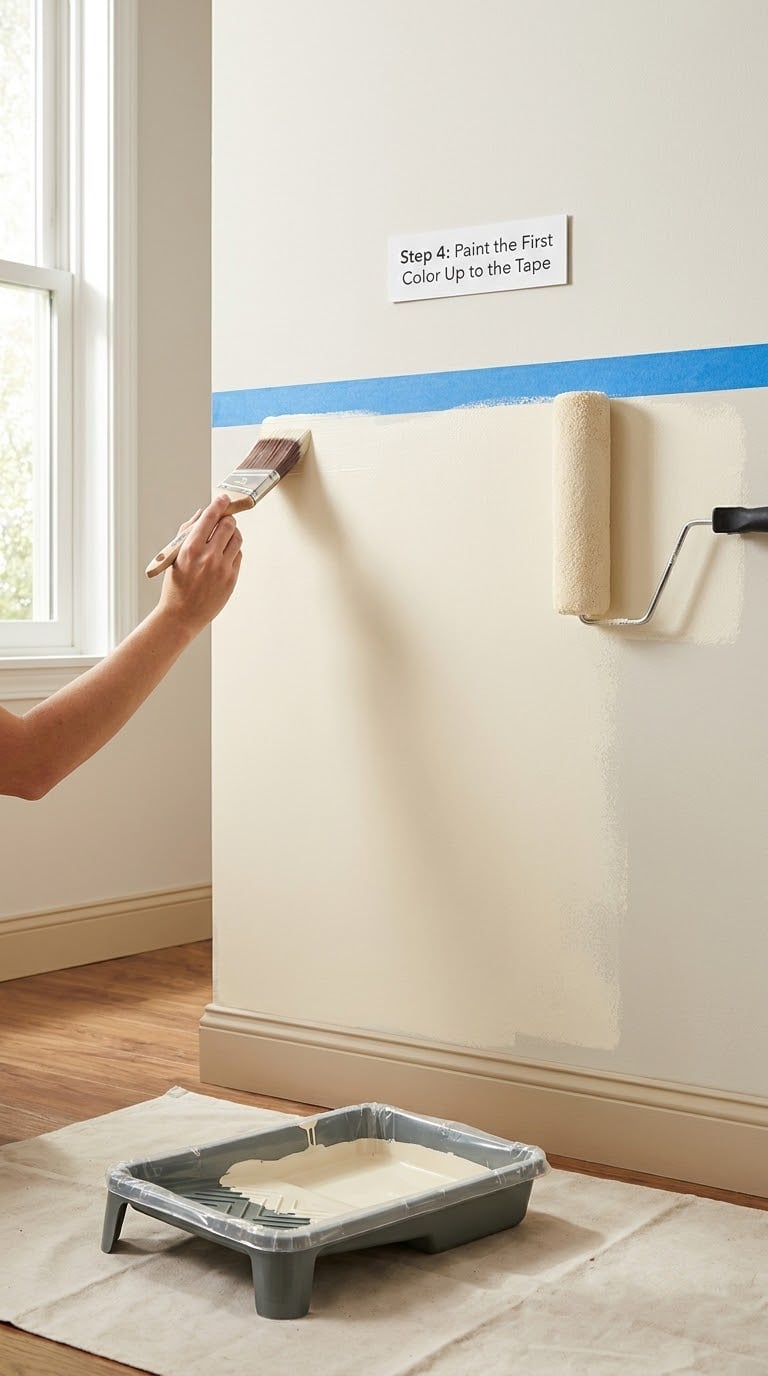
Paint the base color along the taped edge with your angled brush, then seal the tape by painting directly over the tape lip with that same base color. This is the step that makes or breaks the line. Any bleed that sneaks under the tape matches the wall underneath it, so it disappears instead of showing as a colored halo.
Let it dry, then give the wall a second coat if the first one looks patchy. Use the same base color to cut in along the ceiling, baseboards, and corners, and keep a wet edge as you roll the field so you avoid lap marks.
How to tell it’s right: the base color is touch-dry and even, with no shiny patches, before you bring out the second color.
Step 5: Paint the Second Color Against the Tape
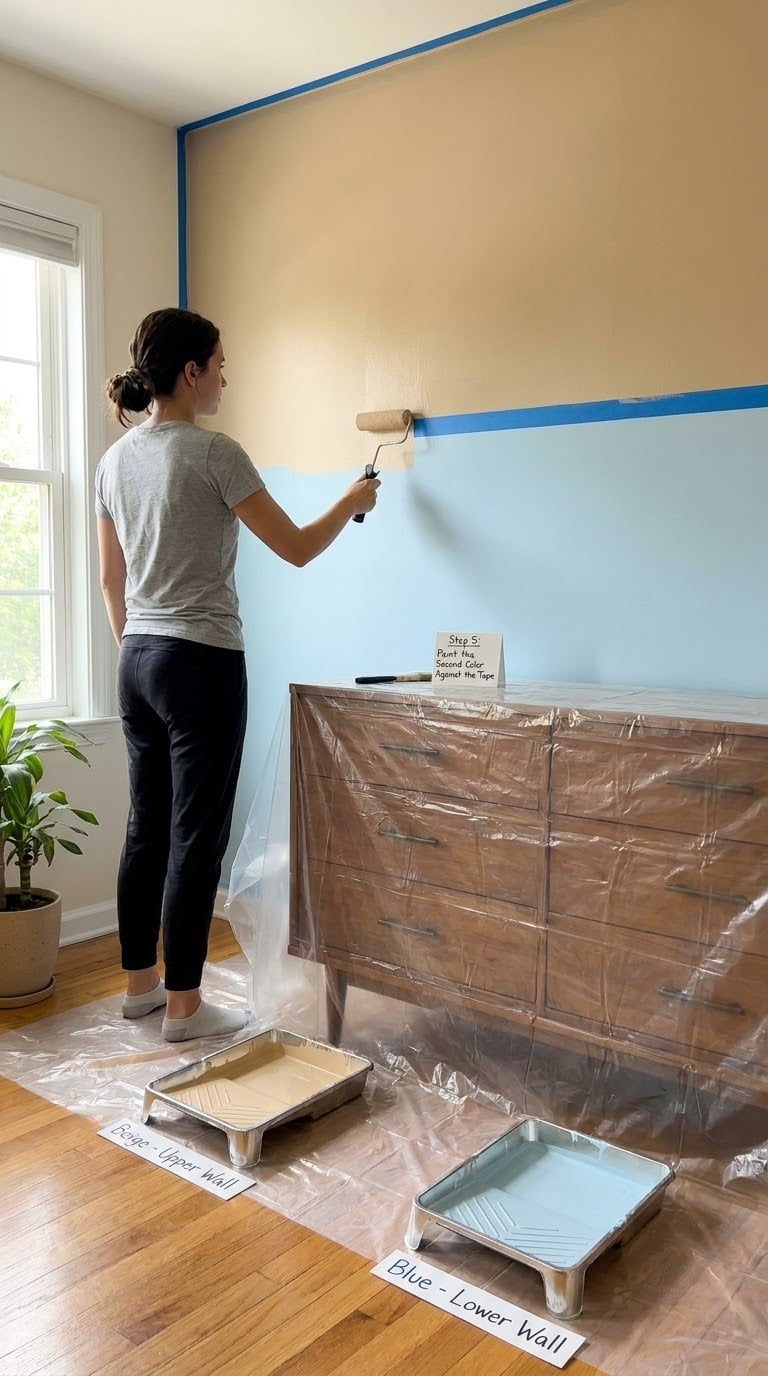
Load the roller lightly and work from the taped edge out into the open wall. Never push the roller into the tape — pressure forces paint underneath it. Cut in with the angled brush along trim and the ceiling first, then roll the field, keeping the roller about 2 inches (5 cm) from the tape.
Start at one end of the wall and work along it rather than back and forth, so the wet edge stays ahead of you. On a textured wall, tape often will not hold, and the honest answer is to freehand it: use a 2.5 inch (6 cm) angled brush, keep the bristles a little longer than the area you are painting, and pull a single steady stroke along the pencil line.
Leave the second color until it is touch-dry before you touch the tape. Painting both colors in the same sitting is the fastest way to a smeared, soft edge.
Step 6: Remove the Tape and Finish the Edge
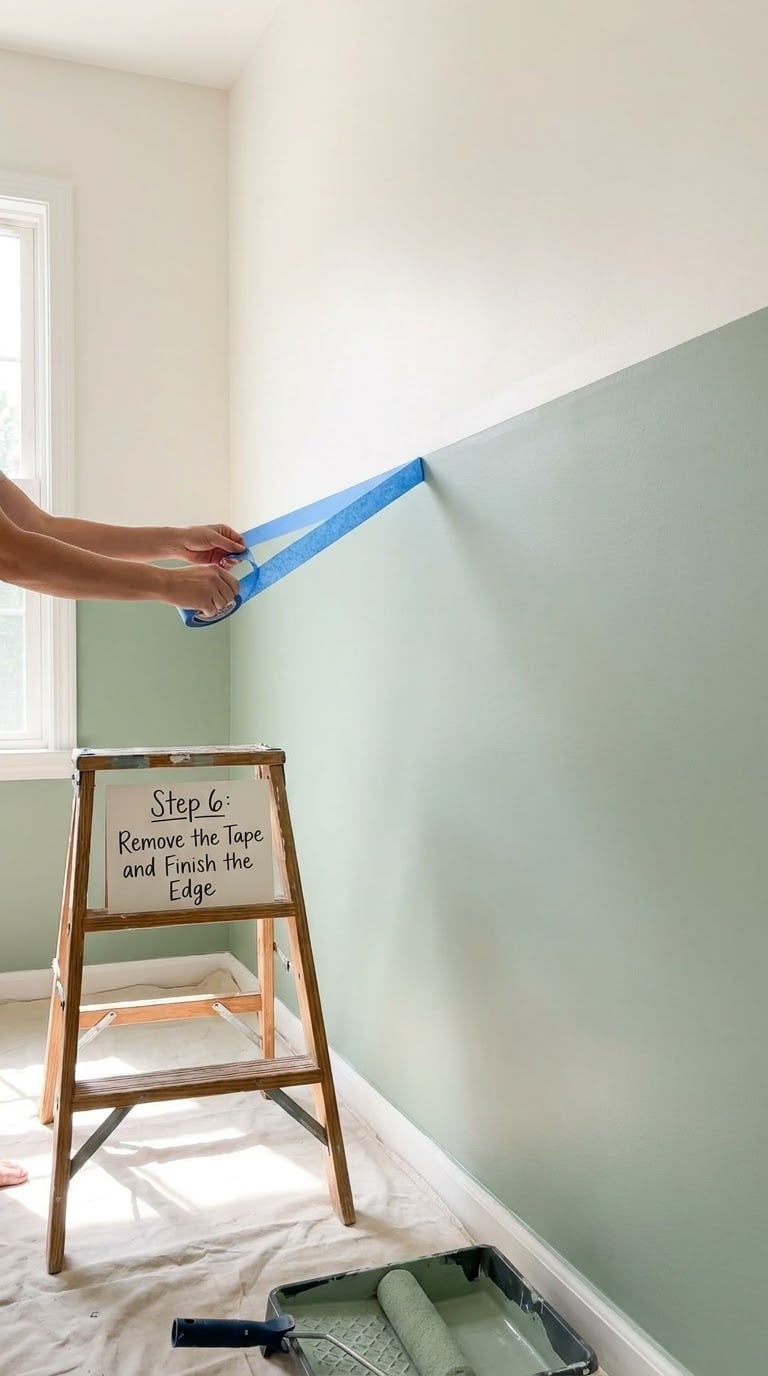
Pull the tape while the second coat is still slightly wet, within about two hours of painting it. Hold the tape at a low angle, close to the wall, and peel back steadily in one motion — pulling straight out or upward tears the top coat off with it.
If a strip refuses to budge, stop. Wait ten minutes, or warm the adhesive gently with a hair dryer held at a distance, then try again from a different point. Forcing it is how you lift the paper layer off old drywall.
Once both colors are dry, fill any missed spots with the matching color and a small brush, working from the outside of the gap inward. Feather the touch-up into the surrounding wall and let it dry before you judge it — a patch always looks worse while damp than it will in the morning.
Common Mistakes to Avoid
Almost every bad two-tone wall is one of these six problems, and each has a straight fix.
- The line is crooked over a long wall. You marked from one end and trusted it. Fix: mark at 2 foot (60 cm) intervals, sight the line from several angles, and use a chalk line past 10 feet (3 m).
- Paint bled under the tape. You painted straight across the tape with no seal. Fix: paint the tape lip with the base color first, press the edge down hard, and mist the wall lightly before taping.
- Paint peeled off with the tape. The top coat had cured, or the wall was already flaking. Fix: peel at a low angle while the top coat is still wet, and repair any loose paint before you start.
- A ragged or fuzzy line on a textured wall. The wall texture is too deep for tape. Fix: skip the tape and freehand with a longer angled brush, or accept a slightly softer line and disguise it with a chair rail or shelf.
- Visible tape marks or sticky residue. The tape was cheap, or it sat in direct sun or heat. Fix: use low-tack tape, keep the room cool, and remove residue with a cloth and a little cooking oil while the surface is still sound.
- Roller edges and lap marks in the field. You let the roller dry before returning to it. Fix: keep a wet edge, use a roller cover rather than a foam one, and always roll the top coat over the sealed base coat the same day.
One more forum tip, from r/homerenovations: running a bead of paintable caulk along the seam before taping adds a second seal. It helps on trim lines and outside corners, though it adds drying time before you can paint.
When to Call a Pro
Most of this job is well within a beginner’s reach. A few situations are not.
- Extensive wall repair. Plaster cracks, sagging drywall, patched holes bigger than a fist, or walls that need skimming before paint. That is a drywall job, not a paint job.
- Mold, or suspected lead paint. In homes built before 1978, disturbed lead paint and mold both need professional testing and handling. Do not sand or scrape.
- High or detailed lines. A line above a staircase, a diagonal split, a curved or scalloped edge, or a color block that wraps around a corner is precision work. Professionals set out these lines with a straightedge and laser, and they accept the risk of a bad line.
- Very large areas or high ceilings. A two-storey stairwell wall or a whole open-plan accent wall involves more paint, more scaffolding, and more risk than a single bedroom wall.
- Specialty finishes. Faux finishing, limewash, lime plaster, color matching an existing cabinet or a photograph, or anything that must be sprayed evenly across a large surface.
Maintenance
A two-tone wall is easier to look after than people expect, because each color only ever covers its own half.
Clean it the same way you would any painted wall: a soft cloth, warm water, and a little mild cleaner, tested in a corner first. Avoid anything abrasive, and never scrub the dividing line itself — that seam is where scuff marks show up first, and a little rubbing is enough to take the paint off the edge.
For scuffs, match the color to the half of the wall the mark is on, not to the whole room. Use a small touch-up brush and feather outward from the mark. If the lower section is the one getting scuffed — which it always is, because that is where hands, shoes, and furniture go — a sacrificial chair rail or a piece of trim at that height solves the problem permanently.
Tape future decorating rather than freehand it. Pictures, shelves, and a holiday garland all leave marks on paint if you stick them straight on. When you repaint one section later, expect a faint color difference: a fresh tin on an old wall rarely matches exactly, and light will usually blend the difference within a few months. If the can is more than a couple of years old, stir it thoroughly and test a dried sample before committing to the whole wall.
Frequently Asked Questions
What kind of painter’s tape is best for a two-color wall?
Low-tack painter’s tape made for painted surfaces, 1.5 inch wide for a flat horizontal split, gives the cleanest result. General masking tape is cheaper but its stronger adhesive grips the top coat and peels it off when you pull. Self-adhesive edge tape is fine for a quick touch-up and awkward corners, but it is too narrow for a long line. Buy more than you think, since a strip that tears mid-pull has to be reapplied.
How long should I wait before I remove the painter’s tape?
Pull it while the second coat is still slightly wet, usually within about two hours of rolling it on. The tape needs to have lost its grip but the paint must not have hardened. If you wait until the paint is cured, the adhesive bonds to the top coat and lifts it with the strip. Let the base coat cure 24 to 48 hours before you tape it on, then work on the second color the same day you finish it.
Can I make a straight two-color line without using tape?
Yes, on a smooth wall with a steady hand. Mark the line with pencil and level, load a 2.5 inch angled brush lightly, and pull one continuous stroke from one end to the other without lifting. A chalk line snapped against the wall gives you a guide you can follow rather than draw freehand. On a textured wall, freehand lines go ragged no matter how good the brush, so tape or a piece of trim is the better bet there.
Should I paint the darker or lighter color first?
Paint the lighter color as the base coat and the darker one on top. Light paint covers more reliably, shows fewer flaws, and any bleed that gets under the tape will be far less visible against a light base. If you have to start with the dark color, seal the tape edge with two coats of the dark paint and take extra care pressing the tape down. Either way, let the base coat cure fully before you tape.
How do I fix a two-color wall line if paint bleeds?
Wait until both colors are fully dry, then run a straight edge or a scraper carefully along the pencil line to lift the bled paint back to the correct height. Feather the exposed area with a small brush in the correct color, working from the edge outward. Sand the repair lightly with 180 grit, wipe off the dust with a tack cloth, and lay on a thin finishing coat. Deep bleed is faster to fix with a strip of tape used as a mask.
Can I paint two different colors in the same room without lap marks?
You can, as long as you keep a wet edge in each color. Roll the first section and move on before it dries, always working back to the start of the wall rather than re-entering a section you already finished. Use a roller cover rather than foam, and apply two thin coats over one thick one. Lap marks show up as a faint shiny stripe, so if you spot one, roll over it while the whole area is still wet.
Start on a small test patch in a corner and leave it overnight. If the edge holds there, it will hold across the whole wall. If it does not, the fix is nearly always the same one: seal the tape edge with the base color before you roll on the second one.