How to Install a Toilet Yourself: Easy DIY Guide 2026
Yes, you can install a toilet yourself. It is one of the most doable plumbing jobs in a house: roughly two to four hours, and the only two real failure points are an uneven closet flange and a bad seal. Both of those you can check before the bowl ever touches the floor.
Time: 2 to 4 hours · Cost: the toilet plus roughly 20 to 60 dollars in parts · Difficulty: moderate · Skill level: patient beginner with basic hand tools
Contents
A toilet works in a pretty simple way. It bolts to a metal or plastic ring on the floor called the closet flange, and a compressible seal between the bowl outlet and that flange makes the connection watertight. Everything else is holding the bowl still so the seal stays compressed. That is why almost every leak on a freshly installed toilet traces back to movement, a crooked set, or a flange sitting at the wrong height.
The other reason people hesitate is weight. A one-piece toilet can weigh well over 100 pounds, which is genuinely awkward to carry down a hallway. If you have any doubt about lifting one, buy a two-piece model and set the bowl first, then carry the tank in separately. Experienced DIYers say it is the difference between a good afternoon and a sore back.
I have set plenty of these over the years, and the ones that leak are almost never the ones with hard plumbing. They are the ones where somebody rocked the bowl to line it up, or squeezed the closet bolts an extra quarter turn to stop a wobble. Skip those two habits and this is a very forgiving job.
Tools and Materials
Gather everything before you pull the old bowl apart. A five-minute trip to the hardware store halfway through an install is how a two-hour job turns into an evening.
Tools
- Adjustable wrench or basin wrench, for the supply line and tank fittings
- Adjustable pliers or tongue-and-groove pliers, for the closet bolt nuts
- Flat-head and Phillips screwdrivers, for tank and seat hardware
- Hacksaw with a fine-tooth metal blade, for bolts that will not turn
- Caulking gun and a 2.5 inch bathroom silicone cartridge
- Small spirit level, 9 inch or longer
- Tape measure
- Bucket, old towels, and a drop cloth
- Rubber gloves and eye protection
- Flashlight or headlamp for the flange inspection
Materials
- The new toilet, with seat and hardware in the box
- Wax ring with a horn, or a waxless toilet flange seal (usually in or near the tank)
- Two closet bolts, usually 1/2 inch by 4-1/2 inch brass, plus two extra if your flange is rusted through
- Two rubber closet bolt washers, two metal washers, and two nuts
- Braided stainless supply line, 3/8 inch compression to 1/2 inch angle stop
- Flexible supply line long enough to reach the shut-off valve once the bowl is in place
- Wood shims or a plastic shim pack for leveling
- Silicone sealant labelled for bathroom use, not general-purpose acrylic
- Paper towels and a dry cloth for leak testing
- Plumber’s putty only if your seat or fill valve calls for it
Buy brass closet bolts rather than the zinc-plated steel ones. They cost a couple of dollars more and they will not seize the way cheap bolts do in a wet floor. Set-fast cut-off bolts are worth having if you want the option to trim the excess after the nuts are snug.
Before You Start: Safety, Shutoffs, and Permits
First, find the shut-off valve before you touch anything. It is usually on the wall or floor behind the tank, on the left when you face the bowl. Test it by shutting it off and flushing. If the bowl still fills, the valve is stuck or the water is coming from somewhere else, and that is your cue to find the main water shut-off for the house before you start.
Wear gloves and eye protection. Old toilets hide rusty bolts and decades of grime under the base, and porcelain chips if it shifts. Lay a drop cloth and set two old towels around the bowl before you disconnect anything, because the tank holds several gallons and it will find the floorboards when it tips.
Next, measure the rough-in. This is the distance from the finished wall to the center of the closet bolt holes, and it decides which toilets will physically fit in your bathroom. Standard sizes are 10, 12, and 14 inch, and 12 inch is the one you will find in almost every house built in the last fifty years. Measure before you buy, not after.
Then look at the flange itself. Lay your level across it and check whether the top sits even with the floor, above it, or below it. If you have replaced the flooring or added tile, the flange may now sit below the new surface, and that single detail causes more failed installs than anything else DIYers hit. It also means the seal has to be the type that can span the gap.
| Flange height after flooring | What it means | What to use |
|---|---|---|
| Top of flange level with the finished floor | The normal, easy case | Standard wax ring with horn, or a waxless seal |
| Top of flange 1/4 inch or more below the floor | New tile or flooring buried the flange | A thicker ring, a flange with a built-in extender, or a waxless seal |
| Top of flange above the floor | Bowl sits high and may not seal | Trim with a carbide scoring wheel or fit a shim; confirm the seal reaches the drain |
Now think about the money. A plumber typically charges somewhere between 150 and 400 dollars to swap a toilet, depending on your region and whether the supply line and flange are in good shape. A full parts kit runs about 20 to 60 dollars, so most of the savings comes from the labor, not the toilet.
| Job line | DIY path | Hiring a plumber |
|---|---|---|
| Toilet unit | You choose and buy it | You still buy the toilet, or accept their model |
| Seal, bolts, supply line, caulk | 20 to 60 dollars | Often included in the service call |
| Labor | Your weekend afternoon | 150 to 400 dollars, higher after hours |
| Broken flange or moving the drain | Call a pro anyway | Required; adds parts and labor |
On permits: swapping a fixture where the plumbing already exists almost never needs one. Moving a drain line, adding a bathroom, or working in a commercial space usually does. Call your local building department or ask a plumber if you are unsure, and check whether your municipality requires a licensed plumber for anything more than a like-for-like swap.
One old-house warning. In homes from before the 1950s you may find a cast iron or lead-peened flange, or no flange at all, with carriage bolts running through the subfloor and nuts underneath in the basement. That is a plumber conversation, not a Saturday afternoon. Also plug the open drain with a folded rag before you walk away from the job, both to stop sewer gas and to catch a dropped tool.
Step-by-Step Instructions
Step 1: Turn Off the Water and Drain the Old Toilet
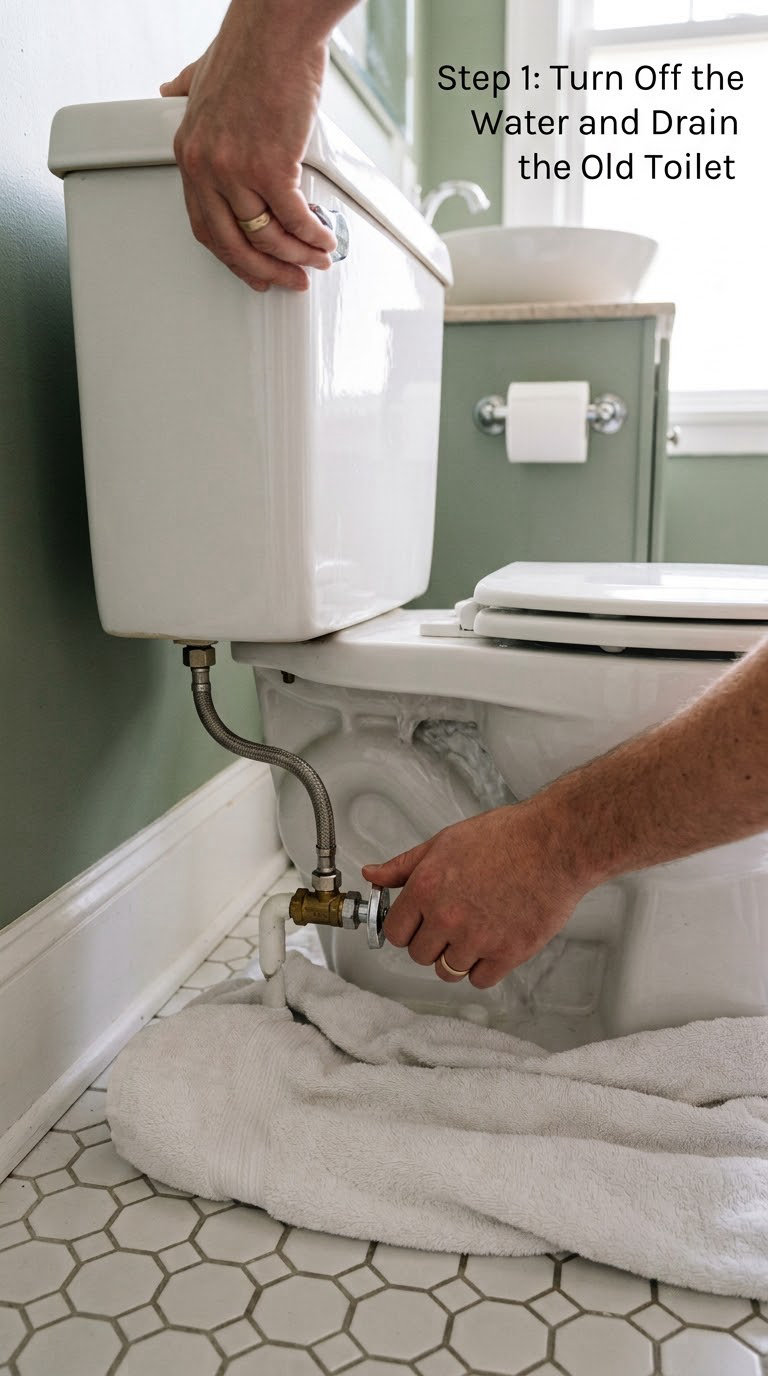
Shut the supply valve clockwise until it stops. Flush the toilet once to empty the tank, then flush again with the valve closed and sponge out what is left, or bail it with a cup if you have no wet vac nearby. Most of the mess happens here, not later.
Disconnect the refill line from the fill valve or the overflow tube, and disconnect the supply hose at the angle stop. Hold a bucket underneath the tank while you work, because a tank with a few cups of water in it is manageable and a full one is not. Then pad the floor and, if you are feeling ambitious, empty the tank and move it to the tub.
You are now ready to take the fixture apart.
Step 2: Remove the Toilet and Inspect the Flange
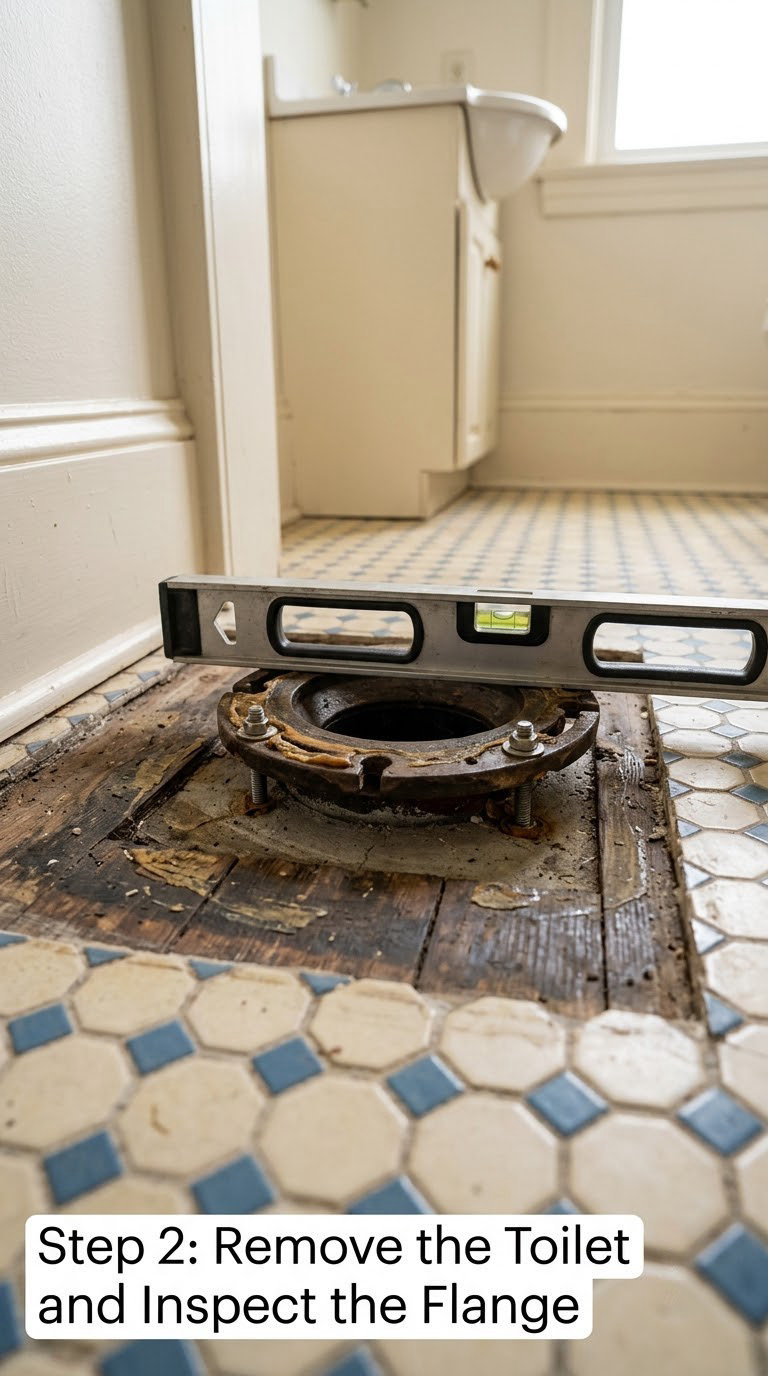
Remove the tank by loosening the nuts inside the tank underneath the bowl and lifting it straight up, then set the bowl aside. Remove the seat. Put a wide, flat screwdriver or a box cutter under the decorative caps at the base of the bolts and pry them off, then loosen the nuts counterclockwise with your pliers.
If a bolt will not budge, soak it with penetrating oil for fifteen minutes and try again. Failing that, saw the bolt off above the nut with the hacksaw, or split the nut with a nut splitter. Never use force that twists the flange.
Lift the bowl straight up and off. Do not rock it, because rocking is exactly how the wax seal gets folded and torn, and that folded seal will fail later even after a fresh ring goes on. Once it is off, scrape away the old wax with a putty knife and drop a rag in the drain hole.
Now inspect the flange while the floor is bare. You are checking four things: that it is solid and not cracked or eaten with corrosion, that it is firmly screwed to the subfloor rather than floating, that the flange bolts move but are not rusted smooth, and that the top of the flange is level with your finished floor. Any wobble in the flange means the bolts will not hold the bowl.
If the flange is loose, screw it down with the correct screws into solid wood or use a flange with an attached ring of subfloor. If it is cracked or crumbling, replace it. Plastic flanges get criticised on forums for being flimsy, and the complaints are fair: if you are replacing anyway, stainless steel or brass is the sturdier pick in a wet room.
Step 3: Measure and Position the New Toilet
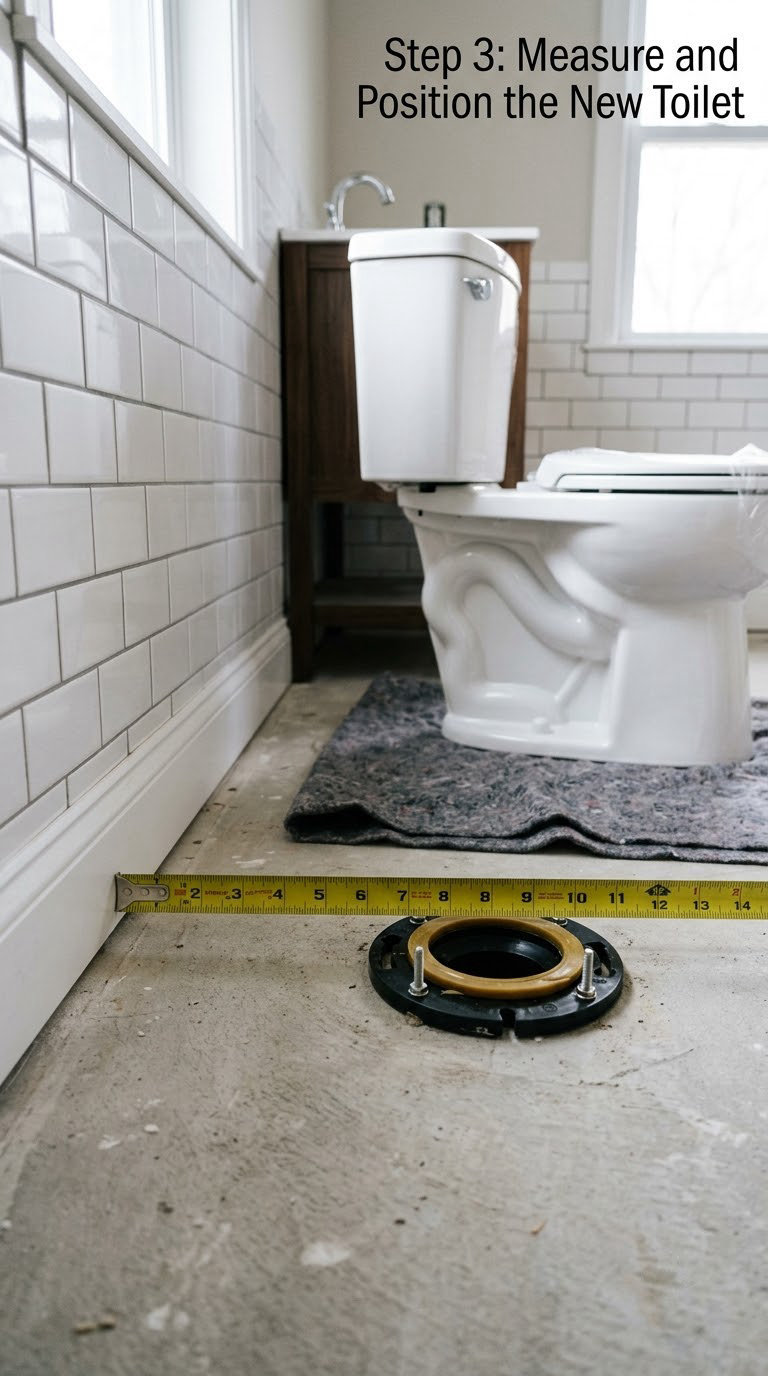
Measure the rough-in again now that the bowl is gone, because this is the moment to catch a surprise. Hook the tape on the finished wall, not the baseboard, and run it to the center of the bolt holes or the drain opening. If it is 12 inch, your shopping list is easy. If it lands somewhere between sizes, take the closest two-piece model with an adjustable base or bring the tape to the store.
Dry-fit the new toilet over the flange without any seal underneath. Confirm the footprint clears the side walls and the vanity, check the bowl orientation, and check the bowl centerline lines up with the drain. If the base has a mounting footprint wider than the bolt spacing, mark the bolt positions with masking tape so you can find them once the bowl is out of the way.
This is also where you check the supply line. Hold the end of the new braided line up to the angle stop and confirm it reaches without a kink. A line that is a few inches short turns an install into a second trip to the store, and it is a completely avoidable annoyance.
If you are still choosing models, our roundup of toilet models worth looking at covers the shapes and flushing systems you will run into.
Step 4: Install the Wax Ring and Set the Toilet
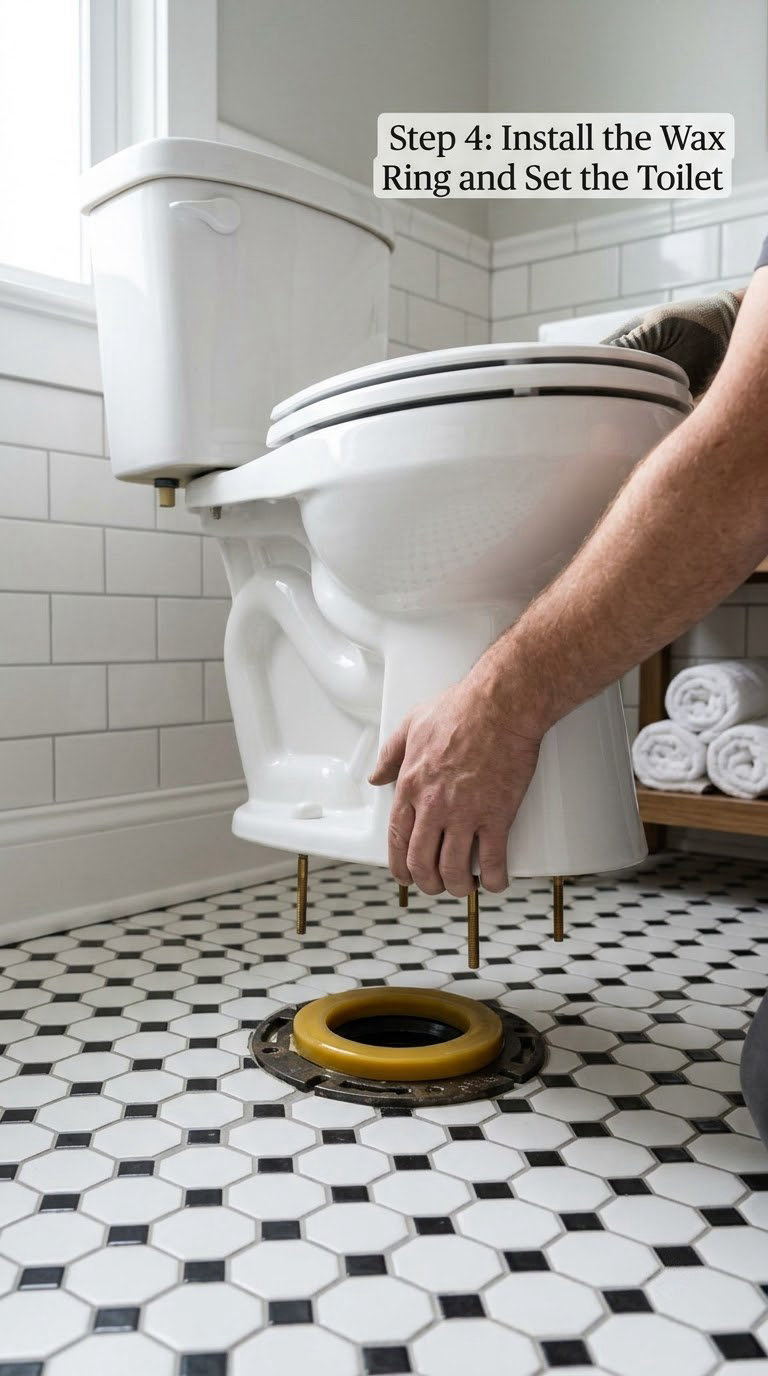
Set the closet bolts into the flange slots, pointing straight up, and tighten the bolt heads down to about 1/2 inch above the flange. Put the metal washers and nuts on now so they are ready, but leave them loose.
Place the seal. A standard wax ring with a horn sits on the flange with the cone of wax down into the drain throat. A waxless seal, which is a thick rubber gasket with a slide-in or bolt-on design, takes a few minutes longer to fit and is far more forgiving when the toilet needs repositioning. Experienced installers favor the waxless type because it works whether the flange sits above or below the floor and because it does not smear if you lift the bowl again.
If the flange top is below the finished floor, use a thicker ring or a seal rated to span the gap. This is the moment to solve it properly, because a seal that cannot reach the drain throat is the number one cause of a new toilet leaking at the base.
Lift the bowl straight down over the bolts, threading the holes without shifting the seal. Lower it vertically in one motion and do not slide it around to line things up. Once it is down, press evenly on both sides of the bowl so the seal compresses fully. Check for rock with your hand; if there is any, lift the bowl back out and shim under the high spot rather than trying to torque the bolts.
Now snug the nuts alternately, a quarter turn at a time, until the bolts are firm and the bowl no longer moves at the base. Then stop. Over-tightening is how beginners crack porcelain or snap a PVC flange, and a cracked bowl is a trip to the store and a fresh floor. Cut the excess bolt length with a hacksaw once you are happy with the gap.
Step 5: Attach the Tank and Connect the Water Supply
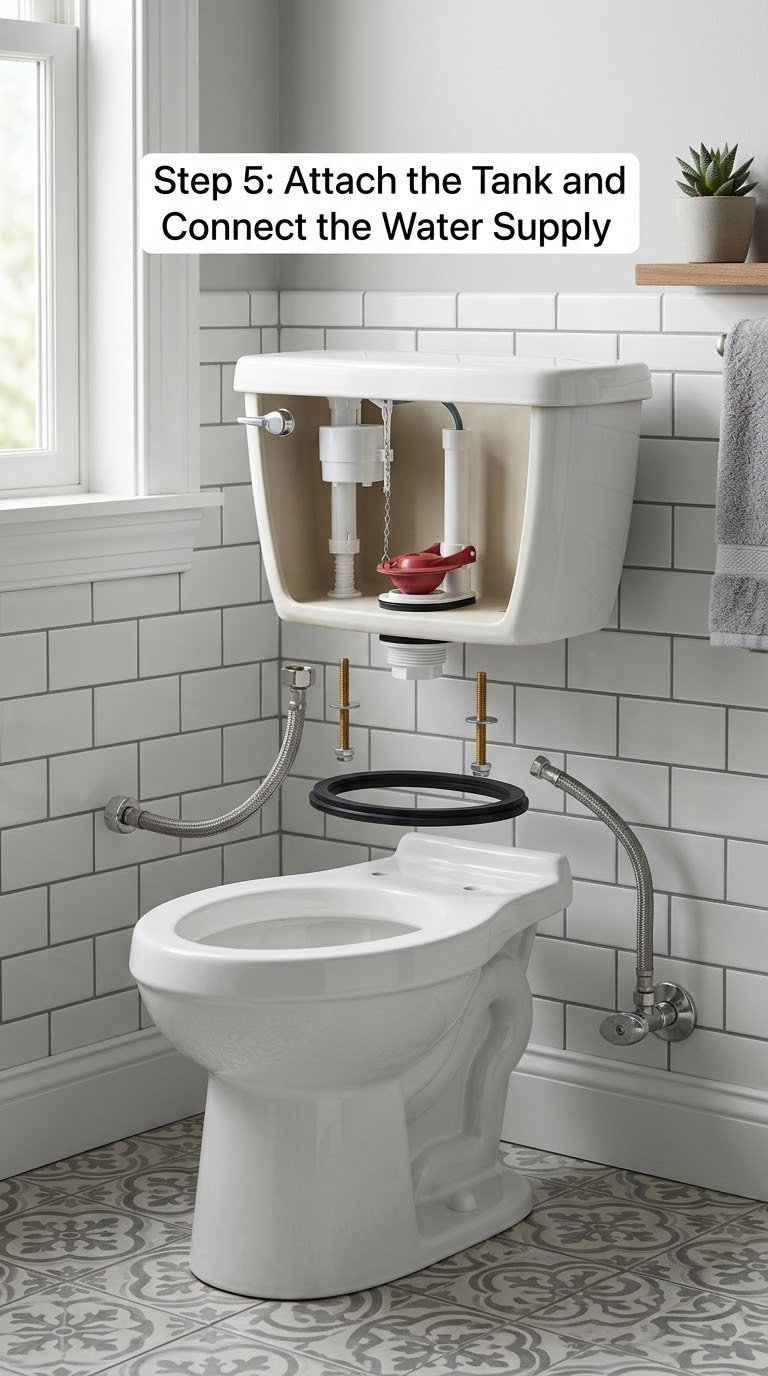
Fit the rubber gasket on the outlet of the tank or on the bowl’s inlet, whichever your model uses, then lower the tank onto the bowl with the tank bolts through the holes. Hand-tighten the nuts under the tank first, then a very light wrench turn. This joint is tightened by the rubber gasket, so excessive force there leaks or warps the tank. Alternate sides.
Check the tank is level front to back and side to side before you go any further. A tank that is off by a few degrees rocks, and a rocking tank eventually cracks at the bolt holes and drips down the bowl. Adjust shims under the tank if you need to.
Connect the fill valve per the manufacturer’s diagram. The refill tube clips to the overflow tube’s clip, and the float or float cup should stop the fill before water reaches the top of the overflow. That water line usually sits about 1 inch below the overflow tube; too high and the toilet will keep running.
Hand-tighten the braided supply hose onto the angle stop first, then snug with the wrench a quarter turn past hand-tight. If the stop is an older 1/2 inch chrome shut-off, the hose needs a 3/8 inch compression to 1/2 inch angle adapter. Some local codes require rigid copper instead of a flexible connector, so check before you buy.
Step 6: Caulk, Fill, and Test for Leaks
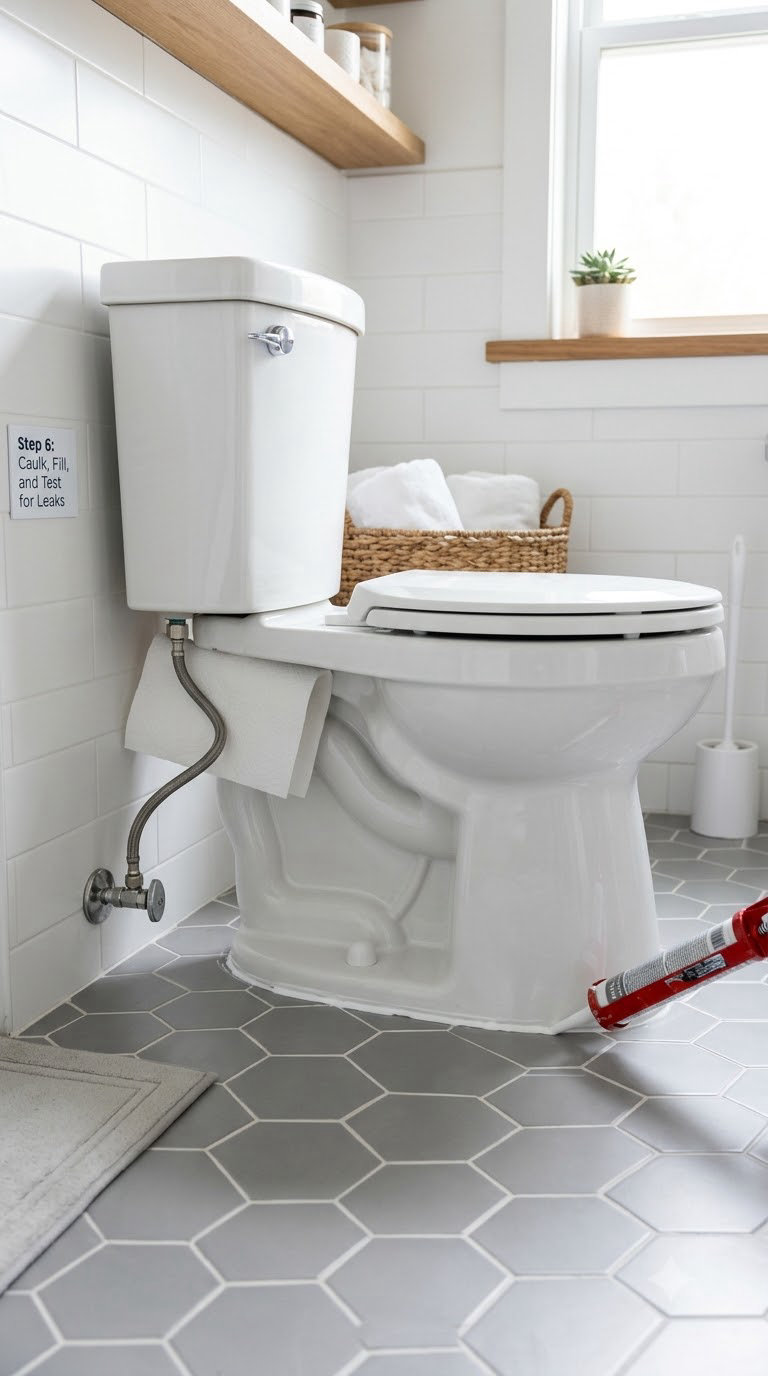
Turn the water on slowly at the angle stop. Let the tank fill and watch every connection while it does: the supply nut, the tank-to-bowl bolts, and the flapper seating. A drip at the supply nut means snug it another quarter turn with the water off. A toilet that keeps filling means the flapper or fill valve needs adjusting.
Flush several times in a row and watch the bowl refill each time. Then dry the base of the toilet and the floor around it with paper towels, wait ten minutes, and check again. Wipe the tank-to-bowl joint and the bolt heads the same way. This is the single most useful habit in the whole job, because a slow weep shows up on the towel long before it shows up on the subfloor.
Caulk last, and only if you want to. Some inspection codes require it. Run a continuous bead of bathroom silicone around the base where the toilet meets the floor, leaving a small gap at the back corner, and let it cure for 24 hours before wetting or walking on it. The gap at the back is deliberate; sealing it fully can trap moisture against the floor.
Put the seat on, tighten the hinge bolts evenly, and run the water one last time. Then check again tomorrow. Most failures show up in the first hour, and the second one shows up the next morning.
Common Mistakes to Avoid
These are the errors that turn a two-hour job into a return trip to the store or a leak six months later.
- Over-tightening the closet bolts. Tighten until firm, then stop. Porcelain cracks and plastic flanges split under too much torque, and a loose bolt is easier to fix than a shattered bowl.
- Rocking the bowl to align the bolts. Sliding the bowl folds the seal and leaves a crease that leaks. Line the bolts up with masking tape marks and lower it straight down.
- Using the wrong seal for the flange height. If the flange sits below the finished floor, a standard thin ring will not span the gap. Use a thicker ring, an extender-style flange, or a waxless seal.
- Leaving the floor uneven and bolting down anyway. A rocking toilet breaks its own seal. Shim until there is zero movement, then tighten.
- Forgetting the rag in the drain. Sewer gas, a dropped bolt disappearing into the pipe, and an unpleasant afternoon.
- Tank bolts tightened like closet bolts. They compress a rubber gasket, not a thread. Hand-tight plus a touch is enough.
- Buying before measuring the rough-in. A 14 inch toilet will not fit a 10 inch space, and you will find out in the worst possible way.
- Caulking the whole base including the back corner. Seal the sides, leave the rear gap, and respect the cure time before wetting the bead.
- Forcing a seized bolt. Penetrating oil, then a hacksaw above the nut. Forcing it twists the flange and turns a small job into a flange replacement.
Common Toilet Problems and How to Fix Them
Most problems after an install announce themselves in one of four places. Find where the water is coming from first, because the fix follows directly from the location.
| Where you see water | Likely cause | Fix |
|---|---|---|
| Around the base on the floor | Folded or wrong-height seal, or a bowl that rocks | Lift the bowl, reset or replace the seal, shim the floor until it is solid, retighten |
| Dripping down the outside of the tank | Tank bolts too loose, or the tank-to-bowl gasket not seated | Reset the gasket and snug the bolts evenly, no more |
| Constant running or hissing | Flapper not seating, fill valve set too high | Lower the water line about 1 inch below the overflow, then clean or replace the flapper |
| A puddle under the tank | Supply nut or failed braided line | Hand-tight plus a quarter turn; replace any hose that looks bulged or corroded |
| Weak flush, double flush | Low water level or partial clog | Check the fill level first, then use a toilet auger rather than a plunger |
| Bowl rocks after tightening | Uneven floor or a flange that is not well anchored | Shim to the high spot, and check the flange screws go into solid wood |
One more note on rocking, because it comes up constantly: a wobbling toilet is not a loose-bolt problem. Tightening the bolts just tilts the bowl harder on the seal, which breaks the seal faster. Level first, bolt second.
When to Call a Pro
Some situations are not a weekend job, and knowing which ones they are saves you money rather than costing it.
- No flange, or a lead or cast iron flange. Old homes were built before modern PVC flanges. Cutting and replacing a cast iron flange is a plumber’s job with a specialty saw.
- A flange that cannot be anchored. If there is no solid subfloor under the bolt holes, the flange has to be rebuilt or the floor opened up.
- You are moving the toilet. Any change to the drain location means new DWV piping, venting, and often a permit. Our basement toilet venting guide explains the trap rules that come up.
- Corroded or galvanized supply lines. A braided connector is the easy fix. Replacing the pipe behind the wall or the shut-off valve is not, especially when it means opening a finished wall.
- Recurring sewage smells, gurgling, or slow drainage. That is a drain or vent problem, and a new toilet will not fix it.
- Commercial, rental, or multi-unit work. Plenty of jurisdictions require a licensed plumber for anything beyond a like-for-like fixture swap. Check your local rules rather than guessing.
Flooding is the one thing that changes the math. A slow leak under a toilet can soak a subfloor and joists long before anyone notices. If you already have water damage or you are in a finished basement where a leak would reach a finished ceiling, paying a plumber is cheaper than the repair that follows.
Maintenance
A new toilet gives you almost nothing to do, which is the nice part. Ten minutes twice a year is plenty.
Check the fill valve and flapper while you flush: the water should stop just below the overflow tube, and the flapper should land flat without clicking against the overflow. A flapper that needs to be jiggled shut will wear out and leave you with a running toilet and a water bill to argue about.
Look at the supply connection and the shut-off valve every few months. Run your hand along the braided hose looking for a bulge, and turn the valve a quarter turn each way to keep it from seizing. Braided lines fail at the crimped ends, usually with a slow drip you can catch with a paper towel long before it becomes a problem.
Clean with a pH-neutral toilet cleaner and a soft brush, and keep acidic cleaners away from the flush valve and seals. If you like the idea of cleaning without fumes, our non-toxic toilet bowl cleaner roundup covers the gentler options.
Know the early warnings. Water on the floor after a flush, a slow drip from the tank bolts, a bowl that has started to rock, or a fill that runs for more than a minute after a single flush all mean the seal or the floor is moving. Catch it at the paper-towel stage and it is a ten-minute fix. Ignore it for a month and it is a subfloor.
Frequently Asked Questions
How long does it take to install a toilet yourself?
Two to four hours for a first-timer on a straightforward replacement, including removal, the seal, the tank, and leak testing. Add another 30 to 60 minutes if the old bolts are rusted solid, the shut-off valve is seized, or you need to replace the flange. Buying the toilet and gathering the parts is not included in that time.
Do I need a plumber to install a toilet?
For a like-for-like swap where the flange and supply line are in good shape, most homeowners can do it and most places do not require a license. You do want a plumber if the flange is missing, cracked, cast iron or lead, if you are moving the drain, if the floor cannot be anchored, or if your local rules require a licensed trade for anything beyond a fixture swap.
What size rough-in does a standard toilet need?
Rough-in is the distance from the finished wall to the center of the closet bolts. Standard sizes are 10, 12, and 14 inch, and 12 inch fits the overwhelming majority of modern bathrooms. Measure from the tile or finished wall, not the baseboard, and measure before you buy, because a 14 inch toilet will not fit a 10 inch space.
Should I use a wax ring or a rubber toilet flange seal?
Both make a reliable seal on a flat, solid floor. A wax ring is cheap and standard, but it must be seated without sliding the bowl. A rubber waxless seal costs more, takes longer to fit, and tolerates repositioning, plus it works when the flange sits slightly below the finished floor, which is the situation that trips up most first attempts.
How do I know if my toilet flange needs to be replaced?
Look for a flange that rocks when pressed, has cracked or crumbling plastic or metal, has bolts that spin freely or are rusted smooth, or no longer reaches the drain because new tile was installed over it. Any of those means the flange will not hold a seal. A stainless or brass flange is the sturdier replacement in a wet room.
Can I install a toilet without removing the old bowl?
Not in any way that works. The new bowl has to bolt to the same flange and seal to the same drain, so the old toilet has to come out first. The only shortcut is lifting the old bowl, scrubbing and replacing the seal, and putting the same toilet back, which is a repair rather than a replacement and still needs the full remove and reset process.
Start with the flange, not the toilet. Measure the rough-in, check whether the flange top sits level with your new floor, and gather brass closet bolts and the right seal for what you find. Take the bowl out, lower it straight down, snug the bolts until firm and stop, then paper-towel test everything before you caulk. That sequence is the whole job, and it will keep working quietly for years.