How to Repair a Rotted Window Sill: Easy DIY Guide 2026
A rotted window sill is repairable when the damage stays on the surface and the wood around it still has its strength. You probe it, cut it back to sound wood, replace or rebuild it, then reseal the joints so water never gets a second chance. Most single-window jobs take a weekend and a modest pile of materials.
This project suits you well in autumn, before the first hard freeze and before wet spring days start pushing water into cracks. Fall also gives exterior primer and paint time to cure properly before winter weather tests them.
Contents
Time: one to two days for a single window, plus drying and curing time · Cost: roughly fifty to a hundred fifty dollars in materials for a straightforward sill replacement · Difficulty: moderate DIY · Skill level: confident with a circular saw, pry bar, and caulk gun.
Tools and Materials for Repairing a Rotted Window Sill
Hand tools and safety gear
- Screwdriver or awl for probing soft wood and removing fasteners
- Pry bar and flat bar for pulling trim off without splitting it
- Hammer, 16 ounce or 20 ounce
- Putty knife, 2 inch and 6 inch wide
- Utility knife with fresh blades
- Chisel set, including a 1 inch bevel edge chisel
- Hand saw or backsaw for trim cuts that a power saw would tear
- Tape measure, pencil, and a small combination square
- Clamps, at least two quick grips
- Safety glasses, work gloves, and a dust mask or respirator for cutting old wood
- Extension ladder or a properly rated scaffold for anything above the first floor
Power tools
- Circular saw with a fine-tooth framing blade for clean cuts in wood
- Reciprocating saw with a wood blade for cutting out a rotted section in place
- Drill driver plus a 1/4 inch bit for pilot holes
- Random orbital sander, 80 grit and 120 grit pads
- Optional: oscillating multi-tool for flush cuts into the jamb without nicking the frame
Exterior-grade materials
- Rot-resistant replacement wood: cedar, white oak, or a quality exterior trim stock, about 8 to 12 linear feet
- End-seal product or exterior wood glue rated for wet conditions
- Exterior construction adhesive or liquid nails type sealant, one tube
- Exterior deck screws, 3-1/2 inch length, one box
- Galvanized or stainless steel finish nails, 1-1/2 inch, for trim
- Plastic shims or tapered wood shims, a small pack
- Flashing tape and a sill pan or sloped flashing strip
- Exterior polyurethane seal or 100 percent silicone sealant, two to three tubes
- Epoxy wood filler for small fills, wood consolidant if remaining wood feels punky
- Exterior primer and exterior paint or solid stain for finishing
- Polymer-modified setting bed or exterior sealant for the apron joint
Order the wood after you have measured. Cedar and redwood hold rot resistance naturally, while PVC trim board never rots at all but needs careful fastening and cannot be shimmed or notched the way wood can.
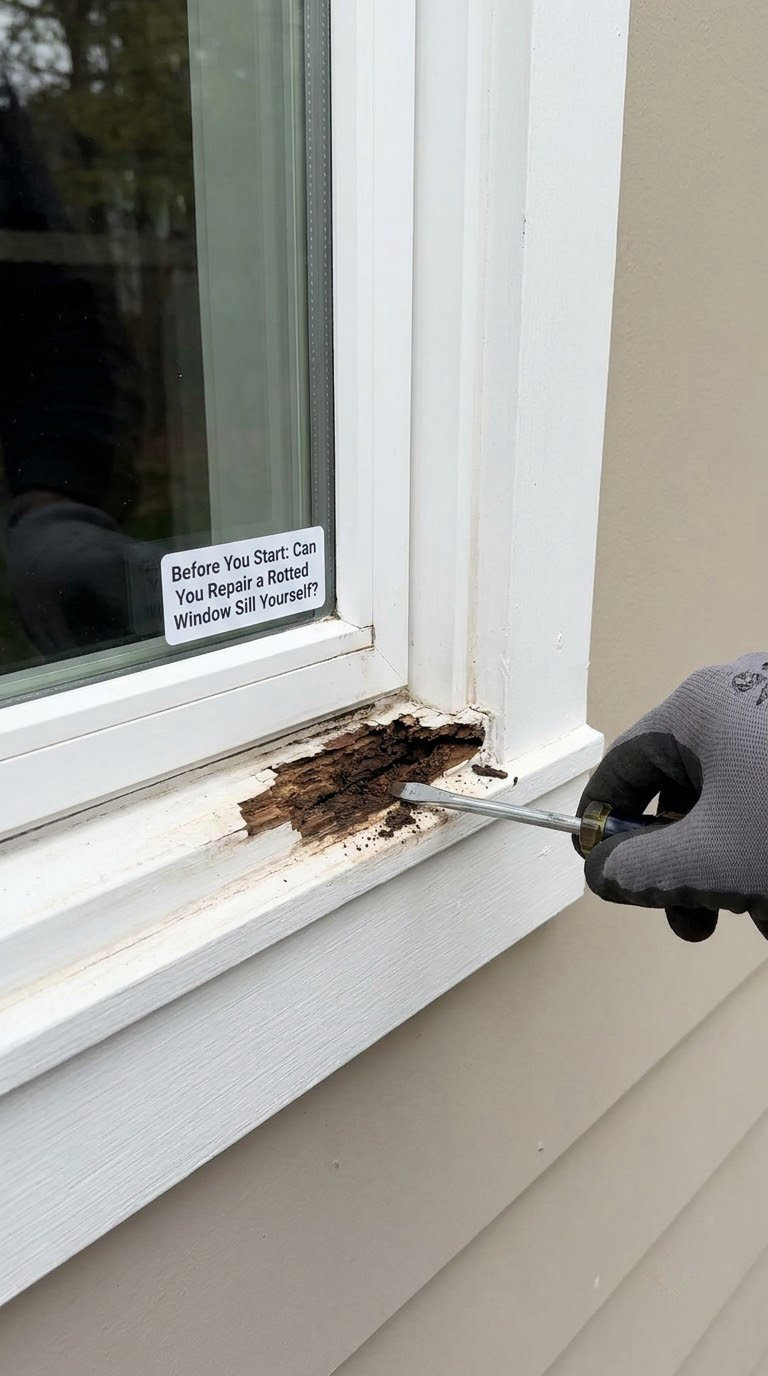
Before You Start: Can You Repair a Rotted Window Sill Yourself?
Probe the suspect wood with a screwdriver or an awl before you plan anything. Sound wood resists the point and feels dense. Soft wood pushes aside, smells musty, and often shows a dark brown or blackened colour under the paint film.
Look at the assembly around the sill, not just the sill. Check the lower corners of the window jambs, the sill-to-jamb joints, the trim below, and the siding where it meets the wall. Decay almost never stays in one board.
Find the cause before you cut anything. Failing paint, a cracked caulk joint, a missing drip cap, a clogged weep hole, or shrubs pressed against the wall are the usual sources. Water that keeps arriving will undo any repair within a few seasons.
Protect the room inside. Lay down a drop cloth over the floor and the top of any furniture, tape plastic sheeting over the interior trim below the opening, and keep sawdust out of the room. When you cut overhead, wear eye protection and a mask.
Know what you are working with. Older homes often have double-hung or casement units set into wood jambs and plaster or lath walls, which can crumble the moment you pry trim. Newer vinyl and aluminium units are different animals, and a rotted sill under a vinyl window may mean the flange itself is compromised.
Permits and code questions mostly appear when you alter the window opening, its size, or its flashing detail, or when the work involves structural framing. A like-for-like sill replacement on an unaltered opening rarely needs one, but your local building department decides that, not the internet.
How to Repair a Rotted Window Sill Step by Step
Step 1: Inspect the Damage Before You Repair a Rotted Window Sill
Scrape or sand a small area of bare wood to see what you are dealing with under the paint. Sound wood smells like timber. Rotted wood smells musty and often has a crumbly, fibrous texture you can push out with a fingernail.
Measure the damaged area as a share of the whole sill. A rot that covers roughly a quarter of the board or less, with sound wood at both ends, is usually a repair or partial replacement. Deeper decay, soft framing below, or a sill that disintegrates when you touch it points toward a full replacement and possibly a larger opening repair.
Tap the jambs and the trim beneath with the handle of your screwdriver. Hollow sound means solid wood underneath. A dull thud that leaves a dent means decay has moved past the sill into the frame.
Take photos of everything before disassembly. If the rot turns out to be worse than expected, those photos tell a contractor exactly what they are dealing with.
Step 2: Protect the Opening and Remove the Damaged Sill
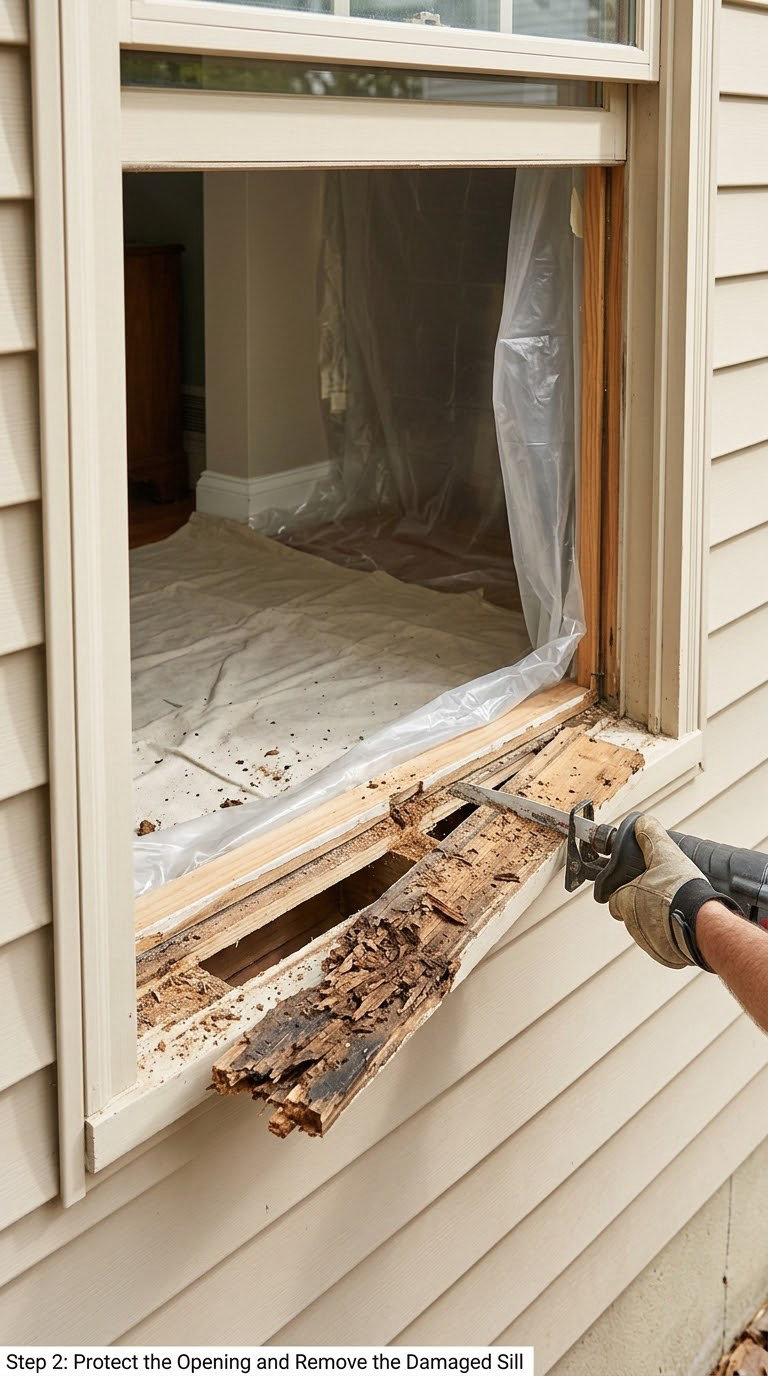
Slide a flat bar behind the apron trim and pry it off in long pieces, working along the length rather than levering at one corner. Stand the trim aside if you intend to reuse it.
Cut the old caulk joint where the sill meets the window frame with a utility knife. A reciprocating saw with the blade pointing downward and a scrap of cardboard under it makes a fast, controlled cut through the sill without hitting the frame above.
Cut the sill out in short sections rather than one long plunge. A 10 inch blade in soft, wet wood binds and kicks, and a stuck blade in a wall opening is miserable to free. Make the cuts, break out a piece, reposition, repeat.
Take the cut back to clean, pale wood with the chisel and putty knife. Everything you leave behind is a future failure point, so scrape until the wood is firm and dry to the touch, not merely brownish.
Set the window sash aside if it is in the way, or wedge it securely so nothing can fall into the opening while you work. Wear eye protection and gloves for the removal; old exterior paint is easy to chip.
Step 3: Check the Wall for Moisture and Structural Damage
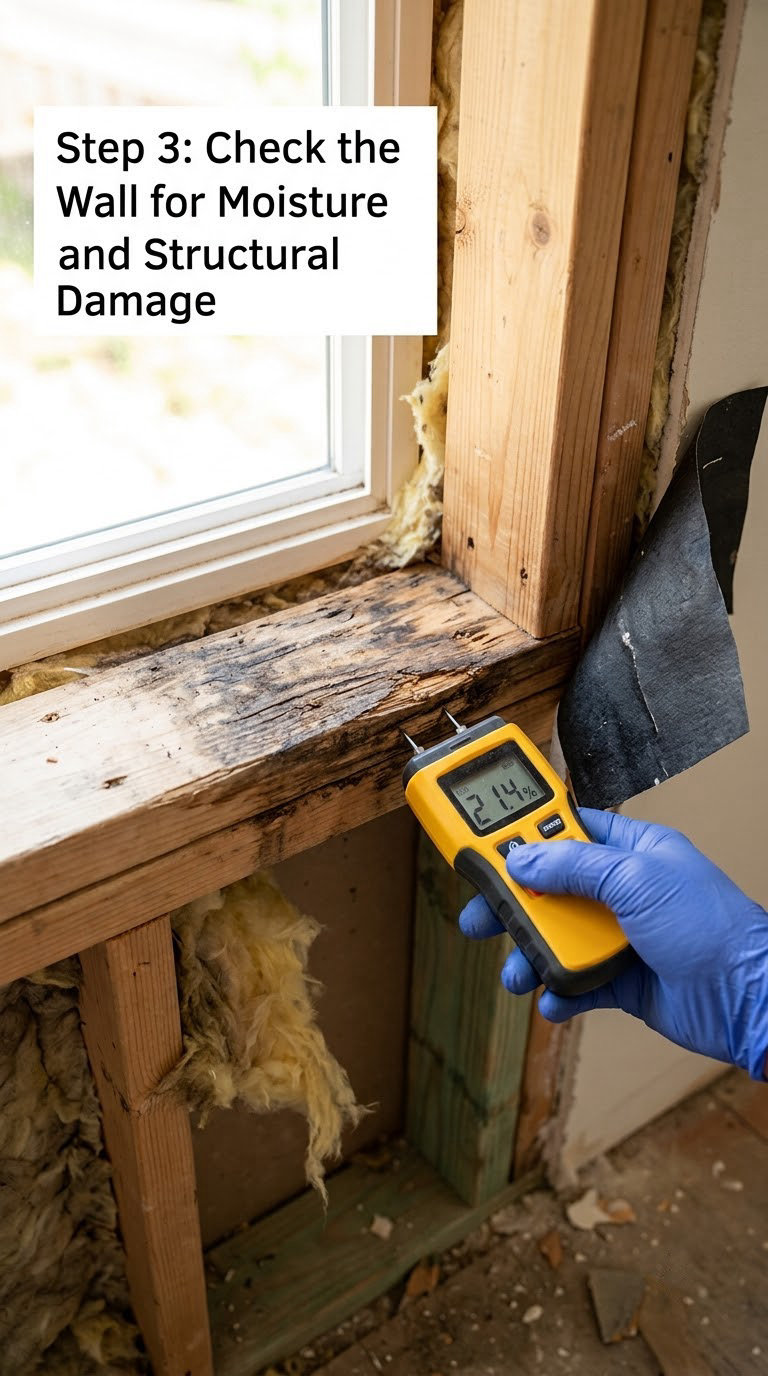
With the sill gone you can finally see the wall. Look for dark staining on the sheathing, insulation that feels damp or has settled, mold growth, and framing members with soft faces. Probe the framing at each end of the opening where water tends to run.
Check the bottom of the opening from inside. The interior stool or apron is where a slow leak usually announces itself first, as peeling paint, swelling, or a water stain on the wall below the window.
Inspect the sill pan or flashing tape under the old sill. In older homes it is often absent or folded flat, which means the sill sat directly against the sheathing and wicked water into the wall. That omission is frequently the original cause of the rot.
Stop and reassess if the sheathing is soft, the framing is compromised, or insulation is wet. Wet insulation loses most of its thermal value and can hold mold, and structural decay in the wall is a different job with a different scope.
Step 4: Measure, Cut, and Build the Replacement Sill
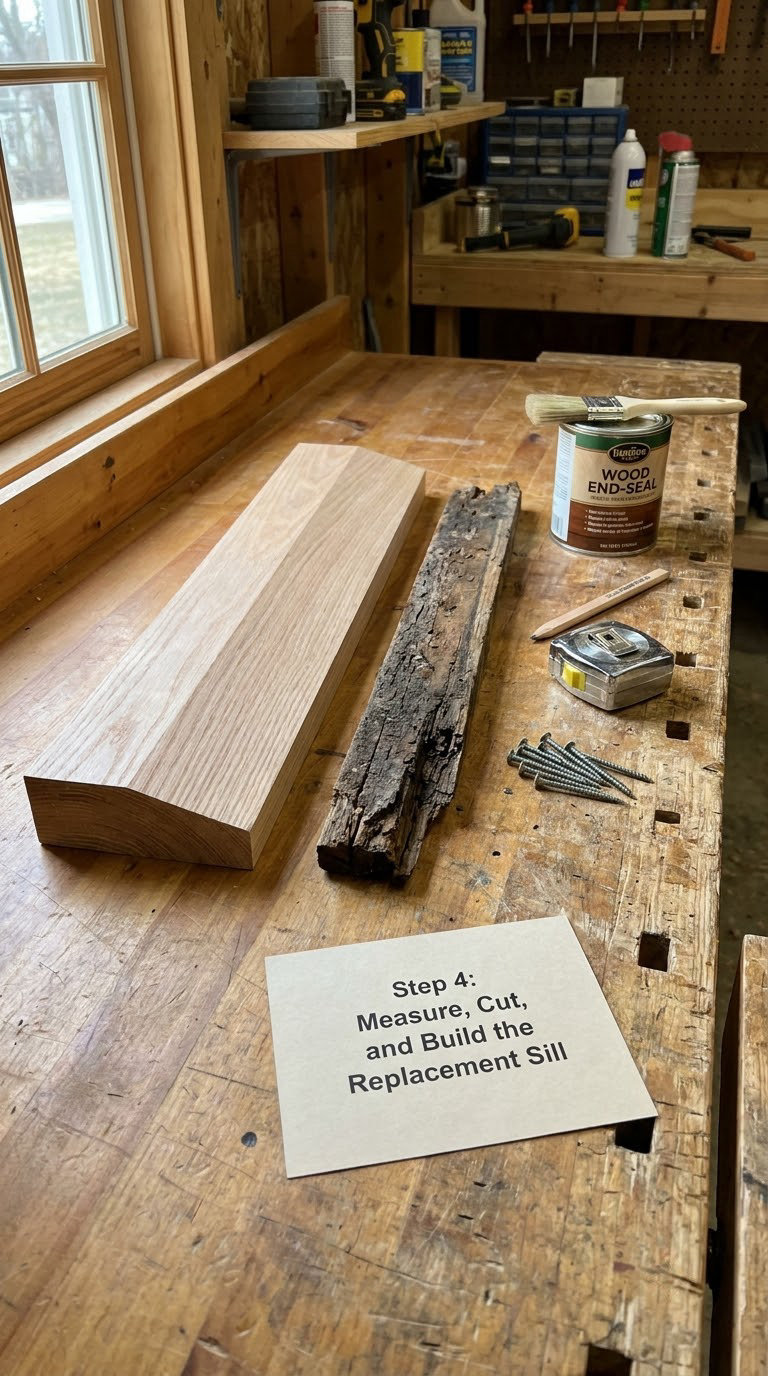
Measure the opening at three points: both ends and the centre. Older walls are rarely square, so take the largest measurement and use it for your cut.
Measure the depth you need by combining the wall thickness, the window frame thickness, and the overhang you want beyond the exterior wall plane. A one-quarter inch to one-half inch overhang helps water clear the wall.
Cut the top of the replacement at a slight slope so water runs outward, roughly 15 percent, which works out to about 3/16 inch of drop per inch of run. Mark the direction carefully, because the heart of the board and the slope have to face outward together.
Cut the underside in a shallow rabbet or drop profile if the old sill had one, so the window frame beds flat. Match the existing nose shape where the trim and siding meet it.
Seal every cut end immediately. End grain drinks moisture faster than any other face of the board, and a factory end that sits exposed is where the next sill fails. Apply end-seal product, or exterior wood glue, to the cut ends and let it dry fully.
Let the replacement acclimate on the bench for a day or two before fitting, and use exterior-grade screws rather than nails where the sill will be exposed. Stainless or hot-dipped galvanized fasteners resist staining and corrosion.
Step 5: Fit the Sill and Restore the Water-Shedding Details
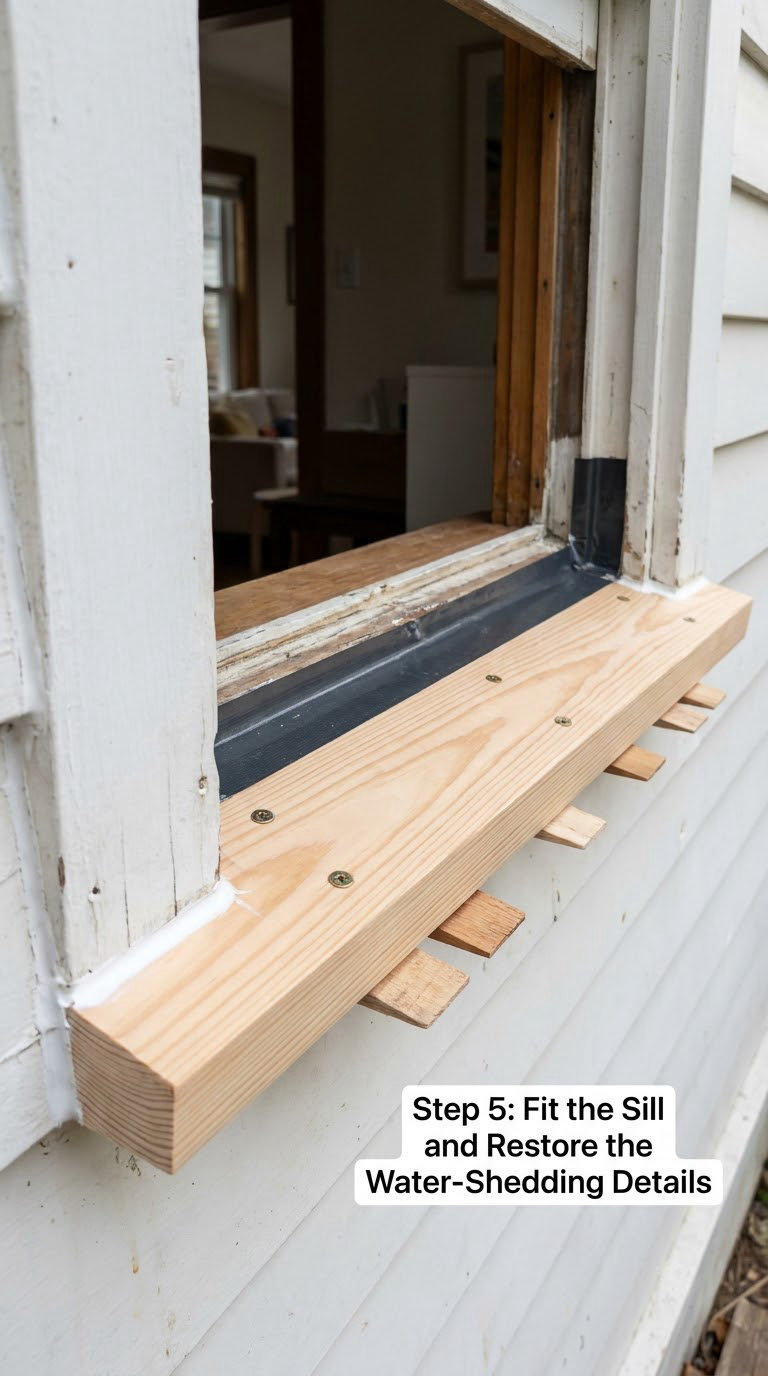
Shim the sill so the slope runs outward and nothing holds water at the ends. Check the fit with a level, and shim at the low corner rather than forcing the board flat, since forcing it flat is how a sill ends up without drainage.
Keep a small gap between the sill ends and the jambs, and fill that gap with exterior sealant. Wood expands across the grain in humidity, and a tight butt joint will split the board.
Fasten through the top of the sill into the jambs with 3-1/2 inch exterior screws, spaced roughly every 12 inches, with pilot holes drilled first and the heads countersunk about a quarter inch so they sit below the surface. Bed a bead of exterior construction adhesive along the bearing surface first, then screw through.
Cut flashing tape or a sill pan to the width of the opening and set it over the sill where it meets the window frame, always lapping the tape so water runs down and out rather than back under it. This detail matters more than most people expect.
Keep the drainage path clear. If the window has weep holes in the frame, make sure nothing you add covers them, and confirm that the exterior trim below the sill does not bridge up over the sill and trap water against it.
Step 6: Finish, Reassemble, and Check the Repair
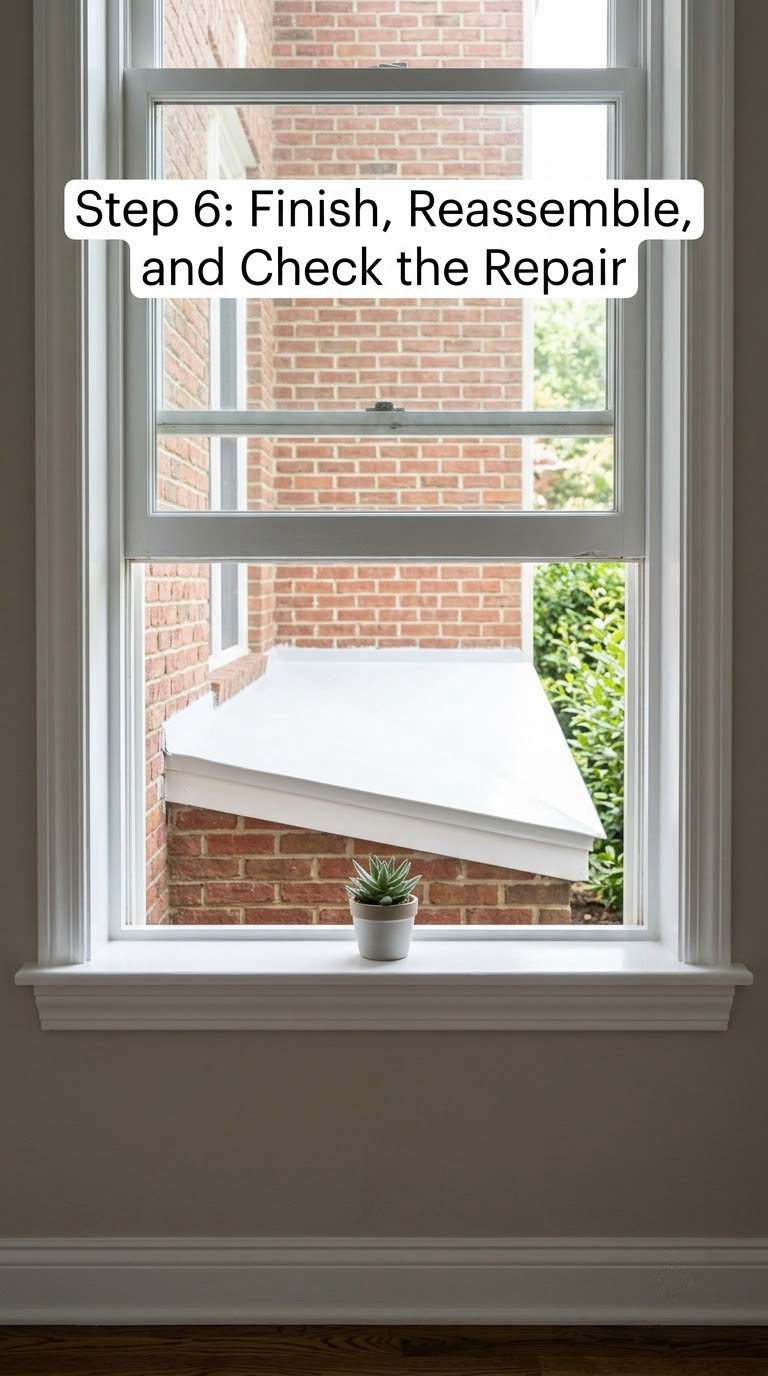
Fill small gaps and screw holes with exterior filler, letting it dry according to the label, typically one to three hours depending on depth and temperature. Sand flush with 120 grit, and vacuum the dust off before sealing.
Prime bare wood with an exterior primer first, especially the end grain and the cut edges. Paint or stain in two coats, letting the first cure before the second goes on. Allow a full day, and longer if the weather is cool and damp.
Reinstall the apron and any trim below the sill with galvanized finish nails, caulking the top edge of the apron where it meets the sill with 100 percent silicone or a polyurethane seal.
Rehang the sash or the casement panel and check operation. The window should close fully, latch without force, and swing or slide without binding, since the frame position shifted slightly when the old sill came out.
Do a final water check on the first rainy day. Stand outside and watch the sill-to-jamb joints, the apron line, and the corners where the sill meets the trim. Water should run off the sill and drip clear of the wall.
Common Mistakes to Avoid
- Filling soft rot with filler. Wood filler and epoxy will stick to punky wood for a while and then let go as the rot continues. Cut it out to sound material first, or the repair is temporary.
- Skipping the moisture fix. Repairing a sill without correcting the water source is the single most common reason a second repair is needed two or three years later.
- Using interior lumber. Pine, MDF, and untreated stock outside will absorb water and fail faster than the piece you removed.
- Flattening the sill slope. A level sill holds water. Keep the outward pitch and confirm it with a level before fastening.
- Blocking the weep holes. New trim, sealant, or a new apron piece can seal off the drainage path and push water into the wall instead of out of it.
- Caulking over a failed flashing detail. Caulk seals joints; it does not replace a sill pan or step flashing. A generous bead of caulk over a missing flashing strip just buys time.
- Painting damp or unseasoned wood. Paint over wet wood traps moisture and peels off in sheets. Let the replacement acclimate and dry first.
- Letting shrubs and irrigation spray hit the sill. Vegetation pressed against siding holds moisture against the wood. Keep a clear gap of 6 to 12 inches between plantings and the wall.
When to Call a Pro
Some repairs stop being a weekend project. Call a qualified contractor when decay reaches the framing or the sheathing, or when the sill itself is soft all the way through rather than at one spot.
Wet or contaminated insulation needs handling too. Once insulation is soaked, it rarely dries inside the wall cavity, and mold can grow behind drywall where you cannot see it.
Get help if the window is fixed in place, unusually heavy, or glued into the opening, since removing it can crack plaster or the frame. Upper-story access is its own risk, and a repair that needs a ladder taller than you are comfortable with belongs to someone with proper equipment.
Stop and call someone if you find concealed wiring in the wall cavity near the opening, or if the home is historic or listed. Original millwork has different rules, and matching historic profiles may need a specialist.
Finally, if the repair changes the size of the opening, the window itself, or the structural framing around it, expect a permit and expect the work to be inspected. Build permits and inspection requirements vary widely by jurisdiction, so check yours before starting.
Maintenance
Twice a year, in spring and autumn, walk the exterior of every window and look at the sill-to-jamb joints and the apron. Fresh peeling paint or a hairline crack in the caulk is the earliest warning you will get.
Clear debris from the sill surface and from the weep holes in the frame each spring. Grit and leaf fragments hold water against the wood longer than rain does, and they are the easiest thing to fix.
Check the head of the window for runoff from the roof. A missing drip cap or a roof edge that empties onto the sill will keep wetting it no matter how well you seal everything else.
Look at the ground below the window after heavy rain. Soil, mulch, or a planting bed sitting high against the siding keeps the sill damp and is a simple fix to correct.
Press a thumb into any suspicious paint. Softness under the film means decay is active, and a small repair at that stage costs a tube of filler rather than a weekend.
Trim back vegetation to 6 to 12 inches from the wall, and redirect lawn sprinklers and downspout discharge away from the opening. Cut the annual gutter cleaning short as well, since a backed-up gutter finds the sill first.
Frequently Asked Questions
Can you repair a rotted window sill without replacing the whole window?
Yes, in most cases where the decay sits in the sill itself and the surrounding jambs and framing still feel solid. Remove the rotted wood, rebuild or replace the sill board, and reseal the joints. Full window replacement only becomes necessary when the rot has spread into the jambs, the frame, or the wall sheathing around the opening.
Is it possible to fix a rotted window sill with wood filler?
Only for small, shallow damage. Two-part epoxy filler works well once all soft, punky wood is cut out and the remaining wood is firm, clean, and dry. If the area is still soft, the filler bonds to nothing that holds. Anything covering more than about a quarter of the sill wants new wood, not filler.
What is the best material for replacing a rotted exterior window sill?
Cedar or white oak handle weather exposure naturally and accept paint well. PVC trim board will not rot at all and needs no sealing, though it cannot be notched or shimmed like wood. Pressure-treated pine works with a good exterior primer and end-seal on every cut face. Whichever you choose, seal the end grain before installation.
How long does it take to repair a rotted window sill?
A straightforward single-window replacement takes one to two days of active work, plus two or three days of drying and curing for primer, paint, and sealants. Add time if the trim is glued in place, if the wall is out of square, or if the interior is finished. Prep and removal usually consume the first half of the first day.
How much does it cost to repair a rotted window sill?
Materials for a do-it-yourself repair typically run fifty to a hundred fifty dollars, mostly the replacement wood, flashing tape, sealants, and fasteners. Hiring a contractor for a localized sill repair commonly runs a few hundred dollars per window, while a full window replacement lands in the low thousands. Prices vary by region and access difficulty.
Should I caulk over a rotted window sill instead of replacing it?
No. Caulk over rotted wood traps the damp wood inside a sealed joint and hides the problem until the paint peels again. Caulk belongs on sound joints after the structural repair is done, and step flashing or a sill pan belongs where the window frame meets the sill so water has a path out of the wall.
What to Do First
Probe the wood with a screwdriver and find the water source before you cut anything. That single hour of diagnosis decides whether this is an afternoon of filling or a full sill replacement, and it is the difference between a repair that lasts and another one in three years.
If the damage is localized and the framing feels solid, this is a job you can finish in a weekend. The same diagnostic habit comes in handy for household fixes like electric recliner repair, and the tool list overlaps more than you would expect.