How to Paint a Stair Railing: Easy DIY Steps (2026)
How to paint a stair railing well comes down to four things: get the hand oils off, roughen the old finish, prime for adhesion, and lay on two thin coats of durable trim paint. Skip the first step and the new paint starts lifting within a few months, no matter how good the paint is.
A railing is the most-touched painted surface in most homes. Hands, sleeves and pets work that top rail constantly, and that contact leaves a greasy film sanding alone will never remove. Once you understand that, the rest of the job is ordinary and quite satisfying. Walk away from a stair railing that has been stripped, primed properly and coated evenly and it looks like a different staircase entirely.
Contents
Autumn is when most people take this on, and it suits the work well. Windows can be open, the house is empty during the day, and the finish has all weekend plus a couple of quiet evenings to cure before anyone leans on it.
Time: About 3 hours per 5 feet of railing, plus drying time between coats
Cost: Modest, since the bulk of what you need is cleaning and prep supplies
Difficulty: Easy to moderate DIY
Skill level: Beginner-friendly, if you are patient between coats
Tools and Materials
Gather everything before you start. Nothing ruins the flow of a paint job like realizing you need a second brush and the store is closed.
Preparation supplies
- Degreaser — trisodium phosphate mixed per the label, or a ready-to-use degreaser. One quart is plenty for a standard interior run
- Nylon bristle brush or stiff utility brush, 2 inch wide, for scrubbing balusters and the base rail
- Shop towels or lint-free rags for wiping, plus a tack cloth for final dust pickup
- Sandpaper in two grits — 120 to 150 grit for cutting through failed paint, 180 to 220 grit for scuffing sound finishes and shaping repairs
- Sanding block roughly the size of your palm, and a sanding sponge for the rounded top of the handrail
- Wood filler or spot putty for nail holes, dings and small chips — a small tub covers a lot of holes
- Wood putty knife, 1 to 2 inch blade
- Fine nylon brush or small roller for primer on tight baluster spacing
Painting and protection supplies
- Drop cloth, at least 4 by 6 feet per flight, plus extra if you have carpet
- Painter’s tape for the wall, baseboards and any hardware you are not removing
- Angled sash or trim brush, 2 to 2.5 inch, with nylon bristles — synthetic holds up in water-based paint and stays springy
- Small artist brush, 1 inch or so, for the underside of the handrail and the tight joints where balusters meet the base rail
- Short nap foam roller, 3 inch, with a small tray — for the flat top of the handrail and any broad surfaces
- Cabinet-and-trim enamel in satin or semi-gloss — a high-traffic enamel formulated for trim, doors and cabinets
- Bonding or stain-blocking primer for bare wood, stained wood, glossy surfaces or a dramatic color change
- Nitrile gloves, safety glasses and a dust mask — non-negotiable when you are degreasing, sanding or on a ladder
- Step stool or small platform ladder that lets you reach the handrail without standing on a stair tread
If you are still deciding on hardware rather than paint, the porch railing ideas we gathered is a decent place to see what finished railings look like at different scales.
Before You Start
Look at the railing honestly first. If paint is already peeling, flaking or coming off in sheets, this is a repair job and you will need to strip the failed areas back to sound wood before anything else. Painting over a peeling finish is the fastest route to doing the whole job twice.
Push on the rail with a coin and listen. A dull thud means sound film; a hollow, sharp ping means the coating has separated from the wood underneath and needs attention. Check the underside of the handrail and the area where people grip hardest, since those are the first places to fail.
Next, think about what is already on the rail. Paint applied before 1978 in a home with children is worth treating as possibly lead-based. If you are unsure, use a lead test kit from a hardware store rather than sanding and hoping. Do the same general caution for any railing in a house old enough to have been painted before lead paint rules changed.
Protect everything below and beside the rail. Lay drop cloths over the treads and the floor at the base, tape the baseboards and wall if overspray is a risk, and take curtains or wall hangings down if they hang near the stair. A canvas cloth taped at the top of each tread catches drips that would otherwise soak into carpet.
Ventilate the room properly. Open a window at each end of the stair run and keep a fan moving air toward the open window, which pulls fumes out rather than spreading them through the house. Keep the ladder and tools where people still need to walk past without stepping on a wet cloth.
Estimate your paint before opening a can. One gallon of trim enamel covers roughly 400 square feet in a thin coat, and a rail with 20 balusters over 10 feet can swallow far more surface than it looks like it should. Buy one gallon plus a spare for a typical run, and mix the second can thoroughly if you have to stretch it — water-based paint separates if it sits.
While you are deciding, settle the color. Satin and semi-gloss are the practical choices for a rail, since flatter sheens scuff and show dirt fast under this much contact. Gloss is the hardest-wearing finish available but its mirror surface reveals every dent in the wood underneath. Two-tone also works well: white balusters with a dark handrail and newel post reads sharp in a stairway with lots of light. If you are going dark over a light primer, expect two coats to be the minimum.
If you are working over carpet, push a folded piece of cardboard under the cloth at each tread edge. It stops the fabric rucking up and turning a wet edge into a track for someone to catch a heel on.
Step-by-Step Instructions
Work in this order and the job goes smoothly: clean and sand the surface, repair what needs it, prime where it is required, then two thin coats applied with a controlled brush. The single rule that decides whether the paint lasts is removing the oils before anything else touches the wood.
Step 1: Protect the Stairs and Remove Loose Hardware
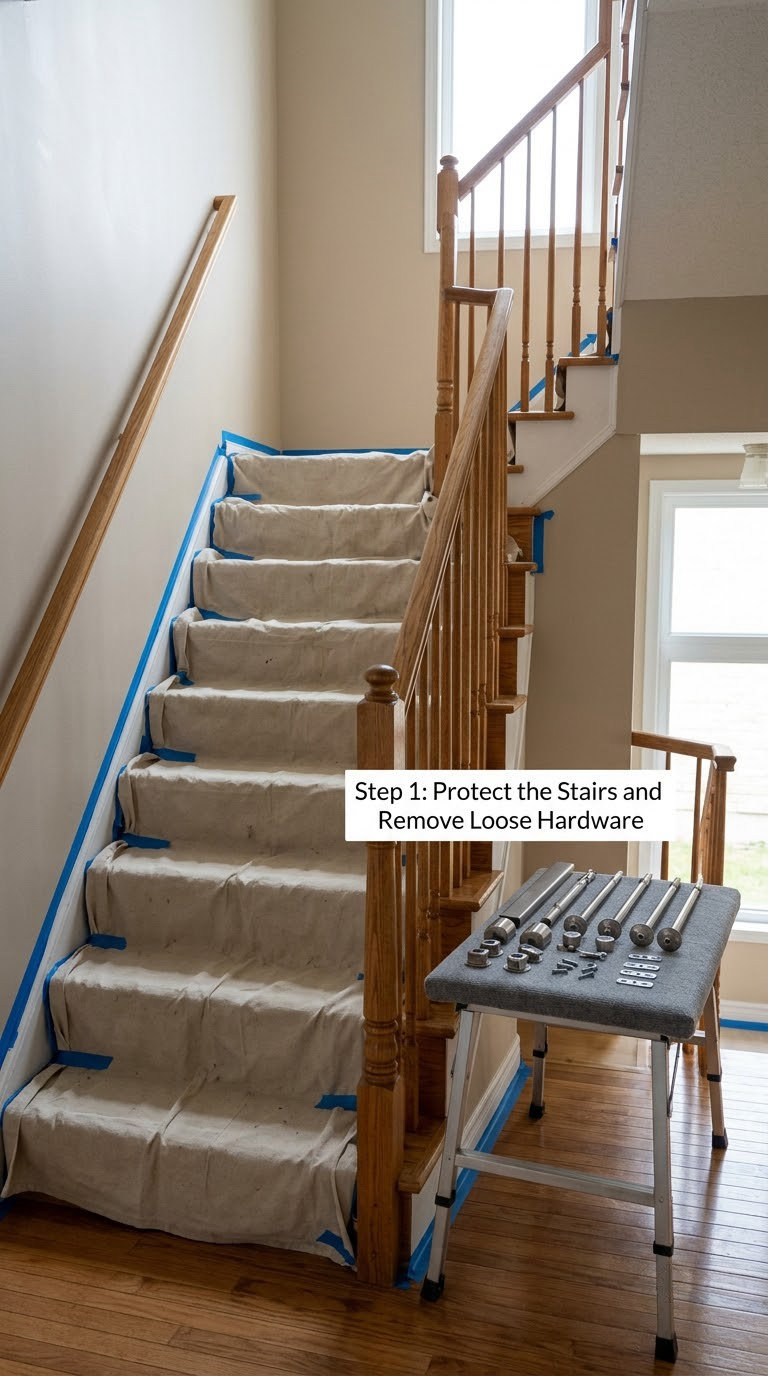
Cover the work area before you take anything apart. Tape drop cloths to the top of each tread so they do not slide when someone walks past, and run one down to the floor below.
Remove railing caps, finials and any loose brackets. Put screws in a labelled bag or tape them to the piece they came from, because losing a set screw halfway through a project is maddening.
Open the windows and set up the fan now, not later. You will be working with a ladder or step stool while the stairs stay in use, so check that your protective covering leaves a safe path through the home.
If your railing can be unbolted from its brackets without anyone losing the use of the stairs, removing it and working on it at floor level is far easier. Sanding a rail at hip height on a ladder is miserable work, and flat on the floor you can paint every side with no awkward reaching.
Step 2: Clean and Sand the Railing
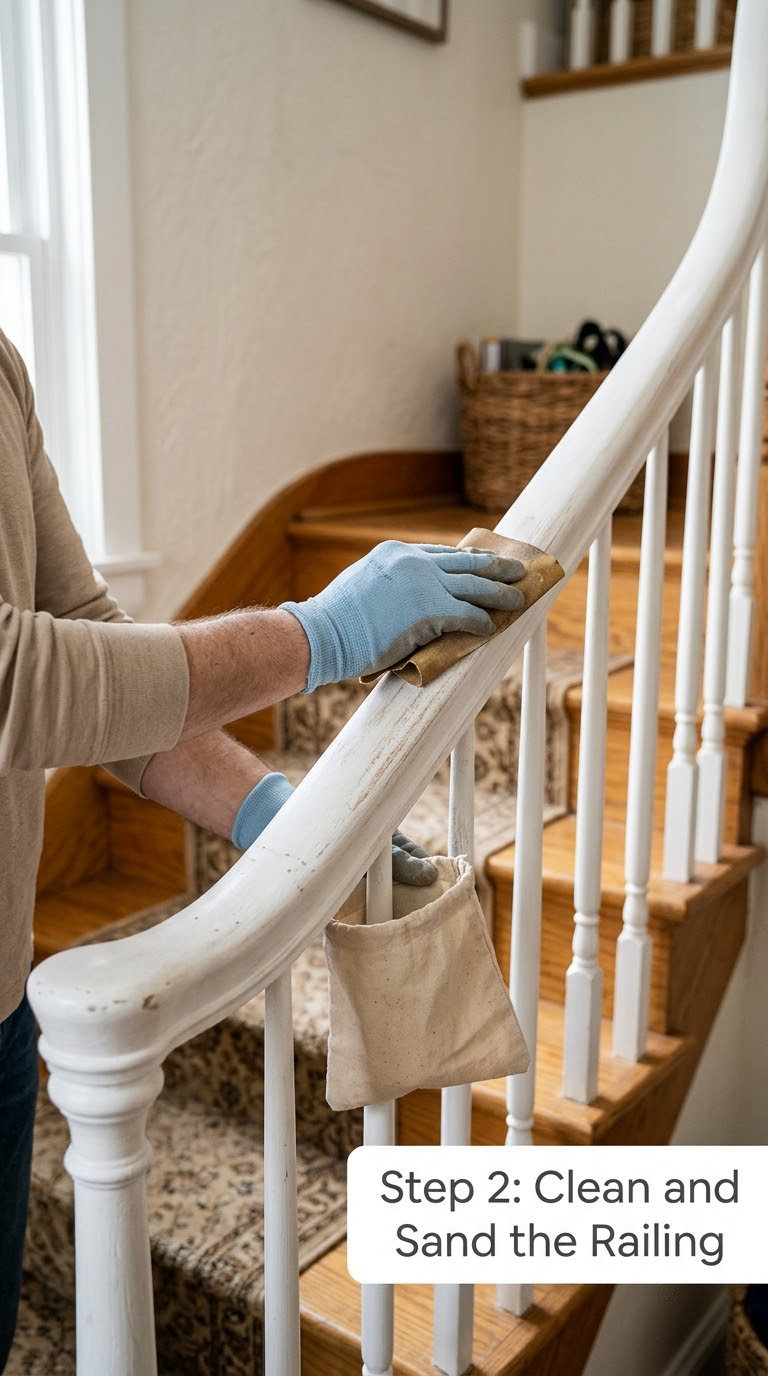
Degrease first, always. Mix trisodium phosphate or your degreaser at the label ratio, wet a brush in it and scrub every surface of the rail, balusters and newel posts. Give it a few minutes to break the grease down, then wipe with a clean damp rag until the rag comes up clear.
This step is doing more work than the painting will. Hand oils sit on top of the finish and inside any cracks, and they defeat even good primer. A highly-upvoted reply over on r/paint puts it plainly: sanding a handrail does not remove oils from years of hands gripping the rail, and new paint applied over those oils peels off in sheets within a few months.
Now decide between sanding and deglossing. If the existing coating is peeling, chipping or coming loose anywhere, sand it back to bare wood with 120 to 150 grit paper. If the finish is intact and firmly attached, you can skip heavy sanding and use a liquid sandpaper or deglosser instead, which chemically roughens the surface without taking off the coating.
Whichever path you take, scuff glossy areas with 180 to 220 grit paper, always moving with the grain rather than across it. Round off any sharp edges or arrises where the wood catches your sleeve, then vacuum or wipe the dust away and follow with a tack cloth right before priming.
One quick test tells you what you are dealing with. Put a drop of water on an inconspicuous spot — if it beads up, the finish is likely oil-based and needs a bonding primer or a scuff-defensive paint. If it soaks in, you are looking at a water-based finish and have more freedom.
Step 3: Repair Joints and Prime When Needed
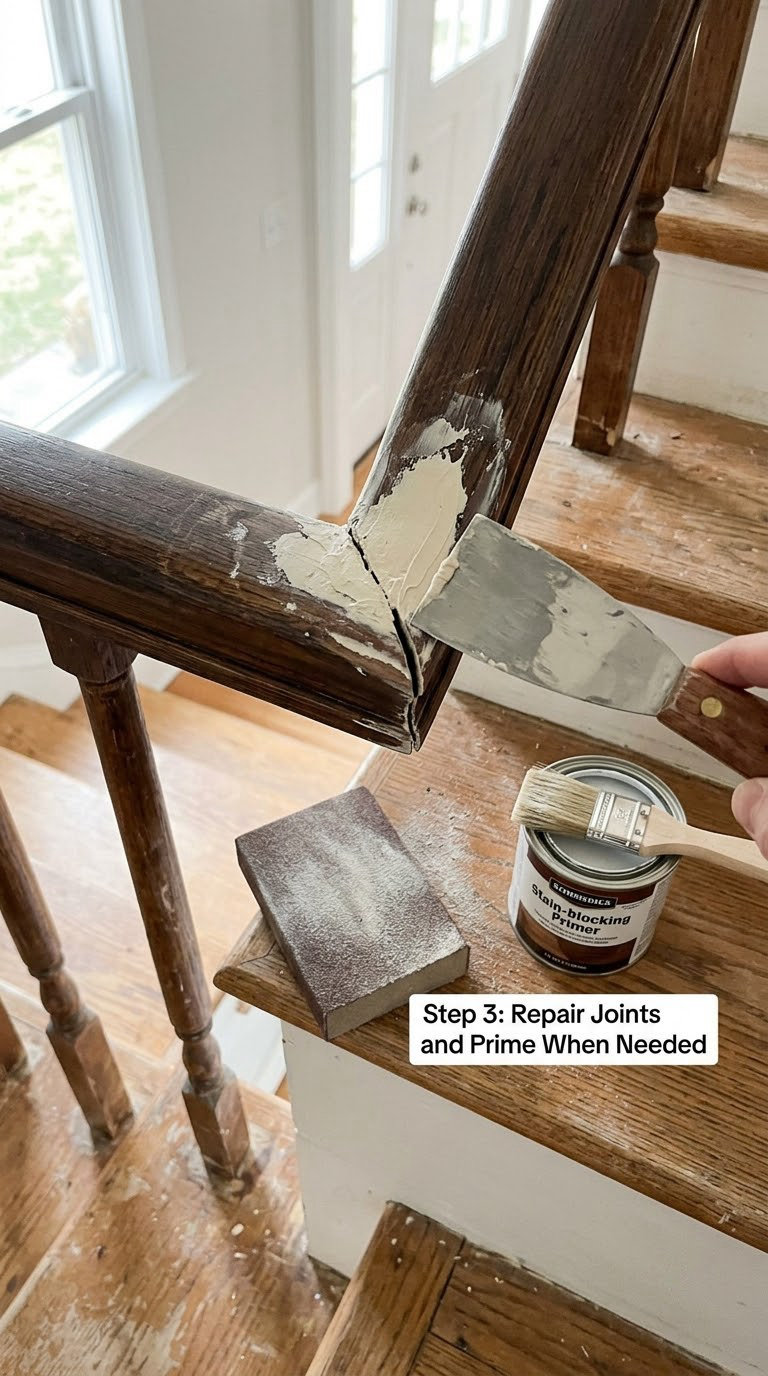
Fill holes and dings while the surface is bare or freshly scuffed. Press wood filler into nail holes, chips and small gouges with your putty knife, let it dry, then sand it flush with 180 to 220 grit. A second thin fill often beats one thick one that shrinks and dips.
Primer is not optional in several common situations. Use a stain-blocking or bonding primer on bare wood, on stained wood, on any glossy surface, and when you are jumping from a light color to a dark one. Primer does not need to look good — it just needs to seal and hold.
Use paint-and-primer-in-one instead only when the existing finish is sound, firmly attached and you are changing to a similar or lighter color. That kind of product saves a whole step on an easy job and disappoints you on a hard one.
Apply a thin coat with a small brush or foam roller and follow the grain on flat sections. Watch for a hot, heavy hand — thick primer puddles on a vertical face and takes far too long to dry.
Step 4: Apply the First Coat with Controlled Brush Technique
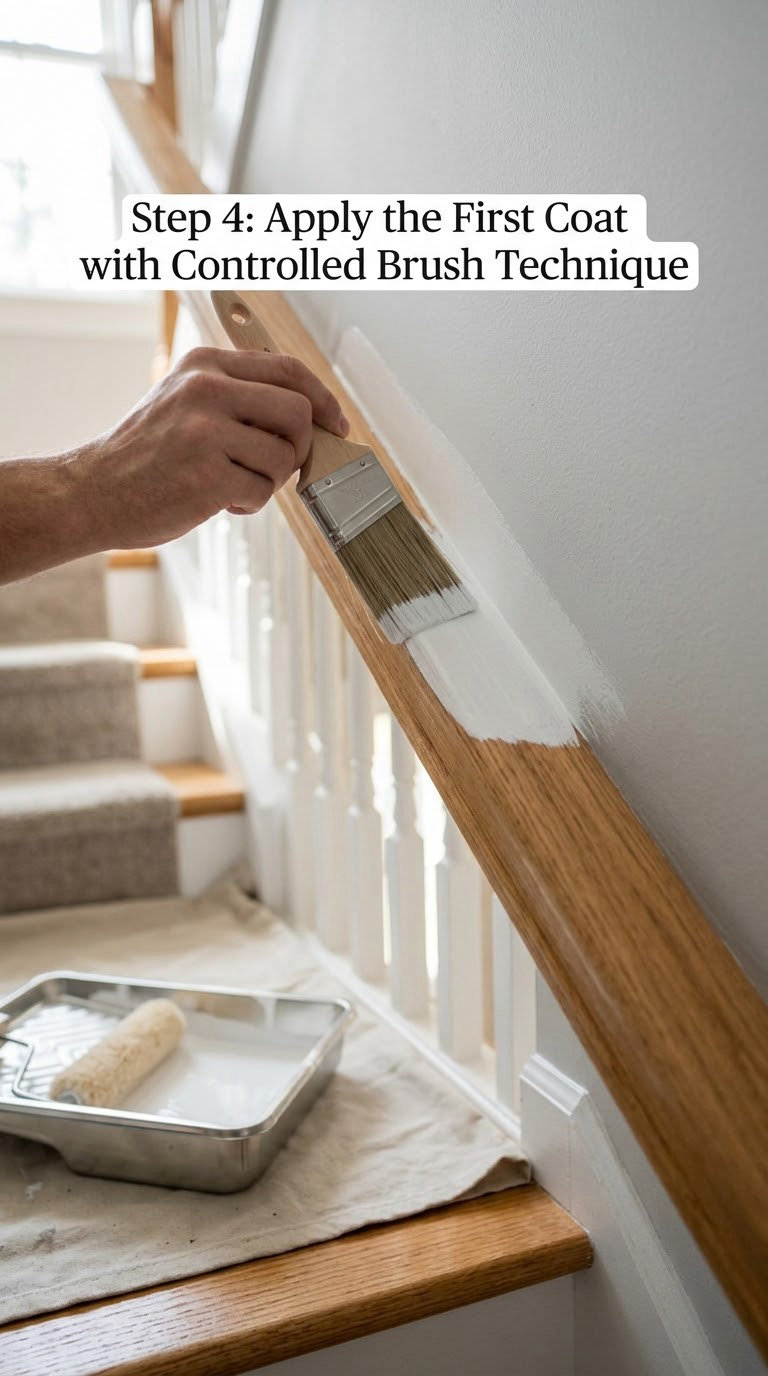
Load your brush properly. Dip one third of the bristle length, tap off the excess against the side of the can, and wipe the rim. A properly loaded brush feels heavy but does not drip when you turn it.
Start at the bottom of the staircase and work upward. This matters more than it sounds: any drip travels downward, so painting low to high lets you brush it out while it is still wet. Start at the top and you are chasing runs down your own work.
Work in one direction across the whole run. If you are right-handed, move along the rail so your painting hand never crosses a wet baluster you just finished. Paint every other baluster first, then come back for the in-betweens — your arm never has to reach across anything wet.
Cut in with the angled brush along the underside of the handrail, the top edge and the tight joints where balusters meet the base rail. On tight spacing, a small artist brush beats masking tape every time — tape bleeds if paint creeps underneath, and pulling it off can take the new finish with it.
Use a short nap foam roller on the flat top of the handrail to avoid brush marks on the surface people look at most. Roll it off the rail and out onto a scrap cardboard so the nap does not roll the paint back onto itself.
Keep a wet edge and do not back-brush a coat that has started to set. Lay paint on evenly and move on; a second pass over tacky paint pulls it up into a stippled mess.
Step 5: Add a Second Coat for an Even Finish
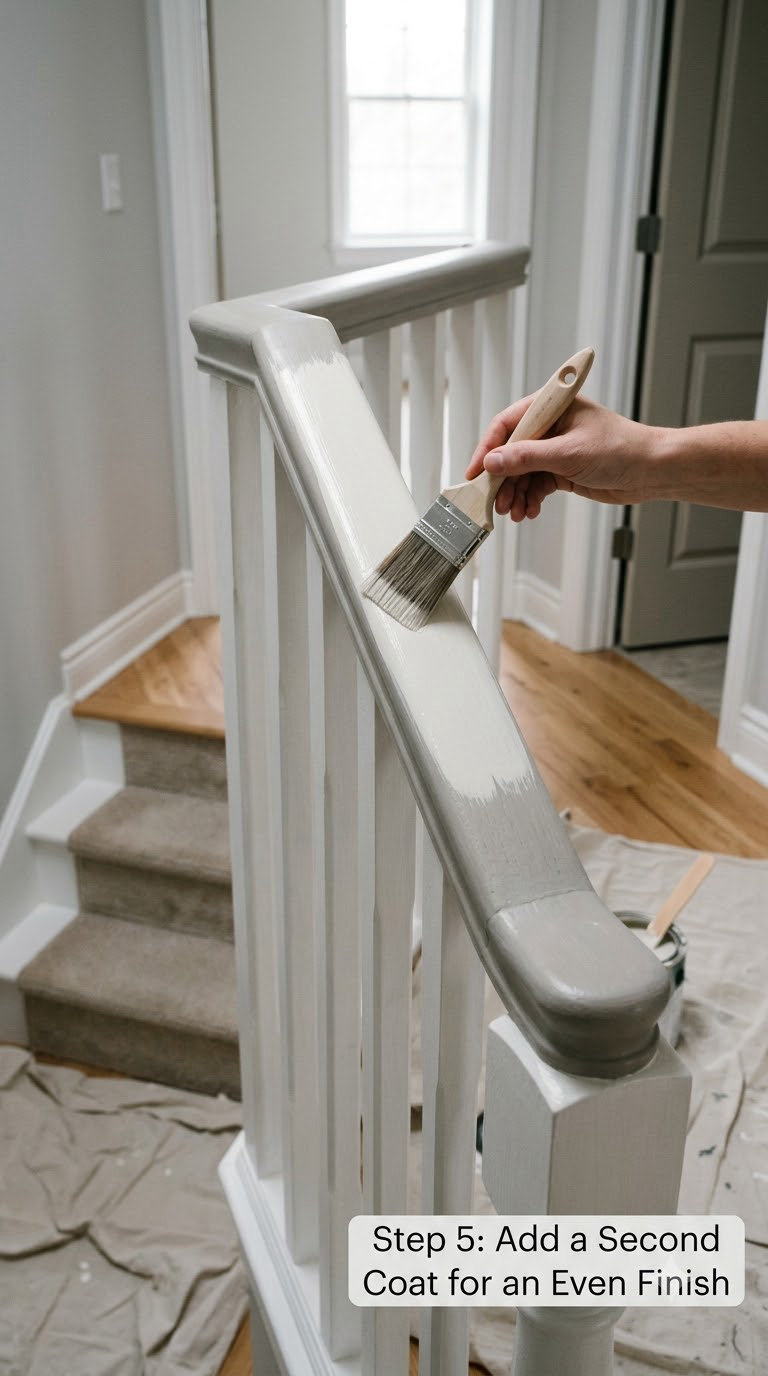
Wait for the manufacturer’s recoat window before going again — usually a few hours, and overnight in cool or humid rooms. Painting early catches a skin that has formed on the surface, and painting late makes adhesion harder.
Give the first coat a light scuff with a sanding block or sanding sponge, about 220 grit, along the rail’s length. This knocks down any drips and gives coat two something to grip. Wipe the dust off with a tack cloth before you open the can.
Use this pass to catch what you missed. Look at the railing from a low angle with the light behind you — skips and thin patches catch the light differently from wet paint, and they are obvious once the coat has dried.
A third coat is worth it when you are going dark over a light primer, when the first coat soaked into raw wood, or when you can still read the old color through the new finish.
Step 6: Let the Paint Dry and Finish the Edges
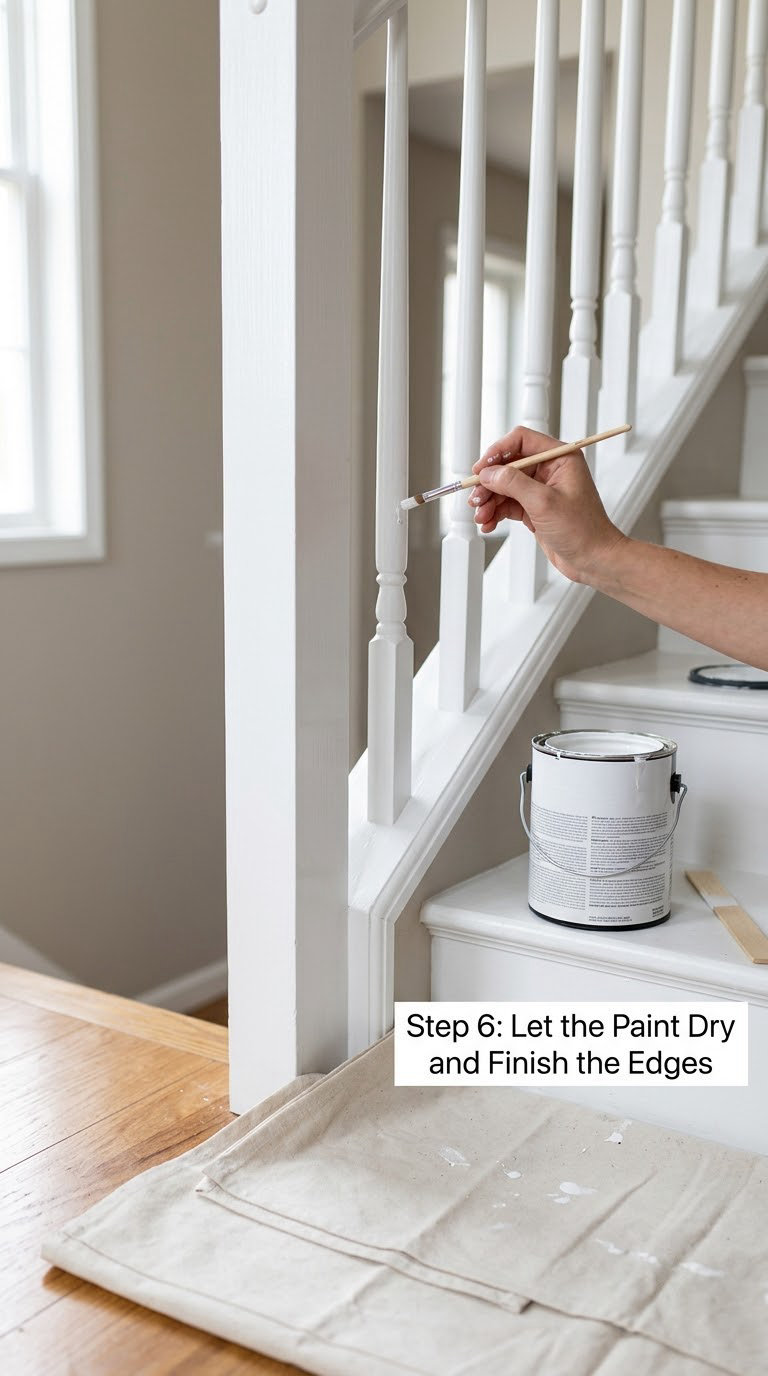
Once the paint is touch-dry, walk the whole run and look for drips. A dried drip is a small raised bead with a hard edge; you can sand it lightly with fine paper or knock it down with the artist brush and a dab of the same paint, depending on how noticeable it is.
Remove tape while the surrounding paint is still slightly soft, pulling it at a low angle rather than straight up. If a tape edge has already set, score it gently with a utility knife first so you do not lift the new finish.
Do not confuse surface dry with cured. Touch dry means paint will not smear under a fingertip, usually within a couple of hours. Full cure takes days, sometimes up to a couple of weeks depending on the product, humidity and airflow. Light use is fine once it is touch dry, but hold off on heavy leaning and moving furniture against the rail for a few days.
Once the full cure is done, reassemble the caps, finials and brackets and pull the drop cloths and tape. A water-based clear coat on the handrail and newel post alone is a reasonable extra layer if hands and kids are constant, since those are the surfaces that take the most abuse.
Common Mistakes to Avoid
Skipping the degreasing. This is the expensive mistake. No amount of sanding removes hand oils, and primer applied over grease holds for weeks, not years. The fix is a degreaser, a wet rag and fifteen more minutes.
Overloading the brush. A brush dipped halfway down the bristles drips down the baluster and leaves runs. Load one third of the bristle length, tap and wipe, and reload often instead.
Painting over a tacky coat. If the first coat still grabs the brush, it has not dried enough. Pushing through tacky paint creates a stippled, uneven surface that no amount of careful brushing will fix. Wait for the full recoat window.
Missed edges and undersides. The underside of the handrail, the back of each baluster and the joint at the base rail are the spots that show first. Cut in with an angled or artist brush before you do any broad face.
Painting in poor conditions. Cold, damp or overly breezy conditions slow drying and can cause lap marks and uneven sheen. Aim for a comfortable room, airflow but no wind tunnel, and follow the temperature range printed on the can.
Failing to protect the stairs. Paint drips land on treads, and drips on carpet do not come out. Tape your drop cloths down and treat the treads as the floor you would least like to repaint.
Water-based paint over old oil-based paint. This is the most repeated warning in DIY forums and it is worth repeating. Unless the old finish is fully removed or a bonding primer is used, latex paint over an oil-based coating can lift and peel. If you are unsure what is on the rail, the water-bead test from Step 2 is the place to find out.
When to Call a Pro
Some railings are not a painting problem. A wobbly handrail, a baluster that moves when you push it, or visible crack or rot at the base of a newel post needs a carpenter, not a paint can.
Get a qualified pro involved if the paint is lead-based and the scope is large, since the rules for disturbing it are strict and the required protection is substantial. High-traffic commercial stairs, apartment buildings with shared liability and any code-regulated handrail or guard are also jobs for a licensed contractor rather than a weekend.
If the rail itself needs replacing rather than refinishing, our picks for cable railing kits for wood posts are worth a look before you buy more paint for a failing structure.
Maintenance
Treat a painted railing the way you would treat a painted handrail in a busy hallway. Wipe it with a damp cloth and a drop of dish soap every few months, along the top edge and the grip zone, then dry it.
Skip abrasive sponges, scouring pads and all-purpose cleaners with solvents. They dull satin and semi-gloss quickly, and once the sheen is gone the surface holds dirt and shows every scuff.
Deal with scuffs while they are small. A mark from a shoe or a bag handle is a five-minute fix with a fine brush and a dab of the same paint, and doing it then means you never touch a sanding job later.
Watch the high-touch areas between projects: the top of the handrail, the newel post and the return where hands grab on the way up. If the finish there is wearing thin but still adhered, spot prime and recoat just those areas. If it is cracking and lifting at the edges, that is an adhesion problem, not a wear problem, so go back to the degreasing and priming steps rather than adding another coat on top.
Frequently Asked Questions
What type of paint is best for a stair railing?
A water-based cabinet-and-trim enamel in satin or semi-gloss is the usual choice, because these formulas are built for high-traffic trim and cure hard enough to survive hands and pets. Oil-based enamel is harder still and is what old railings were often finished in, but it yellows over time and has stronger fumes. If the existing finish is oil-based, use an oil-based or high-adhesion primer first, or remove the old coating completely.
Should I use a brush or roller to paint a stair railing?
A brush for nearly everything, with a small foam roller only on the flat top of the handrail and other broad faces where brush marks show most. A 2 to 2.5 inch angled trim brush handles the faces and edges, and a small artist brush gets into the joints where balusters meet the base rail and along the underside of the rail. Rollers do not fit tight baluster spacing and will not reach into corners.
How long does painted stair railing paint take to dry?
Expect a few hours to touch dry and longer before the coating is hard enough for heavy contact, with full cure commonly taking several days and sometimes a week or two. The recoat window for most water-based trim enamels is a few hours, longer in cool or humid rooms. Always follow the times printed on the can rather than a generic estimate, and let the rail cure before leaning anything against it.
Can I paint an outdoor stair railing?
Yes, with exterior paint and more caution. Use a paint formulated for exterior trim, clean off any algae or mildew, remove rust from metal fittings, and expect the surface to weather and need recoating sooner than an indoor rail. If the rail is wood, check for rot before painting, because sealing damp or soft wood traps the decay. Sealers and exterior coatings also need the same thin coats and full cure before rain.
Do I need to prime before painting a stair railing?
Prime whenever the wood is bare or stained, the existing finish is glossy, or you are making a dramatic color change, which means nearly every interior railing. Bonding and stain-blocking primers handle all three cases. Paint-and-primer-in-one is acceptable only over a sound, firmly attached finish and for similar or lighter colors. Skipping primer over an oily or glossy rail is the most common reason railing paint peels off early.
How do I fix drips and uneven spots on a painted railing?
Wait until the paint is touch dry, then knock a raised drip down with fine sandpaper or a sanding sponge, feathering the edges so the repair blends in. For a small run, dab it with a fine artist brush loaded lightly with the same paint rather than dragging the brush through the surrounding coat. Thin patches get a touch-up of the same color once the surface has been lightly scuffed and wiped clean.
Conclusion
Learning how to paint a stair railing is a weekend job once you stop treating the prep as optional. Before you open a can, work through this list and the finish will still be there in five years.
- Inspect the rail, and strip back anything that is already peeling
- Degrease every surface before sanding, so hand oils do not sabotage the bond
- Sand or degloss the whole run with the grain, then fill and sand the repairs
- Prime bare wood, stained wood, glossy finishes and big color changes
- Apply two thin coats of durable trim enamel, following the grain and working upward
- Let the finish cure fully before the railing takes heavy daily use
If you have never painted before, start with one baluster and a small section of the base rail rather than the whole newel post. You will learn the feel of the brush on your own rail, which is worth more than any instruction.