18 Raised Bed Garden Layout Ideas for Small Yards 2026
The best raised bed garden layout for most yards is two long beds with a path running between them, kept no wider than 4 ft across and no narrower than 2 ft of path. That one rule means every plant is reachable from a walkway without stepping into the soil. Here are 18 raised bed garden layout ideas you can copy for whatever shape you actually have: a narrow side yard, a square lot, an awkward corner, a slope, or a patio.
Most of these get planned in late summer or fall, which is a good time to build. Fresh soil settles over winter, and you will thank yourself in spring when nothing has to be squeezed in at the last minute. Cost ranges below are realistic US planning ranges for materials and vary by region, so treat them as a starting point, not a quote.
Contents
18 Raised Bed Garden Layout Ideas at a Glance
| Idea | Cost | Difficulty | Time |
|---|---|---|---|
| 1. Parallel beds with a central path | 250-600 USD | Easy DIY | One weekend |
| 2. U-shaped layout | 300-700 USD | Easy DIY | One weekend |
| 3. Four-bed square grid | 450-1100 USD | Moderate DIY | Two weekends |
| 4. Two long beds, wide center aisle | 300-750 USD | Easy DIY | One weekend |
| 5. L-shaped patio garden | 250-650 USD | Easy DIY | One weekend |
| 6. Circular or curved beds | 500-1400 USD | Moderate DIY | One to two weeks |
| 7. Vertical stacked bed design | 300-800 USD | Moderate DIY | One weekend |
| 8. Narrow side-yard beds | 250-600 USD | Easy DIY | One weekend |
| 9. Corner garden with angled beds | 350-800 USD | Moderate DIY | One weekend |
| 10. Patio container-and-bed hybrid | 200-550 USD | Easy DIY | Half a day, then a weekend |
| 11. Bed-and-bench perimeter | 400-1000 USD | Moderate DIY | Two weekends |
| 12. Herb spiral | 150-400 USD | Moderate DIY | One long day |
| 13. Separate beds for crop rotation | 350-850 USD | Easy DIY | One weekend |
| 14. Accessible beds with wide aisles | 400-1000 USD | Moderate DIY | Two weekends |
| 15. Polytunnel or covered bed layout | 900-3500 USD | Moderate DIY | One to three weeks |
| 16. Pollinator and edible flower border | 300-750 USD | Easy DIY | One weekend |
| 17. Multi-level backyard garden | 600-2000 USD | Hire a pro | One to three weeks |
| 18. Modular beds that expand | 250-700 USD | Easy DIY | One weekend per module |
1. Parallel Beds with a Central Walking Path
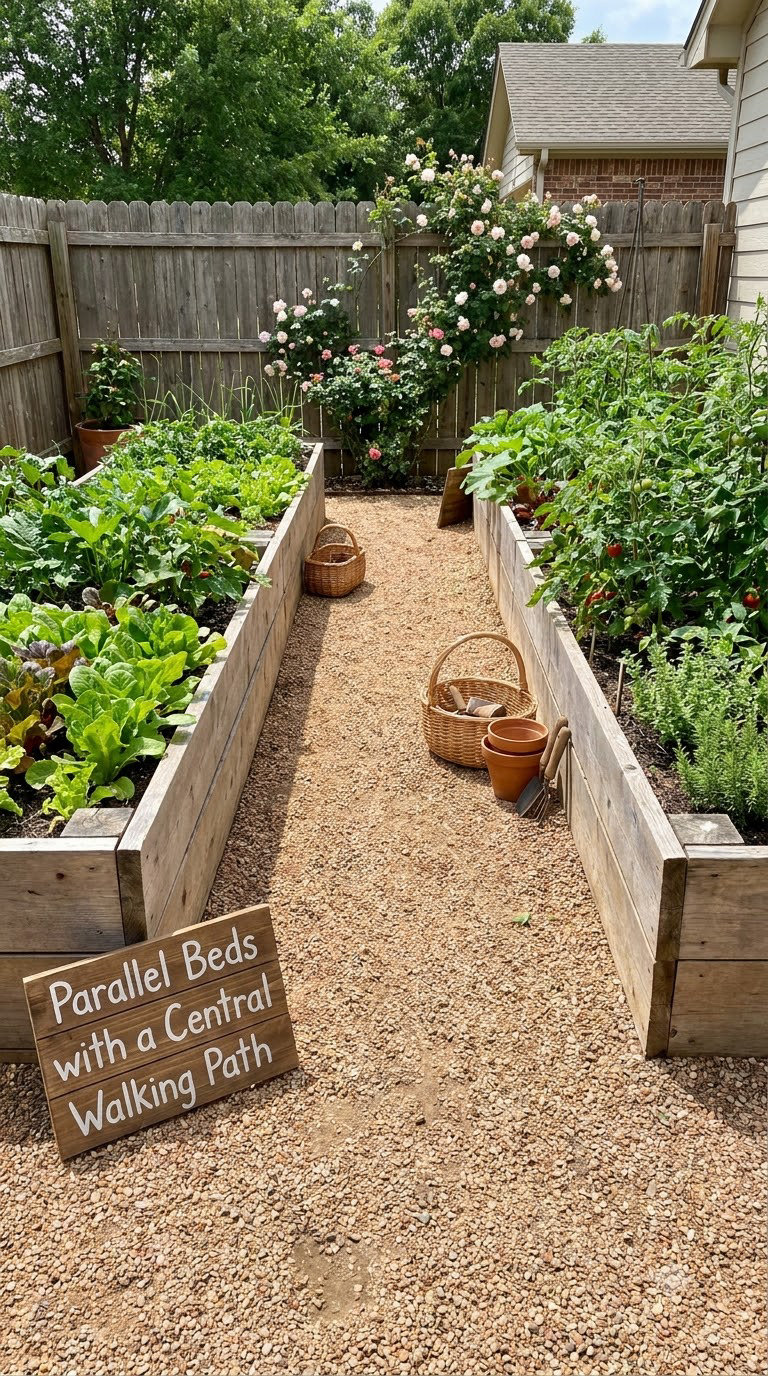
Two identical rectangular beds set the same distance apart with a path running down the middle is the layout most first-time gardeners should build. It works because every plant can be reached from a path on two sides, so you never have to kneel in the dirt with wet shoes to pull weeds.
How to lay it out:
- Set two 4 ft x 8 ft beds with the long axis running north to south so both sides get even light.
- Leave 2 to 3 ft between the beds and at least 18 in between each bed and the fence.
- Square every corner with a 3-4-5 triangle before you drill the first screw.
- Fill to 6 to 8 in below the top edge, then top-dress with 2 in of compost or mulch.
- Run a drip line along the centre of each bed and set it on a timer.
Cost: 250-600 USD · Difficulty: Easy DIY · Time: one weekend, roughly 6 to 8 hours.
Good to know: if a bed has to run east to west because of the yard, put the tall crops on the north side so they never shade the short ones.
2. U-Shaped Garden Layout
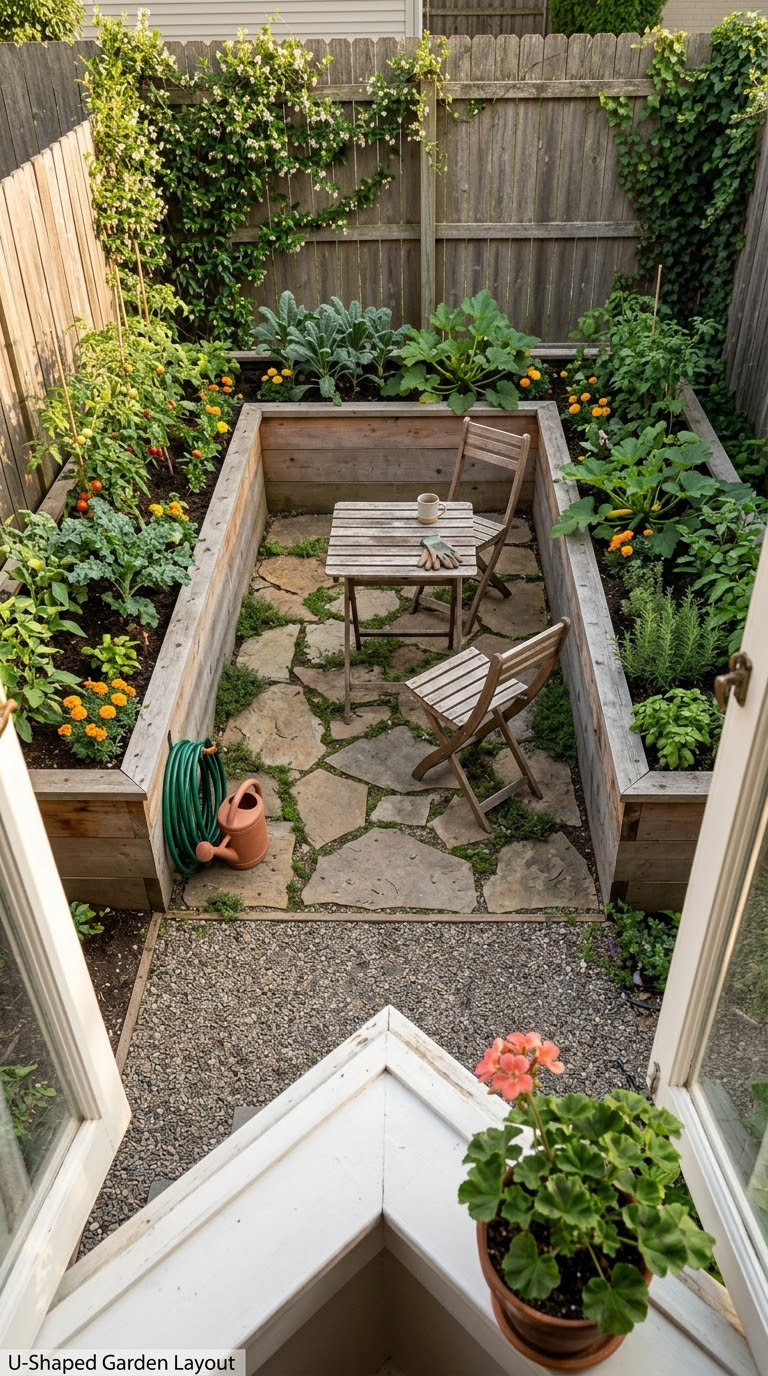
Three beds placed in a U, with the open end facing the house, turns a narrow space into a garden you can work from the middle. The compact footprint is the whole point: you get three beds’ worth of soil in the area of about two and a half.
How to lay it out:
- Run two beds along the side fences, long ends toward the house.
- Set the third bed across the far end, joining the two returns, and leave a 2 ft opening at the near end as your entry.
- Keep the centre paved or covered with cardboard and gravel so the ground stays firm underfoot in wet weather.
- Stand in the centre and check you can touch the middle of every bed from the path. If not, shorten the beds.
Cost: 300-700 USD · Difficulty: Easy DIY · Time: one weekend plus a half day for the centre path.
Good to know: this is the layout for a side yard that is 10 ft wide and 30 ft long. A designer working from that shape doubled a planned row of three beds into two sets of three.
3. Four-Bed Square Grid
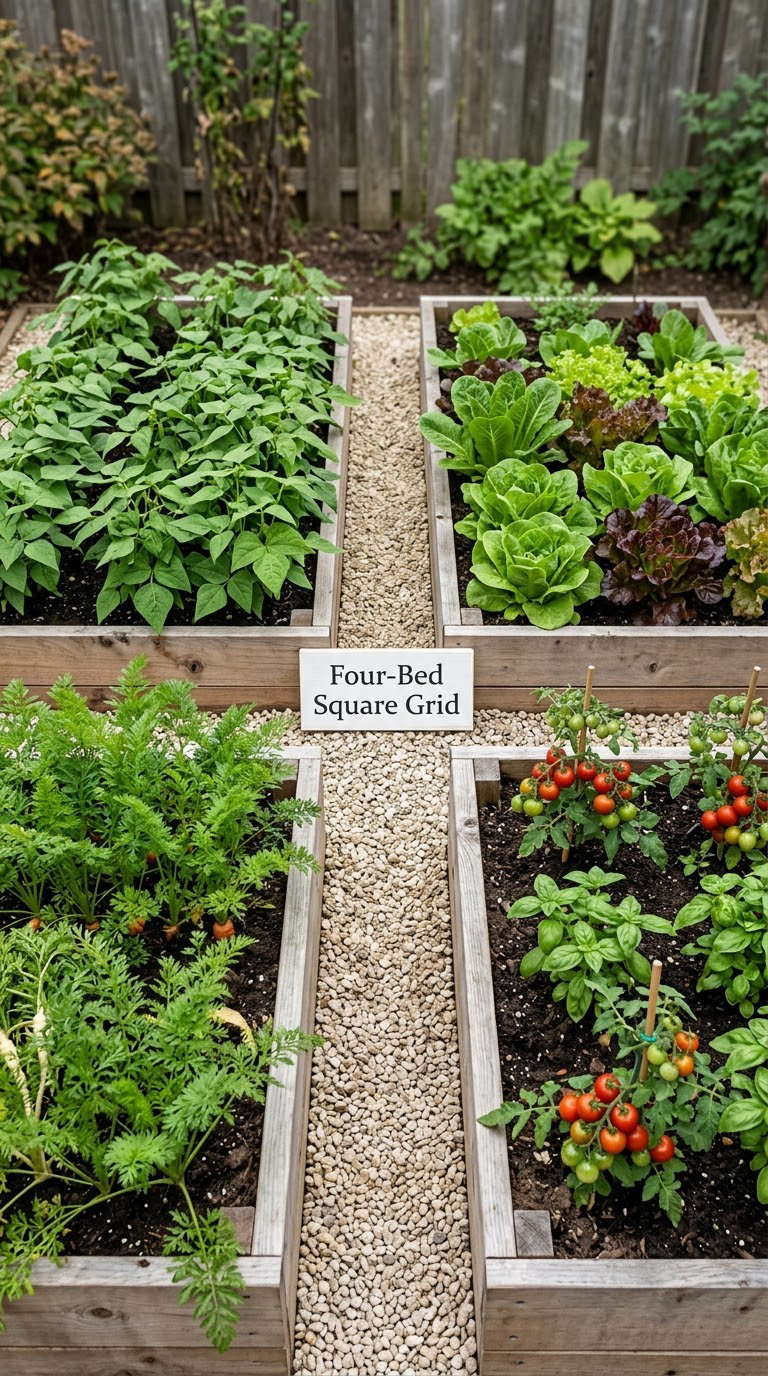
A grid of four equal beds separated by straight gravel paths looks tidy from the house and works well for anyone who likes order. Symmetry is not just decorative here: matching bed sizes mean every bed gets the same soil recipe and the same crop rotation treatment.
How to lay it out:
- Use four 4 ft x 4 ft beds for a yard at least 15 ft square, or four 4 ft x 8 ft beds if you have 20 ft or more.
- Set the paths at 2 ft wide and keep the outside path wider, around 3 ft, so a wheelbarrow fits.
- Level the whole grid before building, because a bed that sits proud of its neighbour will shed water into the gap.
- Label each bed on a small stake so you know what grew there last season.
Cost: 450-1100 USD · Difficulty: Moderate DIY · Time: two weekends, most of it spent levelling.
Good to know: the grid eats lawn. In a 15 ft square section you are giving up roughly half the ground to paths, which is a fair trade for never kneeling in mud.
4. Two Long Beds with a Wide Center Aisle
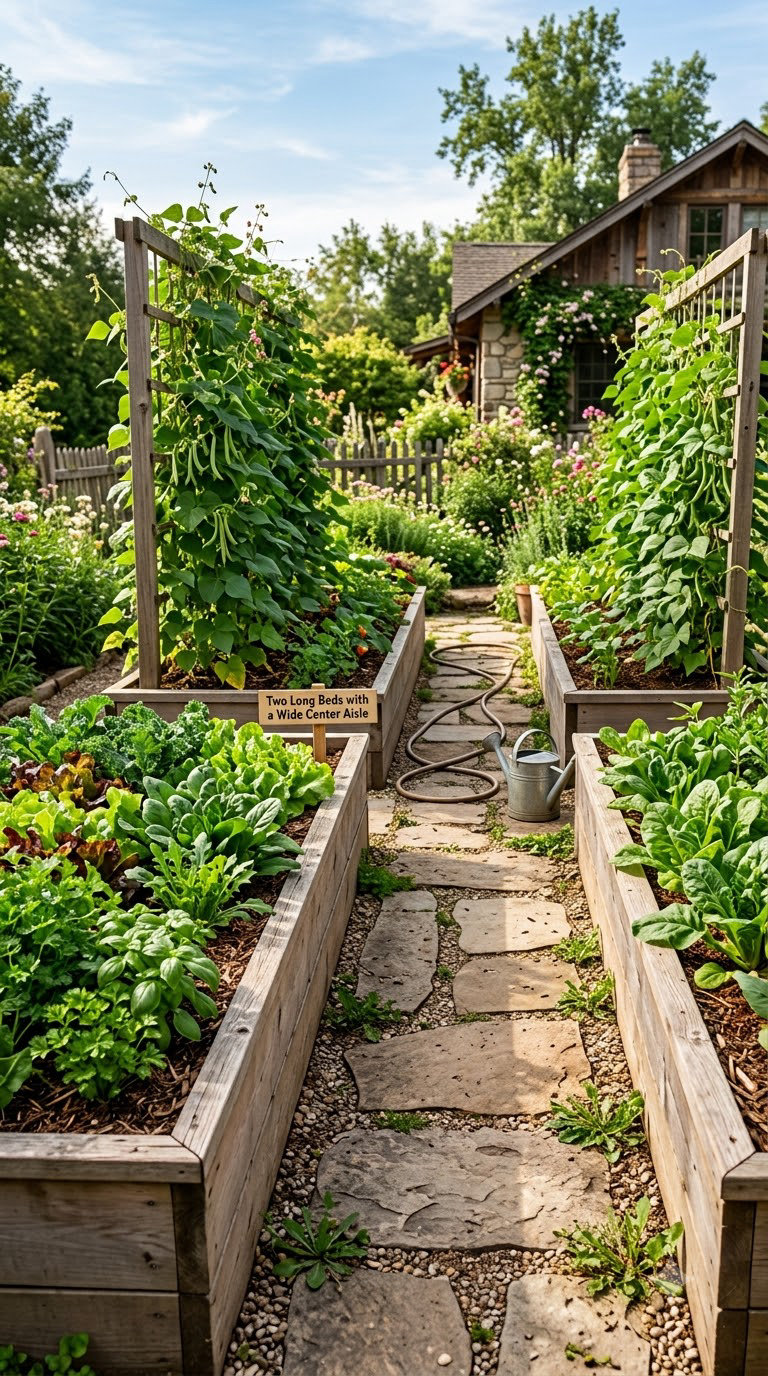
Two elongated beds with a genuinely wide aisle down the middle is the generous cousin of the parallel layout. A 3 ft aisle lets two people work opposite each other, fits a wheelbarrow, and means a wheelchair or garden cart can roll right down the middle.
How to lay it out:
- Choose 4 ft x 12 ft or 2 ft x 8 ft beds rather than standard 8 ft lengths if you have the run.
- Hold the aisle at 3 ft and pave it flush, not proud, so a loaded cart does not tip.
- Trellis the far bed on its north side for beans and cucumbers so the aisle stays open.
- Use square-foot spacing rather than rows: one large plant per square foot, four small ones.
Cost: 300-750 USD · Difficulty: Easy DIY · Time: one weekend.
Good to know: if you want to know what fits in a bed that size before you order wood, our pick of vegetables for small raised beds maps crops to bed dimensions.
5. L-Shaped Patio Garden
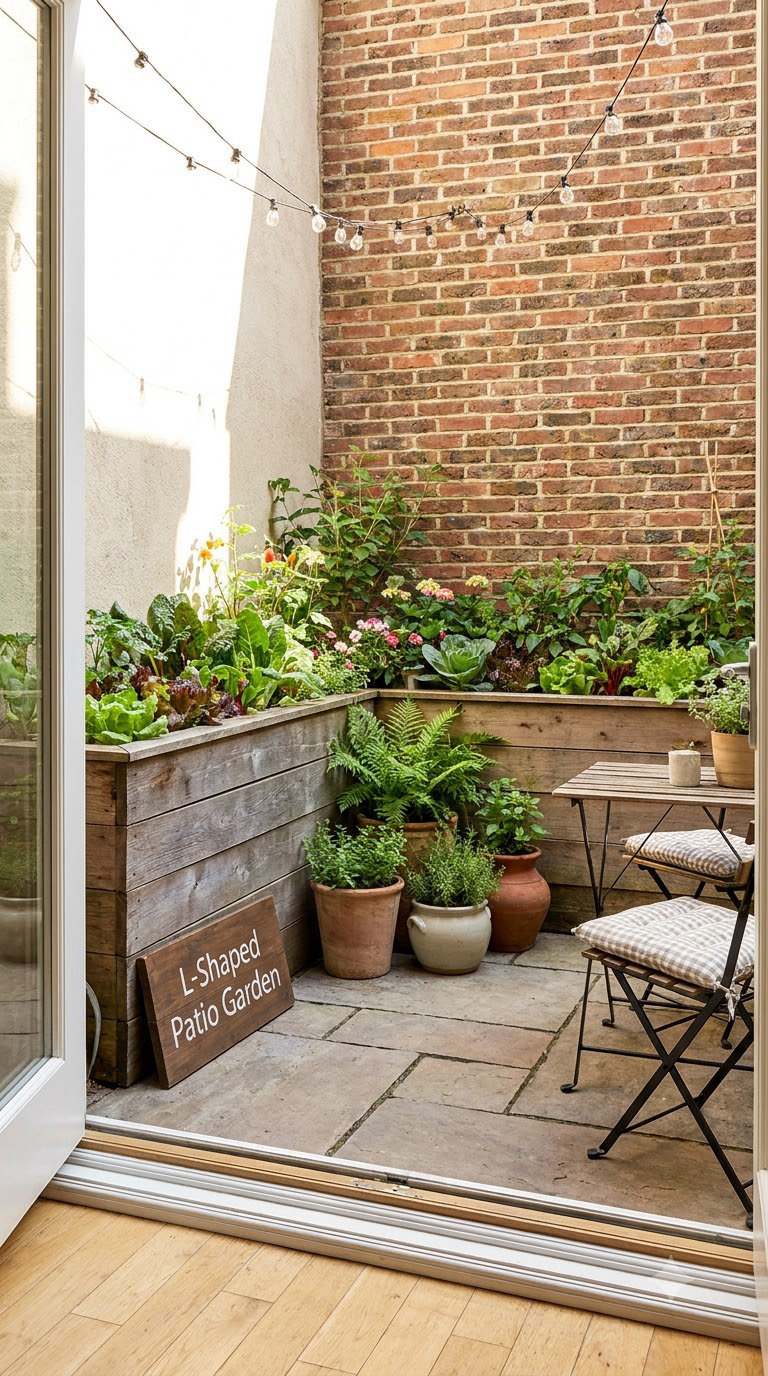
An L of beds along two adjoining walls wraps a corner of a patio or deck and leaves the middle of the hard surface completely open. That open middle is the reason to choose this shape: you keep your table, your chairs and your walking route exactly where they were.
How to lay it out:
- Run one 4 ft x 8 ft bed along the long wall and a 4 ft x 4 ft bed down the return wall.
- Keep the outer edge of each bed within 2 ft of the wall so you can reach the back of the bed from the side.
- Set the tall bed to the north if the corner is open to afternoon sun.
- Use pots at the corner itself, where a square bed will not fit, to round out the planting.
Cost: 250-650 USD · Difficulty: Easy DIY · Time: one weekend.
Good to know: on a deck, weigh the beds filled. Wet soil runs about 100 lb per cubic foot, and a patio needs to be able to carry the load.
6. Circular or Curved Bed Layout
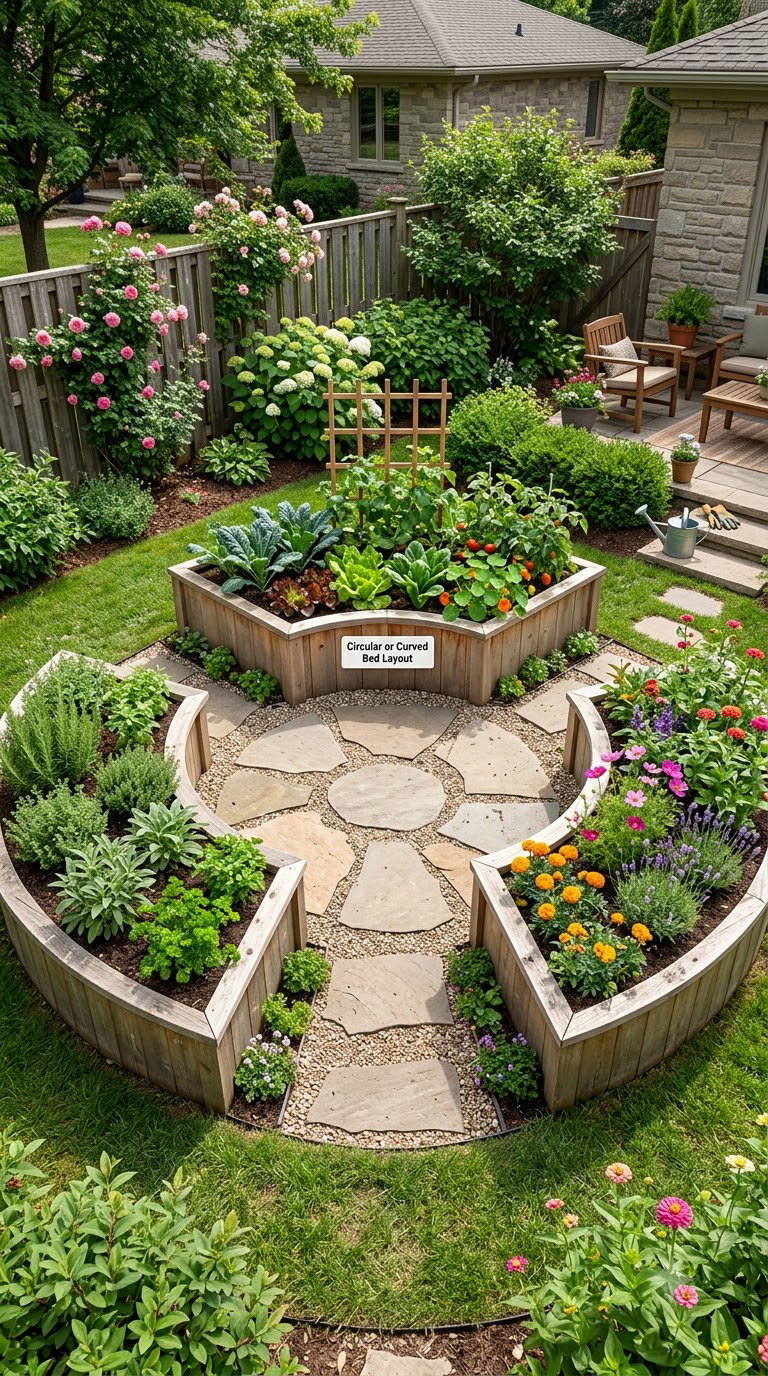
Curved or segmented beds soften a rectangular yard and, done properly, plant more than straight boxes of the same length. A gentle arc uses the whole curve instead of wasting the corners, and it turns the middle of the yard into a place to stand.
How to lay it out:
- Sketch three arcs on paper with a 6 ft radius before you stake anything.
- Build the curve from flexible steel edging bent on the ground, or from stacked boards on a slight angle.
- Keep each bed under 4 ft wide at its deepest point so the centre stays reachable.
- Anchor every stake point, because a curved wall pushes outward harder than a straight one.
Cost: 500-1400 USD · Difficulty: Moderate DIY · Time: one to two weeks, slower than straight beds.
Good to know: curves complicate lining and crop rotation because each bed is a slightly different size. Mark the short end of every curved bed and treat it as its own planting zone.
7. Vertical Stacked Bed Design
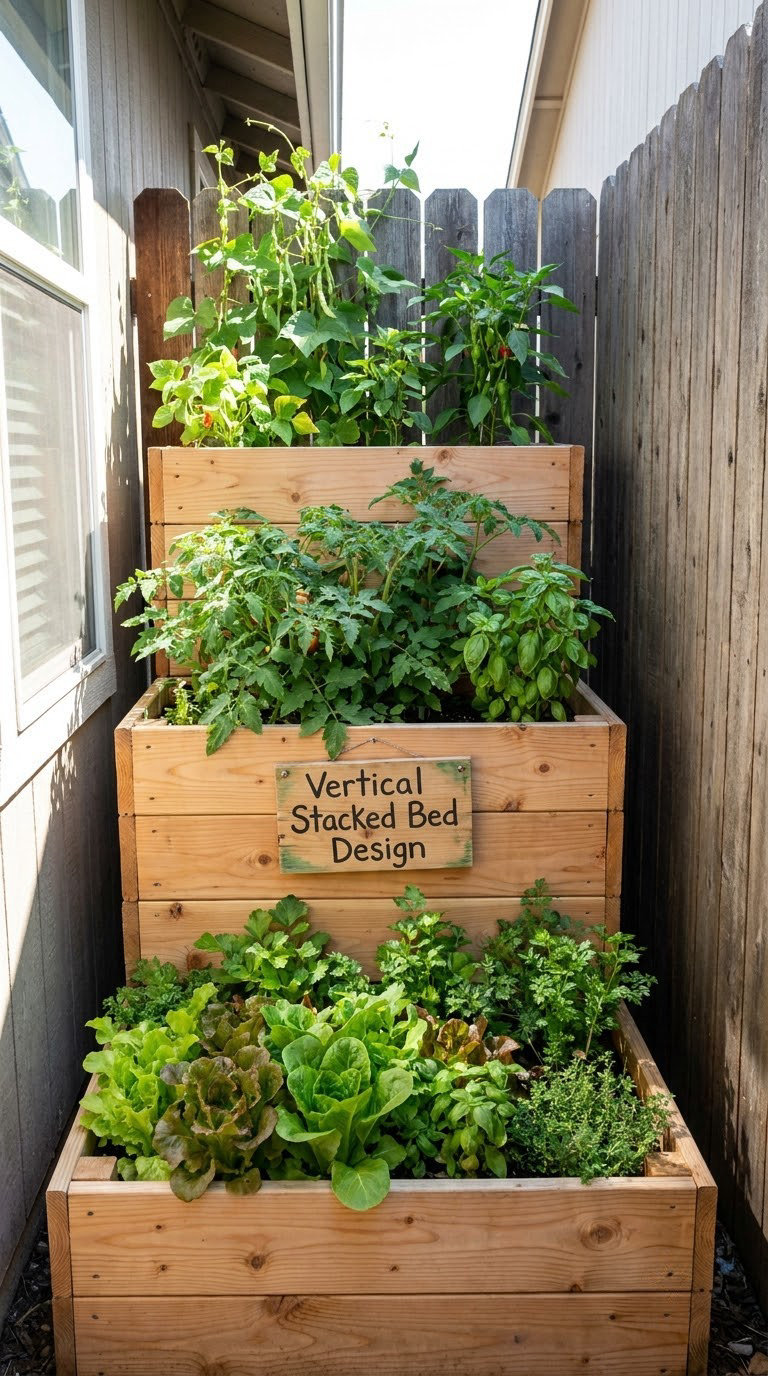
Stacked tiers add planting height to a small footprint and put the back row at eye level instead of at your ankles. It is the layout to pick when you want more beds in fewer square feet, or when bending over a low bed is not for you.
How to lay it out:
- Build the lowest tier at 12 in tall, the middle at 24 in, the top at 36 in.
- Set each tier back 12 to 18 in from the one below so no tier shades the one under it.
- Keep the top tier narrow, about 18 in deep, and use it for herbs and salad greens.
- Brace every tier to the posts behind it; stacked soil pushes hard on the frame.
Cost: 300-800 USD · Difficulty: Moderate DIY · Time: one weekend.
Good to know: a tall bed holds roughly double the soil volume per square foot, so fill cost climbs fast. Four 4 ft x 4 ft beds at 36 in tall need several cubic yards of soil.
8. Narrow Side-Yard Beds
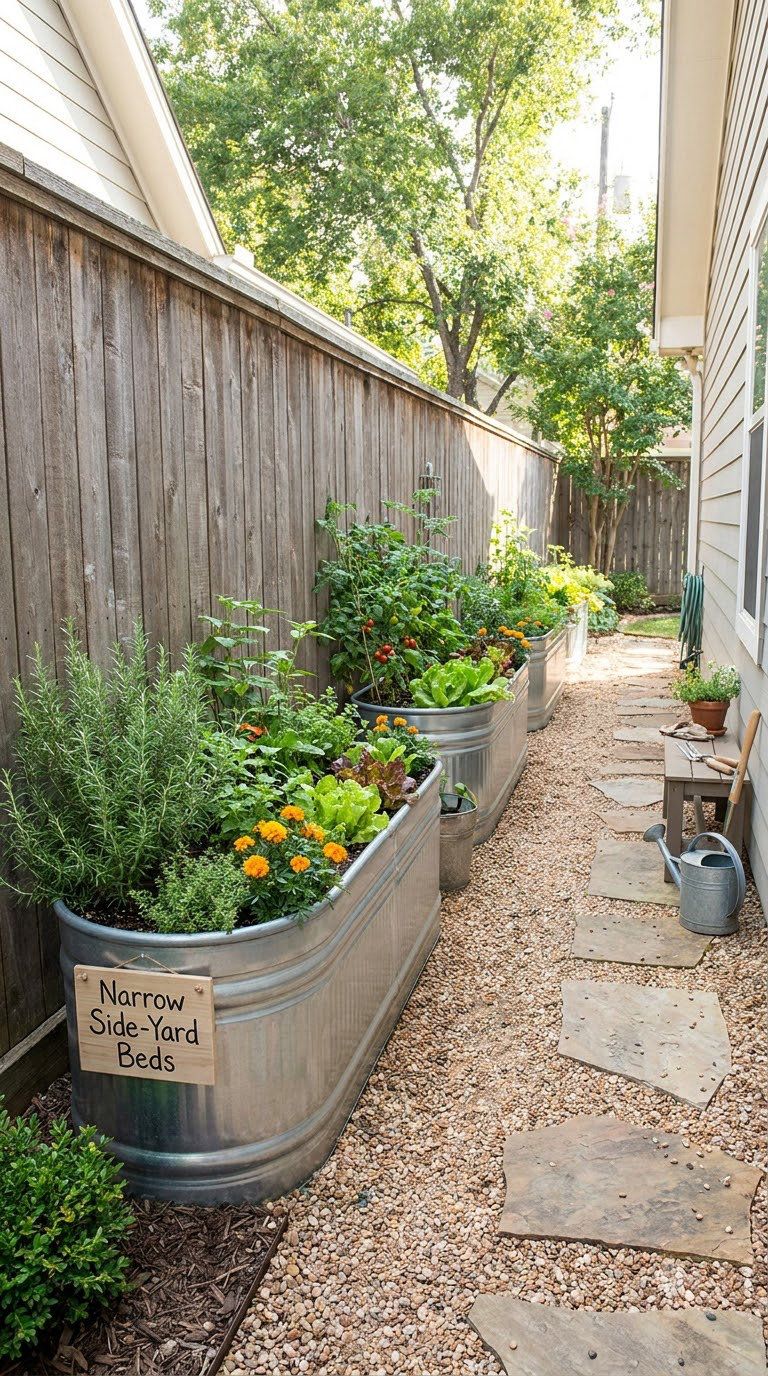
Slim raised beds run along a fence line turn leftover side-yard ground into a productive herb or salad garden. They are the classic fix for the strip of dirt between two houses that nobody knows what to do with.
How to lay it out:
- Use beds 18 to 24 in wide and 6 ft or longer, placed against the fence.
- Hold a walking route of at least 24 in clear between the bed and the house wall.
- Stay under 18 in tall so you can reach the back of a narrow bed without standing on it.
- Run the long axis north to south so plants shade each other evenly.
Cost: 250-600 USD · Difficulty: Easy DIY · Time: one weekend.
Good to know: a side yard between two buildings often gets a strip of light and little else. Leafy greens, herbs and strawberries handle that better than tomatoes, which want six solid hours.
9. Corner Garden with Angled Beds
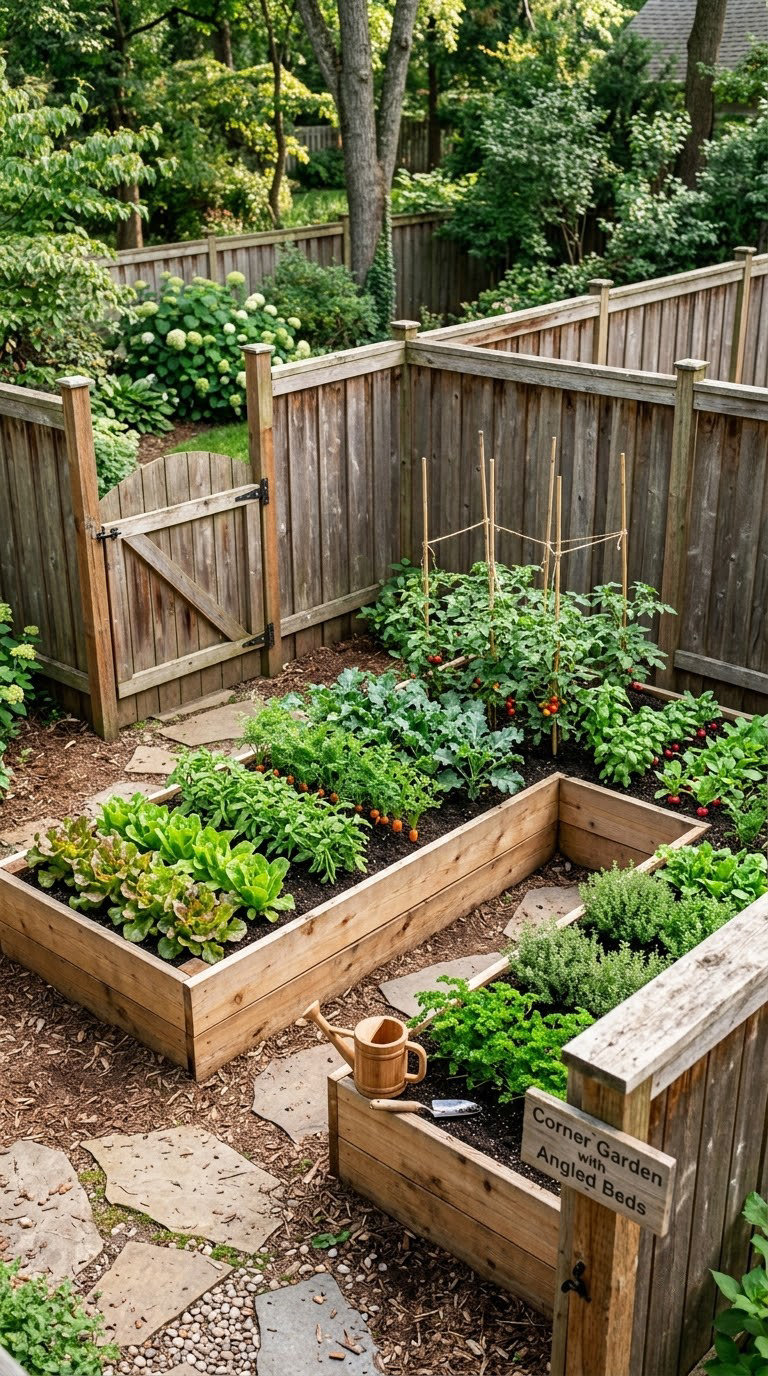
Beds cut at 45 degrees to follow the corner of a fence turn awkward triangular ground into two usable rectangles. It looks deliberate from the house, and it keeps the back corner of the bed within reach instead of hiding it against the fence line.
How to lay it out:
- Measure the corner and mark two 45 degree cuts so both beds meet the fence at matching angles.
- Keep each bed between 3 ft and 4 ft at the cut end so you can reach the middle.
- Miter the end boards rather than butting two boards together, so the joint has no gap for soil to spill through.
- Leave a 3 ft gate opening on one fence run so you can get a wheelbarrow into the corner.
Cost: 350-800 USD · Difficulty: Moderate DIY · Time: one weekend, plus an hour for careful measuring.
Good to know: mitered corners leak at the joint if the boards are not screwed from both faces. Add a corner post and drill through it from outside and inside.
10. Patio Container-and-Bed Hybrid
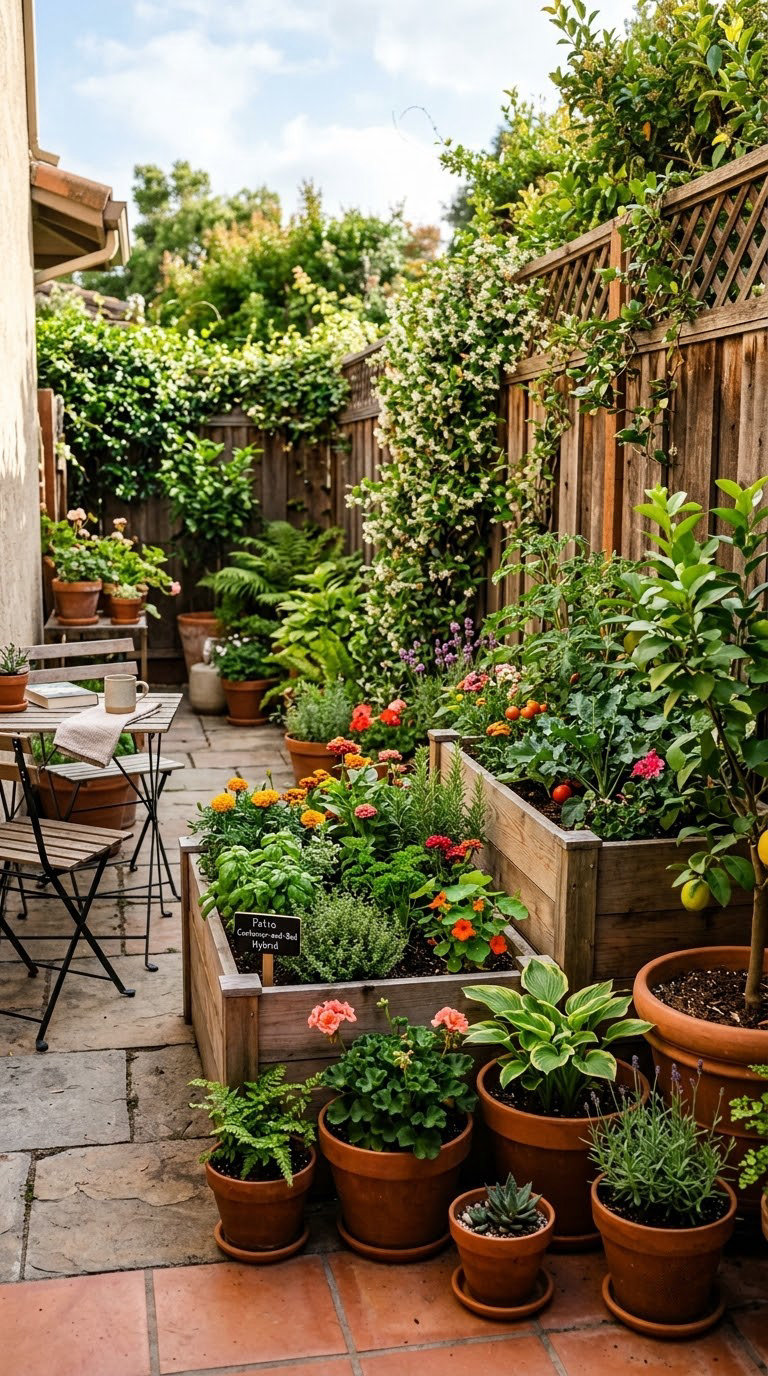
Combining one or two raised beds with movable pots gives you a patio garden you can rearrange for a party, a sunny week, or a shaded afternoon. It is the most flexible layout here and the easiest to change as the season moves on.
How to lay it out:
- Anchor two compact beds against a solid wall so they are not in the middle of foot traffic.
- Group pots in odd numbers of three or five, off-centre from the table rather than ringed around it.
- Put tall pots at the back and low ones at the edge so nothing blocks the view.
- Move the pots, not the beds, when the shade shifts; that is the whole advantage.
Cost: 200-550 USD · Difficulty: Easy DIY · Time: half a day to build, plus an afternoon for pots.
Good to know: container soil dries out fast in July. Check pot weight by hand every other day, and group the thirstiest plants together on one watering round.
11. Bed-and-Bench Perimeter Layout
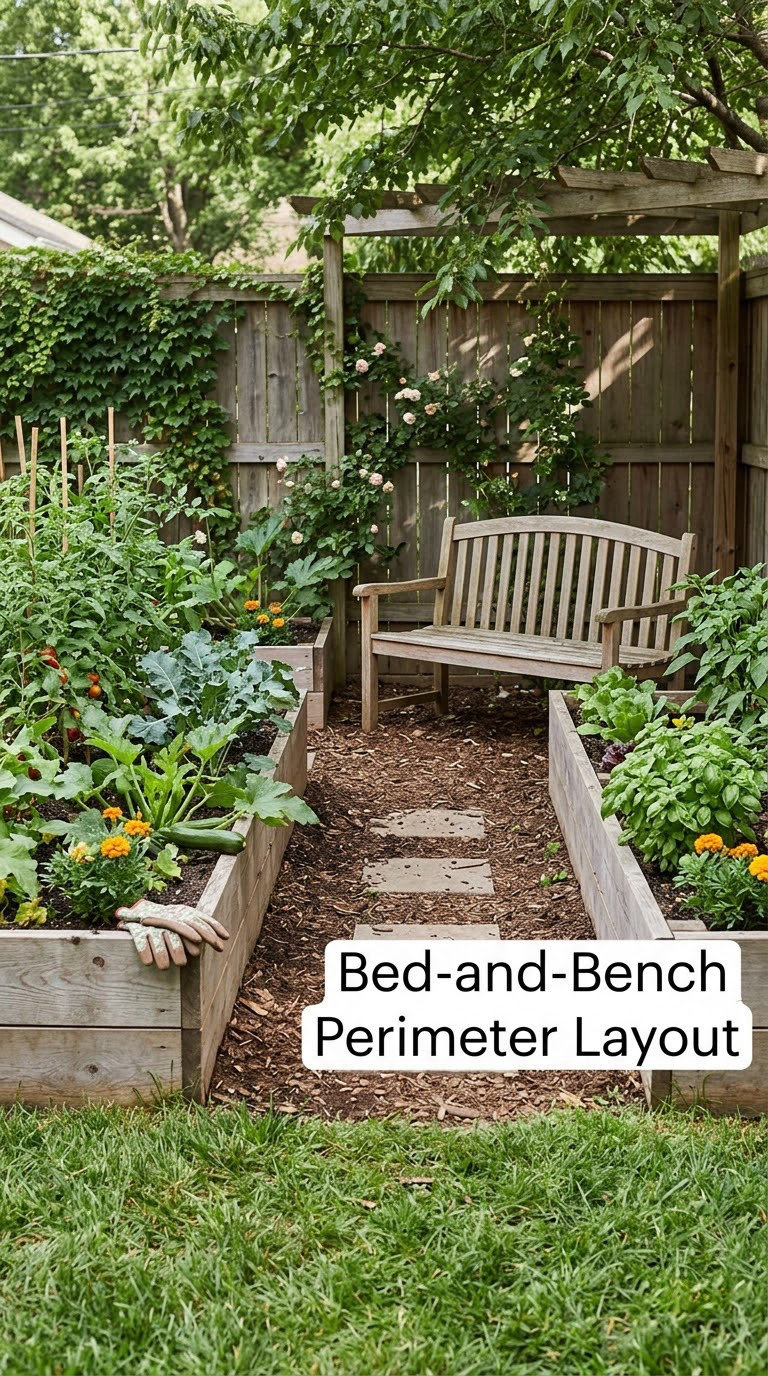
Beds around the edge of a yard with a bench tucked into the gap between them gives you somewhere to actually sit in the garden. It solves the lonely-box-in-the-middle problem, where one raised bed in a wide lawn reads as an afterthought.
How to lay it out:
- Run a 2 ft x 8 ft bed along each of two boundaries, leaving a 3 ft gap where the bench goes.
- Set the bench seat at 18 in high so it doubles as a knee-level rest while you work the bed behind it.
- Back the bench with a narrow bed or leave it freestanding if you want sightlines across the yard.
- Keep a 3 ft path from the back door to the far side so the whole garden stays connected.
Cost: 400-1000 USD · Difficulty: Moderate DIY · Time: two weekends, one for beds and one for the bench.
Good to know: benches collect moisture and rot first at the joints. Sit them on pavers rather than bare soil, and oil the seat once a year.
12. Herb Spiral Raised Bed Layout
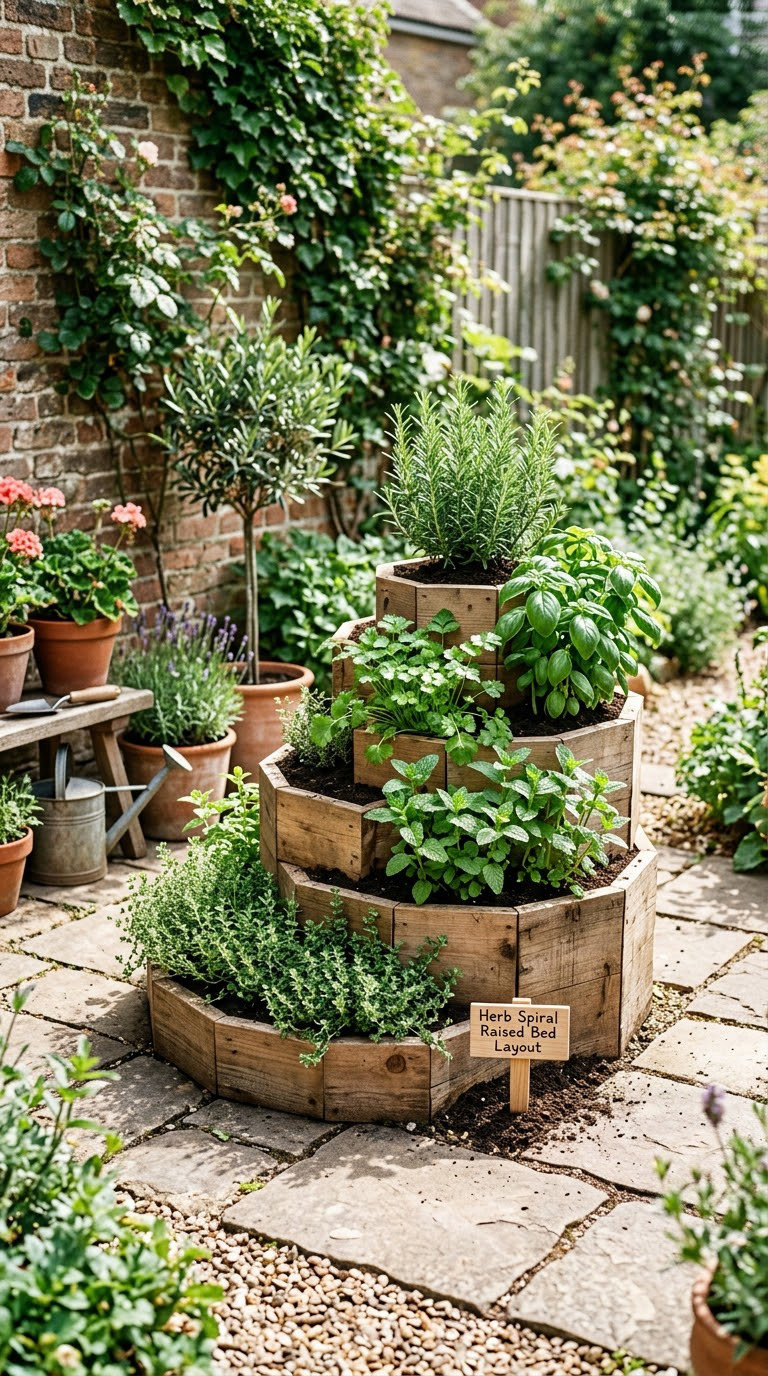
A spiral bed packs a surprising number of herbs into about a 6 ft circle by using height as well as ground area. It also lets you group plants with opposite needs, since a dry sunny top and a damp lower ring sit only inches apart.
How to lay it out:
- Build a 6 ft diameter spiral with 4 to 5 turns, rising from 8 in at the outer edge to about 3 ft at the centre.
- Plant the centre with the driest, hungriest herbs such as rosemary, thyme and sage.
- Use the middle ring for chives, parsley and cilantro, and the outer ring for mint and basil.
- Sink a liner or a section of rot-proof fabric under the whole spiral if the soil there holds water.
Cost: 150-400 USD · Difficulty: Moderate DIY · Time: one long day.
Good to know: mint will take over a spiral given a season. Plant it in its own pot set into the ring so you can pull the whole thing out.
13. Separate Beds for Crop Rotation
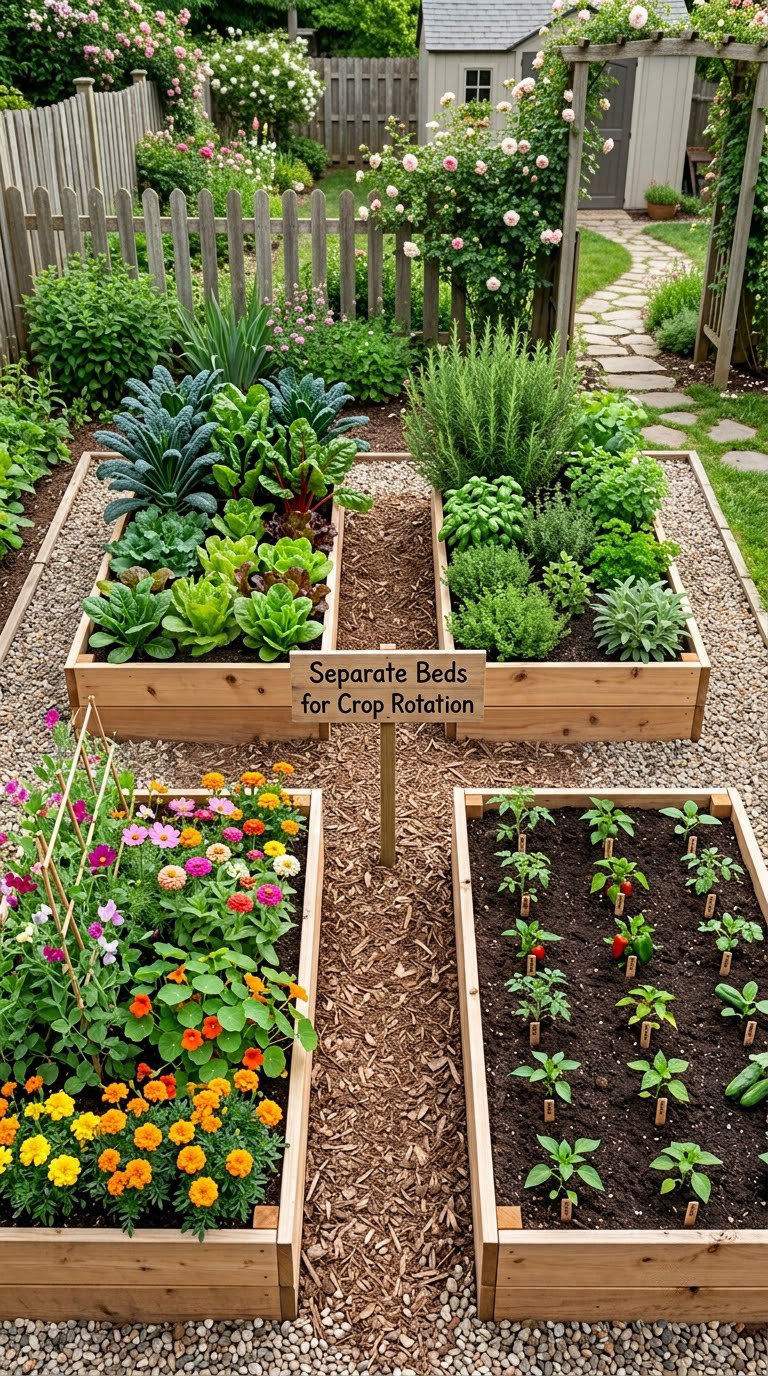
Dividing the garden into dedicated beds by crop family turns crop rotation from a vague intention into a physical system. Because each family stays in its own bed, moving it next year is a matter of relabelling rather than rebuilding.
How to lay it out:
- Group beds by family: nightshades, brassicas, legumes and roots, plus one herb bed.
- Use four 4 ft x 4 ft beds or three 4 ft x 8 ft beds for a 16 ft square section.
- Keep a separate bed or tray for seedlings so they never sit permanently in a family bed.
- Write the family name and last planted year on a stake at the head of each bed.
Cost: 350-850 USD · Difficulty: Easy DIY · Time: one weekend to build, ten minutes a season to plan.
Good to know: a family only needs about a third of a 4 ft x 8 bed. Cutting families back to what you actually eat usually frees a whole bed for succession planting.
14. Accessible Beds with Wide Aisles
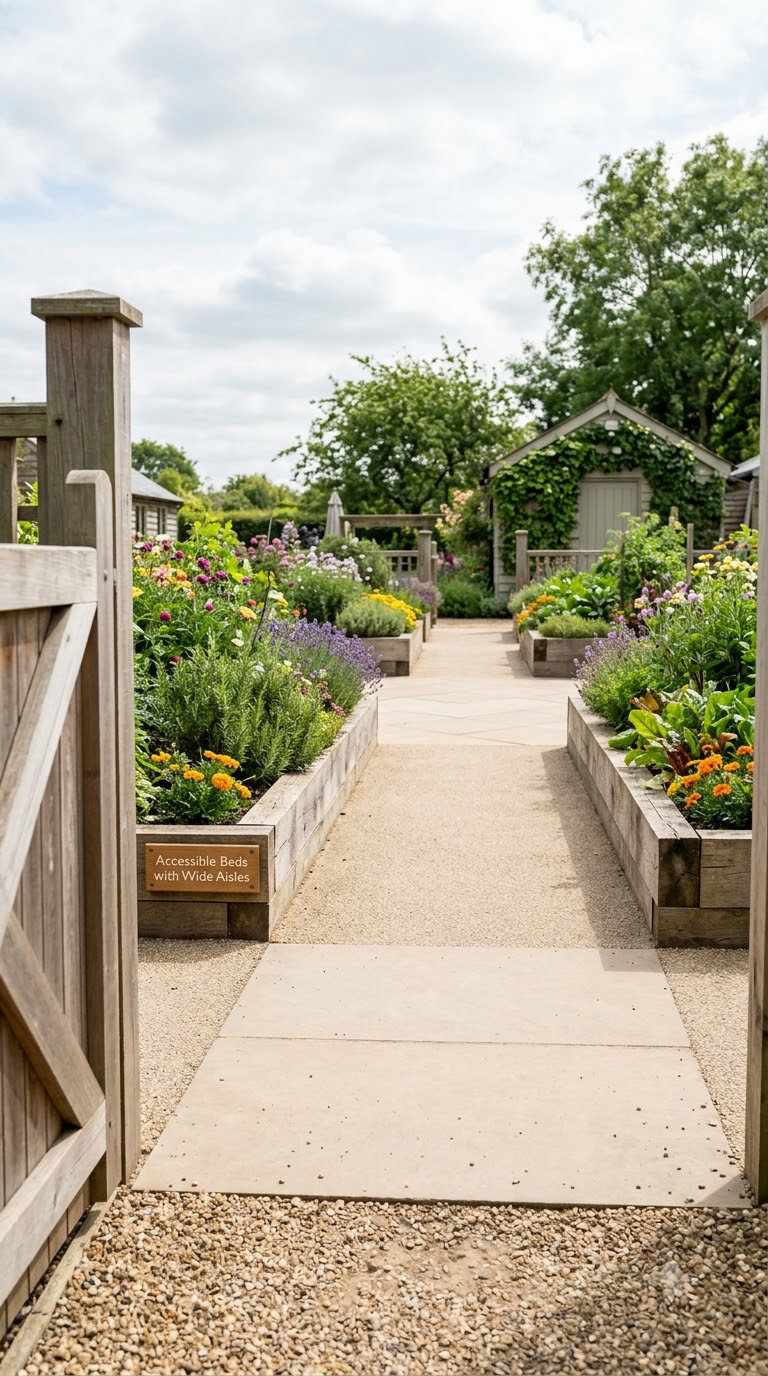
Wide aisles, reachable bed heights and turning space make a garden workable for an older gardener, someone recovering from an injury, or a family sharing one space with a wheelchair user. The layout costs you more ground than any other on this list, and it is the one worth the ground.
How to lay it out:
- Set aisles at 4 ft and provide a 5 ft turning circle at both ends.
- Hold bed height at 24 to 30 in so a seated gardener can reach the back edge without leaning.
- Keep beds narrow, 2 ft to 3 ft wide, so the whole surface is within arm’s reach.
- Use firm, level paving instead of gravel; loose gravel is hard to push a chair or walker across.
Cost: 400-1000 USD · Difficulty: Moderate DIY · Time: two weekends.
Good to know: a raised bed at 30 in tall holds far more soil and moisture than one at 12 in. Expect to top up with a fresh inch of compost each spring.
15. Polytunnel or Covered Bed Layout
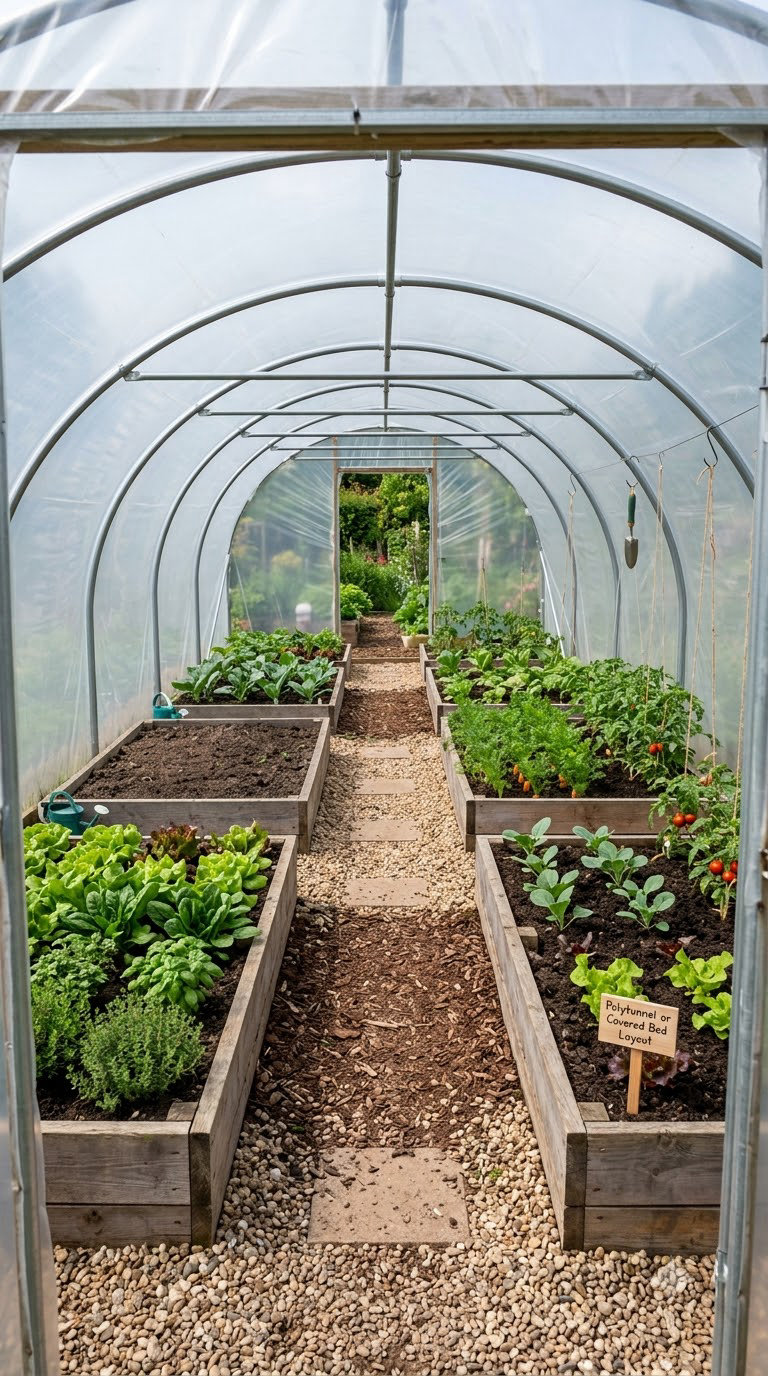
Putting raised beds under a simple cover buys you several extra weeks at each end of the season and takes the sting out of hail and heavy rain. It also traps heat, so the spacing inside has to be wider than the spacing outside.
How to lay it out:
- Leave 12 to 18 in between beds inside a tunnel so air can move and leaves do not touch the cover.
- Run one bed down each side of a central path so every plant is reachable from inside.
- Anchor hoops or rails to ground anchors, not just to the bed frames, before the wind picks up.
- Vent the ends on warm days; a closed tunnel in spring will cook the plants it is meant to protect.
Cost: 900-3500 USD · Difficulty: Moderate DIY · Time: one to three weeks.
Good to know: a large tunnel needs a foundation and often a permit, depending on your local rules. Check with your building department before anchoring anything taller than your fence line.
16. Pollinator and Edible Flower Border
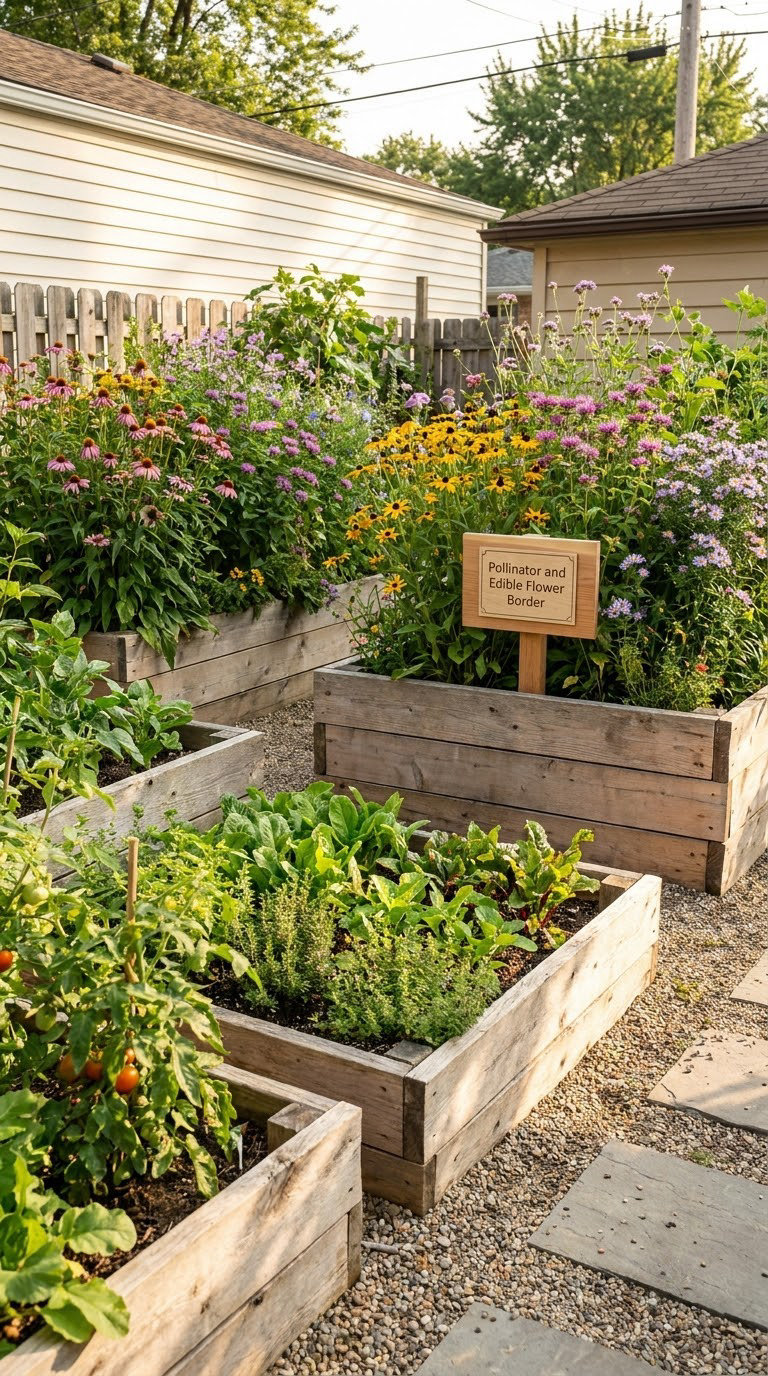
Surrounding your vegetable beds with raised flower sections brings pollinators in and makes the whole yard feel finished. This is the layout to use when the garden has to look good from the kitchen window, not just produce food.
How to lay it out:
- Place two 2 ft x 8 ft flower beds along the sunny boundary and keep the vegetable beds low and central.
- Aim for roughly a third of the planting area in flowers, which is the working ratio most gardeners land on.
- Choose a mix that blooms in sequence, starting with early crocus and ending with asters and goldenrod.
- Keep the tallest flowers on the north side so they do not shade the vegetables.
Cost: 300-750 USD · Difficulty: Easy DIY · Time: one weekend for the beds, a full season for the flowers.
Good to know: many edible flowers such as calendula, nasturtium and borage self-sow hard. Deadhead them before the seed heads set or you will be pulling volunteers all summer.
17. Multi-Level Backyard Garden
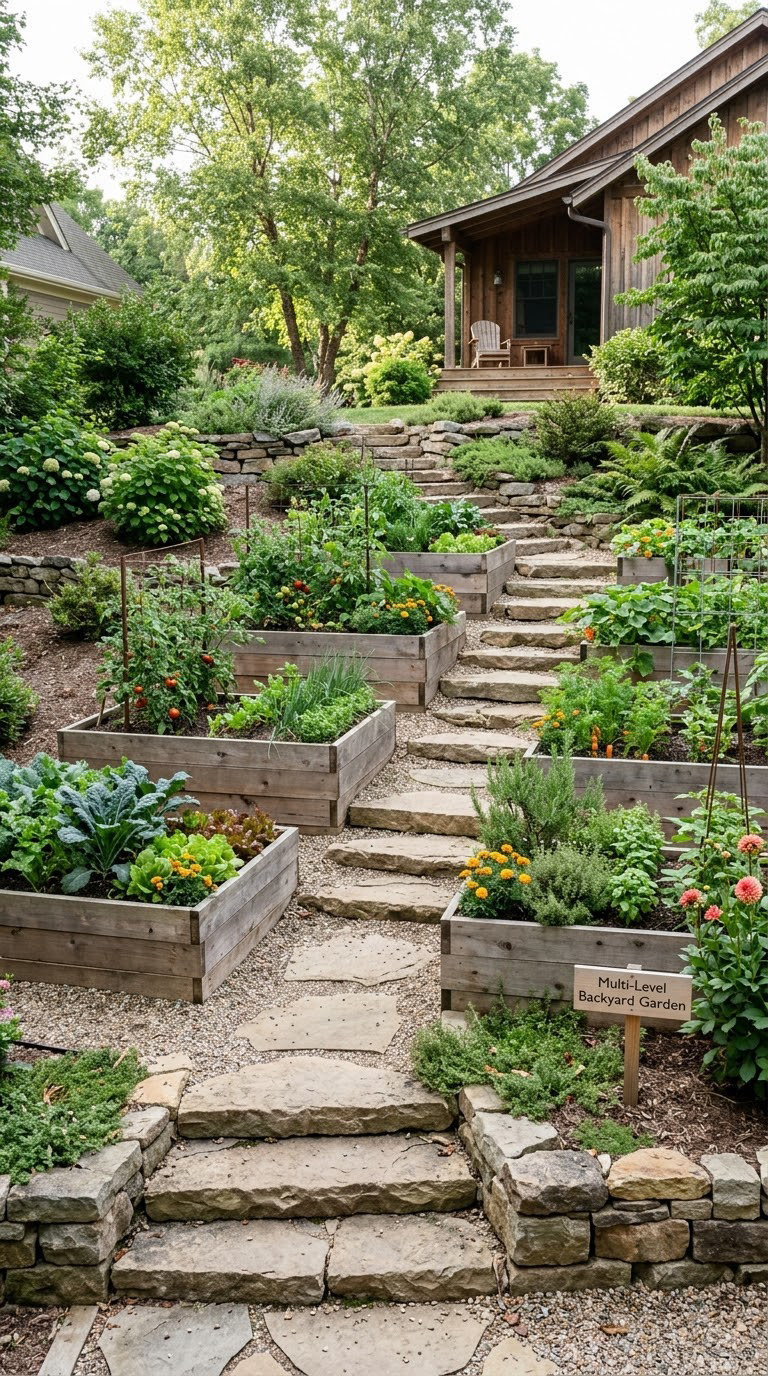
Staggering beds up a slope turns a yard that drains badly and looks awkward into a garden that steps down in terraces. Each level gets its own flat soil surface, which is the single biggest win on uneven ground.
How to lay it out:
- Contour the site and mark level platforms before building, working from the lowest point upward.
- Hold each bed at 18 to 24 in tall and let the uphill side stand slightly proud to shed water away from the house.
- Link levels with stone steps or a switchback path at least 3 ft wide.
- Keep a 12 in gap between the uphill bed’s frame and the downhill bed’s fill so water can drain between levels.
Cost: 600-2000 USD · Difficulty: Hire a pro · Time: one to three weeks.
Good to know: anything above 2 ft of stacked retaining material or anything close to a house usually needs a permit. This is one to leave to someone who can check your local code.
18. Modular Beds That Can Expand
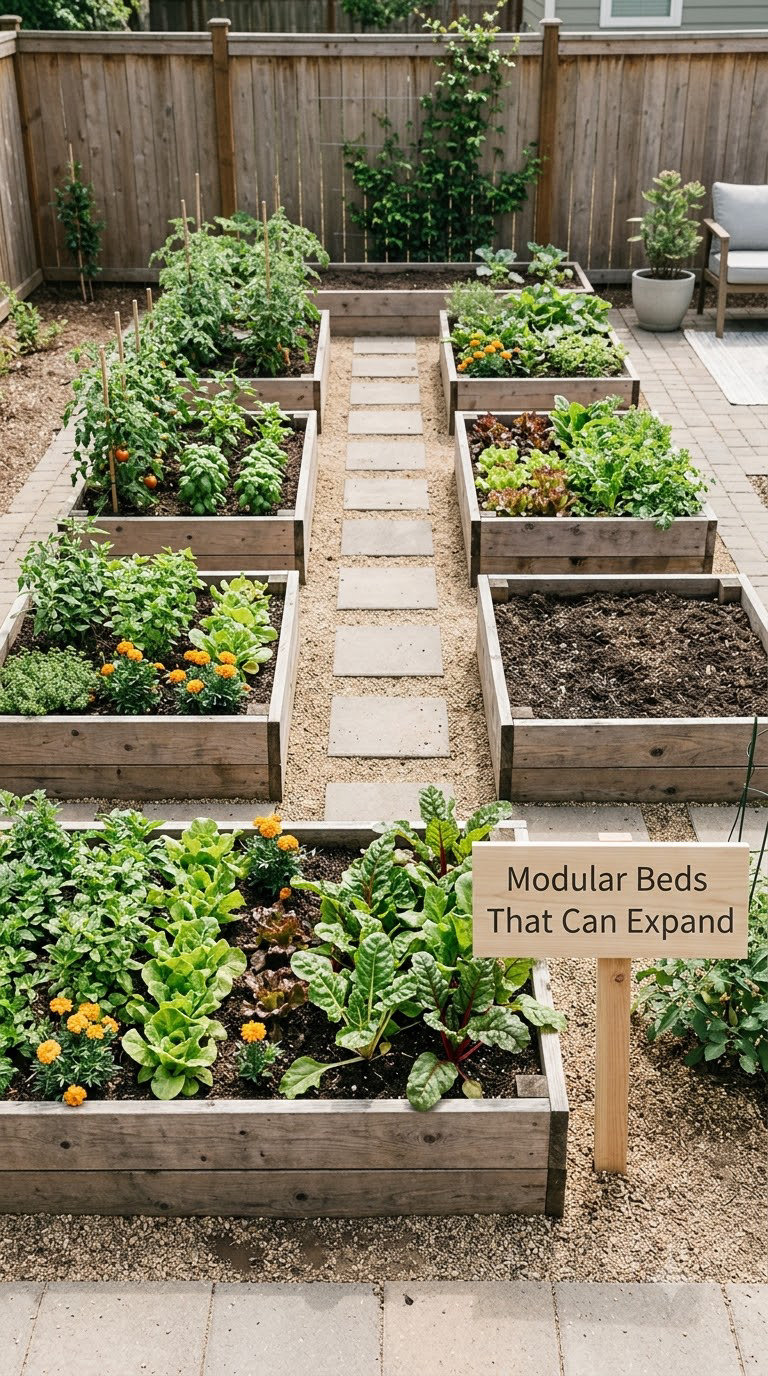
Building in modules means you start with two beds and add more as the garden proves itself to you. It is the cheapest way to begin, and it also means you can move one module next season if it turns out to be in the wrong place.
How to lay it out:
- Build two 4 ft x 4 ft modules first and leave at least 4 ft of clear ground beside them for future beds.
- Anchor the first pair to the fence line so the grid stays straight as you add more.
- Keep the path between modules at 2 ft now, and 3 ft on the side you will grow into.
- Order later modules to the same dimensions so the tops line up at the same height for watering.
Cost: 250-700 USD · Difficulty: Easy DIY · Time: one weekend per module.
Good to know: if you are starting from scratch, comparing durable raised bed kit materials before you buy lumber is worth an evening of reading.
Planning Tips
- Measure the usable space twice before you buy anything. Walk the site with a tape, mark bed corners with stakes, and step around the layout for a full minute. If you cannot reach the middle of a bed without climbing in, narrow that bed.
- Map your sun before you place a single frame. Note where shadows from the house, fence and trees fall in the morning, midday and late afternoon. Most vegetables want six hours; leafy greens and herbs are happy with four.
- Keep beds 4 ft wide or narrower. That is the reach limit for most people. Longer is fine, because you walk along the length rather than across it.
- Hold every path at 2 ft minimum, and 3 ft if a wheelbarrow has to fit. Paths you cannot walk comfortably become paths you stop using, and then the far beds stop getting harvested.
- Set bed heights by who works the garden. 12 in suits frequent bending, 24 to 30 in suits a seated gardener or anyone with a back that complains.
- Keep a 10 to 15% buffer on your material list and your soil order. A cut you mismeasured, a board that split, and the fact that soil is always sold by the cubic yard all eat into the original figure.
- Plan the watering route before the build day. Walk the hose to every bed and time it. If the far bed takes more than a minute to reach, that tells you where the path needs to go next.
- Order the work in this sequence: measure, stake, level, build frames, add liner if the soil is poor, fill, then plant. Filling an unfinished frame is the most common way to end up with lopsided beds.
How to sun-map your yard in four steps
Sketch your yard to scale on graph paper and mark the compass north at the top. Then note the sun’s path in three blocks: 9 am, noon and 4 pm in midsummer, marking where each one lands. Any bed that reads clear in all three is full sun; beds clear in only one or two are partial shade, which suits greens, herbs and strawberries. Once the map is done, put tall crops on the north edge of each bed so they cast shade away from everything shorter.
What to plant once the layout is set
Fill the whole bed rather than crowding the middle and leaving bare edges. Square-foot spacing is the simplest rule: one large plant such as a tomato or pepper per square foot, four medium ones like lettuce or basil, or nine small ones like radishes. A finished 4 ft x 8 ft bed then holds 32 squares, which is plenty for a household of two or three. If liner fabric or a plastic liner is going into the bed, weigh it against the drainage it costs you before ordering.
Frequently Asked Questions
How much space do I need for raised bed garden layouts?
A single 4 ft x 8 ft bed needs about 50 sq ft including a 2 ft path around it, and a two-bed layout with a central path fits comfortably in 10 ft by 16 ft. Three beds in a U shape need roughly 10 ft by 20 ft. Add 2 ft of path on every side you need to walk. Measure the space you actually have, then subtract the paths before choosing a layout.
What is the best raised bed layout for a small backyard?
Two long beds with a wide path between them is the best starting layout for most small backyards. It gives you the most planting area per square foot, keeps every bed reachable from two sides, and stays simple to build and to expand. In a yard narrower than 12 ft, switch to the U-shaped layout so the beds wrap the space instead of crowding it.
How wide should the path be between raised garden beds?
Two feet is the working minimum between raised beds. Three feet is better if a wheelbarrow, mower or garden cart needs to pass through, and four feet makes the garden comfortable for a wheelchair user or anyone with balance issues. Paths are often the first thing to cut when space is tight, but a narrow path you avoid is worse than no path at all.
Should raised beds follow the slope of my yard?
No. Beds should sit level across their short axis even when the ground slopes, because a tilted bed sends water to one edge every time it rains. On a slope, build each bed as a level platform on short posts, step the levels down the yard, and leave a 12 in gap between levels so water can drain between them.
How can I organize raised beds for crop rotation?
Give each crop family its own bed rather than mixing them. Nightshades, brassicas, legumes and roots each get a dedicated bed, and you move the family to a different bed the following year. Label each bed on a stake with the family name and the year it was planted, and keep seedlings in a separate tray so they never become permanent residents of one bed.
What is the cheapest way to build raised bed garden layouts?
The cheapest version is two 4 ft x 4 ft beds built from untreated timber, filled with a soil mix you buy by the cubic yard rather than bag by bag. Start small and add a module a year once you know what you use. Untreated wood lasts roughly three to five years, cedar lasts considerably longer, and galvanized steel costs more up front but outlasts both.
If you only do one thing this weekend, stake out the parallel bed layout and walk it. Measure the footprint, hold 2 ft on both sides of the path, and check the width of a bed against your own reach before anything gets delivered. Most layout mistakes get caught with a tape measure on a Saturday afternoon, and none of them get caught after the soil arrives.
Once the shape feels right, compare liner options for beds sitting on poor ground, then pick crops that fit the square footage you ended up with rather than the one you wished for.