How to Install Under Cabinet Lighting (October 2026)
Under cabinet lighting is a strip, bar or puck fixture mounted to the underside of your upper cabinets, so light lands on the counter instead of coming straight down over your head. Here is how to install under cabinet lighting in a way that actually looks finished, whether you plug it in, hardwire it to a switch, or skip wiring completely.
Most people underestimate the wiring and overthink the fixtures. Get the power source decided first, and the mounting is the easy part. A ceiling-only kitchen leaves the counter directly under the cabinets in shadow, which is exactly where you do your chopping.
Contents
Time: 2 to 4 hours for the plug-in path, a full weekend once you add drywall cutting and patching.
Cost: the fixtures are the bulk of it, plus cable and a dimmer if you hardwire.
Difficulty: Easy DIY for plug-in, Moderate DIY for hardwired.
Skill level: Comfortable with a drill and a tape measure for plug-in; working knowledge of a switch box for hardwired.
Still deciding what to buy? Our under cabinet lighting kit roundup covers the fixture families side by side, and smart under cabinet lighting for kitchens is worth a read if you already have a smart home and want voice control.
Hardwired vs Plug-In vs Battery Under Cabinet Lighting
This is the first decision because it dictates everything else, including whether you need a permit and whether you will be patching drywall in the evening.
| Option | Power source | Skill level | Clean look | Dimmable | Removable | Best for |
|---|---|---|---|---|---|---|
| Hardwired | 120V circuit from a switch box | Moderate DIY or a pro | Best, nothing visible | Yes, with the right dimmer | No, it is in the wall | Finished kitchens you plan to keep |
| Plug-in linkable | A nearby countertop outlet | Easy DIY | Good, if the cord is hidden | Only with a specific adapter | Yes, unplug and go | Renters, older homes, quick upgrades |
| Low-voltage strip with a driver | Driver plugged into an outlet or hardwired | Easy to moderate | Excellent once the driver is hidden | Yes, at the driver | Yes | Even, shadow-free runs of any length |
| Battery or rechargeable | Its own cells | Easy DIY | Good, no cord at all | Sometimes | Yes | Apartments, closets, glass cabinets |
| Hard strip in an aluminium channel | Same as hardwired or plug-in | Moderate | Excellent | Yes | Depends on the feed | Continuous linear runs with no visible joins |
My own rule: if the counter outlet sits more than a few inches outside the cabinet run, the cord is going to be visible no matter how cleverly you route it, and that pushes me toward hardwired. If you are in a rental, plug-in wins every time.
Tools and Materials for Under Cabinet Lighting
For the plug-in or low-voltage path, this is the whole list.
- 24 to 36 inch tape measure and a pencil
- Painter’s tape for a trial layout
- Stud finder
- Cordless drill with a 1/4 inch bit and a 1/8 inch bit
- Rubber grommets or cable bushings, one per wire hole
- Adhesive wire clips or cable staples, roughly six
- Step stool
- Safety glasses
- Your fixtures, plus 10 to 20 percent extra length if you are running strip
Add these if you are hardwiring.
- 14/2 or 12/2 NM-B cable (Romex), enough for the run plus 2 feet of slack
- Wire nuts or push-on connectors, about a dozen
- Non-contact voltage tester and a two-pole tester
- Drywall saw or a keyhole saw for the channel
- Wire fish tape for pulling cable through the wall
- Old work electrical box if you are adding a switch
- Single-pole dimmer rated for LED loads
- Joint compound, mesh tape, primer and touch-up paint
- Drill bit long enough to pass through a 2×4 stud, usually a 3/8 inch extender
Before You Start: Power Off, Permits and Planning
Switch off the breaker for the circuit you are working on and confirm it with a two-pole voltage tester before touching any conductor. A non-contact tester gives you a hint, not proof. If you are only plugging in fixtures, there is nothing to kill, but if you are replacing old hardwired lights, treat it as a live circuit until a tester says otherwise.
Permits usually apply the moment you cut into a wall, run new cable, or add a box. Hardwiring into an existing switch box on a general lighting circuit is common in owner-occupied homes and often needs no permit, but check your local authority. Dedicated appliance circuits, the ones feeding the dishwasher, disposal or microwave, are off-limits for under cabinet lighting. Code does not allow you to tap them for another purpose.
Plan the run backwards from your switch. The switch position sets where the cable starts, so decide that before you look at the cabinets.
One more thing worth doing now: if you are in a remodel, get the cable in before the backsplash goes up. Electricians on r/AskElectricians say the same thing over and over, and the window between studs and tile is short. Waiting until after the tile means cutting tile or routing surface conduit across the backsplash.
How to Install Under Cabinet Lighting Step by Step
This is the plug-in and linkable path. It works for light bars, low-voltage strip with a driver, and any hardwired-looking fixture that has a plug.
Step 1: Find and confirm your power source
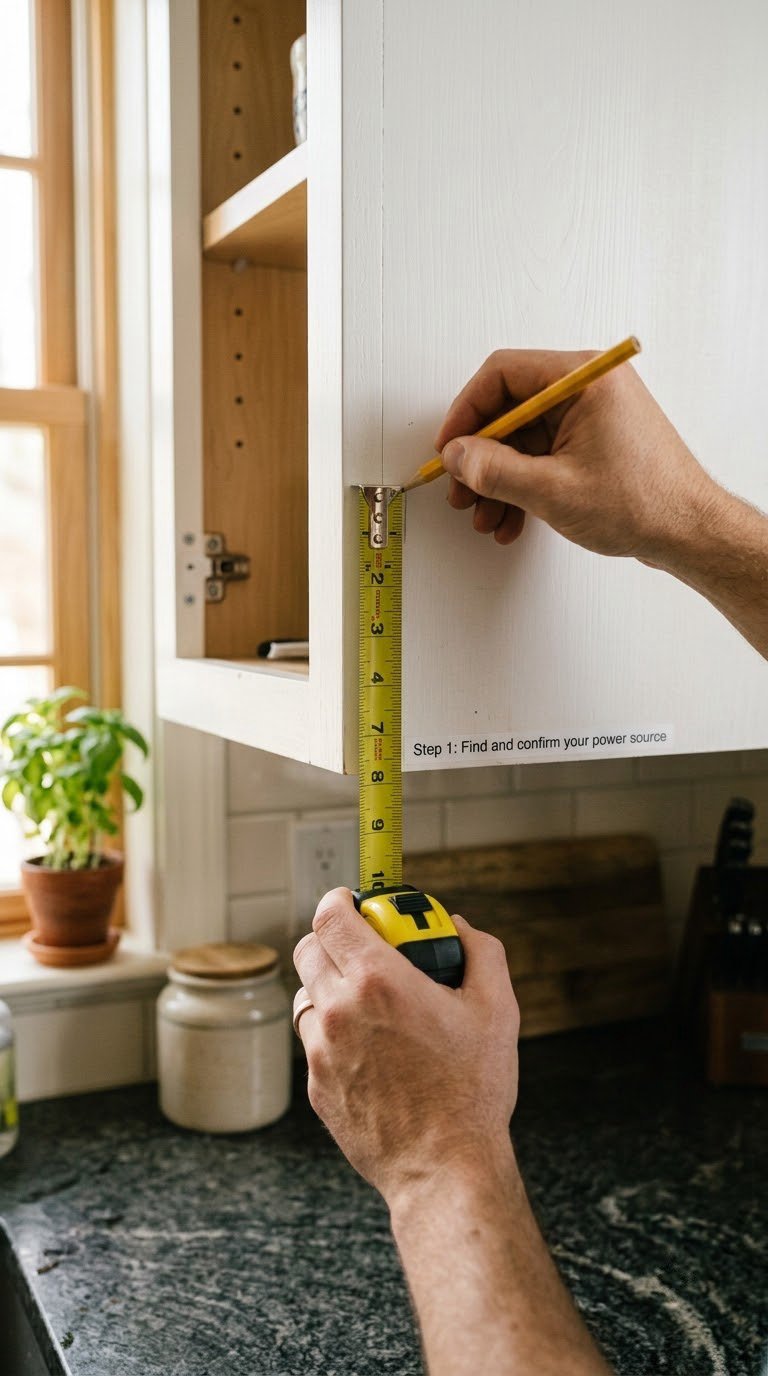
Locate the nearest countertop outlet and measure from it to the far end of the cabinet run. If the distance is more than about 6 feet, you are relying on the linkable jumpers between fixtures, so count your cabinet bays and add one jumper per gap.
Confirm the outlet is on a general lighting circuit, not the microwave or dishwasher, by switching off that specific breaker and seeing whether the outlet goes dead.
Step 2: Mark the layout with painter’s tape
Tape a strip on the cabinet underside where each fixture will sit. Most people put it too far back and end up with a shadow cast by the cabinet frame, so aim for 1 to 3 inches from the front edge of the cabinet.
Spacing matters more than fixture length. For even coverage, keep gaps under 24 inches, and balance the corner cabinet separately or that corner goes dark.
Step 3: Trial-fit before you commit
Hold each fixture up under the tape and switch it on. Two minutes here saves two drilled holes in a mistake.
Look at the shadow under your hand at the counter. If the shadow is sharp and offset, the fixture is mounted too far back.
Step 4: Drill the wire holes
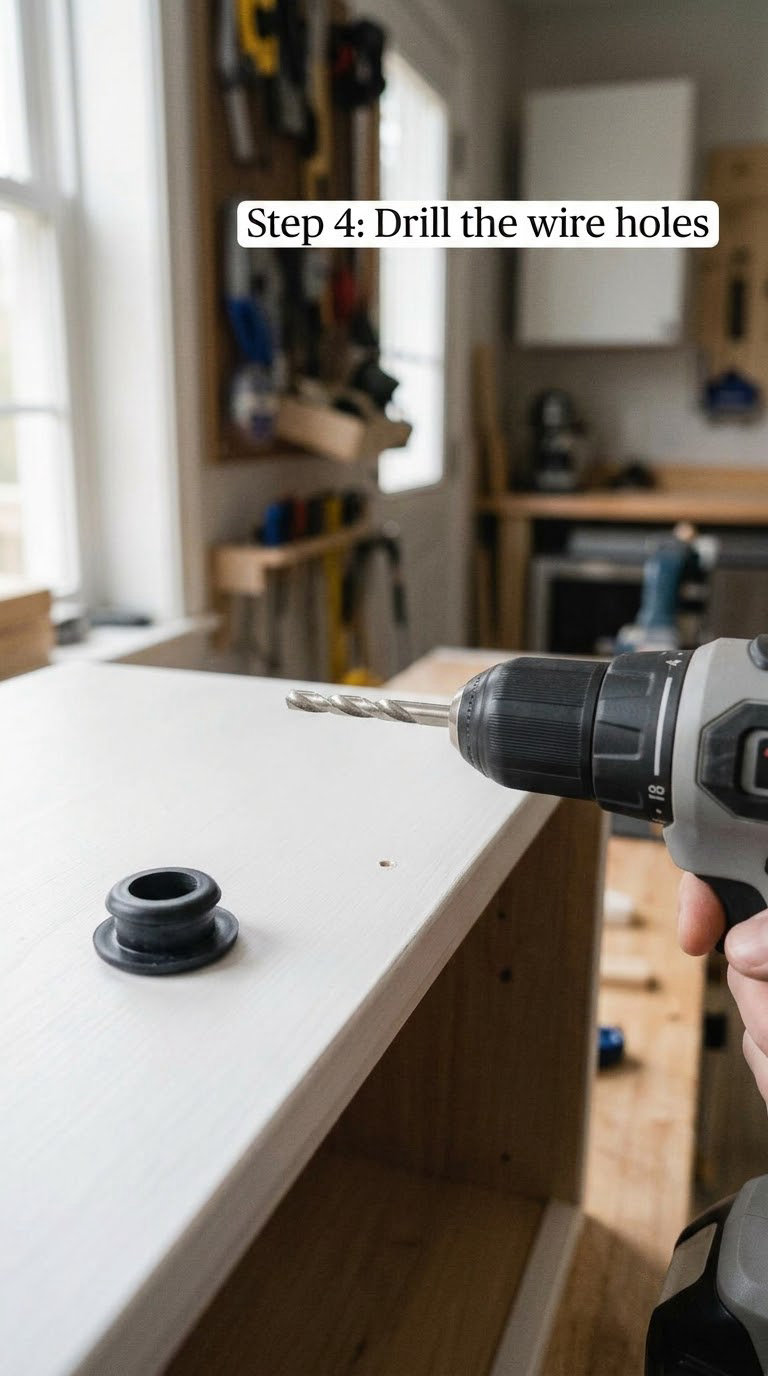
Run the cord from one fixture to the next through the side panels, so drill a 1/4 inch hole at the back corner of each shared panel. Push a rubber grommet into every hole so the cable does not see a raw edge.
On frameless or glass-front cabinets there may be no rail to drill through at all. In that case use adhesive-mounted surface fixtures, or clip the wiring to the back edge with adhesive tabs rather than drilling.
Step 5: Mount the fixtures
Screw each fixture into the cabinet bottom with the screws it came with, or snap it onto a magnetic or clip-on bracket. For double-sided tape mounts, hold the fixture in place with a strip of painter’s tape and leave it for the adhesive to cure, usually 24 hours.
That tape trick came up repeatedly in DIY discussions and it works, because tape puts steady pressure on the whole back instead of your thumb pushing on one corner.
Step 6: Link the fixtures together
Plug the jumper from fixture one into fixture two, and keep going down the run. Coil the excess cord inside the base of the cabinet rather than leaving a fat loop hanging behind the toe kick.
Count the load before you chain a long run off one outlet. A countertop outlet on a 15 amp circuit tops out around 1,440 watts at the 80 percent continuous load limit, and a typical LED fixture draws only a few watts, so a whole kitchen of strips is nowhere near it. If your run includes halogen or xenon fixtures, count them properly.
Step 7: Plug in and test
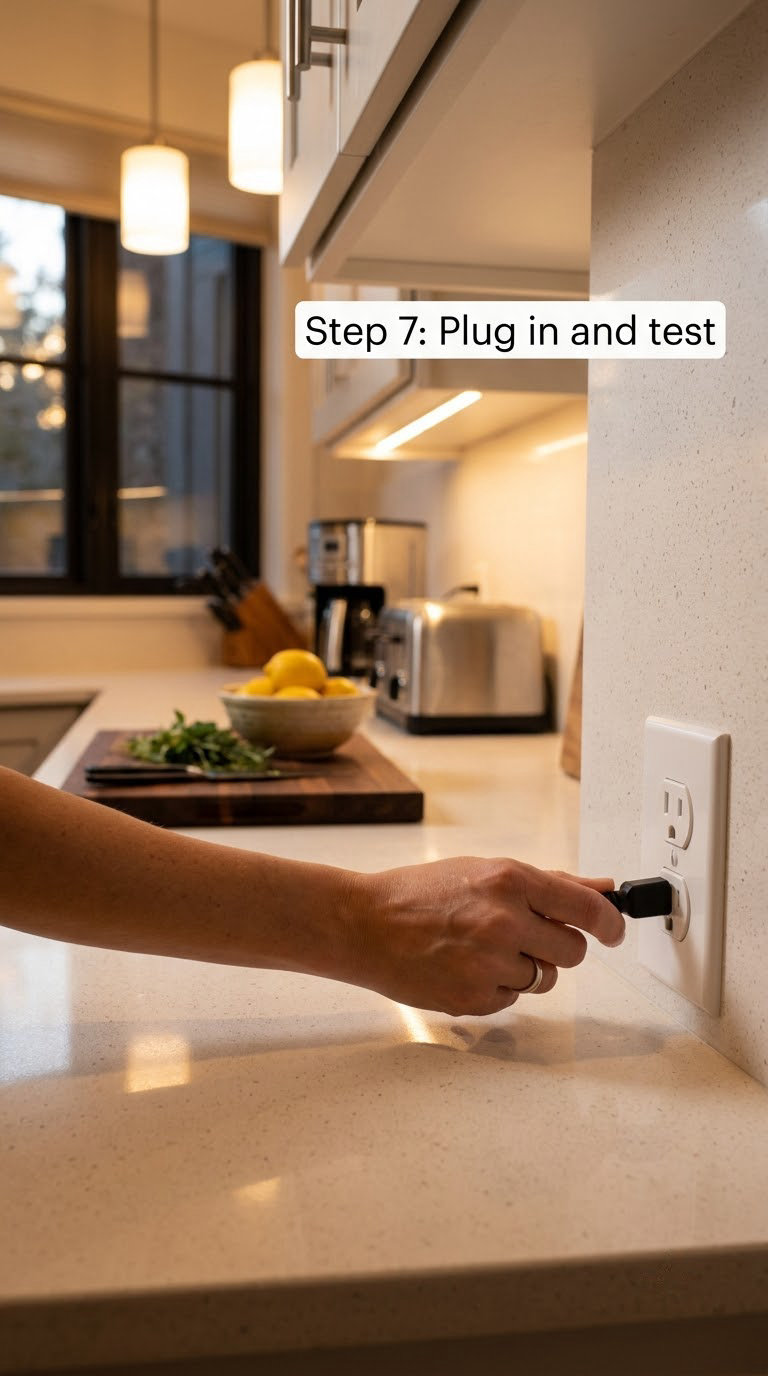
Plug the first fixture in and walk the length of the run with the switch on. Confirm every fixture lights before you start tidying anything.
Step 8: Route and secure the cord
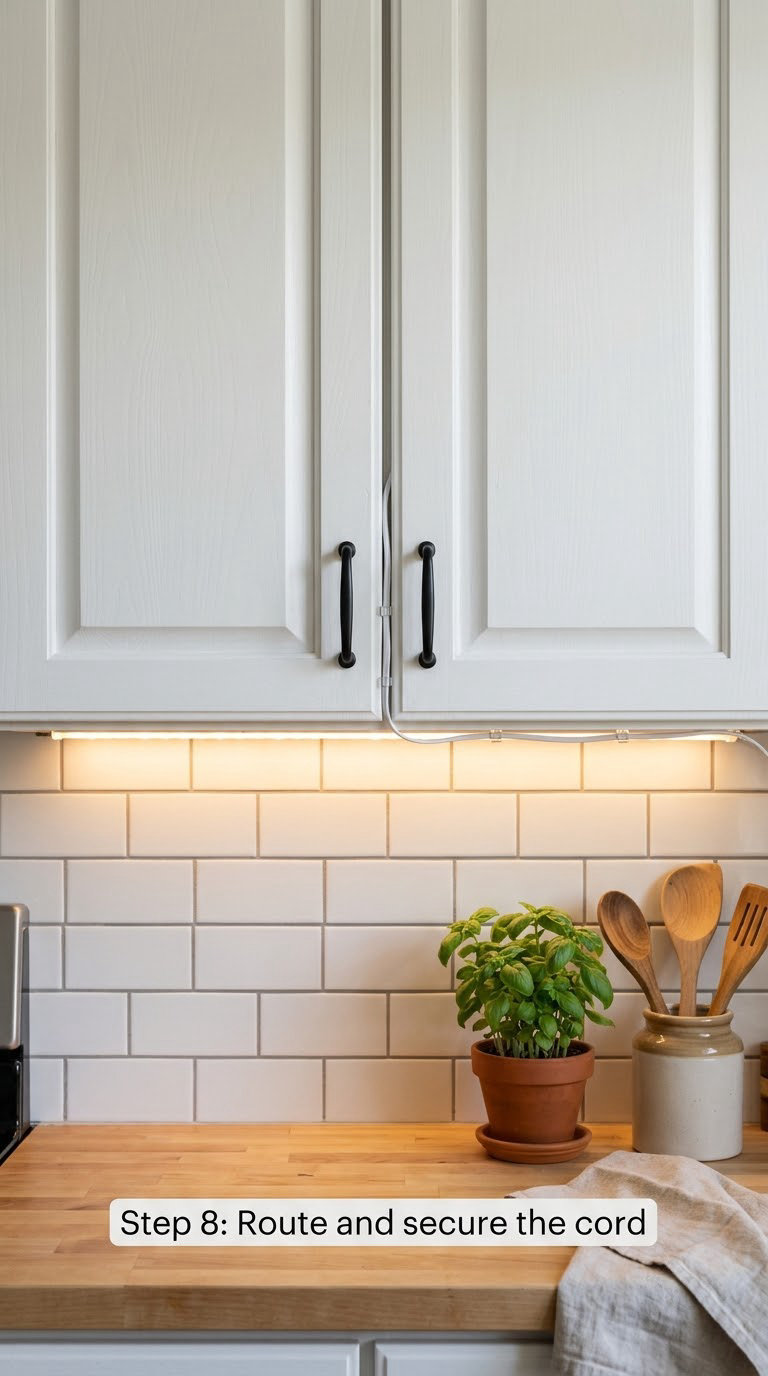
Run the cord taut, clip it with adhesive wire clips every 8 to 12 inches, and push any slack down into the gap between cabinets or behind the toe kick.
Do one last walk-through at night. Lights that look fine at noon show every cord shadow after dark.
How to Hardwire Under Cabinet Lighting
Hardwiring gives you the cleanest result because nothing is visible on the counter or backsplash. It also puts you inside the wall, so treat every step as live until tested.
Step 1: Kill the power and verify
Turn off the breaker, then test the box with a two-pole tester on each pair of conductors. If either reading shows voltage, you are on the wrong breaker.
Step 2: Plan the run from the switch box
Pick the shortest sensible path from the switch box to the farthest fixture, then work back. Most kitchens route up the wall, across the top of the cabinets, then down behind the first fixture.
Step 3: Cut the drywall channel
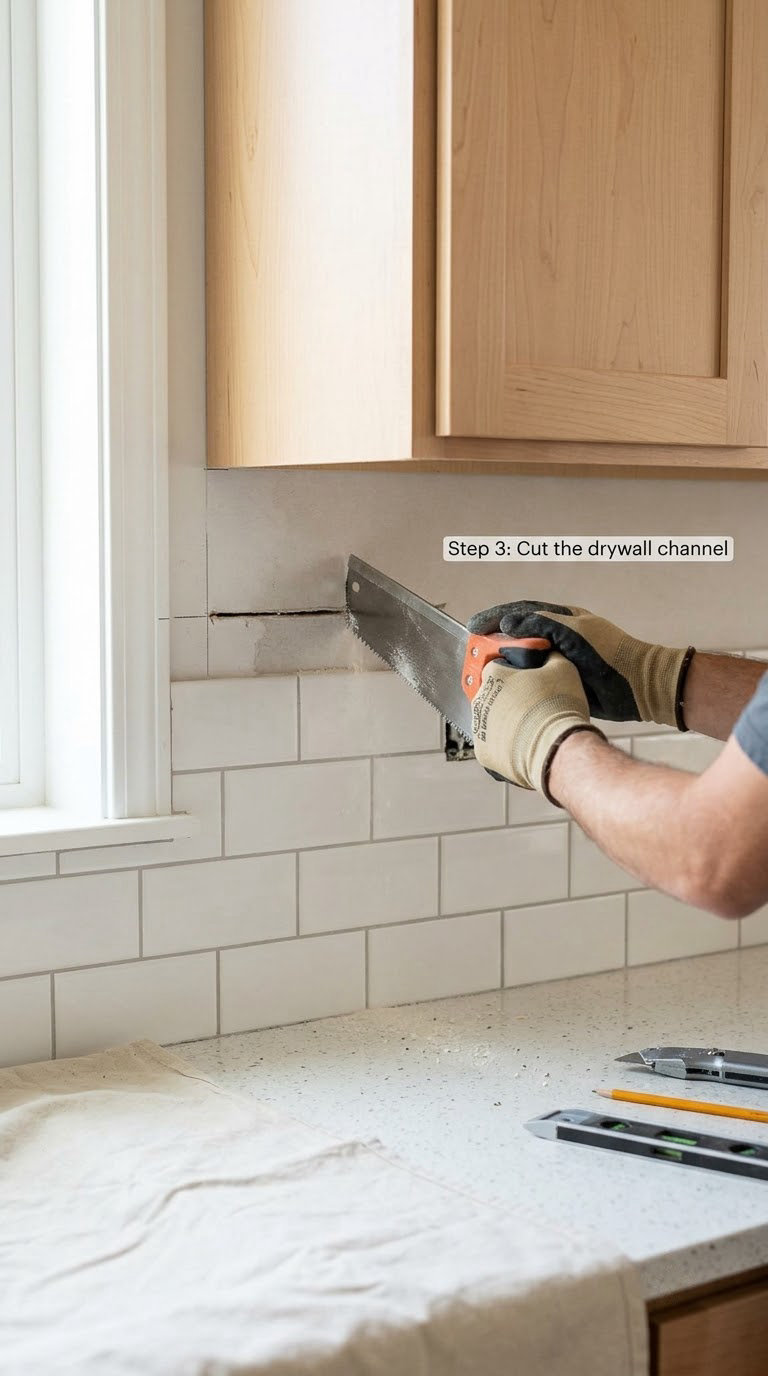
Score the cut line with a utility knife, then run a drywall saw along it between two studs. A shallow channel about 1 inch wide is enough for 14/2 cable.
Keep the channel at least 1 inch above the backsplash and below the cabinet rail so a later backsplash project does not cut into it.
Step 4: Pull the cable through the wall
Fish the cable from the switch box up to the channel with wire fish tape, leaving 10 to 12 inches of slack at both ends. Where you have to pass through a stud, drill from one side with a long bit, thread the cable, then plug the hole with fire-rated caulk from both sides.
Step 5: Drill pass-throughs and feed the cabinets
Drill 1/4 inch holes through the cabinet panels at the back corner, add grommets, and feed the cable in. Most people are wiring around 20 feet of cable for a typical 10 foot run, so buy with slack.
Step 6: Daisy-chain the fixtures
At the far end, one cord enters the last fixture. At each intermediate fixture, two cords enter, one in and one out. Follow the polarity marks if the fixtures have them, and cap every connection with a wire nut.
Step 7: Terminate at the switch box
Connect the new cable to the existing box: black to black, white to white, bare or green to the ground screw pigtail. Then wire your dimmer according to its diagram, which is not the same as a standard single-pole wiring diagram.
Step 8: Patch, prime, paint, then hide the driver
Close the channel with mesh tape and joint compound, let it dry, prime and touch up. If you are running low-voltage strip, tuck the driver behind a drawer box or into the back of a base cabinet. That is the single most-asked question in the cabinet forums and the answer is always the same place.
Step 9: Test before you close anything
Restore power, test from the switch, and check for flicker or buzzing before you paint. Finding a loose connection in an open wall takes five minutes. Finding it behind finished drywall takes an afternoon.
How to Hide the Wires (and the Driver) Under Your Cabinets
The complaint I hear most from people who went plug-in is the cord coming down to a boxy plug on the backsplash. Four tricks fix almost all of it.
- Run it up and over. Instead of dropping straight down from the cabinet to the outlet, run the cord up behind the cabinet, over the top, and down the back. It disappears from every normal viewing angle.
- Use the cabinet gaps. Push slack into the 1/4 inch gap between two cabinets, then run behind the dish rack. Nobody sees it.
- Clip along the route. Adhesive wire clips every 8 to 12 inches keep a long run tight instead of letting it belly out.
- Hide the driver. For low-voltage strip, the transformer or driver goes behind a drawer box, inside a base cabinet, or in the toe kick. Leave access, because drivers do fail and you will want to swap one without opening the wall.
Painter’s tape earns its place in this list twice. Once for holding adhesive fixtures while they cure, and once for bundling a cord run neatly instead of taping it in a lump.
Choosing the Right Wire and Circuit
Use 14/2 NM-B cable on a 15 amp circuit and 12/2 on a 20 amp circuit. That is not a preference, it is what the conductor ampacity allows.
The load math is simpler than people make it. A 15 amp circuit is good for 1,440 watts of continuous load and a 20 amp circuit for 1,920 watts, once you apply the 80 percent rule. A 12 volt strip drawing 3 amps pulls 36 watts, so a full kitchen of strip is a rounding error on either circuit.
The thing to stay away from is the dedicated appliance circuit. Dishwasher, disposal, microwave and range circuits serve one outlet each, and adding under cabinet lighting to them is not permitted.
Wiring a Switch or Dimmer for Under Cabinet Lighting
A single-pole dimmer handles one switch location, which covers most kitchens. A 3-way dimmer only matters if you want control from two doors.
- Check for a neutral. Smart switches, 3-way dimmers and most electronic dimmers need the white neutral wire at the box. If you see a bundle of white wires tied together and no splice, that is your neutral.
- Buy an LED-rated dimmer. Leading-edge dimmers were designed for incandescent loads and they make LED strips flicker or buzz at low settings.
- Respect the minimum load on the dimmer label. If it says 5 watts minimum and your strip draws less, add a small dummy load or pick a dimmer with a lower rating.
- Dim low-voltage strip at the driver, not at the strip. Most drivers have a dimmable input marked clearly.
Common Mistakes to Avoid
- Mounting too far back. The cabinet frame then casts a hard shadow across the counter. Mount 1 to 3 inches from the front edge.
- Guessing spacing. Gaps over 24 inches leave dark patches. Tape the layout first and look at it.
- Skipping grommets. Raw cable on a cabinet edge wears through faster than you think.
- Drilling in a frameless or glass-front cabinet. There is no rail to screw into. Use surface-mounted adhesive fixtures instead.
- Taping a fixture down and removing it too soon. Adhesive needs about 24 hours with no movement.
- Mixing low-voltage and 120V fixtures. They are different products and combining them causes failures. Long-time DIY regulars will tell you the same.
- Painting before testing. Always test with the channel still open.
Troubleshooting Under Cabinet Lighting That Won’t Turn On
Work through this in order and you will find it in under ten minutes most of the time.
- Check the breaker, then check the switch with a non-contact tester to confirm there is power at the fixture.
- For hardwired runs, open the switch box and check every wire nut. A loose nut under a cap is the most common fault by a wide margin.
- For plug-in runs, unplug everything and plug in one fixture at a time. That isolates a dead fixture from a dead link.
- If only one end of the strip glows, the run is too long for that driver or the far end has a voltage drop. Split it into a second run off its own port.
- Check polarity on a hard strip. Reversed connections on some models give you dim light or nothing.
- If it flickers on a dimmer, replace the dimmer with an LED-rated trailing-edge model rather than rewiring anything.
- If a plug-in kit has stopped working entirely, test the adapter with a known-good device, then replace the adapter. Adapters fail far more often than the strip.
- For old hardwired lights you are swapping out, confirm whether the existing run is a switch box feed or a direct-wire feed with no switch. Direct-wire needs a switch added at the box.
When to Call a Licensed Electrician
Stop and call someone in for any of these.
- Old cloth or rubber-insulated wiring, or a box with no ground wire.
- Anything at the panel, including adding a circuit.
- A room where you cannot identify which breaker feeds the switch.
- Running cable through finished walls you would rather not open twice.
- Any doubt about loading an existing circuit or about whether your jurisdiction requires a permit.
An electrician will also spot the awkward ones: a switch box with only two conductors and no ground, or a kitchen where every circuit is already near capacity. On a mid-size kitchen retrofit the labor commonly costs more than the fixtures, which is the argument for hardwiring once rather than redoing it in a few years.
Maintenance: Keeping Under Cabinet Lighting Clean and Working
Wipe the diffuser with a damp cloth every few months, since grease cooks onto it fast and cuts output noticeably.
Check adhesive-mounted fixtures twice a year. A strip that has crept an eighth of an inch is one more season from falling, and catching it early takes one press instead of a new piece of tape.
Leave the driver accessible. If your low-voltage driver is buried inside a base cabinet with no removable shelf, that is worth fixing now before you need it.
Frequently Asked Questions
Should under cabinet lighting be hardwired?
Hardwired gives the cleanest finished look because no cord or plug shows on the backsplash, and it dims properly through a wall switch. Plug-in linkable fixtures are faster, cost less and can move with you, which is why they suit rentals. Choose hardwired if the counter outlet sits outside the cabinet run or the backsplash is tile you do not want drilled.
How can I hide the wires for under cabinet lighting?
Run the cord up behind the cabinet, over the top and down the back instead of dropping straight to the outlet. Push slack into the gap between two cabinets, clip the run with adhesive wire clips every 8 to 12 inches, and bundle the excess behind the dish rack. Hide a low-voltage driver behind a drawer box or inside a base cabinet.
How do you power under cabinet lighting?
Three ways. Plug-in linkable fixtures chain together and draw power from a nearby countertop outlet. Hardwired fixtures take a 120 volt feed from a switch box on a general lighting circuit. Low-voltage LED strip needs a driver that is either plugged in or hardwired. Battery and rechargeable fixtures need no wiring at all.
What size wire should I use for under cabinet lighting?
Use 14/2 NM-B cable on a 15 amp circuit and 12/2 on a 20 amp circuit. Keep in mind that a 15 amp circuit handles about 1,440 watts of continuous load and a 20 amp circuit about 1,920 watts once you apply the 80 percent rule. LED strip draws so little that an existing lighting circuit is almost always plenty.
Can under cabinet lights be on a dimmer?
Yes, with a dimmer rated for LED loads. Leading-edge dimmers built for incandescent bulbs cause flicker and buzzing with LED strip, so choose a trailing-edge electronic model and check the minimum load rating on the label. Low-voltage strip should be dimmed at the driver input rather than at the strip itself.
What is the best type of hardwired lighting for under cabinets?
Hard strip in an aluminium channel gives the most even, join-free run, while individual light bars are easier to replace when one fails. LED tape in an aluminium channel offers the smoothest shadow-free wash. Whichever you pick, buy 2700K or 3000K with a CRI of 90 or higher so food and paint colours read accurately.
What to Do First
Stand in front of your cabinets and find the power source, because everything else follows from it. Tape a full layout on the underside with painter’s tape, switch the fixtures on, and check the shadow under your hand before a single hole is drilled. If you are going hardwired, do that before the backsplash goes up, and if you are renting, plug-in gets you most of the benefit in an afternoon.
Once the fixtures are in, our guide to smart lighting systems with color scenes covers adding the rest of the room’s lighting to one app so you are not reaching for a different switch every time.