How to Stain a Deck Step by Step: Simple DIY Guide (2026)
How to stain a deck step by step comes down to three things: a clean, dry surface, an even coat applied while you keep a wet edge, and enough dry weather to let it cure. Most decks take two to three dry days, and the actual work is a weekend project.
A penetrating stain does not sit on top of the wood like paint. It soaks into the fibers, carries colour and UV protection down with it, and lets moisture escape, which is why a stain that goes on correctly will not peel the way a solid finish does. Get the surface right and the result is an even, weather-resistant deck that still looks like wood. Get it wrong and you will be scraping it off next summer.
Contents
Tools and Materials
A good stain job ends in one thing: clean boards, an even colour, and a finish that sheds water without peeling. The tools below are what gets you there, sized for a typical 200-square-foot deck. Adjust quantities up for larger surfaces.
Time: 2 to 3 dry days, roughly 4 to 6 hours of actual work · Cost: about 180 to 400 dollars in materials, depending on region and product choice · Difficulty: Moderate DIY · Skill level: Beginner-friendly with patience. Costs vary by region, so check local pricing before you buy.
Preparation supplies
- Deck cleaner or wood cleaner concentrate — 1 gallon per 200 sq ft, diluted per the label
- Wood brightener — 1 gallon, only if the deck has greyed or you are following a solid-stain system
- Stiff-bristle deck brush or car wash brush
- Pressure washer (optional) — 1,200 to 1,400 psi with a 40 or 45-degree fan tip, or a garden hose and stiff brush
- Orbital or random orbital sander with 60 to 80 grit paper for scuffing, and 80 to 120 grit for smoothing raised grain
- Dust mask, safety glasses, nitrile gloves
- Plastic sheeting and painter’s tape for masking off posts, siding, and house walls
- A bright drop cloth or plastic sheet to catch drips on the ground below
- Bucket, garden hose, and a clean rag for the water-bead test
Application supplies
- 2.5 to 3.5 inch angled stain brush for edges, gaps, risers, and spindles
- 9 inch roller frame with a 6 foot extension handle, plus a short 9 inch roller for the stairs
- Roller cover: 3/16 inch for smooth planed boards, 3/8 to 1/2 inch for rough or weathered wood
- Stain pad applicator on a pole for large flat areas
- Plastic paint grid and tray for loading the roller evenly
- 5 gallon bucket, stirring paddle, painter’s plastic to cover the open can
- Metal shim or hardware to prop open a door or gate so nothing gets painted shut
Buy the stain and one extra gallon. Running out mid-coat is how you end up with a visible band where the first section dried harder than the second.
Before You Start: Check the Deck and Weather
First figure out what you are dealing with. New pressure-treated lumber has a glossy factory coating, called mill glaze, that has to be broken before anything will absorb. Older grey wood needs a brightener to bring the natural colour back. Composite decking will not take stain at all. Check the label before you buy, not after you have cleaned the whole deck.
Walk every board and stair riser. Mark anything that is soft, punky, cracked through, or hollow when you knock on it, and note any screw or nail standing proud. Cleaning will not save rotted wood, and a stain over rot just seals the rot in.
Then watch the forecast. You want a 48 to 72 hour window with no rain, no heavy dew overnight, and temperatures inside the range printed on the can, which for most exterior wood stains falls somewhere between 50 and 90 degrees Fahrenheit. Morning shade with afternoon sun that never hits the boards directly is easier to work in than full afternoon sun, because the stain will not dry out on the surface before you can spread it.
Wear eye protection, nitrile gloves, and a dust mask for sanding. If you use an oil-based product, ventilate and keep it away from any pilot light, flame, or spark. Switch off the water at the spigot before you hose down the deck, and shut off power at the breaker before plugging in a pressure washer or sander outdoors. Dispose of oily rags and rollers by laying them flat outdoors to dry or soaking them fully in water in a closed metal container. Oil-soaked rags can ignite on their own.
Routine staining is a maintenance coat, not a construction job, so it usually needs no permit. Local rules cover waste disposal, runoff near drains, and hours of work, so check your city or county requirements if you are unsure. Disposing of stain and rinse water down a storm drain is a good way to earn a fine.
If you are working with oil products in an enclosed space, our guide to how to stain a sauna covers the ventilation side in more depth, and the same care applies on a covered deck.
Step-by-Step Instructions: How to Stain a Deck
Step 1: Inspect and Repair the Deck Surface
Sweep the whole deck, including between boards and under railings. Pull leaves, pine needles, pet food, and anything else that will trap moisture or block the brush.
Replace only the boards that have failed structurally, and match the new board’s thickness and treatment to the old. Caulk nail holes and screw holes on boards that will take stain, then drive proud fasteners flush or replace them. Anything more than a handful of bad boards is a repair job worth assessing before you start.
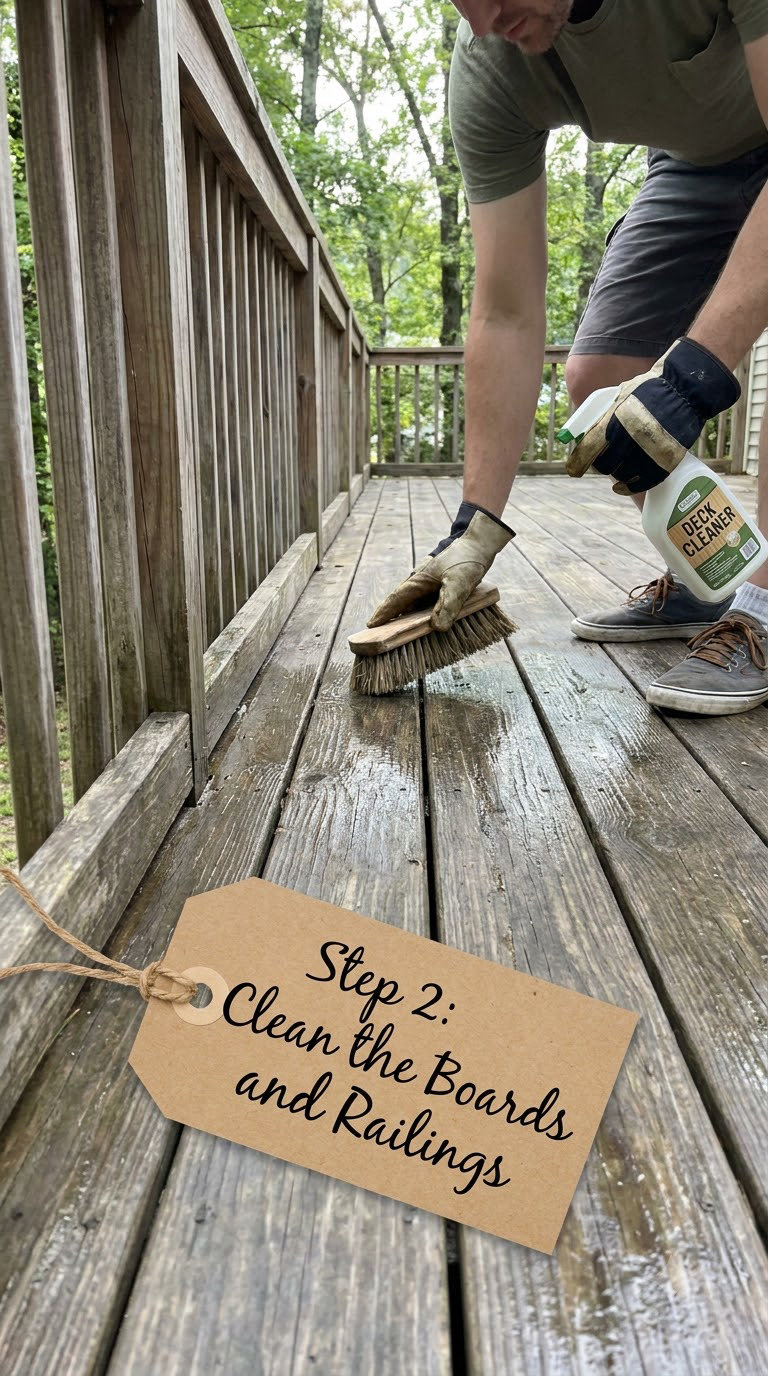
Step 2: Clean the Boards and Railings
Dilute deck cleaner according to its label and apply it evenly with a pump sprayer or brush. Most products need 15 to 20 minutes of dwell time, but never leave a wet film sitting on the boards. Scrub with a stiff brush in the direction of the grain, working railings, risers, and stairs as you go.
Rinse thoroughly with low-pressure water. If you use a pressure washer, keep the tip at least 12 inches from the wood, use a wide fan rather than a pencil jet, and stay below 1,400 psi. Too much pressure, too close, or too narrow a spray will splinter softwood and force water into end grain and joints.
Let the wood dry completely before the next step. Drying is not optional, and it is the single most common reason stain peels a year later.
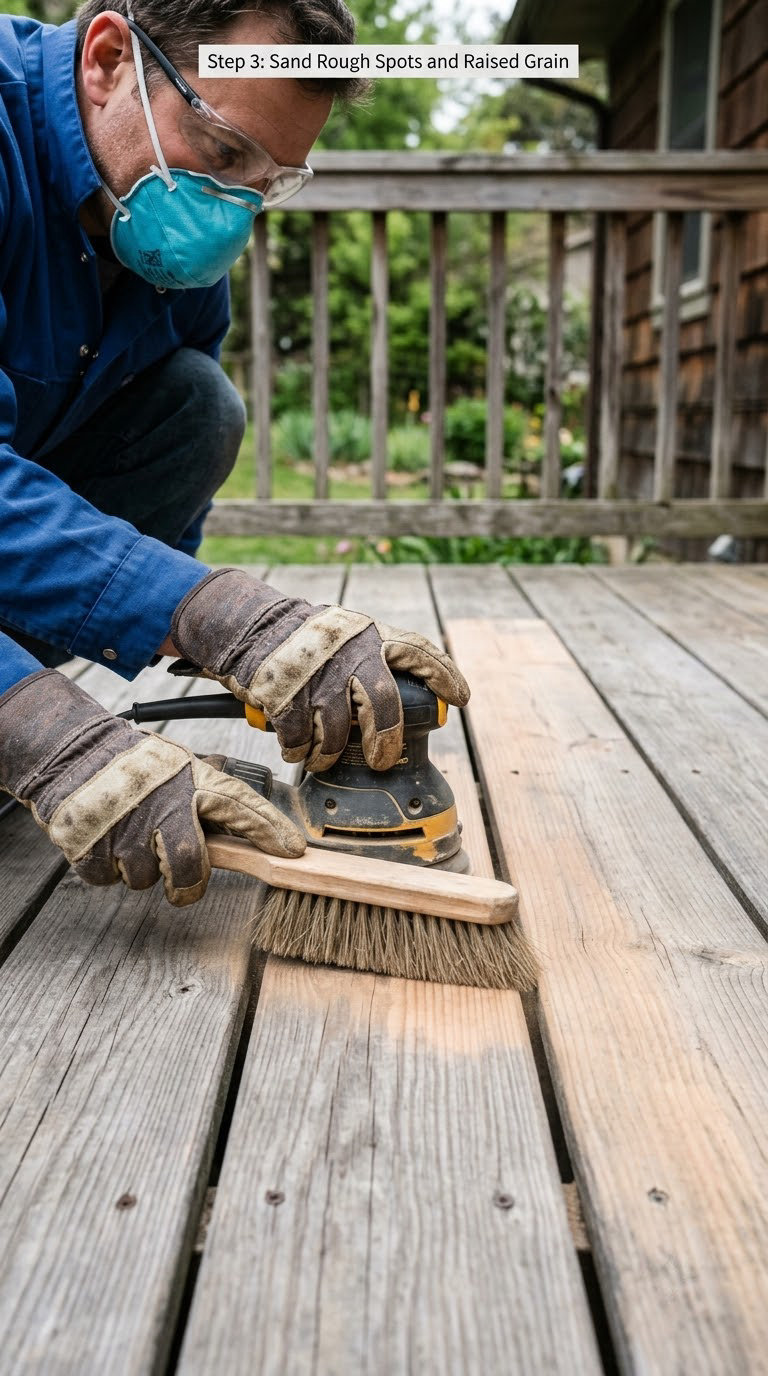
Step 3: Sand Rough Spots and Raised Grain
Sanding a deck is not a full strip job. If an old compatible stain is wearing evenly, scuff it with 60 to 80 grit and move on. Full-board stripping is only necessary when the old coating is peeling, incompatible, or covering unknown paint.
Use 80 to 120 grit where the grain has raised up underfoot or where a board feels rough. Sand along the grain, not across it, and count on brushing the edges by hand to keep a soft round profile. On old growth-knotted pine, back off the pressure. You are smoothing raised fibres, not shaping the board.
Run a bare hand over the surface afterwards. Uniform scuff marks are fine and will disappear under stain. Bare shiny spots and gouges mean that board needs another pass before you move on.
Step 4: Brighten the Wood When the Product Requires It
UV light strips the natural colour out of wood and leaves that flat silver-grey. A deck brightener, which is an acidic cleaner with a neutralizer step, removes the oxidized surface layer so the colour comes back and the wood can absorb stain properly.
Apply it per the label, scrub it in, let it sit for the stated dwell time, commonly three to five minutes, then rinse with plenty of water until the runoff runs clear. Use it when the deck is grey and you want a natural wood look, and follow your stain system’s directions when you are using a solid-colour stain, which depends on a clean, uniform surface.
You can skip it when the wood is clean, is not grey, and your stain is a semi-transparent or penetrating water-based product that is allowed over clean, compatible grey wood. The label decides, not the other way around.
Step 5: Test the Stain and Plan the Application
Stir the stain thoroughly with a paddle, working the bottom of the can up until the colour is even. Do not shake it and do not stir while you are applying, because the swirl introduces bubbles that show up as pinholes in the finish.
Test on an inconspicuous area, ideally a sample board of the same species, and let it dry for the full period on the label. Judge colour, how much grain shows through, and how patchy it looks in full daylight. Wet stain always looks darker than it will dry.
Work out coverage from the label and divide it by the surface area including railings and stairs, then add 10 percent. Plan the job so you finish at an open door or stair you can walk out of. Two or three boards at a time, end to end, keeps a wet edge you can blend into.
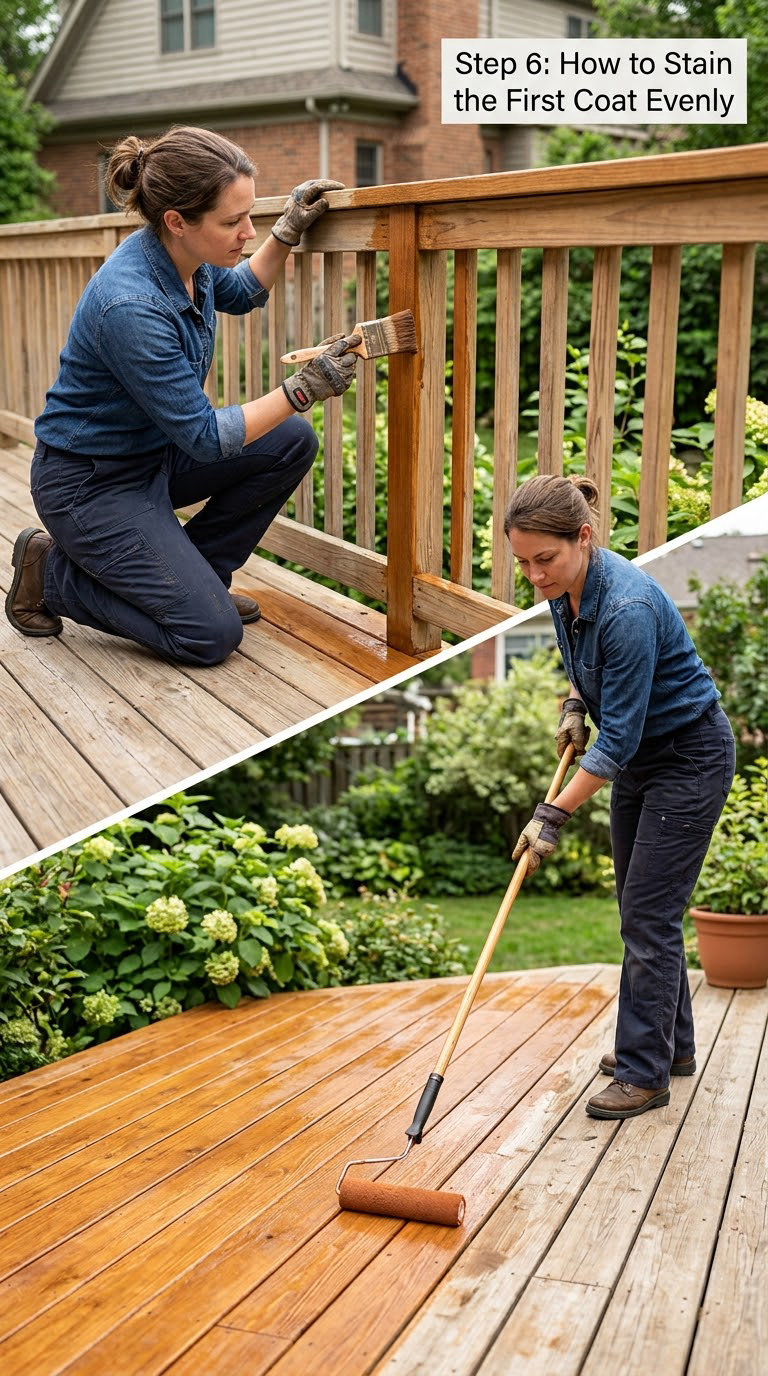
Step 6: How to Stain the First Coat Evenly
Mask anything that is not part of the deck, and prop open doors with a shim.
Start with the vertical work. Cut stain into railings, posts, spindles, board ends, risers, and the gaps between boards using your angled brush, loading it rather than dipping it. Then spread the same coat over the flat field with the roller or stain pad. Follow the spreading rate on the label, no heavier and no thinner.
Keep a wet edge by rolling two or three boards at a time from the far end toward your exit. Back-brush every pass with the brush so the stain sits in the grain instead of sitting on the surface, and pick up any puddles before they soak in and dry darker than everything around them.
Penetrating stains soak in and leave the grain visible. Semi-transparent stains add more pigment and block more UV. Solid-colour stains behave like thin paint, sit on top, and peel on a horizontal deck floor even though they work well on a fence or a railing. Pick the one that matches the surface.
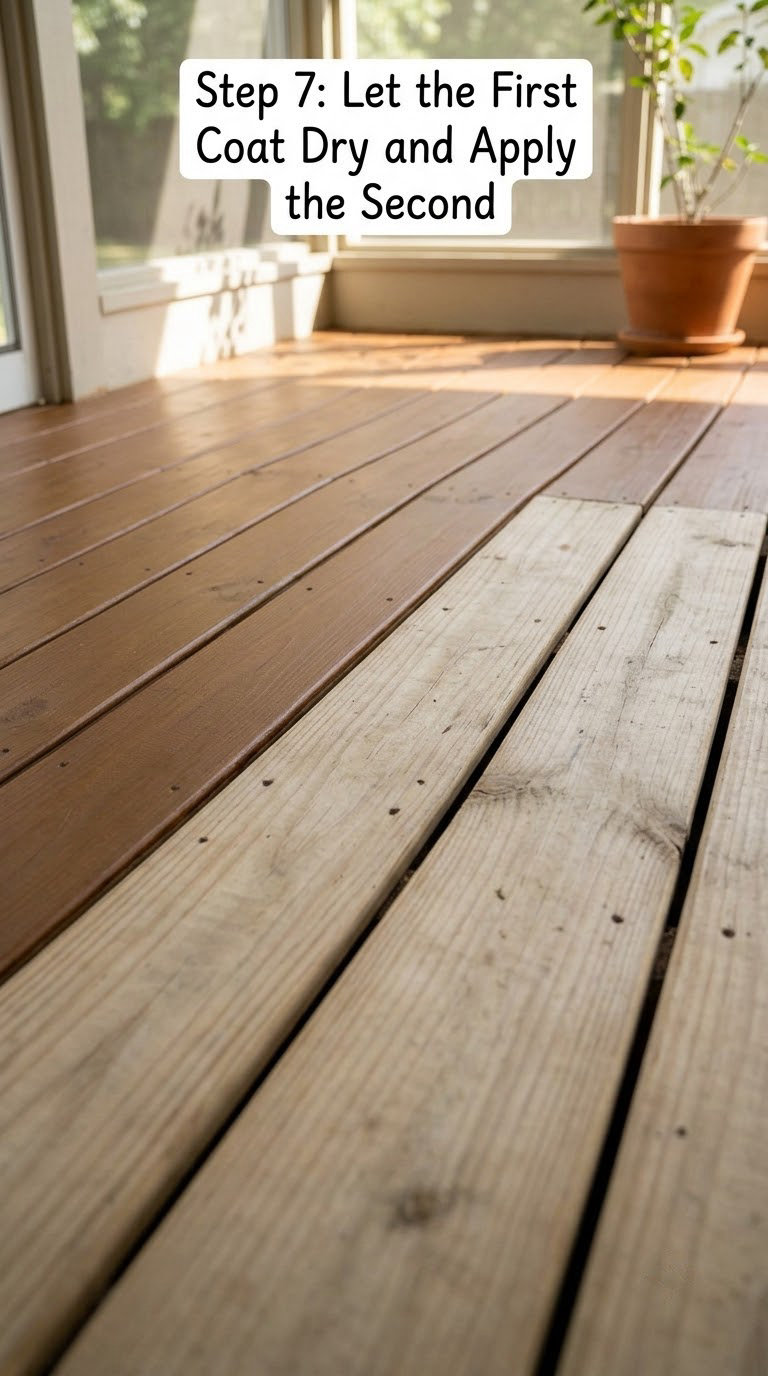
Step 7: Let the First Coat Dry and Apply the Second
Use the label’s drying and recoat window, not the feel of the boards under your hand. Some products are ready in a few hours, others need overnight, and oil-based products generally take longer than water-based ones. Recoating early traps solvent or moisture under the film.
Inspect the dried coat from several angles. Look for tackiness, uneven colour, lap marks where you stopped and started, bare corners, and patches that are noticeably darker from excess product. A second coat evens out blotches and lap marks, but it will not rescue a coat that was applied to damp wood.
Stir again, reload the pan, and run the second coat the same way. A second coat on a surface that dried to the manufacturer’s stated time gives you a noticeably more uniform result. If the first coat already looks even and the label allows only one, stop there.
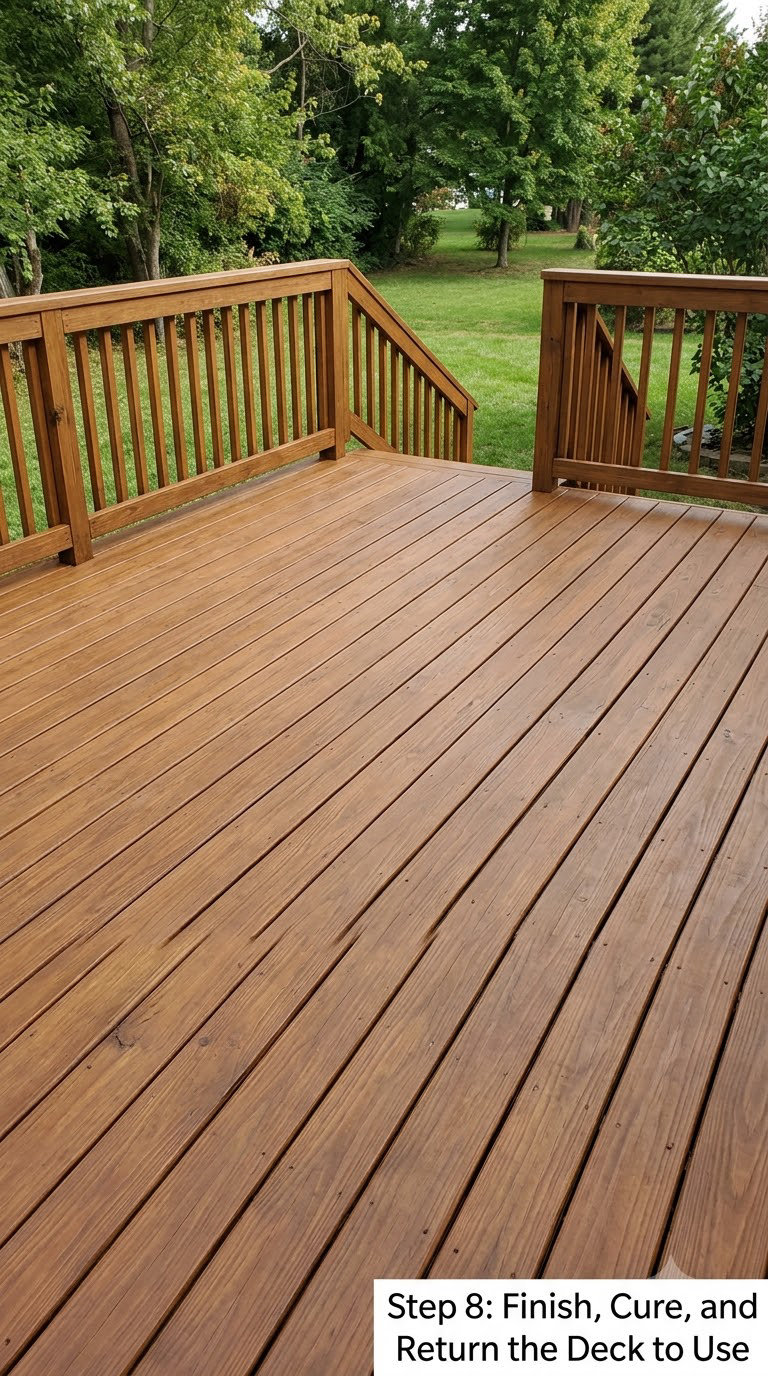
Step 8: Finish, Cure, and Return the Deck to Use
Pull masking tape at the time the label recommends, and lift it slowly at a low angle so it does not peel a dried edge off the wood.
Walk the deck in daylight and look at it from eye level and from a corner. Check railings, risers, stairs, and the underside of the top rail where runs collect. Fix any drips while the finish is still workable.
Keep foot traffic off for the label-specified time, then let the finish fully cure before putting furniture, planters, grills, or rugs back. Dry to the touch and fully cured are not the same, and cure times run from a day or two for water-based products up to several days for oil-based ones in cool or humid weather. Setting furniture down early leaves marks or imprints that can last the life of the finish.
Stop work if rain, heavy dew, or temperatures fall outside the label limits while you are applying. Deal with a wet deck the way the label describes, and let it dry fully before you try again.
Common Mistakes to Avoid
- Leaving debris behind. Sweep and hose under railings and between boards before cleaning, and do it again after sanding to remove dust.
- Missing edges and gaps. Cut in board ends, risers, and the gaps between boards with a brush before you roll the field.
- Trapping water in joints. Keep pressure low and the tip wide, and let the deck dry completely, including between boards, before stain goes on.
- Too much pressure-washer damage. Stay at 1,200 to 1,400 psi, at least 12 inches away, with a 40 or 45-degree fan.
- Inconsistent sanding. Match grit to the task, 60 to 80 grit for scuffing, 80 to 120 for smoothing, and always sand with the grain.
- Skipping the compatibility check. A water-based finish over an oil-based one fails to adhere, and solid stain over a sealed floor peels. Read the label for what it may go over.
- Applying over damp wood. Test with the water-bead test: sprinkle water on the boards. If it soaks in rather than sitting on top, the deck is dry enough.
- Stirring during application. Stir before you start and again at your break, or bubbles and lap marks appear.
- Overloading the roller. Roll off excess in the grid, or you lay down a puddle that dries darker and peels.
- Allowing lap marks. Work in the shade, two or three boards at a time, back-brushing each pass and blending into a wet edge.
- Staining in direct heat. Wood too hot to touch absorbs unevenly and flashes on the surface. Work early or late in the day.
- Recoating too soon. Follow the label window, not the surface feel, or you seal solvent or moisture underneath.
- Assuming touch-dry means cured. Wait the full cure time before loading the deck with furniture.
- Staining yourself into a corner. Pick your exit before the first brush touches wood, and always work toward it.
When to Call a Pro
Some deck conditions are not a coating problem. Send the job to a qualified contractor or structural professional when you find structural rot, soft or warped load-bearing boards, or damage to the ledger or joists, since stain cannot fix any of that.
Railing height, guard construction, and stair rise changes are code-sensitive and often need a permit and inspection. The same goes for surface prep on a deck carrying an old coating of unknown origin, and for any deck built before 1978 where paint may contain lead.
If the surface cannot be safely prepared, such as boards too soft to stand on or a coating that keeps bonding back up as fast as you remove it, that is a professional job too. A maintenance coat of stain is well within a beginner’s reach. Anything under the boards is not.
Maintenance
A stained deck needs about a day of attention each spring and a quick check every couple of months. Sweep, wash gently with a mild deck cleaner, and rinse. Do not get into a habit of pressure-washing on a schedule; clean wood does not need it and the water finds ways into the joints.
Look for mold or algae in shaded corners, standing water in low spots, colour fading, peeling, and soft spots around fasteners. Dry the surface fully before touching it with anything, and recoat only when the existing coating is compatible and your stain’s label allows it. Recoating over a peeling film just adds another layer that peels with it.
Use pads or runners under furniture legs so they do not hold water against the boards, keep planters and grills off the surface so air can move underneath, and clear drainage paths between boards after storms. Push snow off with a plastic shovel rather than a metal blade. Reflective surfaces like foil-backed mats and bright metal trays trap heat and moisture against the wood and can bleach the finish, so keep them off the deck.
A penetrating stain on a sun-exposed deck usually needs recoating every three to five years, sooner on a shaded side or under trees. Our guide to using zero gravity chairs on a deck covers placement and pads for the furniture you will be putting back down after curing.
Frequently Asked Questions
Can I use exterior deck stain on an already painted or solid-color deck?
Only if the paint and stain share a base. Learn how to stain a deck step by step and the first check is what is already on it: a water-based stain needs a water-based system, and an oil-based product needs an oil-based one. Over a painted deck you would need a bonding primer first, and some solid finishes cannot be coated at all. When in doubt, pull up a corner and test in a hidden spot.
Should I pressure-wash a deck before applying stain?
Often yes, but only on the lowest setting that will work. Stay at 1,200 to 1,400 psi, hold the tip at least 12 inches from the wood, and use a wide fan rather than a pencil jet. On soft cedar or aged pressure-treated pine, a hose and a stiff brush with 15 to 20 minutes of dwell time is gentler and works just as well.
Is an oil-based or water-based deck stain better for beginners?
Water-based is easier: it cleans up with soap and water, dries faster, and is far less flammable. Oil-based penetrates deeper, often looks better at the one-year mark, and lasts longer, but rags soaked in it can ignite on their own if you pile them wet, and cleanup needs mineral spirits. Whichever you choose, never switch types over the top of each other.
How long should a newly stained deck stay empty?
Follow the time printed on the can rather than how dry the boards feel. Water-based products are often walkable in a day but need several days to cure, and oil-based products take longer in both cases. Keep furniture, planters, grills, and rugs off until the full cure period has passed, because anything resting on the boards can leave an imprint that lasts as long as the finish.
Can I stain a composite or pressure-treated deck?
Pressure-treated wood can be stained, but only once the mill glaze from the factory is broken by a deck cleaner, and some brands need extra drying time after installation before they will absorb anything. Composite decking is a different material entirely and will not absorb stain, so it has to be coloured with a solid acrylic deck coating made for composite surfaces.
Start by walking the deck and checking the wood, then watch the forecast for two or three clear days. Clean it, brighten it if it has gone grey, sand only what needs it, test the colour somewhere hidden, and apply thin coats working toward an exit. That is how to stain a deck step by step in a way that still looks good in five years.