How to Build a Shoe Rack for an Entryway: Simple Plan (2026)
The fastest way to stop shoes from taking over the front hall is to build a landing place for them. Learning how to build a shoe rack for an entryway takes one afternoon of work, a short list of pine boards, and about two hours the following evening for the paint to cure.
This plan makes a three-tier rack that is roughly 32 inches wide, 11-1/4 inches deep, and 32 inches tall. It holds about 12 pairs, works in a narrow hallway, and doubles as a bench for pulling off boots. No pocket hole jig, no table saw, and no special skills. Just a drill, a square, and a level.
Contents
Time: 2 to 3 hours of work, plus 4 to 6 hours of drying between coats
Cost: A few pieces of construction-grade pine and a can of paint, cheaper than one pair of boots
Difficulty: Beginner, if you have a drill
Skill level: First woodworking project is fine
Tools and Materials
You need very little. If you own a drill, a square and a sander, you can skip the buying trip for tools entirely.
- Drill/driver with a 1/8 in. bit, a 5/16 in. bit, and a 3/8 in. bit
- Tape measure and a combination square or speed square
- Circular saw, hand saw, or a jigsaw
- Random orbital sander with 120, 180 and 220 grit paper
- Clamps (four is plenty, a bungee cord works in a pinch)
- Pencil, straightedge, painter’s tape, drop cloth
- Safety glasses and a dust mask or respirator for sanding
The full cut list
Buy one 8-foot length of 1×12 pine board and one 6-foot length of 2×2 pine. Cut everything before you start assembling.
| Board | Quantity | Finished length | What it becomes |
|---|---|---|---|
| 1×12 pine | 1 | 34 in. | Top panel, overhangs 1 in. past each leg |
| 1×12 pine | 3 | 29-1/4 in. | Bottom shelf and two middle shelves |
| 2×2 pine | 4 | 30 in. | Legs |
| 2×2 pine | 2 | 28-1/2 in. | Rear top and rear bottom stretchers |
| 1×4 pine | 1 | 29-1/4 in. | Optional retaining lip on the bottom shelf |
Nominal lumber sizes are smaller than the label. A “1×12” is actually 3/4 in. by 11-1/4 in., and a “2×2” is really 1-1/2 in. square. Measure your boards before you trust the numbers above, and add a few thousandths of an inch if a shelf feels tight.
For fasteners, add 1-1/4 in. pocket hole screws if you own a jig, otherwise use 2-1/2 in. construction screws with a counterbore, plus wood glue, 1/2 in. shelf pins (four), and 2 in. wall anchors if you plan to anchor. Optional but recommended: a 1/8 in. thin strip of aluminum or a small piece of dowel to act as a shelf stop.
If you have no power tools at all, buy the boards already cut to length at the lumber yard, drive screws with a hand drill, fasten with a claw hammer and 3 in. finish nails, and plane rough edges with a hand plane. It takes longer and the joints are simpler, but the rack still works.
Before You Start
Measure the wall before you buy lumber, not after. Most entryway mistakes are sizing mistakes, and a rack that is two inches too wide will block the door swing forever.
Stand in the doorway and measure the clear wall width, the ceiling height, and the space the door needs to swing. Then leave three inches of breathing room on each side and at the ends, because shoes stick out past the rack more than you expect. For a wall under 36 inches wide, drop to a 24-inch-wide version and cut the shelves to 21-1/4 in.
Height matters too. Anything over 40 inches tall that is only 11 inches deep will tip if a child leans on it, so keep this design in the 30 to 36 inch range unless you anchor it. Low is also better for everyday use. A shelf at chest height means putting shoes up high, and nobody does that.
Choose the freestanding version rather than a wall-hung one. It uses no studs, no drywall anchors and no drywall cuts, so it moves with you and it costs nothing extra. Decide the wood next: pine and poplar are the practical picks for an entryway because they take paint cleanly and they are inexpensive. If you want the grain to show, birch, maple or oak work well. Skip MDF for the shelves if kids will lean on it; the edges chip.
Prep the boards before the first cut. Sand the faces lightly with 120 grit to catch any bumps, wipe on a wood conditioner or a diluted stain if you are going to stain, and let the boards acclimate to your indoor humidity for a day. Lay out a drop cloth, tape the drop cloth edge, and open a window or run a fan before you sand or finish.
Before you drill anything into a wall, run a stud finder and check with a non-contact voltage tester or a multimeter. Entryways often hold wiring in the ceiling and along the baseboard near switches and plugs. If you find live wiring where you planned to anchor, move the rack or call an electrician.
Almost none of this work needs a permit, since a freestanding shelf is furniture, not a structural change. If you are in a condo or an apartment with a shared or structural entryway wall, or your local rules treat wall-mounted fixtures over a certain weight as permanent alterations, check with your building manager or the local building department first.
Set up your cutting area outside or in a garage if you can. If you must work indoors, put a piece of cardboard under the boards so sawdust does not reach the floor, and cut on top of a stable surface like a sawhorse pair or the back of a couch. Never cut on your lap.
Step-by-Step Instructions: How to Build a Shoe Rack for an Entryway
Work in order and check each square before the next step. Pine moves, and a small error early shows up as a wobbly rack on day one.
Step 1: Measure and Mark the Wood
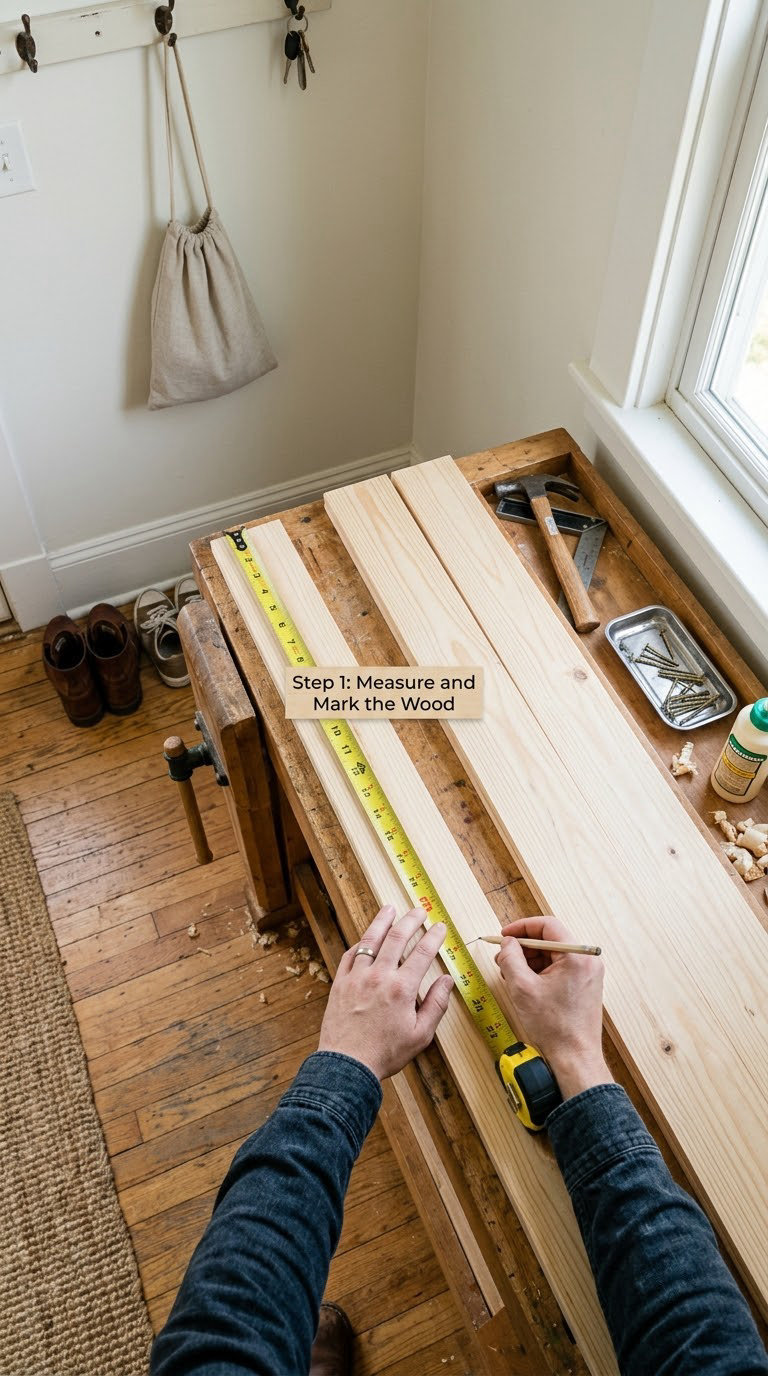
Lay every board flat, mark the lengths from the cut list with a pencil, and measure twice from the same end each time. A mark made from the factory end catches a consistent reference.
Use your square to draw a line across the face at each mark, then score the line with your utility knife or a chisel. Scoring the cut line is what keeps a circular saw or jigsaw from wandering. Label each piece as you go: leg, leg, leg, leg, shelf, shelf, shelf, top.
Check each board for square cuts by placing the pencil line of one piece against the straight edge of the square. If the line is not at 90 degrees, re-mark it before cutting. This ten seconds saves a miscut leg.
Step 2: Cut the Shelf and Leg Pieces
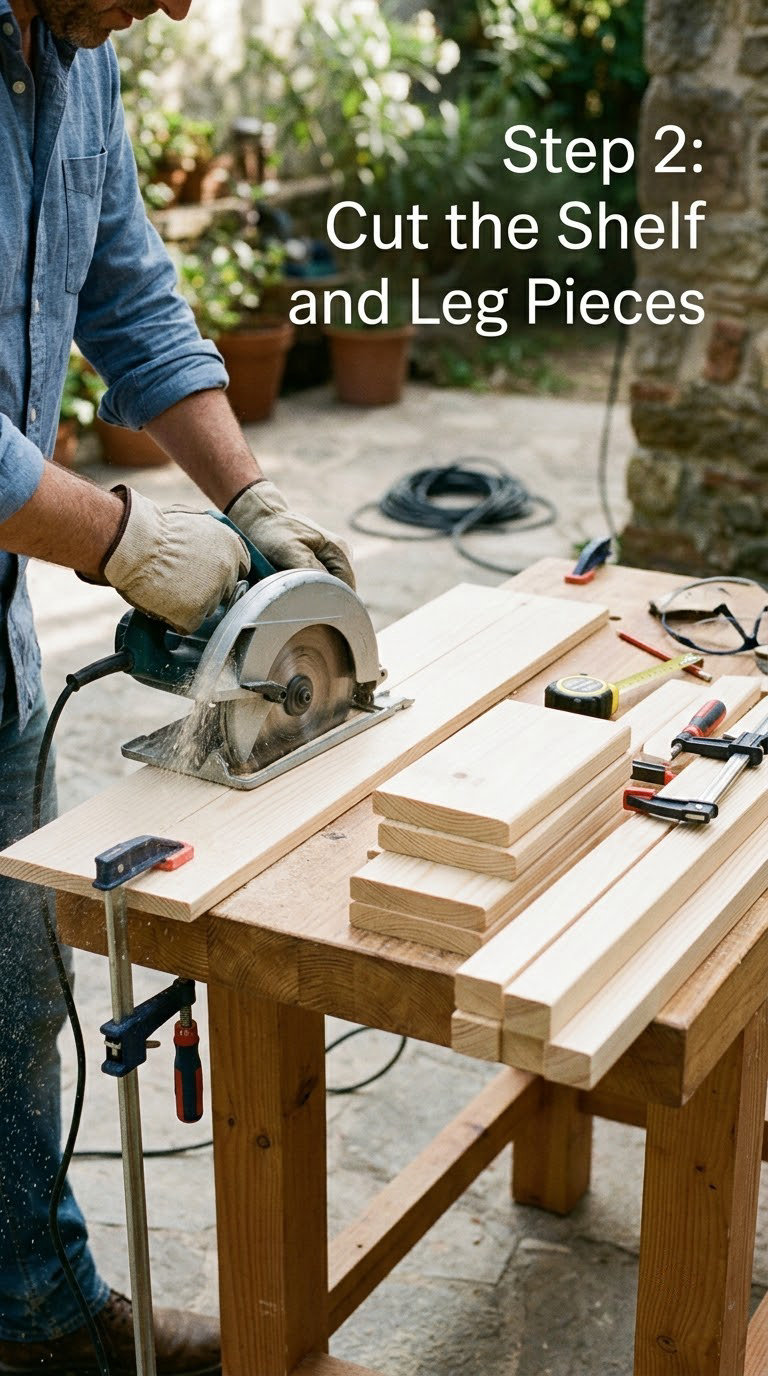
Cut the legs first while you still have long boards to clamp down. Clamp the 2×2 securely, keep your body out of the line of the blade, and cut one leg then check it against the square before cutting the other three. Four legs that differ by a quarter inch will make the whole rack wobble.
Next cut the shelves. Measure the distance between the outer faces of two legs, subtract a sixteenth of an inch for clearance, and cut the first shelf. Test it between the legs before cutting the rest. If it slides in loose, your legs are not parallel, and the fix is to sand the high leg rather than forcing a tight shelf.
Beginner woodworking forums have a good trick for this. Mark the high spot with a pencil, flip the leg over, and file or rasp the high side flat. Then the legs match without taking wood off the good face.
Cut the top panel last, since it is the one piece you can still adjust later. Sand the rough cut edges now with 120 grit while the boards are still flat and easy to work.
Step 3: Drill the Shelf Supports
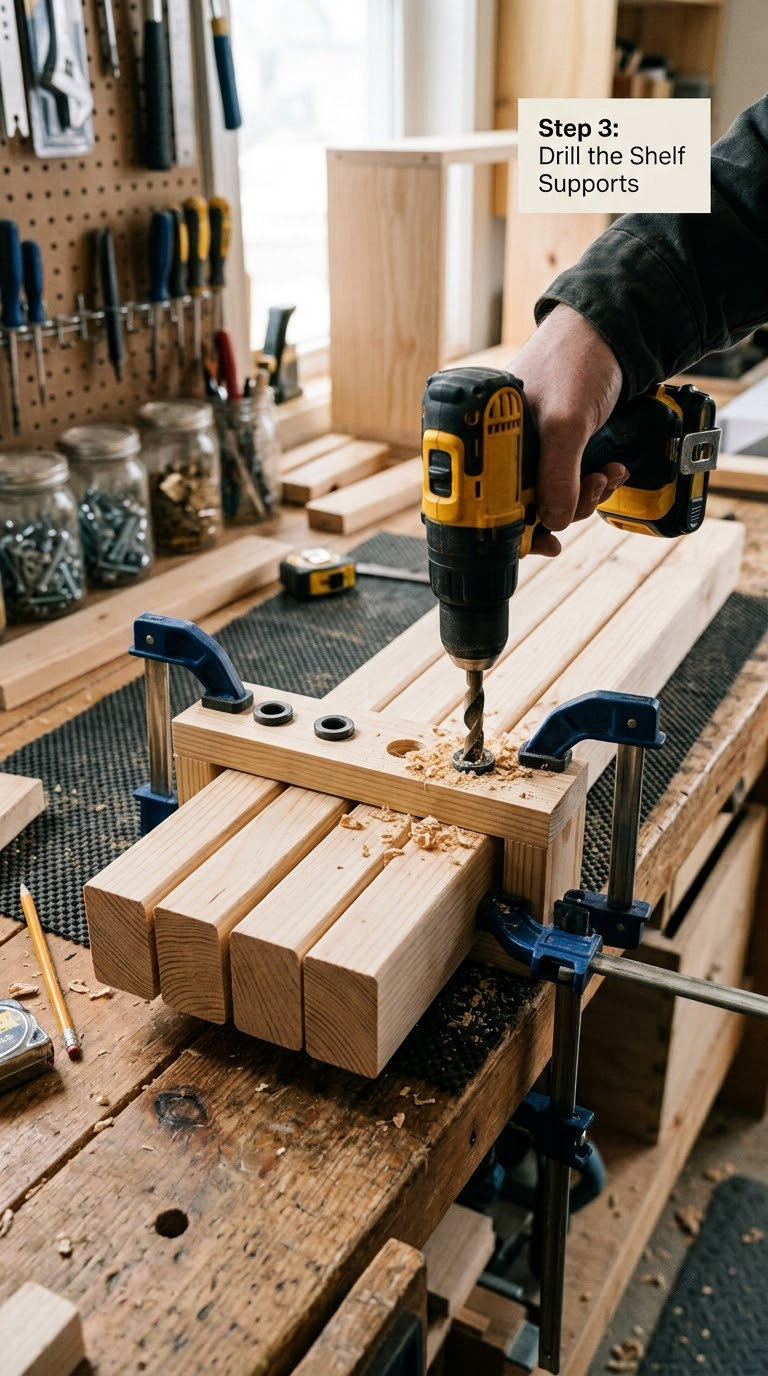
Stack the four legs with their faces aligned and drill one hole through all of them at each shelf height. Aligning the legs guarantees every hole matches, and it saves you from re-measuring sixteen times.
Use the 5/16 in. bit for shelf pins. Drill from the inside face straight across, keeping the drill square so the holes line up in a row. Set the shelf heights at 1 in., 11 in. and 21 in. from the end of the leg that touches the floor. That gives clear openings of roughly 9 in., which fits sneakers and heels but not tall boots.
If you need boot clearance, skip one set of holes. Later, in autumn, you can pull the middle shelf out and stand tall boots on the bottom shelf where they have the full height of the opening.
Do a dry fit now. Slide one shelf into a leg and rest it on pins, then check that it sits flat and does not rock. If it rocks, the hole is slightly angled; fill the hole with a glue stick and redrill straight.
Step 4: Assemble the Frame and Shelves
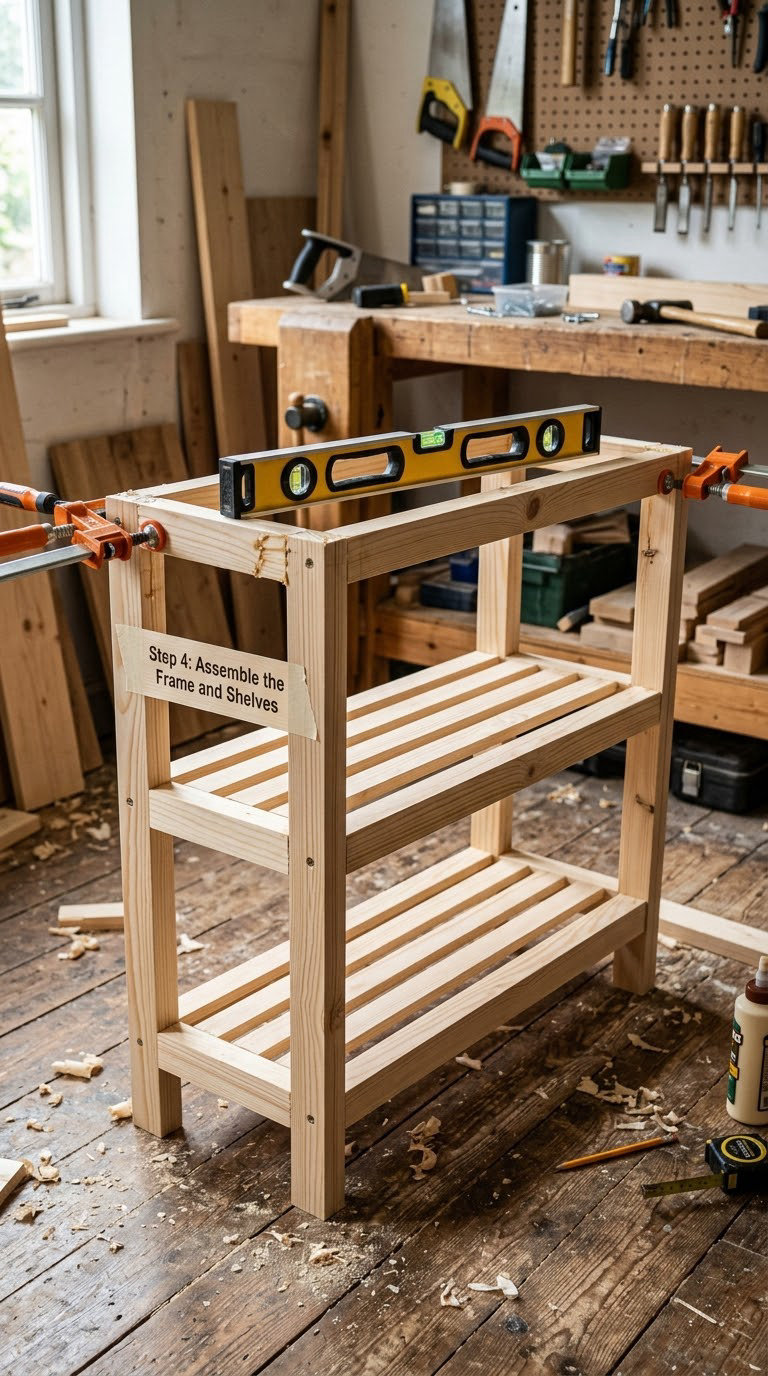
Stand two legs on the floor, then screw the rear top stretcher between them. A stretcher is simply a short board that holds two legs a fixed distance apart. Put a thin bed of wood glue on the end grain first, then drive two screws from the inside face of each leg into the stretcher ends.
Repeat for the second frame, then stand both frames up and connect them with the second stretcher. Clamp the stretcher to the legs, check the frame with your level before tightening, and only then drive the screws home.
Put a 1/8 in. pilot hole before every screw. Screwing into end grain without a pilot hole splits the wood more often than not, and a split leg cannot be glued back convincingly. Wipe off squeeze-out glue with a damp rag while it is still soft.
Leave the frame clamped for 30 minutes before adding shelves. Then drop the bottom shelf and one middle shelf onto the pins, and screw through the legs into the shelf ends with 1-1/4 in. screws. Add the optional 1×4 lip along the front edge of the bottom shelf so shoes do not slide off, and glue a thin aluminum or dowel strip along the same edge.
Set the top panel on last, centred, with a 1 in. overhang at each end. Glue and screw it into each leg top, then check the whole rack diagonally across both corners. If it is not square, nudge one leg until it is.
Step 5: Sand, Finish, and Cure the Rack
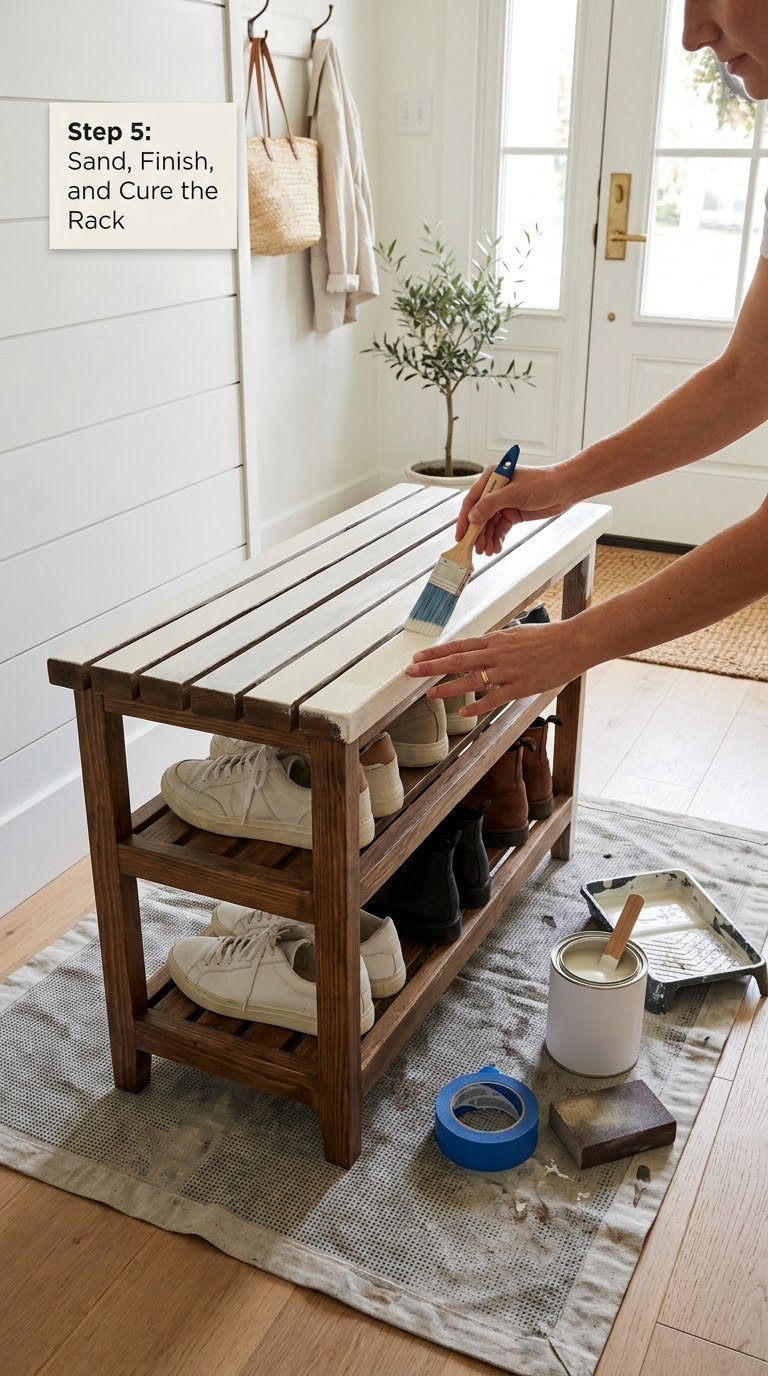
Sand the whole rack with 120 grit to knock down the pencil marks and any glue squeeze-out, then go over it again with 180 grit. Skip the 220 grit step if you are painting; it is only worth it under stain or a gloss top coat. Round every sharp corner slightly so the rack feels safe to brush past.
Vacuum or wipe off dust with a damp cloth. Do not apply finish over dust; it is the single most common reason a first paint job looks blotchy.
For an entryway, semi-gloss or satin water-based paint is the most practical choice. It scuffs less than flat paint, it wipes clean where flat paint ends up looking permanently chalky, and it dries in a couple of hours. Cut in the edges with a brush, roll the faces, and follow the grain.
Let each coat dry fully before the next. Typical ranges are 2 to 4 hours between coats and 24 to 48 hours before the rack can take a load, longer if the room is cool or humid. A second coat of paint after a light sand with 220 grit gives a much better surface than one thick coat.
Stain and polyurethane give a richer look and show the grain, but they take longer and are easier to botch. If you go that route, apply stain first, let it dry 6 to 12 hours, seal with two coats of satin polyurethane, and allow 24 hours between coats and 72 hours of cure before loading shoes.
Step 6: Install the Shoe Rack Safely
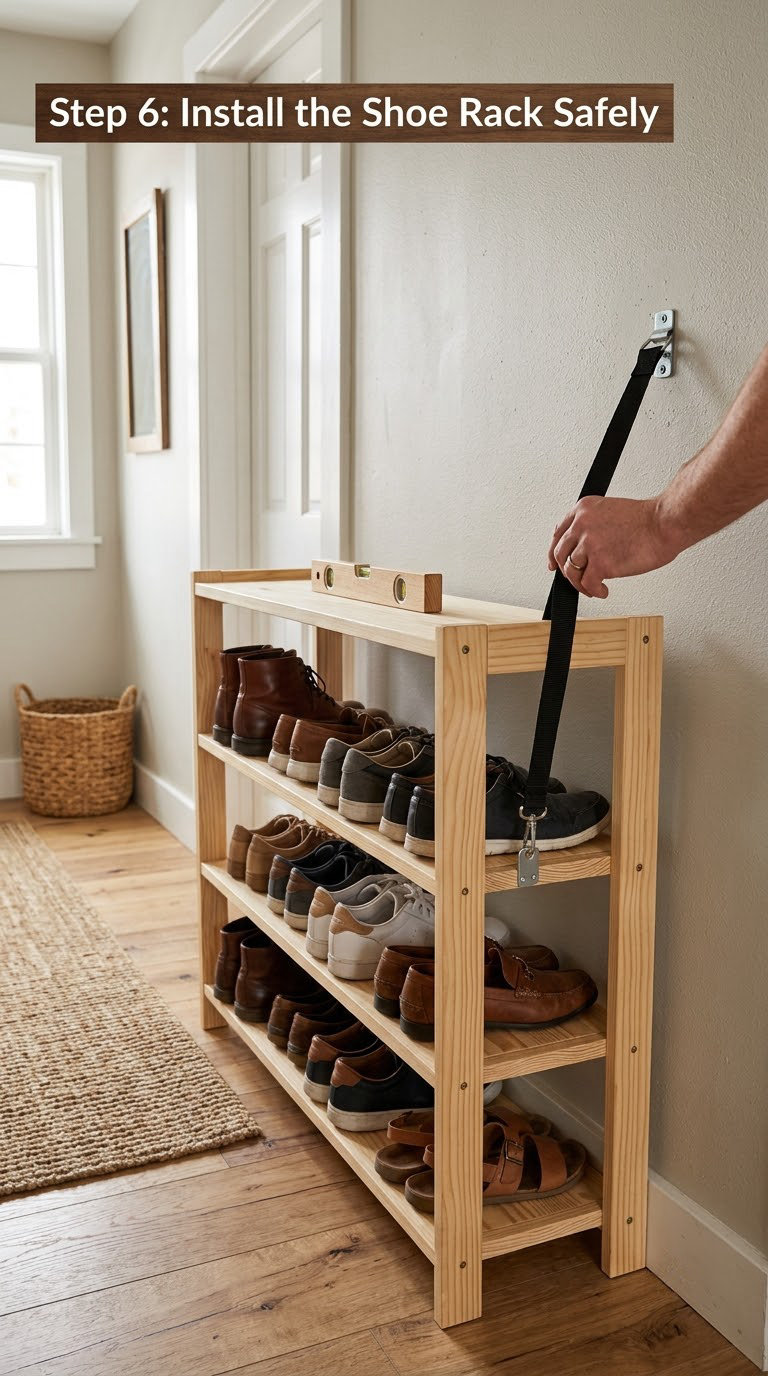
Carry the rack by the top panel with a helper if it feels heavy. Slide it into position, check that the door still opens fully, and shim one leg with a folded piece of cardboard if the floor is not level.
Anchor it if it is taller than about 34 inches, sits in a house with kids, or stands where someone could grab it while putting shoes on. A stud finder will show you where the framing sits; attach an L-bracket or an anti-tip strap to a stud and to the rack’s back rail with 2 in. screws. Into drywall between studs, use a toggle anchor or a strap rated for the pull-out force.
Add the wall-mounted extras only after the finish has fully cured. A strip of coat hooks screwed into the wall above the rack turns dead space into a drop zone for keys and leashes, and a shallow tray on the bottom shelf catches grit and rainwater from wet shoes.
Do a load test before you trust it. Set four pairs of shoes on the top shelf for a day and check for sag the next morning. If the shelf bends, add a middle leg or a centre brace rather than removing the shoes and pretending it is fine.
Common Mistakes to Avoid
- Shelves that sit uneven. Usually a high leg. Fix it by sanding or planing the high spot, or re-cut the leg, rather than forcing the shelf.
- Weakened wood from misplaced fasteners. Driving a screw near the edge of a shelf splits the board and lets it sag. Keep screws at least 3/4 in. from any edge and drill pilot holes.
- Ratios that tip. Height more than twice the depth will lean. Keep height under about 2.5 times the 11-1/4 in. depth, or anchor it into a stud.
- Too little wall clearance. A rack flush against the baseboard traps dirt and makes it hard to fit shoes against the wall. Leave the three inches you measured in step one.
- Over-sanding. Removing every bit of character, or sanding one face flush while the other stays rough, wastes material and wastes time. Sand to 120 or 180 and stop.
- Finishing too early. Painting before the wood has dried from the humidity can trap moisture and cause peeling later. Paint inside, let the rack acclimate for 24 hours first, and ventilate while you work.
One more habit worth keeping: shoes sliding off an open shelf is not a defect, it is a missing lip. A 1 in. strip along the front edge takes two minutes and solves it.
When to Call a Pro
Building a freestanding pine rack is squarely a beginner job. Stop and hire someone when any of these turn up.
- The wall you want to use is load-bearing or you suspect it holds plumbing, wiring or ducting. Get a detector scan or an electrician or plumber on site before you drill.
- You are working on masonry, brick or concrete. Anchoring into masonry needs masonry bits and appropriate anchors, and drilling into brick can hit a sleeve.
- You want to cut a stud or notch framing to gain depth. That changes the structural picture and belongs with a carpenter.
- The rack must be permanently fastened in a rental, condo or shared building where you are not allowed to modify the wall.
- Custom dimensions push past what a standard board gives you, such as a 6-foot-long built-in that wraps a corner.
- Local rules require a permit for built-in cabinetry or permanent wall-mounted furniture of that weight.
Insurance and licensed-trade rules differ by region, so check your local building department before starting anything permanent.
Maintenance
A rack like this needs less care than people expect. Ten minutes twice a month keeps it looking new.
Remove the shoes first, then vacuum or wipe each shelf. Grit from a driveway is the main thing that scratches a painted surface, and it sits there happily for weeks. Use a damp cloth with a drop of dish soap, and avoid soaking the joints.
Every couple of months, check the screws that go through the legs into the shelves and the screws holding the top panel. Pine loosens as it dries, and a rack that gets a little longer lived will turn a quarter turn loose. Tighten them, and if a screw spins without biting, drive it out, coat the hole with wood glue, let it set overnight and drive it back in slightly off-center.
Check the anti-tip strap or bracket the same way. This is the part families forget, and it is the part that protects the wall and the child who leans on the rack.
For scuffs, touch up with the same paint and a small brush after feathering the edge with 180 grit. For water rings or a damp shoe stain, dry the wood fully, then reapply the top coat only where it is worn. When the finish gets thin across whole shelves, a fresh coat of paint over a clean, scuffed surface takes an afternoon and no sanding beyond a quick pass.
Wood movement is normal. A solid pine shelf gains or loses a fraction of an inch across a season, which is why the shelves fit loosely rather than tightly.
Frequently Asked Questions
What size should an entryway shoe rack be?
Most entryways suit a rack between 24 and 36 inches wide, about 11 inches deep and 30 to 36 inches tall. Measure the clear wall width first, then subtract six inches for breathing room on both sides. Anything taller than 40 inches should be anchored to a stud, especially in a house with children.
How much wood do I need to build a three-tier shoe rack?
For the three-tier plan above, one 8-foot length of 1×12 pine and one 6-foot length of 2×2 pine is enough, plus a single 1×4 for the optional shelf lip. That is roughly 17 board feet, which covers the top panel, three shelves, four legs and two stretchers with a little offcut left over.
What is the best wood for an entryway shoe rack?
Pine or poplar is the best wood for an entryway shoe rack because both are inexpensive, easy to cut and take paint or semi-gloss finish cleanly. Stained wood looks richer, and birch, maple or oak hold their shape well for a bench seat. Avoid MDF on shelves, since the edges chip once kids lean on them.
How much weight can a DIY shoe rack hold?
A 1×12 pine shelf spanning about 29 inches between legs and screwed at both ends generally carries 30 to 40 pounds before it starts to sag, so expect 15 to 20 pairs of shoes per shelf. Heavier loads need a centre brace or a middle leg. Load test one shelf for a day before you fill the rack.
Should I anchor a shoe rack to the wall?
Anchor the rack if it is taller than about 34 inches, deeper than 14 inches, or if children live in the house. Use an L-bracket or anti-tip strap screwed into a stud, or a toggle anchor rated for the pull-out force. A freestanding rack under 34 inches and 11 inches deep is stable on its own.
Start With the Wall, Not the Boards
If you only do one thing before the weekend, measure the wall and check the door swing. Pick a width that leaves three inches on each side, buy the boards in the cut list above, and the rest is cutting and screws.
Once it is up and loaded, hang hooks above it and put a tray on the bottom shelf. If you would rather buy something ready-made while you decide, our picks for the best entryway benches and best shoe racks for an entryway cover the store-bought side of the same problem. If your hallway is narrow enough that a floor rack is a squeeze, our guide to the best shoe storage cabinets for entryways shows what a shallower footprint looks like.