How to Install a Pedestal Sink: Easy DIY Guide 2026
A pedestal sink is two heavy pieces — a vitreous china basin and a decorative column that hides the plumbing — and installing one takes most of a working day. You shut the water off, clear the old basin or vanity, anchor hardware in the wall, set the column, hang the basin, fit the drain trap inside the column, connect the supplies, then caulk and leak-test. If your waste pipe already sits at the right height, this is a fair weekend job with a second pair of hands.
Time: 4 to 8 hours, plus drying time for caulk
Cost: the fixture, faucet, drain, and fittings drive it; plumber quotes run several times higher than the parts, and regional pricing varies widely
Difficulty: intermediate — more about patience and sequencing than skill
Skill level: comfortable with a pipe wrench, a drill, and slow, steady hand-tightening
Contents
The part nobody warns you about is the trap. It has to live inside the column, and if the waste pipe behind your wall sits too low, no amount of cleverness makes that space appear. Measure that before you buy anything.
Tools and Materials
Gather everything before you turn a wrench. Three trips to the hardware store is the classic way to ruin a Saturday.
Tools
- Adjustable wrench and a basin wrench — the basin wrench reaches the drain nut behind the basin where your fingers cannot.
- Channel-lock pliers — for the angle stops and the trap slip nut.
- Drill/driver with a stud finder — studs decide where your basin can hang, so find them before you mark anything.
- 12-inch level and a tape measure — you need both the vertical height and the wall-to-drain distance.
- Socket wrench set, screwdriver set, and a hammer — for removing the old vanity and driving anchors.
- Hacksaw or a small tubing cutter — for trimming the tailpiece to length.
- Utility knife, pencil, and a cardboard cutout — the template is usually in the shipping box.
- Propane torch, flux, and lead-free solder — only if you are re-sweating a supply stub-out. Skip these if your angle stops are already in place.
- Angle grinder — only if the wall is tiled and you need to cut back for mounting clearance.
- Bucket, old towels, and a drop cloth
Materials
- The pedestal sink set — basin and column, plus any hanger bolts, bracket, or hardware that shipped with it
- A faucet that matches the basin’s hole configuration: single-hole, three-hole centerset, or widespread
- A pop-up drain assembly sized to the basin opening
- Two acorn-head supply tubes or braided supply lines, long enough to reach the connections outside the column
- Plumber’s putty or a rubber gasket, depending on your faucet
- Plumber’s tape (Teflon tape) and pipe dope
- Chrome escutcheons if you want to cover the supply stub-outs
- Masking tape, pencil, and shims — vinyl or cedar, never anything brittle
- 100% silicone bathroom caulk in a color that matches your tub or trim
- Lock washers and fender washers for lag screws
Before You Start
Put on eye protection and gloves, and open a window if you will be soldering. Ceramic edges chip easily, and a shard of vitreous china in a floor drain is a bad afternoon.
Shut off the hot and cold angle stops, then open the faucet to bleed pressure from the lines. If the stops do not exist or do not work, find the main shutoff and use that instead. Know where it is before you need it.
Now measure four things, and write the numbers down:
- Waste pipe height — from the finished floor to the center of the drain stub-out. A trap adapter that leaves only the threads showing buys you a few inches of clearance inside the column, and it is the fix most people miss.
- Distance from the wall to the drain center — this is fixed by your plumbing, so make sure the sink you picked matches it.
- Supply stub-out height and spread — the two angle stops should sit about 10 to 12 inches apart on an 8-inch centerset, or match your widespread faucet.
- Wall clearance — measure the space between the wall and the toilet, side wall, or tub so the basin actually lands where you want it.
Two configurations matter here. If your drain and supply come out of the wall, you have a standard rough-in. If the drain comes out of the floor, the sequence changes and there is a full guide on how to install a bathroom sink with floor plumbing worth reading before you start.
Check the model, too. A true pedestal unit supports itself on the column and the wall. A wall-hung basin paired with a decorative column needs solid framing behind the wall, and that changes the wall work completely. If you are still choosing, our picks for best pedestal sinks for small bathrooms cover both styles.
Drop a canvas or cardboard sheet on the floor, move the toiletries out, and clear about 3 feet of working space in front of the wall. The basin weighs more than you expect — a two-piece vitreous china set commonly runs 60 to 90 pounds, and the basin alone is awkward.
A few jobs belong to a licensed plumber. You need one if the waste pipe is below roughly 15 inches, if the plumbing is corroded or concealed behind finishes you do not want to cut, if the wall needs structural framing changes, if your building or municipality requires a permit, or if you find an active leak you cannot shut off.
Step-by-Step Instructions: How to Install a Pedestal Sink
Fittings vary by model, so the manufacturer’s template and instruction sheet that came in the box take priority over anything written here. If the two disagree, follow the manual — and read it before you start, not halfway through step four.
Step 1: Shut Off Water and Prepare the Bathroom
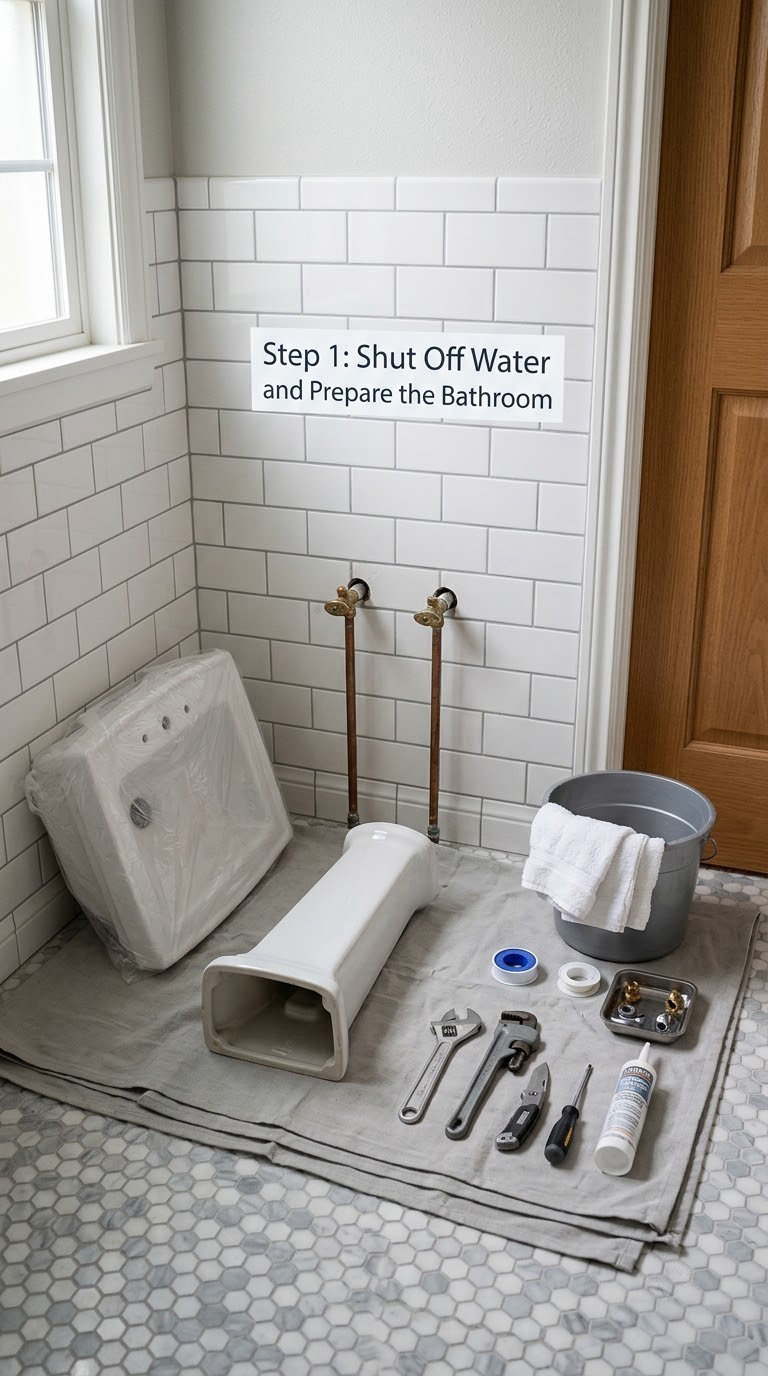
Turn off both angle stops and open the faucet to relieve pressure. Then clear the floor around the drain and lay down your drop cloth.
Measure and record where the drain center sits relative to the finished floor and the wall studs. These numbers drive every mark you make later, so get them right now rather than guessing at the end.
Step 2: Remove the Old Sink and Inspect the Drain
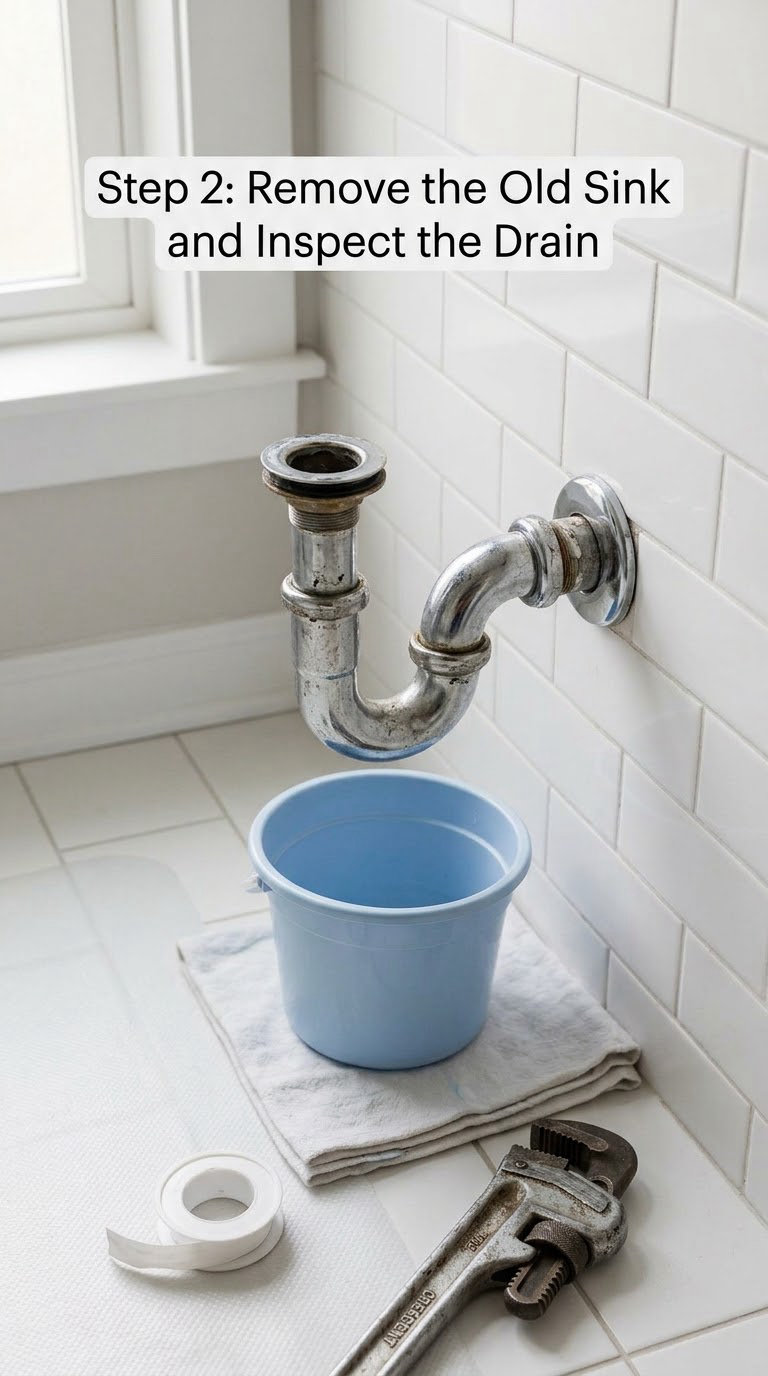
Disconnect the drain first: loosen the slip nut on the trap and separate the tailpiece from the basin. Have the bucket ready, because residual water will come out even after you shut the stops off.
Remove the old fixture, then inspect what is left. Check the trap adapter and the flange for corrosion, and confirm the drain opening is clear and usable. If the stub-out is 1-1/2 inch and your sink tailpiece is 1-1/4 inch, you need a reducer washer — that mismatch is common.
Step 3: Mark the Pedestal and Sink Centerlines
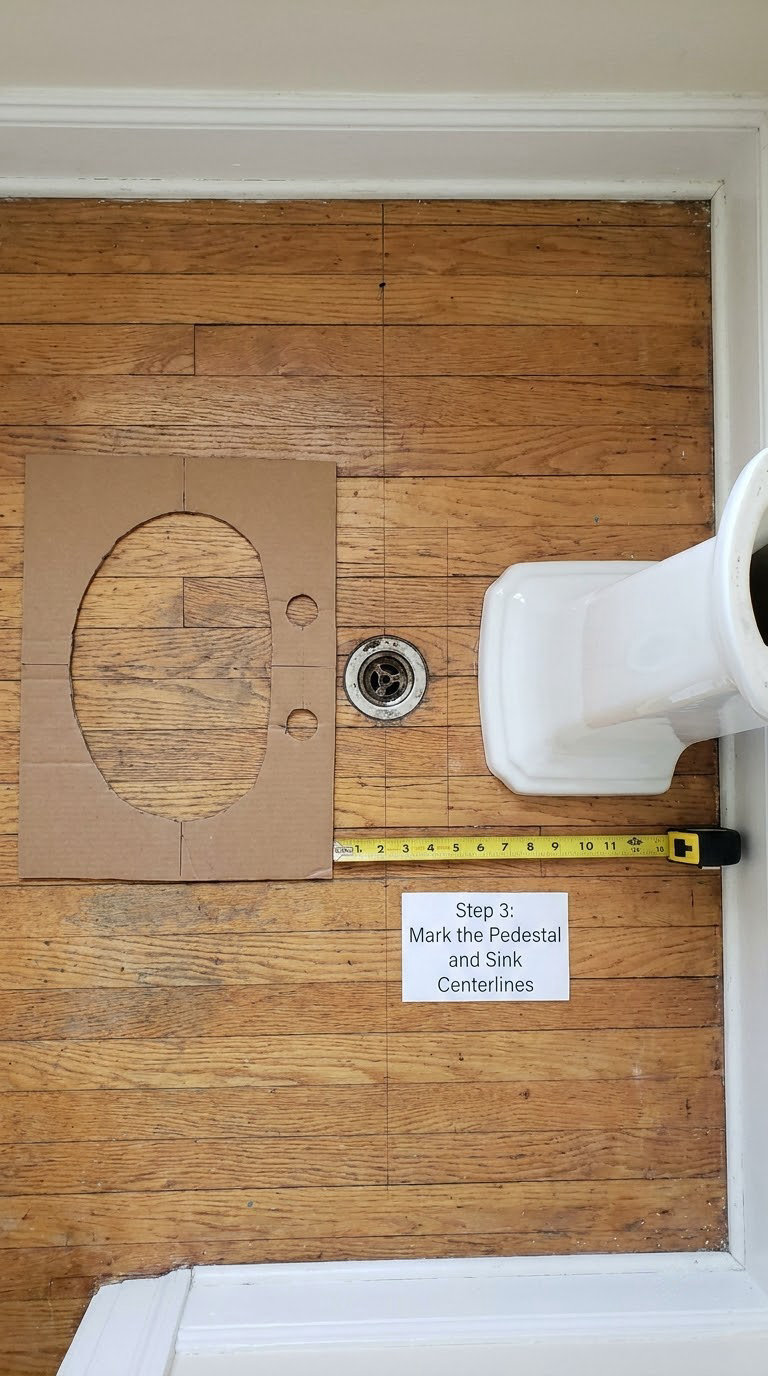
Tape the manufacturer’s cardboard template to the floor and trace it, or mark the centerlines yourself with a pencil snapped from the drain center. Set the column roughly 4 to 6 inches out from the wall depending on the model.
Before you drill, check the finished basin fits between the wall and whatever is beside it. Lay the template in position and look at the gap to the toilet flange and the side wall — this is the moment to discover you picked the wrong width.
Step 4: Install the Drain Connection and Pedestal
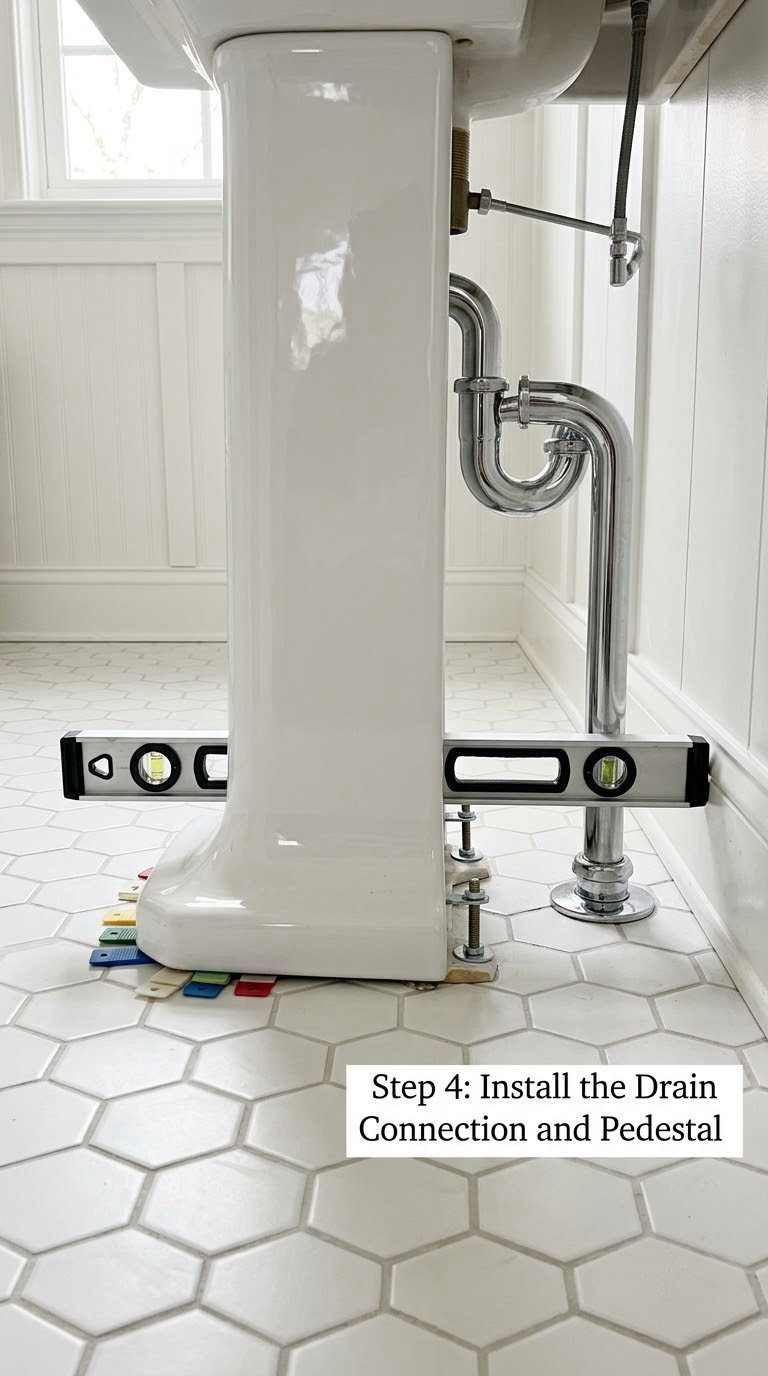
Fit the tailpiece or flexible connector to the basin first while the basin is still on the floor and easy to reach. Install the trap adapter on the stub-out if you need extra clearance, leaving only the threads proud of the finished wall.
Set the column over the drain and shim it until it stands plumb and does not rock. Use a level on two axes. Fasten the base with the supplied hardware or an expansion bolt, and snug it — do not crank it. Anything that expands as it cures will crack the column.
Step 5: Set the Basin and Join the Plumbing
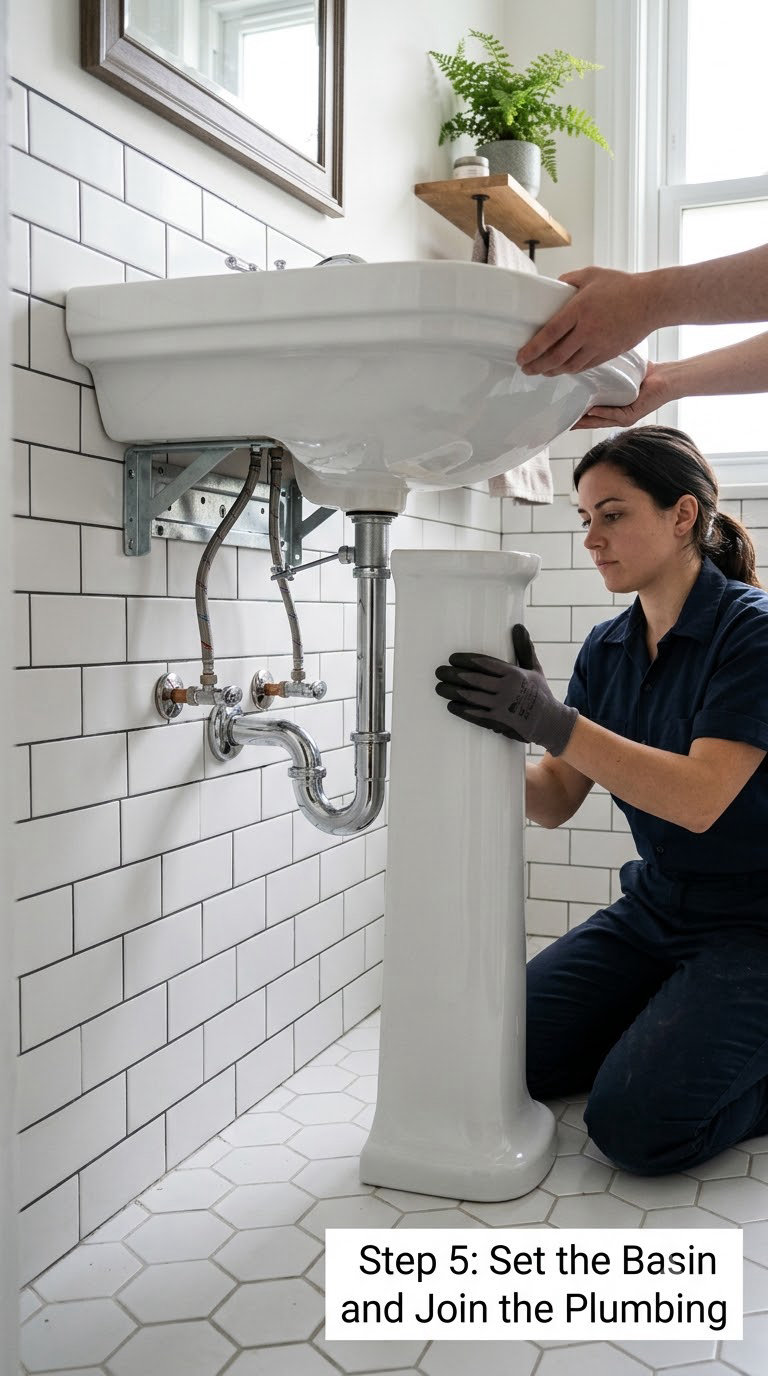
Have a helper lift the basin onto the column while you guide the tailpiece into the trap opening from below. Slide the basin back toward the wall until the mounting holes line up with your bracket or hanger bolts.
Run the fasteners through the holes with a fender washer and lock washer behind the head, then tighten with your fingertips and finish with a quarter turn. You are feeling for the wall to stop, not for torque. A sharp tink means you went too far — back it off and try again.
Connect the supply lines at the angle stops with the compression nuts, using pipe dope on the threads and plumber’s tape on any tapered stub. Braid or chrome supply tubes must reach a connection point outside the column.
Install the pop-up drain from above the basin using the gasket or a 3/4-inch rope of plumber’s putty, then hand-tighten the locknut another quarter turn underneath. The putty rope should bulge slightly, not ooze.
Step 6: Caulk, Reconnect the Drain, and Test for Leaks
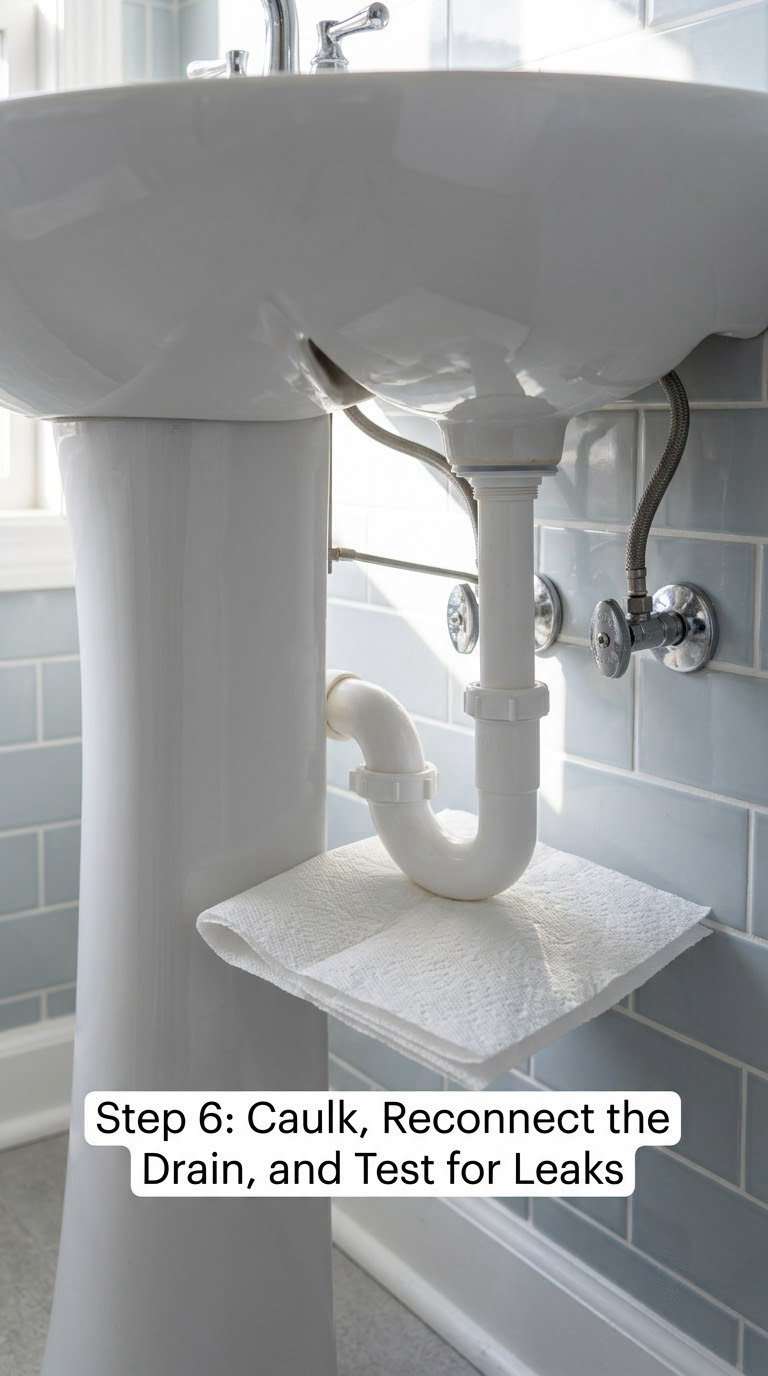
Hand-tighten the trap slip joint only, leaving a small amount of play. Run the faucet for a full minute with a paper towel pressed to every joint — the paper shows a drip long before the floor does. Retighten only the fitting that actually weeps, a quarter turn at a time.
Restore the water slowly at the angle stops, then open the hot side first and check both supply connections with the paper towel again. Once everything is dry, run the drain and watch the trap from below.
Run a clean bead of 100% silicone along the basin-to-wall joint and the column-to-floor joint, then tool it smooth. Full cure takes 24 hours, so do not let anything lean on the basin or run a wet bath until the next day. Avoid epoxy or any adhesive that expands after it hardens.
Common Mistakes to Avoid
- The sink rocks. The column base was not shimmed or was fastened unevenly. Remove the basin, shim to plumb, and recheck with a level before final caulking.
- The basin will not sit flush. Mounting hardware is off by as little as an eighth of an inch. Re-measure before you shim anything; do not force the basin against the wall.
- You hear a tink while tightening. That is porcelain telling you to stop. Back the fastener off and snug it to the wall instead.
- The trap is misaligned or will not reach. You forced the tailpiece into the trap at an angle. Cut the tailpiece to length, support the basin, and align both parts straight before the slip nut goes on.
- Water pools under the basin. A dry tailpiece or a missing gasket lets water drip for minutes before anything shows. Replace the washer, then dry the joint and retest with paper towel.
- Too much caulk squeezes out. A fat bead at the column base shows up weeks later as a crusty ring. Cut it back with a razor and keep the bead to about a quarter inch.
- Supply connections were made after the column went in. Once the column is flush to the wall you may not physically reach the stop. Move the braided lines and shutoffs into place first, then slide the column on.
When to Call a Pro
Hire a licensed plumber when the work means changing your plumbing rather than connecting to it. A waste pipe that sits too low for the trap to fit inside the column, a drain that has to move to a new location in the wall or floor, or supply lines that need new rough-ins all fall here.
Stop and call someone if you find galvanized or lead pipe, a slab-plumbing system, active leaking you cannot shut off, or framing that is not where the plan says it is. Cutting into a wall that carries structural load is not a weekend job.
Permits and inspection requirements vary by city, and any relocation of the drain or supply lines usually triggers one. Many plumbers will not quote pedestal work at all because of the tight working space inside the column, so ask specifically for someone who has done one before. If a quote comes back far above what you expected, get a second one and ask for a line item breakdown.
Maintenance
Run a dry paper towel under the basin every few months, especially after a busy stretch of guests. A joint that weeps one drop per minute becomes a wet cabinet problem within a season.
Clean the basin with a non-abrasive bathroom cleaner and a soft cloth. Skip the scouring pads and the bleach-on-porcelain habit, since both dull the glaze and leave the surface more porous over time.
Watch the seal at the wall and floor joints. If the silicone has shrunk, cracked, or pulled away from the surface, cut it out and redo it — a fresh bead takes ten minutes and prevents water from reaching the wall.
Do not hang weight off the basin rim or lean on the bowl. Pedestal sinks carry their load through the column and the wall fasteners, and both were sized for the fixture, not for laundry baskets of towels.
Frequently Asked Questions
Can I install a pedestal sink where the drain and water lines are already in place?
Usually yes, and that is the easiest version of this job. As long as the waste pipe is high enough that the trap fits inside the column, you only need to connect to what is there. Measure from the finished floor to the drain center before buying, and confirm the wall-to-drain distance matches your chosen sink.
Do I need plumbing experience to install a pedestal sink?
You do not need to be a plumber, but you do need to be careful with fittings. The job is mostly assembly plus two measurements that must be right. If you can use a pipe wrench and a drill, work slowly, and stop tightening ceramic once you feel resistance, a first-time install is realistic. Moving any pipe is a different conversation.
Should a pedestal sink be caulked to the wall?
Yes, run a thin bead of 100% silicone along the basin-to-wall joint and where the column meets the floor. The caulk is not what holds the sink up, it just blocks water and grime from getting behind the fixture. Let it cure for 24 hours before the sink gets wet or loaded.
What should I do if my new pedestal sink keeps rocking?
Lift the basin off and check the column base with a level on two axes. It should sit plumb with no movement at the base ring. Shim with cedar or vinyl shims until it is stable, then re-fasten evenly. If the base ring itself is warped, stop and replace the column rather than packing it with caulk.
Why is water leaking from the pedestal sink drain connection?
It is almost always a dry joint. Slip nuts trap the seal, so a tailpiece that is cut too short or pushed in crooked will drip slowly and appear to leak from the bottom of the column. Disconnect it, cut the tailpiece square and to length, and hand-tighten the slip nut snugly with a quarter turn left on.
Can I replace a vanity sink with a pedestal sink without moving plumbing?
Usually, because most vanities were roughed in at the same height a pedestal sink needs. The catch is the wall plumbing sits higher and further back, so check the drain height and the wall clearance against the toilet before you buy. If the numbers line up, you can leave the supply lines in place and move the drain over to the stub-out.
Conclusion
Start by measuring the waste pipe height and the wall-to-drain distance, then confirm the sink you picked matches both. Protect the ceramic, keep a helper on the basin, and follow the template rather than your eye. Connect the drain and supply lines before the column goes into place, tighten the wall fasteners by feel, and paper-towel every joint before you let the water run. Get every connection dry and the sink is done — a caulk line the next morning and the job is finished for good.