
How to Install a Vanity Light Fixture (2026) Safe Steps
How to install a vanity light fixture is a beginner-level electrical job most people can finish in an afternoon: kill the power, prove the wires are dead, swap the mounting bracket, connect black to black, white to white and bare copper to green, then restore the breaker and test. Because the electrical box and wiring are already in the wall, no new wire has to be run in almost every case.
It is also the single highest-impact upgrade you can make in a bathroom for the least money. Good task lighting over a sink changes how a room feels at 6am, and getting the connections right is what keeps it safe.
Contents
Time: 45 to 90 minutes for a straight swap · Cost: roughly 80 to 250 dollars for the fixture, connectors and bulbs · Difficulty: beginner, if the box is grounded and the wiring looks ordinary · Skill level: careful, not clever
Tools and Materials
Gather everything before you touch the wall. Half of a slow electrical job is putting the screwdriver down to hunt for a connector.
Tools
- Phillips and flat-blade screwdrivers, a 1/4 inch nut driver or socket for decorative fixture nuts
- Non-contact voltage tester plus a two-pole tester for a confirming reading
- Wire strippers, 14 to 18 AWG, and needle-nose pliers
- Listed twist-on wire connectors, three if one wire per function, plus one spare
- Short step stool, and a second person or a clamped work light
- Safety glasses and insulated-handled tools
Materials
- Replacement fixture listed as damp rated for a bathroom location
- Wire connectors, electrical tape and a roll of painter’s tape for labelling
- Mounting screws and screws long enough to bite into the box or stud, roughly 1 inch
- LED bulbs matching the fixture’s socket and maximum wattage
- Optional: spackle or patching compound, fine sandpaper, touch-up paint, and a 100 percent silicone bead for the final seal
Check the back of the new fixture before you buy it. It needs to fit the existing electrical box, and it needs to be damp rated, because a bathroom is a damp location and a fixture without that listing can fail early or void its warranty. If the new backplate will sit on a wall you are repainting anyway, our notes on the best bathroom vanity paints cover the touch-up stage.
Before You Start
Identify the circuit first, and label it. Turn on the vanity light, then switch breakers off one at a time until the light goes out. That is the breaker you flip for this job, and the label you write on it will save you the same guessing next time.
Clear the counter, lay a drop cloth, and dry the work area completely. Water and a step stool do not mix well, and a damp cloth wipes grit off the wall before you patch it.
Put on eye protection, keep your hands out of the box until power is verified, and work with the breaker off from the moment you start until the moment you test. The rule I follow is simple: if you have not tested it in the last ten minutes, test it again.
Confirm the new fixture suits what is already there. It should cover or fit the existing box, use the same mounting screw spacing, and match the voltage and bulb type your bathroom circuit serves. If the box is missing, damaged, ungrounded, or the wiring is anything other than ordinary black, white and bare copper, stop reading and check the section on calling a pro below.
Finally, know your local rules. A like-for-like fixture swap in an existing box is permitted almost everywhere, but some jurisdictions want a permit or an inspection for any bathroom electrical work, and your homeowner’s policy may care too.
Step-by-Step Instructions
Work in order and do not skip forward. Each step assumes the one before it finished cleanly.
Step 1: Turn Off and Verify the Electrical Circuit
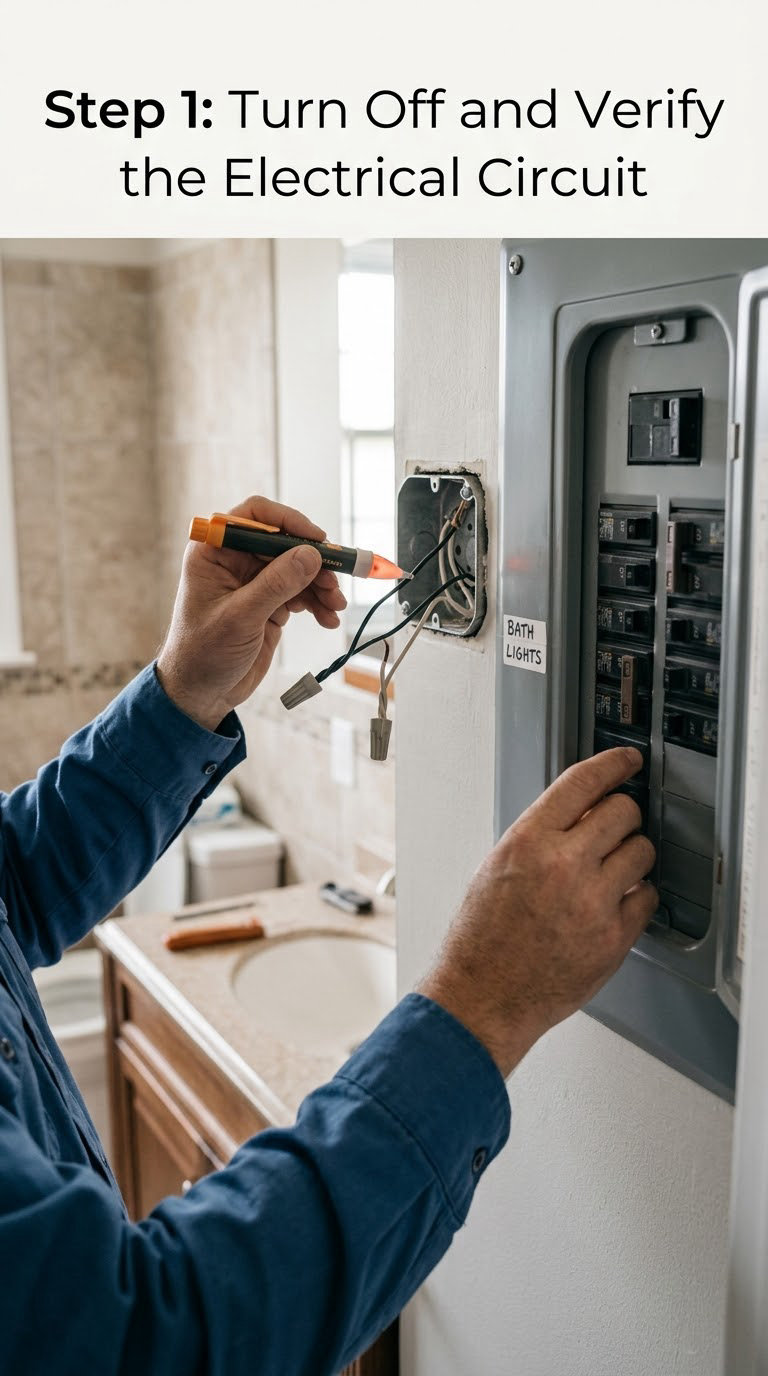
Switch off the labelled breaker, then confirm it visually. Stand clear, switch it back on, step away, and go touch the fixture to make sure you have the right one. Switch it off again for good.
Now test the wires before anything else. Open the fixture, hold the non-contact tester near each conductor, then confirm with a two-pole tester across every accessible conductor: hot to neutral, and each conductor to ground. Zero volts on all of them, every time, before you touch a single connector.
A non-contact tester alone is not enough. It can miss a low-voltage or poorly terminated conductor, so use it to find the circuit and a two-pole tester to prove it is dead.
Step 2: Remove the Old Vanity Light Fixture
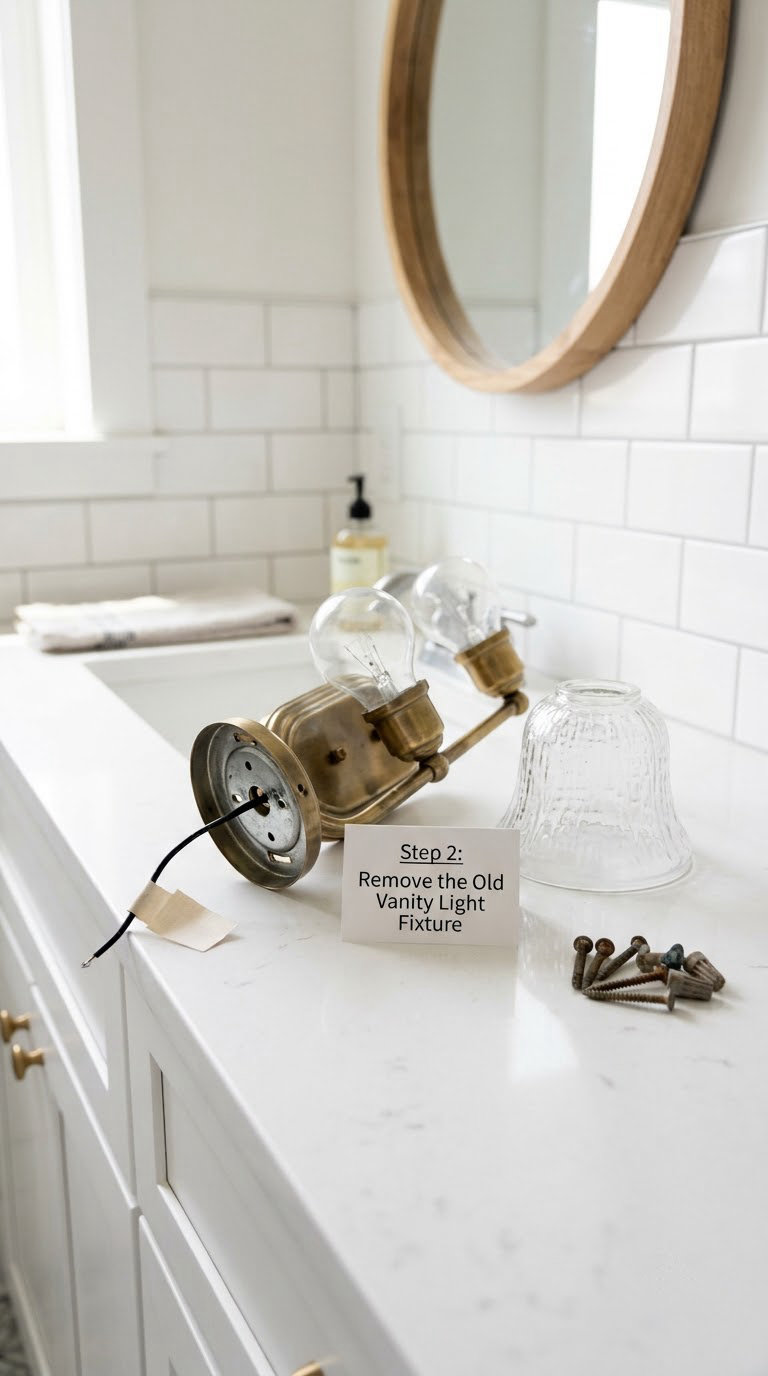
Photograph the wiring before you disconnect anything. A phone photo of the box with the conductors still attached is your reference when the replacement lands on your head later.
Unscrew the decorative nuts or finials holding the glass shades, set the shades aside on a towel, and remove the bulbs. Then take out the screws securing the fixture body or backplate to the electrical box.
Support the fixture as the last screw comes out. Lower it until the wires have slack, disconnect the connectors one at a time, and lower the fixture clear. Never twist or yank the conductors out of the box to free the fixture, and never pull a wire free of a screw terminal without loosening the screw first.
If wire positions are unclear or unmarked, label them with painter’s tape before you disconnect. A small strip of tape costs nothing and removes the guesswork at the exact moment you would be guessing.
Step 3: Inspect and Prepare the Electrical Box
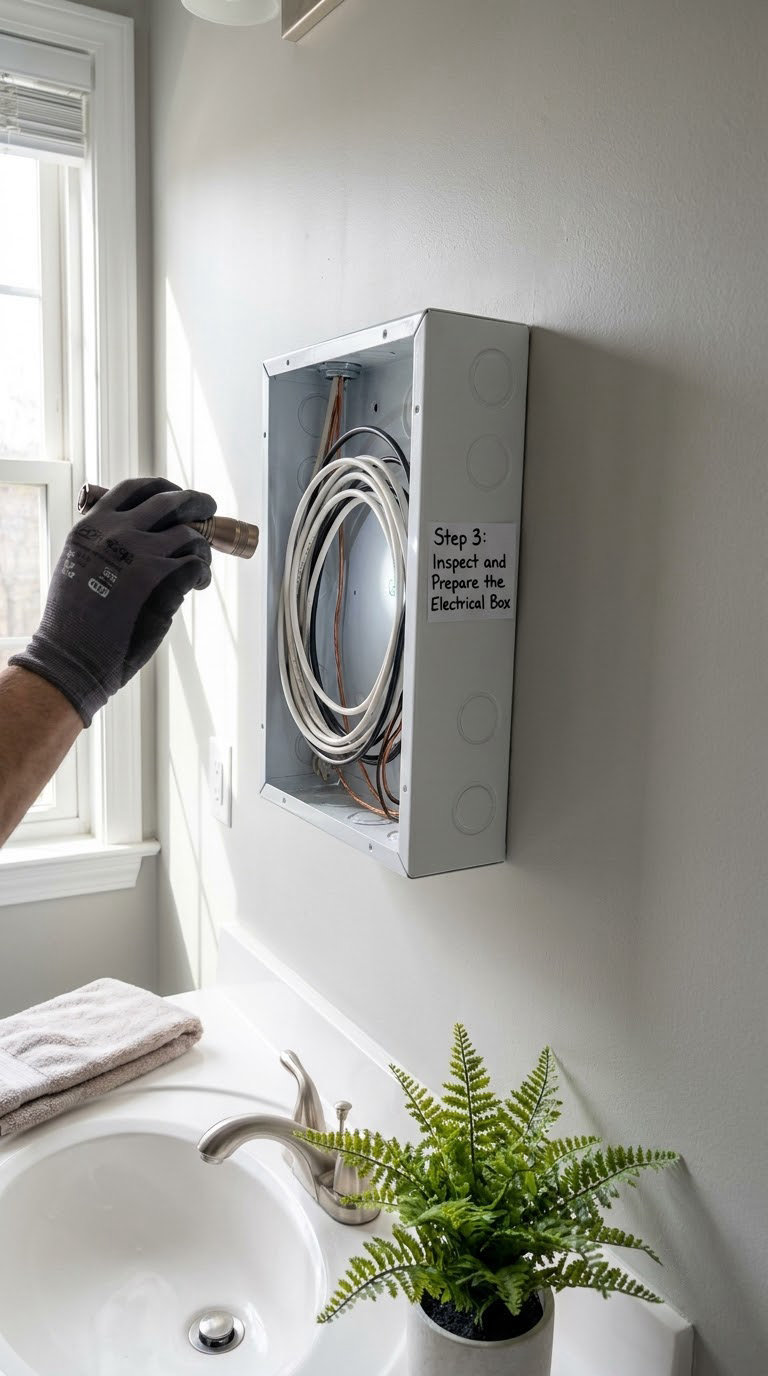
Look at the box with the breaker still off. Check that it is solidly fastened to a stud or brace, not moving when you press on it. A box that wiggles will eventually take the fixture down with it.
Check the conductors for damage, brittle insulation, discoloration, scorch marks, or damp. Any of those means stop: scorched or heat-damaged wiring is a fire signal, and moisture inside a bathroom box needs a professional.
Trim the conductors to about 6 inches of working length and strip roughly 3/4 inch of insulation from the end of each. Leave the ground conductor a little longer than the others so it can be folded in neatly. Clean out dust and debris so the connectors have room.
Step 4: How to Install a Vanity Light Fixture and Connect the Wiring
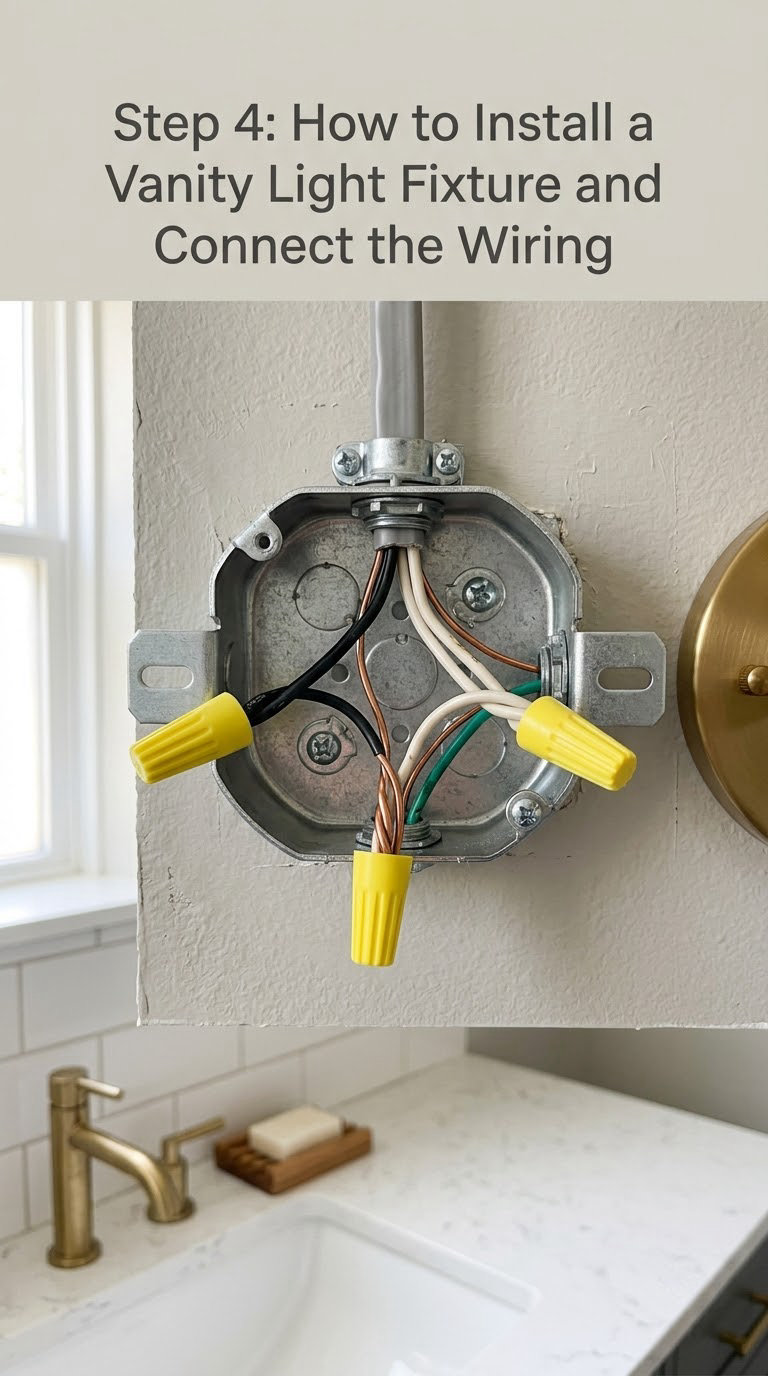
Match conductors by function, follow the wiring diagram printed on the fixture, and use listed connectors sized for the conductor. Three rules cover almost every residential box:
- Black or red hot wire carries current to the lamp. It joins the fixture’s black or red lead, or to the brass screw terminal on the socket.
- White or grey neutral wire returns current. It joins the fixture’s white or silver lead, or to the silver screw terminal.
- Bare copper or green ground wire is the safety path. It joins the fixture’s green or bare lead and, crucially, is bonded to the metal box with a grounding screw so the box itself is grounded.
Strip only far enough for the connector, twist the conductors together so they are solid, and screw the connector on until it seats. Tug gently on each wire to confirm it is gripped. No bare copper should be visible outside the connector, and no strands should escape past it.
Slide the ground connection on last, leaving a little slack so it is not the first thing to snap when someone changes a bulb. Electrical tape wraps a connector; it does not replace one.
If the box is full of other splices, if the conductors are aluminum rather than copper, if the wiring is knob-and-tube, or if you cannot identify a ground, stop here and call a licensed electrician. Do not improvise, and do not use a breaker as a switch.
Step 5: Mount and Align the New Fixture
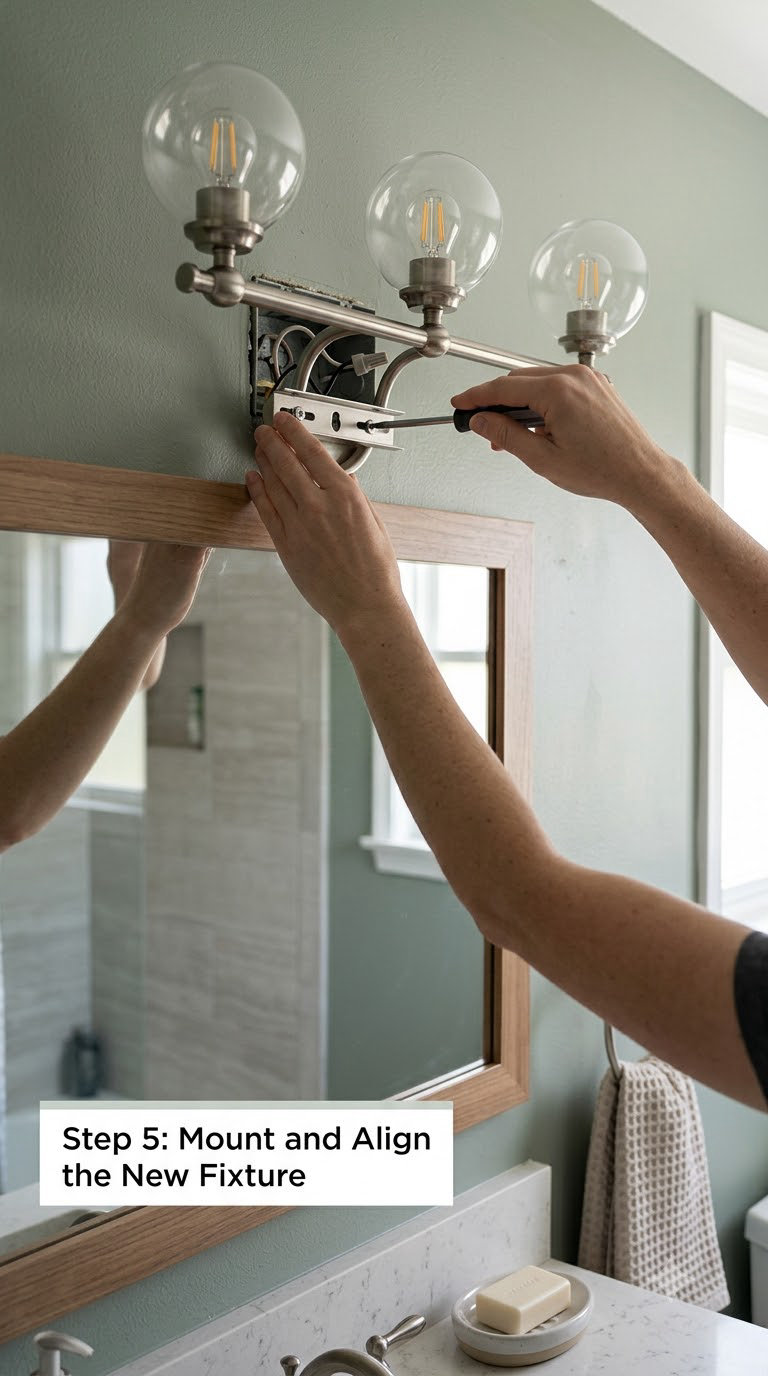
Attach the mounting bracket or cross-bar to the box with the supplied screws, tightening them evenly until the bracket is rigid and does not rotate. If the box sits off-centre, this is the moment to address it, not after the fixture is up.
Tuck the conductors neatly into the box so nothing is pinched between the bracket and the wall. Bring the fixture body up to the bracket and secure it with the provided nuts or screws, snugging alternately rather than cranking one side tight.
Set a level on the fixture and adjust until it reads true, then step back and check that it is centred over the sink or mirror. Most crooked fixtures were tightened first and straightened never.
If the new backplate is smaller than the old footprint, you will see the old screw holes and any scuffing. Deal with that after the fixture passes its test, not before.
Step 6: Install the Bulb, Shade, and Covers

Choose bulbs that match the socket and stay at or below the fixture’s maximum wattage. LED bulbs run cool and last far longer than incandescent, and in a bathroom the color temperature matters more than people expect: around 3000K reads warm and flattering, while 4000K to 5000K is crisper for shaving and makeup. If you plan to dim it, buy bulbs marked dimmable.
Screw the bulbs in snugly but not hard, then fit the glass shades, diffusers and any decorative nuts, tightening until firm. Handle glass with a clean, dry cloth so you do not leave fingerprints on the shade.
Keep the packaging, the extra screws and the old fixture until the new one has passed testing. Nobody regrets having the box the part came in on the counter for a week.
Step 7: Restore Power and Test the Installation
Replace the cover plate and make sure no conductor is pinched and no bare copper is visible. Stand clear of the fixture, not beside it, then flip the breaker on.
Test from a safe position: use the wall switch, then confirm each bulb lights steady. Watch and listen for flickering, buzzing, a hot smell, or heat at the backplate. If any of those appear, switch off at the breaker immediately and go back to the connections.
If the breaker trips as soon as it is reset, do not reset it a second time. That is a short or a fault, and it belongs with an electrician. A breaker that trips once and holds is telling you something important too.
Common Mistakes to Avoid
Most failed installs come down to one of the same handful of errors, and every one of them has a simple fix.
- Skipping the voltage test. Breaker off does not guarantee dead. Test every accessible conductor before touching it.
- Confusing hot and neutral. Reversed conductors still light the lamp, which is why the fault hides. Hot must reach the black or brass terminal.
- Leaving the ground unconnected. A green or bare lead plus a grounding screw on the metal box, every time. This is the fault that shocks people.
- Overtightening the mounting screws. Snug and even. Too much torque cracks the terminal block inside the socket.
- Overfilling a connector. Match the connector to the conductor count and size, and do not cram extras in with electrical tape holding it together.
- Using the wrong bulb wattage. Above the rating, the socket runs hot and the fixture fails early. LED or not, the rating applies.
- Mounting a heavy fixture to a weak box. A plastic old work box with light tabs can let go under a heavy bar light. Screw into the stud or add a brace.
- Pinching a conductor under the bracket. Tuck wires into the box first, then tighten. A nicked wire is a future fault.
When to Call a Pro
Stop and contact a licensed electrician if any of these show up. This is the part people skip, and it is the part that decides whether this was a safe afternoon.
- The electrical box is missing, cracked, loose, or full of splices you cannot identify
- The wiring is aluminum, or you can see old knob-and-tube cloth sheathing
- There is no ground wire, or the ground is loose in the box
- The breaker trips, the switch feels warm, or there is scorch, melting or moisture
- The fixture is heavy, glass-fronted, or larger than the box and studs can carry
- The job needs new wiring, a new box location, a dimmer change, or a permit and local inspection
Getting a quote is normal, not a defeat. On a straightforward swap most electricians will look at it and tell you honestly whether it is a small job or a bigger one.
Maintenance
Wipe the fixture and shades with a dry or barely damp microfiber cloth, and never spray cleaner straight onto a bulb or a socket. Do it with the breaker off if you need to reach the top of a shade.
Replace bulbs at the same rating and socket type you removed. Every few months, check that the fixture is still firm by gently pressing the backplate, and tighten any loose mounting screw.
Keep water away from the box itself. Wipe splashes off the wall around it, and if you see bubbling paint or a damp patch above the fixture, look at the seal.
Treat flickering, buzzing, discolored bulbs, heat at the backplate or a breaker that trips as faults, not nuisances. Switching off at the breaker and having it looked at is cheaper than replacing a scorched socket. When you are choosing the mirror the light sits against, our notes on vanity mirrors with LED lighting and bathroom vanity mirrors are useful if you are reworking the whole wall.
Frequently Asked Questions
Can I install a vanity light fixture myself?
Yes, if you are replacing a fixture on an existing, properly grounded box using ordinary copper wiring. The job is a beginner-level electrical task: isolate the circuit, verify it is dead, swap the bracket, match hot, neutral and ground, then test. You should not attempt new wiring, aluminum or knob-and-tube circuits, a missing box, or a location that needs a permit.
Do I need to turn off the breaker before removing a vanity light?
Always. Shut off the breaker that feeds the fixture, confirm it visually by switching it back on, then test every accessible conductor with a tester before touching a connector. A non-contact tester finds the circuit; a two-pole tester proves it is dead. Treat the wires as live until your own test says otherwise.
What size bulb should I use in a vanity light fixture?
Match the socket type and stay at or below the wattage printed on the fixture, which is often marked near the socket. LED bulbs are the usual choice for a bathroom: they run cool, last far longer and come in color temperatures from about 3000K warm to 5000K crisp. If you use a dimmer, buy bulbs marked dimmable.
Can I install a vanity light where the old wiring looks different?
Not safely on your own. If the conductors are aluminum, the wiring is old knob-and-tube, there is no ground, or the box is missing or full of unidentified splices, stop and call a licensed electrician. Those conditions need the correct listed connectors, sometimes a box change, and often a permit. Do not splice connections inside the fixture frame to get around it.
When should I hire an electrician instead of installing a vanity light myself?
Hire one for new wiring, a new box location, aluminum or knob-and-tube circuits, a missing or damaged box, an ungrounded circuit, a breaker that trips, any scorching or moisture, or a fixture too heavy for the box. A straight like-for-like swap in a sound, grounded box is a reasonable DIY job. If you are unsure which situation you have, ask before you start.
Finishing the Job
Do one thing before anything else: find the breaker that feeds the vanity, switch it off, and prove the wires are dead. Everything after that is mechanical, and it will take under an hour on a sound box.
Connect black to black, white to white, and bond the bare copper or green ground to both the fixture lead and the box’s grounding screw. If the box is missing, damaged, ungrounded, or the wiring is not ordinary copper, that is not a learning exercise — bring in a licensed electrician. Everything else here is a patient afternoon with a screwdriver and a tester.
