How to Paint Ceramic Tile Floors: Simple DIY Guide 2026
You can paint ceramic tile floors, and the method is short: clean the tile thoroughly, scuff the glaze, seal it with a bonding primer, roll on two coats of a two-part epoxy floor coating, and let it cure before anyone walks on it. Skip the bonding primer and the coating peels off in sheets within a year.
That last warning matters more than the color swatch. Most painted tile that fails was not sanded, not degreased, or coated with wall paint, which is why the failures always look the same: paint lifting in curled flakes along traffic lanes rather than wearing thin.
Contents
Time: two full days plus a curing week · Cost: modest, one primer kit plus one color coat kit and a small roller set · Difficulty: moderate DIY · Skill level: careful prep work matters more than painting technique
Tools and Materials
A 40 sq ft (3.7 m²) powder room and a 160 sq ft (15 m²) kitchen both fall inside one kit and one spare quart. Buy by floor size, not by guesswork, and add 10% for grout, which drinks more coating than tile does.
Cleaning and prep supplies
- Heavy-duty degreaser or trisodium phosphate cleaner, about 1 quart for 160 sq ft
- Nylon scrub brush and a stiff plastic grout brush
- 80, 120 and 220 grit sandpaper, plus a detail sander with a 180 grit pad
- Shop vacuum with a brush head, plus a tack cloth
- Paintable silicone or latex caulk for cracked grout, one 10 oz tube
- Utility knife, putty knife, and a plastic scraper
- Rubbing alcohol and clean rags for the final wipe-down
Painting supplies
- Bonding primer made for slick surfaces, 1 gallon
- Two-part epoxy floor coating kit in your chosen color, 1 kit plus 1 quart of base for larger rooms
- 3/8 inch nap roller, a roller frame and a 4 inch mini roller frame for edges
- 2 inch angled synthetic brush for cutting in
- Painter’s tape, 2 inch wide, and a plastic drop cloth
- Extension pole for the roller, safety glasses, nitrile gloves and a N95 or P100 respirator
- Box fan for ventilation and a wet/dry vacuum rated for the wet prep stage
A roller cover costs a couple of dollars, so swap it rather than trying to clean a loaded one overnight. Do not buy a foam roller for the color coat; it leaves bubbles that read as defects under a satin finish.
Before You Start
Painting tile is a good call when the tile is dated in color but sound underneath. It is a bad call in a shower, over a damp slab, or on a floor whose previous paint is already lifting.
Run through this list before you buy anything:
- Go ahead if the tile is solid, grout is intact or repairable, and the room sees normal household foot traffic.
- Go ahead carefully if the tile is porcelain. It is denser than ceramic and holds less moisture, so scuff more thoroughly and expect slightly longer primer dry times.
- Skip it if tile is loose, hollow-sounding, or bedded in a cracked mortar bed. Paint will follow the movement and fail with it.
- Skip it for shower pans, shower interiors, and pool decks. These need a waterproof membrane system, not a decorative coating.
- Skip it for busy kitchens and entryways with tracked-in grit. That wear pattern is where coatings fail first.
Knock on tiles with a coin or a screwdriver handle. A hollow sound means the mortar behind is loose, and that tile needs setting or replacement before any coating goes down.
Check for moisture first. Press a 4 inch square of plastic sheeting or aluminum foil to the floor, seal the edges with tape, and leave it overnight. Condensation or a damp-feeling underside means stop and find the leak; coating a wet floor traps the moisture and the epoxy blisters within weeks.
Older homes add one more concern. Ceramic tile installed before 1980 can carry lead in the glaze and in the surrounding materials, and sanding generates dust. Test the surface for lead first, and if it comes back positive, stop and hire a certified abatement contractor rather than disturbing it. If you are unsure whether the floor is safe to scuff, our bathtub tile painting guide covers the same age of material.
Plan ventilation before you start. Epoxy coatings give off vapour while mixing and for several hours after, so open every window, run the box fan, and keep pets and small children out of the room until the air clears. Remove all furniture, door swing clear of the floor, and store or relocate the baseboards only if they are loose.
For the wet cleanup stage, a shop vac keeps slurry out of your grout lines better than a sponge and a bucket. Our picks for wet and dry vacuums for tile floors cover that job and the dry dust pickup that comes later.
Step-by-Step Instructions: How to Paint Ceramic Tile Floors
Work in one direction from the furthest corner toward the exit, and never paint yourself into a corner you cannot leave. Keep a wet edge moving ahead of you and stage the mixing so your working time stretches to cover the room.
Step 1: Clean, Repair, and Sand the Tile
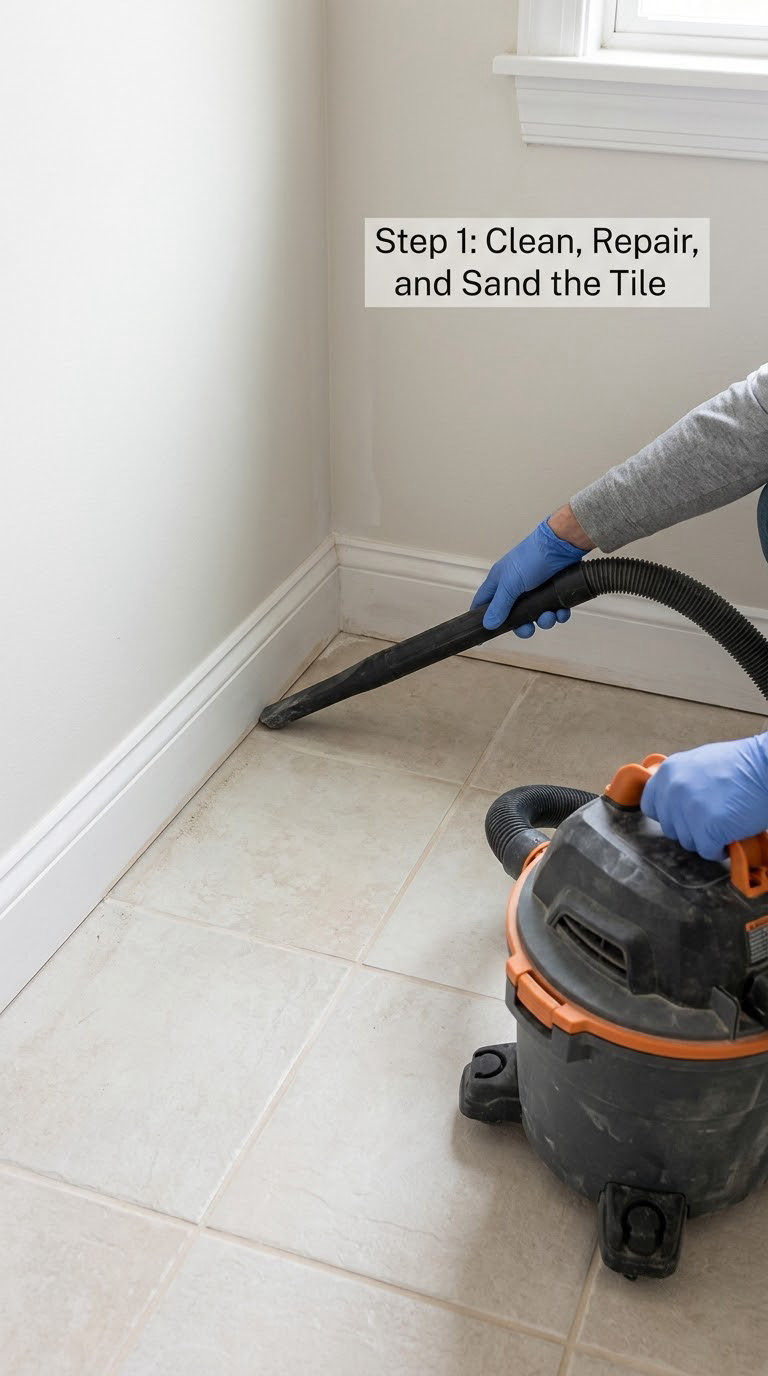
Mix the degreaser at label strength and scrub every tile with the nylon brush, working in 4 ft (1.2 m) squares so you can see the difference between clean and still filmed. Rinse with a wet/dry vacuum rather than a hose if the drain allows, or squeegee the slurry to a towel.
Let the floor dry completely, at least 4 hours and preferably overnight. Then rake out crumbling grout with the putty knife and fill the gaps with paintable caulk, leaving the bead slightly proud. Once that skin hardens, sand it flush.
Scuff the glaze with 120 grit, then finish with 220 grit for a uniform matte surface. You are not trying to remove the glaze, only to give the coating micro-texture to grip. Vacuum twice with the brush head and wipe with a tack cloth.
The check before you prime: run a bare hand across the tile and look for shiny patches. Any glaze still polished under your palm is a spot the epoxy will peel from later.
Step 2: Mask Edges and Apply the Bonding Primer
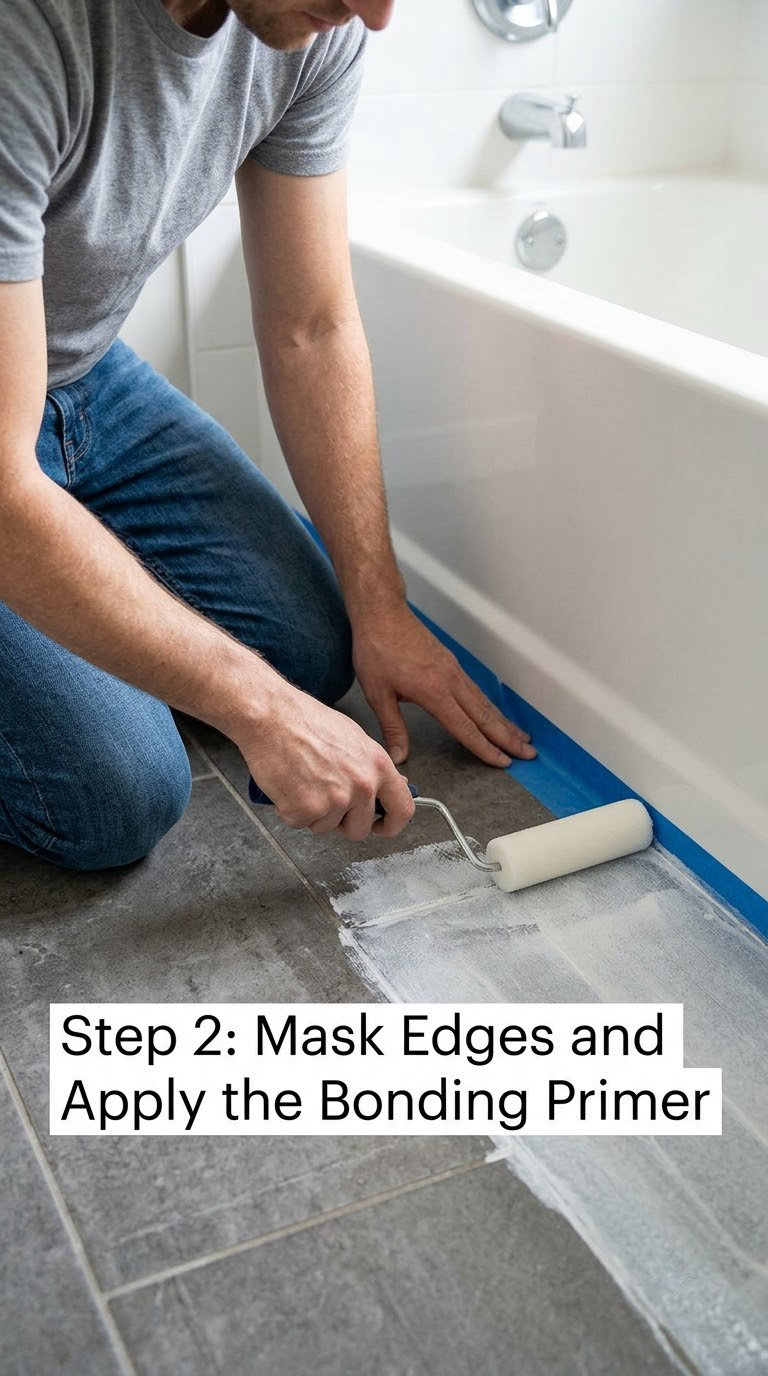
Tape baseboards, wall junctions, fixtures and the tub surround, pressing the tape edge down firmly with a putty knife so no bleed-through can happen. Lay a drop cloth over anything you cannot tape.
Apply the bonding primer exactly as directed, cutting in along every edge with the 2 inch brush first, then rolling the field with the 3/8 inch nap roller. Two thin coats beat one thick one; the second coat follows the first once it is dry to the touch, usually 2 to 4 hours depending on temperature and humidity.
Between coats, lightly re-sand the cured primer with 220 grit and tack it off. That knocks off the roller texture and gives the epoxy a slightly rougher surface to bond to, which is the difference between a floor that lasts and one that lifts.
Primer dry time is not cure time. Even when it feels dry to a fingertip after a few hours, plan on 24 hours before the color coat goes on in cool or humid rooms.
Step 3: Mix and Apply the First Epoxy Color Coat
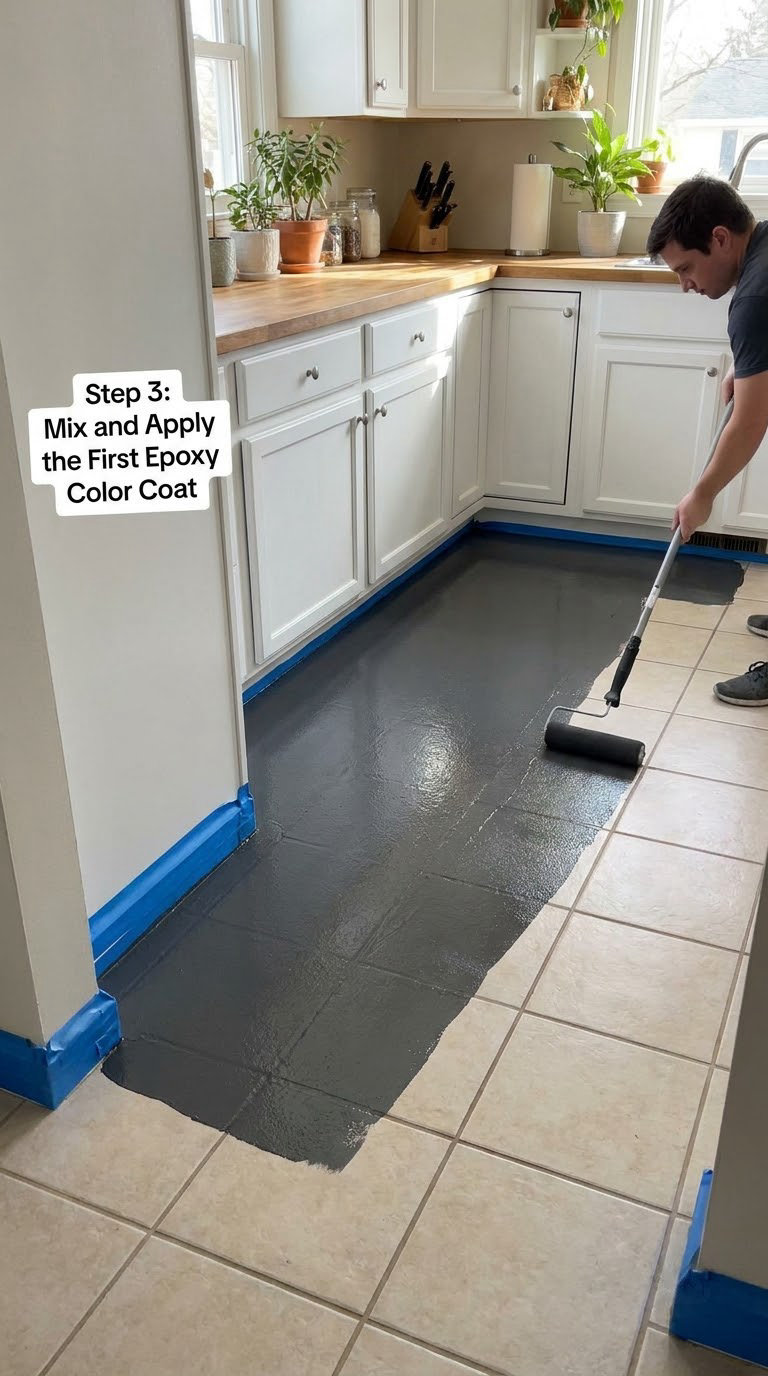
Most two-part kits mix at two parts base to one part hardener by volume, but read your own label twice and measure accurately. Under-measuring hardener leaves a soft floor; over-measuring leaves a brittle one that chips instead of flexing.
Stir for the full time on the label, about two minutes, scraping the sides and the bottom of the pail. Working time after mixing runs roughly 2 to 4 hours at room temperature, so mix only what you can roll in that window. Pour a measured amount into a paint tray and thin the puddle slightly with water if your kit allows, aiming for a wet oatmeal consistency.
Cut in the perimeter with the angled brush, then roll the field in a single direction. Expect coverage near 400 to 500 sq ft per gallon on prepared tile, and plan for two color coats because grout stays visible through one.
Load the roller lightly and keep pressure even. Too much paint causes lap marks as the edge half-dries; too little leaves the tile reading through. Roll from the far corner toward the door.
Step 4: Let the First Coat Dry and Inspect the Finish
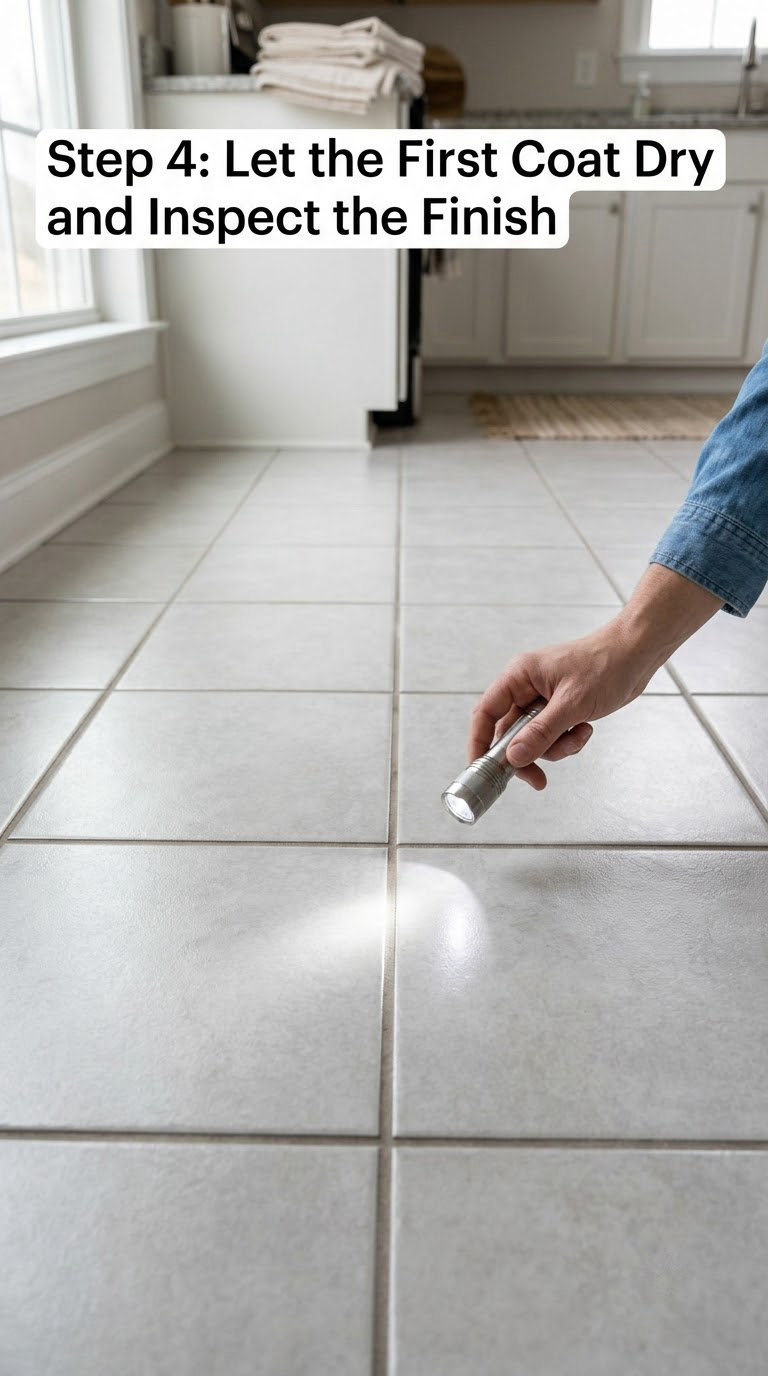
Leave the first coat undisturbed for 12 to 24 hours. Walk on it only in clean socks if you must move through, and keep furniture, rugs and pets out entirely.
Inspect with a flashlight held at a low angle across the floor. The light finds exactly what you need to see: thinned spots along grout lines, shiny bald patches where the roller skipped, and lap marks from an uneven reload.
Sand any defects with 220 grit, vacuum, and touch them up with the same mixed coating rather than a different product. Do not add a third full coat for a few thin grout lines; it creates a ridge the second coat will telegraph.
Apply the second coat only when the first is fully dry to a light touch and no colour transfers to a fingertip.
Step 5: Apply the Second Color Coat and Treat the Grout
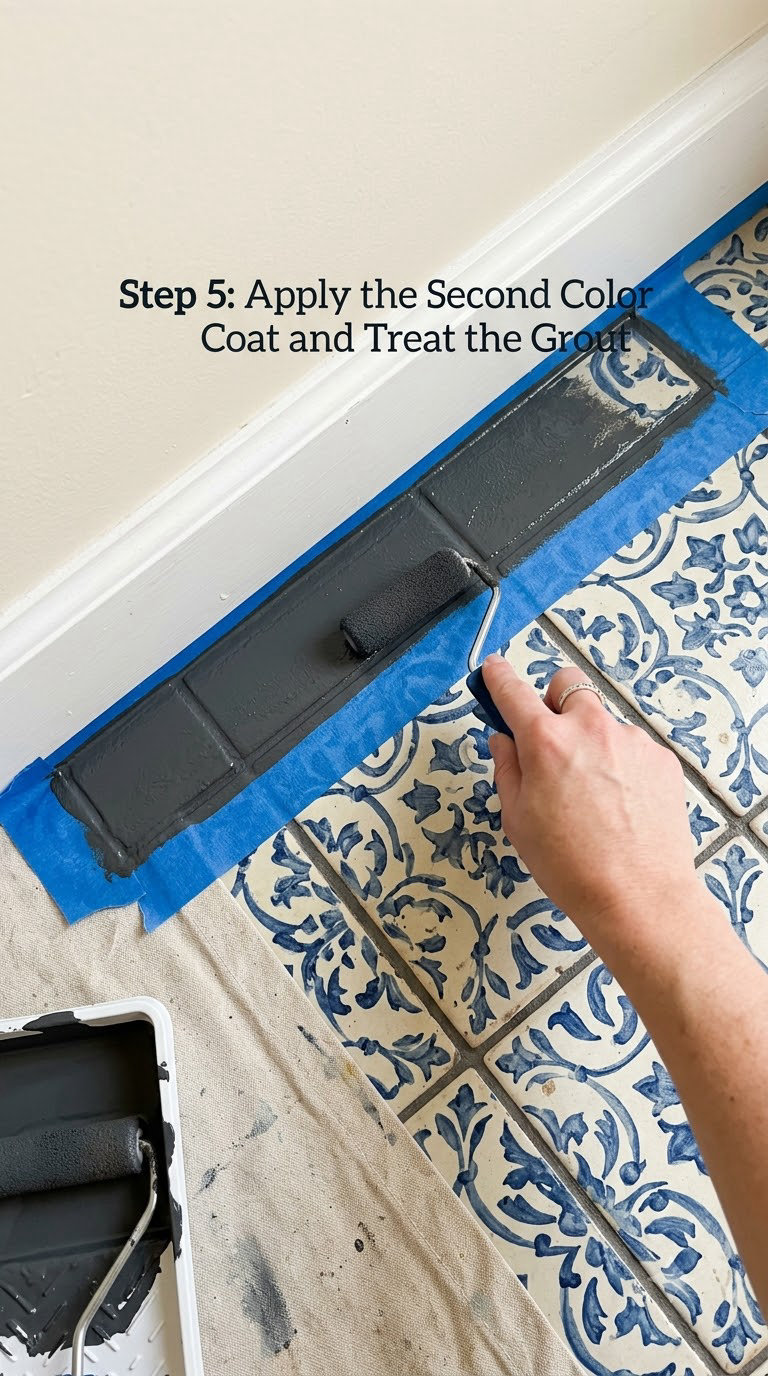
Mix a fresh batch the same way, and start where the first coat started so your wet edge travels at a familiar pace. Roll across the long dimension, keeping the tape boundary your guide and feathering paint up against it rather than over it.
Push the roller into each grout line on the final pass so the joints take colour evenly instead of showing as pale stripes. Where grout resists coverage, work a small amount of coating into the joint with the angled brush rather than laying more full coats.
Pull the tape while the coating is still workable, usually within a few hours and inside the label window. Paint that has set for a day can bond to the tape, and pulling it then takes the edge with it.
Step 6: Finish, Clean, and Allow the Floor to Cure
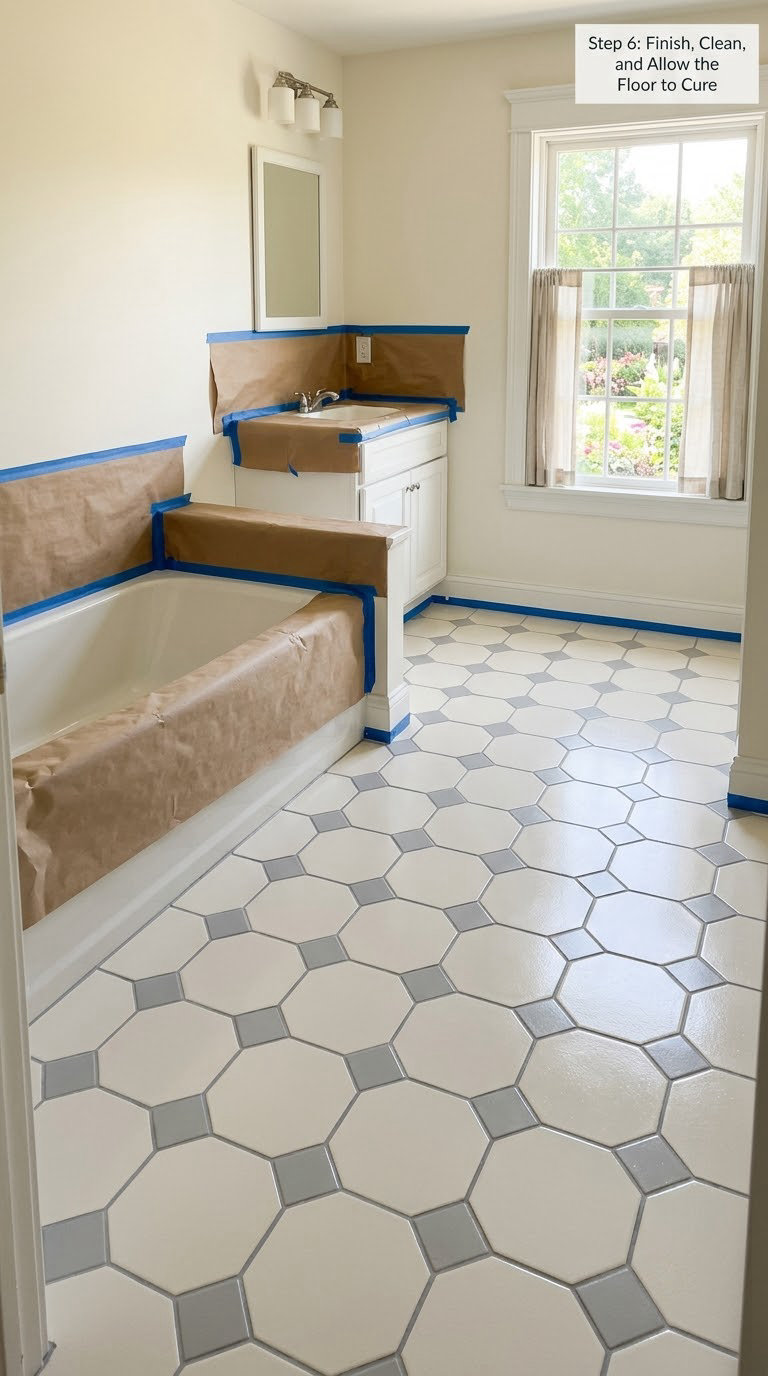
Remove any tape residue and sweep out dust with a soft brush, then wipe the floor with a damp microfiber cloth and no cleaner. Leave windows open until the room no longer smells of coating.
Light foot traffic is usually fine after 24 to 48 hours. Wait 72 hours before rugs or mats, five to seven days before furniture, and about a week before heavy loads like a tool chest or a stack of boxes. A rug placed too early traps moisture and dulls the sheen permanently.
Judge the finish on day seven, not day one. Full cure runs two to four weeks, and the floor keeps hardening after you start using it normally.
Common Mistakes to Avoid
- Skipping the bonding primer. This is the single cause of sheet peeling. Nothing else on this list matters as much.
- Using wall latex paint. Interior wall paint has a thin binder that cannot flex with thermal movement, so it lifts. Use an acrylic or two-part floor system built for foot traffic.
- Painting over damp tile or grout. Overnight moisture testing is cheap; a blistered floor is not. Re-test in any spot you cleaned with water.
- Mixing epoxy off ratio. Measure rather than eyeball, and stir for the full label time.
- Rolling too thick. Thick coats trap solvent, cure soft inside, and peel as one sheet. Keep the coat even and thin.
- Making lap marks. Reload the roller and keep moving so the wet edge stays ahead of you.
- Coating grout while it is still damp. Damp grout holds colour poorly and goes patchy. Let grout dry longer than the tile around it.
- Leaving tape on too long. Once the coating sets, the tape edge becomes a bond line. Pull within the label window.
- Walking on the floor too soon. Footprints early in cure turn into worn paths that never come out. Use clean socks only.
When to Call a Pro
Some floor problems are not paint problems. Call a contractor when any of these show up:
- An active leak, or a moisture reading that stays high after the source is fixed.
- A saturated or rotten subfloor that flexes under weight.
- Structural movement, such as stairs treading unevenly or a floor that bounces over joists.
- Extensive cracked, loose or hollow tile, which means resetting or replacing rather than coating.
- Suspected asbestos in older resilient flooring or mastic under the tile. Leave it alone until tested.
- Large commercial spaces, where a special coating system and a permit review are usually required.
One more reason to bring in help: coating a floor nobody can reach to sand and prep properly. Corners behind a toilet or under built-in cabinetry are where shortcuts produce failure.
Maintenance
Clean the painted floor with a neutral pH cleaner diluted per its label, applied with a microfiber mop or cloth. Wipe the mop on a second cloth between passes so you are not spreading grit back across the finish.
Stay away from abrasive pads, green scrub pads, steel wool, and alkaline or acidic products. Vinegar, ammonia-based window cleaners, and automatic scrubbers dull the satin finish permanently, and powder-style cleaners leave a residue that traps dirt.
For scratches, sand the spot with 400 grit, feather the edges, and touch it with the same coating. For a chip through to bare tile, scuff a wider ring around it, re-prime, and apply two light coats so the repair blends.
Expect light scuffing to appear in the first year and scrub dull spots with a non-abrasive pad and neutral cleaner. If wear reaches bare tile in traffic lanes rather than thinning evenly, recoating the whole floor is worth more than patching patches.
Vacuum grit away often. Sand tracked onto a coated floor acts like sandpaper under every footstep, and our best vacuums for tile floors roundup covers keeping grit off hard floors.
Replace the tile rather than recoat when the subfloor is exposed, when coating keeps lifting in the same places, or when you want a pattern rather than a colour. Peeling in sheets means a prep problem you can fix; peeling in a worn lane in a busy kitchen means the room is asking for new tile.
Frequently Asked Questions
Can you paint over ceramic tile floors without sanding?
You can, but expect shorter life. Sanding is not about removing the glaze, it is about scuffing it to a matte surface so the primer has something to hold. On a floor where sanding is not practical, mechanically scuffing with a floor grinder or a stiff abrasive pad works the same way. Skipping it entirely means relying on the bonding primer alone, which is where most peeling starts.
What type of paint is best for ceramic tile floors?
A two-part epoxy or waterborne acrylic floor coating rated for foot traffic, applied over a bonding primer made for slick surfaces. Wall latex, chalk paint, and ordinary porch paint on their own do not hold. Match the system to the room: high traffic kitchens and entryways want the epoxy kit, while a low-traffic powder room is fine with primer plus acrylic floor paint.
How long does painted ceramic tile take to dry and cure?
Plan on 12 to 24 hours between coats, 24 to 48 hours before light foot traffic, and 72 hours before rugs or furniture. Full cure takes two to four weeks, so be gentle during the first week. Cool or humid rooms run slower than the label suggests, and the floor keeps hardening well after you start using it.
Should painted tile grout be painted too?
Paint the grout as part of the same system. It saves the repeated sanding and re-coating that comes from leaving joints bare, and it stops the tile looking striped after a few years. Work coating into each line on the final roller pass, or use an angled brush on stubborn joints. Let grout dry longer than the tile around it, since it holds moisture and repels colour.
Can you use epoxy paint on a bathroom tile floor?
Yes, and epoxy is a good fit for a bathroom floor outside the shower. It handles water and cleaning better than acrylic and does not yellow the way oil-based polyurethane can. Keep it out of shower pans and shower interiors, where a waterproof membrane system is required rather than a decorative coating. Good ventilation during application matters more in a small bathroom.
How do you remove peeling paint from ceramic tile?
Scrape off what lifts with a plastic scraper, then sand the whole floor to a uniform matte with 120 and 220 grit, moving across the entire surface rather than only the damaged spots. Vacuum thoroughly, degrease, and let the floor dry fully before re-priming. If paint has fused to the glaze and will not sand, the tile may need replacing, which is a demolition job rather than a weekend.
Start where the project actually fails: the prep. Scrub every tile until your bare hand finds no film, scuff the glaze to matte, and give the bonding primer its full dry time. Everything after that, including how to paint ceramic tile floors for a finish that survives real traffic, follows from those two decisions.