
How to Remove Adhesive from a Tile Floor 2026
Leftover glue is the one thing standing between you and a clean floor. How to remove adhesive from a tile floor is mostly a matter of knowing what the adhesive is, because the gentlest method that works on soft peel-and-stick residue will never touch hardened thinset.
Start slow. Scrape what lifts on its own, warm what resists, use a solvent only when you know the tile and the adhesive can handle it. Skip ahead to a strong stripper and you can end up with dull porcelain, etched stone, or grout that crumbles under a fingernail.
Contents
Time: 2 to 6 hours for a small bathroom or entryway, depending on how much residue is stuck down · Cost: one scraper, one or two containers of adhesive remover, and a Saturday · Difficulty: Moderate DIY · Skill level: patient beginner
Tools and Materials
You can do this with hardware store basics. Borrowing a floor scraper rather than buying one saves money if the job is a single room; I’ve rounded up the best floor scrapers for tile and adhesive removal if you want to pick one properly.
Hand tools you’ll actually use
- Plastic scraper or putty knife, 4 to 6 inch wide. A wide flexible blade is the safest first tool. Cheap window putty knives bend just enough to follow the tile without gouging it.
- Stiff nylon-bristle brush. A dish brush or grout brush works the remover into residue and out of the joints.
- Microfiber cloths, 4 to 6 of them. One for remover, one for rinse, one for final dry. They get saturated fast.
- Shop vac or household vacuum with a floor head. Fine dust from scraped adhesive is easy to inhale and easy to spread back onto the floor.
- Wet/dry vacuum or sponge mop. Needed for the damp rinse at the end.
- Masking tape and plastic sheeting, 6 by 8 foot. For cabinets, baseboards, and the wall behind the work area.
Protection, cleaning, and optional gear
- Nitrile gloves and safety goggles. Chemical removers and old adhesive can irritate skin within minutes.
- Adhesive remover matched to the adhesive type. Labels list the adhesive families each formula attacks, and most state a dwell time. Follow the label rather than a forum guess.
- Hair dryer, or a heat gun on low if needed. A hair dryer is usually enough. A heat gun adds risk around vinyl, sealed wood, and grout.
- Pure neutral pH floor cleaner. For the final wash after the residue is gone.
- Trash bags for soaked cloths. Solvent-soaked rags go in the bin, not the sink, and never in a clothes dryer.
- Optional: oscillating multi-tool with a scraper blade, or a rented floor grinder. Worth it only for large areas of hardened thinset, and not a weekend rental for one bathroom.
Before You Start
Ten minutes of identification saves an hour of damage. Look at the residue before you touch it, and check the flooring documentation if you still have it. Manufacturers publish cleaning and solvent guidance for their own tiles, and that sheet overrides anything you read here.
Move furniture, rugs, and baseboards out of the room entirely if you can. What stays gets covered with plastic sheeting tucked under the edge, and painted cabinetry gets taped where the sheeting meets it.
Open the windows and prop the door open. Even a low-odour stripper needs air moving, and a closed bathroom with a strong solvent is the fastest route to a headache and a fogged mirror.
Before you bring heat anywhere near the floor, find out what is under it. Radiant floor heating, in-floor heating mats, copper plumbing, and buried electrical cable will not forgive a heat gun held still. If you cannot trace what runs beneath the floor, use a hair dryer at a distance and skip the heat gun.
Have a bin bag ready for every scraperful of residue. Old adhesive sticks to shoes and gets tracked through the house faster than you’d think, and pulling a dried glob off a sole in the middle of the kitchen is miserable.
Step-by-Step Instructions
Step 1: Identify the Tile and Adhesive
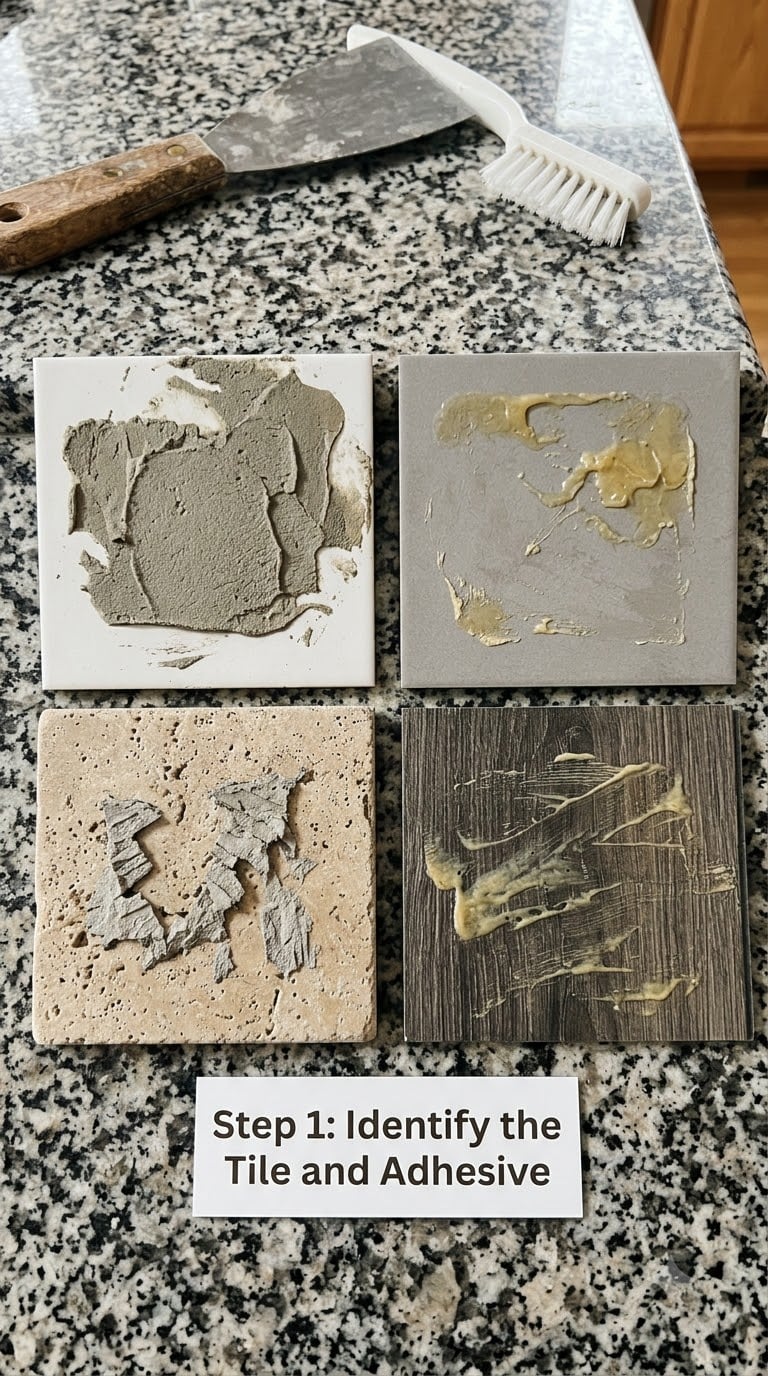
Glue tells you what it is if you know the tells. Peel-and-stick residue is soft, slightly rubbery, and often faintly sweet-smelling. Ready-mixed mastic is soft brown or grey and dents under a fingernail. Cement-based thinset is hard, grey, and feels like stone. Epoxy is extremely hard, often tinted, and shrugs off ordinary strippers.
The tile matters just as much. Ceramic is forgiving. Porcelain has a fired glaze that scratches visibly under a metal blade. Marble, limestone, and travertine are acid-sensitive, which rules out acidic cleaners entirely. If the residue is on a wall rather than a floor, the same chemistry applies but the substrate behind it matters more.
Smaller jobs, like how to remove shower caddy adhesive without damage, use the same approach on a much smaller patch, and that’s a good place to learn the technique before tackling a whole room.
Step 2: Test and Protect the Surface
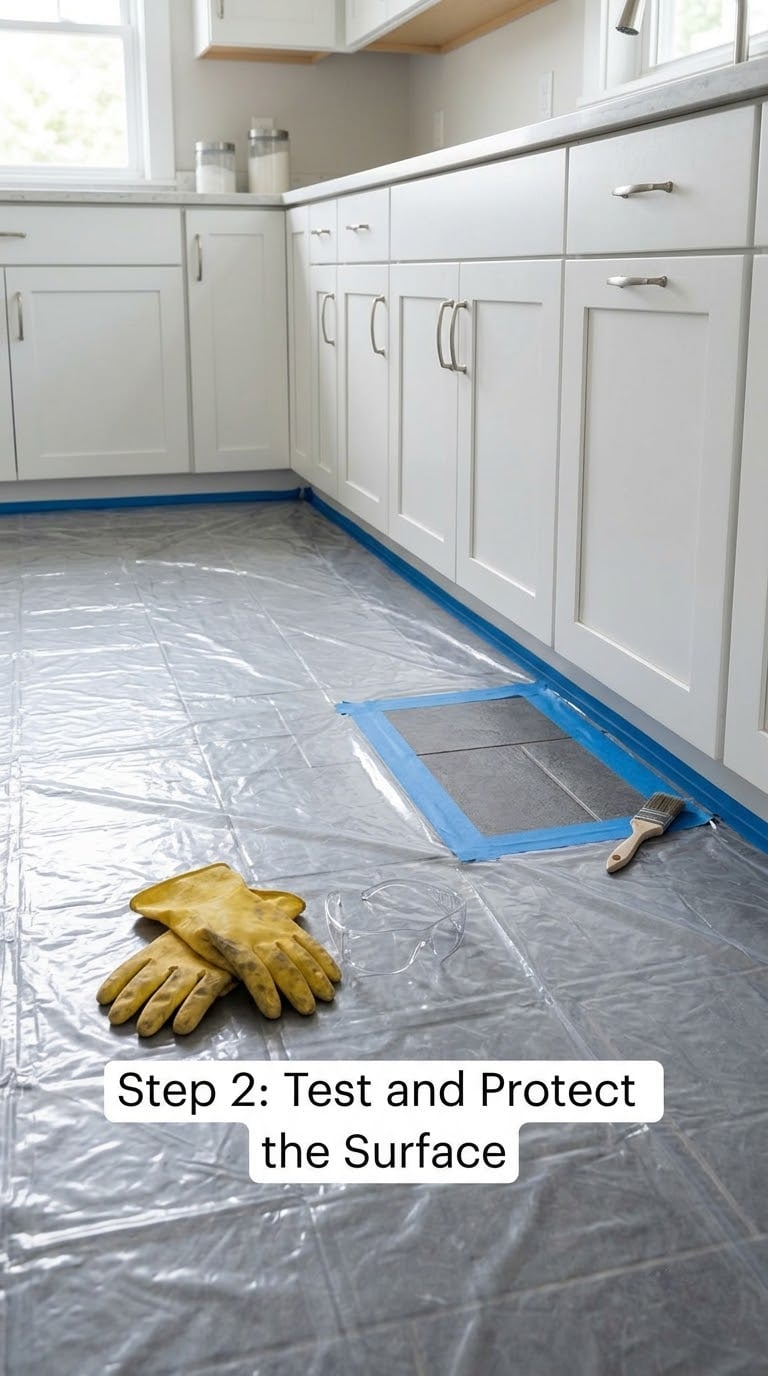
Find a hidden spot. Behind the toilet, under the vanity, or in a corner behind a door. Apply your chosen method to a patch about 2 inches square and leave it for 10 to 15 minutes.
Check back on glaze clarity, colour, and grout firmness. Wipe it, then look again once the area is fully dry, because hazing and etching often only show up as the moisture leaves.
Read the adhesive removal section of your flooring and adhesive documentation now, while the residue is still untouched. If the adhesive manufacturer states a removal method, follow it; some newer urethane and hybrid adhesives are designed to stay removable, and forcing them breaks the tile instead of the bond.
Step 3: Scrape Away Thick Residue
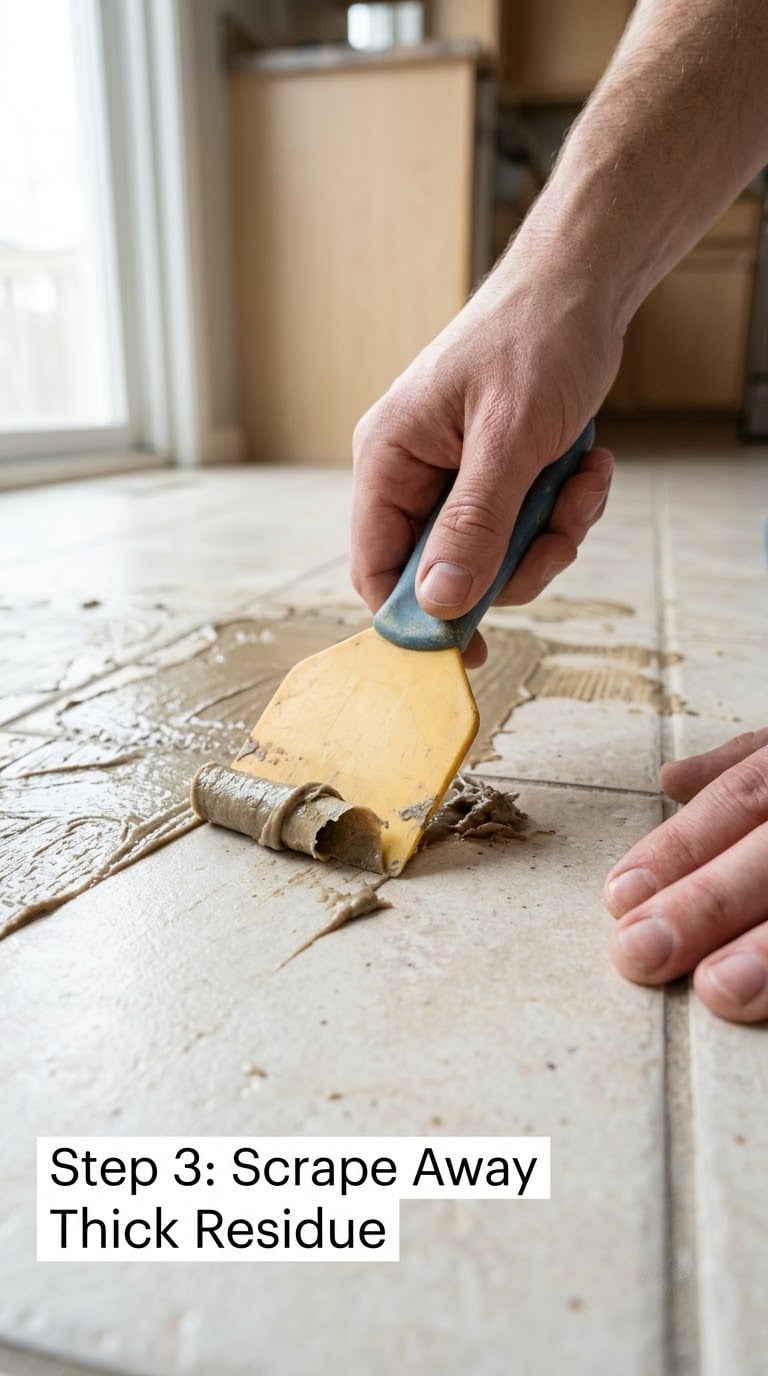
Hold the scraper at a low angle, almost flat, with your fingers well back from the edge. Short controlled strokes, about 3 to 4 inches long, in the same direction. Long sweeping strokes skid and chatter.
Work from the middle of the tile toward the grout line rather than across the whole floor, so debris falls onto a clean tile instead of a dirty one. Keep the blade moving and let the residue ride up onto it; don’t try to shave residue flush in one pass.
Residue that lifts in sheets is going well. When the blade skates over the surface without catching, stop and change tools rather than pressing harder. A flexing plastic blade is the right tool here; a metal blade on porcelain is a scratch you cannot polish out.
Vacuum every few square feet. Adhesive dust settles into grout lines and becomes part of the finish if you leave it.
Step 4: Soften Residue with Controlled Heat
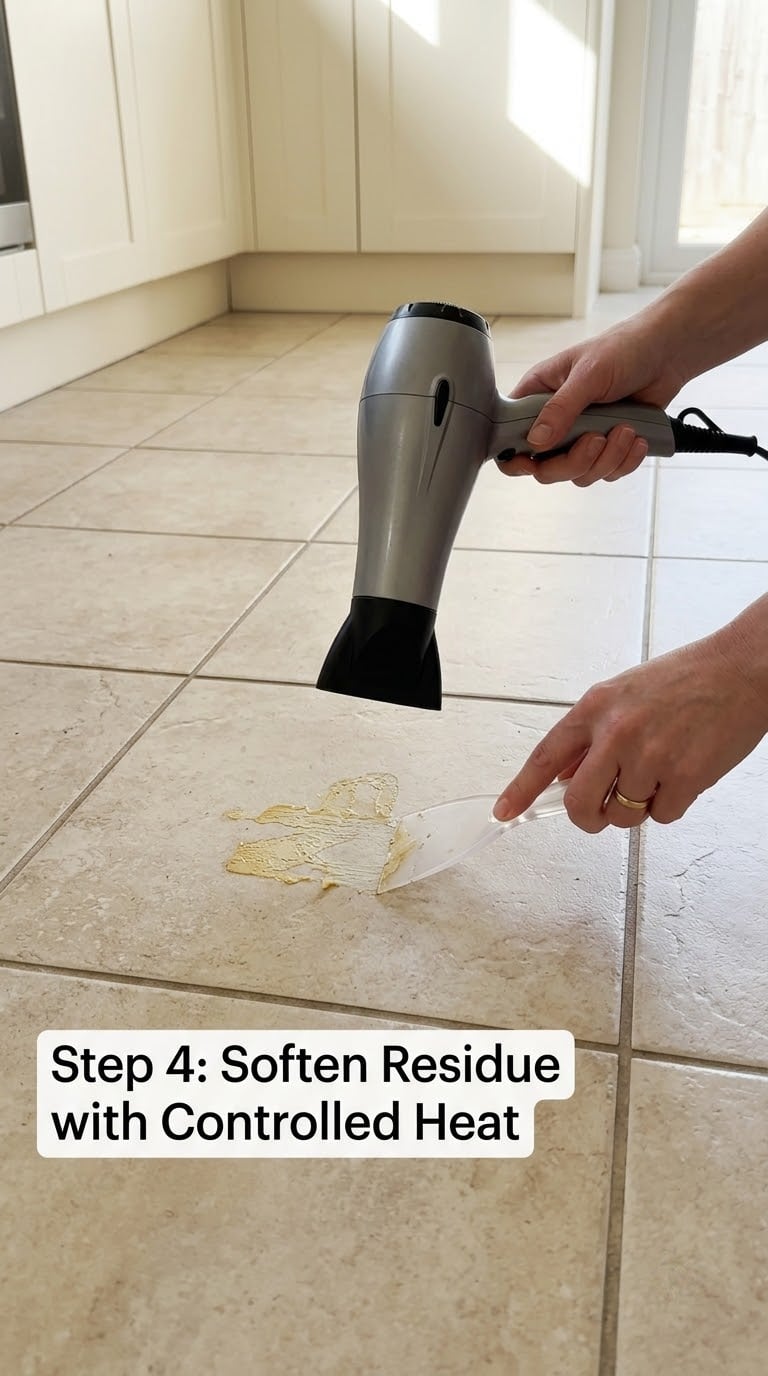
Heat only after you confirm the flooring is heat-safe. Ceramic and porcelain handle gentle warmth well. Vinyl, sealed wood, and some older resilient floors do not, and natural stone can crack if heated fast.
Use a hair dryer first. Hold it 3 to 6 inches above the residue, keep it moving, and work in 2 foot by 2 foot sections. Most adhesives soften somewhere between roughly 140 and 190 degrees, and a dryer in constant motion reaches that range without cooking the surface.
Scrape immediately while the residue is soft. Adhesive that cools re-hardens, and you will end up chasing the same spot. A heat gun on its lowest setting speeds this up considerably, but only on a floor you have confirmed is safe, only on moving passes, and never parked on one spot.
If the residue bubbles, smells strongly, or darkens sharply, stop heating. That is the adhesive breaking down past the point of usefulness, and you are creating a mess instead of moving it.
Step 5: Dissolve the Remaining Adhesive
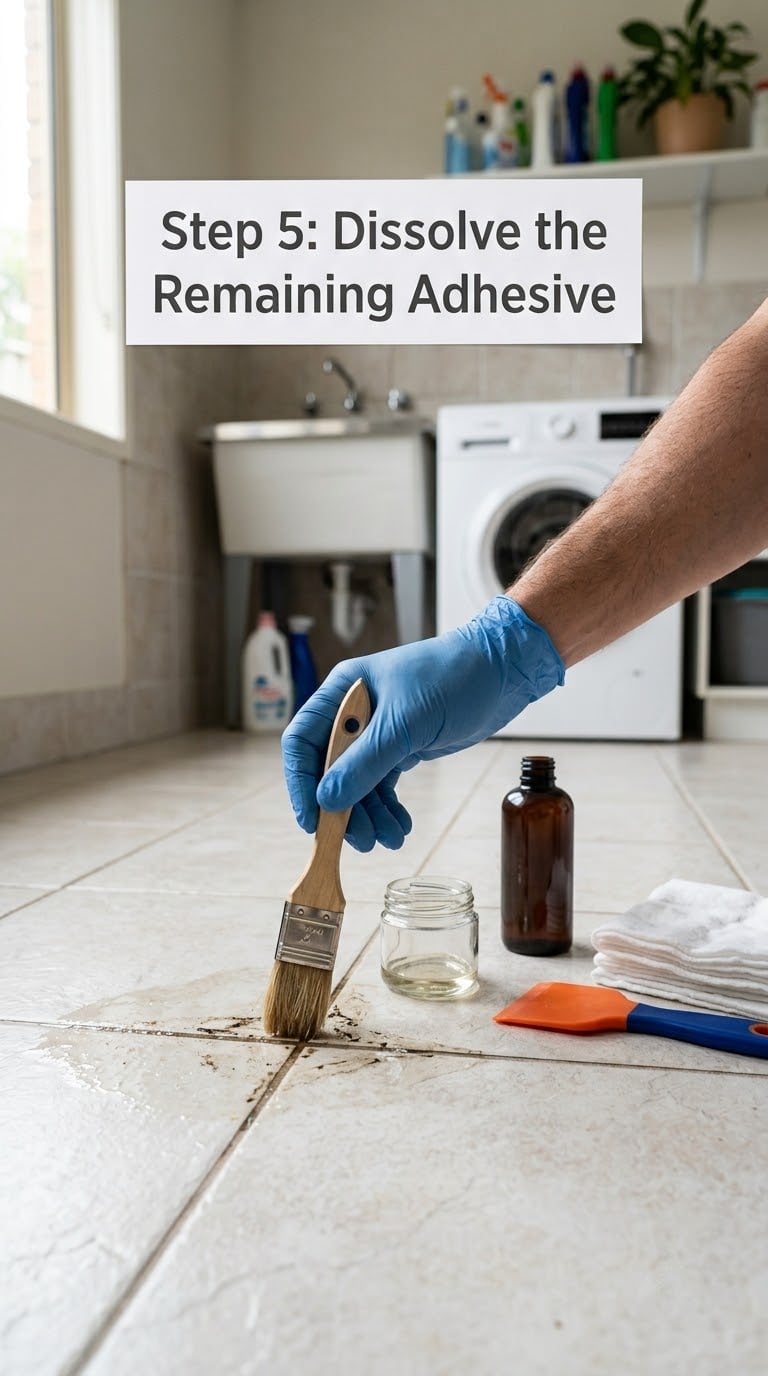
Choose a remover for the adhesive family you identified in Step 1, not for the surface. Cured cement-based thinset needs a dedicated mineral adhesive remover, while peel-and-stick and mastic residues respond to general-purpose strippers.
Work in 2 foot by 2 foot sections so the product stays wet where you are working. Apply it to a cloth or spread it with a stiff nylon brush, then wait for the dwell time printed on the label. That range runs from about 10 minutes for a light consumer stripper up to an hour for hardened residue, and going early is the single most common reason people think strippers don’t work.
Keep the liquid out of the grout joints. Flooding cement-based grout weakens it, carries stain deeper into the concrete, and takes a long time to dry out. Damp cloth on the surface, product on the residue, and the joints stay comparatively dry.
On natural stone, skip anything acidic. Grout haze removers, vinegar, and citrus-based products etch marble, limestone, and travertine, and the dull patch may not appear until the floor dries.
A few things work well enough to be worth naming. A paste of baking soda and water, left to sit and scraped off, cleared peel-and-stick residue for one r/DIY poster who said they barely had to scrape at all after days of failed attempts. A little cooking oil worked into a dish soap and warm water mix helps with rug adhesive on sealed tile. Vinegar is only useful on fresh adhesive on non-stone, and never near epoxy.
Never mix two products to see what happens, and never add bleach to any remover. Keep a window open and the fan running.
Step 6: Clean, Rinse, and Dry the Floor
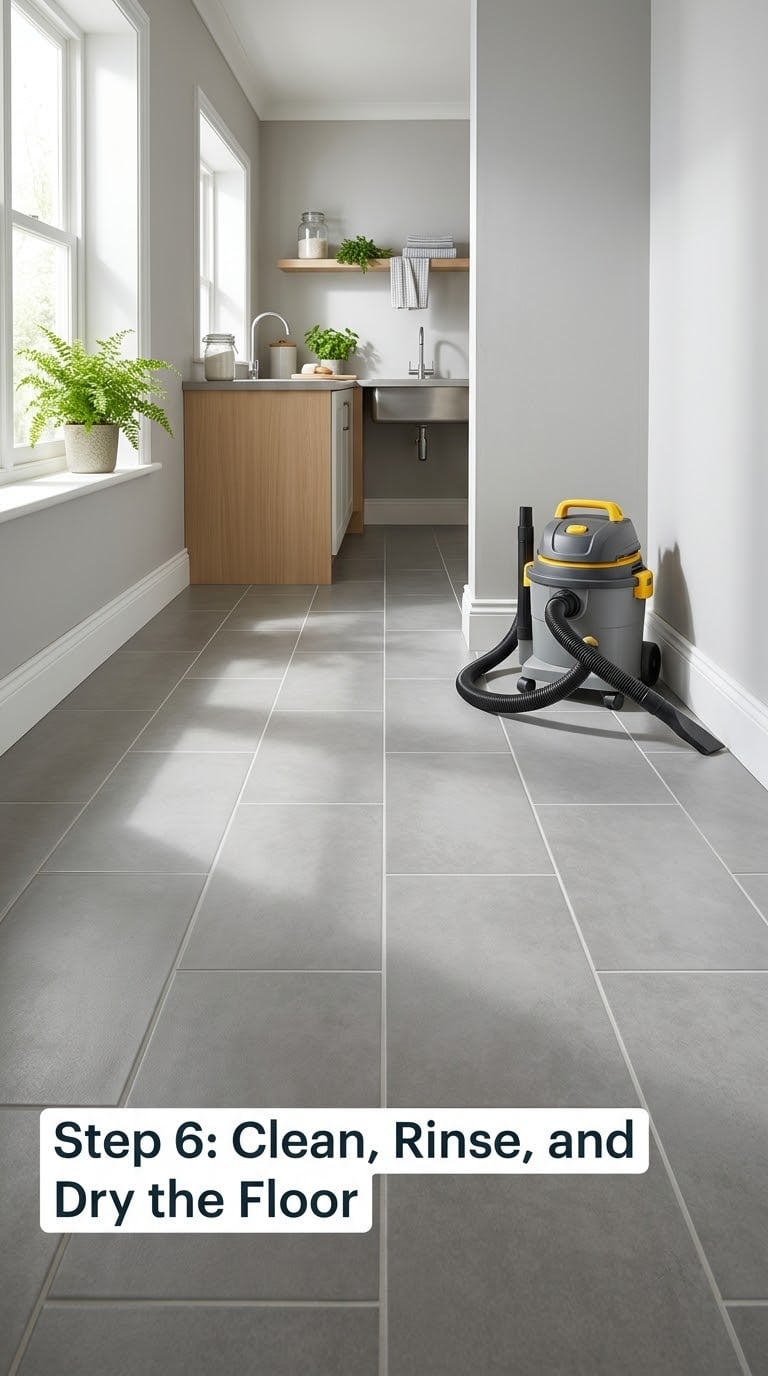
Remove loosened residue while it’s still soft, using the plastic scraper and a stiff brush. Bag it as you go. Then vacuum the whole area, including the grout lines, before anything gets wet.
Damp mop with a neutral pH cleaner and a clean mop head, and change water often. Rinse only where the flooring and grout permit it; porcelain takes a light rinse fine, unsealed natural stone and old cement grout do not.
Extract what you can from the joints with a wet/dry vacuum rather than flooding them. Grout that stays wet for days weakens at the surface and flakes out from under the trowel later.
Give the floor a full dry before you put furniture back. Most floors need 24 to 48 hours in a ventilated room, longer in a humid one. Press a paper towel firmly into a joint; if it feels cool or damp, wait another day.
Common Mistakes to Avoid
Nearly every gouge I see comes from one of these:
- Using a metal blade on porcelain or polished ceramic. Use a plastic scraper and let dwell time do the work. A metal putty knife needs more force, which means more chipping at grout edges and more scratch marks that only come out with a diamond pad.
- Pulling up residue before the dwell time is up. Wait for the label time, and wait a few minutes longer for hard residue. Scraping semi-softened glue smears it thinner instead of lifting it.
- Soaking unknown adhesive with water. Water can spread a water-soluble adhesive further into concrete and out under baseboards. Peel-and-stick responds to a damp cloth; cement-based thinset does not.
- Overheating the floor. A heat gun left on one spot softens vinyl, dries out grout colour, and can craze stone. Keep the tool moving, keep it 3 to 6 inches off the surface, and use the lowest setting that works.
- Flooding the grout joints with remover. Damp cloth on the surface, not a poured bath of stripper. Let the moisture go out on its own rather than pushing it deeper.
- Mixing chemicals for extra power. Bleach plus an ammonia-based or acidic product makes a gas. Nothing in this job is worth a trip to urgent care.
- Starting at the far end of the room. Work back toward the door so you are not walking over a finished floor at the end of the day.
When to Call a Pro
Some jobs are a poor DIY trade, and the deciding factor is usually the substrate rather than the glue. If the tile is a bonded or moisture-locked system, the sheet vinyl or rubber floor is welded to the concrete, or the old material goes all the way to a wet area threshold, call a flooring contractor. Those assemblies are removed as a system, and picking at one by hand tears up the backer board.
Homes built before about 1980 may have black mastic or a coal-tar adhesive, which can contain asbestos. Do not sand, grind, or heat it. Test for it first, and if it comes back positive, hire a licensed abatement contractor and follow local disposal rules.
Call someone in when radiant heat, plumbing, or wiring is under the floor and cannot be traced, when the concrete is spalling or delaminating, when grout damage is extensive enough that the joints need raking out and re-filling, or when the floor is expensive natural stone you would rather not gamble on.
Maintenance
Once the floor is dry, keep it clean with a neutral pH cleaner. Harsh acidic cleaners dull the glaze of porcelain and etch unsealed stone, and residue removal chemicals leave a slight film that attracts more residue if you skip the final rinse.
Porous grout and natural stone that were exposed during the job can absorb oil and dirt faster than they did before. If the flooring manufacturer recommends sealing, reseal after the floor is completely dry, following the product’s own cure time. If they don’t recommend it, don’t seal it, because an unnecessary sealer sits on the surface and needs its own maintenance.
Scuff marks from furniture come off with a soft white pad on porcelain and ceramic. On polished or honed stone, use a product made for that finish, and test it in a corner first, since a pad that’s too aggressive will dull the whole tile rather than just the mark.
Put felt pads back under every leg that sits on the floor, and check for a reappearance of stickiness in high-traffic spots over the next few weeks. If a patched area feels tacky again, it means solvent is still migrating out of the concrete, so scrub it again with a neutral cleaner rather than sealing over it. Getting the new adhesive right is the other half of a good result, and why tile adhesive sometimes never dries properly is worth reading before you buy anything for the retile.
Frequently Asked Questions
What is the safest way to remove adhesive from porcelain tile?
A plastic scraper held at a low angle, working in short strokes away from the grout, is the safest starting point. Follow it with a hair dryer kept moving and a pH-neutral cleaner. Save chemical strippers for residue that stays soft after heat, and always use them at the label dwell time, since holding the blade still and leaning on it is what actually scratches porcelain.
Can I use a metal scraper without scratching porcelain tile?
Not without a real risk. Porcelain has a fired glaze that a steel edge catches and scores, and those scratches do not sand out of the glaze. Metal tools have their place on hardened thinset on bare concrete, away from the tile, but never on the tile face. If you need more bite on residue sitting on porcelain, extend the dwell time or add heat rather than sharpening the blade.
How long should adhesive remover stay on the floor?
Follow the label, because it varies widely by formula and adhesive type. Light consumer strippers for peel-and-stick residue often work in 10 to 20 minutes, while strippers made for hardened tile adhesive commonly need 30 to 60 minutes. Wiping early is the usual reason a remover seems ineffective. Keep the section damp, work in small areas, and keep the liquid out of the grout joints.
Does removing adhesive damage grout?
Not if you stay off it. Grout damage comes from blade strikes along the joint, from flooding it with remover, and from leaving it wet for days. Keep the scraper angled toward the tile, apply stripper to the residue rather than the joint, and extract water with a wet/dry vacuum. Cement-based grout that has already been softened or dislodged will not recover, and those joints need re-filling before retiling.
Should I seal the floor after removing adhesive?
Only when the flooring manufacturer says to. Porcelain and glazed ceramic are non-porous and need no sealing. Natural stone and some older ceramic are porous and may need it, but only after the floor is fully dry, typically 24 to 48 hours. Sealing when it is not needed traps whatever is left in the surface and gives you another maintenance problem to deal with later.
When does old tile adhesive contain hazardous materials?
The main concern is homes built before about 1980, where black mastic and coal-tar adhesives were common and may contain asbestos. Do not sand, grind, drill, or heat that material, since all of those put fibres in the air. Other risks are more ordinary: strong solvents need ventilation, and a respirator is sensible if you are grinding hardened thinset. If the adhesive is black and brittle, test for asbestos before touching it.
Find a hidden corner, spend 15 minutes there before you touch the rest of the room, and escalate only as far as the residue forces you to. Most jobs end at scraping plus a little heat, and the floor you keep is the one you didn’t try to hurry.
