How to Replace a Sink Drain Assembly: Easy Steps (October 2026)
To replace a sink drain assembly, put a bucket under the sink, unscrew the slip nuts and pull the P-trap down, then loosen the locknut underneath the basin and lift the old drain out. Scrape the sink hole clean, drop in the new flange sealed with plumber’s putty, tighten the locknut, reconnect the tailpiece and trap, and run water to check for drips. Most people finish this in under an hour with two pairs of pliers.
A slow drip into the cabinet is the telltale sign. Water sitting in a vanity or under a kitchen sink for a few months warps the cabinet base, feeds black mould behind the pipes, and quietly roaches the drywall. Replacing the drain assembly stops the leak at the source instead of mopping it up again next weekend.
Contents
Time: 30 to 60 minutes for a standard bathroom vanity or single-bowl kitchen sink, longer if the old locknut has seized. Cost: one drain kit plus whatever sealant you already have in the toolbox. Difficulty: beginner-level, if the trap below is intact. Skill level: anyone comfortable with a pair of pliers.
The five stages below match how plumbers describe the job: remove, prep, install, reconnect and test. Skim the whole thing once before you start, because the order matters and a forgotten rubber gasket is the reason most replacement drains leak on day two.
Tools and Materials
Gather everything before you open the cabinet. Half-finished jobs happen when you discover mid-way that the only adjustable pliers are in the garage.
Tools
- Adjustable pliers and channel-lock pliers — one of each is ideal; channel-locks grip slip nuts without the crushing bite an adjustable wrench gives on plastic.
- Basin wrench or strap wrench — needed only if the locknut sits in a tight corner behind a supply line.
- Flat-head screwdriver — for the overflow plate and the clevis screw on a pop-up drain.
- Bucket, about 2 gallons — the drain trap always holds water, so plan on catching a gallon of it.
- Old towels or rags — three or four, folded into the cabinet floor to catch splashes.
- Scrub brush, putty knife and a damp cloth — for scraping hardened putty off the sink rim.
- Penetrating oil and a rag — optional, but the single most useful thing to have if the locknut is corroded.
- Hacksaw — the last-resort tool for cutting a stubborn tailpiece off. Hope you never need it.
- Gloves and eye protection — old brass and dried putty cut fingers faster than anything in the drawer.
Materials
- Drain assembly matched to your sink — a 1-1/2 inch lavatory drain with a pop-up for most bathroom vanities, or a 3-1/2 inch basket strainer for a kitchen sink.
- Rubber washers — most kits include them, but check. The tailpiece-to-trap washer is the one that leaks when it is missing.
- Plumber’s putty — needed for gasket-less, putty-style drains. Skip it entirely if your new drain has a rubber gasket.
- PTFE (Teflon) tape — only for threaded metal-to-metal joints such as the pop-up ball and rod seat.
- Slip nuts — usually sold with the trap or the kit. Buy two extras; they crack more often than drains do.
- Silicone sealant — optional, if you want to reseal the drain rim to a stone or composite sink instead of putty.
If you are still deciding on a diameter, our bathroom sink drain sizes guide lists the standard lavatory and kitchen openings and how to measure yours before you buy.
Before You Start
Look at the old drain before you touch a tool. Two details decide the whole job: how the sink is sealed, and whether the pipe below is plastic or metal.
Identify your drain type
Putty-sealed drains have a metal flange sitting in the sink hole with hardened putty or silicone squeezed around the rim. Gasket-sealed drains have a rubber ring under the flange and no putty at all. If you scrape the rim and find a soft grey bead, that is putty, and your replacement needs putty too. If the rim is clean metal sitting flat, look under the flange for a black rubber ring — do not add putty on top of it, because the extra layer stops the flange sitting flat and you get a permanent weep.
Check the pipe material and size
Most bathroom lavatory drains are 1-1/2 inch and kitchen basket strainers are 3-1/2 inch, but there is no rule that says every sink followed the standard. Measure across the drain opening with a ruler before ordering anything, and note the diameter of the existing tailpiece. Plastic tailpieces measure cleanly. Corroded brass ones often need a caliper or an outside measurement taken across the threads, since the outer surface no longer tells the truth. More on sizing is in our piece on bathroom sink drain pipe size.
Protect the cabinet and the sink
Lay towels in the cabinet bottom and set the bucket underneath the drain, not beside it. Turn off the shut-off valves under the sink if the cold and hot lines are in the way, and put a mark on the faucet so you know which handle is which when you turn them back on. If the sink has a garbage disposal, unplug it or switch off the breaker feeding it before you put hands anywhere near the drain body. You are not going to hurt yourself with water, but the disposal will happily chew a pair of pliers.
Photograph the existing pipe layout from a low angle before you disconnect anything. When you are under the cabinet trying to make a tailpiece reach a trap arm that sits at an awkward height, a photo of how it used to sit is worth more than memory.
Step-by-Step Instructions
Put on gloves, place the bucket, and start with the pipe. Work in the order below and do not skip ahead to the flange while the trap is still attached.
Step 1: Remove the old drain assembly
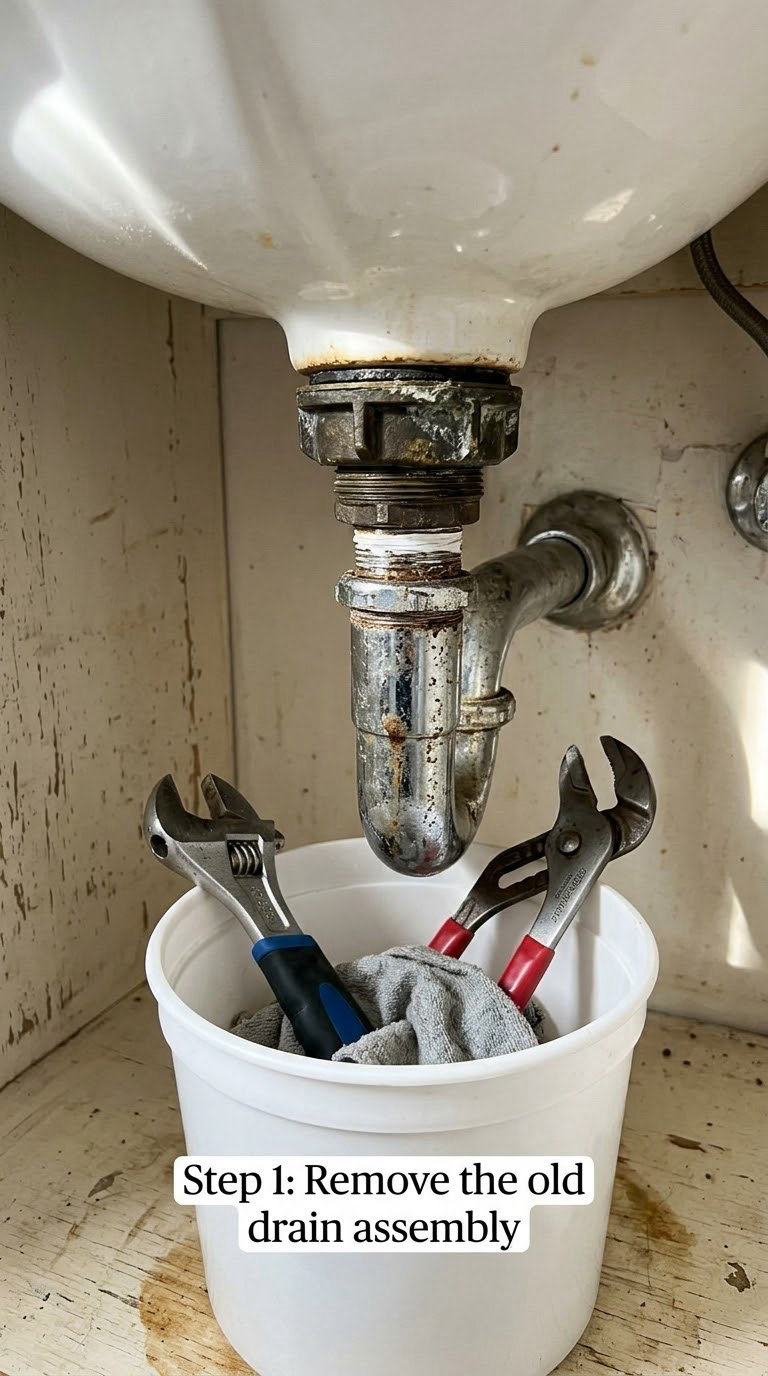
Place the bucket directly under the drain and make sure both supply valves are open. Empty the sink basin first if the tailpiece feels fragile, because a full basin dropping into a cracked plastic piece makes a bad afternoon worse.
On a bathroom sink, reach behind the drain and unscrew the cap that holds the pop-up ball and rod, then lift the assembly out of the way. On a kitchen sink, skip this — there is no lift rod, just a basket.
Hold the tailpiece with one pair of pliers and loosen the slip nut on top of the P-trap with the other. Support the weight of the pipe as you turn, because the trap arm is not meant to hold the vertical drop. When the nut clears the threads, pull the tailpiece straight down and off the trap, then lower the whole trap to the bucket and empty it. That water is what keeps sewer gas out of the room, so expect a small splash and a smell for a minute.
Set the trap aside. You will reuse it if it is intact. Now, from underneath the sink, hold the drain body with pliers and turn the locknut counter-clockwise. It is usually stuck in place by years of corrosion and dried putty, so it may take a minute of steady pressure rather than force.
Unscrew the locknut all the way, slide it off the threads and lift the old drain body out of the sink. Have the second pair of hands, or a magnet on a string, ready — the flange drops straight down into the hole once the locknut clears, and it is a filthy, sharp-edged thing to fish out of a cabinet base.
Step 2: Clean and inspect the sink hole
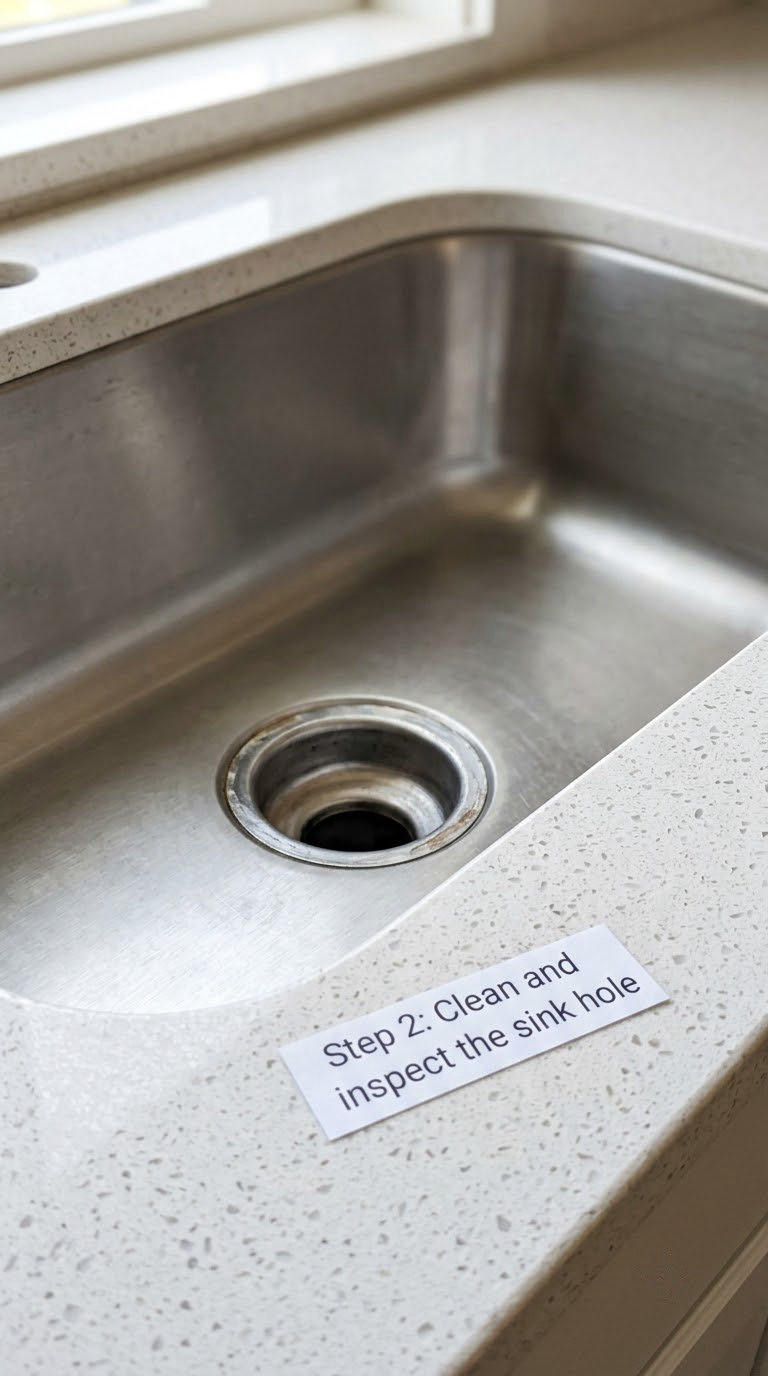
Scrape every trace of old putty, silicone and corrosion off the sink rim with a putty knife. Get it down to bare, dry metal or porcelain, because a new bead of putty will not bond to a dirty surface and the leak will show up weeks later rather than minutes.
Wipe the rim and the inside of the hole with a damp cloth and let it dry while you read the rest of the instructions. Wipe the drain hole itself too, and check that no old gasket fragment is still wedged under the flange seat.
Hold the new drain up to the hole now, before you seal anything. It should rest flat on the rim with the flange slightly overhanging and the body hanging straight down. If it rocks or sits above the rim, the diameter is wrong, and finding that out now costs you nothing.
Step 3: Install the new sink drain assembly and seal it
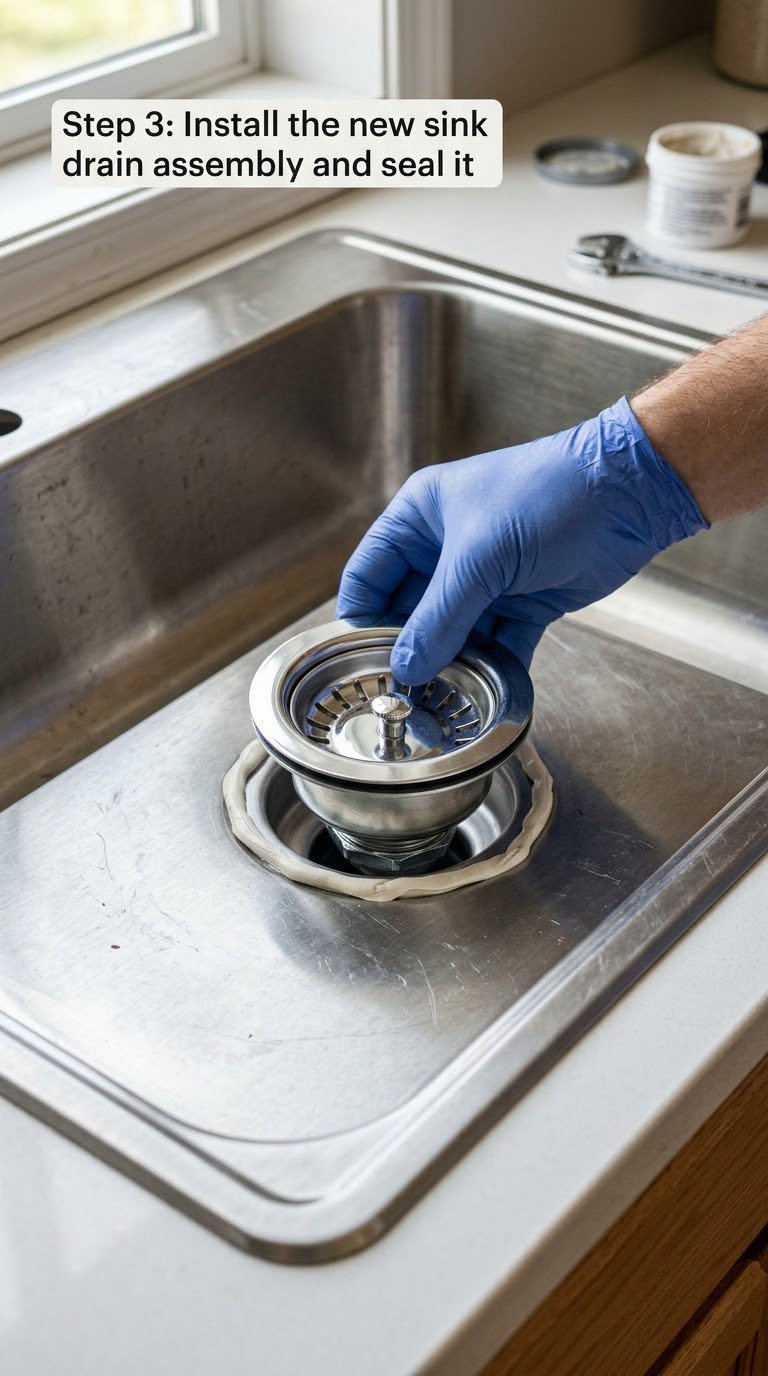
Roll a rope of plumber’s putty about the thickness of a pencil and about 8 inches long. Press it evenly around the underside of the new flange, then set the drain into the hole from above and press down firmly all the way around so the putty spreads into a continuous bead.
Wipe the squeeze-out from the sink rim before it skins over. Give a putty-sealed flange 15 to 30 minutes before you tighten underneath, and follow the cure time printed on a silicone product if you used that instead — typically 24 hours before water hits it.
Skipping the putty entirely when your drain has its own rubber gasket is correct. In that case the gasket sits flat and the flange is clamped straight down by the locknut. If you measure a gap between the flange and the sink rim before tightening, something is missing.
Step 4: Attach the locknut and tailpiece
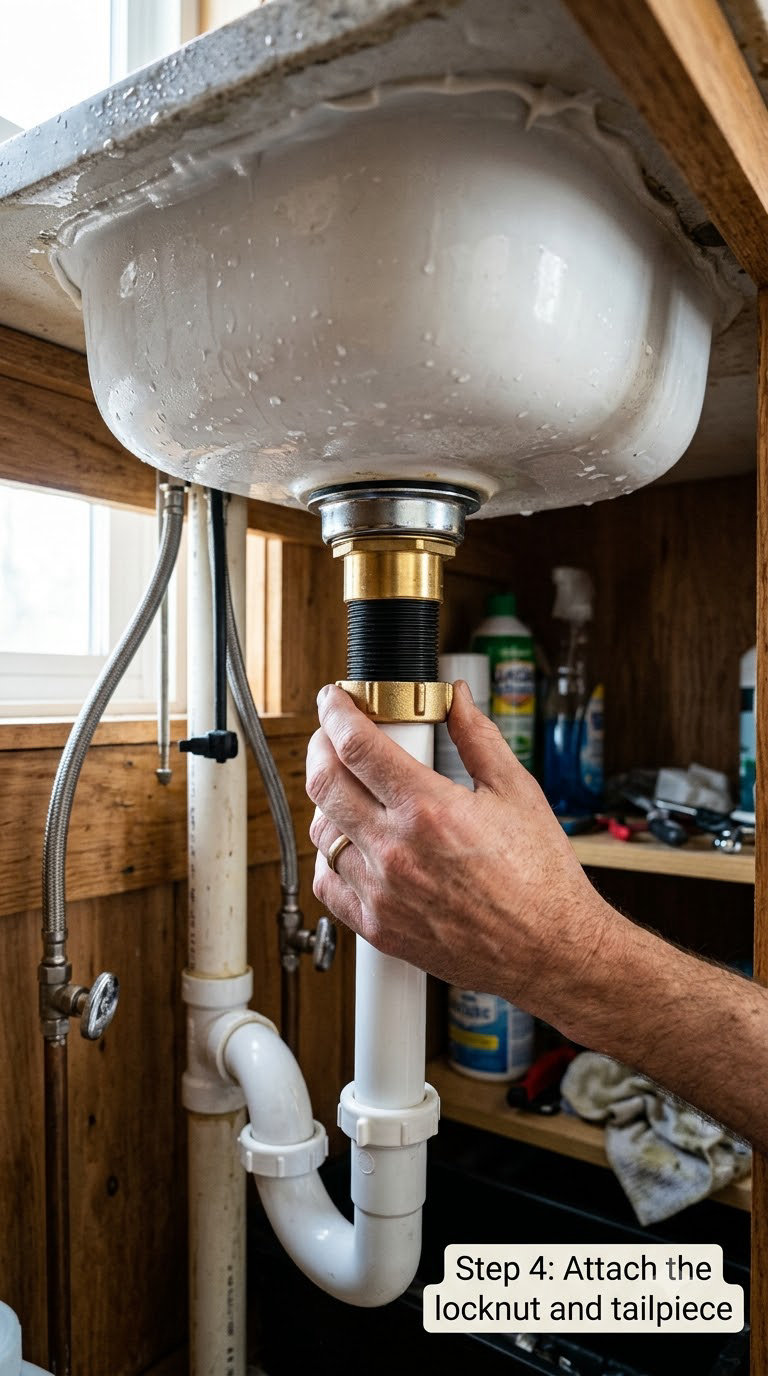
From below the sink, slide the friction ring and then the locknut up the drain body threads. The rubber or fiber friction ring has to sit above the locknut — behind it, the locknut has nothing to grip and the drain will leak no matter how tight you go.
Thread the locknut on by hand until it is snug, then give it a quarter turn with pliers. That is the whole rule: hand tight plus about a quarter turn. Brass is soft and porcelain cracks, and a tailpiece will shear clean off if you lean on it with a 12-inch wrench. If you are squeezing hard, stop.
Now attach the tailpiece. Push it up onto the drain body threads, add the washer, and screw the slip nut on. Hand tight, quarter turn with pliers, and hold the tailpiece still while you turn the nut so you do not cross-thread and shear plastic.
Step 5: Connect the drain to the trap
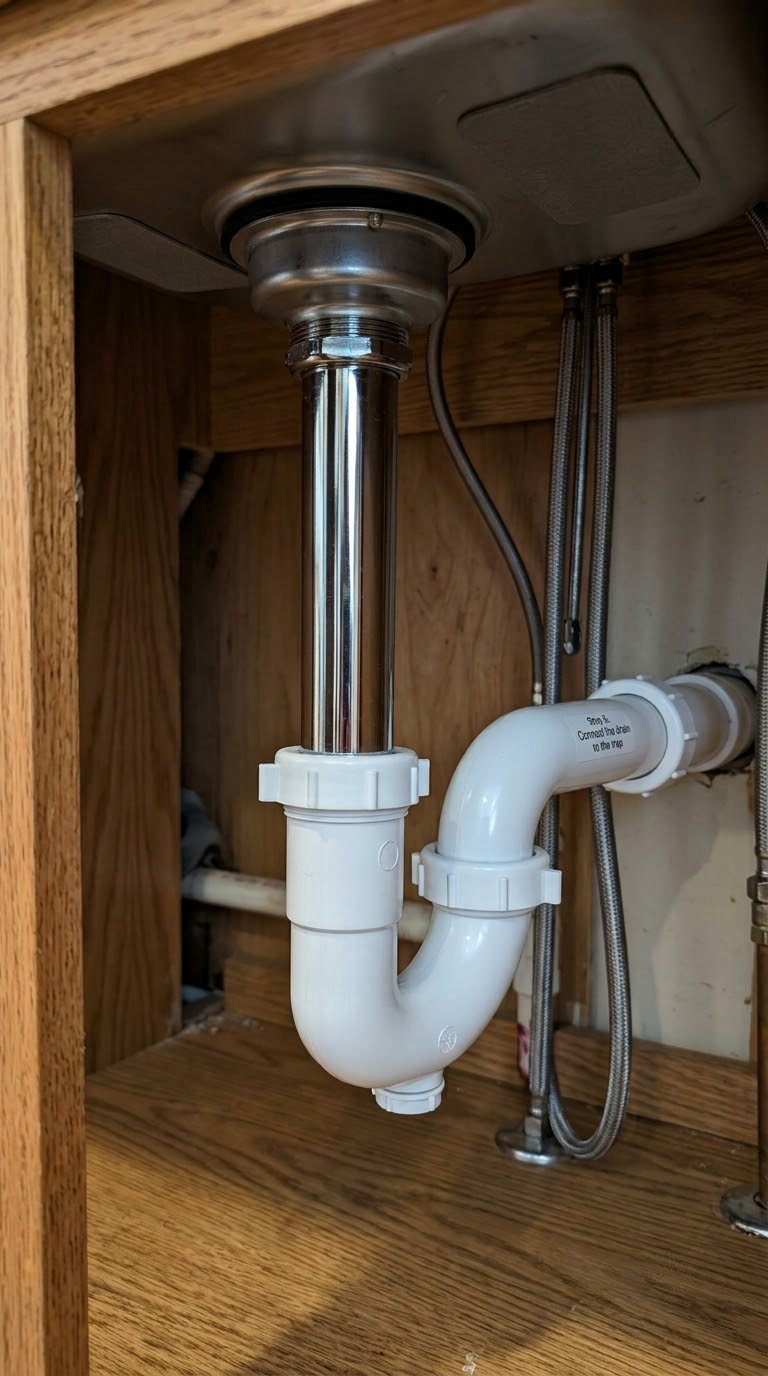
Put the P-trap back on the tailpiece, slip nut and washer in place, and hand-tighten the slip nut until it stops. PTFE tape is only for threaded metal-to-metal joints such as the pop-up ball and rod seat. Slip nuts and tailpiece threads are flat compression fittings — tape there just adds grit and prevents a proper seal.
Slide the trap arm into the wall stub-out, check that the trap arm stays roughly level so the trap keeps its water seal, and tighten that slip nut the same way. A trap arm pushed up at an angle drains slow and gurgles no matter how tight the nut is.
For a kitchen sink with a double bowl, the two tailpieces join at a tee before the trap. For a sink with a garbage disposal, the disposal flange bolts directly to the drain body instead of a tailpiece going down — the same three-step process at the mounting bolts, then the disposal outlet screws into the bottom of the drain body. If a dishwasher shares the drain, its hose tees into the disposal inlet or the downstream pipe, and the hose must run high enough to hold a loop of water for backflow protection.
Step 6: Test the drain and check for leaks
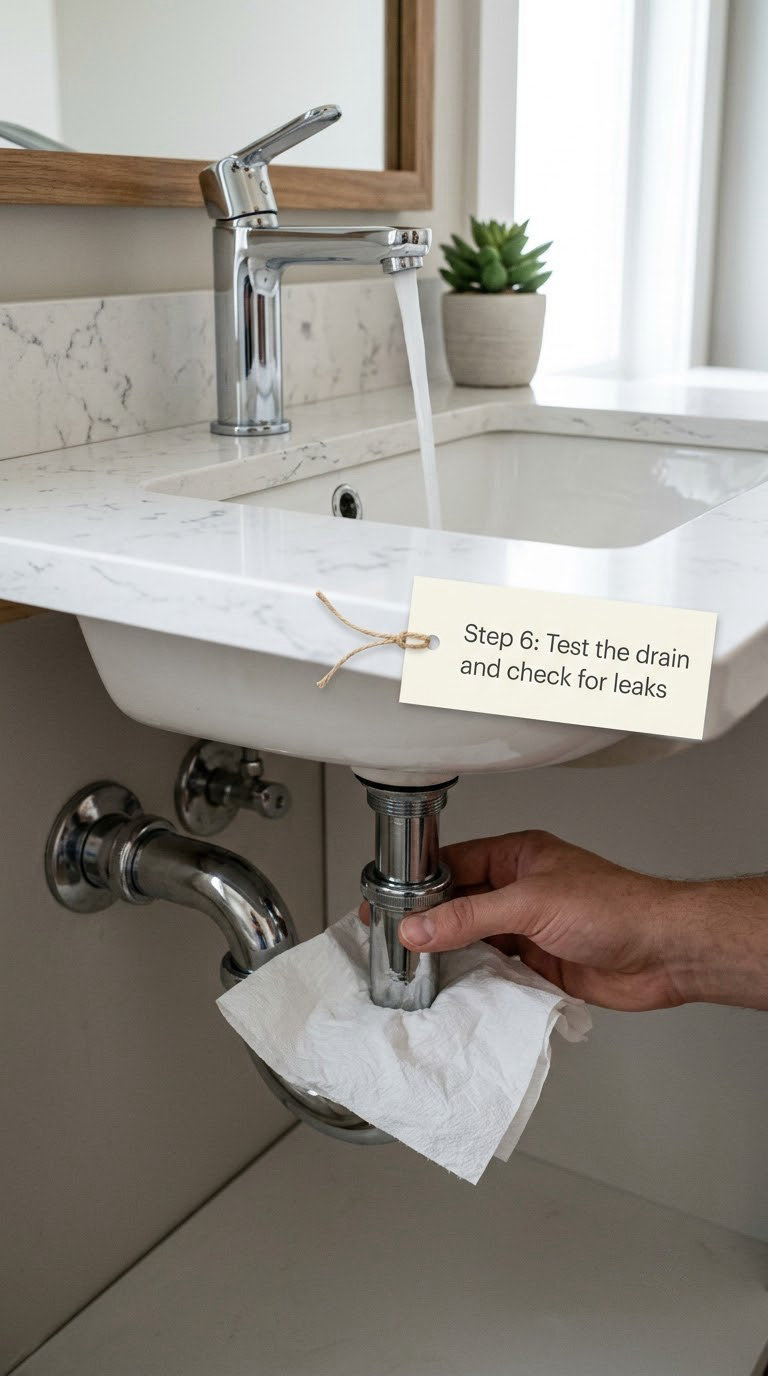
Turn the water back on and run the tap at full flow for a full minute. Watch every joint with a dry paper towel pressed against it: the locknut, the tailpiece slip nut, the trap nut and the stub-out. A cold, damp paper towel catches a drip long before you see one land in the cabinet.
Fill the basin with water, let it sit for ten minutes, and check again. This is the real test, because it puts standing water pressure on the seal rather than a moving stream. While the basin is full, press the pop-up stopper down and up to check the linkage seats and seals. Kitchen sinks get the same treatment with the strainer lifted and lowered.
A drip at the flange rim means the putty failed or the rim was not clean. A drip at the locknut means it needs another eighth of a turn, not half. A drip at a slip joint usually means a missing or misplaced washer, and disconnecting it to look is faster than tightening something that is already as tight as it should go.
Common Mistakes to Avoid
Almost every failed replacement comes down to one of seven things.
- Buying the wrong diameter. Measure the drain opening before you order. A 1-1/2 inch lavatory kit will not pass through a 3-1/2 inch kitchen hole, and vice versa. This is the most common complaint in plumbing forums, and it is entirely avoidable with a ruler.
- Putting putty under a gasket drain. The flange then sits proud of the sink and never seals flat. Gasket drains need putty nowhere.
- Not cleaning the sink rim first. Putty bonds to metal and porcelain, not to a layer of dust and dried sealant.
- Overtightening the locknut. Hand tight plus a quarter turn. Cracked porcelain basins usually start at the drain hole, and stripped plastic threads turn a five-minute job into a trip to the hardware store.
- Leaving off the friction ring or washer. Both are what the nut actually grips. Assemble the stack dry and check it before you spin anything.
- PTFE tape on slip nuts. Those joints seal with a flat rubber washer, not on threads. Tape gets in the way of a clean seal.
- Skipping the full-basin test. Running the tap for a minute tests far less pressure than a filled basin sitting for ten minutes, and slow seepage around a flange may not show up until hours later.
One more old-hardware trap worth knowing: threads on long-installed brass drain bodies are often shorter than the new locknut expects, so the nut reaches the end of its travel before it feels snug. If it bottoms out and still leaks, replace the body rather than forcing it.
When to Call a Pro
Stop and get a licensed plumber when any of these turn up mid-job. None of them are skills you can pick up in a weekend, and all of them are cheaper to fix now than after the water has spread into the wall.
- The supply lines or shut-off valves are corroded. An old valve that crumbles when you close it turns a drain job into a wall repair.
- The pipe below the sink is cast iron or lead. Cutting or disturbing it needs the right tools and, in some places, a permit.
- The sink or countertop is cracked, or the sink does not lift out cleanly. Replacing a whole basin means new plumbing rough-in, not a drain swap.
- The drain is unreachable. If the locknut is buried behind a fixed cabinet wall or a disposer you cannot move, access has to be created first.
- You are inside a wall. Cutting into the stud cavity to replace a drain stub-out or add an air gap is where permits and inspection come in. The air gap fitting is required in some jurisdictions for exactly this reason.
- A disposer or dishwasher is involved and the flange or motor mount will not seat square. Forcing a disposal flange can strip the drain body threads and cost you a new drain too.
The honest dividing line: if the trap and tailpiece are plain PVC or ABS and the fittings turn by hand, this is a beginner job. If anything requires cutting pipe inside a wall, hire the plumber. Their typical call-out and labour for a straightforward drain swap sits well above the cost of a drain kit, which is why people try it themselves first — and usually succeed.
Maintenance
A new drain assembly lasts years if you keep two things in check: what goes down the hole and what sits on the joints. Most failures I see in cabinets started with hair and soap scum rather than bad hardware.
- Monthly: pull the stopper and rinse the strainer basket. Wipe the rim and the underside of the flange dry with a paper towel. Two minutes, and it catches the first weep instead of the hundredth.
- Quarterly: flush the trap with a cup of hot water after a load of dishes, and check the slip joints with a dry paper towel. Avoid pouring drain cleaner into the trap — it attacks the rubber washers and the plastic you just replaced.
- Twice a year: look at the cabinet floor and the wood around the drain hole for damp, swelling or black speckling. Wipe any condensation from the back wall of the cabinet.
- Whenever you see a stain: trace it before you clean it. Water pooling in the cabinet floor means the leak is upstream of the trap, and a drain swap will not fix it.
- Keep the overflow clear: on bathroom sinks, rinse the overflow channel with the tap running. A blocked overflow shows up as a full basin that will not drain.
Related jobs go deeper into the same cabinet. Our guide to replacing a bathtub drain elbow covers the other leak most people find while they are down there.
Frequently Asked Questions
Can I replace a sink drain assembly without replacing the entire sink?
Yes, in almost every case. The drain assembly is a separate component that passes through a hole in the basin, so it can come out and be swapped while the sink, cabinet and countertop stay put. You only replace the sink if the basin or countertop is cracked, or if the drain hole is damaged.
How do I choose the right replacement drain assembly?
Measure the drain opening with a ruler first. Most bathroom lavatories take a 1-1/2 inch drain, usually with a pop-up, and kitchen sinks take a 3-1/2 inch basket strainer. Then decide between a putty-sealed drain, which needs plumber’s putty under the flange, and a gasket-style drain, which needs none.
Should I use plumber’s tape or plumber’s putty on a sink drain?
It depends on the drain, not on the sink. Plumber’s putty goes under the flange of a drain that has no rubber gasket. PTFE (Teflon) tape is only for threaded metal-to-metal joints such as the pop-up ball and rod seat. Slip nuts and tailpieces seal with flat rubber washers, so tape on those threads does more harm than good.
Why is my new sink drain leaking after installation?
The usual causes are a dirty sink rim that putty could not bond to, putty used under a drain that already has a gasket, a missing washer at a slip joint, or a locknut tightened past hand tight plus a quarter turn. Fill the basin and watch each joint with a dry paper towel to find which one it is before you change anything.
How do I remove a stuck drain locknut or basket strainer?
Work up a ladder: spray penetrating oil on the threads and wait 10 to 15 minutes, then try channel-lock pliers again, gripping the drain body rather than the tailpiece. If it still will not move, hold the body with an adjustable wrench and turn the locknut. As a last resort, saw the tailpiece off under the locknut so the nut slides straight down.
Do I need a plumber to replace a sink drain assembly?
You do not need one if the trap below is plain PVC or ABS, the shut-off valves turn, and the locknut is reachable. Call a plumber if the valves or supply lines are corroded, the pipe is cast iron or lead, the sink or countertop is cracked, or the work means cutting pipe inside a wall, where permits and inspection may apply.
Start where the leak starts. Measure the drain hole, order the right diameter, set the bucket before you open anything, and give the finished joint a full basin of water and ten minutes of your time. If the old locknut turns freely and the trap below is plain plastic, you can finish this before dinner.