How to Remove Old Caulk from Kitchen Countertops (2026)
To remove old caulk from a kitchen countertop, score the top and bottom edge of the bead with a utility knife held flat, soften what is left with a solvent matched to your caulk type and your surface, then pull the bead off in long slow pieces. Wipe the joint with isopropyl alcohol, let it dry fully, and reseal. That whole job takes one to three hours for a typical 8 to 12 foot run.
Most people get this job wrong in one of two ways. They paint new caulk over the old bead, which bonds to a layer that has already lost its grip, so the whole thing peels off together inside a few months. Or they attack hardened silicone with a dry blade, gouge the quartz or marble, and give up. Neither has to happen.
Contents
The countertop-to-backsplash joint is a movement joint. Two different materials meeting at a right angle will expand and contract at different rates, all year, forever, and the bead is the flexible thing that absorbs that movement. When it hardens, cracks, or loses adhesion, water gets behind the backsplash and the failures start.
Time: 1 to 3 hours for an 8 to 12 foot run, plus 24 hours of drying before new caulk goes down. · Cost: low if you own a knife, plastic scraper, and a bottle of alcohol; the only real spend is a tube of the right sealant. · Difficulty: moderate for a first-timer, easy once you have done a foot of it. · Skill level: patient beginner with steady hands.
Tools and Materials
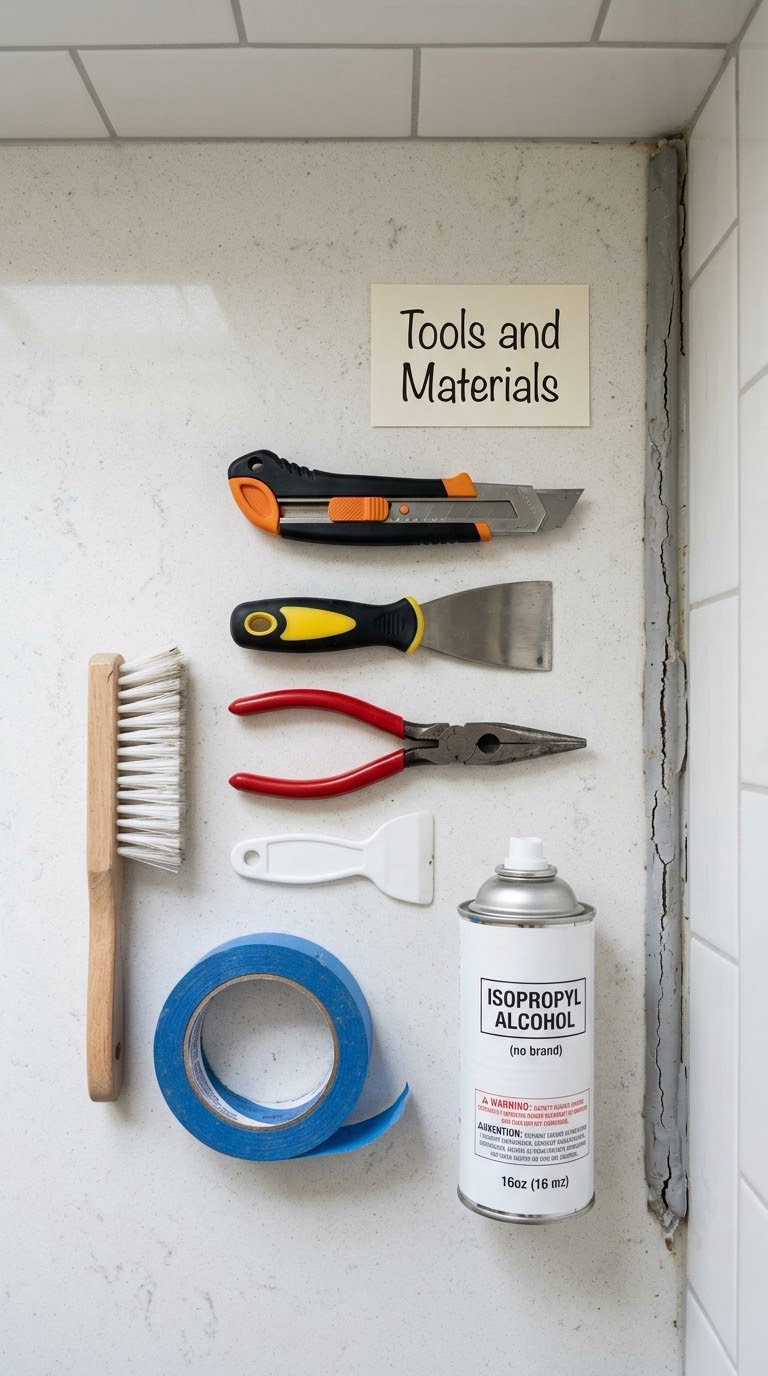
Hand tools:
- Utility knife with fresh blades. A standard retractable 1 inch utility knife. Keep three or four spare blades within reach, because a dull blade is what gouges.
- Single-edge razor in a scraper handle. A window-scraper handle is the safe version because the blade cannot flip back and cut you. On honed stone you can often skip this entirely and use the knife alone.
- Plastic scraper. An old credit card, a plastic putty knife, or a credit-card-sized floor scraper. Plastic will not scratch quartz, granite, or laminate even when you drag it.
- Needle-nose pliers. For gripping and pulling long strips of softened bead without touching the surface.
- Stiff nylon brush and wooden skewer or toothpick. For residue in grout lines and in the tight corner where counter meets wall.
- Razor-free caulk removal tool. Optional, but the angled V-blade style tools do a clean job on the top edge without any risk of slicing the stone.
Supplies:
- Purpose-made silicone caulk remover or caulk softener gel. This is the one thing worth buying for pure silicone.
- Isopropyl alcohol, 70 percent or higher, for the final wipe of the joint.
- Painter’s tape to mask the backsplash, cabinets, and the counter face below the joint.
- Drop cloth or old sheet plus a small bowl to catch drips under the joint.
- Nitrile gloves and eye protection. Solvents dry skin out fast, and softened caulk sticks to skin.
- Stiff nylon brush and a clean microfiber cloth.
What to skip: heat guns on natural stone, metal scrapers on quartz or polished granite, and anything acidic on marble, travertine, or limestone. Vinegar and citrus removers etch calcium-based stone, and a torch will crack or discolor quartz and granite.
Before You Start
Figure out what kind of caulk you have first, because it decides which solvent works. The old bead on most kitchens is 100 percent silicone, and alcohol will do nothing to it. Pure silicone will not stretch and it will not dissolve in alcohol. Latex caulk and siliconized latex stretch easily and dissolve faster.
The stretch test: hook a small piece of bead under the edge of a countertop with a fingernail and pull slowly. If it stretches rubbery and springs back, it is silicone. If it stretches and stays stretched, or tears easily, it is latex or acrylic. The swab test: rub a cotton pad soaked in isopropyl alcohol on a hidden section of the bead. Latex will smear and give way; silicone will not budge. Wipe a second pad on the surface of the caulk, not the counter, so you do not put a solvent on the stone yet.
Test the full method on a hidden section first, about 6 inches long inside a cabinet corner or behind the cooktop cutout. Put a drop of your chosen solvent on the bead, wait the full dwell time, then take a light pass with the plastic scraper. If the surface dulls, etches, or changes color, stop and pick something milder.
Tape the backsplash, the cabinet face, and the countertop below the joint before you start, and lay the drop cloth under the run. Open a window and keep the room aired out while solvents are working. Solvents in a closed kitchen build up fumes fast, and most of them are flammable, so keep them away from pilot lights and never smoke while you work.
Plan for a dry stretch of a day. Spring and early autumn are the easiest windows because the joint can dry fully at moderate temperatures; if you are working in winter, keep the room above 60 degrees F (16 C) until the new bead has cured.
Step-by-Step Instructions
Step 1: Identify the Caulk and Protect the Countertop
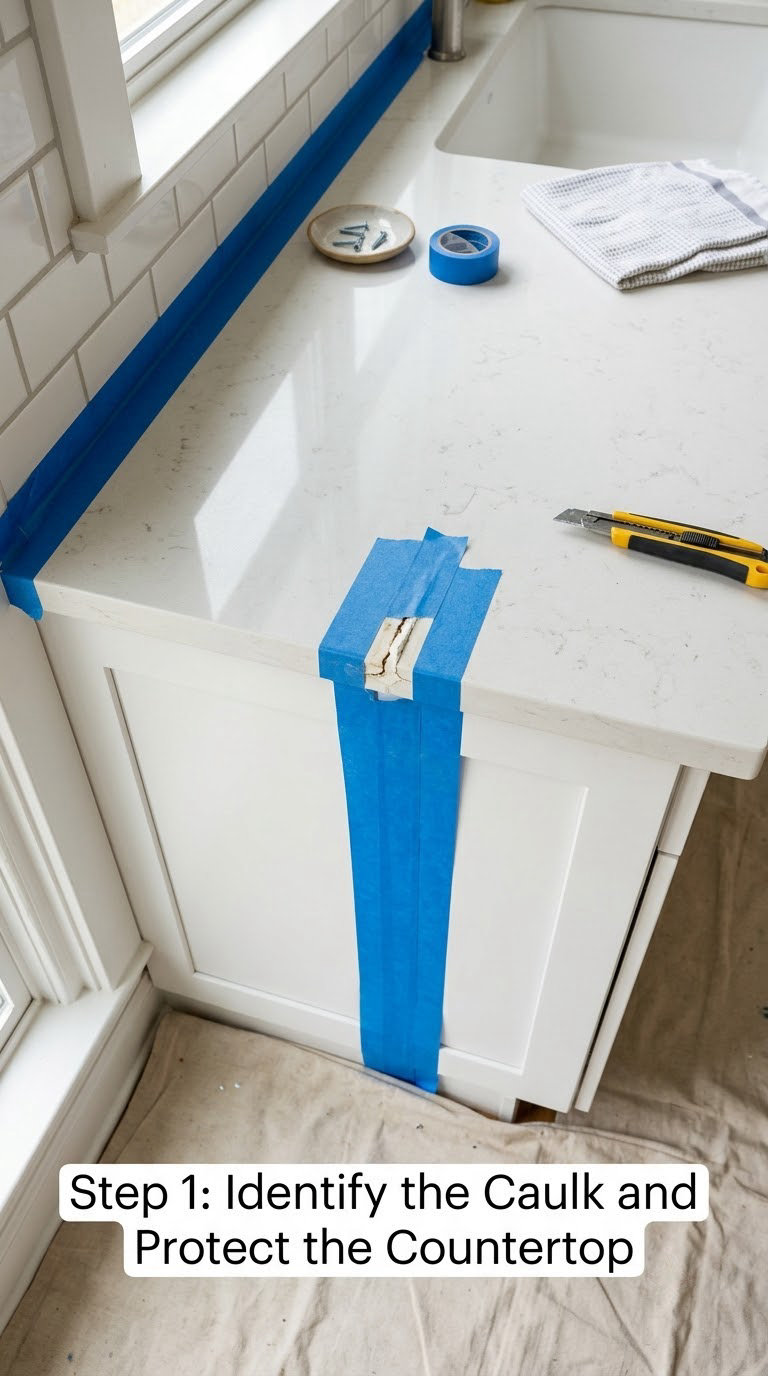
Run both tests described above before you touch anything, then tape. Press painter’s tape along the top of the backsplash and along the face of the countertop below the joint, leaving the bead itself fully exposed.
Take your time on this step and you will not have to think about damage for the rest of the job. The tape is what lets you drag a blade flat across the surface without nicking the finish.
Step 2: Cut and Break Up the Old Caulk
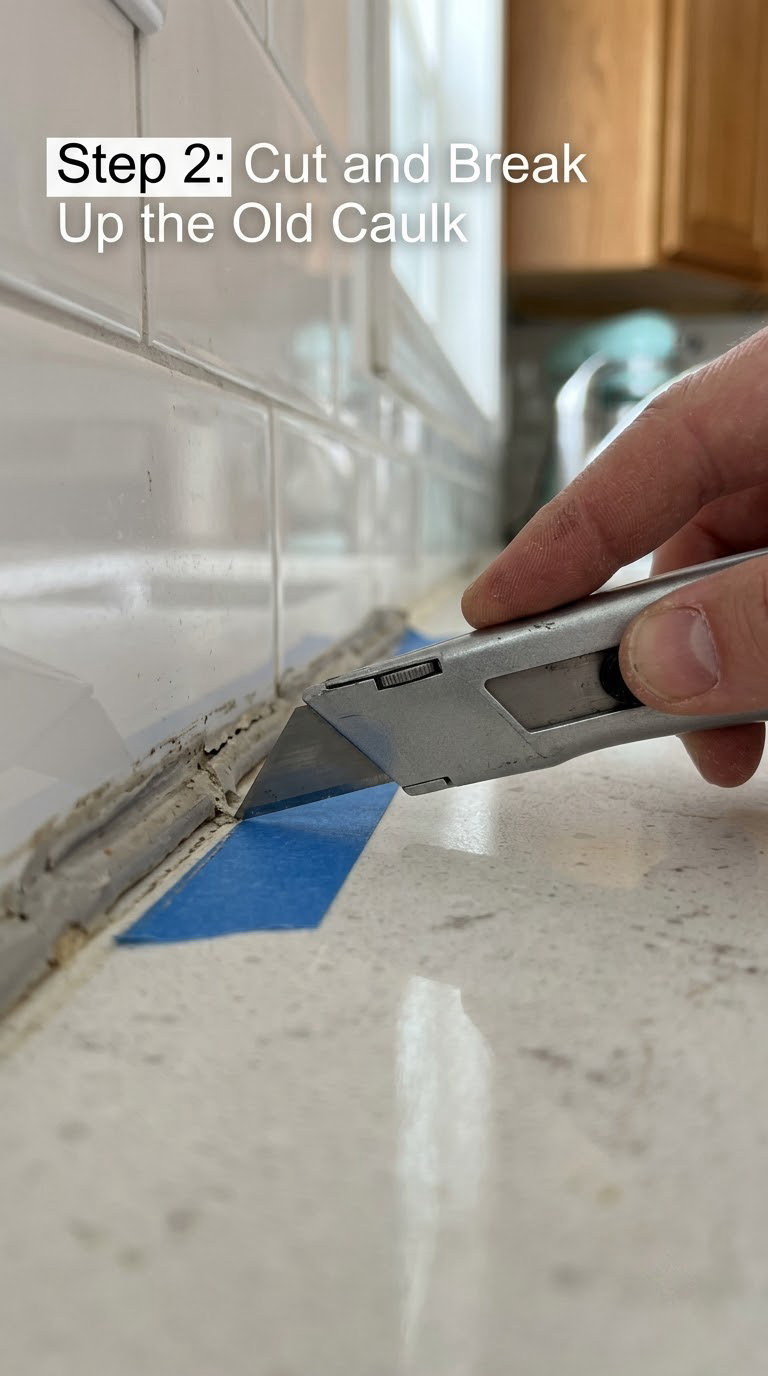
Hold the utility knife nearly flat, angled under 15 degrees, with the blade tip pointing away from your hand. Score the top edge of the bead from one end to the other in a single pass. Then score the bottom edge the same way. You are cutting the bond, not sawing through the bead.
If the blade keeps skipping or skating, it is too dull. Stop, change it, and start again.
If the caulk runs in short sections rather than one long bead, work one section at a time and leave the rest alone. Caulk that is 10 years old often shatters like hard rubber once the bond is broken, and trying to take it all in one pull just rips pieces you have to chase.
Step 3: Loosen and Lift the Remaining Caulk
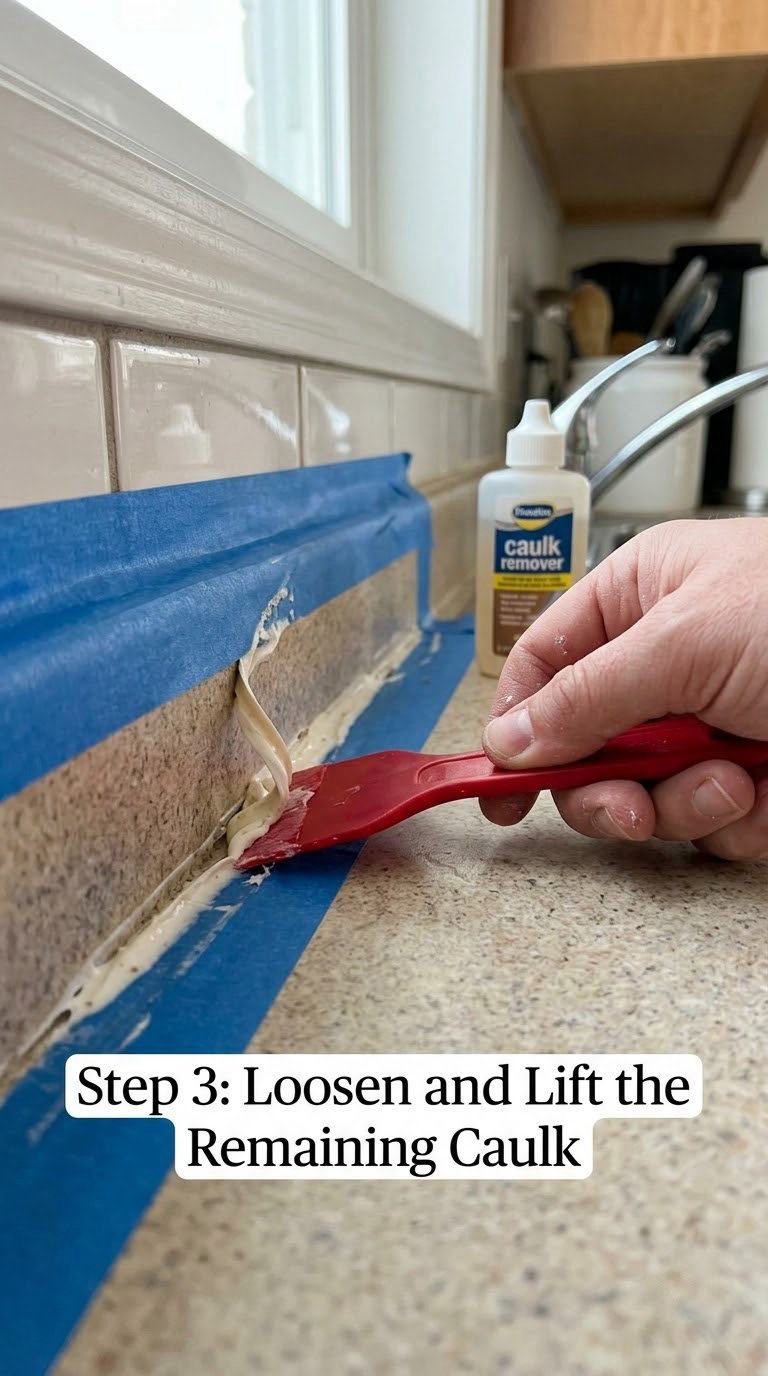
Now soften what is left. Apply purpose-made silicone remover or caulk softener gel along the bead and wait the full 15 to 30 minute dwell time listed on the product. Do not test it early. Most “caulk remover does not work” complaints are just someone checking at minute four.
Once the bead goes rubbery, slide the plastic scraper under the cut edge and pull in one long, slow strip. Long slow pulls beat short aggressive jabs every time because the joint follows the blade. Grip stubborn sections with needle-nose pliers and peel them back on the same angle you cut them, which keeps drywall paper from tearing off the wall.
What to use by surface:
- Marble, travertine, limestone: never anything acidic. No vinegar, no citrus remover, no acetone. Use a purpose-made silicone remover gel and a plastic scraper only.
- Granite and quartz: 100 percent silicone remover gel or a methylene chloride based remover. Isopropyl alcohol works well on the final residue. Avoid the drill-mounted abrasive wheels; they chew a visible ring into the polish.
- Laminate and Formica: no acetone and no nail polish remover. The dye and solvent will print on the top layer permanently. Stick to isopropyl alcohol, mineral spirits, or a silicone-specific remover.
- Solid surface: heat is tolerable in moderation and mechanical scraping is fairly forgiving, but stay off the seam edges. Isopropyl alcohol and a plastic scraper are enough for most residue.
- Butcher block: keep solvents off the wood as much as possible and work fast. Oil the exposed edge lightly once it is dry.
- Tile and grout: work along the joint, not across it, and tease residue out of the grout lines with a wooden skewer rather than digging with metal.
- Painted drywall: pull the bead slowly at a shallow angle. Drywall paper tears far more easily than drywall compound.
If the blade or the scraper starts skipping across the counter instead of lifting the bead, you are moving too fast for the angle you set. Stop, re-seat the blade flat, and take another pass.
Step 4: Remove Residue and Clean the Joint
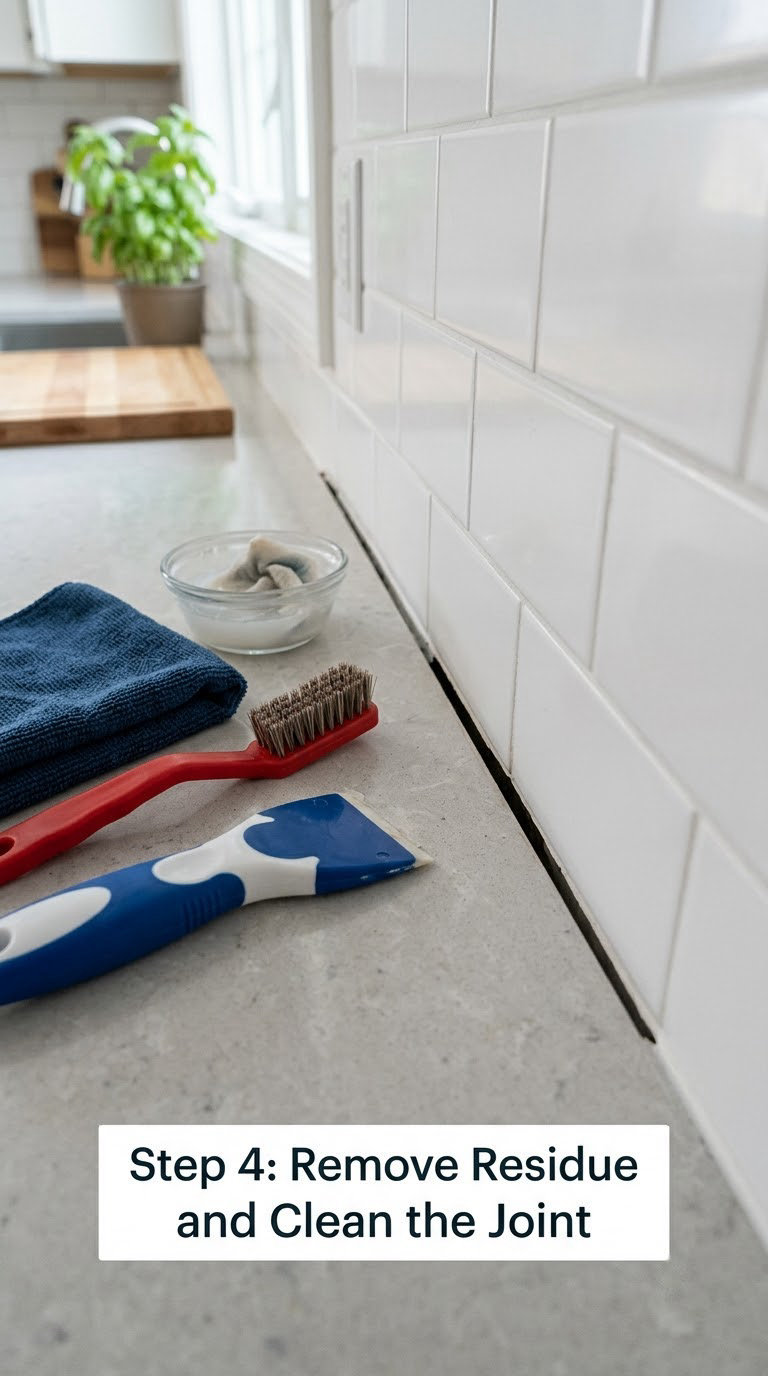
Scrape the edges of the joint flat, then wipe with a cloth dampened with mineral spirits if the counter is granite, quartz, or solid surface. Follow with a cloth dampened with isopropyl alcohol. The alcohol strips the oily film that the solvent leaves behind, and that film is exactly what stops new caulk from bonding.
Work into the corner with the nylon brush and the wooden skewer. Residue in the back of the joint is the reason new caulk peels off in a year, and it is invisible until you are trying to get a blade into the gap.
Wipe again with clean alcohol and let the joint look dry. If a bead of solvent beads up on the surface instead of evaporating, wipe it off rather than letting it sit. Oils repell the new sealant.
Step 5: Let the Surface Dry and Check for Damage
Give the joint 24 hours of open, dry time before new caulk goes on, longer if the joint is deep or the house is humid. A hair dryer on cool for a few minutes helps, but patience costs nothing here.
While it is open, look at what you uncovered. Run your fingernail along the countertop edge. Check whether the joint is deep enough to see the back of the cabinet, whether the drywall behind the bead is soft or crumbling, and whether the stone edge is still crisp or now has a soft, powdery spot. Deep brown or black staining on drywall or subfloor means water has been getting in for a while, which changes the job.
Look along the top of the bead line for a shadow. Old caulk often hides a joint that is wider and deeper than it looks, and new caulk filling only part of it will peel again within months.
Step 6: Re-Caulk the Joint
Once the joint is dry and sound, run a bead of 100 percent silicone kitchen and bath sealant rated to ASTM C920, or a good siliconized acrylic for a low-moisture joint. Siliconized acrylic is paintable and cheaper; pure silicone lasts longer and shrugs off water, which matters at a sink or cooktop.
Fill the joint completely in one continuous pass, then smooth it within the product’s working time, usually 3 to 10 minutes. Pull the masking tape off while the bead is still wet so you get a clean edge. Then leave the joint alone.
Silicone skins over in about 30 minutes but needs 24 hours before water hits it, and 48 hours for a full cure. Block the sink or the joint if kids or pets will be in there.
Common Mistakes to Avoid
- Caulking over old caulk. New sealant bonds to the old layer, not the counter, and the whole assembly lifts when the old layer lets go. Strip first.
- Dragging a dry blade across hardened silicone. That is how you get a visible scratch line in polished stone. Soften first, then score.
- A dull blade. Change it every few feet. A blade that skates will wander off the joint and into the surface.
- Using WD-40. It barely softens the bead and leaves an oily film that stops the new caulk adhering at all. Wipe it off thoroughly or do not use it.
- Using vinegar or citrus remover on marble, travertine, or limestone. Acid etches calcium-based stone, and you cannot undo it.
- Skipping the 24 hour dry. New caulk laid over damp joint or solvent residue peels within weeks. This is the most common reason a redo fails.
- Grabbing the tool nearest your hand. Metal putty knives and screwdrivers are for drywall. Plastic gets no closer to the stone.
When to Call a Pro
Stop and get a fabricator, tile setter, or plumber involved if you find any of the following after the bead is off.
- The countertop edge is cracked, chipped, or powdery where the old bead was. Stone repair is not a DIY job, and the crack will run.
- Soft, crumbling drywall or a water-stained subfloor. Somebody needs to open it up and find the moisture source, whether that is the caulk, a plumbing leak, or an exterior wall problem.
- The counter rocks when you press on it. That is an unsupported or unlevel installation, and filling the joint will not fix it.
- The joint is around an undermount sink that has any give at the rim, or the removal disturbed the sink clips. Water is already behind that rim.
- The old bead was hiding a section of bare, damp wood. Any sealed assembly there is a waterproofing detail, not a caulk job.
A fabricator also handles a special case well: caulk smeared in wide swaths across a quartz seam, or a joint where the previous installer ground into the surface. Sanding and re-polishing is not something you can do at home. If you want more context on the hardware side of these joints, our guide to undermount kitchen sinks for granite countertops covers how the sink rim joint is meant to be detailed.
Maintenance
A good bead lasts five to ten years if the joint stays dry and moves a little. Wipe standing water off the joint as soon as you see it, especially beside the sink and cooktop, and treat the bead like you would a grout line. Run your fingernail along the caulk twice a year, and the first time it feels hard and brittle, take it out while it is still bonded instead of waiting for it to peel.
Keep harsh and abrasive cleaners off the joint, since they break down the sealant faster than most people expect. On natural stone, seal the counter on the maker’s schedule with a pH-neutral stone sealer; acid-based bathroom cleaners are a bigger threat to the counter than to the caulk. If you have butcher block, the joint is the least of your maintenance worries, but our butcher block countertop roundup covers the oiling routine that keeps the wood from drying out next to the sink.
Mold that keeps coming back after a proper removal usually means water is arriving from somewhere else, so chase that before you reseal. For the right sealant type on a different joint, see our guide to choosing caulk for a toilet base.
Frequently Asked Questions
Can I remove old caulk from a kitchen countertop without scratching it?
Yes, if you soften the bead before you touch it with any blade. Spray or gel a purpose-made silicone remover along the joint, wait the full 15 to 30 minute dwell time, score the top and bottom edges with a fresh utility knife held flat under about 15 degrees, then lift the bead with a plastic scraper. Masking tape on the surface above and below the joint adds a second layer of protection.
Should I use heat to remove silicone caulk from a countertop?
Only sparingly, and never on stone. A heat gun on low can soften a stubborn silicone blob on laminate or solid surface, but quartz and granite can crack or discolor from thermal shock, and it bakes residue into the pores. If you use it at all, keep the nozzle moving, stay more than 6 inches (15 cm) away, and stay under 200 F (93 C).
What is the safest tool for removing caulk from laminate or quartz?
A plastic scraper or an old credit card is the safest on both. On laminate, a metal blade can print dye or gouge the decorative layer, and acetone will permanently discolor the top. On quartz, a blade held flat scores the caulk without touching the surface, but a plastic card lifted at the correct angle removes nearly all of it on its own once the bead is soft.
Does old caulk need to be removed before applying new caulk?
All of it. New caulk bonds to whatever it is laid on, so if the old bead is still there, the new bead grips a layer that has already lost its adhesion. Both come off together within a few months, usually faster than the original bead lasted. Strip to bare countertop and bare backsplash, wipe with isopropyl alcohol, and let the joint dry 24 hours.
How long should the countertop joint dry after removing old caulk?
At least 24 hours, and 48 hours if the joint is deep, the house is humid, or you used a heavy solvent. The joint has to be dry all the way through, not just on the surface, because moisture and solvent residue trapped under the bead are the top cause of new caulk peeling within weeks. Keep the area dry and do not close up the cabinet behind the joint while it cures.
What if removing old caulk exposes a crack or countertop damage?
Stop and stop scraping. Photograph the area and call a countertop fabricator. A chipped or powdery stone edge, soft crumbling drywall, or a dark stain on the subfloor all point to a bigger problem, such as water intrusion or an unsupported counter, and filling the joint will hide the symptom while the damage continues. Only surface-level residue on the joint should be handled at home.
Start at one end of the joint with the least visible run, tape everything off, and do six inches end to end before you commit to the whole stretch. Get the dwell time right and the rest of the job is almost easy. Strip every last trace of the old bead, give the joint 24 dry hours, and the new bead has a chance to last a decade.