How to Fix a Loose Toilet That Rocks: Easy Steps (October 2026)
A rocking toilet is one that shifts or rocks when weight lands on the bowl, which means the fixture is no longer anchored to the floor. To fix a loose toilet that rocks you work down a ladder: snug the anchor bolts, shim the gap, and pull the toilet only if the wax seal or the flange is the real problem.
Most wobbles never need more than a wrench and a plastic shim. The ones that turn into a mess are the toilets that leak quietly under the base for months while the subfloor underneath goes soft, and the ones someone glued or grouted down trying to stop the rock.
Contents
Time: 30 minutes to 2 hours for bolt and shim work, half a day to reset the toilet · Cost: parts only — a wax ring kit, shims and bathroom sealant cover every step below · Difficulty: Moderate DIY · Skill level: Beginner-friendly plumbing, no permit usually needed
Tools and Materials
Hand tools and inspection supplies, sized for a typical two-piece toilet:
- Adjustable wrench or 5/8-inch basin wrench — one for the anchor nuts and the supply line. Buy a basin wrench if the closet nut is in a tight corner behind the bowl.
- Flathead screwdriver — for the fill valve and the tank-to-bowl lever nut.
- Putty knife or plastic scraper — to lift old caulk and dried adhesive off the porcelain rim.
- Utility knife with a fresh blade — for trimming shim material and cutting caulk.
- Flashlight or headlamp — you cannot see the gap under the base without one.
- Spirit level — a 9-inch level is plenty.
- Painter’s tape — protects porcelain and floor from wrench marks.
- Rag or folded shop towel — for the drips and the wet-floor check.
- Toilet paper — dry paper under the base is the cheapest leak detector there is.
- Gloves and eye protection — porcelain chips and old caulk both fly.
Materials for cleaning, tightening, sealing, shimming and resetting:
- Plastic or rubber plumbing shims, 1/16-inch to 1/8-inch thick, cut to fit. Buy the pre-cut cone-shaped wedge pair if you have never shimmed before.
- 5/16-inch stainless steel or solid brass closet bolts with brass nuts and washers — one pair, plus a spare. Plain steel bolts rust and seize.
- Wax ring replacement kit — the standard wax ring with a horn, sized to your flange. Wax-free seals are an option but cost more and are fussier to seat.
- Flange repair kit — two backing plates and a bolt set, for a flange whose ears have snapped off.
- Flange extender ring — only if the flange sits below the finished floor after new tile or flooring went in.
- 100% silicone kitchen-and-bath sealant, mold-resistant — for the outer base bead. Not acrylic latex caulk, which shrinks and goes brittle.
- Disinfecting wipes or mild bathroom cleaner — optional, for the post-job cleanup. Our guide to fixing a running toilet covers the rest of the water-side maintenance.
Before You Start
Find out why it moves before you touch a wrench. A toilet that rocks from loose bolts behaves completely differently from one sitting on a low spot in a tile floor, and tightening bolts on a toilet that rocks for another reason just strips the flange ears.
Shut the water off at the stop valve behind or beside the toilet and flush until the bowl is empty. Then sponge out the tank so it weighs as little as possible before you ever lift it. Open a window or run the exhaust fan, because the trap seal that blocks sewer gas gets broken the moment you move the fixture.
Lay a folded shop towel or a scrap of cardboard around the base to protect the floor and the porcelain. Tape a 2-inch pad to the bowl’s side where the wrench touches if the fixture is old and brittle.
Ordinary toilet repair needs no permit anywhere in the US. Damaged subfloor, corroded supply piping inside a wall, and any active leak are the exceptions, and those belong to a licensed plumber or a flooring contractor.
If water is coming out of the base right now, this is not a weekend job. Close the stop valve, put towels down, and get the leak triaged before you start cutting into anything.
Step-by-Step Instructions: How to Fix a Loose Toilet That Rocks
Step 1: Diagnose Why a Loose Toilet Rocks
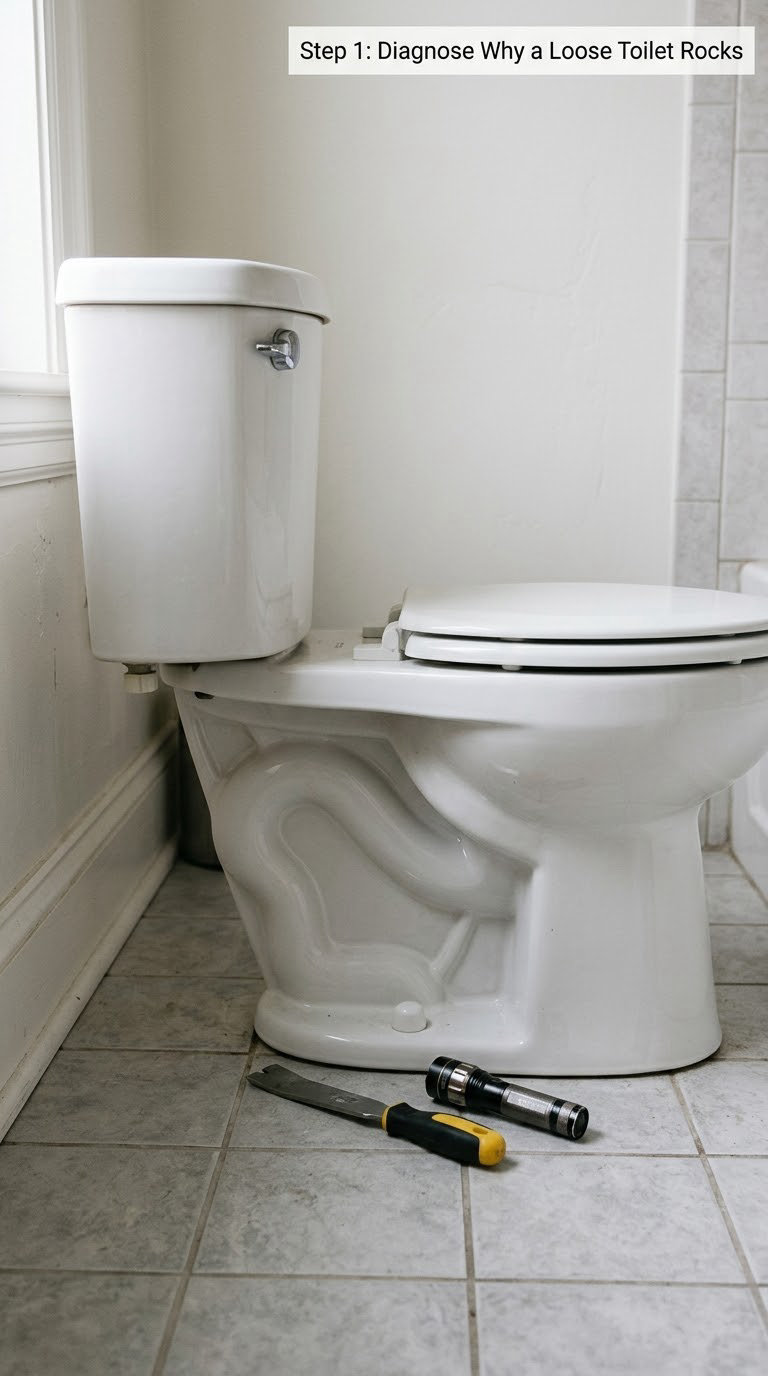
Put one hand on each side of the bowl and press gently. Movement under load, not a light push, tells you what you are dealing with. Then crouch down with a flashlight and look along the base line where the porcelain meets the floor.
Five things make a toilet move, and each one leaves a different signature:
- Dried caulk or adhesive under the rim — a visible hard bead, sometimes a gap beside it, and the toilet rocks even though the bolts are tight.
- An uneven floor — the base touches at two corners and you can slide a business card under the front or the back. Tile lippage shows up as a side-to-side rock.
- Loose anchor bolts — the toilet rocks, and when you snug the nuts the wobble shrinks or disappears.
- A failed wax ring — a sewer odor in the bathroom, damp flooring, staining, or a floor that feels spongy under the bowl.
- A damaged flange — anchor nuts spin freely in empty slots, the bowl shifts when you lift it, or the flange rim sits below the finished floor.
Check the supply connection while you are down there. A leaking lever nut wets the floor around the base and gets mistaken for a base leak constantly. Wipe it dry, flush, then look again with dry paper under the joint.
One more thing worth knowing: a tank that wiggles a little on its own is normal, because the rubber gasket cushions the tank-to-bowl connection. A rocking bowl is not normal.
Step 2: Clean and Dry the Toilet Base
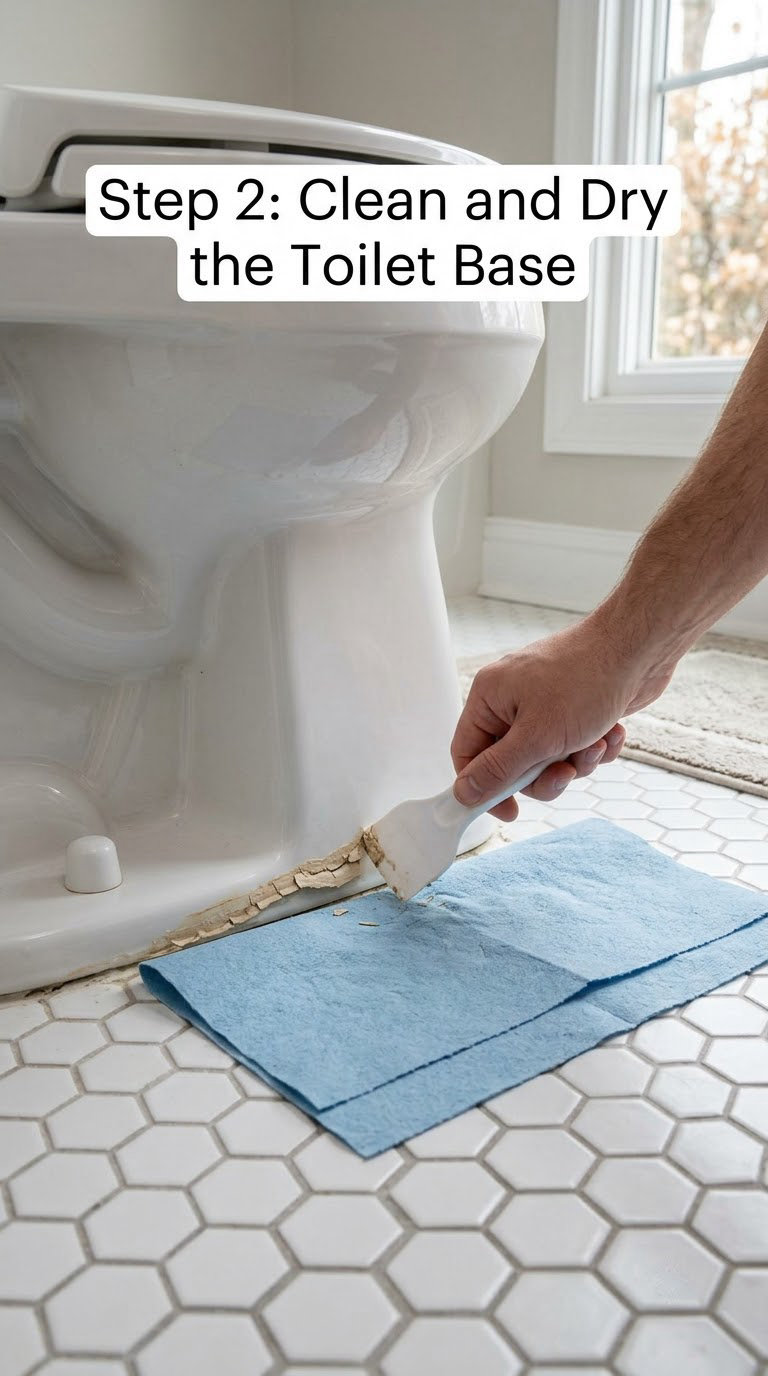
Everything you seal or shim has to go onto a clean, bone-dry surface. Old caulk under the rim is the single most common reason a resealed toilet still rocks months later.
Slide the putty knife or plastic scraper under the old bead at a shallow angle and lift it away in pieces. Work along the rim rather than digging into it, and keep the blade shallow enough that you are cutting caulk rather than porcelain. A knife mark on the glaze is cosmetic; a chip out of the base is not.
Vacuum or brush out the debris, then wipe both mating surfaces — the underside of the bowl and the floor — with a damp cloth. Let them dry fully. Twenty minutes of fan-forced drying is worth more than an impatient bead of sealant that skins over while moisture is still underneath.
Step 3: Check and Tighten the Toilet Anchor Bolts
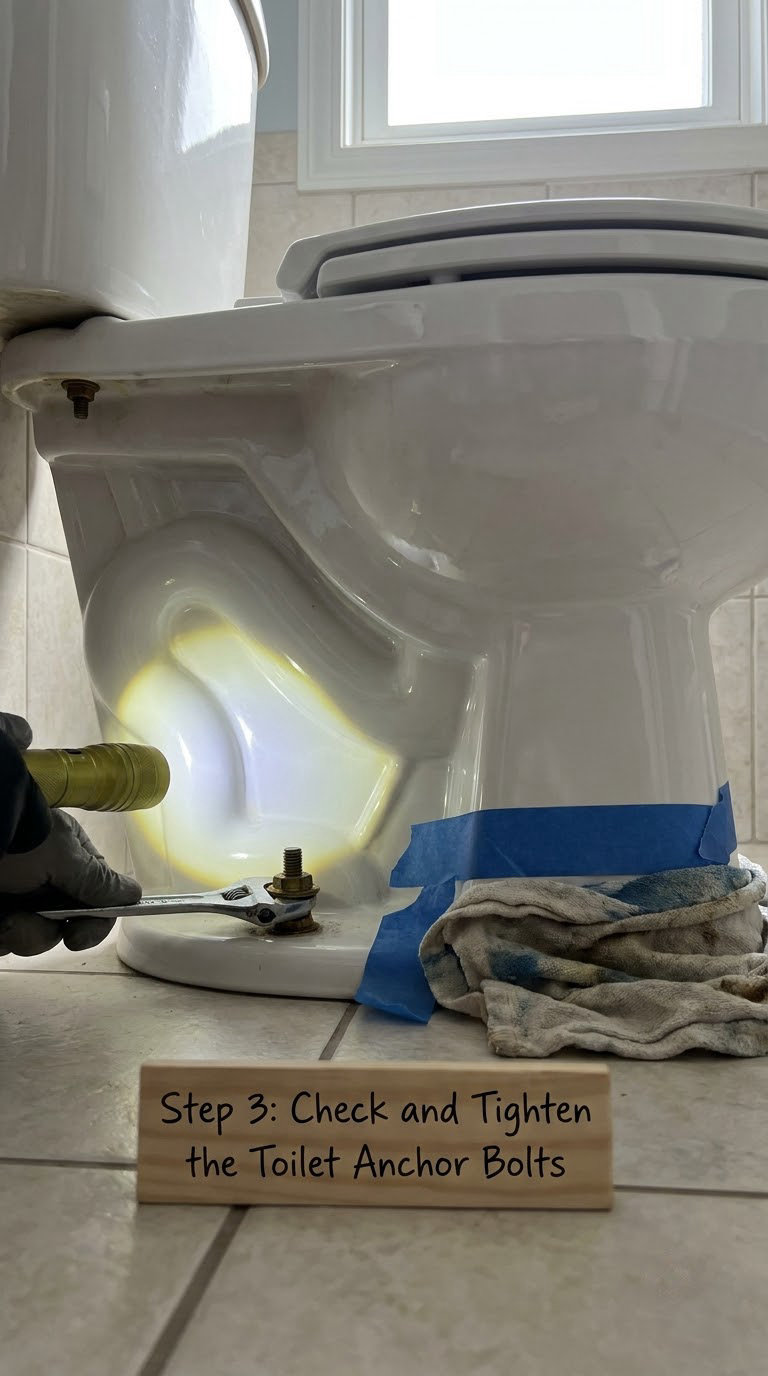
Put the wrench on the nut and turn it about a quarter turn, then move to the other side and do the same. Alternating sides keeps the base from twisting. Stop at snug, not at gone: porcelain cracks long before steel bolts do, and the hardware store floor models make that mistake look harmless.
Watch the gap on the opposite side as you go. If the front lifts off the floor before the wobble is gone, something underneath is propping the bowl up, and you need shims, not torque.
You should never drive a closet bolt down through the floor into the joists. If the nut is rusty, seized, corroded into a stub, or missing entirely, cut it off with a hacksaw and fit a 5/16-inch stainless steel or brass bolt set. Replacement bolts must land in the flange slots, not bear on the flange rim — the flange is a seal, not a structural base.
If the new nuts still spin in empty slots, the flange ears are gone. Stop here and read the section on calling a pro, because a stripped flange is a repair-kit job.
Step 4: Repair an Uneven or Damaged Base
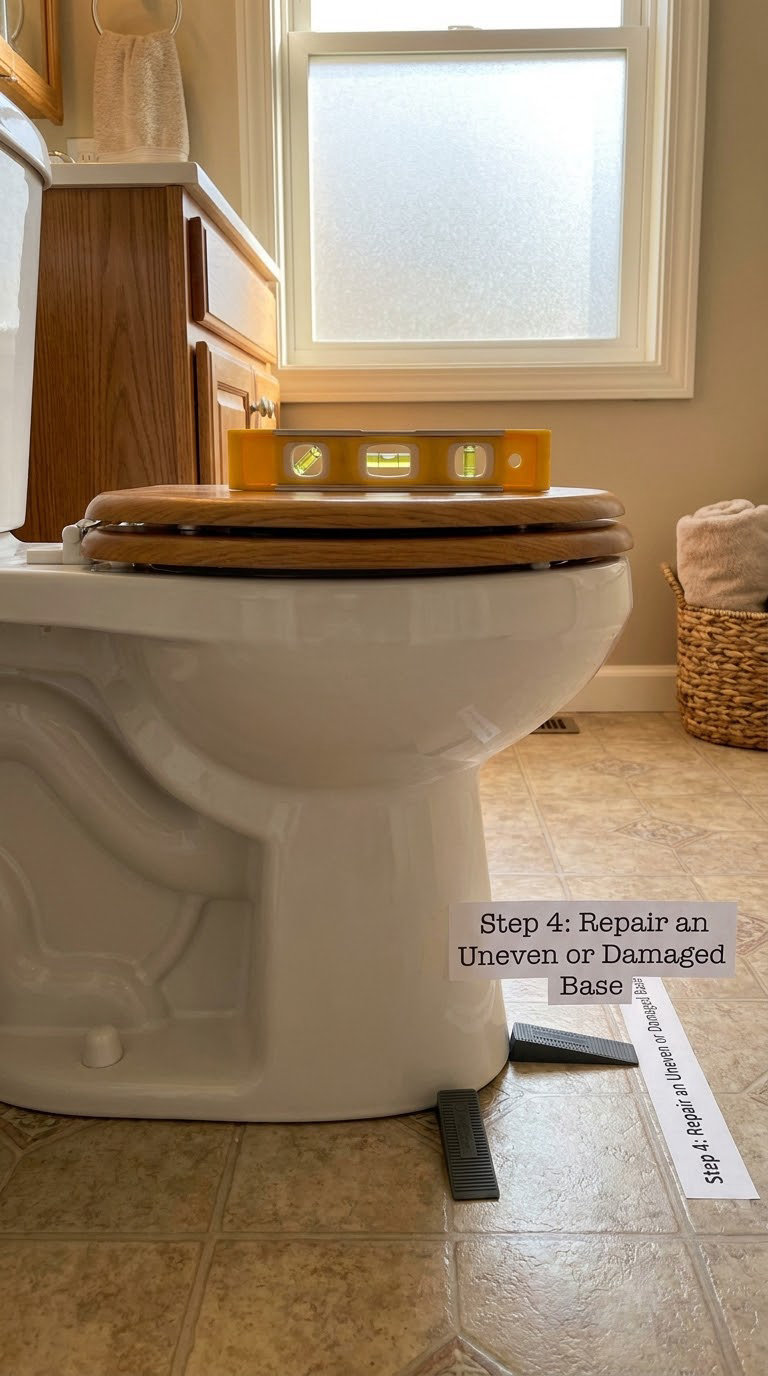
Two methods work here, and picking between them is just about the shape of the gap.
Shims, when the floor is sound. Measure the gap with a ruler held perpendicular to the floor, then slide a plastic or rubber shim under the rocking side until the base is supported. Loosen the nuts a quarter turn first and leave the bolts in place — pulling them out lifts the bowl and can tear the wax seal that was doing its job fine.
The rule from plumbers is to shim the back and let the front stay pinned down, because shims under the front get soaked every time the floor is mopped. Tap the shim in, tighten the bolts evenly, then trim the excess flush with a utility knife. A spirit level across the rim should sit flat.
Sealant, when no shim will fit. If the gap is smaller than a shim will stay in, or the base is slightly dished, run a continuous bead of 100% silicone kitchen-and-bath sealant around the base and let it cure. Typical cure time is 24 hours, and some formulas ask for 48. That is a support fix for a nearly-flat floor, not a repair for a badly rocking one.
Two things to get right. Run the bead around the front and both sides, then stop short and leave the back open, so any future leak shows up in daylight instead of under the bowl. And never grout or glue the base permanently — the next person to replace that toilet may have to break the porcelain to get it out, which leaves a dangerous field of sharp shards.
Step 5: Remove and Reset the Toilet if the Base Still Leaks
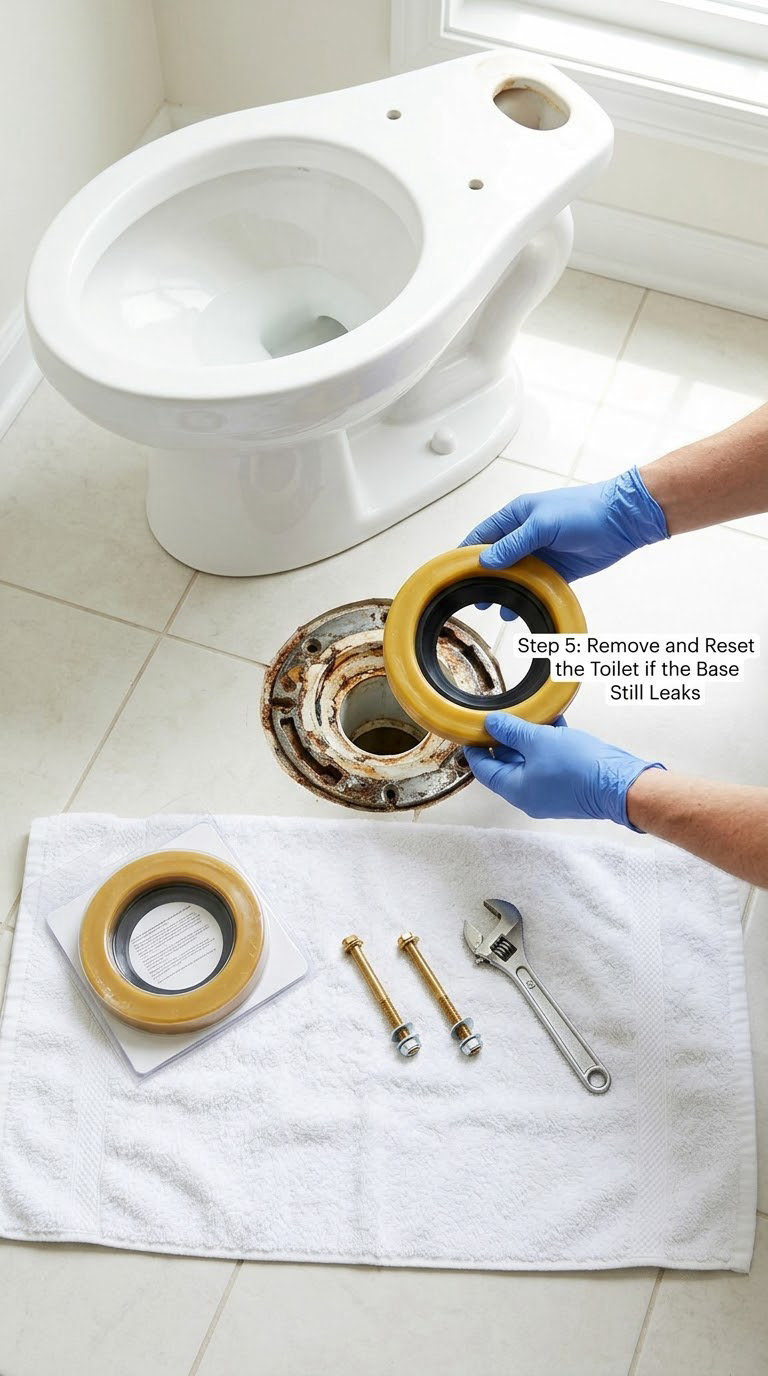
If the bolts are tight, the base is level and the rock is gone, but there is still seepage, a sewer odor, or a damp patch, then the seal is the problem. That means lifting the toilet.
Shut off the stop valve, flush, and dry the tank. Disconnect the supply line at the lever nut, then loosen the two anchor nuts. Rock the bowl gently to break the old wax seal and lift it straight up — do not twist hard, the porcelain horn can shear off. Set the toilet on a folded towel beside the drain.
Scrape the old wax ring off the flange rim with a putty knife and rag. Now inspect the flange itself: press around the rim and ears, and look for hairline cracks, rust, or sections that flex. A sound flange is rigid all the way around.
Fit the new wax ring, set it on the flange, and lower the toilet straight down so the horn passes through the ring’s funnel. If the bowl will not drop into position, the wax horn can catch — press down firmly and rotate slightly, or check that the ring is not folded. Secure with the new bolts, tightening left and right alternately a quarter turn at a time until snug.
Seal only the outer base with silicone, leaving the back open again. If the flange rim sits more than a quarter-inch below the finished floor, add a flange extender before anything else — a wax ring squeezed too thin from the start is a leak you have paid to build.
To fix a loose toilet that rocks properly, the work ends here: new ring, new bolts, even base. Adding more sealant over a failing seal only hides it until the floor gives out.
Step 6: Test for Stability and Leaks
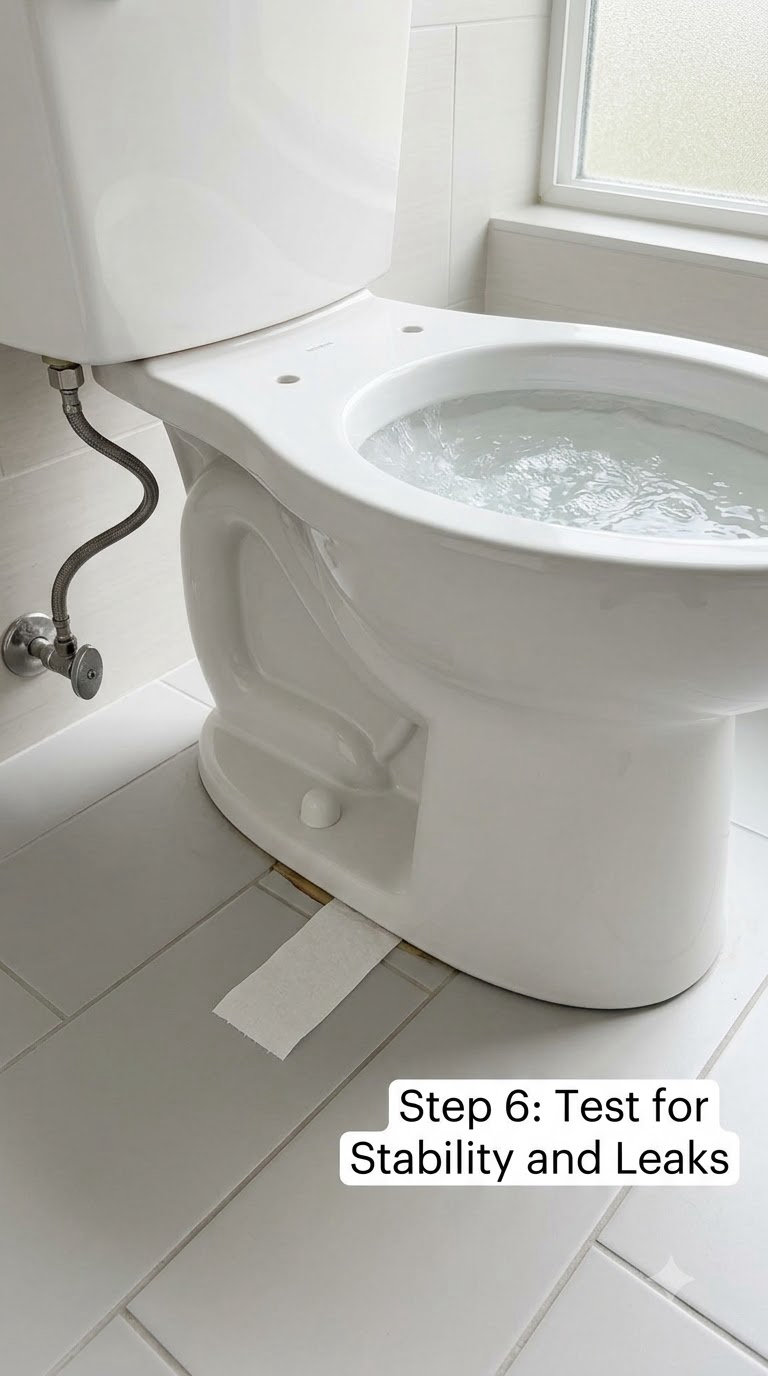
Wait out the cure time your sealant specifies before using the toilet properly. Twenty-four hours is the common figure for 100% silicone; give it 48 if the bathroom is cool or damp.
Refill the tank, then flush three or four times in a row. After each flush, look at the base line and press gently around the bowl. A good result means the base does not shift under hand pressure and does not shift when you sit down with your full weight.
Lay folded dry toilet paper under the joint and the flange area, let it sit for an hour, then check it. Paper that stays dry means there is no active leak, even if the base is still damp from the reset. If it is wet, go back to the cause you identified in Step 1 rather than reaching for another bead of caulk.
Movement, odor, seepage or a floor that stays damp after a full day means something is still wrong underneath. Treat that as a stop signal, not a reason to keep sealing.
Common Mistakes to Avoid
Most failed toilet repairs come down to one of these six.
- Tightening against a cracked or stripped plastic flange. The nuts spin, the base shifts, and the porcelain takes the load instead of the bolts. The fix is a flange repair kit with backing plates, or a plumber if the flange itself has fractured through.
- Overtightening the anchor bolts. A quarter turn per side, alternating, until snug. Porcelain is strong in compression and terrible in tension, and the crack shows up months later at the base.
- Using wood shims or oversize blocks. Wood swells, rots, and crushes where it bears on the base, and it cannot be trimmed cleanly. Use purpose-made plastic or rubber plumbing shims.
- Sealing over an active leak. A bead of silicone across a wet joint traps the water instead of stopping it. Find the source first, always.
- Mixing incompatible sealants. Acrylic latex caulk and plumber’s putty shrink and crack; 100% silicone kitchen-and-bath sealant does not. Pick one and let it cure.
- Treating added caulk as a substitute for a new wax ring. Caulk stabilizes a base. It cannot re-seal a drain. If there is odor or seepage, the seal has to be replaced.
One more worth naming: bolting a toilet permanently through the floor framing. The flange and the subfloor are not designed to carry that load, and the repair later costs far more than it saved.
When to Call a Pro
Some rocking toilets are a fifteen-minute fix and some are the first sign of a floor problem. These are the ones where a licensed plumber earns the call:
- The leak keeps coming back after a new wax ring, which points at a failed flange or a wet subfloor.
- A sewer odor persists even though the bowl rocks and seals are both corrected, which usually means the vent or the trap, not the base.
- The flange is cracked, snapped at the ears, or sitting below the finished floor where an extender and more labor are needed.
- Supply pipes are corroded or the shut-off valve does not hold, and the work touches piping inside a finished wall.
- The bolts cannot be replaced because the flange ears are gone and the subfloor around the drain is soft or rotten.
- The floor moves noticeably, or the toilet rocks on a joist that has sagged. That is structural work, not a plumbing job.
A plumber can also clear a floor that has been grouted or glued down without risking a broken bowl, and can patch a soft subfloor properly with new material rather than a shim on top of rot. Ask for the estimate in writing and ask whether the repair touches the flange or the drain line.
Maintenance
Keep the base stable by keeping it unloaded and dry. Nobody should sit or lean on the bowl rim as a step, and towels draped over the tank lid add weight to a fixture that is already being asked to hold more than it was designed for.
Wipe splashes out from under the base right away rather than letting them sit. Give the supply connection and the anchor nuts a glance every few months, and re-run dry toilet paper under the base once a season — it catches a slow leak long before a stain does.
Watch what sits under the toilet. Toilet bowl cleaner should not pool beneath the base, where it can attack the seal and the sealant you just applied. Keeping the rest of the room in decent shape helps too, and if you are planning a remodel, our guide to fixing a bathroom door that hits the toilet covers another job that tends to surface at the same time.
If the bowl rocks again within a few weeks of a proper repair, the diagnosis was wrong rather than the work. That points at floor movement or a low flange, and it is worth the plumber call.
Frequently Asked Questions
Why does my toilet rock when I sit on it?
A toilet is held down by two closet bolts that pass through the base and clamp it to the flange on the drain pipe. When it rocks under your weight, one of four things has failed: the bolts are loose or corroded, the floor beneath it is uneven, the wax seal has failed, or the flange itself is damaged. Press each side of the bowl by hand, then look under the base with a flashlight to tell which one it is.
Will caulk fix a toilet that rocks by itself?
Only sometimes. If the gap under the base is tiny and the floor is nearly flat, a continuous bead of 100% silicone kitchen-and-bath sealant can stabilize it once the bolts are snug, and typically needs 24 hours to cure. If the gap is larger, shims do the supporting and the sealant only keeps water out. Caulk cannot replace a failed wax ring or a cracked flange, and it will not fix an uneven subfloor.
How long should a toilet base or silicone repair cure before use?
Give 100% silicone a full 24 hours before loading the toilet normally, and 48 hours in a cool or damp bathroom. Acrylic latex caulk needs about 24 hours as well. If you shimmed and tightened without any sealant, you can use the toilet immediately. If you reset the toilet with a new wax ring, wait at least an hour and flush several times while watching dry paper under the base.
Do I need to remove the toilet to replace the wax ring?
Yes. The wax ring sits between the bowl horn and the flange, and the only way to reach it is to lift the bowl. Shut off the stop valve, flush, dry the tank, disconnect the supply, loosen the anchor nuts, and lift straight up. Set it on a towel, scrape the old ring off the flange, fit the new one, and lower the bowl back down in about an hour.
How do I know if the problem is the wax ring, flange, or subfloor?
A wax ring failure gives you a sewer odor, damp flooring, or staining around the base. A damaged flange shows up as anchor nuts that spin freely in empty slots and a bowl that shifts when lifted. A soft subfloor feels spongy when you press the floor beside the toilet, and the rock returns within weeks of any repair. If more than one of those shows up at once, call a plumber rather than guessing.
What to Do First
To fix a loose toilet that rocks, start with the rock test rather than the wrench. Press each side of the bowl, look under the base with a flashlight, and decide which of the five causes you are actually dealing with.
If it is bolts, a quarter turn a side until snug is the whole job. If it is a gap, shim the back, let the front stay pinned, and trim it flush. Only pull the toilet when there is odor or seepage, because that is the only sign the seal itself has gone.
Leave a gap in the caulk bead at the back, use dry paper as your leak check, and give silicone a full day before anyone leans on that bowl.
Related reading for the rest of the bathroom: how to fix a loose bathroom sink faucet.