How to Fix a Cabinet Hinge That Sags: Easy DIY Repair 2026
A sagging cabinet hinge is almost always loose or stripped screws, and both are fixable in an afternoon. Tighten every screw on the frame-side plate first, fill any hole that spins with toothpicks and wood glue, then use the vertical adjustment screw to bring the door back into line. Most doors drop a quarter inch and stay there for years before anyone notices.
Below I walk through the whole repair in six steps, including the awkward parts nobody mentions: how to support a heavy upper door, what to do when the screw hole is already ruined, and how an old-style butt hinge behaves differently from a modern concealed one.
Contents
Time: 20 to 60 minutes for one door, longer if holes need filling · Cost: A few dollars for screws, glue and toothpicks; a handyman visit typically runs $75 to $200 per door depending on your region · Difficulty: Easy to moderate DIY · Skill level: Beginner, as long as you can handle a screwdriver and a step ladder
Tools and Materials
Hand tools first. Everything else you can improvise.
- A Phillips #2 screwdriver, manual. This one matters. Adjustment screws strip fast in a drill.
- A flathead screwdriver or utility knife for trimming dried glue and separating a stuck hinge plate.
- A cordless drill only if a screw head is painted shut or rusted, and only to back the screw out.
- A small carpenter’s level or a 12 inch ruler to check height against the neighbouring door.
- A 6 inch carpenter’s square for checking whether the door is hanging square rather than truly sagging.
- Painter’s tape and a pencil to mark the door’s current position.
- A shallow tray or a magnetic bowl so screws don’t disappear into the cabinet cavity.
- A step ladder and a wood block or shim to support the door while you work underneath it.
- Safety glasses and gloves. Screws dropped into an eye are the classic kitchen injury.
Materials and parts. You probably need one or two of these, not all of them.
- #6 x 1 inch wood screws for solid wood or plywood cabinets, and #6 x 1.5 inch for particle board, since particle board needs more bite.
- Plain wooden toothpicks, untreated, plus PVA wood glue for stripped holes.
- A 1/4 inch wood dowel as an alternative to toothpicks for a larger stripped hole.
- A 1/8 inch aluminium or steel repair plate if the hole keeps failing, the option regular DIYers know and most blog posts skip.
- A matching replacement hinge if the plate is bent or the hinge cup is cracked. Concealed cups are standard 35mm.
- A flat washer or a couple of plastic shims for an old-style butt hinge fix.
Before You Start
First, know which hinge you are dealing with. Open the door and look at where it attaches. A concealed European-style hinge disappears into a 35mm cup drilled in the back of the door and mounts to a plate inside the cabinet, and those plates usually carry two adjustment screws. A self-closing hinge has a visible spring arm and a pin you can lift out. A surface-mounted old-style butt hinge is screwed straight to the face of the door and the cabinet frame. Overlay style changes the cup depth, not the repair method, so a guide to partial overlay cabinet styles is useful if you’re not sure what you’re looking at.
Next, support the door. Most kitchen doors weigh more than people expect once they’re full of hardware and dishes. For a base cabinet, a wood block under the open door is enough. For an upper cabinet, prop the door with a shim wedged between the door and the cabinet interior, or rest the open door on a step ladder. A door that drops on your foot mid-repair ruins the whole afternoon.
Empty the cabinet. You need both hands and a clear line of sight to the hinge plate, and a falling dinner plate is a good argument for clearing the shelf above the door.
Mark the position. Put a strip of painter’s tape on the cabinet face next to the door and a small pencil line showing where the door edge sits. When you’re done, that line tells you whether you have returned the door to its original alignment or drifted an eighth inch off.
Protect the finish. Lay a folded towel or a scrap of cardboard on the shelf below if you are working overhead, because glue squeeze-out on a finished door is painful to trim. If the whole cabinet needs paint later anyway, working on a refinished china cabinet makes touch-up much less stressful.
Stop and reassess if you find a crack running through the face frame, a cabinet box that moves when you lean on it, or a screw hole that goes through into the back panel. Those are not hinge problems.
How to Fix a Cabinet Hinge That Sags: Step by Step
Step 1: Diagnose Why the Cabinet Hinge Is Sagging
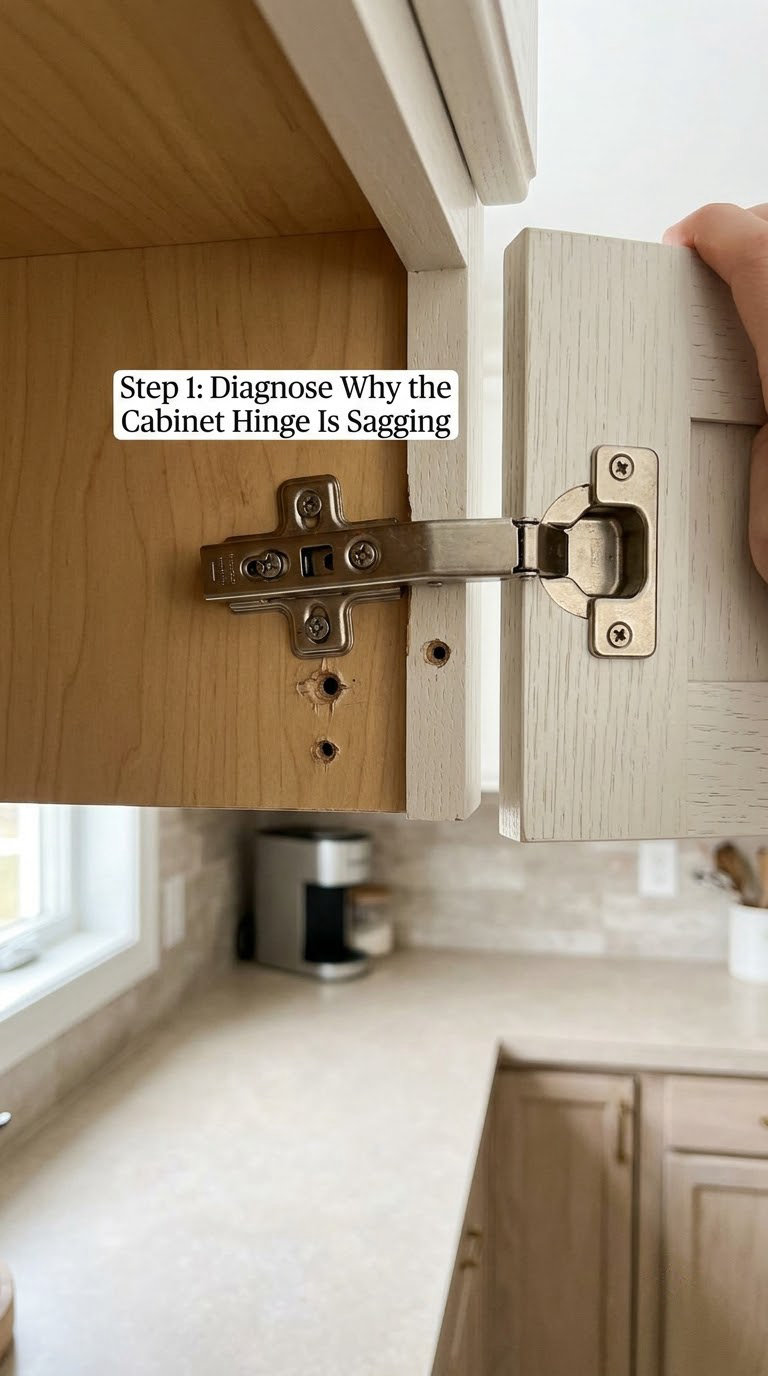
Start by comparing the door to its neighbour. If both doors are low by the same amount, the cabinet box is probably out of square, not the hinge. If one door sits lower while the one beside it is true, the problem is local to that hinge.
Open the door and look for the three failure points. Screws that are proud of the plate, backed out, or sitting loose in enlarged holes mean the door is only being held by friction. A screw that spins without biting means the hole is stripped. A bent plate or a cracked hinge cup means the hardware itself has failed and no amount of tightening will help.
Run a flat palm up the face of the door and the cabinet front. A high spot tells you which direction the door is hanging off.
Step 2: Support the Door and Mark Its Position
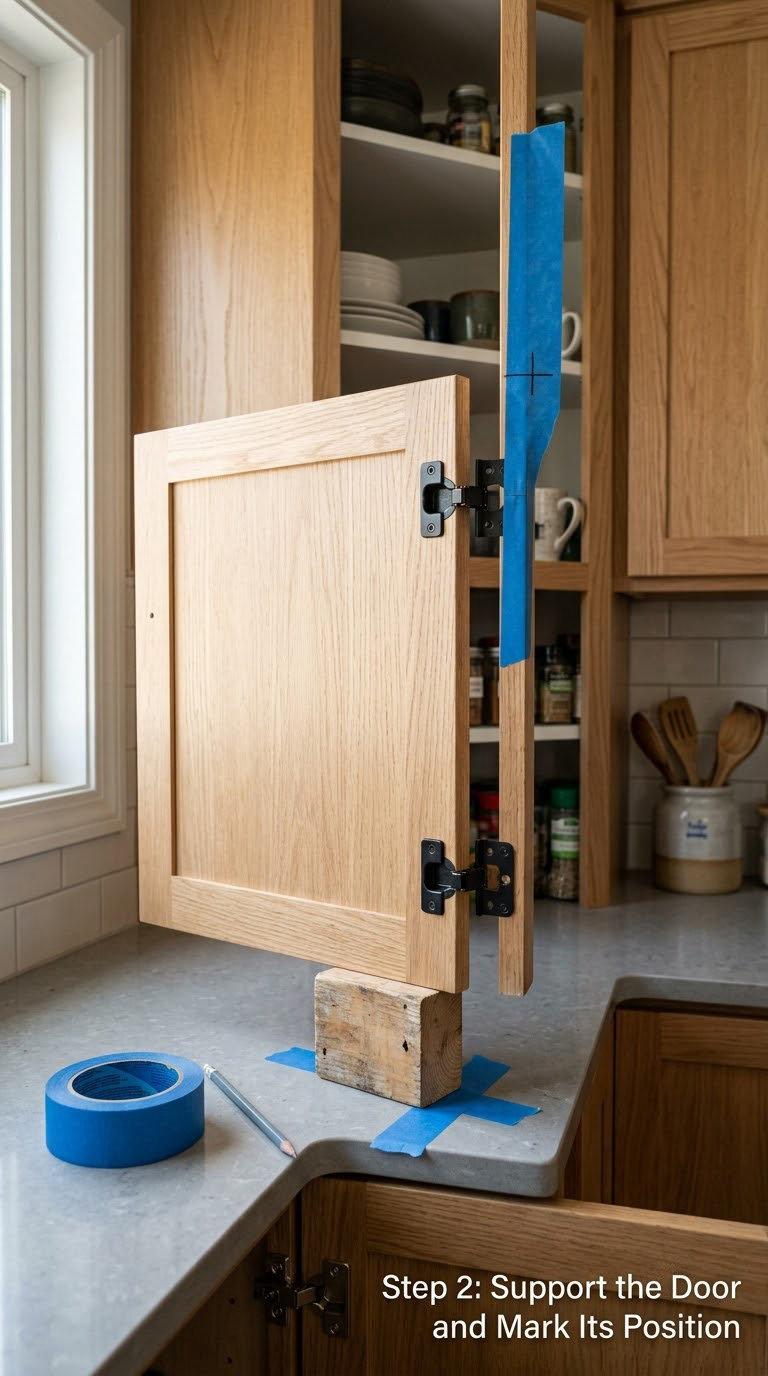
With the door fully open, slide the shim or wood block so it carries the door’s weight. Test it by pressing down gently. If the block moves, wedge it tighter before you touch a single screw.
Tape a strip next to the door and pencil the edge line as planned. Add a second mark at the top corner so a door that is also out of square is obvious later.
Step 3: Tighten Loose Hinge Screws
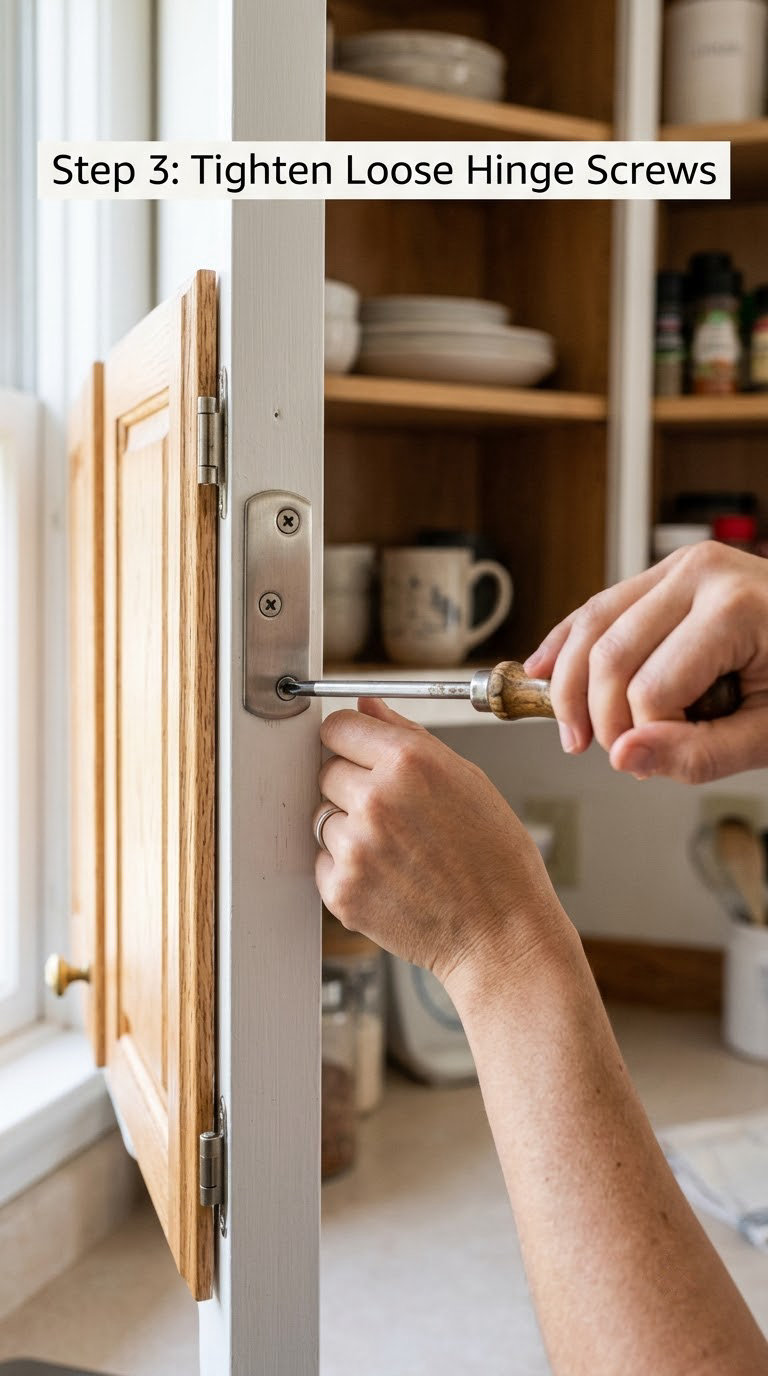
Work through the plate screws one at a time by hand, a quarter turn each, just until the screw seats. Snug means the plate no longer shifts when you push the door. Anything past snug crushes particle board and creates the stripped hole you are trying to avoid.
Keep the plate flat against the cabinet wall as you tighten. If it tilts as the last screw goes in, back that screw off and reseat the plate, because a plate under tension will let go again within months.
Check your pencil mark. Close the door slowly and see whether it has returned to where it started. If the screws were the whole story, you are done. If the door still hangs low, move to the next step rather than tightening harder.
Step 4: Fill Stripped Screw Holes
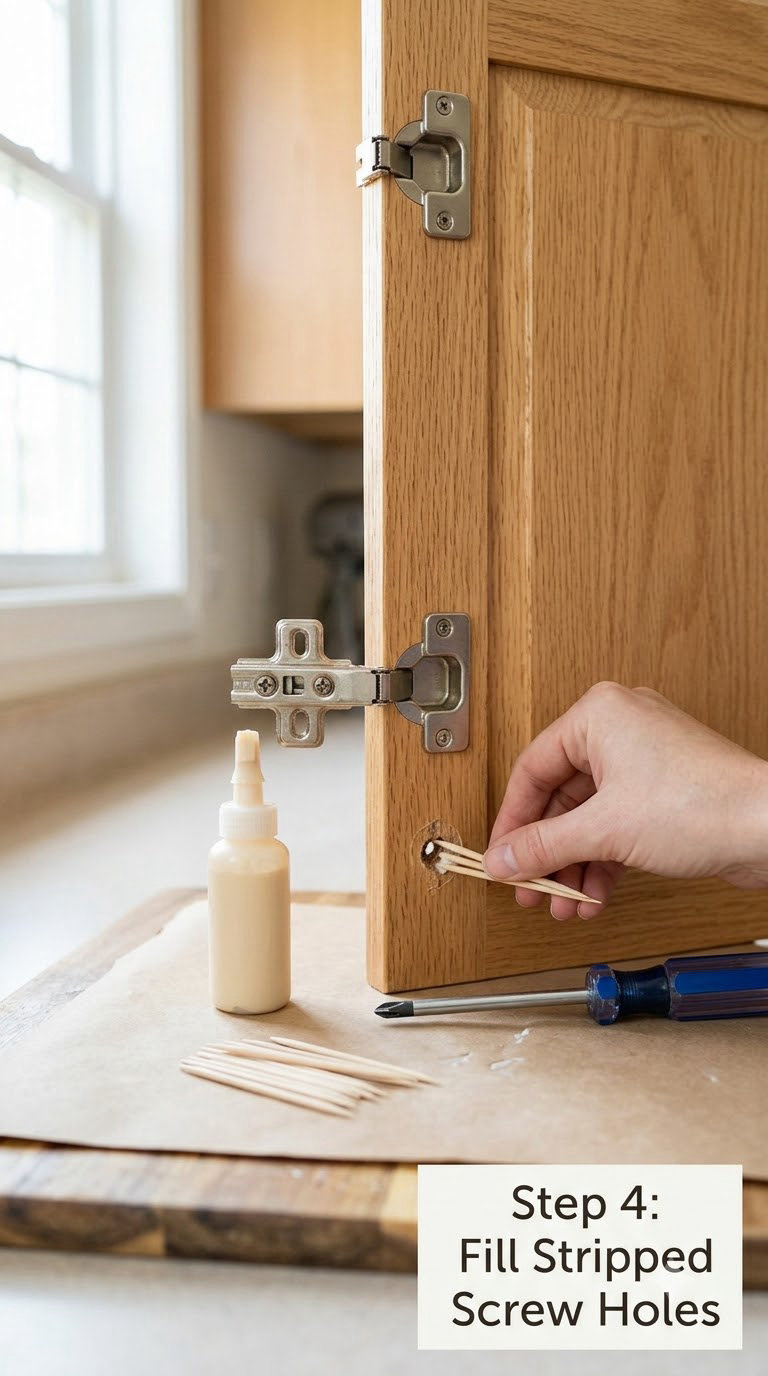
Remove the screw. If the hole is only slightly oversized, a longer screw may be enough: go from 1 inch to 1.5 inch in particle board so the threads bite into the cabinet rail behind the face. If the hole is visibly round and the screw spins, fill it.
For the toothpick method, pack the hole with plain untreated toothpicks dipped in PVA wood glue, driving them in with the screwdriver handle. Push in enough that the hole is solid, add a dab of glue on top so the toothpicks cannot back out, then let it cure overnight. Trim the packed toothpicks flush with a utility knife the next day and re-drive the screw.
In particle board the wood pulp glues and swells better than in solid pine, so the repair usually holds well. In MDF it is weaker, and a repeat failure means you should skip ahead to a repair plate.
For holes that keep failing, screw a 1/8 inch aluminium or steel plate over the damaged area and anchor it into solid wood nearby. It costs more and takes longer, and it is the only version of this repair that tends to last. A cabinet hole repair kit sold for particle board carcasses does the same job with purpose-made hardware.
Ordinary wood filler is the wrong tool here. It is designed to be sanded flush, not to hold a screw under repeated tightening, and it will chew out again the same way.
Step 5: Realign or Replace a Damaged Hinge
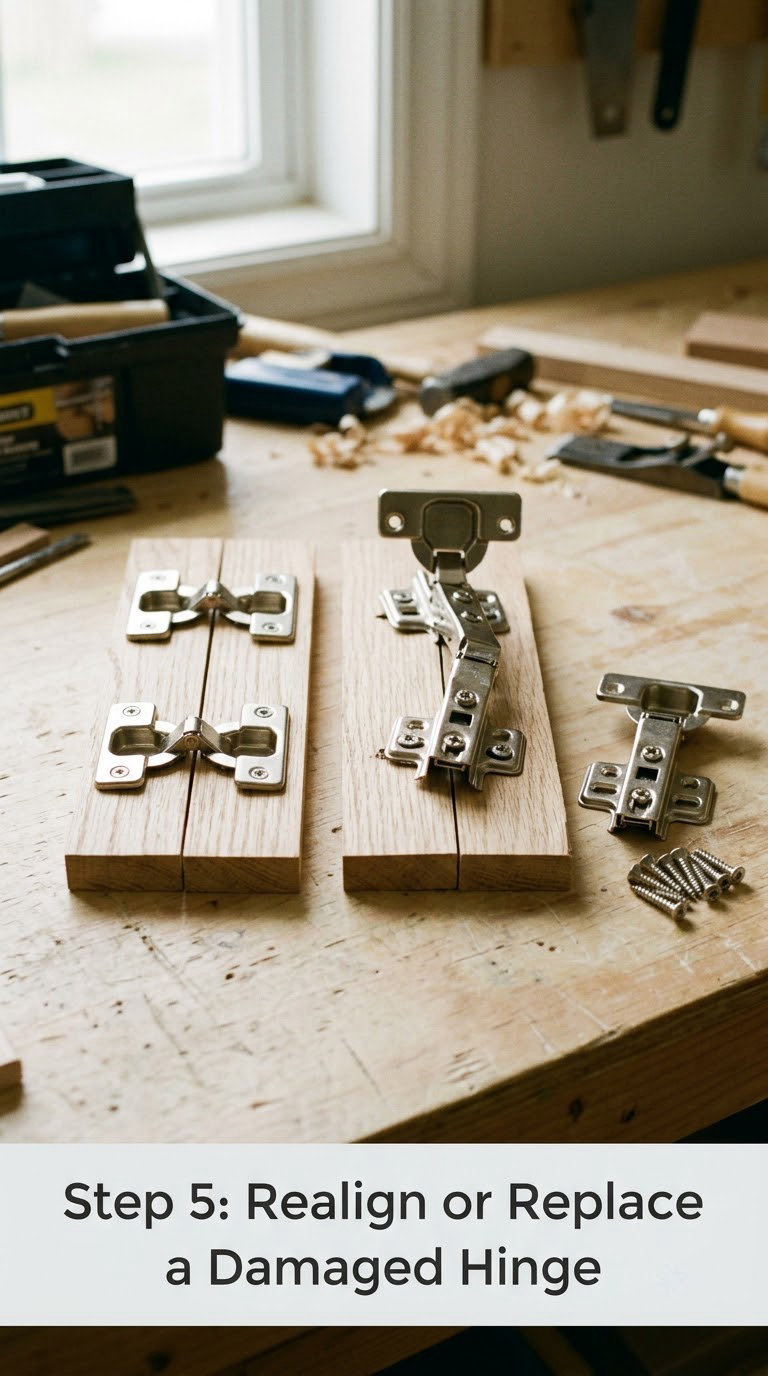
For a concealed hinge, loosen the two screws on the frame-side plate a few turns and slide the plate up or down until the hole lines up with a solid spot, then snug them. If the door edge still sits low after the plate moves, the stop is built into the hinge arm and the plate has reached its limit. At that point, move the door-side plate instead, which changes the arm angle.
Old-style butt hinges work differently. Lift the door off by pulling the hinge pin straight up with a thin screwdriver while supporting the door, then drop a flat washer, a piece of cardboard, or a couple of plastic shims under the pin on the top hinge. Rehang the door and the sag disappears instantly. This fix appears on handyman forums constantly and no major guide covers it.
Replace the hinge itself if the plate is bent, the arm is warped, or the cup has split. Concealed hinge cups are a standard 35mm diameter, so take the old one to the hardware store to match overlay type, screw spacing and cup depth. Never use screws long enough to poke through the back of a thin cabinet box, and never substitute a longer screw where wiring or a shelf bracket sits behind the frame.
Step 6: Rehang, Adjust, and Test the Door
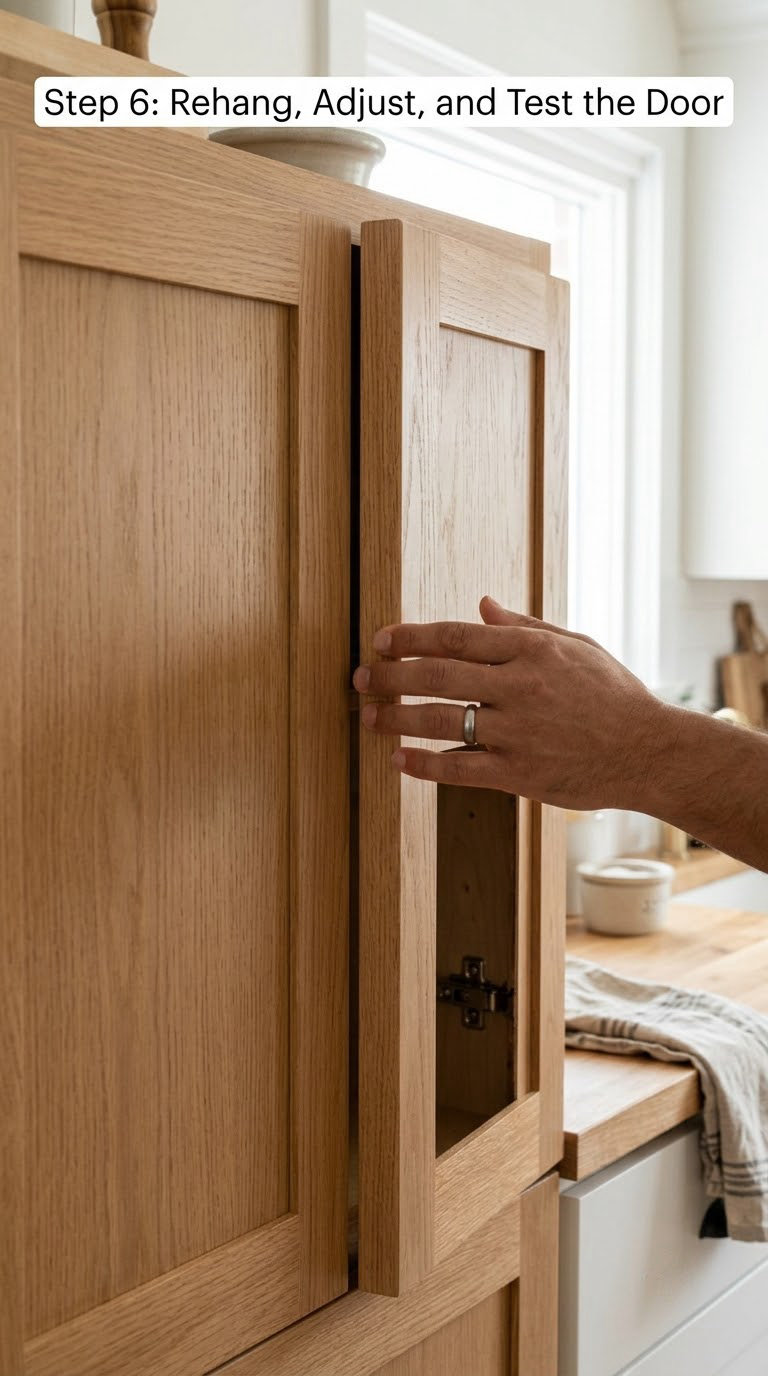
Reattach the hinge and take the support out slowly, keeping one hand on the door. Now use the adjustment screws in quarter turns. The vertical screw moves the door up or down, the side-to-side screw shifts it left or right, and the depth screw pulls the face forward or pushes it back. Realign before you tighten anything, because a plate under load cannot be repositioned.
Stand back and look along the door line. The reveal between neighbouring doors should read as two dark lines of the same width, usually about 1/8 inch, and the gap above and below should match. Check the corners of the door against the face of the cabinet with a straightedge too.
Run the door open and closed three or four times. If it drifts back down, something is still loose and you have not found it. If it bounces open instead of closing, the magnet catch is too strong or a self-closing hinge is catching the frame.
Common Mistakes to Avoid
- Overtightening. The single most common way to create a stripped hole is to crank a screw until the driver bottoms out. Snug is enough.
- Using a drill for adjustment. Power tools strip the small adjustment screws and make it impossible to make quarter turns. The fix is a manual Phillips #2 every time.
- Forcing a bent hinge back into place. A bent plate puts constant tension on the screws and guarantees a repeat failure. Replace it.
- Oversized screws. Longer screws can punch through the back panel of a thin cabinet box or hit wiring behind a wall.
- Filling holes with wood filler. Standard filler crumbles under a screw head. Toothpicks, a dowel, or a metal repair plate hold.
- Losing the original alignment. Without your tape and pencil marks, matching the neighbouring door’s reveal is guesswork.
- Working with the door unsupported. A face-frame upper door weighs enough to damage your foot or the finish.
- Forgetting the cause. Overloaded spice racks and pull-out organisers are usually what stripped the hole in the first place. Take the load off before you re-tighten.
When to Call a Pro
Some damage is beyond a hinge repair. Call a cabinet carpenter, handyman, or renovation contractor if the door itself is warped or delaminated, if the face frame is cracked, or if the cabinet box shifts when you lean against it. Concealed wiring behind a wall, or a fastener you physically cannot reach without removing finished trim, is a pro job too.
Repeated failure at the same hole also deserves a professional opinion, because it usually means the cabinet carcass needs reinforcement rather than another patch. Permits are generally not required for an ordinary hinge repair, but local rules vary, so check if you are working on a rental or in a regulated building.
Maintenance
Check the doors every three to six months. Open each one, look for screws that have backed out, and give them a quarter turn by hand. That single habit prevents most sagging hinges.
Keep the load sensible. A spice rack or a heavy pull-out organiser on a door adds weight the hinge was not rated for, and a 35mm concealed hinge in a particle board cabinet has a real limit.
Watch for rubbing, bouncing, or uneven gaps, since these show up months before a hinge actually fails. Wipe the hinge area with a damp cloth and a drop of oil on the moving arm twice a year so the mechanism keeps working freely, and replace loose washers and damaged screws on old butt hinges while you are there.
One more thing worth checking: if several doors in the same run have drifted, the cabinet box may be out of square. Shimming the cabinet feet with wood brings the whole box back and stops you adjusting doors one at a time forever.
Frequently Asked Questions
Why is my cabinet hinge sagging?
Nine times out of ten it is loose screws. The weight of the door slowly pulls each screw a fraction of a turn, and eventually one backs out enough for the door to drop. The other cause is stripped holes, usually in particle board after years of tightening, where the screw spins without biting. A bent plate or a heavy door overloading the hinge makes up the rest.
Can I fix a sagging cabinet hinge without replacing it?
Usually yes. Tighten the frame-side plate screws, fill any stripped hole with toothpicks and wood glue, and use the vertical adjustment screw to bring the door back into line. Replacement is only needed when the plate is bent, the hinge arm is warped, or the cup is cracked, all of which you can see or hear when you move the door.
What size screws should I use in a cabinet hinge?
Number 6 wood screws are the standard. Use about 1 inch long in solid wood or plywood, and 1.5 inch in particle board so the threads reach the cabinet rail. If screws keep backing out, moving up one length solves it more cheaply than filling holes. Avoid anything long enough to punch through the back of the cabinet box.
How do I fix a stripped screw hole in a cabinet frame?
Pack the hole with plain wooden toothpicks dipped in PVA wood glue, drive them in until the hole is solid, let it cure overnight, trim flush with a utility knife and re-drive the screw. For a hole that keeps failing, screw a 1/8 inch aluminium or steel plate over it and anchor that into solid wood. Ordinary wood filler will not hold a screw.
Should I use wood filler or toothpicks to repair stripped screw holes?
Use toothpicks, not filler. Fillers are meant to be sanded smooth and crumble when a screw is tightened repeatedly. Toothpicks pack tight, absorb glue, and give the screw real material to bite into. A dowel is the better option for a large hole, and a metal repair plate is the durable answer when a hole has already failed twice.
How do I know if a cabinet door is warped instead of having a loose hinge?
Open the door and sight down its face from the top edge. A warped door curves out of plane and will rub even after the hinge is fully tightened and aligned. If the hinge is solid and the door still binds, lay a straightedge across the face or press a post across the door and look for daylight. Replace or refinish a badly warped door instead of adjusting it again.
What to Do First
Start at the top hinge and tighten every screw on the frame-side plate by hand, quarter turn at a time. Most sagging doors return to level right there, and you have spent five minutes instead of an afternoon. If a screw spins, pack that hole with toothpicks and glue, let it dry overnight, and come back to the adjustment screws the next day.