How to Fix a Door That Wont Latch: 8 DIY Steps 2026
A door that won’t latch is almost never a broken lock. The latch bolt is usually fine; something around it has moved. Loose hinge screws let the door sag, a strike plate sits a fraction too high or low, or paint and grit have filled the opening. Here is how to fix a door that wont latch in eight steps, starting with the free checks and ending with damaged hardware.
Most of this job takes a Phillips screwdriver and twenty minutes of patience, and the same two causes account for nearly all of the doors I’ve been called out to.
Contents
Time: 20 to 90 minutes · Cost: nothing if you own a screwdriver, otherwise a pack of screws, a strike plate or a new latch · Difficulty: Easy to moderate DIY · Skill level: Beginner with patience
Tools and Materials
You probably already own most of this.
- Phillips screwdriver, 2 inch (50 mm) and 4 inch (100 mm) shafts
- Flathead screwdriver for bending a strike tab
- Safety glasses and a pair of gloves
- Masking tape or painter’s tape
- Chalk, grease crayon or lipstick for marking the latch
- Metal file or burr file, plus a drill with a 1/8 inch (3 mm) bit
- Cardboard or thin wood shims
- A wedge, a book or a doorstop
For the fixes themselves:
- Long hinge screws, #8 x 2-1/2 inch (64 mm) or #8 x 3 inch (76 mm)
- Toothpicks and wood filler for stripped screw holes
- Wood shims cut from a coffee can lid or cedar fence picket
- A matching strike plate, or a self-aligning shim-style strike
- A replacement latch or lockset matched to your backset: 2-3/8 inch (60 mm) or 2-3/4 inch (70 mm), for doors 1-3/8 inch (35 mm) thick
- A drop of light machine oil or 3-in-1 oil
Before You Start
Work out what you have. An interior hollow-core door, a solid wood interior door and a fiberglass or steel exterior entry door all behave differently, and the fix that helps a bedroom door can make an entry door worse. If the door latches but will not stay shut, that is a different complaint than a door that will not latch at all, and it usually points at weatherstripping or a frame that has shifted.
Support the door before you touch a hinge. Take the weight off it with a doorstop or a wedge so the hinge leaves are not holding the whole load while you work. Keep your fingers clear of the hinge pin as you drive screws, and put a blanket under the door if you will be shimming it while it hangs.
Check for protruding screw heads first. One screw sticking up a couple of millimeters is enough to stop a door dead and it costs thirty seconds to fix.
Routine hinge, strike and latch adjustments on a standard interior door need no permit and no licensed trade. Just keep in mind that fire-rated doors, multipoint-lock entry systems and doors holding custom glass are a different category.
How to Fix a Door That Wont Latch Step by Step
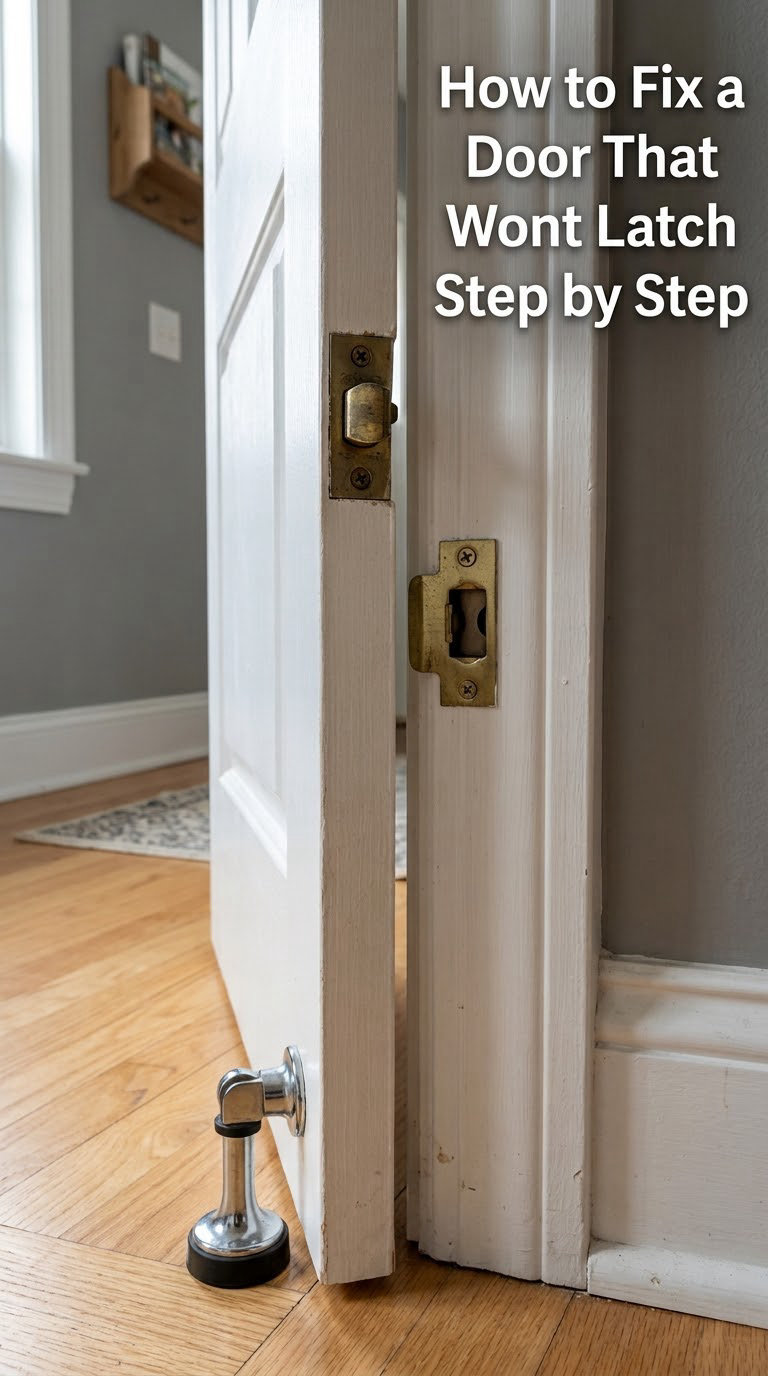
Follow this order. Each step assumes the ones before it didn’t do the job, and skipping ahead is how people end up filing a strike plate that was never the problem.
| What you’re seeing | Likely cause | Check this first |
|---|---|---|
| Latch bolt hits the strike and bounces off | Sagging hinge, door dropped at the latch side | Top hinge screws |
| You have to lift or push the door to latch it | Door binds on the hinge side, or strike set too high | Reveal gaps on all four sides |
| Handle turns, latch never moves | Broken spindle or latch mechanism | Test the latch with the door open |
| Stiff or gritty latch | Paint, dust or corrosion in the mechanism | Clean and oil the latch |
| Door rubs at the top or bottom corner | Frame out of square, hinge leaf screwed too tight | Reveal at the head and hinge jamb |
Step 1: Inspect How to Fix a Door That Wont Latch Problems
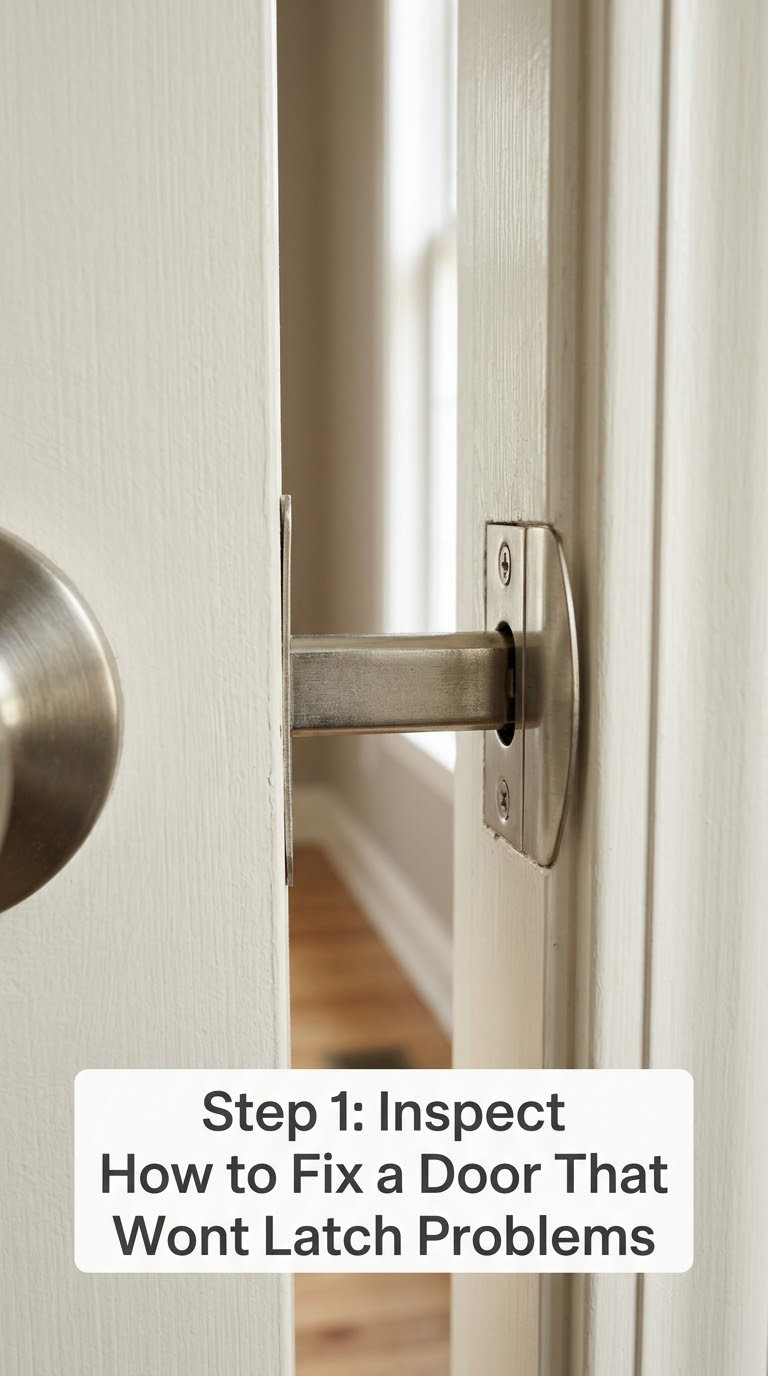
Open the door and turn the handle. The latch bolt should shoot out smoothly and snap back with a click, without being pushed by hand.
If it moves freely, the latch is healthy and the problem is alignment. If it sticks halfway, feels gritty, or only moves with the handle held down, you have a dirty or broken latch and alignment work will not help.
Know what a healthy latch looks like: the bolt sits level with the edge of the face plate, with no gap above or below it, and enters the strike opening dead center.
Step 2: Mark Where the Latch Meets the Strike
Rub chalk, a grease crayon or lipstick on the face of the latch bolt, then swing the door shut slowly until it touches. Open it again and look at the strike plate.
- Mark low on the strike: the door sags, or the strike is set too high. Fix the hinges.
- Mark high: the top hinge is over-tightened or the strike is set too low. Back the top hinge screws off slightly.
- Mark beside the opening: the door is drifting left or right. Move the strike sideways.
- Mark centered and it still misses: the bolt isn’t extending far enough. Go to step 5.
This one mark tells you which of the next three steps to run, and it takes about a minute.
Step 3: Tighten Loose Hinge Screws
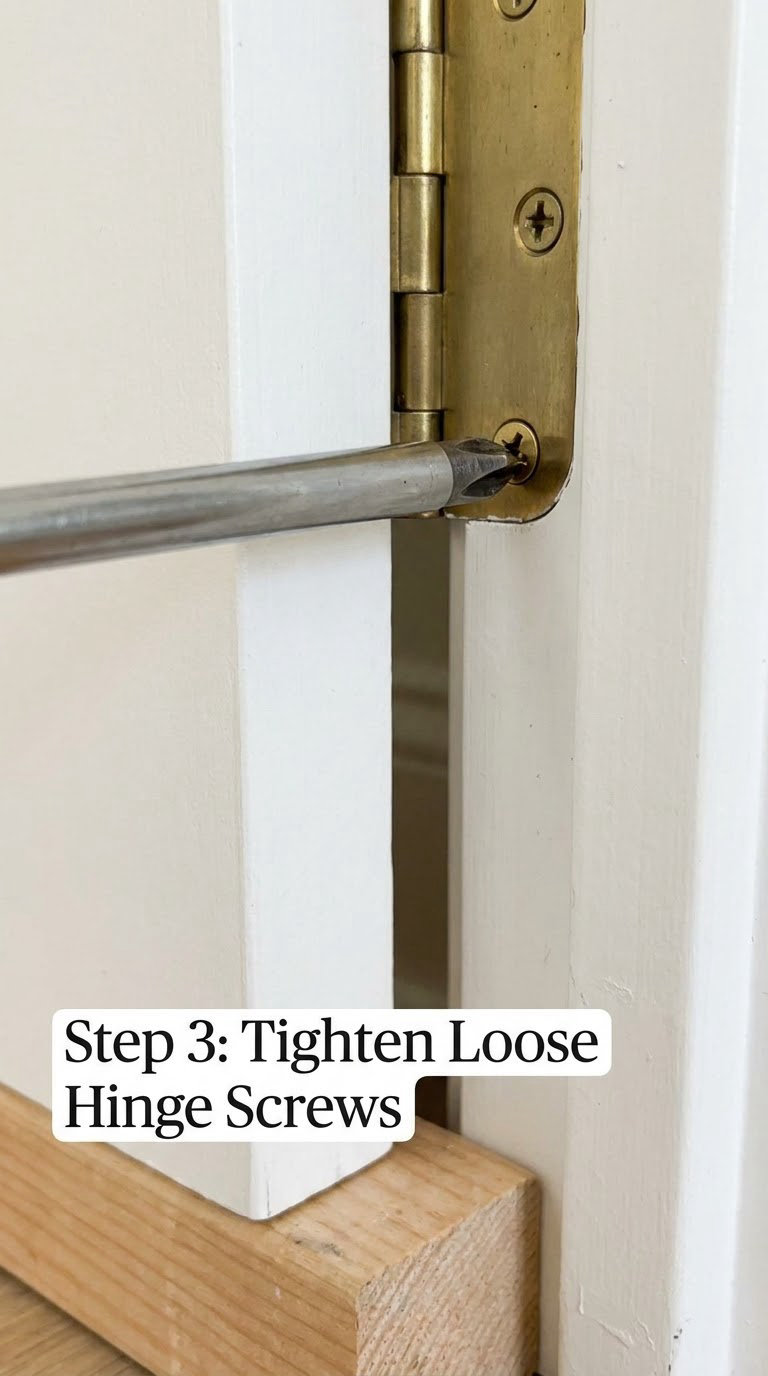
Start at the top hinge. That is where the door weight hangs, and it is where loosening shows up first.
Replace one short screw in the top hinge with a #8 x 2-1/2 inch (64 mm) screw driven into the jamb-side hole, leaving the middle hole for the door. Drive it until the jamb begins to deflect, then stop. Support the door so the hinge leaf is not being pulled out of square while you work, and tighten all screws evenly.
Do not overtighten. Cranking the screws down pulls the leaf into the door edge and pulls the door away from the jamb, which gives you the same problem you started with.
If a screw spins without biting, the hole is stripped. Break toothpicks off at random lengths, pack the hole, trim it flush with a chisel, then re-drive the screw. Wood filler alone will not hold; the toothpicks give it something to grab.
Step 4: Correct Door Swing and Hinge Alignment
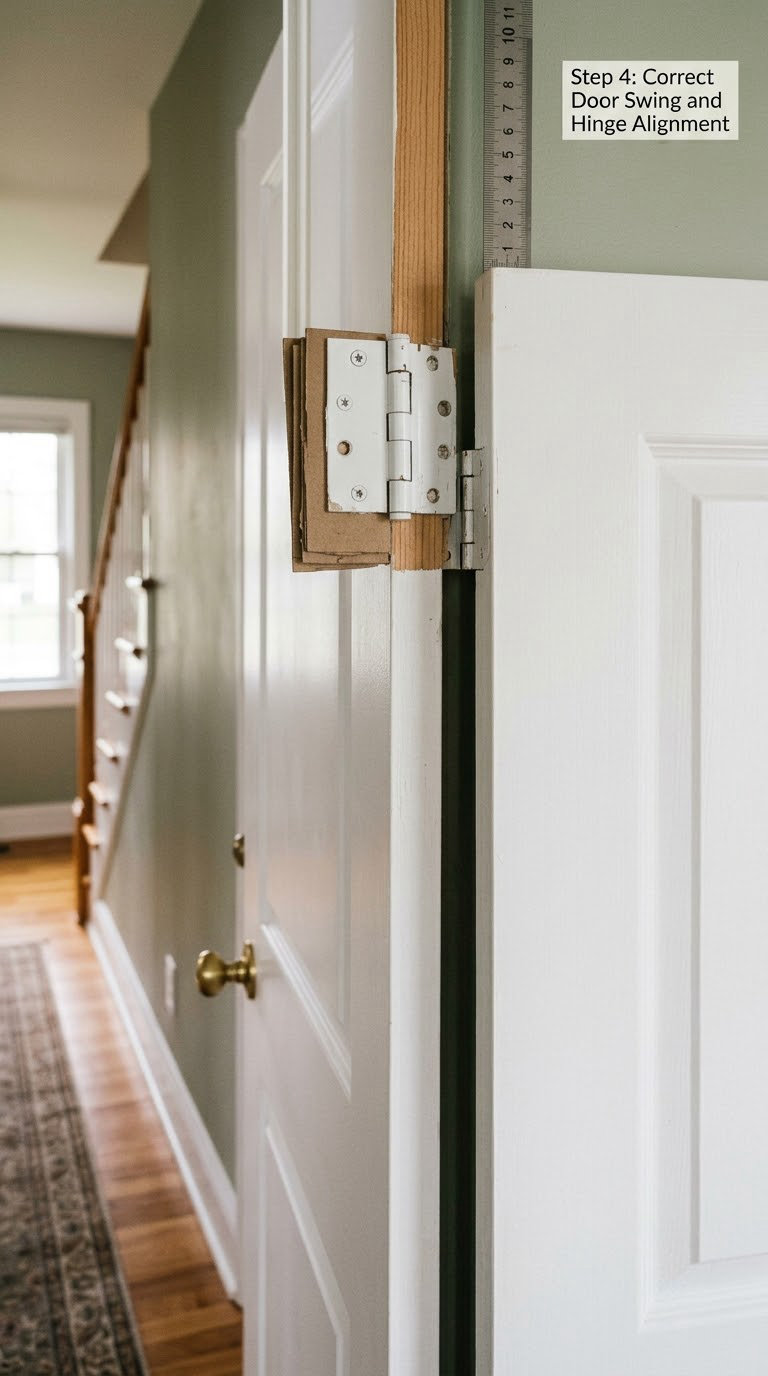
Run a thin cardboard strip or a coin around all four reveals. Equal gaps mean the door is sitting right; a gap that pinches closed means the hinge side is binding.
To take a binding hinge out of the jam, back the top hinge screws off a quarter turn and pull that leaf slightly away from the frame, then retighten evenly. To stop a sagging door rising, slip a shim behind the bottom hinge leaf under the door weight. To correct a door that drifts out of square across the head, shim the top hinge.
Cardboard or cedar works, and it compresses slowly rather than tearing the finish the way a wedge of plywood will.
Step 5: Align or Replace the Strike Plate
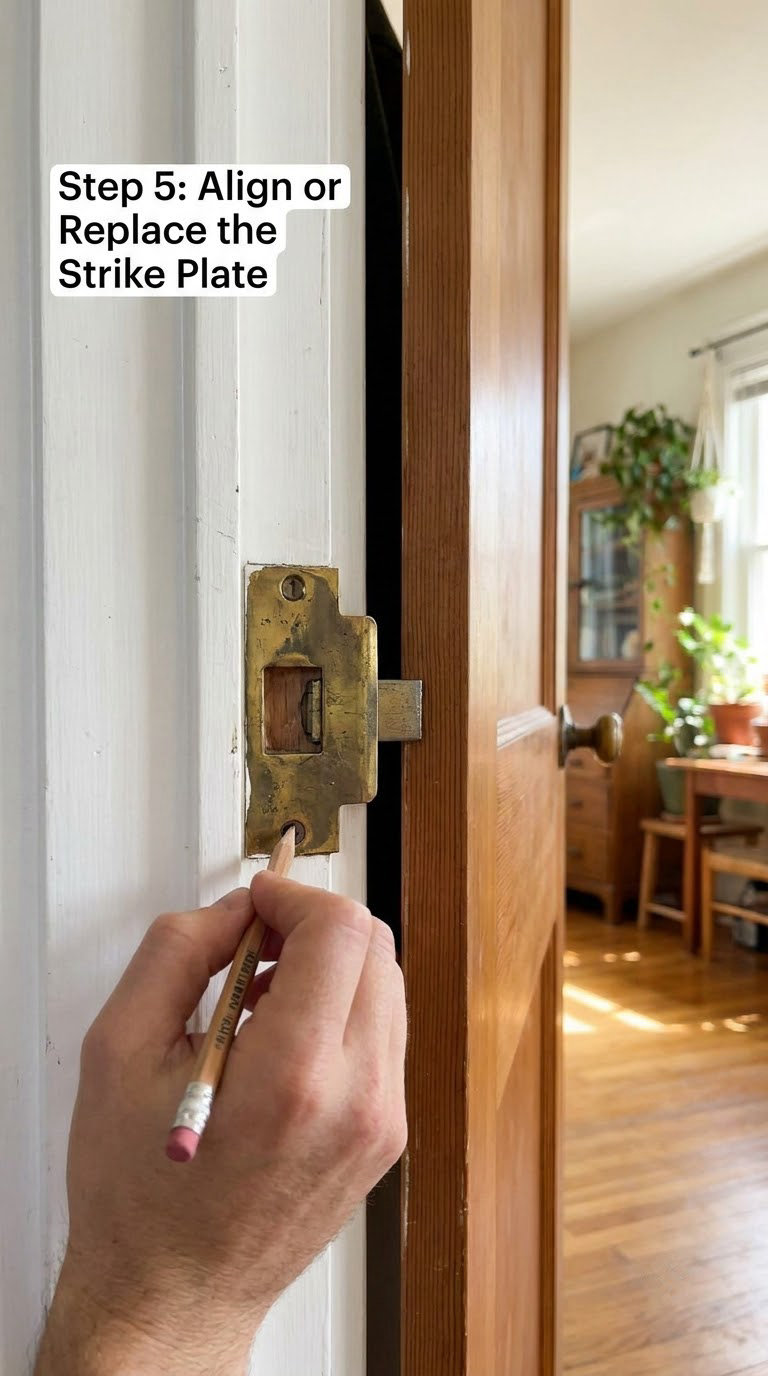
Now, and only now, work on the strike. Remove the two screws and pull the plate off.
Mark the position of the latch opening on the jamb, fill the old hole if the plate has to move more than a quarter inch (6 mm), and screw the plate back on. The opening should sit centered on your mark, with the tab reaching out to meet the door face.
A bent tab is a two-minute fix: slip a flathead under it and bend it inward a few degrees until it clears the face plate. Bend a little at a time and stop if you hear a crack; the tab will snap if you force it.
Enlarging the opening is the last resort. Drill from the hole upward and downward to make a rounded slot, then work the sides with a file. Do not file more than about 1/16 inch (1.5 mm) beyond the original hole, because the bolt loses spring pressure and the door will rattle. If the jamb has no solid wood behind it, screw a longer blocking piece behind the plate or use a self-aligning strike shim.
Where the same frame problem shows up in a different room, our guide on fixing a bathroom door that hits the toilet covers the same hinge-and-shim logic.
Step 6: Adjust or Replace a Sticking Latch
Hold the door open and work the handle a dozen times. Wipe out paint flakes and grit with a damp cloth, then put a drop of light machine oil on the spindle and inside the latch housing. Cycle it again and let the oil work for a minute.
Skip WD-40 as a long-term answer. It is a solvent, and it flushes out the grease that keeps the latch quiet, so the stiffness usually comes back within a few weeks.
If the bolt still sticks or will not fully extend, replace the latch. Measure the backset from the door edge to the center of the spindle, 2-3/8 inch (60 mm) or 2-3/4 inch (70 mm), and check the door thickness. Lay a scrap of paper over the face plate and trace the hole positions to copy them exactly.
Step 7: Fit and Test a Replacement Lockset
Fit a new deadbolt, knob or lever only when the door and frame are already square and the old mechanism is dead. Mark the door face and edge with tape so the finish doesn’t chip, back out the retaining screws from the inside, and pull the two halves apart.
Slide the new spindle through with the flat side at 90 degrees to the door edge, feed the tail bolt into the edge first, then push the outside half flat against the door so the posts line up with the drilled holes. Tighten the inside retaining screws evenly until snug.
Test before you walk away: swing the door from a few inches open, from nearly closed, and from fully closed. The bolt should enter without a shove, and any deadbolt should throw and retract smoothly.
Step 8: Confirm a Secure, Smooth Close
Open and close the door five times. Watch for even shadow lines on both sides and along the head, full bolt engagement with no daylight around it, and a handle that turns smoothly from both sides.
If the latch still misses, go back to step 2 and re-mark. Alignment changes as you tighten, and a door adjusted twice needs its mark read twice.
Common Mistakes to Avoid
- Forcing the bolt. Shoving a door that will not latch bends strike tabs and loosens hinge screws. Read the mark first.
- Filing an oversized opening. Once the hole is a full inch (25 mm) long, the bolt no longer holds the door shut. Fill and re-cut instead.
- Driving screws into an unsupported hollow jamb. The screw head spins forever. Use a longer blocking piece or a strike shim.
- Backing out every hinge screw. Loosen one at a time, and only the one that moved the mark.
- Misplacing the latch spindle. Forcing a spindle into a hole at the wrong angle cracks the door edge. Align the posts by eye before tightening.
- Treating a sagging door as a strike problem. Move the strike and the door keeps sagging; by spring the tab is bent and the hole is elongated.
- Skipping the door weight. Hinges carry the load while you work. Unload them first or you will change the fit as you go.
When to Call a Pro
Some doors are past a screwdriver. Book a carpenter or door installer when the slab is cracked, split or visibly cupped, when the jamb itself is crushed or rotted, or when the whole wall opening is out of square. Structural movement in a foundation wall counts too.
Call a locksmith rather than a handyman for a jammed deadbolt, a snapped cylinder, or a key that will not turn. Electronic and keypad locks need their manufacturer’s service procedure, and forcing one voids the warranty.
Leave fire-rated doors, multipoint-lock French door hardware, pocket door hardware and any door with custom glass alone. Re-hanging a heavy solid core unit is also a two-person job with a door lifter.
Maintenance
Put a drop of oil on the hinges once a year, more often on an exterior door, and cycle the latch a few times while you are there.
Vacuum the strike opening twice a year so paint flakes and grit stay out of it, and wipe the weatherstripping with soapy water to keep it supple through dry winter air. If a door starts binding in one season only, expect the frame to move, so tighten the top hinge gradually and check the reveals again.
Look at the screws at the same time. Quarter turns, never a hard shove, and stop as soon as the door stops swinging.
Frequently Asked Questions
Why is my door not latching even when the latch looks aligned?
Because the mark only tells you where the latch arrives, not whether the bolt travels far enough. A deadlatch plunger that has been pushed in and jammed, a binding face plate, or a spring weakened by age all let the latch reach the strike and still fail to catch. Test the latch with the door open: if it springs out and snaps back cleanly, the issue is alignment. If it feels slow or sticky, oil it, then replace the mechanism.
Can I use WD-40 on a sticky door latch?
It will free the latch for a while, but WD-40 is a solvent and a lubricant rather than a lasting grease. It flushes the pivot surfaces clean, then leaves them drier than before, so a stiff latch usually stiffens again within a few weeks. For a hinge or a latch that needs to stay quiet, use light machine oil or 3-in-1 oil and cycle the handle a dozen times. Reserve WD-40 for seized hardware and sticky garage door tracks.
How do I fix a door that will not close because it rubs on the frame?
Back the top hinge screws off about a quarter turn, then pull that leaf gently away from the frame and retighten all three screws evenly. This usually drops the hinge corner and opens the gap where the door was binding. If the door rubs at the bottom instead, shim behind the bottom hinge leaf under the full weight of the door. Relieve the spot with a block plane or chisel, then check the reveal on all four sides.
What size screws should I use in loose door hinges?
Use #8 x 2-1/2 inch (64 mm) screws in the jamb-side holes of the top hinge, and #8 x 2 inch (50 mm) in the remaining door-side holes. The longer screw reaches the stud or solid jamb behind the thin face, which is what actually pulls the weight up. Drive until the jamb starts to deflect and then stop. Never use screws longer than about 1-1/4 inch (32 mm) in the middle hole, or you will drive straight through the door.
Is it easier to repair or replace a broken door latch?
Replace the latch if the bolt is bent, will not extend, or the handle has come loose, and only after the door sits square in its frame. Repair it if the mechanism works but feels gritty, since cleaning and oiling takes five minutes and keeps the original finish. Measure the backset before buying, 2-3/8 inch (60 mm) or 2-3/4 inch (70 mm), and copy the hole positions by tracing the face plate on paper. A lockset swap runs 20 to 40 minutes.
Should I repair a hollow-core door that will not latch?
Repair it, because the latch is mounted in the door edge and usually has plenty of wood to bite into. The weakness is the frame: hollow-core doors hang on the same thin jamb, so a loose hinge screw there spins instead of tightening. Pack the hole with toothpicks, add a longer screw, or fit a blocking piece behind the strike. If the edge is crushed or delaminated from years of the latch hitting it, a new latch set will not hold and the door itself needs replacing.
Conclusion
Start at the hinges, not the strike. Test the latch with the door open, mark where it lands, and read that mark before touching any metal. Most doors are fixed with a longer screw in the top hinge and ten minutes of work.
Then close it from a few inches open, watch the bolt enter the opening on its own, and check the reveals with a card. If it latches smoothly every time, you are done. If it still needs a shove, the door has not finished settling and the mark needs reading again.