20 Kitchen Table Nook Ideas for Small Spaces (October 2026)
A kitchen nook is simply a small eating spot tucked into a corner, an alcove, or the dead space beside a window: a table, some seating, and usually a shelf or two. The 20 kitchen table nook ideas for small spaces below are all built around the same three measurements you need before you shop, which are wall width, corner depth, and where the window sits.
None of them assume a big kitchen. They assume 36 inches (91 cm) of walkway behind a seated person, outlets and vents that have to stay reachable, and budgets that don’t stretch. Cost ranges are typical US prices and vary by region and by what’s already in your cupboards. If you’re starting a nook in autumn, measure now so the pieces arrive before the season’s first gathering.
Contents
20 Kitchen Table Nook Ideas for Small Spaces at a Glance
| Idea | Cost | Difficulty | Time |
|---|---|---|---|
| 1. Narrow drop-leaf table | $60 to $300 | Moderate DIY | 2 hours |
| 2. Built-in bench with hidden storage | $250 to $1,200 | Hire a pro | One weekend |
| 3. Round table for better flow | $90 to $400 | Easy DIY | 1 hour |
| 4. Wall-mounted breakfast bar | $80 to $350 | Moderate DIY | 3 hours |
| 5. Convertible island cart | $120 to $450 | Easy DIY | 30 minutes |
| 6. Window-side dining alcove | $100 to $500 | Easy DIY | 2 hours |
| 7. Banquet-style corner table | $200 to $700 | Hire a pro | One weekend |
| 8. Round pedestal table | $140 to $500 | Easy DIY | 45 minutes |
| 9. Extendable table with a leaf | $180 to $600 | Easy DIY | 30 minutes |
| 10. Counter-style seating ledge | $40 to $150 | Easy DIY | 1 hour |
| 11. Storage bench opposite the table | $150 to $500 | Moderate DIY | 4 hours |
| 12. Pocket-style corner table | $70 to $250 | Easy DIY | 1 hour |
| 13. Floating shelves beside the nook | $50 to $200 | Moderate DIY | 2 hours |
| 14. Narrow counter-side table | $120 to $400 | Easy DIY | 1 hour |
| 15. Stackable or folding chairs | $60 to $300 | Easy DIY | 30 minutes |
| 16. Wall table with a drop-down top | $80 to $300 | Moderate DIY | 3 hours |
| 17. Small laminate table | $50 to $180 | Easy DIY | 30 minutes |
| 18. Nook with open shelving above | $150 to $600 | Moderate DIY | Half a day |
| 19. Lift-top coffee table | $200 to $700 | Easy DIY | 30 minutes |
| 20. Rental-friendly painted nook | $40 to $250 | Easy DIY | One afternoon |
1. Use a Narrow Drop-Leaf Table
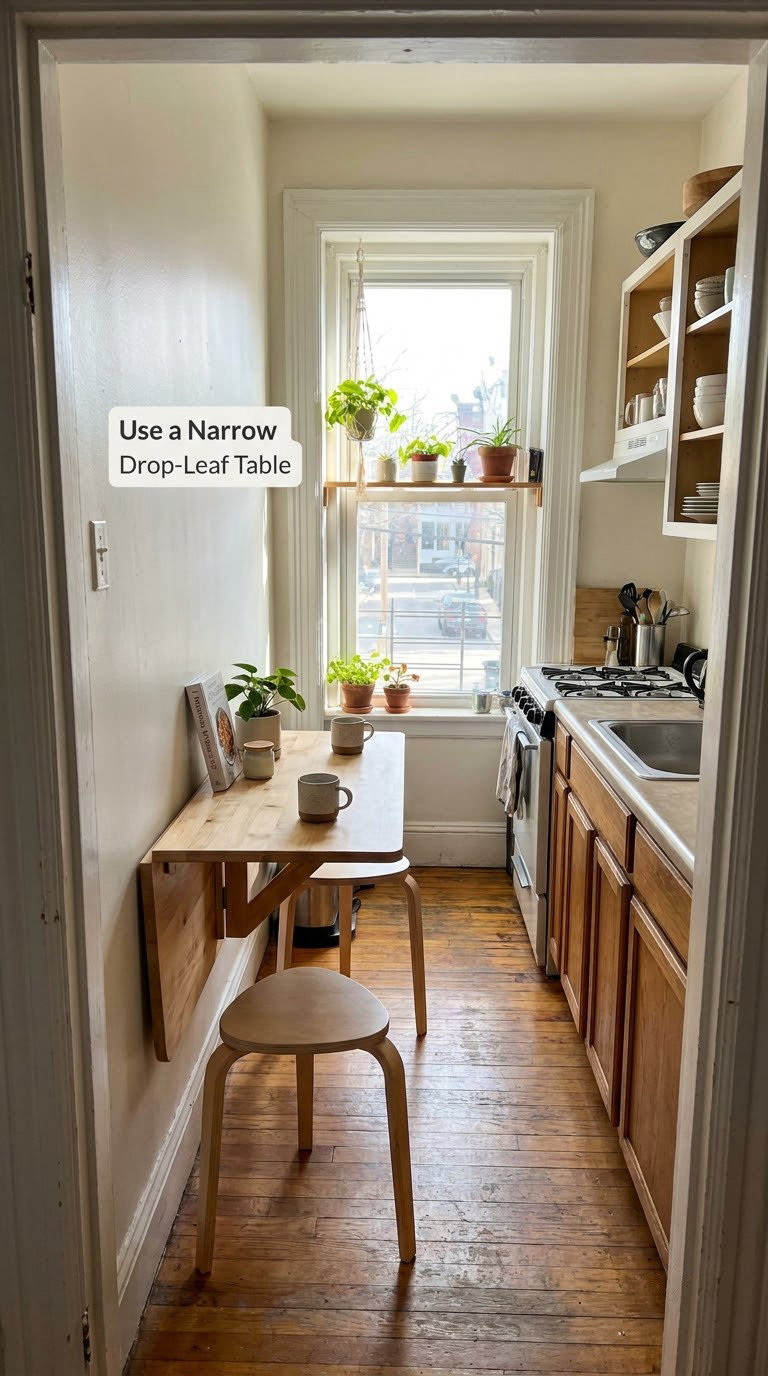
A slim drop-leaf table gives you two or three seats when you want them and about 4 inches of floor space when you don’t. It is the single most useful shape for a nook squeezed between a wall and a walkway.
How to do it:
- Measure the wall run and subtract 2 inches for the mounting cleat if you’re wall-mounting.
- Choose a leaf that opens to 36 inches wide (91 cm) for four, or 24 to 30 inches for two.
- Set the leaf at 30 inches (76 cm) high so a bench at 18 inches deep (46 cm) still leaves knee room.
- Anchor into studs, never just drywall, and test the swing before you paint.
Cost: $60 to $300 · Difficulty: Moderate DIY · Time: 2 hours
Good to know: Routers love the wall, and a real drop-leaf needs a hand to lift. If you’re renting, look for a free-standing console table instead and skip the mounting entirely.
2. Add a Built-In Bench With Hidden Storage
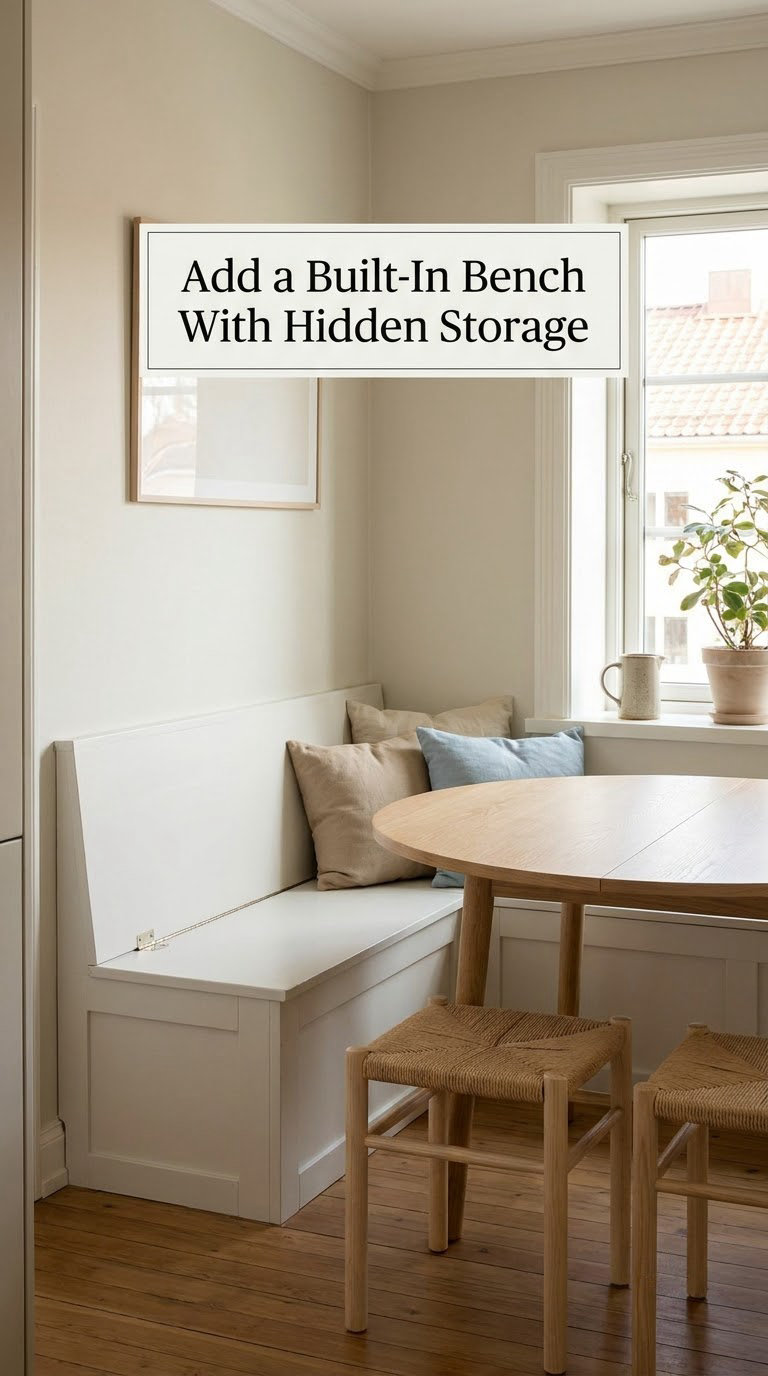
A built-in bench is the best nook upgrade if you own the place, because the seat becomes storage and the storage becomes the reason you keep the nook. Lift-up tops swallow cutting boards, linens and pantry jars.
How to do it:
- Size the seat 18 to 20 inches deep (46 to 51 cm); deeper eats the walkway you’ll need.
- Set the seat height at 17 to 19 inches (43 to 48 cm) and the table at 30 inches (76 cm).
- Build the carcass to the ceiling if the nook is under a soffit, or leave a 6 inch shadow gap.
- Add soft-close hinges and a centre divider so the lid doesn’t slam.
- Before closing anything in, check where the outlets and any HVAC vent sit.
Cost: $250 to $1,200 in materials, more if you hire cabinetry · Difficulty: Hire a pro · Time: one weekend
Good to know: Upholstery near a sink or stove ages badly. Seat it with a washable cover or a leather-look vinyl, and skip fabric.
3. Choose a Round Table for Better Flow
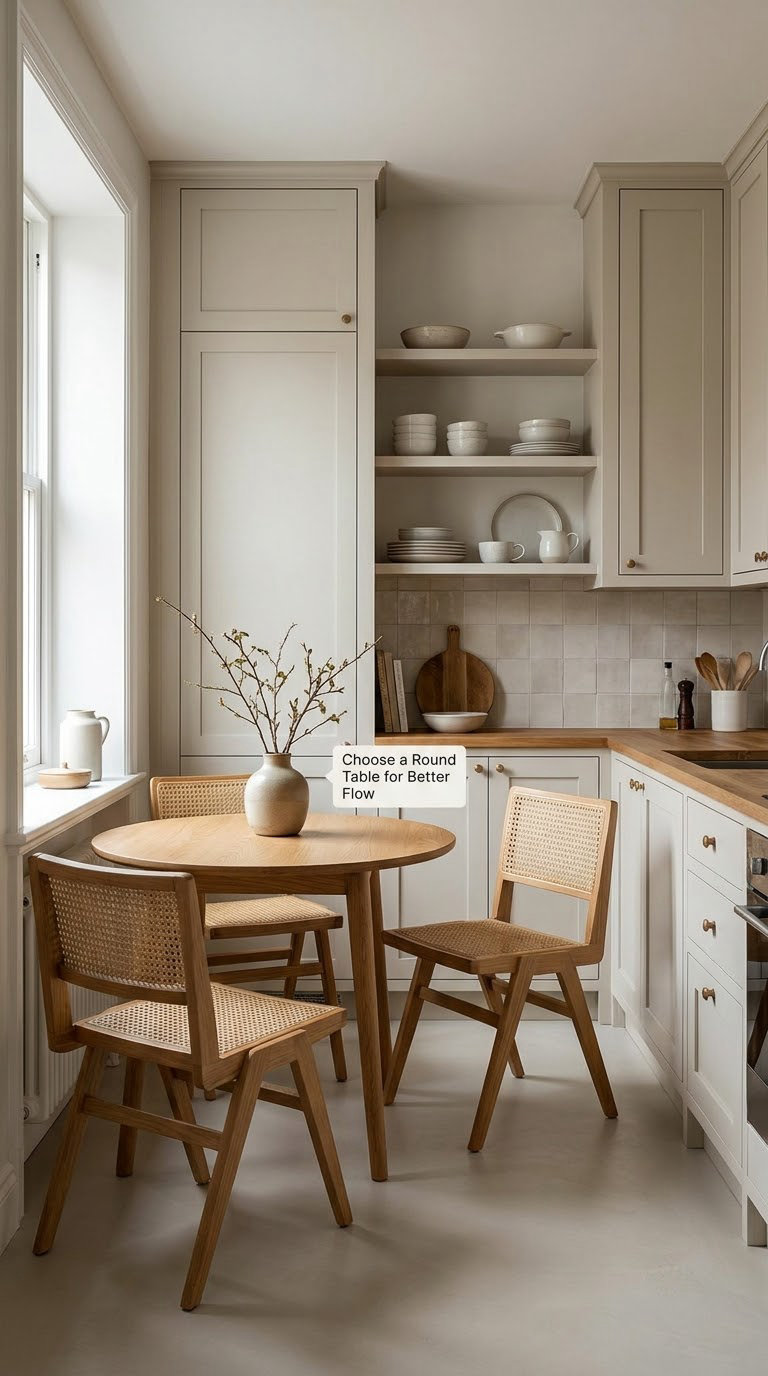
A round table is the fastest way to keep a tight kitchen walkable, because there are no corners to walk into and every seat has the same amount of space.
How to do it:
- Add 24 inches (61 cm) of clearance from table edge to any wall or counter for chair pull-out.
- A 36 inch (91 cm) diameter round seats four comfortably; 30 inches (76 cm) seats three snugly.
- Choose a pedestal or four-leg base under 30 inches wide so knees fit around it.
- Match the finish to your counters so the table reads as part of the room.
Cost: $90 to $400 · Difficulty: Easy DIY · Time: 1 hour
Good to know: A round table loses about 15 percent of its usable surface to the middle of the room. For a family that actually plates dinner, test a 42 inch (107 cm) top before you commit to the small one.
4. Install a Wall-Mounted Breakfast Bar
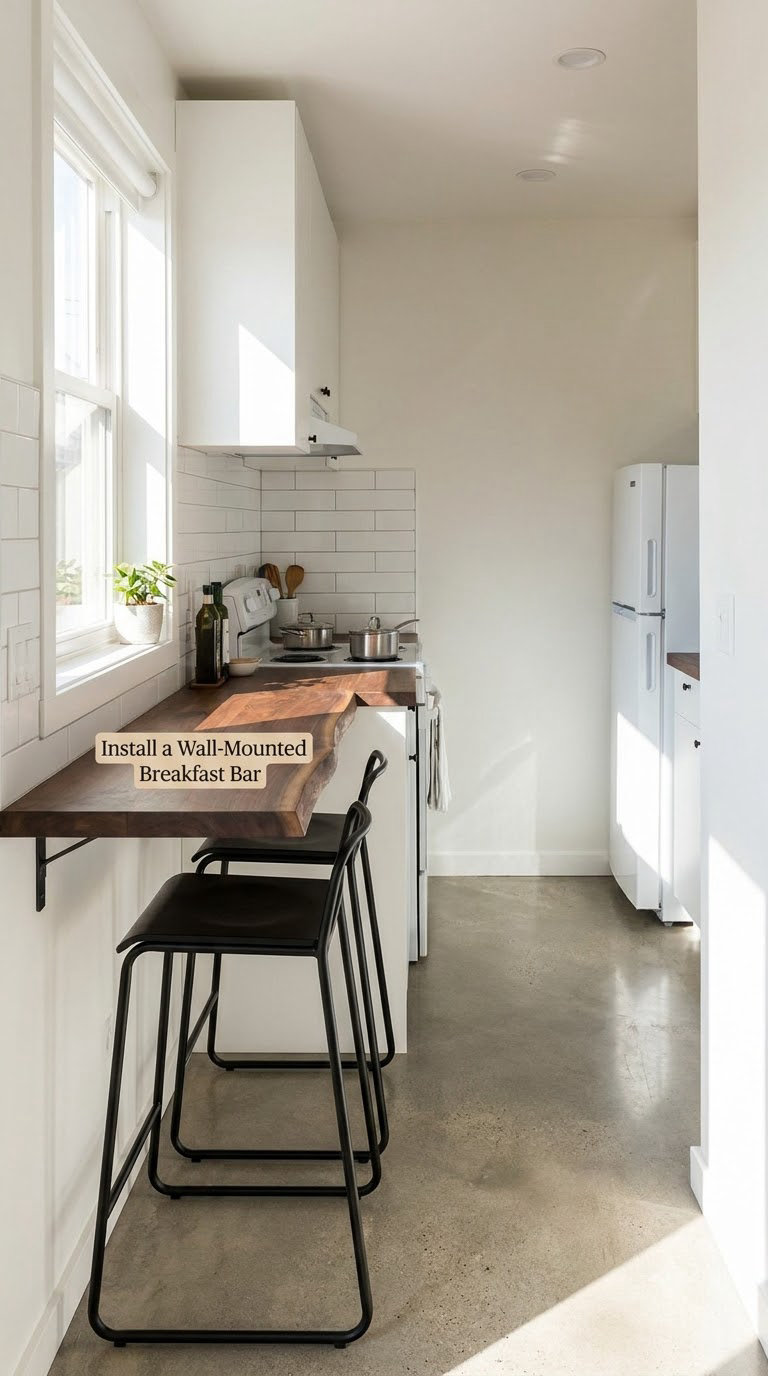
A breakfast bar turns a stretch of unused wall into a two-person eating spot and doubles as a serving surface when guests arrive. Stools tuck fully under it, so the floor stays clear.
How to do it:
- Fix the bar at 36 to 40 inches (91 to 102 cm) high, which is counter height rather than table height.
- Run the top 12 to 16 inches (30 to 41 cm) deep so plates sit on it, not in your lap.
- Leave at least 8 inches (20 cm) behind the stool zone for the walkway, and 36 inches (91 cm) where people pass behind seated guests.
- Add a 2 inch round lip or a rail so mugs don’t slide off.
Cost: $80 to $350 · Difficulty: Moderate DIY · Time: 3 hours
Good to know: A bar at 36 inches is a perch for a 15 minute coffee, not a place for a laptop. If anyone in the house works from home, put a slim shelf under it for the laptop instead.
5. Use a Convertible Kitchen Island Cart
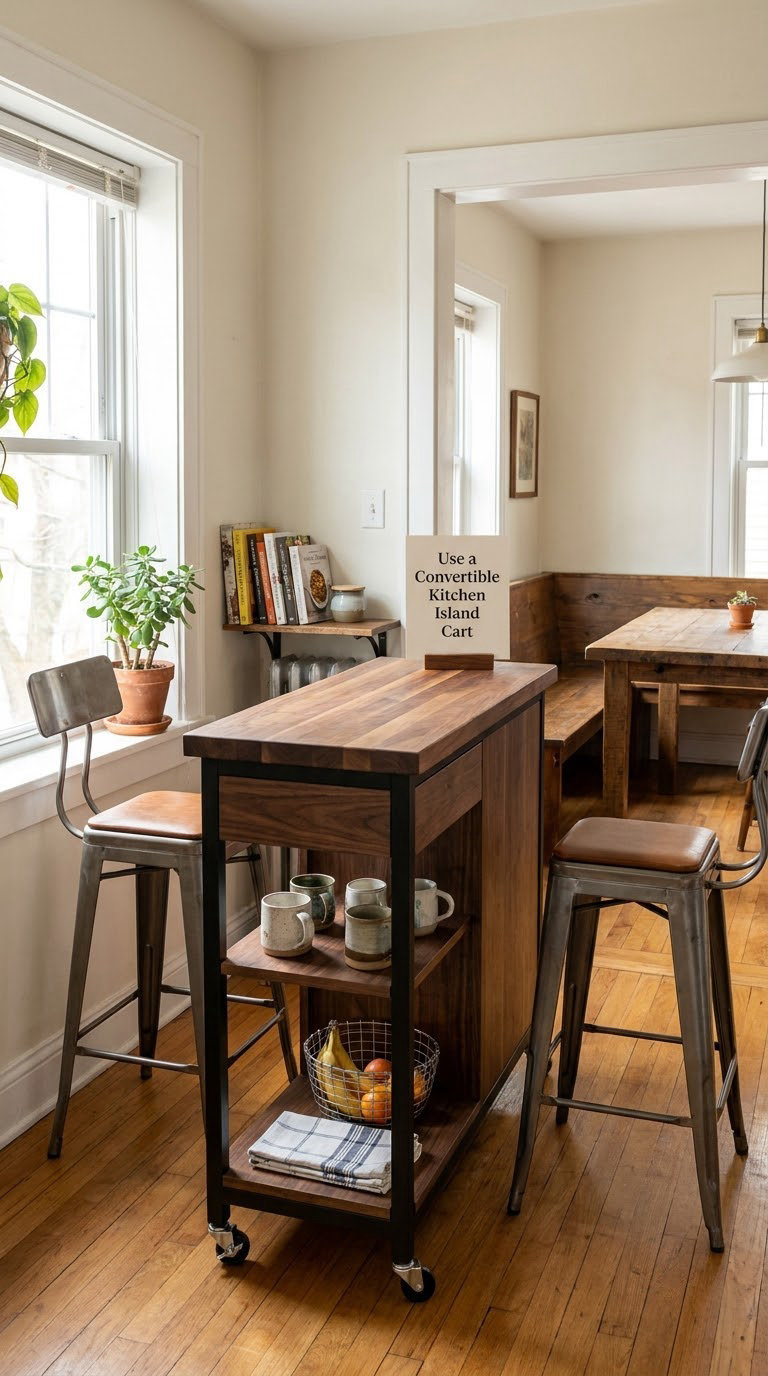
A rolling cart with a butcher-block top gives you prep space in the morning, a serving surface at night, and two seats if the top overhangs far enough. Casters make it the most movable nook option you can buy.
How to do it:
- Pick a cart 30 inches (76 cm) long and 18 inches (46 cm) deep so it clears a 36 inch walkway.
- Choose one with a 6 inch (15 cm) overhang on the seating side for knees and footrest.
- Lock the casters once it’s in place; rolling carts drift toward doors.
- Use the lower shelves for cookbooks and mugs you’ll actually reach.
Cost: $120 to $450 · Difficulty: Easy DIY · Time: 30 minutes
Good to know: Butcher block needs oiling twice a year, more if you bake. If your kitchen is already wood-heavy, go with a stainless or painted cart instead.
6. Create a Window-Side Dining Alcove
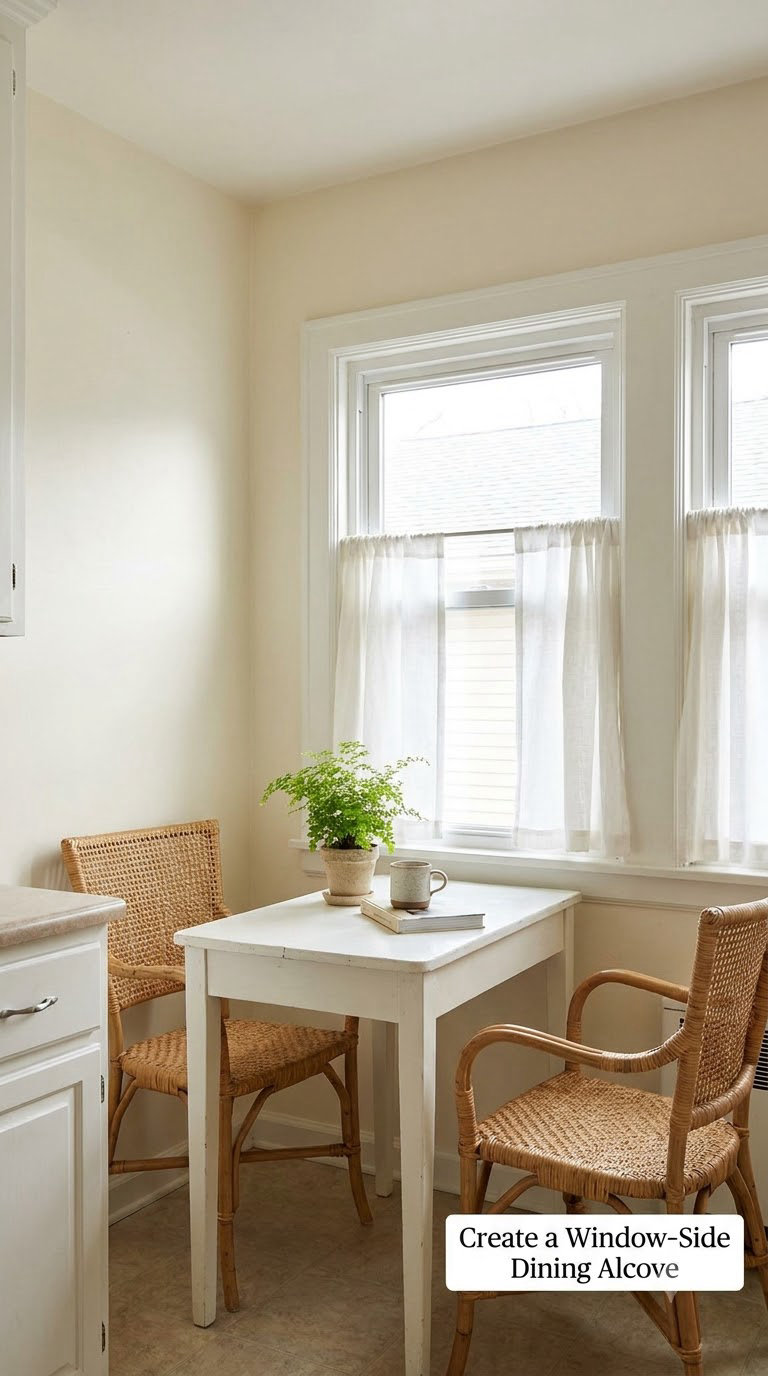
Putting a slim table under the window makes a small nook feel bigger because the eye travels outward instead of at a blank wall. It’s also the cheapest lighting you’ll ever add to a kitchen.
How to do it:
- Keep the top 4 to 6 inches (10 to 15 cm) below the sill so the window still opens.
- Use a shallow 16 to 20 inch (41 to 51 cm) top for two, or 30 inches (76 cm) deep for four.
- Anchor tall furniture or a plant to the wall so the arrangement reads deliberate.
- Add a small sill shelf for herbs if you can’t fit planters on the floor.
Cost: $100 to $500 · Difficulty: Easy DIY · Time: 2 hours
Good to know: Check the window’s opening path before you buy. A table that blocks the sash is the most common return-to-store reason I see for window-side tables.
7. Fit a Banquet-Style Table in the Corner
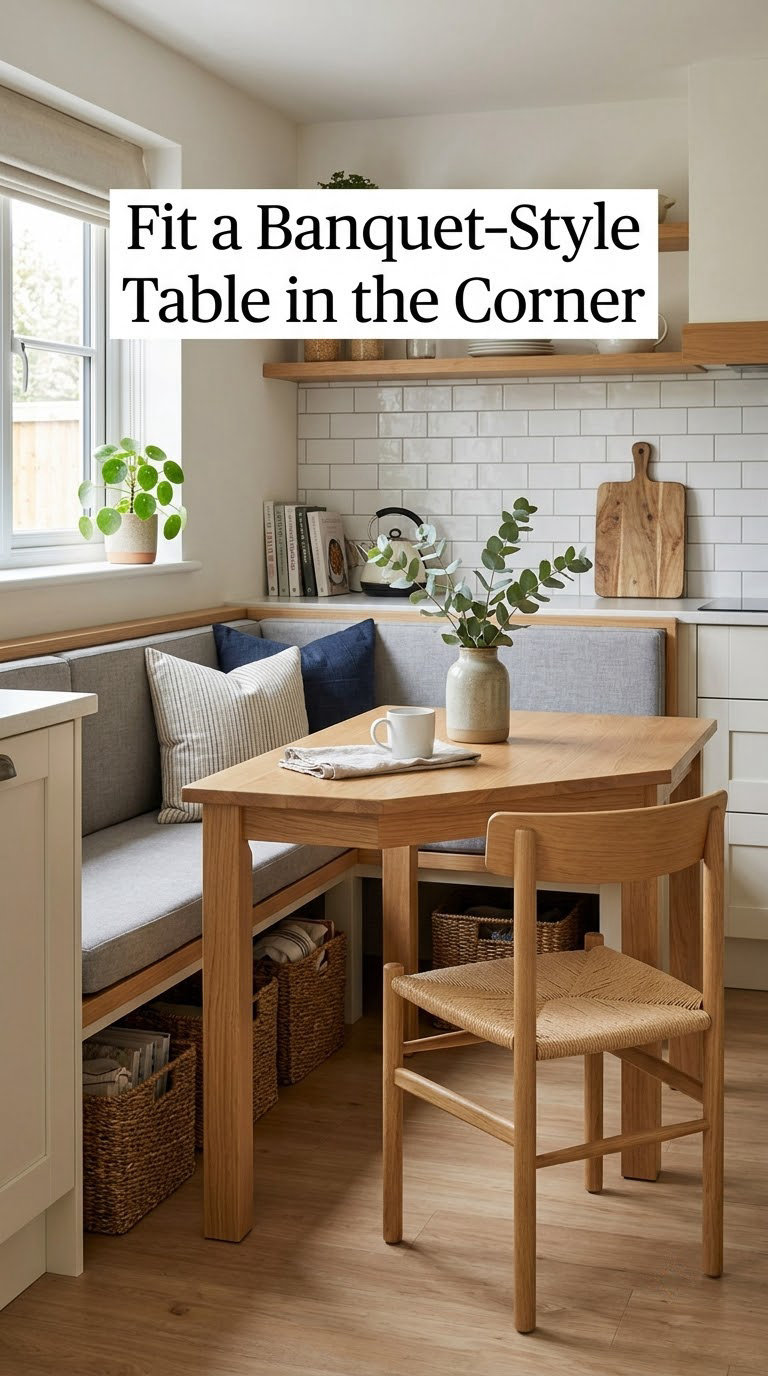
A corner table with one bench along each wall uses two walls at once and removes the need for chairs that need to be pulled back into the room. The tradeoff is a longer custom top.
How to do it:
- Measure wall to wall and subtract 2 inches on each side for the bench backs.
- Order an L-shaped top with the long leg at 36 to 42 inches (91 to 107 cm) for four.
- Keep the corner joint flush and support it with a slim leg at the inside angle.
- Limit the bench to three seats each; longer benches trap the people in the middle.
Cost: $200 to $700 · Difficulty: Hire a pro for a custom top, DIY for a ready-made L · Time: one weekend
Good to know: Two benches facing each other across a narrow top can feel boxed in. If the nook is under 5 feet across, use one bench and one chair so people can slide in and out.
8. Add a Pedestal Table for Flexible Seating
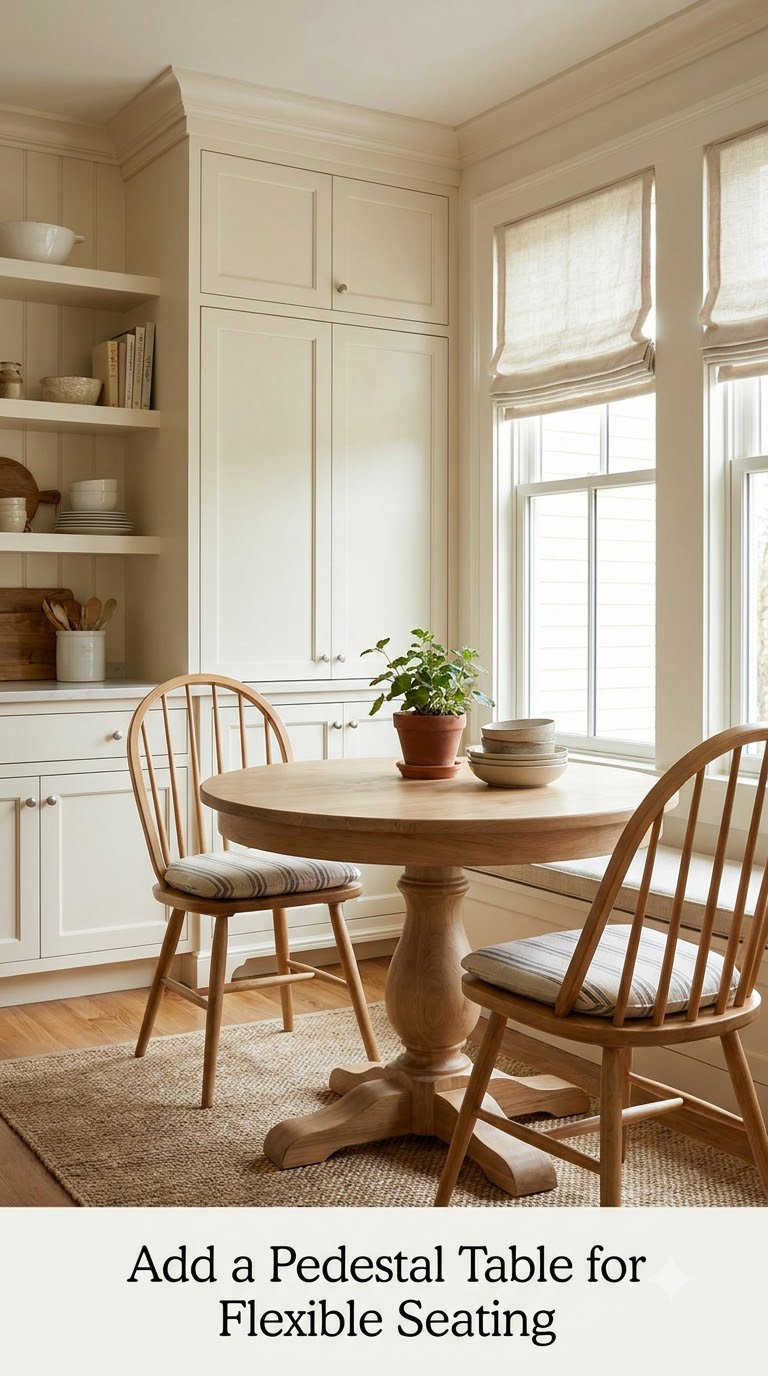
A pedestal base removes the corner legs that catch chair backs and shins, so you can slide seating in and out without hitting anything. It also makes a small table easier to move on cleaning day.
How to do it:
- Look for a base footprint under 15 inches (38 cm) so toes clear under the top.
- Pair it with two to four chairs that seat at 29 to 30 inches (74 to 76 cm) tall.
- Leave 24 inches (61 cm) from the pedestal edge to the wall for chair backs.
- Weight matters more than style; a cast base stops the table creeping.
Cost: $140 to $500 · Difficulty: Easy DIY · Time: 45 minutes
Good to know: Pedestal tables leave a dead centre, so nobody can sit directly across from you. That’s fine for two and awkward for four.
9. Use a Table With a Leaf for Expanding Capacity
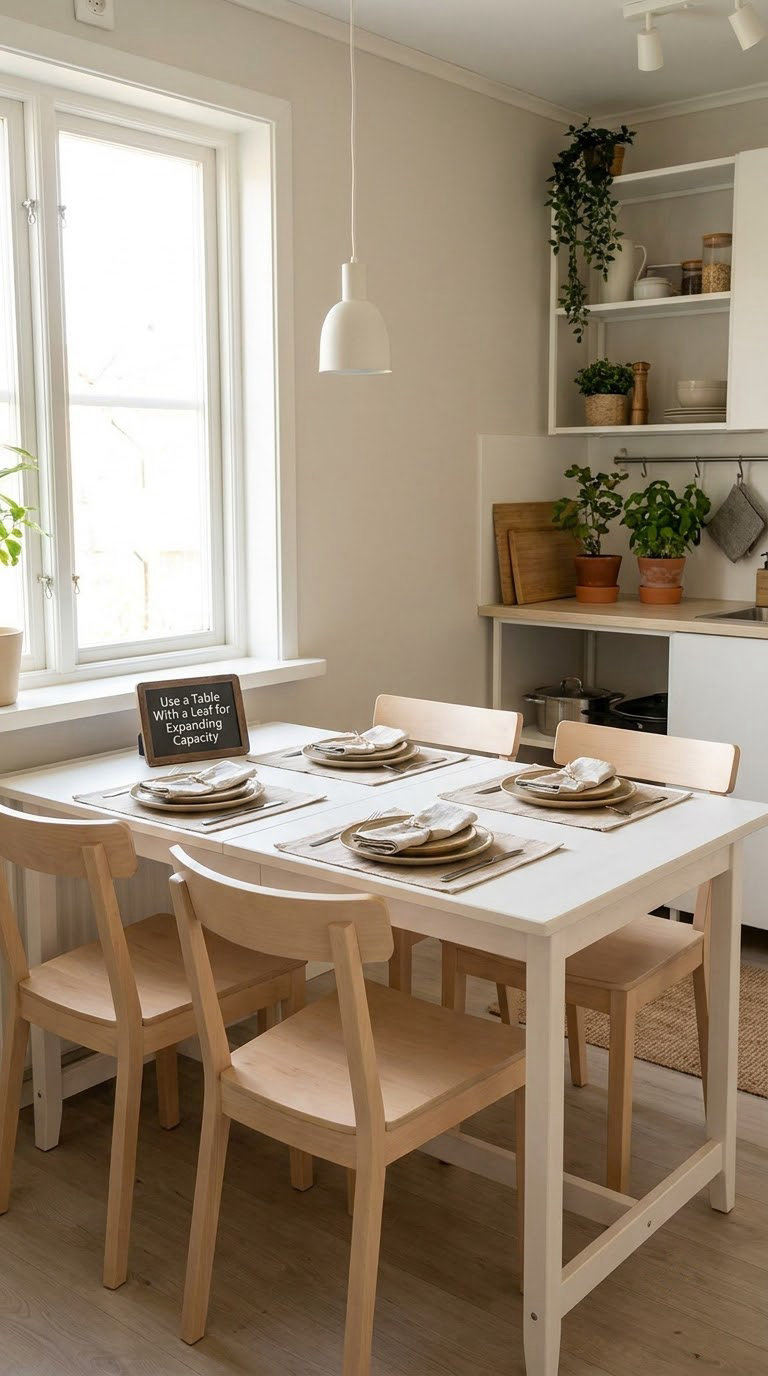
An extendable table lets you live with a small footprint and still host four without borrowing a card table from the closet. Most people only open the leaf when guests come.
How to do it:
- Set the closed length so 24 inches (61 cm) remains on each long side when open.
- Check that the open length still leaves 36 inches (91 cm) to the nearest counter.
- Store the leaf vertically under a bed or in a closet, not in the nook.
- Test the extension mechanism twice before the day it matters.
Cost: $180 to $600 · Difficulty: Easy DIY · Time: 30 minutes
Good to know: Buy a self-storing leaf if you can. A separate stored leaf means one fewer thing to lose between the sofa and the kitchen drawer.
10. Create a Counter-Style Seating Area
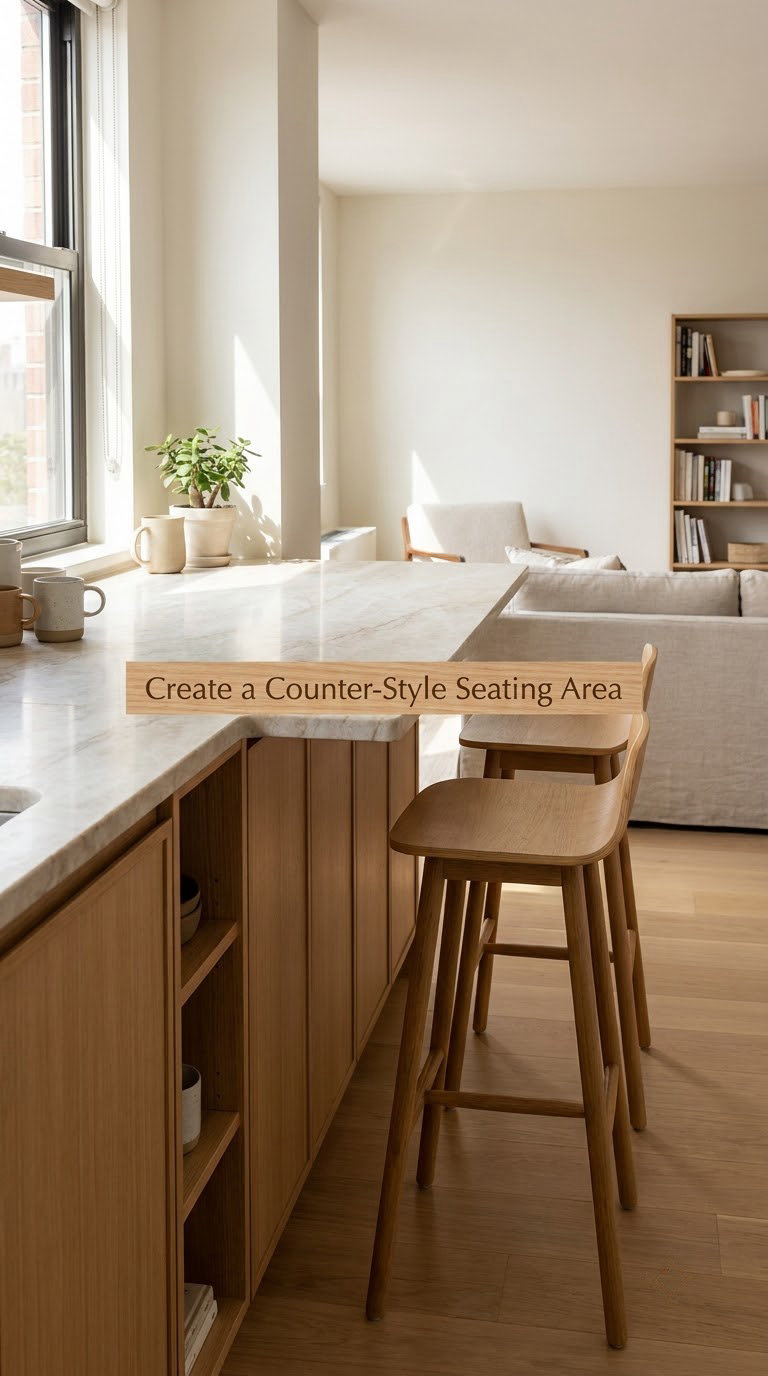
When a full table would overwhelm the room, a counter ledge over a peninsula or a repurposed cabinet top gives you a casual eating spot with almost no floor cost.
How to do it:
- Extend the counter 10 to 12 inches (25 to 30 cm) past the cabinet face for knee clearance.
- Set ledge seating at 30 inches (76 cm) high; lower and it becomes a desk.
- Keep 36 inches (91 cm) clear between the ledge and the opposite run.
- Choose stools that tuck fully under, leaving 2 inches (5 cm) of air at the floor.
Cost: $40 to $150 for stools, or a full counter rebuild costs far more · Difficulty: Easy DIY for stools, Hire a pro to rebuild a counter · Time: 1 hour
Good to know: Counter-height seating puts your feet flat or dangling rather than supported. It’s a 20 minute perch, not a two hour dinner for tall people.
11. Add a Storage Bench Opposite the Table
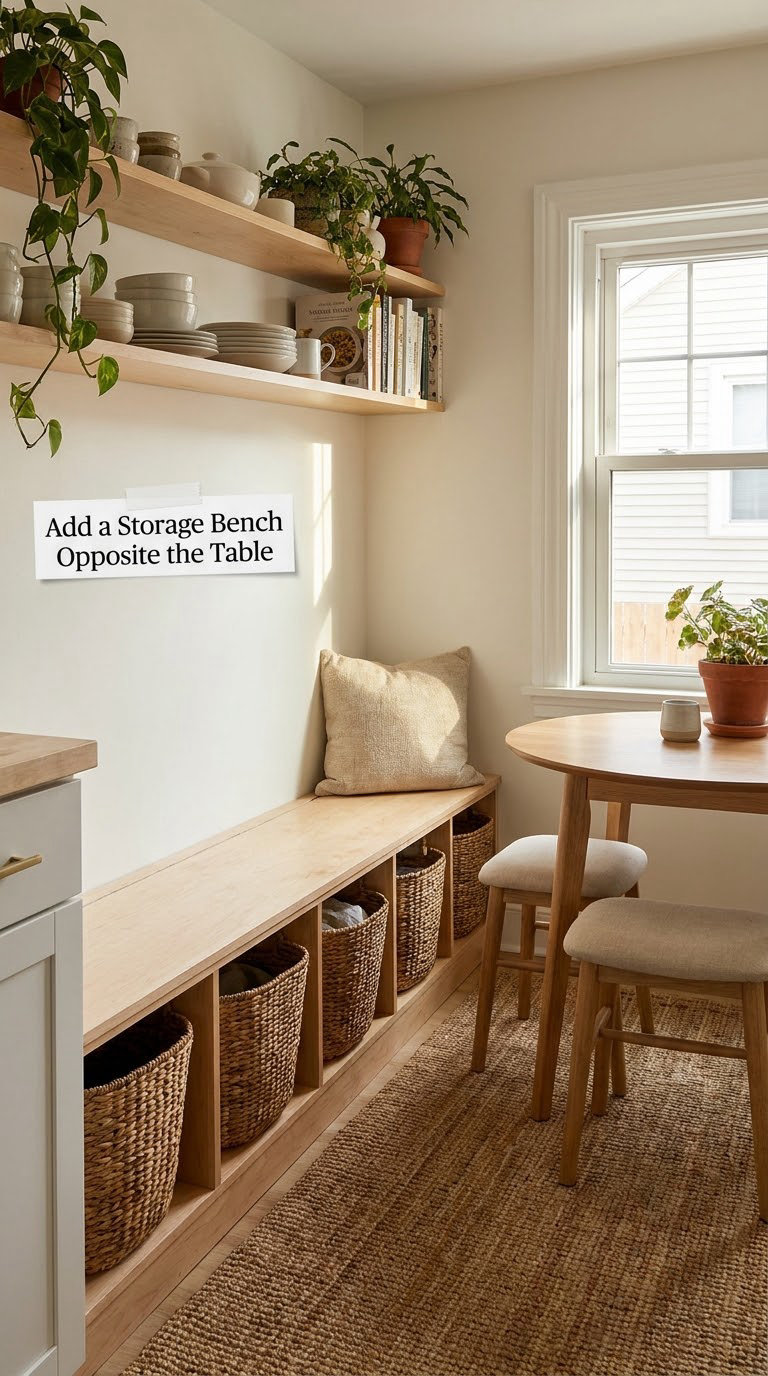
A storage bench opposite a small table doubles your seating without doubling your footprint, and it absorbs the clutter a nook usually accumulates. It’s the single highest-value add to a tight corner.
How to do it:
- Keep the bench 15 to 18 inches (38 to 46 cm) deep so the walkway survives.
- Face the lid toward the wall so the open bin isn’t in view from the kitchen.
- Use baskets sized to the opening rather than one big void.
- Leave a 4 inch (10 cm) gap to the wall behind the bench if you want access to a service line.
Cost: $150 to $500 · Difficulty: Moderate DIY · Time: 4 hours
Good to know: Two benches facing each other is the classic booth look, but the middle seats get trapped. Cap each bench at three people.
12. Use a Pocket-Style Corner Table
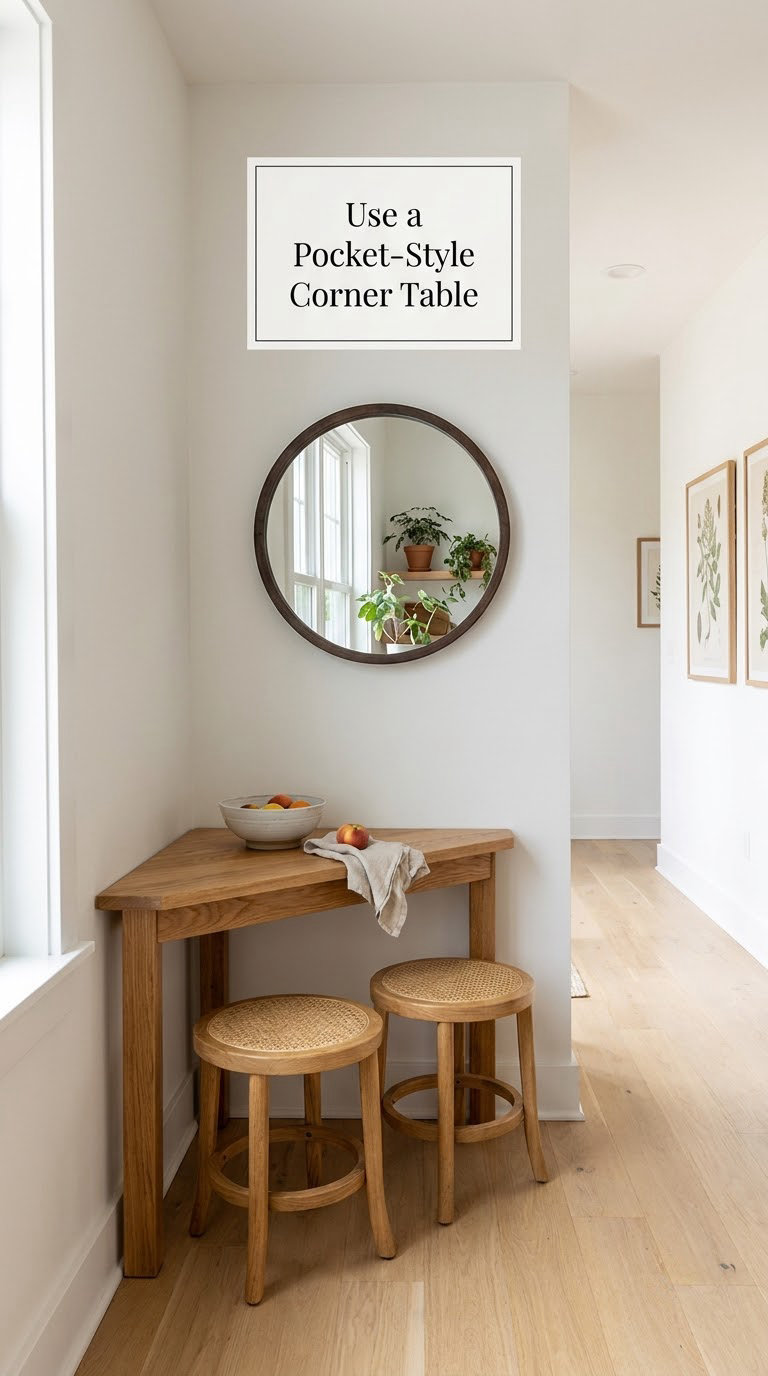
A triangular or half-moon table tucks into a corner without touching either wall, which keeps the walkway open past a spot most tables would block.
How to do it:
- Measure the corner at floor level, not at counter level, where baseboards narrow it.
- Choose a top 30 to 36 inches (76 to 91 cm) across the flat edge.
- Keep the curved side at least 24 inches (61 cm) from anything solid.
- Anchor a tall stool at the point of the triangle to stop wobble.
Cost: $70 to $250 · Difficulty: Easy DIY · Time: 1 hour
Good to know: Triangular tops are hard to extend later and rarely have matching dining chairs. Round is usually a better long-term buy if the corner allows it.
13. Mount Floating Shelves Beside the Nook
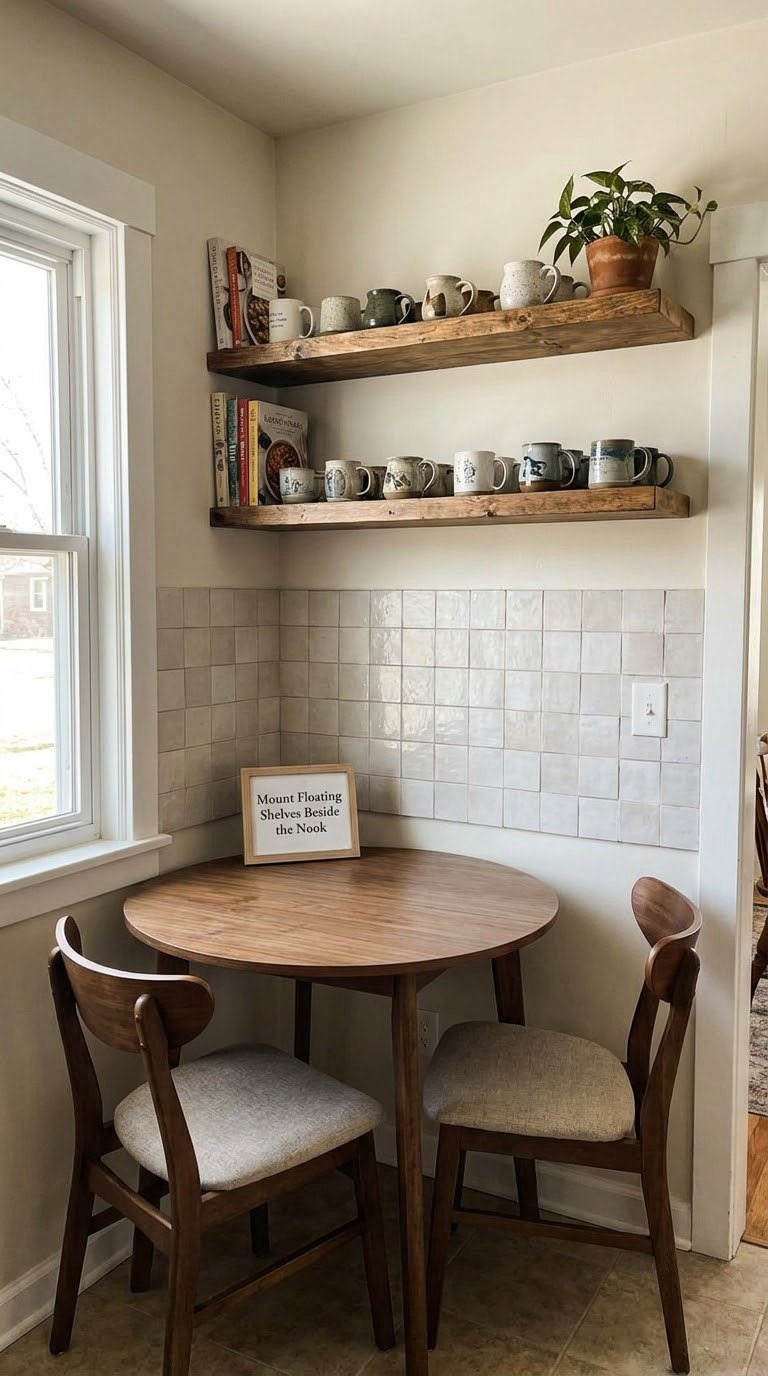
Floating shelves add storage and display space with no floor use at all, which matters most in a nook where the tabletop is already down to two placemats’ worth of room.
How to do it:
- Install one shelf 10 to 14 inches (25 to 36 cm) above the table for mugs and a second at eye level.
- Set brackets into studs or use anchors rated for the load; stone tiles are heavy.
- Keep the lowest shelf clear of anything taller than 8 inches (20 cm) so nobody bumps their head.
- Group items in odd numbers and leave half the length empty.
Cost: $50 to $200 · Difficulty: Moderate DIY · Time: 2 hours
Good to know: Shelves above a table collect grease and dust. In a kitchen, display everyday items rather than breakables.
14. Install a Narrow Counter-Side Table
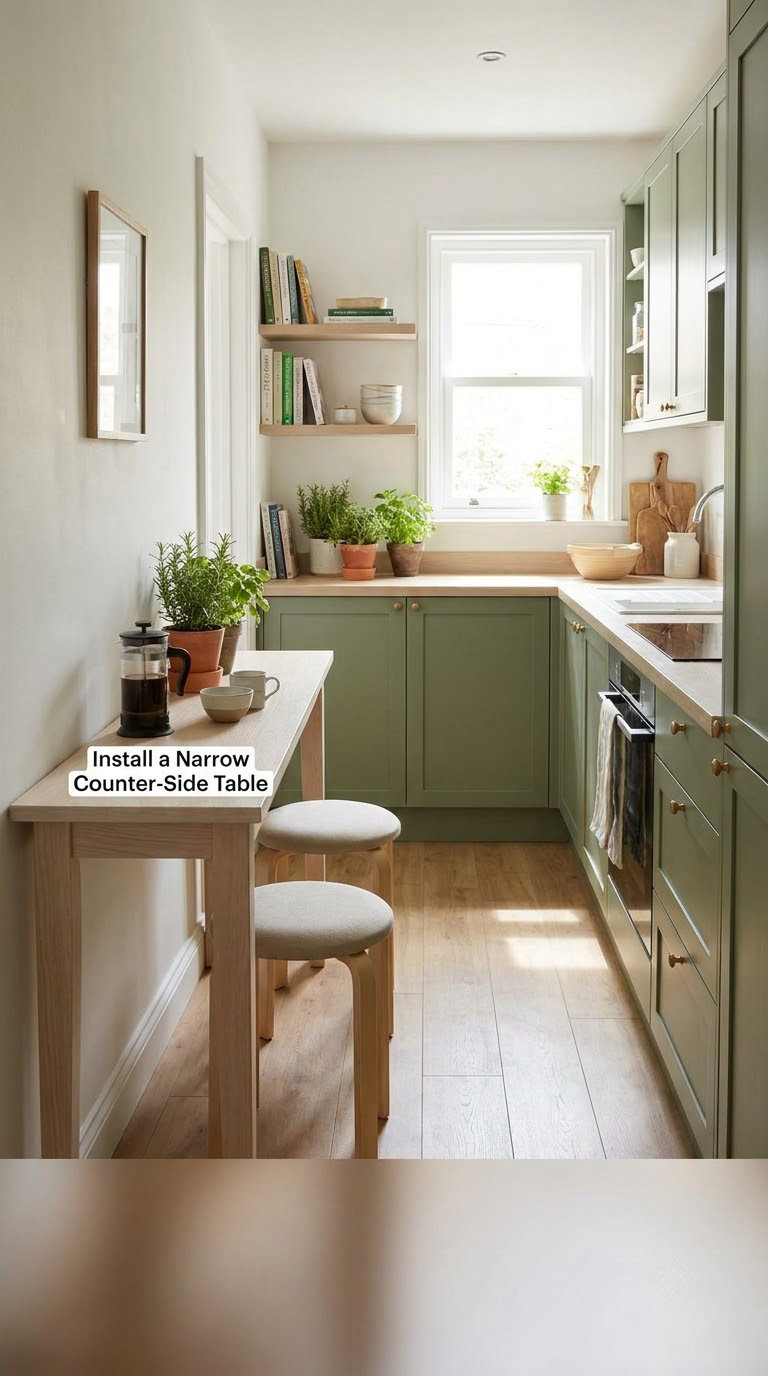
A slim table fitted alongside the lower cabinets gives you a dedicated eating surface without adding a second footprint. It reads as part of the cabinetry run rather than furniture parked in the kitchen.
How to do it:
- Match the table height to your counters at 36 inches (91 cm) or step down to 30 inches (76 cm) for chairs.
- Keep the top 12 to 18 inches (30 to 46 cm) deep so it’s a table, not a ledge.
- Match the door style and hardware so the nook looks built in.
- Leave a full door swing for any cabinet drawer that crosses the table.
Cost: $120 to $400 · Difficulty: Easy DIY if the space is standard · Time: 1 hour
Good to know: Check the dishwasher door before you place the table. Nothing kills a nook faster than a dishwasher that can’t open.
15. Use Stackable or Folding Chairs
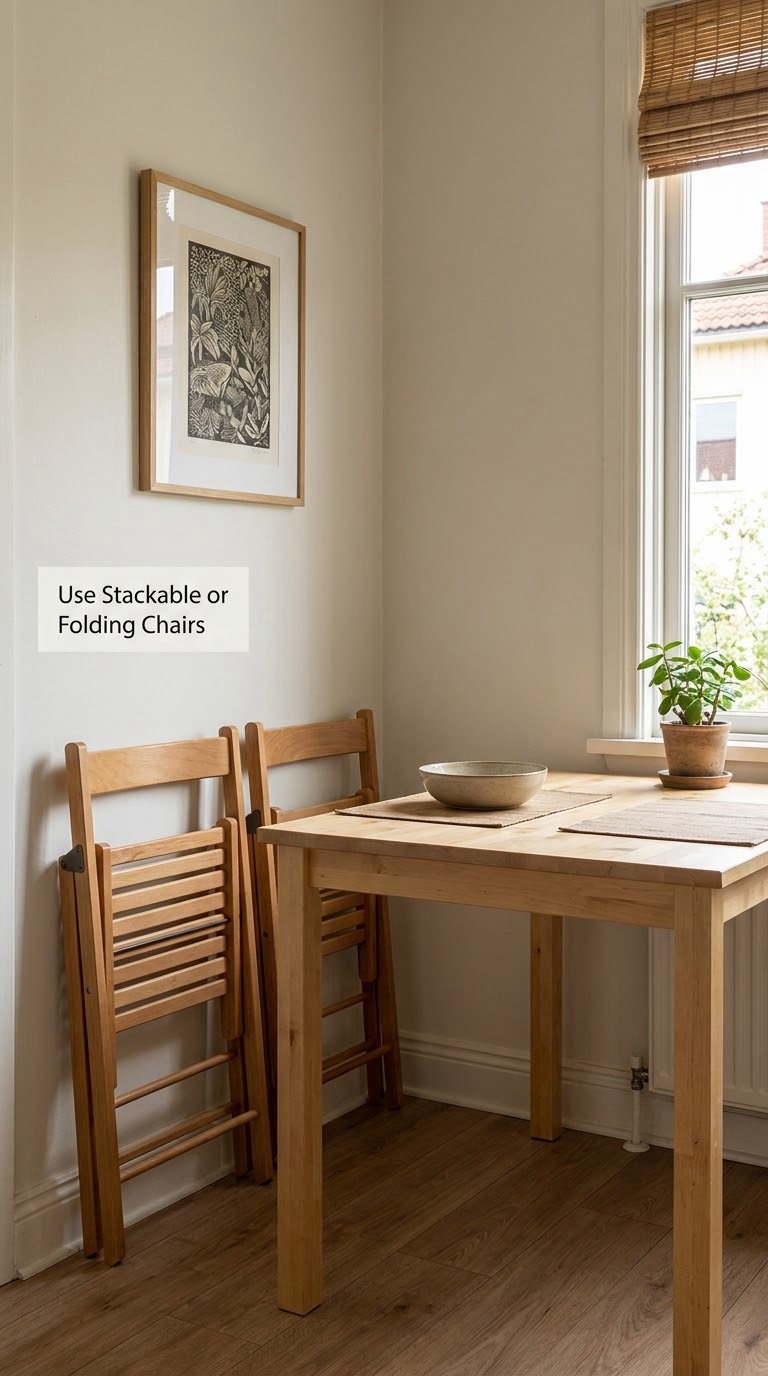
Chairs that fold, stack or nest turn a permanent four-seat nook into a two-seat nook on demand, which is exactly what a small kitchen needs when company arrives.
How to do it:
- Measure folded width: 18 inches (46 cm) per chair stacked against the wall.
- Look for a seat height of 17 to 19 inches (43 to 48 cm) to match a 30 inch (76 cm) table.
- Store the stack in a closet, not under the table, so it doesn’t kick the table legs.
- Add a wall hook rail if the chairs are light enough to lift easily.
Cost: $60 to $300 · Difficulty: Easy DIY · Time: 30 minutes
Good to know: Folding chairs get noisy in a hard-floored kitchen and can waffle. Woven or upholstered seats are quieter and look less institutional.
16. Add a Vertical Table With a Drop-Down Top
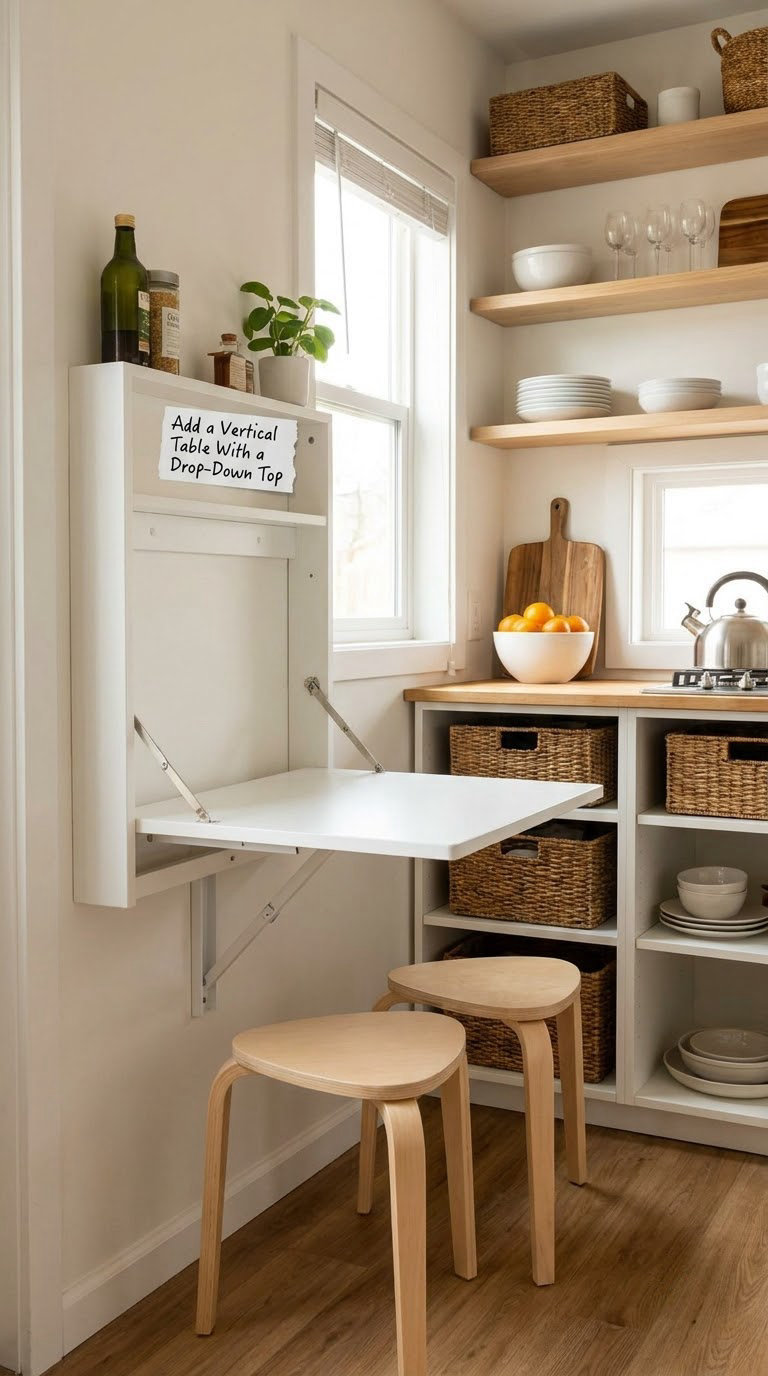
A slim cabinet or wall unit with a drop-down top gives you a table in a room where an open one would block a walkway or a cabinet door. It’s the renter’s version of built-in cabinetry.
How to do it:
- Mount between two studs or into a solid header, never into a single 2×4.
- Set the top at 30 inches (76 cm) with 18 inches (46 cm) of knee clearance beneath.
- Check the swing arc against any cabinet door before drilling.
- Add a small lip so plates don’t slide off the edge.
Cost: $80 to $300 · Difficulty: Moderate DIY · Time: 3 hours
Good to know: Wall-mounted anything needs a stud finder and a level. If you can’t find two studs, use a screw-in bracket rated for the load rather than a drywall anchor.
17. Use a Small Laminate Table for Durability
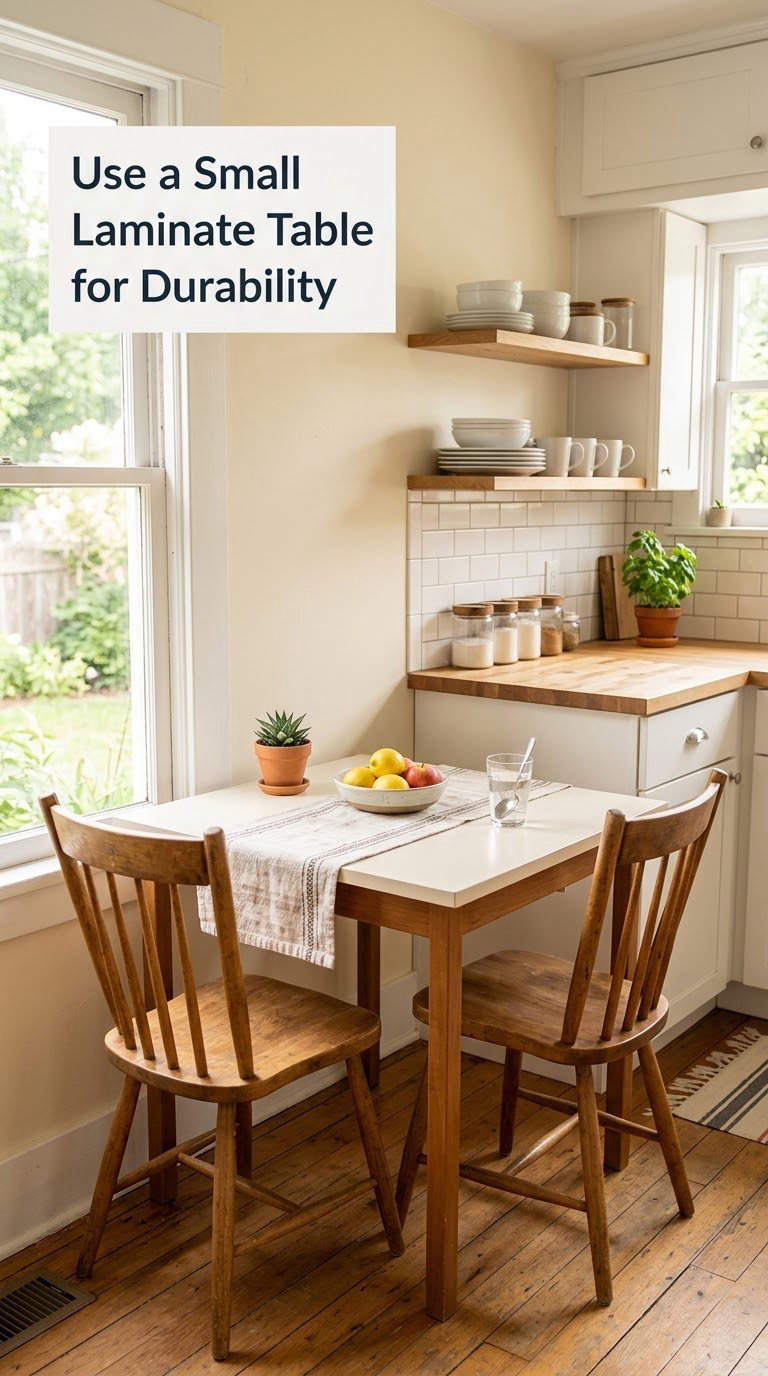
A compact laminate table is light, cheap and almost impossible to damage, which makes it the sensible pick for a rental, a kid-heavy kitchen, or any nook you plan to move again.
How to do it:
- Choose a sealed edge band so the particle board doesn’t swell near the sink.
- Pick a 30 inch (76 cm) round or a 30 by 48 inch (76 by 122 cm) rectangle for two to four.
- Protect the surface with a placemat rather than a cloth, which traps grease.
- Wipe spills immediately; laminate stains rather than absorbs.
Cost: $50 to $180 · Difficulty: Easy DIY · Time: 30 minutes
Good to know: Laminate can’t be sanded or refinished. Buy one with a thicker top, 5/8 inch (16 mm) or more, or it will bow under a hot pot.
18. Create a Breakfast Nook With Open Shelving
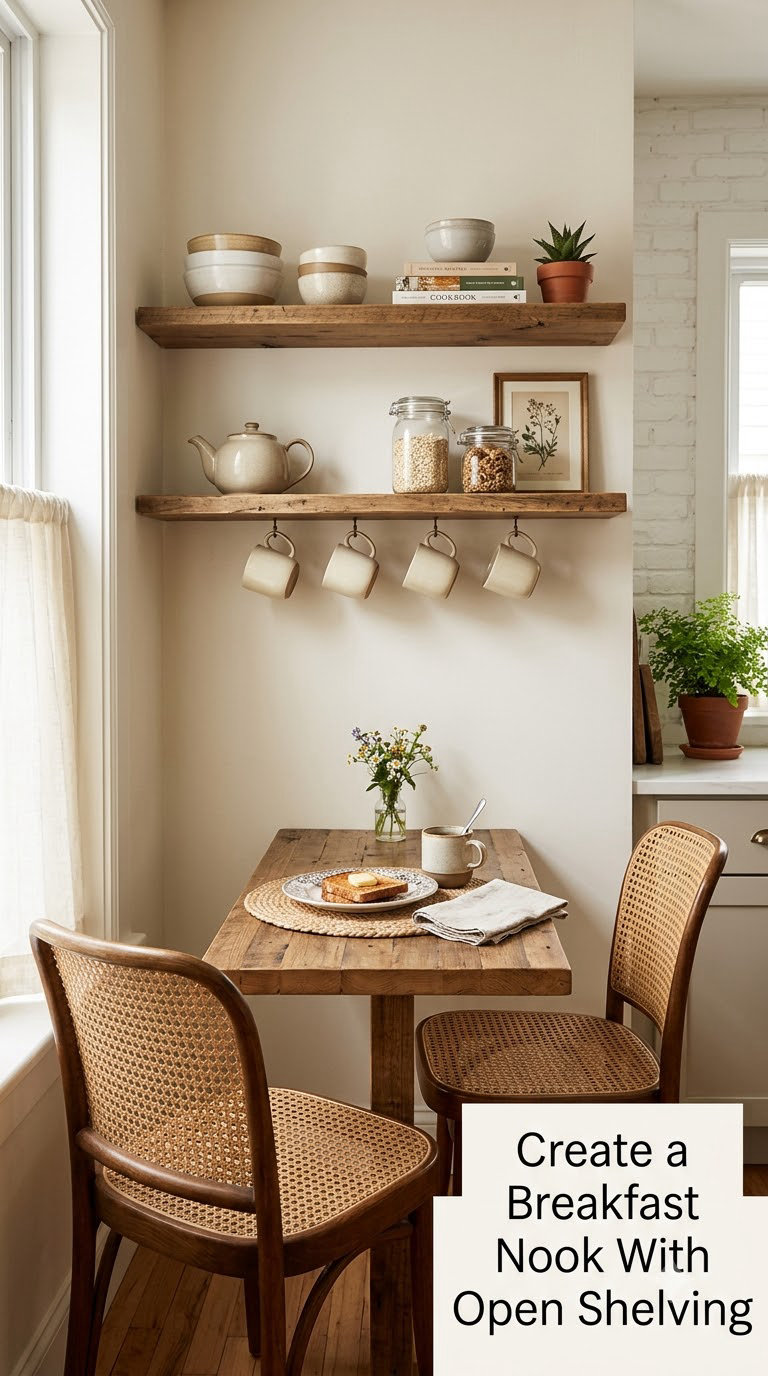
Open shelving above a tiny table gives you the look of built-in cabinetry without the cost, and keeps daily dishes in reach instead of in a cabinet you have to open while holding something hot.
How to do it:
- Run two shelves the width of the table, 12 and 30 inches (30 and 76 cm) above it.
- Set the lowest shelf at least 14 inches (36 cm) above the tabletop for head clearance.
- Line baskets and bins to stop things sliding when you pull them out.
- Keep fragile glassware off the top shelf unless it’s out of reach of the working counter.
Cost: $150 to $600 including shelves and brackets · Difficulty: Moderate DIY · Time: half a day
Good to know: Open shelves near a stove darken with grease. Seal bare wood with a clear matte finish and expect to re-treat it every couple of years.
19. Add a Lift-Top Coffee Table for Flexible Dining
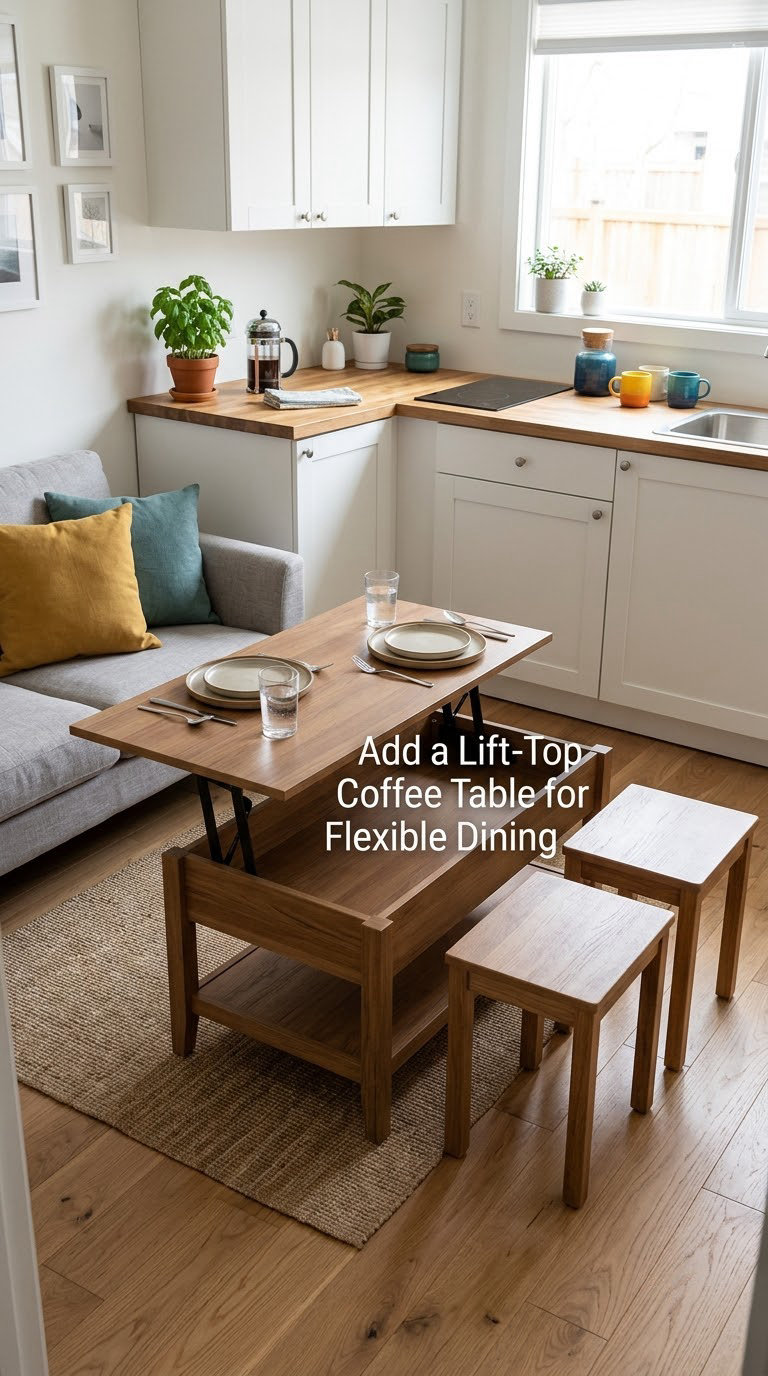
A lift-top table works as a coffee table all day and rises to dining height in seconds, which makes it useful in a studio or an open-plan room where a permanent table would wall off the space.
How to do it:
- Look for a mechanism that raises to 28 to 30 inches (71 to 76 cm) and locks in both positions.
- Leave 36 inches (91 cm) around the table for chairs to move while the top is up.
- Choose a base with storage inside; the best ones have a shelf split for remotes and blankets.
- Test the latch twice a month so a loose lock doesn’t drop a plate of food.
Cost: $200 to $700 · Difficulty: Easy DIY · Time: 30 minutes
Good to know: Lift tops are not a dining table substitute for long meals. They’re built for breakfast and laptops, and the edge is short where four people would need it.
20. Make a Rental-Friendly Painted Nook
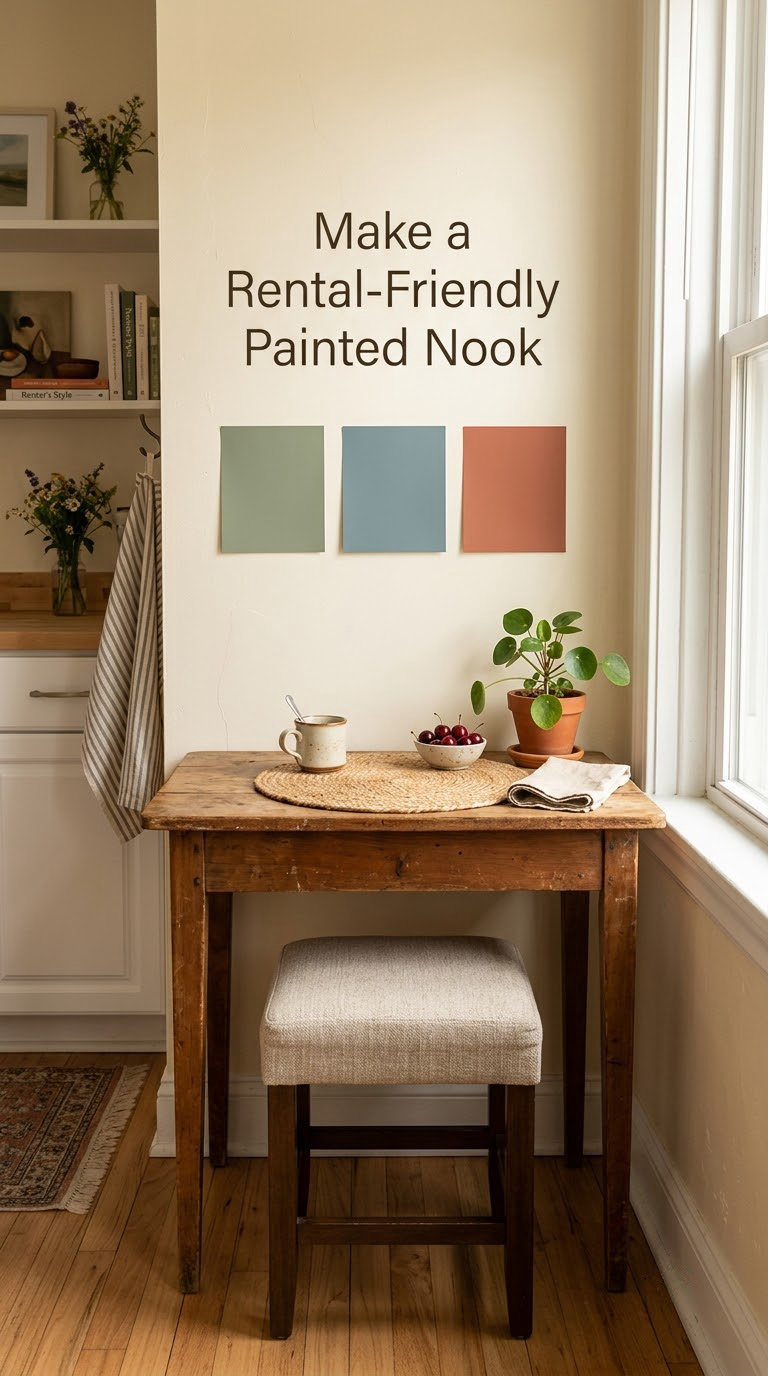
A thrifted table, peel-and-stick wall colour and coordinated textiles will make a rented corner look intentional, and none of it touches the landlord’s paint or drill holes.
How to do it:
- Pick a table under 48 inches (122 cm) long and scrub the top before painting.
- Paint the legs a single colour and leave the top bare for a two-tone look.
- Use a removable peel-and-stick sample on the wall behind the nook, not full wallpaper.
- Repeat one fabric twice: a bench cushion and two placemats.
- Skip anything you can’t carry out the door alone on moving day.
Cost: $40 to $250 · Difficulty: Easy DIY · Time: one afternoon
Good to know: Peel-and-stick on textured plaster lifts early. Test a 4 inch (10 cm) square in a corner and leave it 48 hours before you commit.
Planning Tips
Size chart: kitchen table nook ideas for small spaces by footprint
These 20 kitchen table nook ideas for small spaces all come back to the same question: what fits the gap you have? Measure the floor area first, then pick a top that leaves room to sit down and stand up.
| Nook footprint | Table size | Bench depth | Walkway remaining |
|---|---|---|---|
| Under 40 inches wide | Drop-down top, 24 to 30 inches deep | None | Full width, plus 8 inches |
| 4 ft x 4 ft | 36 inch round or 30 by 36 inch top | 18 inches | 36 inches |
| 5 ft x 5 ft | 42 inch round or 36 by 48 inch top | 18 to 20 inches | 40 inches |
| Galley kitchen, one dead wall | Fold-down bar, 40 by 16 inches | None, use stools | 36 inches behind stools |
| Bay window | Table top 16 to 20 inches deep | Window seat 18 inches | 36 inches |
| Counter run, 4 ft of cabinetry | Counter-side table, 12 to 18 inches deep | None | 36 inches |
How wide should a breakfast nook table be?
For two people, 24 to 30 inches (61 to 76 cm) deep is enough. For four, aim for 36 by 48 inches (91 by 122 cm) or a 42 to 48 inch (107 to 122 cm) round top. Add 24 inches (61 cm) from the table edge to the nearest wall so chairs can be pulled back.
The clearance rules worth memorising
- 36 inches (91 cm) behind a seated diner so someone can walk past with a full plate.
- 40 to 48 inches (102 to 122 cm) between a table and the working edge of a counter.
- 18 to 20 inches (46 to 51 cm) bench depth, with 17 to 19 inches (43 to 48 cm) seat height.
- 30 inches (76 cm) table height, 36 inches (91 cm) counter height. Pick one and match your chairs to it.
Lighting a nook with no window
A dark nook is the most common complaint, and paint won’t fix it. Hang a pendant 30 to 36 inches (76 to 91 cm) above the tabletop, add a warm-white wall sconce on the wall opposite, and put a small lamp on the sill. Three sources at low brightness beat one bright fixture that flattens everything.
Check the room before you build
Photograph the nook wall with your phone and look for outlets, HVAC vents, window sash paths and any access panel. Taping a paper outline of the table on the floor for two days is the cheapest way to catch a problem before a drill comes out.
Order of work
Measure, then paint, then build the bench or bar, then bring the table in, then hang shelves and lighting. Shelf heights depend on your actual table height, so they go last. If you’re painting, colour helps in this order: small kitchen paint colours first, then bench and cabinetry, then trim.
Frequently Asked Questions
How wide should a breakfast nook table be?
For two people, a table 24 to 30 inches (61 to 76 cm) deep works. For four, use 36 by 48 inches (91 by 122 cm) or a 42 to 48 inch round top. Leave at least 24 inches (61 cm) from the table edge to the nearest wall so seated chairs do not hit the wall, and keep 36 inches (91 cm) of walkway behind anyone sitting down.
What is the ideal depth for a breakfast nook bench?
18 to 20 inches (46 to 51 cm) is the sweet spot. That gives a 17 to 19 inch (43 to 48 cm) seat height with a 30 inch (76 cm) table, and leaves the walkway you need beside the nook. Going deeper eats the walking space that made the corner usable in the first place.
Can a 36 inch round table seat four?
Yes, four adults fit comfortably around a 36 inch (91 cm) round table as long as nobody is serving a large roast. Each person gets about 28 inches (71 cm) of edge. In a tight nook, add 24 inches (61 cm) from the table edge to the wall so chairs pull back without scraping.
Is a breakfast nook worth it in a small kitchen?
Usually yes, because it creates a defined eating spot without taking floor space from your counters. The value comes from storage built into the seating, not from decoration. If your kitchen already has a table or peninsula you eat at, skip the nook and spend the money on counter space or a better extractor instead.
What can I do with a nook that has no natural light?
Treat it as a lighting project, not a paint project. Hang a pendant 30 to 36 inches above the tabletop, add a sconce on the opposite wall, and use a warm-white bulb under 3000K. A mirror on the adjacent wall bounces light from the rest of the room. Light colours help, but they will not replace a fixture.
What to do instead of a breakfast nook?
Try four alternatives: a peninsula extension with two stools, an island overhang you can eat at, a pass-through counter facing the living room, or wall-mounted shelf dining with perching stools. Each uses space a table would have taken. If none of them fit, move the table out of the kitchen entirely and add a rolling cart for prep.
If you only do one thing this month, tape the footprint of your chosen table onto the kitchen floor and live with it for two days. Watch where people walk, where the dishwasher opens and where the chairs actually land. That taped outline will save you more money than any piece of advice here, and it costs a roll of masking tape.
While you are measuring, it helps to know what else the room has to absorb. If the fridge is next on your list, the right refrigerator size for a small kitchen is a decision worth making before the nook eats the wall you were saving. For colour, our picks on kitchen paint colours for small spaces hold up well in low light, which is exactly where most nooks live.