20 Picture Frame Molding Ideas for Walls (October 2026)
Updated on October 2026.
Picture frame molding is a strip of decorative trim, sold by the foot, that you fasten to a wall in a raised rectangle so it frames artwork, a mirror, a sconce, or nothing at all. These 20 picture frame molding ideas for walls cover everything from a single slim outline in a home office to a full lattice grid in a dining room, and each one includes the measurements, the profile to buy, and an honest read on cost and time.
Contents
Most of these projects exist to solve the same three problems: a blank wall that gives you nothing to look at, a room built in the 2000s that reads flat and builder-grade, or a gallery arrangement that keeps falling apart because nothing anchors it. Molding fixes all three by giving the eye an architectural edge to stop on.
One thing worth saying up front. Molding is decorative trim, not structure, so it can be fastened to drywall with adhesive or lightweight strips if you rent. None of these ideas require electrical, plumbing, or load-bearing work, though anything near a window, outlet, or door casing needs care so you never cover hardware you still need to reach.
20 Picture Frame Molding Ideas for Walls at a Glance
Read the table first, then jump to the ideas that match your wall. Cost is shown as a tier because material prices move around by region and season; the material quantities are the real number to plan against.
| Idea | Best room | Cost tier | Difficulty | Time |
|---|---|---|---|---|
| 1. Crown molding frame | Living room | Moderate | Moderate DIY | 4 to 6 hours |
| 2. Shadow box border | Bedroom | Moderate | Moderate DIY | 5 to 7 hours |
| 3. Herringbone gallery frame | Dining room | Low | Moderate DIY | 5 to 8 hours |
| 4. Floating molding panels | Hallway | Moderate | Easy DIY | 3 to 5 hours |
| 5. Double-frame molding | Living room | Moderate | Easy DIY | 3 to 4 hours |
| 6. Ornate baroque molding | Formal sitting room | Premium | Hire a pro | Two days |
| 7. Minimalist flat molding | Home office | Low | Easy DIY | 2 to 3 hours |
| 8. Color-blocked frames | Kitchen | Low | Easy DIY | 3 to 4 hours |
| 9. Metal-look molding | Bedroom | Moderate | Easy DIY | 3 to 5 hours |
| 10. Reclaimed wood gallery | Dining room | Low | Moderate DIY | 5 to 7 hours |
| 11. Arched molding frame | Bedroom, entryway | Moderate | Moderate DIY | 4 to 6 hours |
| 12. Geometric accent wall | Living room | Moderate | Moderate DIY | 6 to 9 hours |
| 13. Oversized molding frame | Entryway | Low | Easy DIY | 2 to 3 hours |
| 14. Scalloped molding border | Nursery | Moderate | Moderate DIY | 4 to 5 hours |
| 15. Mixed-width molding | Living room | Low | Easy DIY | 2 to 3 hours |
| 16. Built-in-look surround | Formal living room | Premium | Moderate DIY | 6 to 8 hours |
| 17. Two-tone molding | Bedroom | Low | Easy DIY | 3 to 4 hours |
| 18. Sculptural molding accents | Foyer | Premium | Hire a pro | One to two days |
| 19. Lattice molding frame | Hallway, study | Moderate | Moderate DIY | 6 to 8 hours |
| 20. Metallic and gesso finish | Dining room | Moderate | Easy DIY | 4 to 6 hours |
Costs range widely depending on region, profile, and whether you buy pine trim or solid hardwood. Plan on buying 10 to 15 percent more linear footage than the outside measurement of your frame, since every corner wastes a cut and a miscut takes a whole board.
1. Crown Molding Picture Frames for Taller Looking Rooms
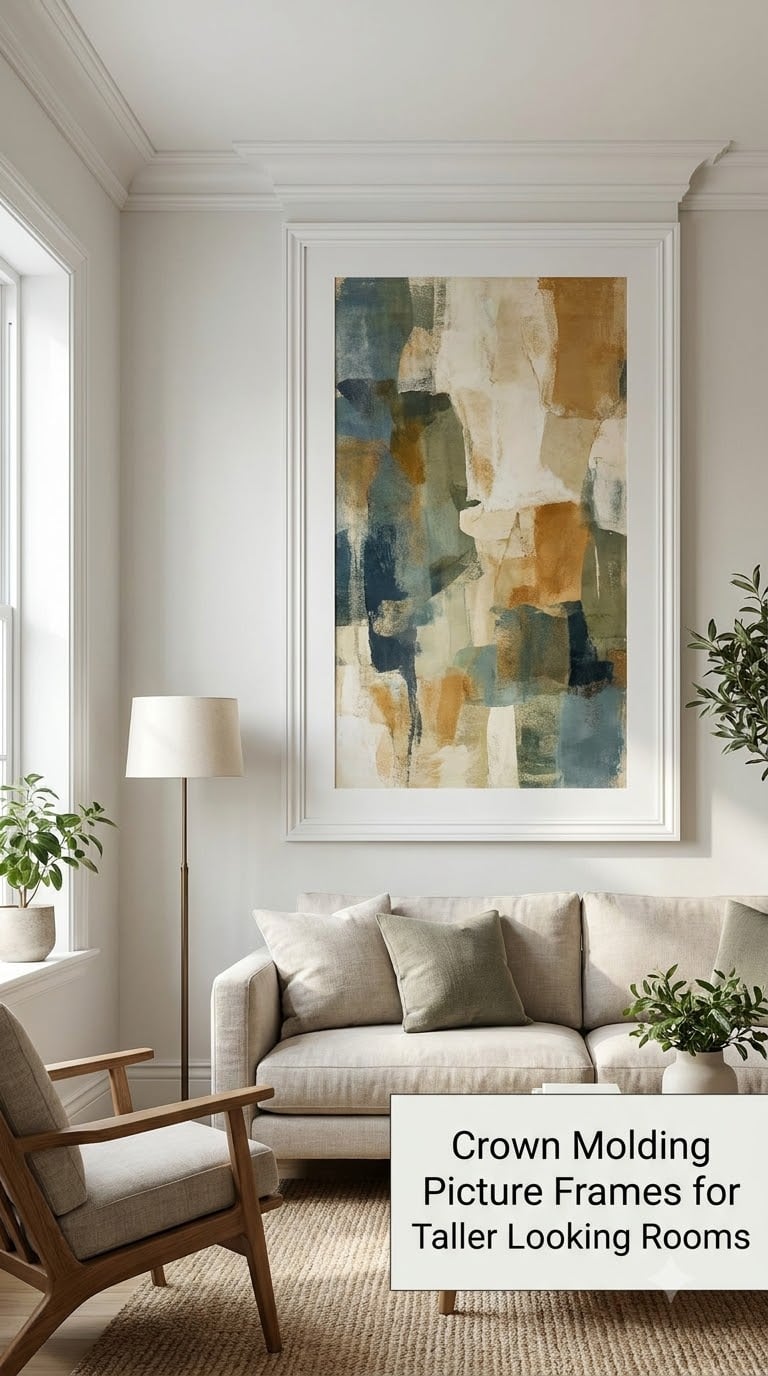
Crown molding used as a picture frame runs along the ceiling line instead of stopping mid-wall, which is the fastest way to make a standard 8-foot wall read as taller. The profile’s own curve does the decorative work, so you need far less of it to get the same effect as a flat outline.
How to do it:
- Measure the wall from the ceiling to the baseboard, then add 2 inches to the finished height.
- Buy crown in a 12-foot or 16-foot length so the long sides need no joints at all.
- Mark the frame on the wall in pencil and tap it out in painter’s tape, then step back before you cut.
- Cut each corner on a miter saw set to 45 degrees, measuring from the outer edge of the profile, not the inner.
- Fasten with a brad nailer about every 12 inches, then fill nail holes, caulk the seams, and paint the whole frame in one coat pass.
Cost: Moderate. Four to six pieces of crown, adhesive caulk, filler, primer, and about a gallon of paint.
Difficulty: Moderate DIY. Handling a 16-foot crown board solo is the hard part, so cut outside or get a second pair of hands.
Time: 4 to 6 hours plus a full dry day for paint to cure.
Good to know: A renter version is thin flat trim taped to the ceiling line, or flat cap molding held on with removable mounting strips. It will not carry the crown’s shadow, but the outline reads the same.
2. Shadow Box Molding Borders That Give Artwork Real Depth
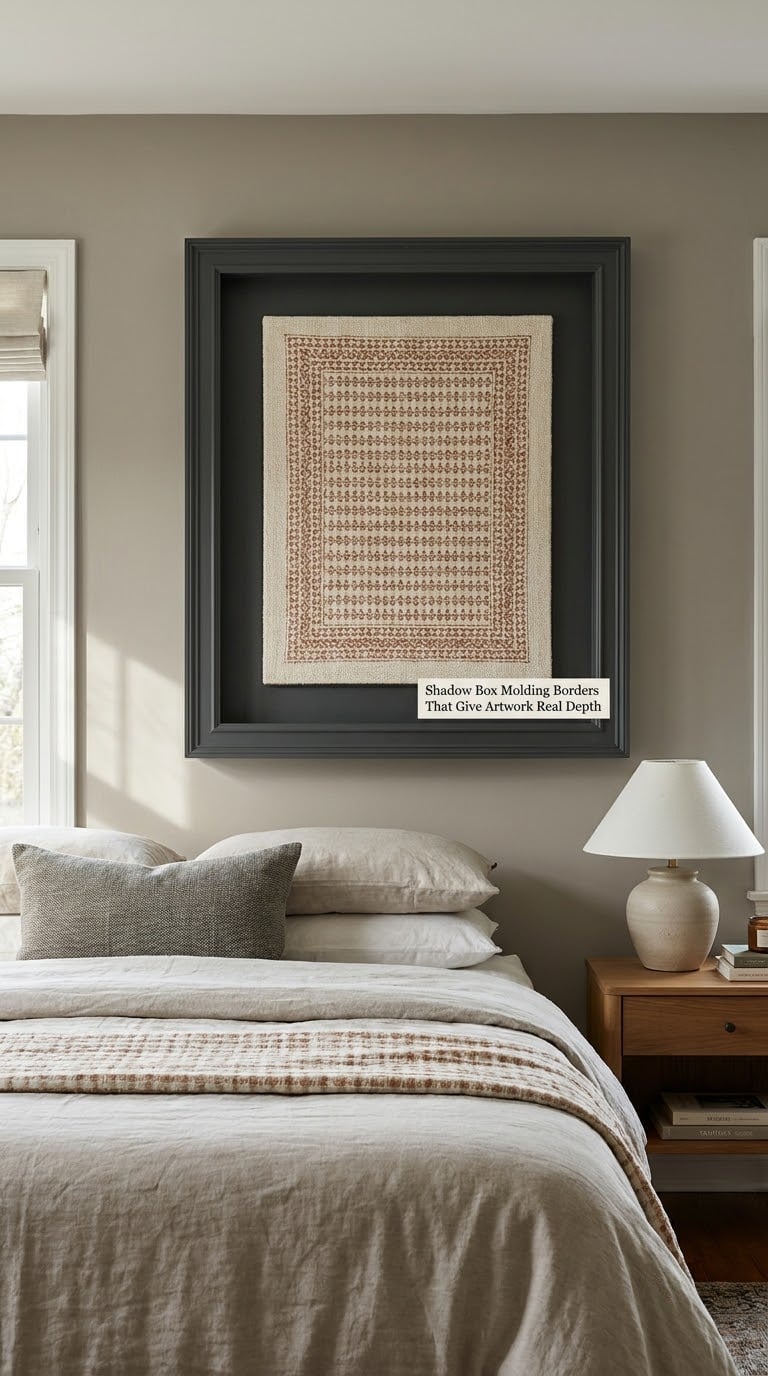
A shadow-box border uses deep trim plus a recessed backing board, so the artwork sits back from the wall plane and casts its own shadow. That depth is what separates this from a flat outline, and it is why it works so well on large textiles and canvases.
How to do it:
- Choose trim between 2 and 3 inches deep. Anything past 3 inches turns a shallow recess into a box you cannot see into.
- Cut a backing panel of 1/2-inch plywood or MDF 2 inches larger than the artwork on all sides and paint it before it goes up.
- Build the frame with butt joints on the two long sides and 45-degree miters on the front, so the miter seams hide on the face.
- Hold the frame off the wall about 1/4 inch so the recess reads as a recess rather than a flush line.
- Fasten into studs with brads every 12 inches, caulk, then paint the backing and frame the same color so the whole thing disappears into one plane.
Cost: Moderate. Roughly 16 linear feet of 2-inch trim, one sheet of half-inch panel, and a gallon of paint.
Difficulty: Moderate DIY. The frame is straightforward; the backing needs a clean cut and a square.
Time: 5 to 7 hours including the paint dry.
Good to know: In a narrow room, deep trim steals usable wall space and the shadow turns muddy. Keep the depth to 2 inches and go lighter in color so the recess still reads.
3. Herringbone Molding Gallery Walls With a Geometric Edge
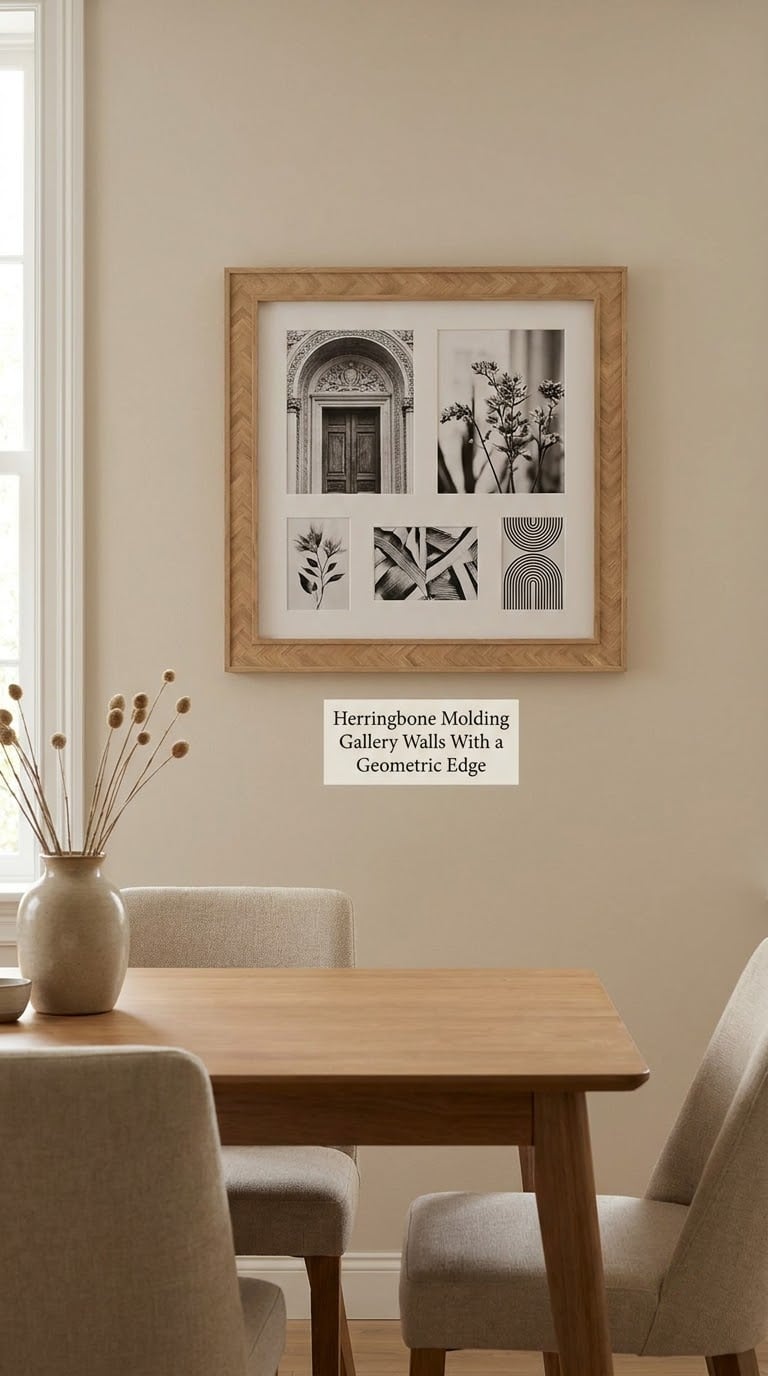
Herringbone uses short pieces of molding set at 45 degrees, alternating direction to make a woven-looking border. It is the most pattern-driven idea on this list and the one that hides a bumpy wall best, because the eye reads texture instead of flatness.
How to do it:
- Sketch the border on paper first and count the pieces, since each short segment needs two 45-degree cuts.
- Cut every segment to the same length, 6 to 10 inches depending on how fine you want the weave.
- Mark the pattern in painter’s tape on the wall so you can correct spacing before the first cut.
- Work from the center outward and swap a test piece into the miters dry before fastening anything.
- Attach with a fine brad or construction adhesive, then fill the joints and paint in two thin coats to keep the profile readable.
Cost: Low, if you buy short lengths. Expect 40 to 60 pieces of 8-inch trim.
Difficulty: Moderate DIY. Cutting time dominates, usually three to four hours of saw work alone.
Time: 5 to 8 hours.
Good to know: A renter version is the same pattern drawn in removable vinyl border strips. Fewer pieces, larger scale, and it comes off cleanly at move-out.
4. Floating Molding Panels for a Clean Architectural Accent
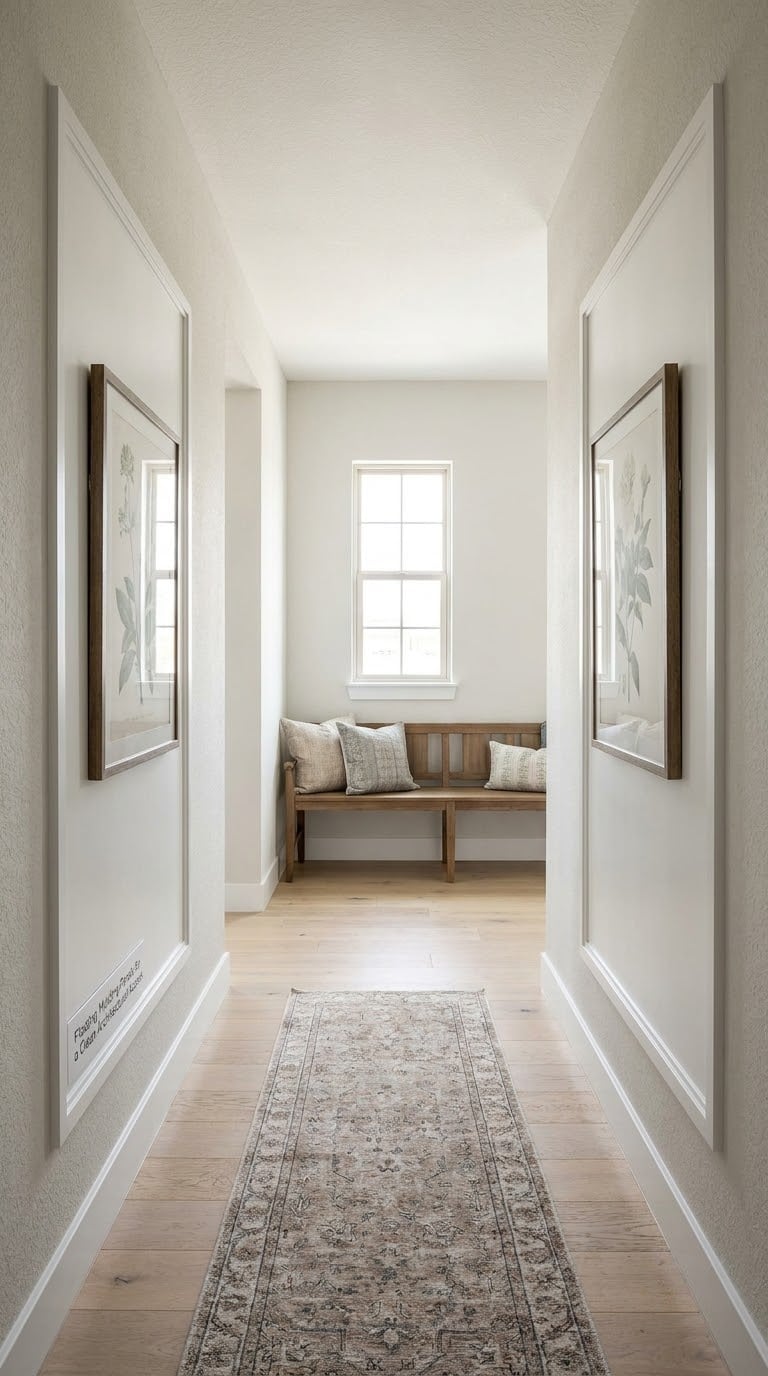
Floating panels are raised rectangles set apart from one another, with no other trim on the wall. Because they read as pure geometry, they suit hallways, stair landings, and any room where you want architecture without a theme.
How to do it:
- Pick panel sizes between 18 and 30 inches on the long side. Bigger panels eat wall quickly in a corridor.
- Space panels 3 to 4 inches apart and keep them 3 to 4 inches off any adjacent wall or casing.
- Build a scrap frame as a spacer gauge, so every panel matches the first one exactly.
- Use flat cap or a shallow ogee profile, and butt-join the corners on the hidden side if the profile is plain.
- Caulk the inner and outer seams, then paint the panel and the wall the same color for a floating effect, or a contrasting color for a paneled look.
Cost: Moderate. Twenty to twenty-five linear feet of flat cap for two panels.
Difficulty: Easy DIY.
Time: 3 to 5 hours.
Good to know: The budget substitute is prefinished trim boards or thin MDF strips cut to size and painted before they touch the wall. No miter saw needed if you square each end with a file.
5. Double-Frame Molding That Makes One Print Look Bigger
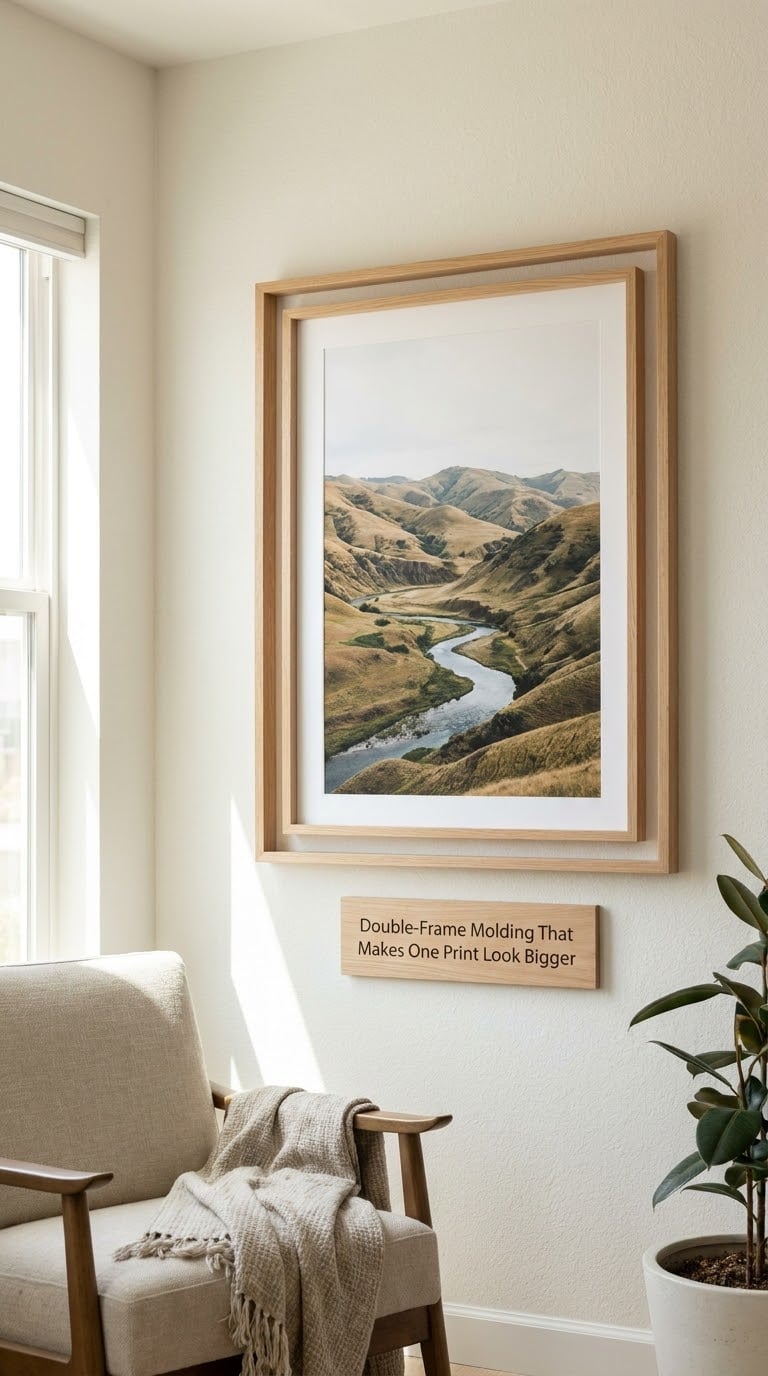
Two concentric molding lines, one inside the other, make a small piece of art read as a large, layered installation. It is the cheapest way to add visual weight to a modest print, and it needs about 30 percent more trim than a single frame.
How to do it:
- Make the outer frame roughly 2 inches wide and the inner one about 3/4 inch, so the two read as different elements.
- Leave a 3 to 4 inch gap between the two profiles; tighter than 2 inches turns the pair into one thick band.
- Measure both frames from their outer edges, and cut the inner frame’s length from the finished outside measurement minus the profile width.
- Use picture-hanging adhesive along the back of both frames for a glue-only install, or brad nail the outer one for strength.
- Fill, caulk, and paint both frames in the same pass so the reveal between them stays crisp.
Cost: Moderate. Around 20 linear feet of two different profiles.
Difficulty: Easy DIY once the tape layout is right.
Time: 3 to 4 hours.
Good to know: Keep the gap identical on all four sides. Measure all four distances before you commit, then adjust the inner frame rather than forcing the corners.
6. Ornate Baroque Molding for Traditional and Victorian Rooms
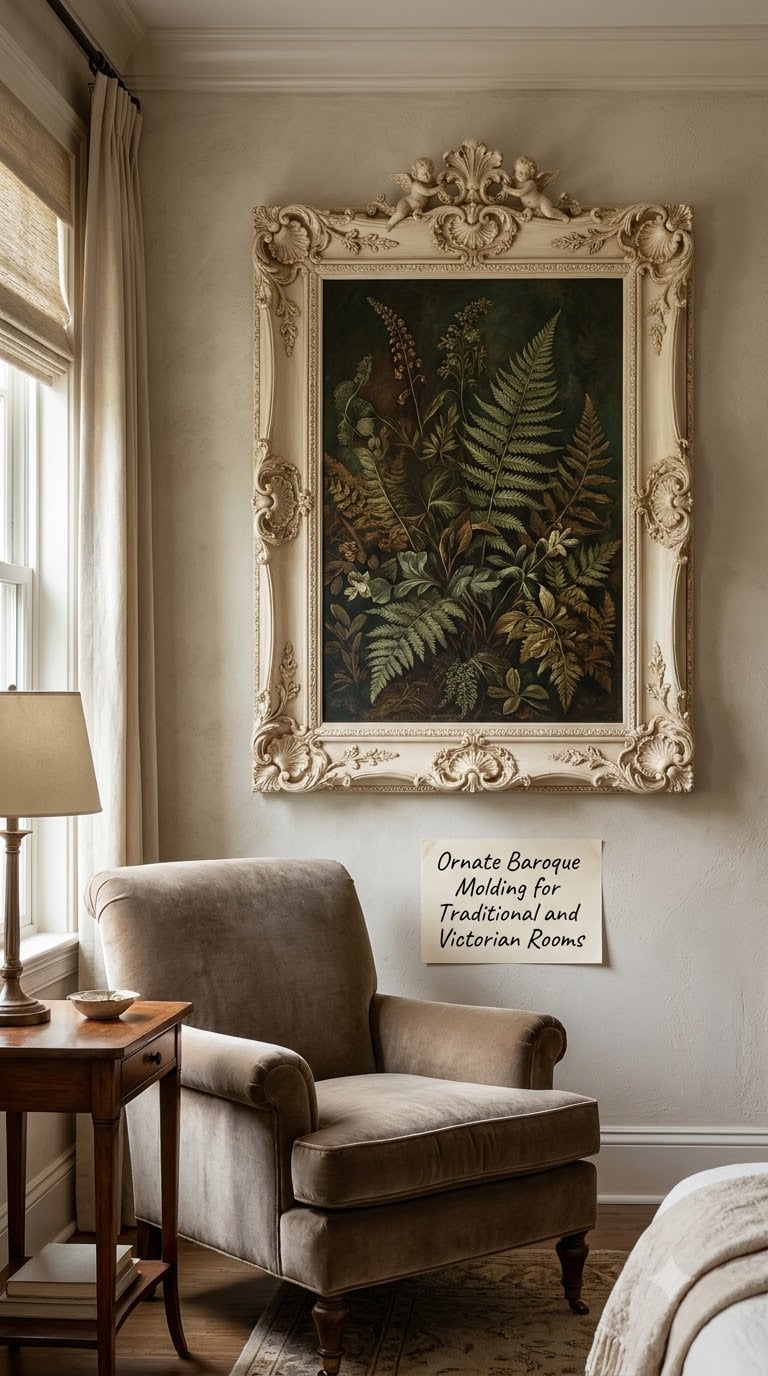
Baroque molding is the most traditional idea here, with carved scrolls, egg-and-dart, or lambs tongue profiles. It suits high ceilings, crown molding, and patterned wallpaper, and it is the one treatment where a mismatched profile looks like a mistake rather than a choice.
How to do it:
- Choose one profile and stick to it. Mixing two ornate carvings in a single frame is the fastest way to make the corners read as a mistake.
- Order lengths long enough that only the four corners need a joint, and check each piece for defects before cutting.
- Dry-fit all four pieces on the floor, miters facing up, before anything reaches the wall.
- Glue and brad the corners from the back, then reinforce the miters with corner brackets.
- Paint the whole frame in a single flat color so the carving, not the paint, carries the detail.
Cost: Premium. Ornate hardwood runs several times the price per foot of flat pine cap.
Difficulty: Hire a pro unless you have cut ornate profile before. The profile is thick, heavy, and unforgiving.
Time: Two days including finishing.
Good to know: A renter or budget version is lightweight foam trim or salvaged pieces from an architectural salvage shop, painted one color so the cast texture carries the look.
7. Minimalist Flat Molding for Modern and Scandinavian Walls
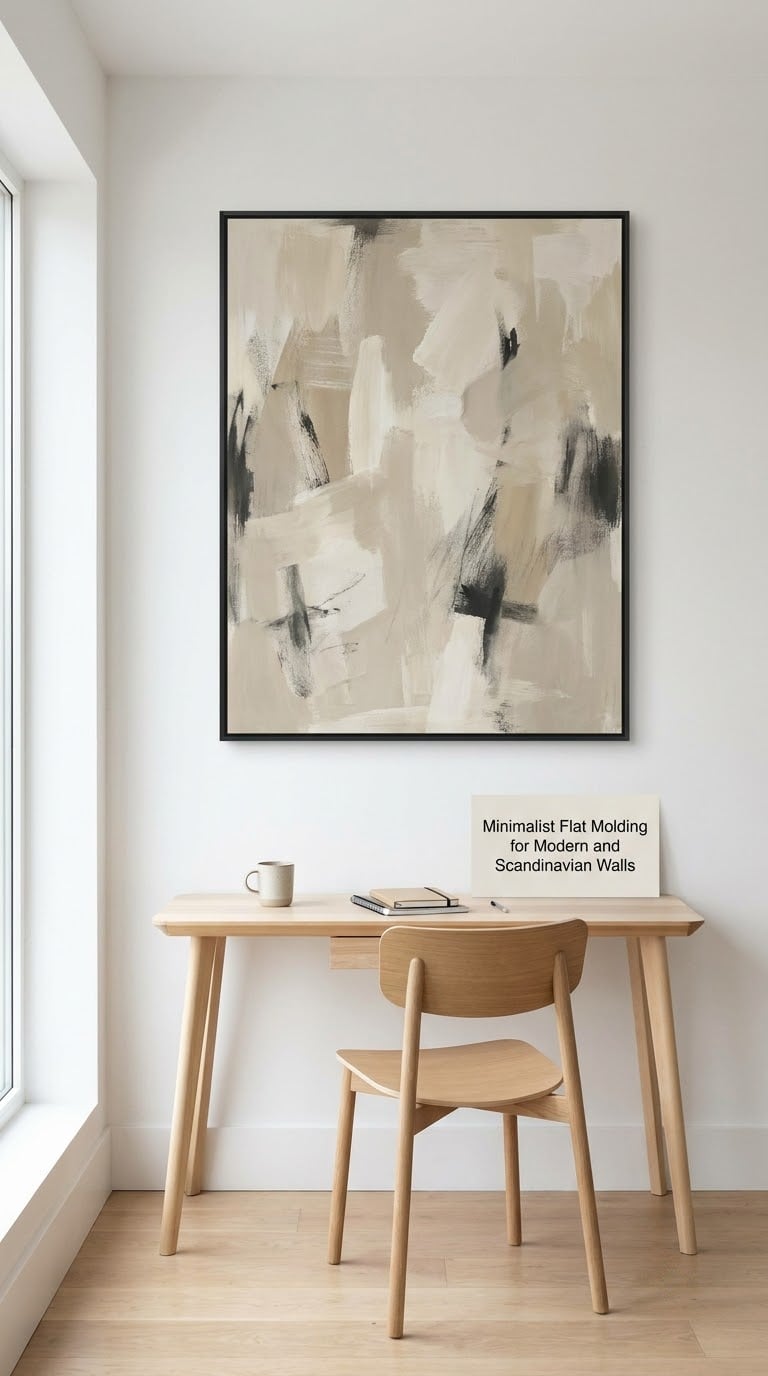
A single slim flat line is the most contemporary option, and it is the one that looks worst when a wall is bumpy. Flat molding has no profile to hide surface irregularity, so prep matters more here than anywhere else in the list.
How to do it:
- Use flat cap or a 1/2-inch by 1/4-inch rectangular strip, and keep the whole frame under 1 inch wide.
- Skim coat and sand any textured wall before you start; a sanded flat surface is what makes the line look intentional.
- Lay the full rectangle in tape first and sight the corners from 10 feet away.
- Fasten with removable mounting strips or low-tack adhesive tape if the wall is painted drywall in good condition.
- Paint the line in a low-contrast tone, one shade off the wall, so it reads as a shadow rather than a border.
Cost: Low. Under 20 linear feet of the thinnest trim available.
Difficulty: Easy DIY.
Time: 2 to 3 hours plus sanding time if the wall is textured.
Good to know: Pull test tape on an inconspicuous spot first. Fresh drywall paint can lift, and no nail-free method is worth a damaged wall.
8. Color-Blocked Molding Frames for Graphic Accent Walls
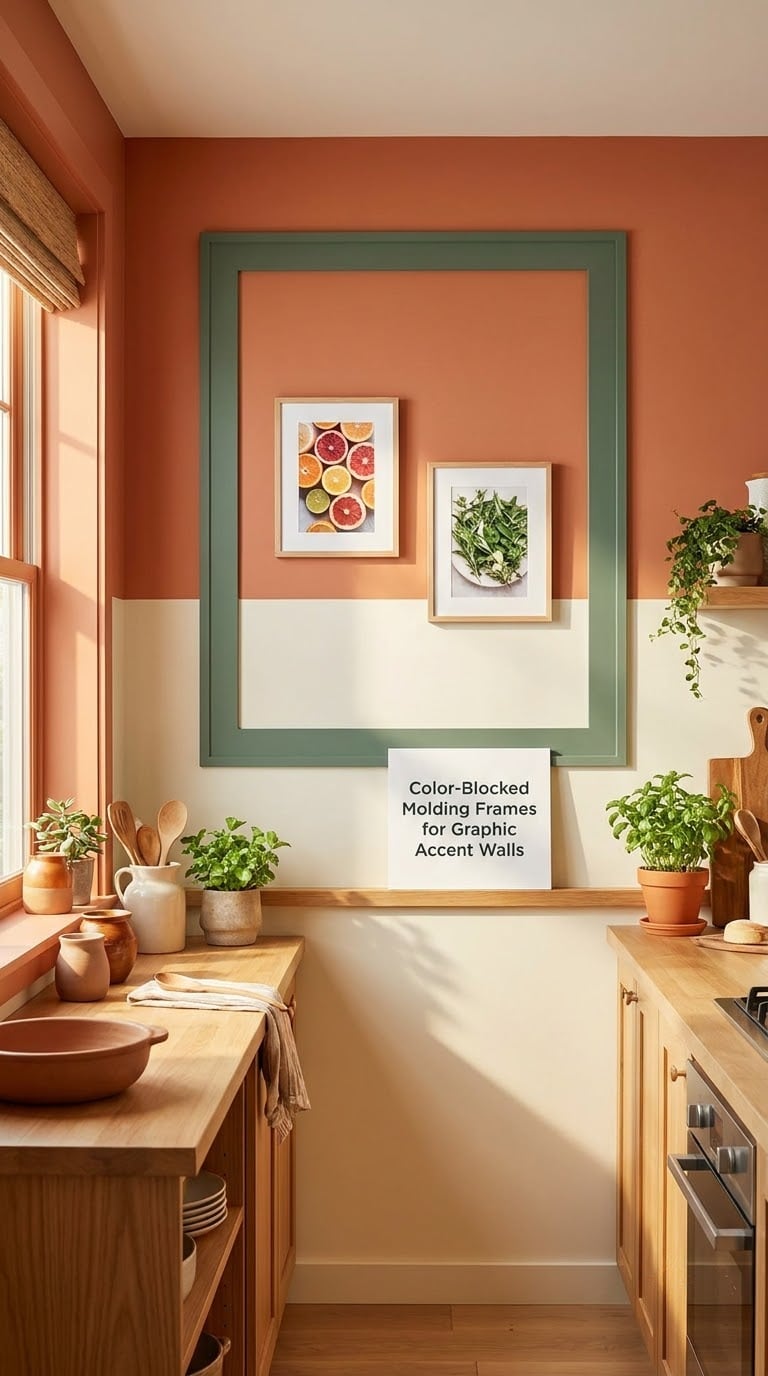
Color drenching, where the wall, the molding, and often the trim share one color, is the technique that most reliably makes cheap trim look expensive. The trick is sheen matching rather than color matching, and a sample board always settles the argument faster than a whole wall.
How to do it:
- Paint the wall first, let it cure 24 hours, then take a scrap of molding to the paint counter for a sample.
- Use the same brand and a sheen one step shinier on the molding; extra-gloss on a flat wall reads as a mistake.
- Brush the molding in with the wall color and let it dry before touching the wall, so you tape off the wall instead of the frame.
- Caulk, fill, and prime the molding, then paint it in the same session as the wall for a single, even coat pass.
- Move slowly at the miters and wipe each corner with a dry brush immediately to keep the shadow line clean.
Cost: Low. One gallon of trim paint covers roughly 350 square feet of 2-inch molding.
Difficulty: Easy DIY.
Time: 3 to 4 hours plus drying between primer and finish.
Good to know: Renters can get the same effect with peel-and-stick vinyl trim in a solid color. It will not have the profile depth, but it holds the line.
9. Metal-Look Molding Frames for Modern Bedrooms
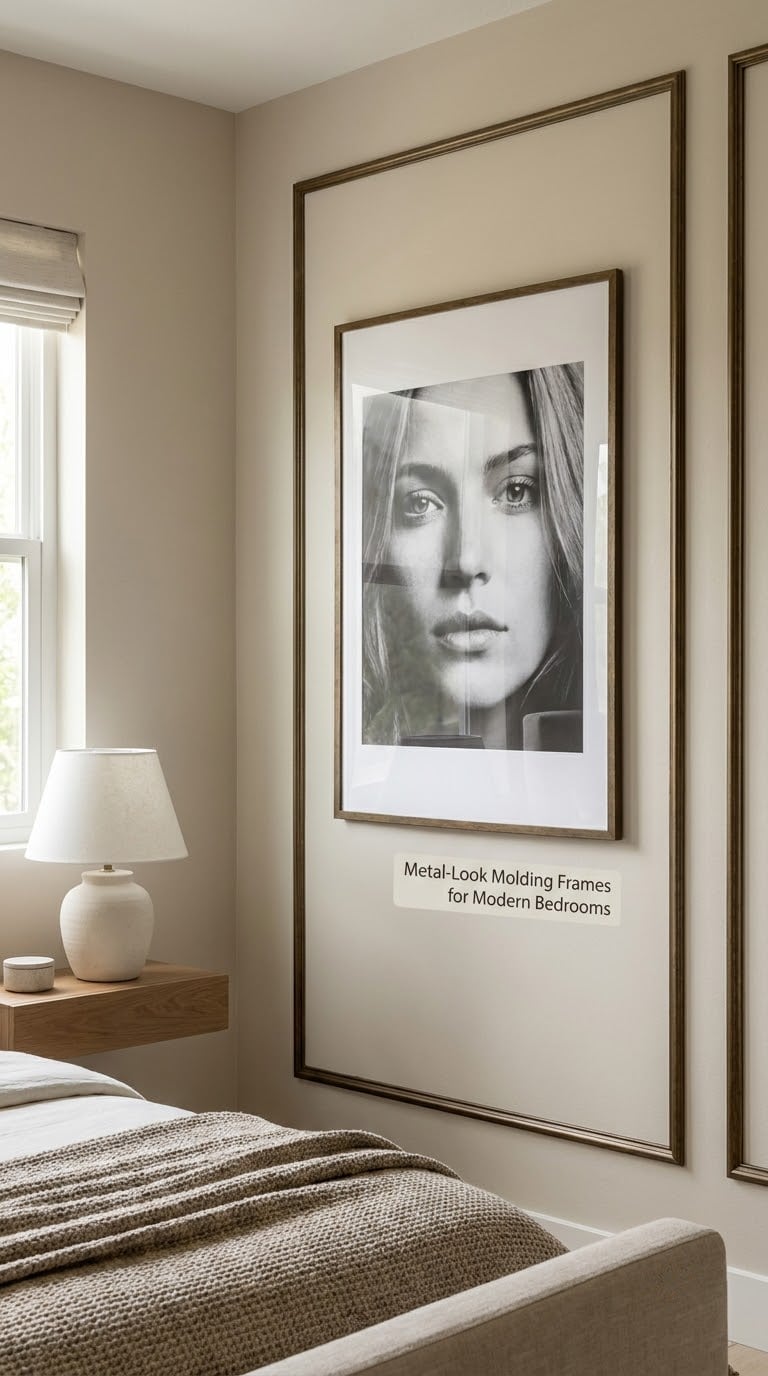
Slim strips in a bronze, brass, or blackened finish pick up the metal hardware you probably already own, so a small bedroom reads coordinated. You can buy faux-metal molding or paint flat wood in two thin layers, and the two methods look close at normal viewing distance.
How to do it:
- Buy 1-inch-wide flat strips, or use pine cut to 1 inch by 1/4 inch for a true custom profile.
- Sand to 120 grit, wipe with a tack cloth, and apply a bonding primer before any metallic paint; metallic flakes will not bond to bare wood reliably.
- Apply the metallic coat in two thin layers with a synthetic brush, allowing four hours between them, then knock off the sheen with 220 grit.
- Keep the strips square-cornered and butt-joined, since a miter on a thin strip exaggerates every error.
- Mount from inside the frame with hidden hangers so no fastener shows on the metallic face.
Cost: Moderate. Metallic paint is pricier per gallon than flat and you will use less than you think.
Difficulty: Easy DIY, with patience for dry times.
Time: 3 to 5 hours spread over two days.
Good to know: Faux-metallic finishes chip at corners where people brush past. If the frame sits in a hallway, choose a satin black instead and skip the problem.
10. Reclaimed Wood Molding Gallery for Warm Imperfect Walls
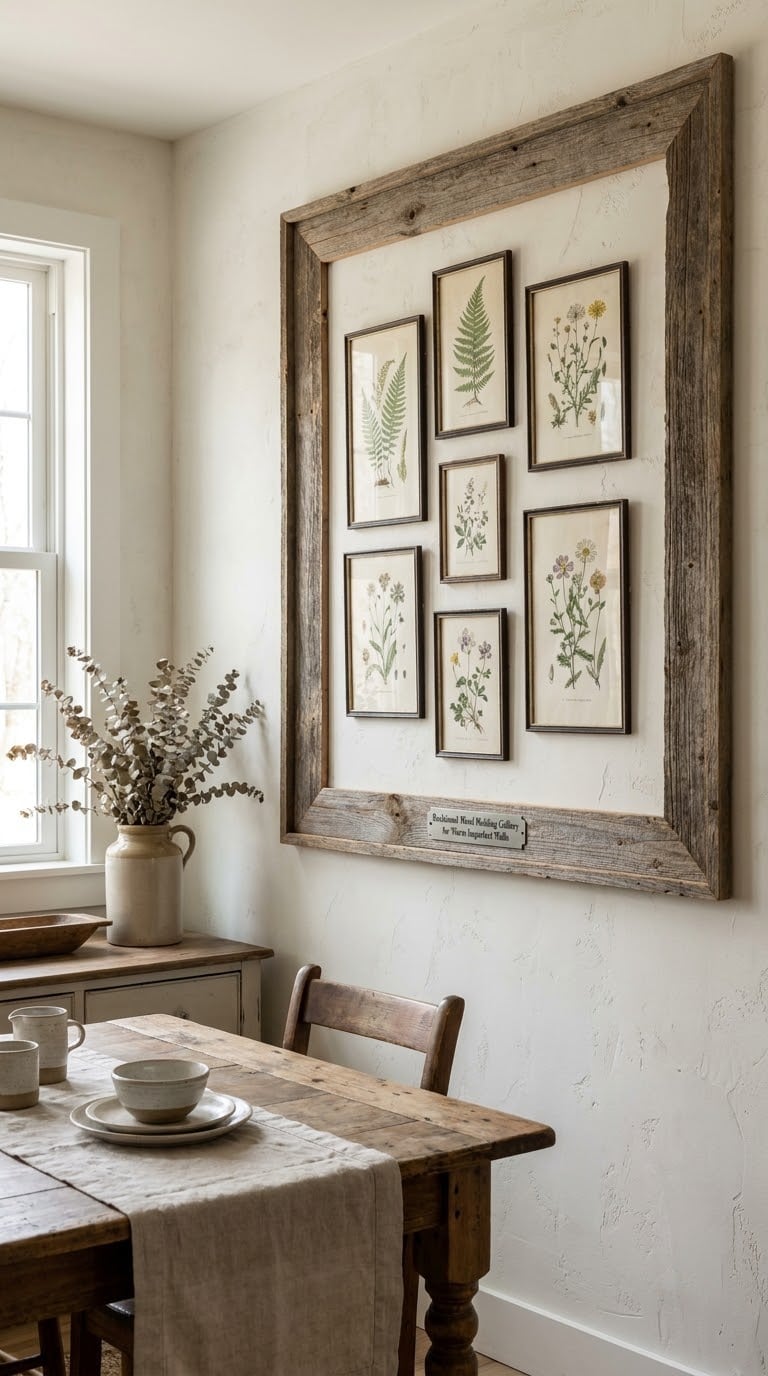
Reclaimed trim has knots, nail holes, and slightly wavy edges, and that irregularity is the whole point. It suits farmhouse, cottage, and eclectic rooms where a factory-straight frame would feel wrong.
How to do it:
- Pull enough pieces to cover your outside measurement plus 15 percent, and sort by thickness before you cut anything.
- Draw out nails, scrape surface grit, and sand any raised grain down to 120 grit.
- Test older material for lead paint before disturbing it, especially on trim salvaged from homes built before 1978.
- Plane or file the backs so the frame sits flat, then join with glue and brads from the back.
- Seal with a matte clear finish if you want the grain to stay pale, or stain and seal for a deeper rustic tone.
Cost: Low, if you already have a stash or access to a salvage yard.
Difficulty: Moderate DIY, mostly in the preparation.
Time: 5 to 7 hours once pieces are on hand.
Good to know: Reclaimed wood delaminates and glued faces can chip if the joints flex. Join with screws from the back if the frame is large, and avoid nailing into old split grain.
11. Arched Molding Frames Above Beds and Entryways
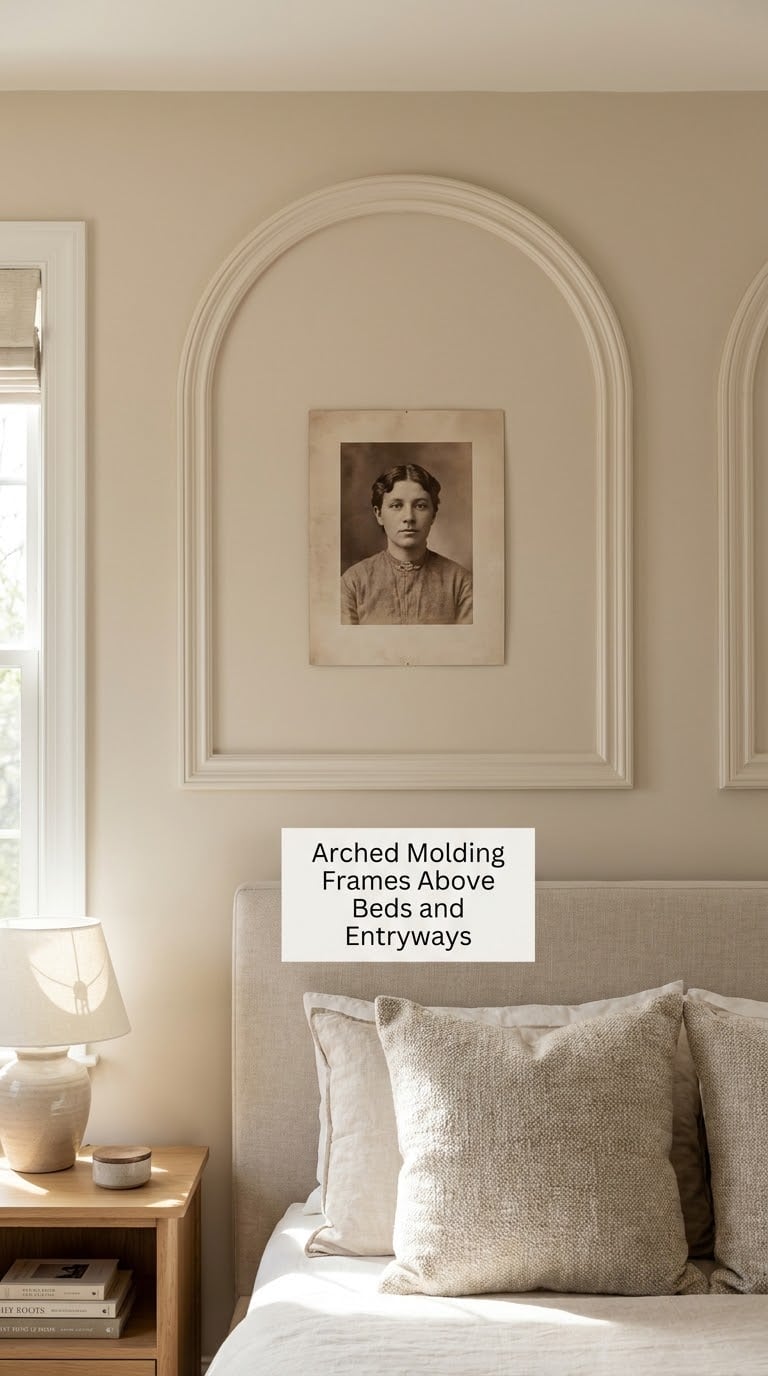
An arch softens the hard rectangle of a wall and works beautifully over a bed, a console, or a doorway. It is also the idea most often abandoned halfway, because the curve has to be built from pieces rather than bent from one strip.
How to do it:
- Find the wall centerline with a level, then mark the spring line where the curve starts, usually 60 to 70 percent of the total height.
- Trace a full-size paper template of the arch and pin it to the wall as your cutting guide.
- Build the straight sides with flat cap, then cut the curve from a pre-bent or segmented piece fitted to the template.
- Reinforce the apex where the two curves meet with a small block behind the joint.
- Caulk the arch seams carefully; a curved seam shows ripples more than a straight one, so smooth with a wet finger and let it dry fully.
Cost: Moderate. You will pay more for pre-bent arch molding than for straight stock.
Difficulty: Moderate DIY.
Time: 4 to 6 hours, longer if you bend your own curve.
Good to know: A template gets you 90 percent of the way. Draw the arch on cardboard, cut it out, and trace around it rather than freehanding the curve.
12. Geometric Molding Accent Walls With Intersecting Strips
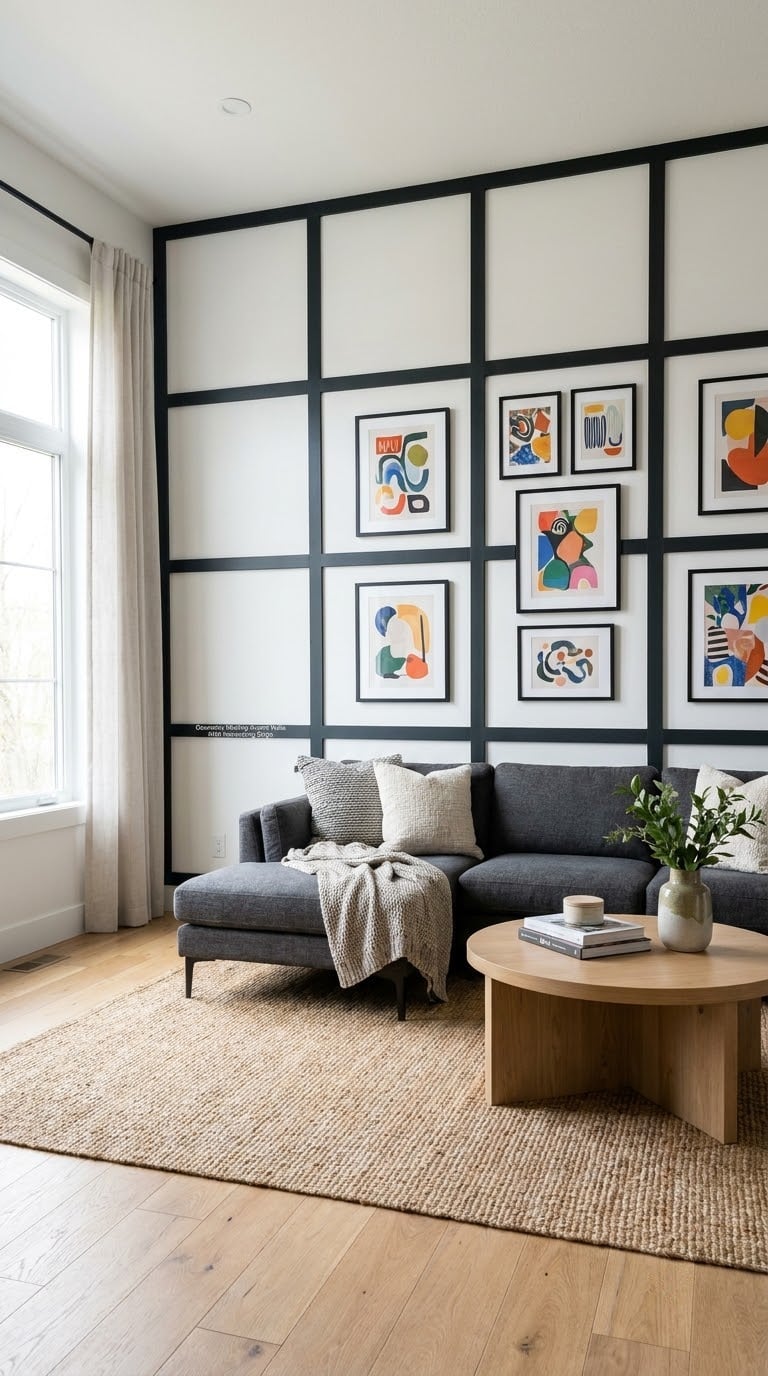
Crossing strips that continue past each other turn a wall into a diagram, and the trick that makes it work is lapping one over the other at every intersection. It is a bold idea, so keep the art inside simple and let the geometry carry the room.
How to do it:
- Map the grid on the wall in painter’s tape and mark the center line of every vertical and horizontal run.
- Cut all verticals first and fasten them, then run horizontals over the top with a small adhesive bead at each crossing.
- Keep every vertical parallel to the same reference, and re-check with the level after each piece rather than at the end.
- Cut intersections as clean half-laps or simply lap one piece over the other and caulk the step.
- Paint all strips before or after installation, but touch up the caulk lines afterward so the grid stays graphically crisp.
Cost: Moderate. The total footage adds up fast on a full wall.
Difficulty: Moderate DIY. Alignment is the skill, not the cutting.
Time: 6 to 9 hours for a full wall.
Good to know: A renter version uses the same grid in removable vinyl strips, which is why the pattern needs to be simple. Two directions, no more.
13. Oversized Molding Frames on High-Ceiling Walls
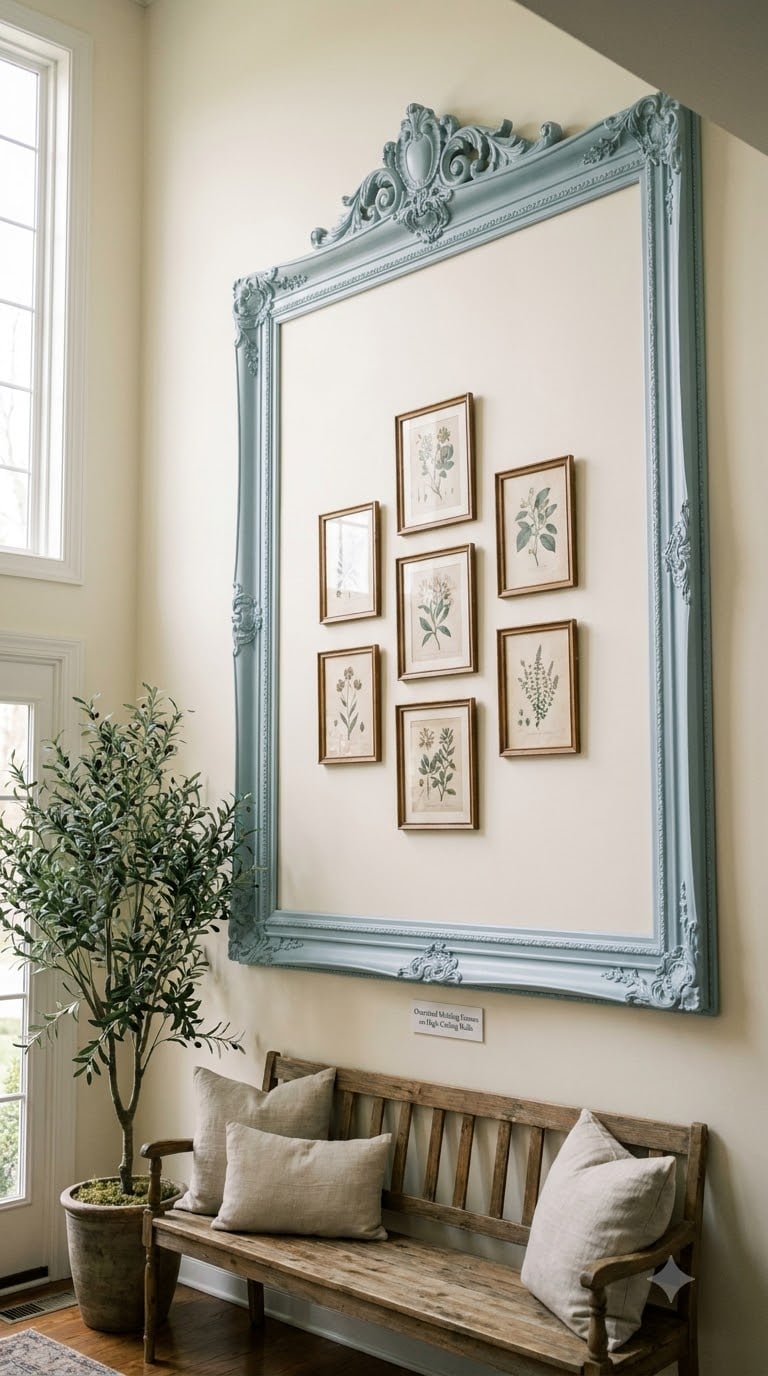
One very large outline around a small cluster of prints solves the problem of a wide wall with a narrow art grouping. It is also the fastest project on this list, because you are cutting four long pieces and nothing else.
How to do it:
- Size the frame so its outer edge lands 3 to 4 inches inside the wall edges, baseboard, and any door or window casing.
- Aim for an outer height of roughly two-thirds of the wall height so the composition sits rather than floats.
- Cut four pieces, miter the corners, and dry-fit them on the floor with the corners just touching.
- Attach the top piece first, then the bottom, then the two sides, checking level at every stage.
- Center the art inside the frame on the wall centerline, not inside the frame, so the composition reads balanced from the doorway.
Cost: Low. A large frame is not more expensive per foot than a small one.
Difficulty: Easy DIY.
Time: 2 to 3 hours.
Good to know: On a tall entryway, support matters. Add a center brace on the back of the top and bottom pieces so the frame cannot rack out of square over time.
14. Scalloped Molding Borders for Nurseries and Cottages
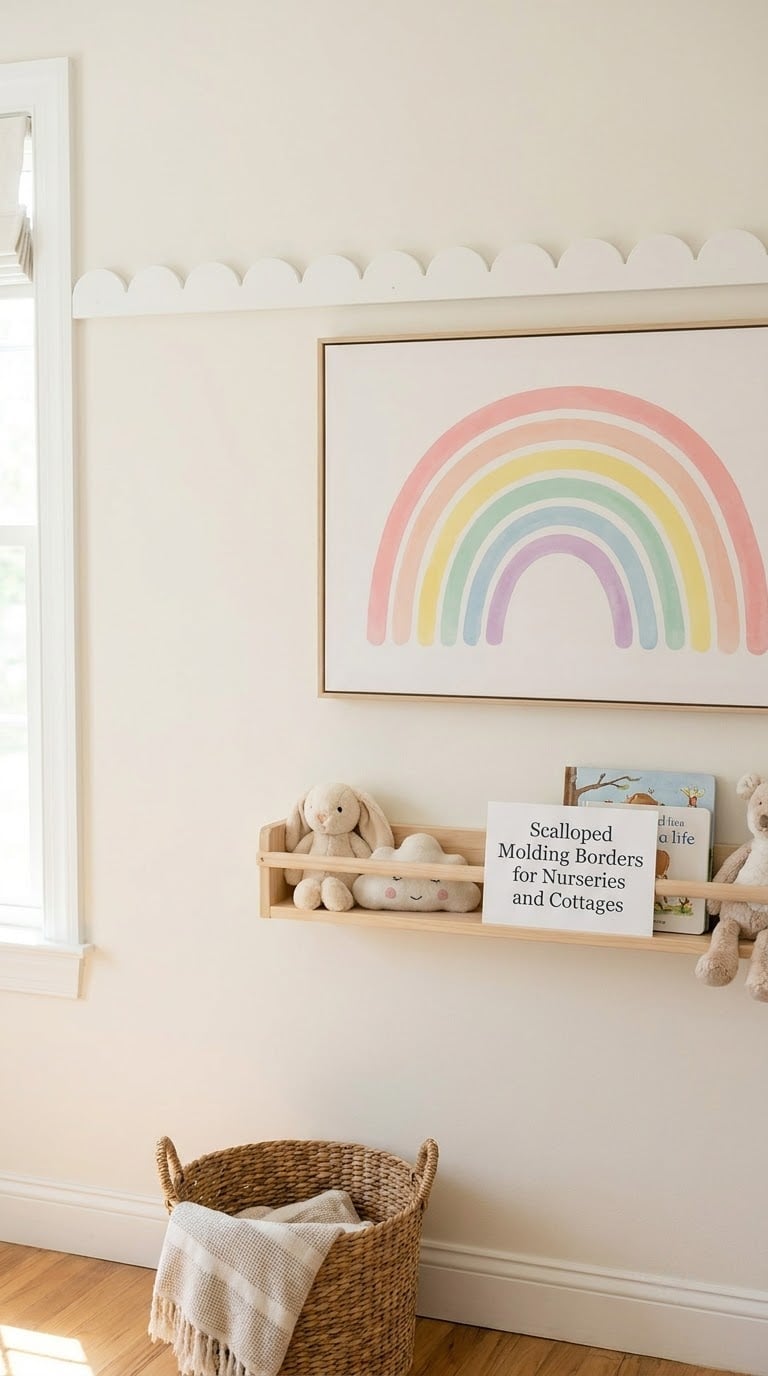
Scalloped and wave profiles read playful and hand-made, and they suit nurseries, cottage bathrooms, and anywhere a straight line feels too serious. The curves need consistency, and that consistency comes from measuring, not from cutting faster.
How to do it:
- Measure one full repeat of the scallop and mark it on the wall in pencil before you cut anything.
- Cut every segment to the same length, and score the face of each cut so the profile does not chip on the miter saw.
- Support runs longer than about 4 feet with a straight scrap behind them so the curve does not flatten.
- Join segments with glue in a scarf joint, then reinforce the back with a short block.
- Paint along the profile with a loaded brush and a light touch, so the valleys of the curve do not fill in.
Cost: Moderate. Scalloped and wave profiles cost more per foot than straight cap.
Difficulty: Moderate DIY.
Time: 4 to 5 hours.
Good to know: For a rental or a no-saw option, use scalloped paper border as a template to mark the pattern, then run a single straight flat-cap line inside it. Same rhythm, one profile.
15. Mixed-Width Molding Frames for a Custom Look
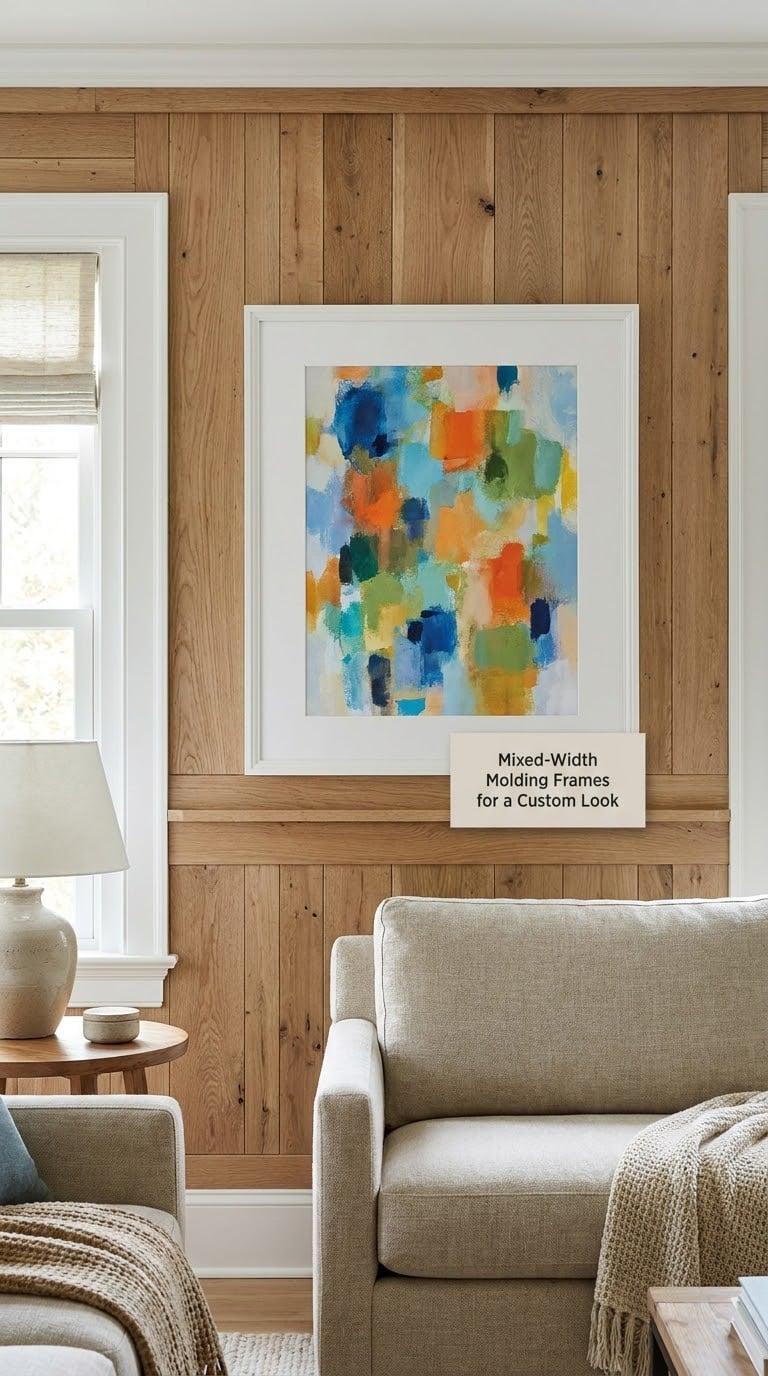
Mixing one narrow strip with one wider strip gives you the layered look of custom millwork without ornate profiles, complex cuts, or a big material bill. It is the most forgiving idea here, because a slight error in the narrow piece is hidden by the wider one next to it.
How to do it:
- Use roughly a 1/2 inch to a 1 inch ratio between the narrow and wide strip.
- Install the wide piece as the outer frame, and butt the narrow strip to its inner edge rather than butting both to the wall.
- Label each piece with painter’s tape and a marker before it leaves the saw, including top, bottom, and each side.
- Work from the longest fixed reference, which is usually the wall edge or a casing line, and measure every other piece off that one.
- Caulk the seam between the two profiles with a fine bead so the reveal stays a clean line.
Cost: Low. Two inexpensive profiles total less material than one wide ornate one.
Difficulty: Easy DIY.
Time: 2 to 3 hours.
Good to know: A narrow profile takes a nail badly. Nail the wide piece as your structural member and let the narrow strip finish the look with adhesive only.
16. Built-In-Look Molding Surrounds Without Building Cabinetry
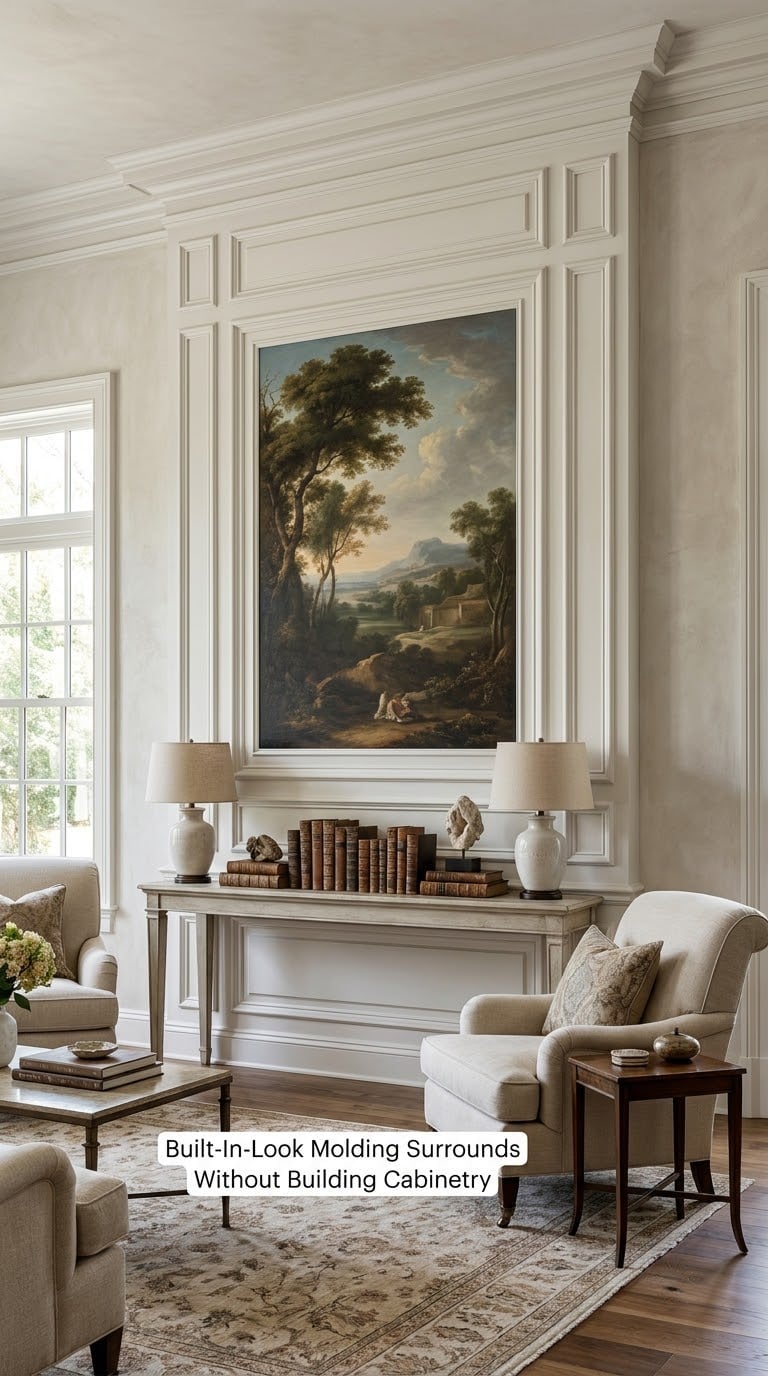
A layered surround with a wide casing on the outside and a narrow inset trim inside mimics expensive built-in millwork on a flat wall. It is the most convincing way to make a plain wall look like a fireplace wall or a paneled library.
How to do it:
- Build the outer casing 4 to 6 inches wide, then add a 1-inch inset trim 1/2 inch inside it.
- Set a flat backer panel behind the recess, sized to the inside edge of the inset trim, and fasten it to studs first.
- Frame the casing against the backer’s edge so the two profiles meet on a consistent plane.
- Check the whole layout against the wall for any outlet, switch, window return, or vent that would be covered.
- Build it up in primer, fill and caulk every seam, then paint casing and inset in one color for the full millwork effect.
Cost: Premium. Wide casing is the most expensive material per foot on this list, plus panel stock.
Difficulty: Moderate DIY, and comfortable only if you own a miter saw.
Time: 6 to 8 hours.
Good to know: Never let a surround cross a window, an outlet, or a door casing without checking you can still open and service them afterward.
17. Two-Tone Molding Frames for Depth Without More Wood
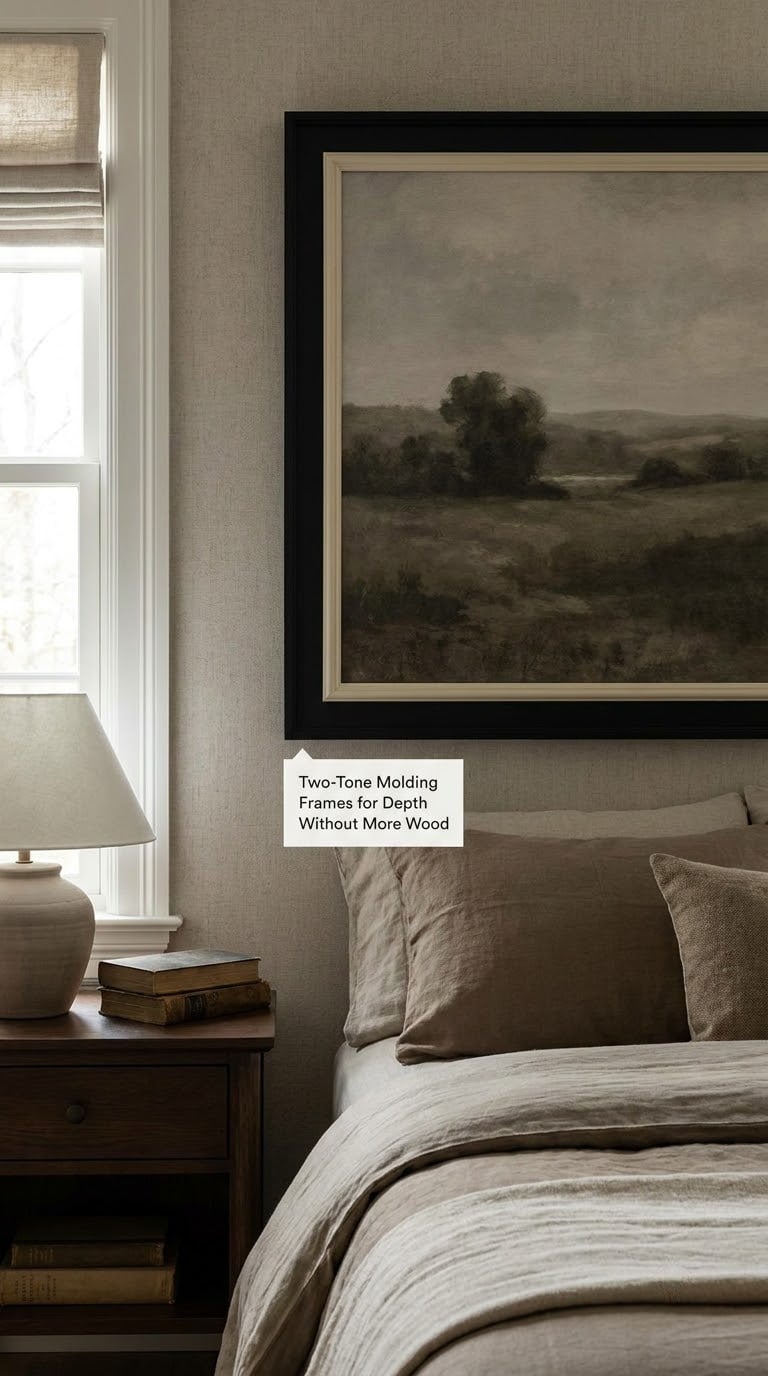
A darker outer profile with a lighter inner one creates depth using the same wall and the same two strips as a double frame. The contrast does the work that adding a third layer of molding would otherwise do, and it costs almost nothing extra.
How to do it:
- Pair a matte or satin dark paint on the outer profile with a warm off-white on the inner, and keep the sheens within one step of each other.
- Sample both colors on a board of the actual molding and let them dry fully overnight, since trim paint reads darker than wall paint.
- Paint the outer frame first and let it cure before installing the inner, so you are not working around wet trim.
- Keep the same 3 to 4 inch gap on all four sides, or the two-tone effect disappears.
- Tape the wall before cutting in the inner color, and use a fine brush along the light profile to keep the edge sharp.
Cost: Low. Two small paint samples cover a large frame.
Difficulty: Easy DIY.
Time: 3 to 4 hours.
Good to know: A renter version is two tones of removable vinyl trim. It holds the contrast well and comes down with a warm hairdryer and a steady pull.
18. Sculptural Molding Accents for Statement Walls
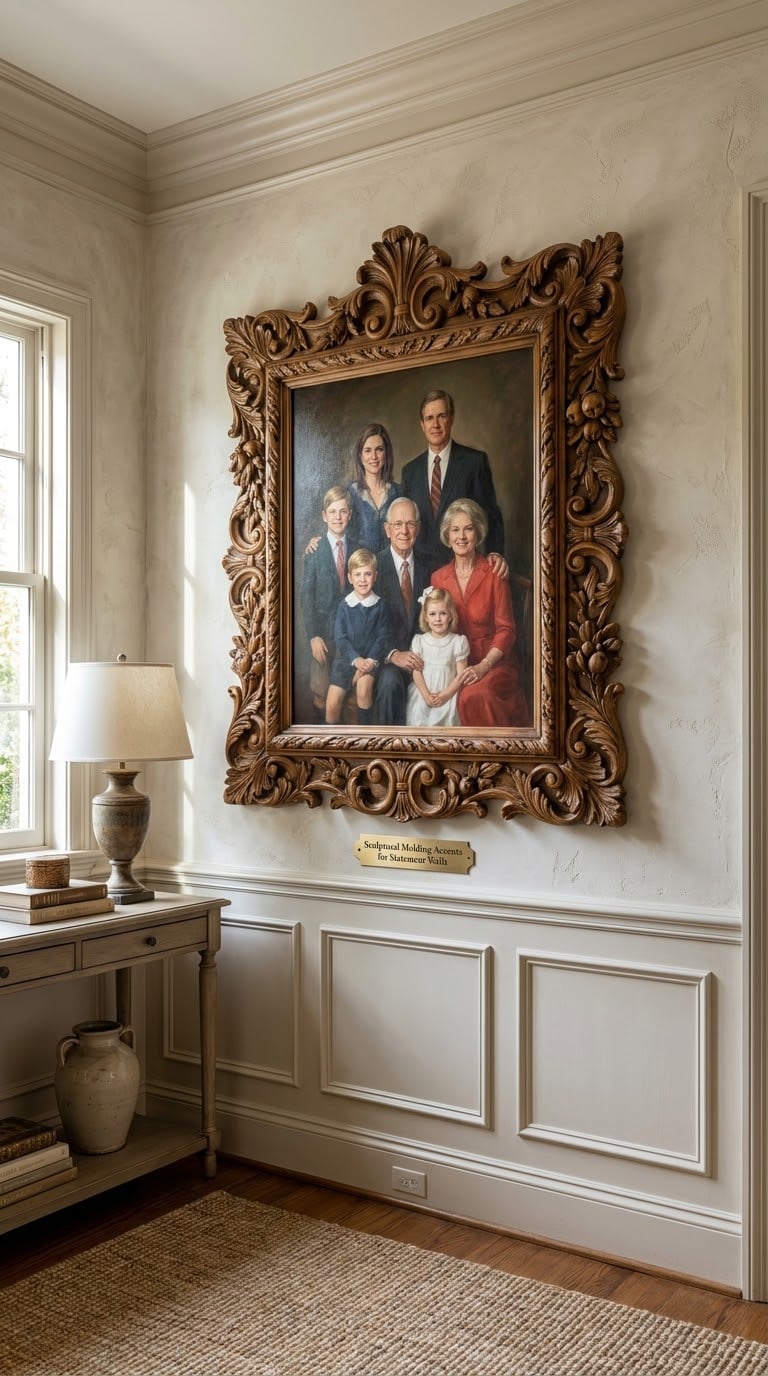
Carved rosettes, corner blocks, appliques, and dimensional trim turn a flat outline into an object. Used sparingly around a single focal wall, they read as period detail, and used everywhere they read as clutter.
How to do it:
- Choose one focal wall, and keep the sculpture to the corners and the top center.
- Reinforce anything heavy with a blocking panel screwed into studs, because a rosette on drywall alone will eventually let go.
- Glue decorative appliques to the flat back of a casing, then nail through the casing into studs to carry the weight.
- Fill around each applique and sand flush, since shadowed filler lines show badly under raking light.
- Paint the whole assembly one color so the carving reads through shadow rather than through color contrast.
Cost: Premium. Carved pieces and rosettes are sold individually and add up quickly.
Difficulty: Hire a pro for anything heavy or high on a wall.
Time: One to two days including finishing.
Good to know: On textured or uneven plaster, appliques bridge a dip and sit proud at the edges. Shim behind them with a thin furring strip so the face sits flat.
19. Lattice Molding Frames for Layered Geometry
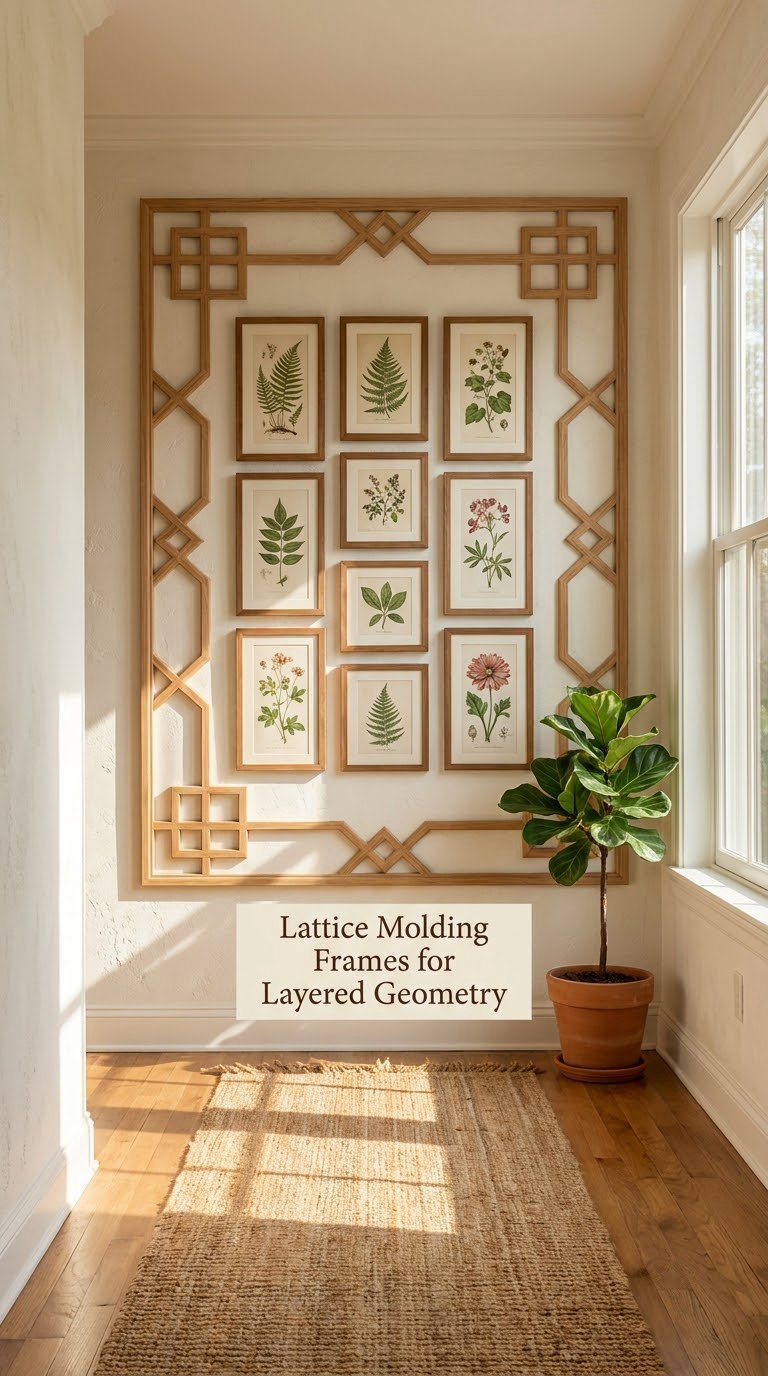
A lattice is a grid of thin strips inside a frame, and it multiplies the apparent number of panels without more wood. It is a good answer to a long hallway wall, where a row of empty panels can look repetitive on its own.
How to do it:
- Lay out the grid on paper first and compute the strip count from your finished opening, not the wall.
- Cut all strips to the same length in one batch, so they all land on the same centerline.
- Work from a fixed vertical reference and check each horizontal run against it with a level.
- Secure thin strips with a bead of construction adhesive first, then add a brad at each intersection, which keeps them from sliding while the adhesive sets.
- Fill the seams lightly and sand flush; thin strips show every ridge, so a heavy filler pass will need a second sanding.
Cost: Moderate. The count of thin strips is high but each one is short.
Difficulty: Moderate DIY.
Time: 6 to 8 hours.
Good to know: A simpler version for beginners is a single grid of two vertical and three horizontal strips. It looks intentional and takes a third of the time.
20. Metallic and Gesso Finished Molding for Formal Rooms
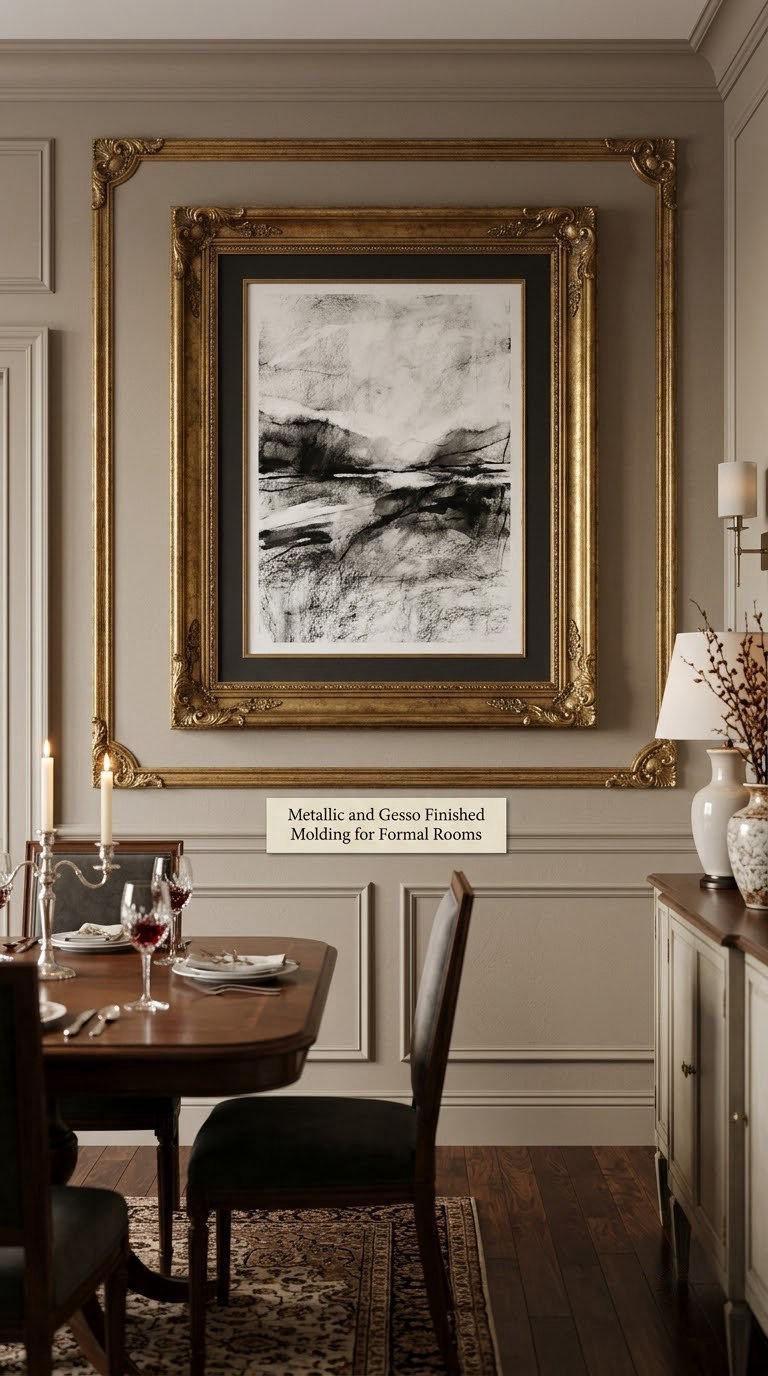
Antique gold, bronze, silver, and white gesso finishes make plain stock molding look chosen rather than default. Gesso, a matte mineral finish, is the quieter option and the one most often overlooked.
How to do it:
- Sand to 150 grit and wipe with a tack cloth; dust is what makes metallic paint look speckled.
- Apply a shellac-based bonding primer first, then two thin coats of your metallic finish, allowing four hours between.
- Lightly scuff with 220 grit between coats and knock the sheen down, which is what separates a smooth metallic from a sparkly one.
- Handle finished pieces by the edges, because fingerprints show on dark metallics more than any other finish.
- Install after the finish has cured 24 hours, and touch up nail holes with the same primer and paint rather than bare filler.
Cost: Moderate. Metallic paint costs more per gallon and needs a good primer.
Difficulty: Easy DIY with careful prep.
Time: 4 to 6 hours over two days.
Good to know: The budget alternative is warm off-white gesso, which gives the soft matte look designers ask for and hides wall patches as a bonus.
Planning Tips for Picture Frame Molding
- Sketch on paper before you tape. Drawing the design to scale catches proportion problems in two minutes that cost an hour of cutting later.
- Measure from the outside edge, always. Every length is the outside dimension of the frame, and inner pieces are the outside measurement minus the profile width.
- Space boxes 3 to 6 inches apart and hold 3 to 4 inches off trim. Keep that gap from baseboards, crown molding, casings, and adjacent walls, and use scrap blocks as physical spacers.
- Buy 10 to 15 percent extra. Four corners, four bad cuts, and one wall out of square is a normal afternoon, and spare stock is cheaper than a second trip.
- Skim coat textured walls. Flat molding and miters show every bump, and a light coat of drywall compound sanded to 120 grit is the difference between trim and stuck-on wood.
- Fasten into studs about every 12 inches. Hit studs with brads, keep adhesive as the backup between them, and if you rent, use removable mounting strips or peel-and-stick vinyl trim instead, testing the paint in a corner first.
If you are hanging art rather than a fireplace mantel, our entryway gallery wall ideas cover the layout that pairs well with a molding outline, and our picture ledge ideas work as a horizontal counterpoint to a vertical frame. For walls that lean maximal, our 1980s luxury interior ideas are a useful reference for how much pattern a room can carry.
Frequently Asked Questions
How far apart should picture frame molding boxes be?
Leave 3 to 6 inches between molding boxes and keep 3 to 4 inches between any box and the baseboard, crown molding, window casing, or an adjacent wall. The gap lets the shadow read separately on each side, which is the whole point of the detail. Use scrap wood blocks as physical spacers so the distance stays identical from panel to panel instead of drifting by eye.
What kind of molding should I use for picture frame molding?
Flat or ply cap trim for modern and minimalist rooms, fluted or bullnose profiles for transitional spaces, and egg-and-dart or carved baroque molding for traditional rooms. Crown molding works when you want the frame to reach the ceiling line. Buy 2- to 3-inch widths for most walls, and go narrower than 1 inch on a small wall so the panels do not crowd the corners.
How do I install picture frame molding without a miter saw?
Use a miter box and a hand saw, which is slower but cuts a true 45-degree joint on slim trim, or buy a pre-cut panel kit where the corners are already assembled. For a no-tool install, use peel-and-stick vinyl molding held with removable mounting strips, and dry-fit every corner on the floor first. Test tape on an inconspicuous patch before you commit, because fresh drywall paint can lift.
How do I fix uneven picture frame molding after painting?
Sand every proud caulk line and filled nail hole flush with 120 grit, then fill any remaining gaps and caulk again, letting it dry fully. Spot-prime the repairs and paint the entire panel in a single pass so the sheen reads evenly across the whole frame. If the unevenness is a mitred corner that no longer closes, glue and brad the frame from the back, add a corner bracket, and re-cut only that joint.
Is picture frame molding still in style?
Yes. The ornate versions that look dated in a 2005 build are the problem, not the technique. What is current is the flat, minimal profile, the color-drenched version where the wall and trim share one color, and oversized panels with a single statement piece. Pick a shallow profile and a light or matched color and it reads contemporary rather than colonial.
What is the difference between picture frame molding and wainscoting?
Picture frame molding outlines and decorates, usually in vertical panels that rise well above furniture height, and it needs nothing inside the outline. Wainscoting caps and protects the lower third of a wall, usually at 30 to 40 inches from the floor, and often covers a full room run. In cost and visual weight, wainscoting is the heavier project and picture frame molding is the lighter one.
Start with one wall and one idea. If you are drawn to the color-drenched look, tape a single outline in the color sample on the wall this weekend and live with it for a day. Whichever idea you pick, sketch it, tape it, then cut.