20 Above Kitchen Cabinet Decorating Ideas (October 2026)
Most kitchens have one surface nobody uses: the strip of wall between the top of the upper cabinets and the ceiling. Left bare it reads as an unfinished remodel, and filled edge to edge it reads as clutter. These 20 above kitchen cabinet decorating ideas cover the middle ground, from no-buy swaps you can finish in an afternoon to trim and paint work that makes the gap look built in.
The thing that trips most people up is scale. A 12-inch vase that looks generous on the counter looks lost at 8 feet up, and three small pieces in a row read as noise. Measure first, buy fewer and larger second. If you want color ideas for the rest of the room, start with 20 purple kitchen ideas for a bolder cabinet run or retro kitchen ideas that hold up today.
Contents
20 Above Kitchen Cabinet Decorating Ideas at a Glance
Costs are US ranges and vary a lot by region, whether you shop new or secondhand, and whether you already own the tools. Read the tier column as a starting point, not a quote.
| Idea | Cost tier | Difficulty | Time |
|---|---|---|---|
| 1. Under-cabinet lighting | Budget to mid-range | Easy DIY (pro for wiring) | 2 to 3 hours |
| 2. Oversized greenery | Budget | Easy DIY | 1 hour plus care time |
| 3. Floating shelves | Mid-range | Moderate DIY | 3 to 4 hours |
| 4. Cohesive art display | Mid-range | Easy DIY | 2 to 3 hours |
| 5. Serving tray vignette | Budget | Easy DIY | 20 minutes |
| 6. Shallow baskets | Budget | Easy DIY | 1 hour |
| 7. Colorful canisters | Mid-range | Easy DIY | 45 minutes |
| 8. Open-front storage boxes | Budget | Easy DIY | 1 hour |
| 9. Cookbook collection | No-buy to budget | Easy DIY | 30 minutes |
| 10. Neutral ceramic vases | Mid-range | Easy DIY | 1 hour |
| 11. Large decorative clock | Mid-range | Easy DIY | 45 minutes |
| 12. Decorative towel rail | Budget | Easy DIY | 1 to 2 hours |
| 13. Utensil display rail | Budget | Easy DIY | 1 hour |
| 14. Seasonal rotation | No-buy to budget | Easy DIY | Afternoon per season |
| 15. Accent paint section | Budget to mid-range | Easy DIY | 1 to 2 days |
| 16. Extended backsplash pattern | Mid-range | Moderate DIY | 1 to 2 days |
| 17. Glass-front tableware display | No-buy to budget | Easy DIY | 1 to 2 hours |
| 18. Decorative cabinet trim | Mid-range | Moderate DIY | 4 to 6 hours |
| 19. Mirrored panels | Mid-range | Moderate DIY | 2 to 3 hours |
| 20. Mini gallery of frames | Budget to mid-range | Easy DIY | 3 to 4 hours |
1. Add Under-Cabinet Lighting
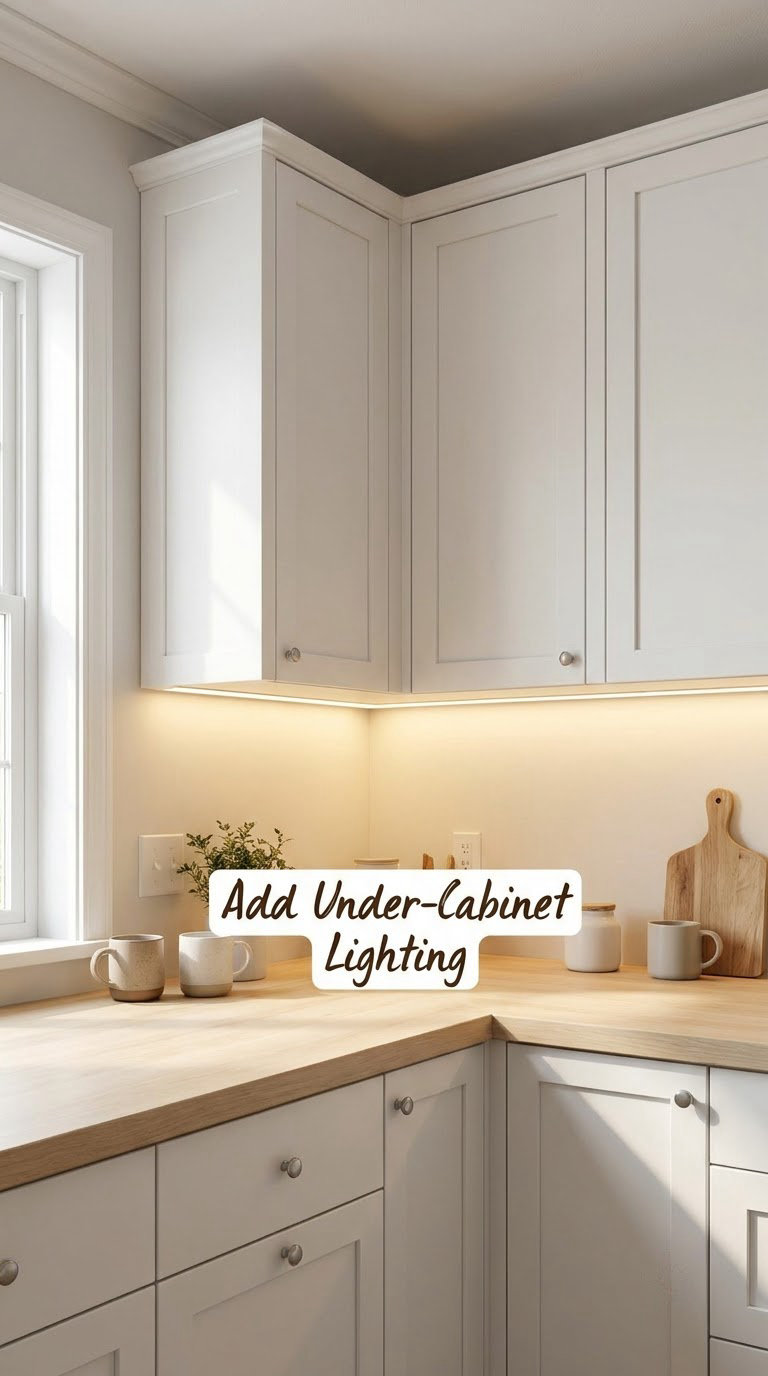
Warm LED strips under the upper cabinets fix a real problem, which is why this is where most people should start. Face-of-cabinet lighting removes the shadow your ceiling light casts on the counter, and the line of light visually finishes the top edge of the cabinet run.
How to do it: measure the cabinet run and cut strip to length at 6 to 12 inch intervals so the light stays even. Peel-and-stick kits with a plug-in transformer need no electrical work at all. Hardwired or under-cabinet hardwired fixtures do, and a permit may apply depending on your city.
Pick 2700K to 3000K for warm white. Anything cooler than 4000K reads blue against wood and stone.
Cost tier: budget to mid-range. Difficulty: easy DIY, or hire a pro for anything hardwired. Time: 2 to 3 hours.
Good to know: nothing above the cabinets blocks a recessed can or a hood vent. Check before you decorate, not after.
How to Use Lighting in 20 Above Kitchen Cabinet Decorating Ideas
Treat lighting as a function, not as decor. It does not add storage and it should not carry visual weight in the room, so keep it low-profile and tucked behind the cabinet lip where you see glow, not hardware.
Diffused strip beats bare bulbs every time. If your kit has visible diodes, look for a channeled or frosted option, or buy an opaque diffuser cover to slide over the strip.
2. Display Oversized Greenery
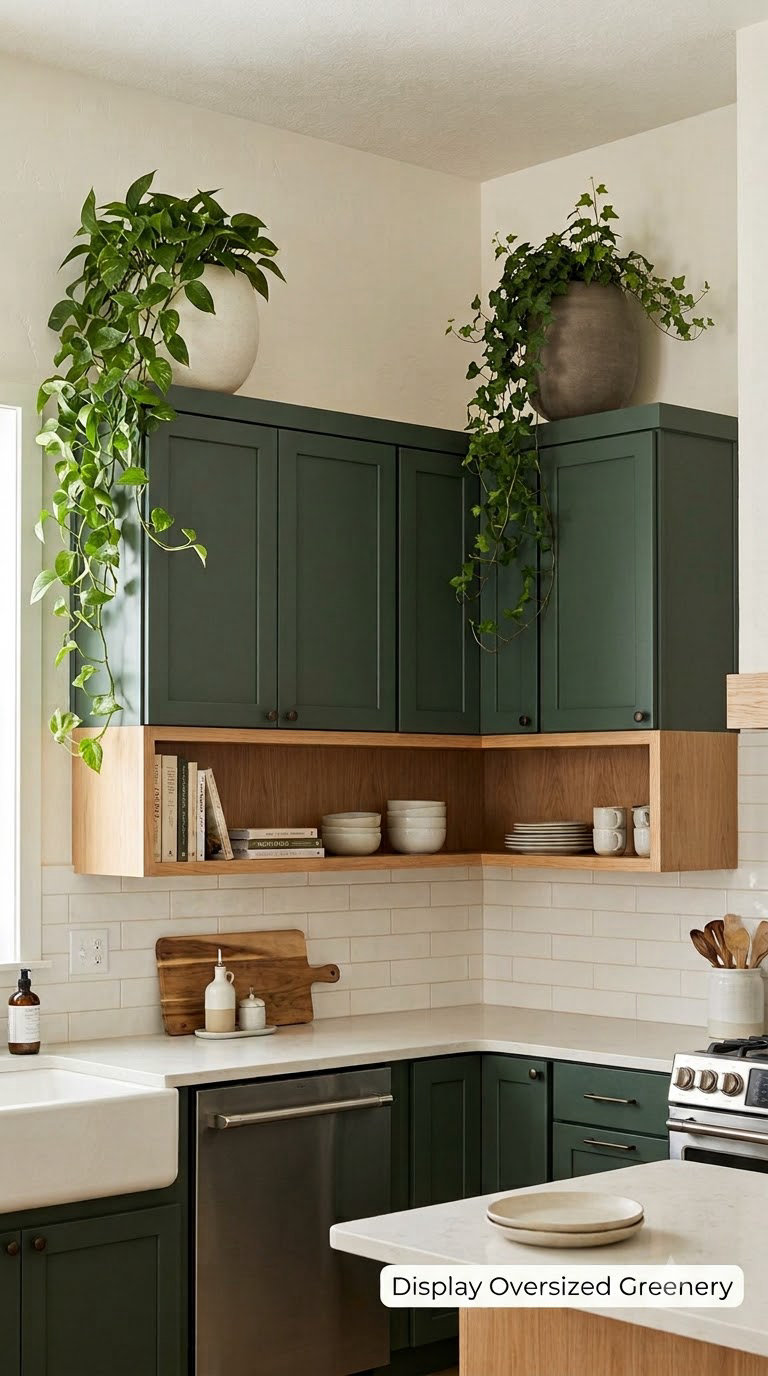
One or two tall trailing plants do more for an awkward gap than any collection of small pieces. The vertical line breaks up the flat cabinet line, and trailing vines soften a hard corner.
How to do it: choose pots 8 to 10 inches tall so the plant mass clears the cabinet top by enough to read as intentional. Place at the ends of the run, not evenly spaced, unless the run is very long. Check light: most kitchens need a grow light or a swap-in rotation for full plants.
Water weekly in summer, monthly in winter for most varieties. Use a liner so the pot does not sit in water.
Cost tier: budget. Difficulty: easy DIY. Time: 1 hour, then ongoing care.
Good to know: a cabinet run near a cooktop or vent collects grease, and a dusty plant makes that worse. If you skip live plants, high-quality faux trailing stems solve the same visual problem without watering.
3. Install Simple Floating Shelves
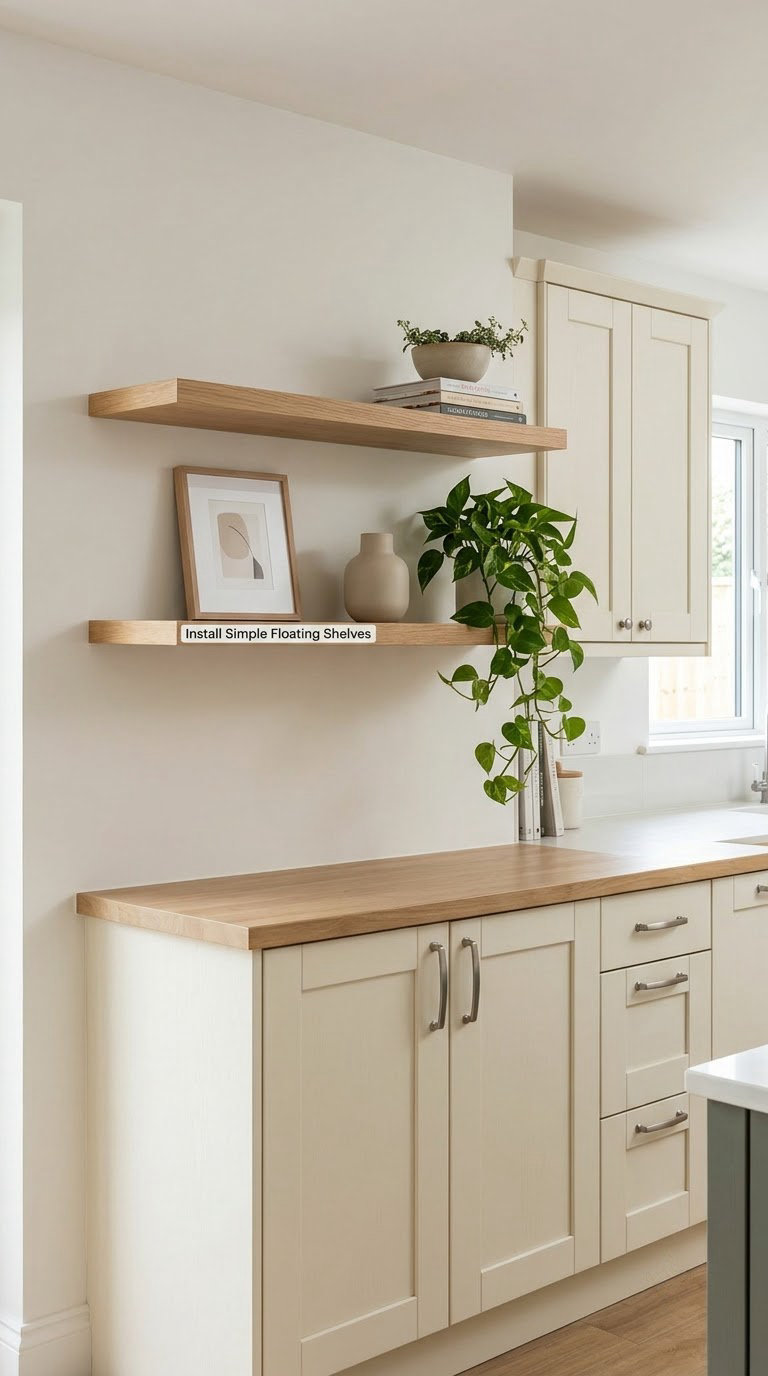
Floating shelves are the workhorse of this space because they give you a surface without a visible bracket line. Two or three narrow boards turn dead wall into display real estate.
How to do it: choose boards 6 to 9 inches deep so they do not cast a heavy shadow line. Space them 10 to 14 inches apart vertically. Mark studs with a stud finder and place brackets within 2 inches of one, then fasten into drywall anchors rated for the load.
Weight check: most residential shelving hardware is rated 15 to 30 pounds, so keep glass and ceramics off and lean on books and baskets.
Cost tier: mid-range. Difficulty: moderate DIY. Time: 3 to 4 hours.
Good to know: renters can skip the drilling with a tension-mounted shelf system rated for light objects, or by styling the cabinet tops only.
4. Create a Cohesive Art Display
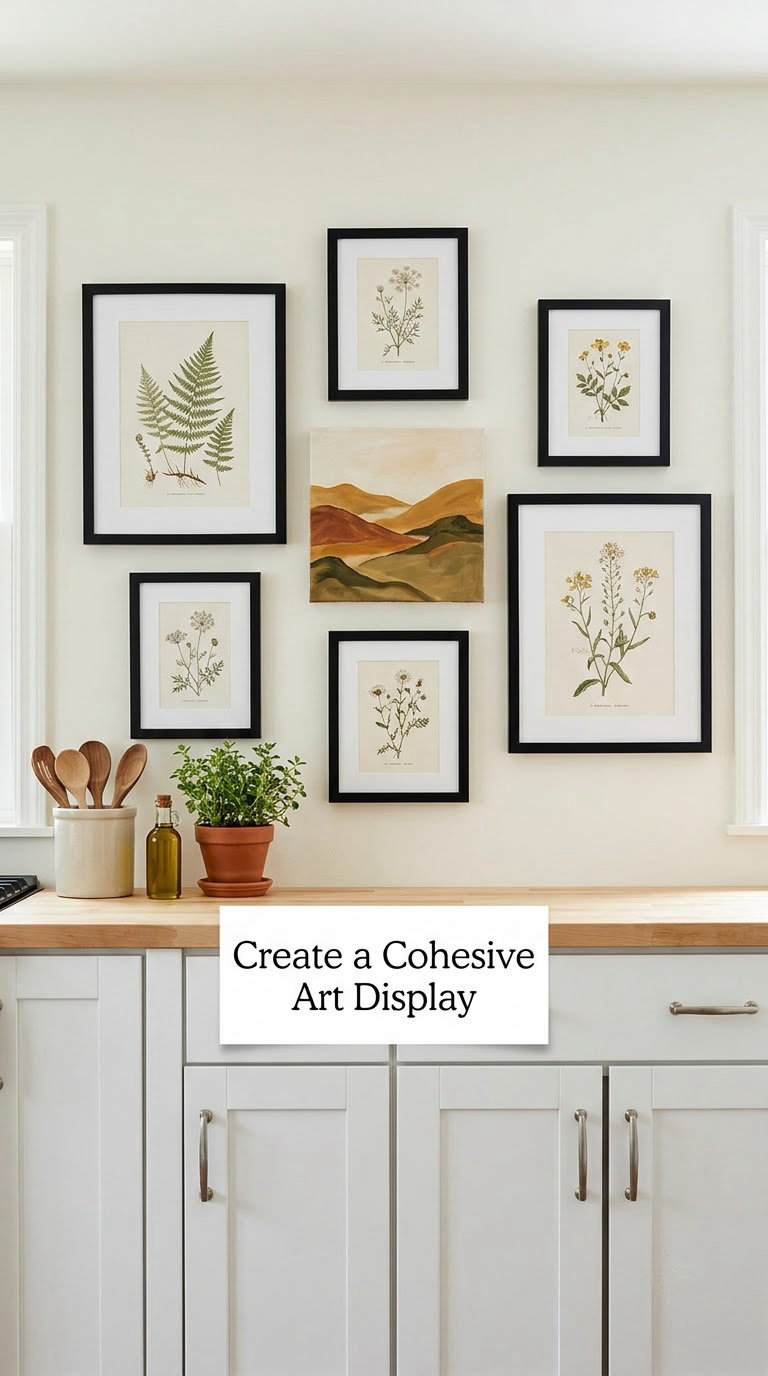
Art hung over cabinets works when it reads as one composition, not when it reads as a scavenged wall. Consistency in frame color or paper color does more than any layout trick.
How to do it: pick 3 to 5 pieces and unify them with matching frames or a shared mat color. Scale the grouping so the total width is 60 to 75 percent of the cabinet run below it. Hang the center of the arrangement 8 to 10 inches above the cabinet tops.
Use two nail points and a level rather than measuring each frame.
Cost tier: mid-range. Difficulty: easy DIY. Time: 2 to 3 hours.
Good to know: matting prints from a local frame shop is often cheaper than buying pre-framed art, and it keeps sizes consistent.
5. Style a Serving Tray
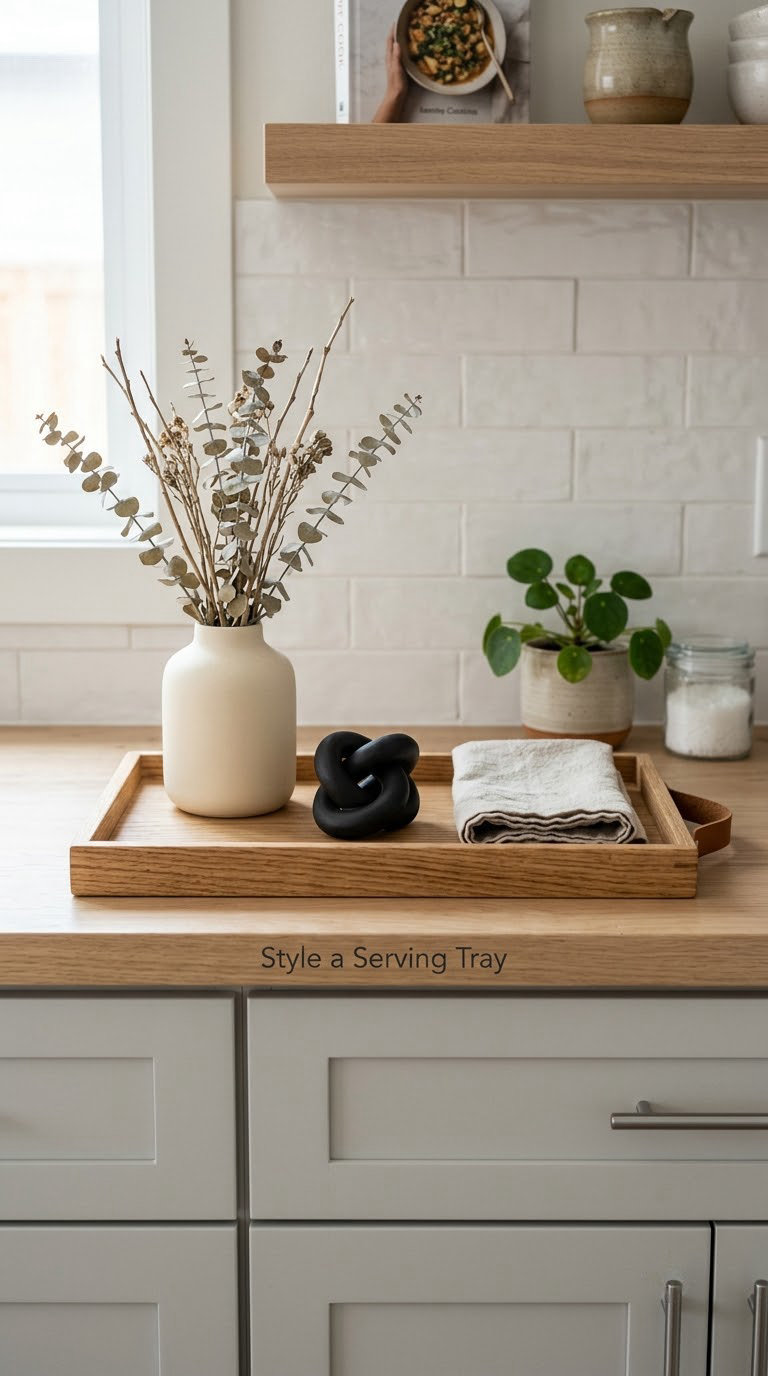
A single tray turns three unrelated objects into one intentional grouping. This is the cheapest idea on the list and the one that most reliably makes a short gap look styled.
How to do it: choose a tray sized so at least 2 inches of empty tray shows on every side, 16 to 22 inches wide for most gaps. Set a tall piece at the back, a medium at one side, and a low object at the front. Three items, no more.
Group odd-numbered pieces instead of facing pairs toward the room.
Cost tier: budget. Difficulty: easy DIY. Time: 20 minutes.
Good to know: a tray hides the dust that settles on top of cabinets and gives you one thing to lift down when you clean.
6. Add Shallow Baskets
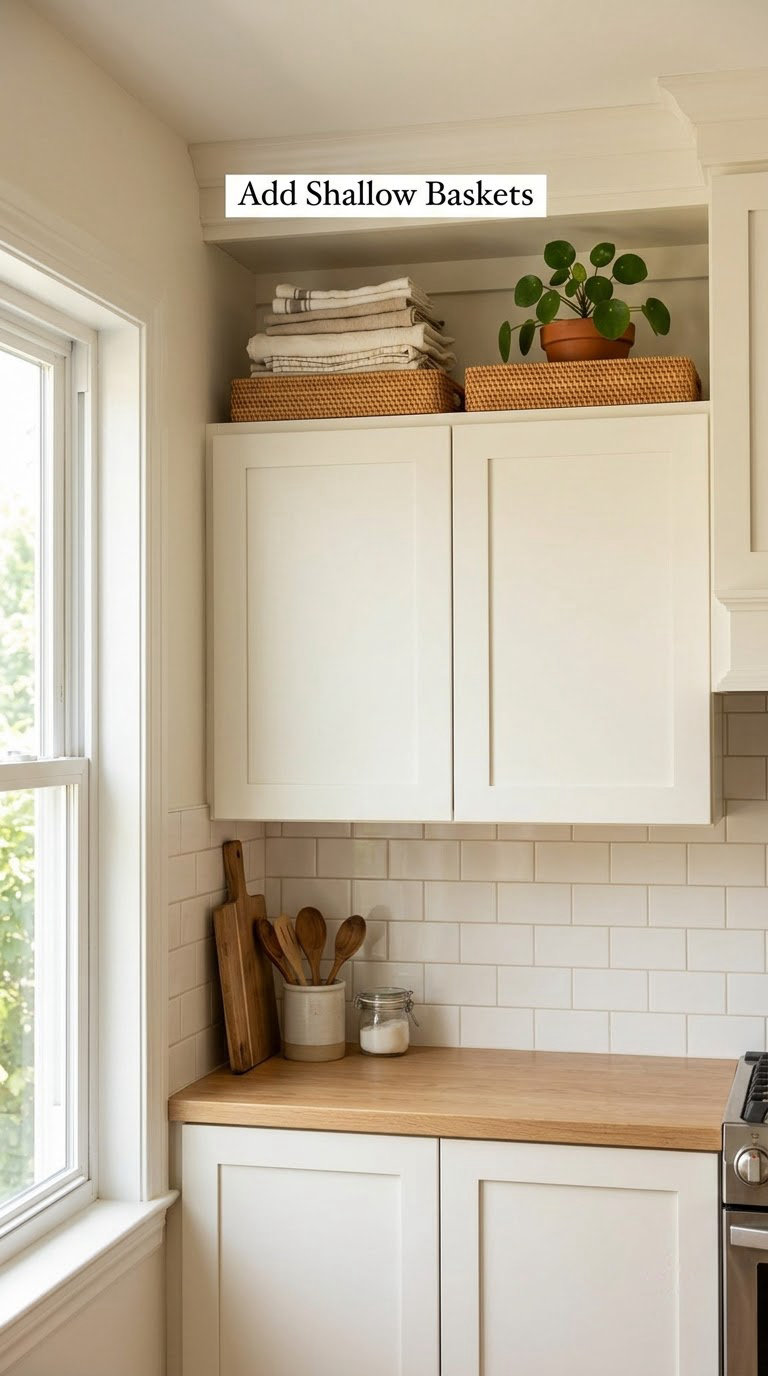
Woven baskets add texture that every smooth cabinet surface is missing, and they hide the plastic bins you were using anyway.
How to do it: measure the flat top of the cabinets first, then buy baskets 1 to 2 inches narrower than that depth so they sit fully supported. Lean them against the wall with the opening facing out and nothing stacked on top. Keep weights light.
Stock baskets with tea towels, dish towels, or firewood if the room suits it.
Cost tier: budget. Difficulty: easy DIY. Time: 1 hour.
Good to know: never store cookware or anything breakable above head height. Baskets give the illusion of capacity without structural strength.
7. Display Colorful Canisters
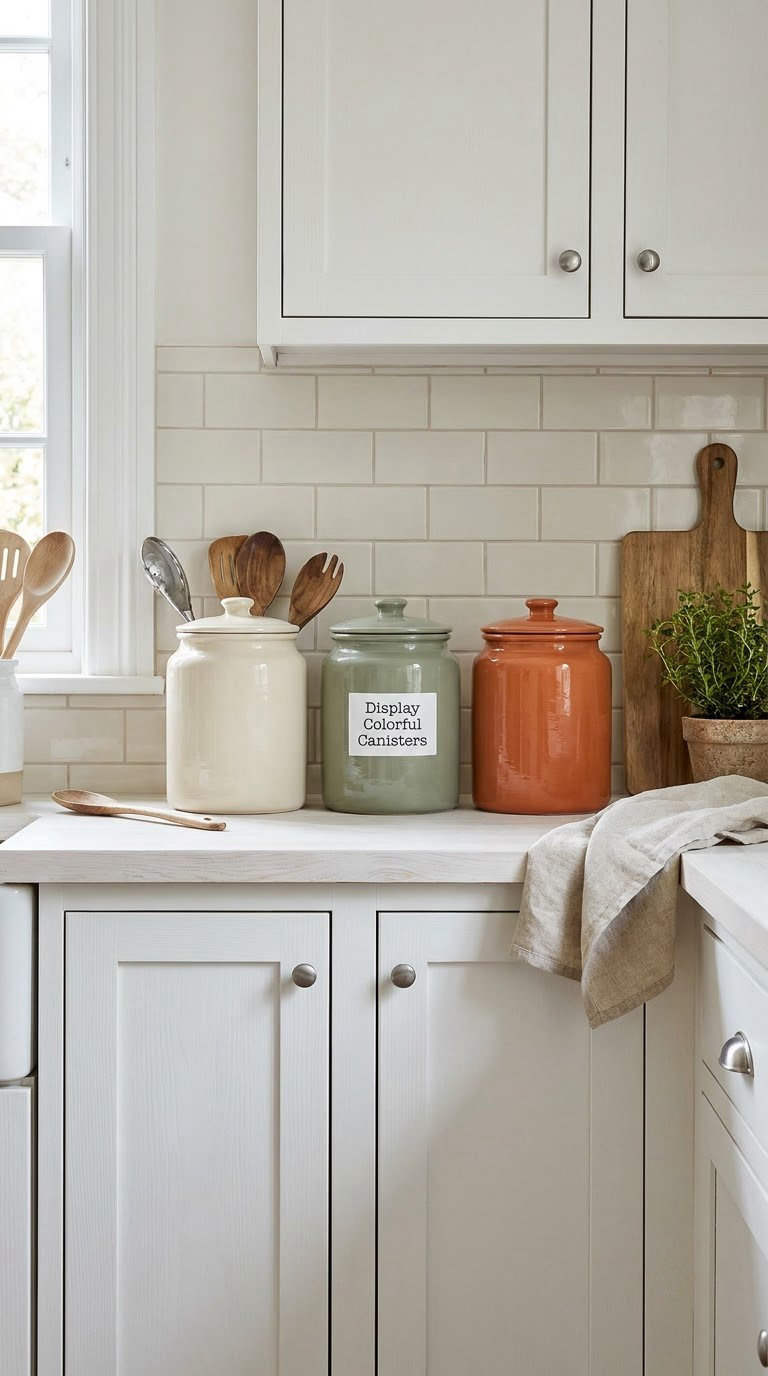
A canister set is a fast way to put color above the cabinets when the rest of the room is neutral. Airtight lids mean they earn their space instead of being pure decoration.
How to do it: measure the cabinet depth plus 2 inches of clearance, then choose sets whose widest can fits. Odd-numbered sets of three look more relaxed than pairs. Keep heights within about 4 inches of each other so the row stays even.
Fill them with something you actually use, like coffee, sugar, or pasta.
Cost tier: mid-range. Difficulty: easy DIY. Time: 45 minutes.
Good to know: matching canister sets in the wrong finish can date a room fast. Muted glaze reads current; glossy bright colors read retro on purpose.
8. Arrange Open-Front Storage Boxes
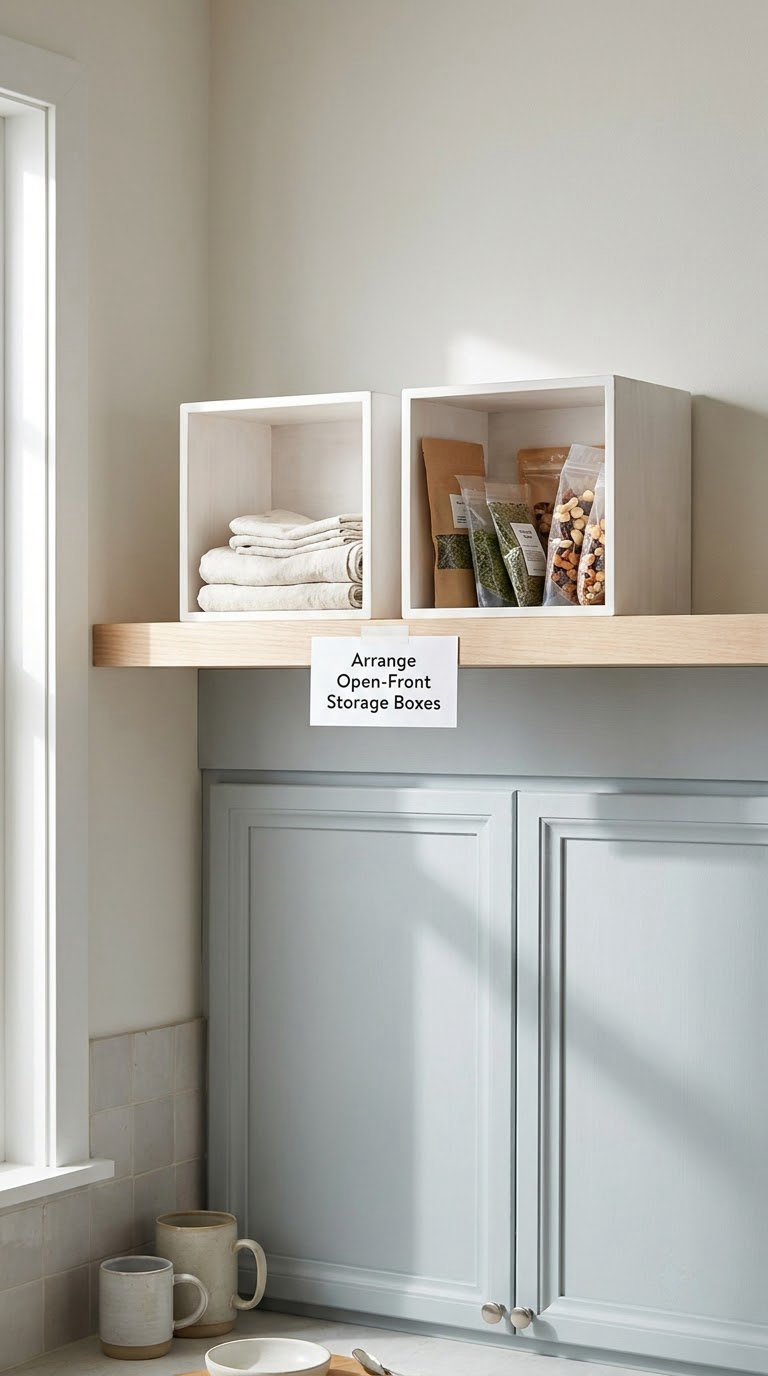
Open-front boxes are where this space stops being a display area and starts earning its keep. They look deliberate because the contents are part of the styling.
How to do it: measure cabinet depth and pick boxes 2 to 3 inches shorter than it. Line them with a cut-to-fit liner so the contents stand upright and read as a pattern. Label the front edge with a small label maker, and check weight limits if you are using floating shelves rather than cabinet tops.
Group by category, not by color, or the shelf starts looking like a warehouse.
Cost tier: budget. Difficulty: easy DIY. Time: 1 hour.
Good to know: use food-safe liners if you are storing open packets, and skip anything heavy. A loaded box on a shelf is the classic failure point.
9. Showcase a Cookbook Collection
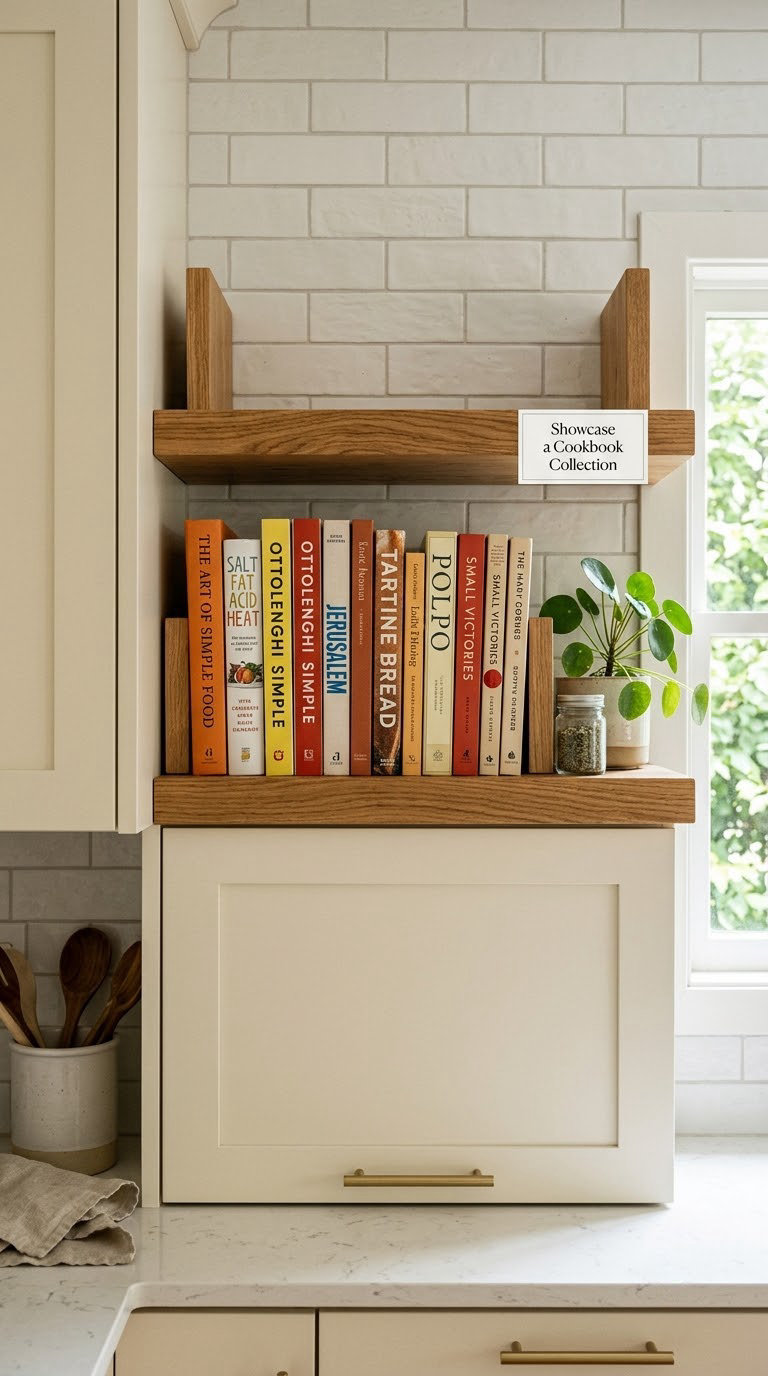
Cookbooks have color, height variety, and a story built in, which is more than most decor brings to a gap.
How to do it: stand books spine-out and sort by spine color if you want a gradient look, or by size for a calmer one. Use two bookends per run of five to seven books so the row cannot lean. Protect dust covers with clear wrap if the books are collectible editions.
Rotate the selection seasonally so the color band changes.
Cost tier: no-buy to budget if you already own them. Difficulty: easy DIY. Time: 30 minutes.
Good to know: dust jackets on old cookbooks fade fast in direct sun. If your gap gets strong light, display modern paperbacks instead.
10. Group Neutral Ceramic Vases
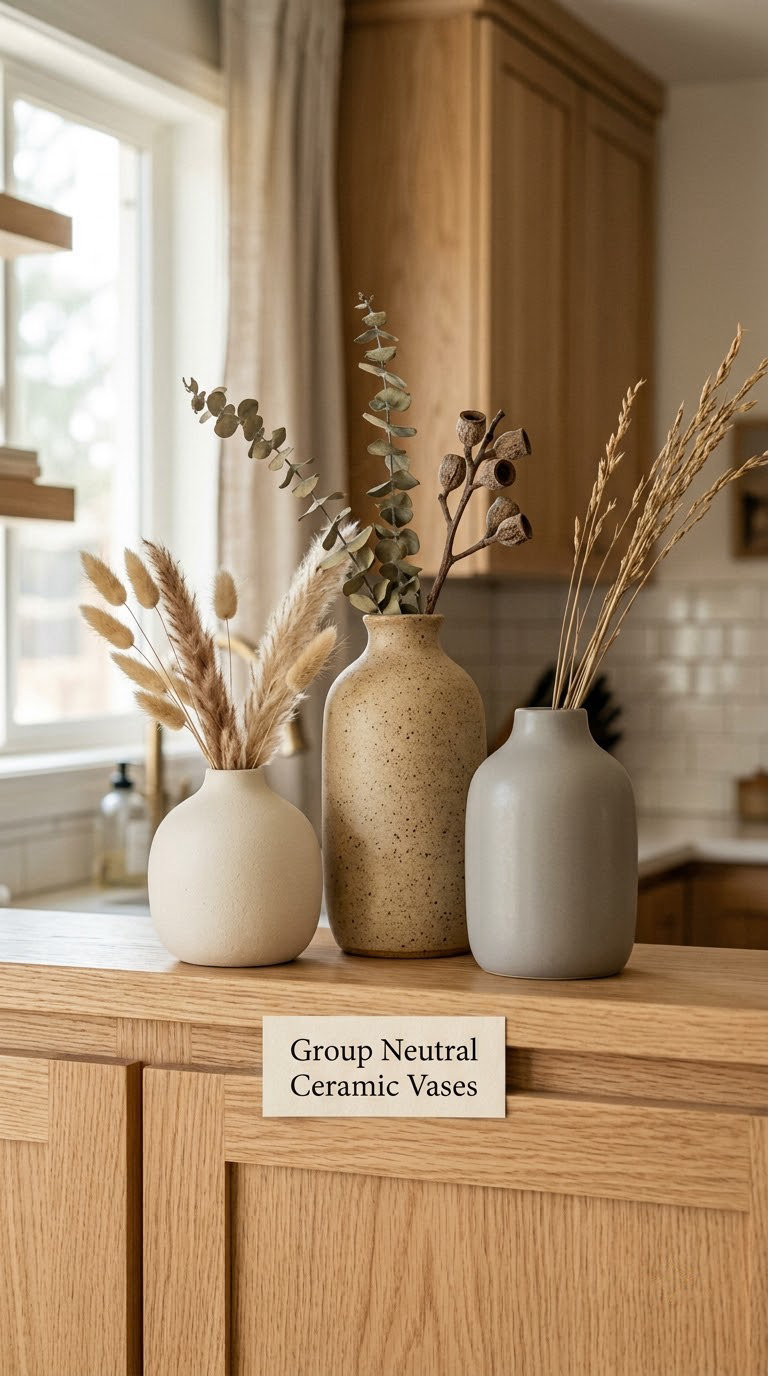
Three vases in the same color family give you shape variation without visual chaos. It is the classic answer for a kitchen where the cabinets already carry strong color.
How to do it: choose one wide base piece, one mid-height, and one tall, with the tallest at the back. Keep them within 12 inches of each other in height so the group reads as a set. Vary shape more than color.
Stack books or crates underneath the shorter pieces to lift them into view, which is the cheapest fix for a gap that sits above your eye line.
Cost tier: mid-range. Difficulty: easy DIY. Time: 1 hour.
Good to know: empty vases collect dust and dust shows on matte glaze. A quick blow-out every few weeks keeps them looking fresh.
11. Add a Large Decorative Clock
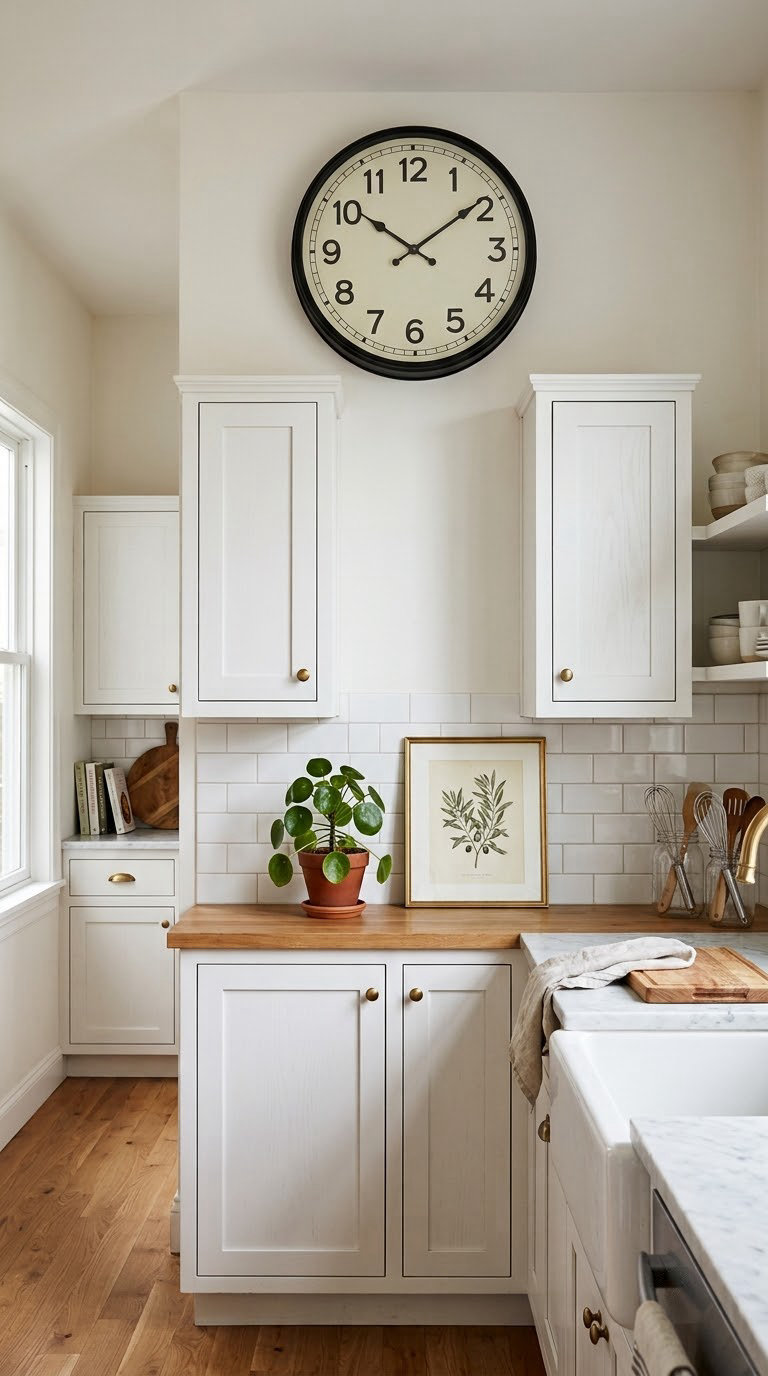
One clock is a focal point that works with no other pieces at all. It reads as a design decision rather than as storage or as a collection.
How to do it: for a cabinet run 6 to 8 feet wide, choose a diameter of 24 to 36 inches so it holds the wall rather than floating on it. Center it over the run and hang it 8 to 12 inches above the cabinet tops. Use a clock mechanism with standard battery cells so you never need wiring.
Balance it with one low object on one side, not a matching pair.
Cost tier: mid-range. Difficulty: easy DIY. Time: 45 minutes.
Good to know: a clock you cannot read from across the room is decoration with a ticking sound. Check the numeral size before you buy.
12. Hang Decorative Kitchen Towels
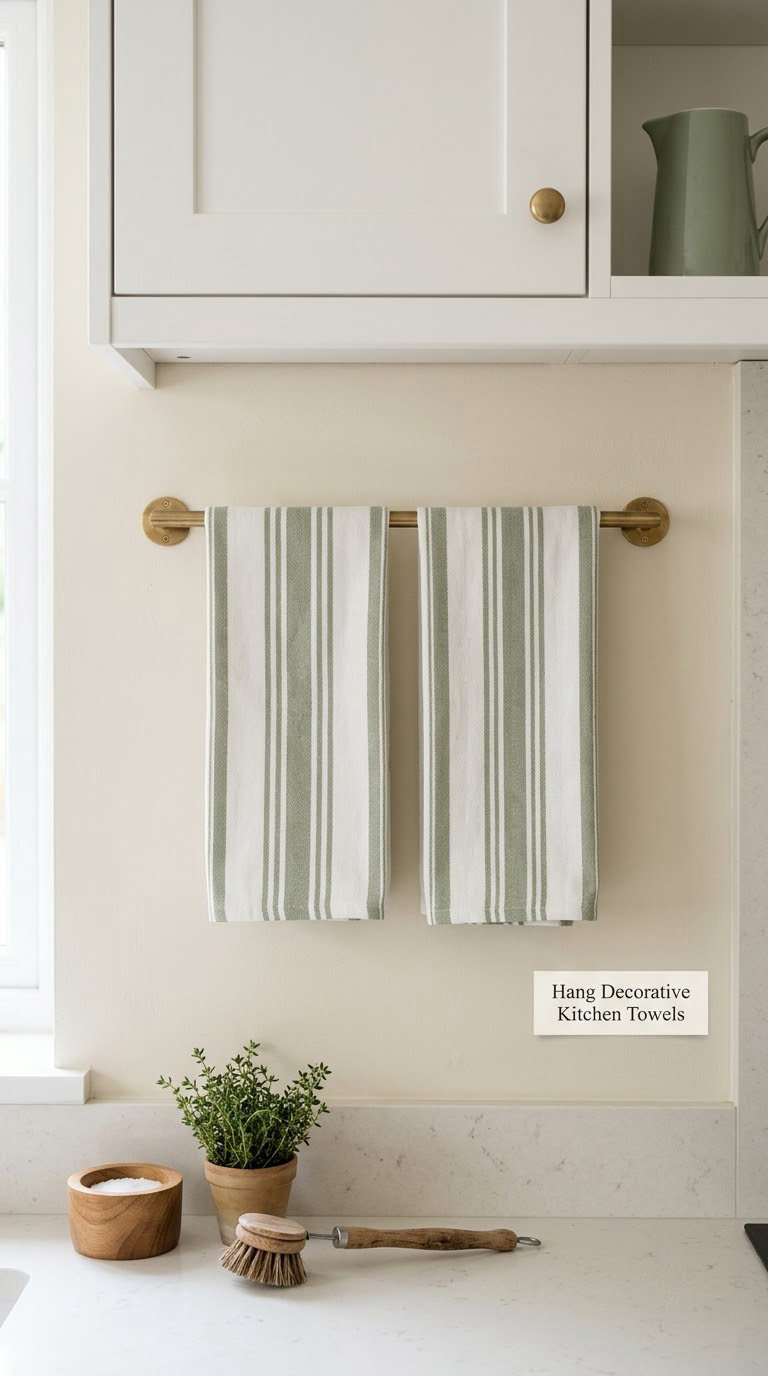
A slim rail adds pattern and a spot of color without using any of the horizontal surface. It works best in gaps you can reach comfortably.
How to do it: mount the rail on the wall just above the cabinet line, not on the cabinet face, so towels hang free. Space two towels with 3 to 4 inches between them. Most rails hold 10 to 20 pounds, so stay under that.
Choose cotton or linen weaves that you are willing to launder.
Cost tier: budget. Difficulty: easy DIY. Time: 1 to 2 hours.
Good to know: decorative towels hanging near a range pick up grease. Keep this idea on the far side of the room from your cooktop.
13. Install a Utensil Display Rail
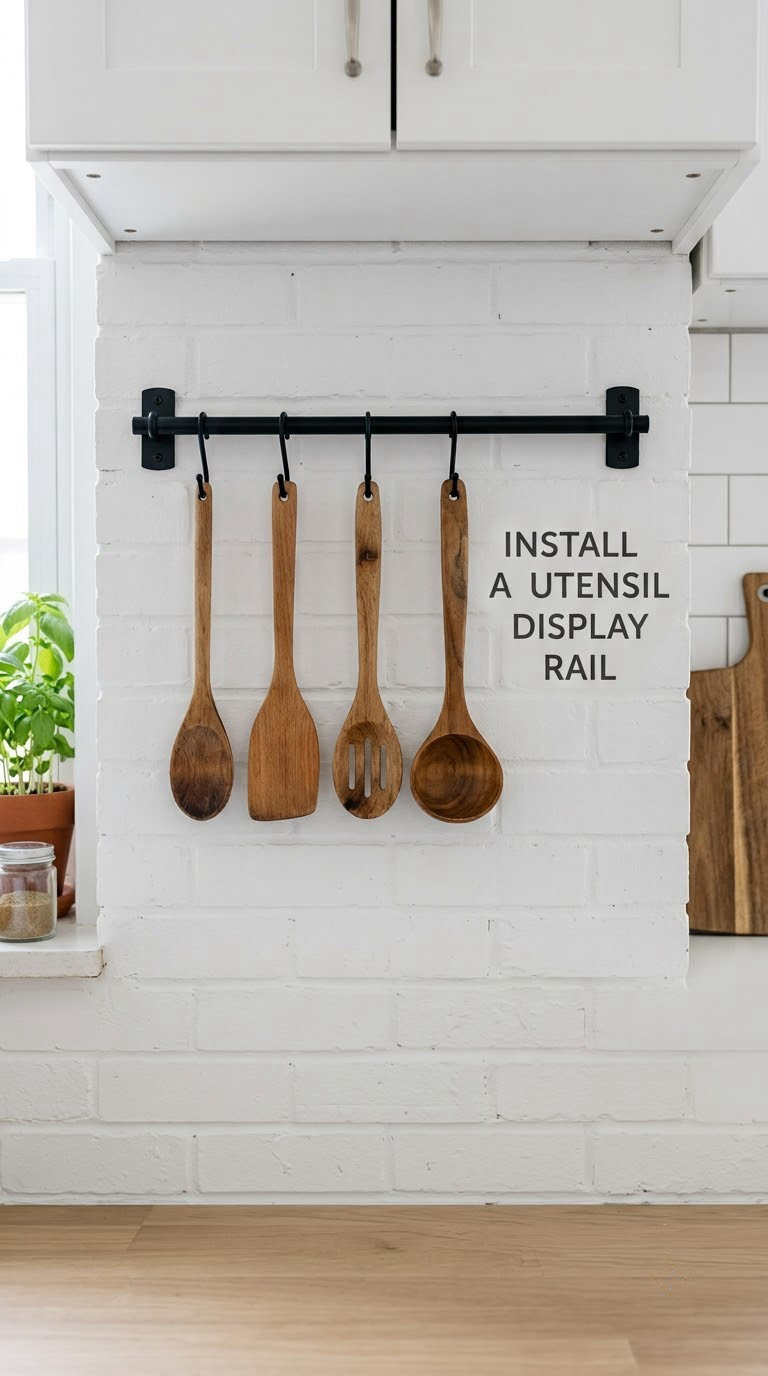
Hanging the tools you already own turns a storage problem into a styling opportunity. It reads better than a utensil crock because there is no bulky mass at the counter.
How to do it: leave 4 to 6 inches between hanging utensils so shapes stay legible. Anchor into studs, not drywall alone, and keep the rail on a wall you can reach without a stool.
Match utensil material to the kitchen: wood against warm cabinetry, or blackened steel against white.
Cost tier: budget. Difficulty: easy DIY. Time: 1 hour.
Good to know: if you have small children or a tall gap, skip this one. Hanging metal within reach at child height is a sharp-edge risk.
14. Curate a Seasonal Display
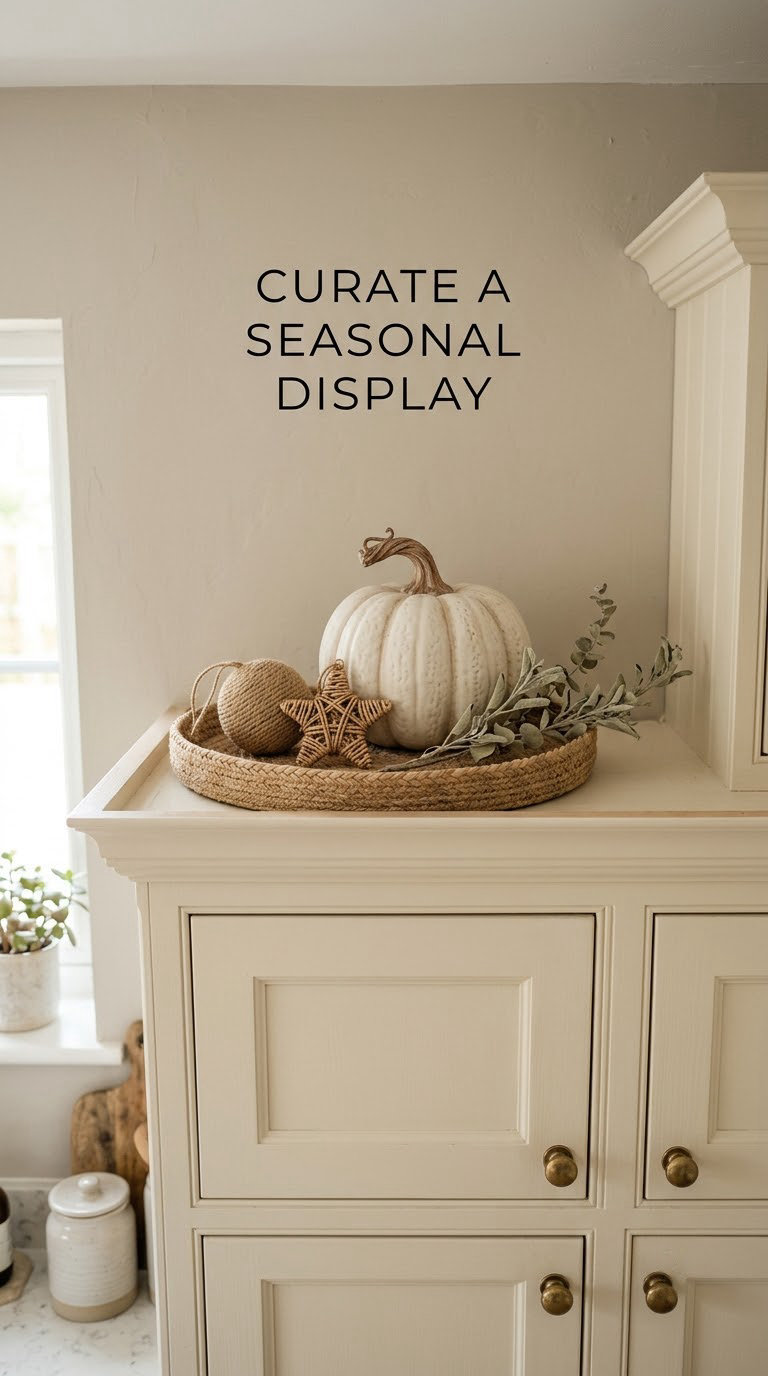
Seasonal styling keeps the space interesting without buying a second set of everything. One neutral base, three swappable accents, done.
How to do it: keep two permanent pieces and store the rest in a lidded bin under the cabinets. Build each seasonal vignette on a tray so swapping takes one move. Choose materials that survive a closet: felt, dried stems, ceramic, and sealed wood rather than fresh-cut.
Give yourself an afternoon per season for the full swap.
Cost tier: no-buy to budget if you reuse. Difficulty: easy DIY. Time: an afternoon per season.
Good to know: harvest and fall pieces collect dust fast, and fabric items stain in a kitchen. Anything you leave out for months should be wipeable.
15. Paint an Accent Section
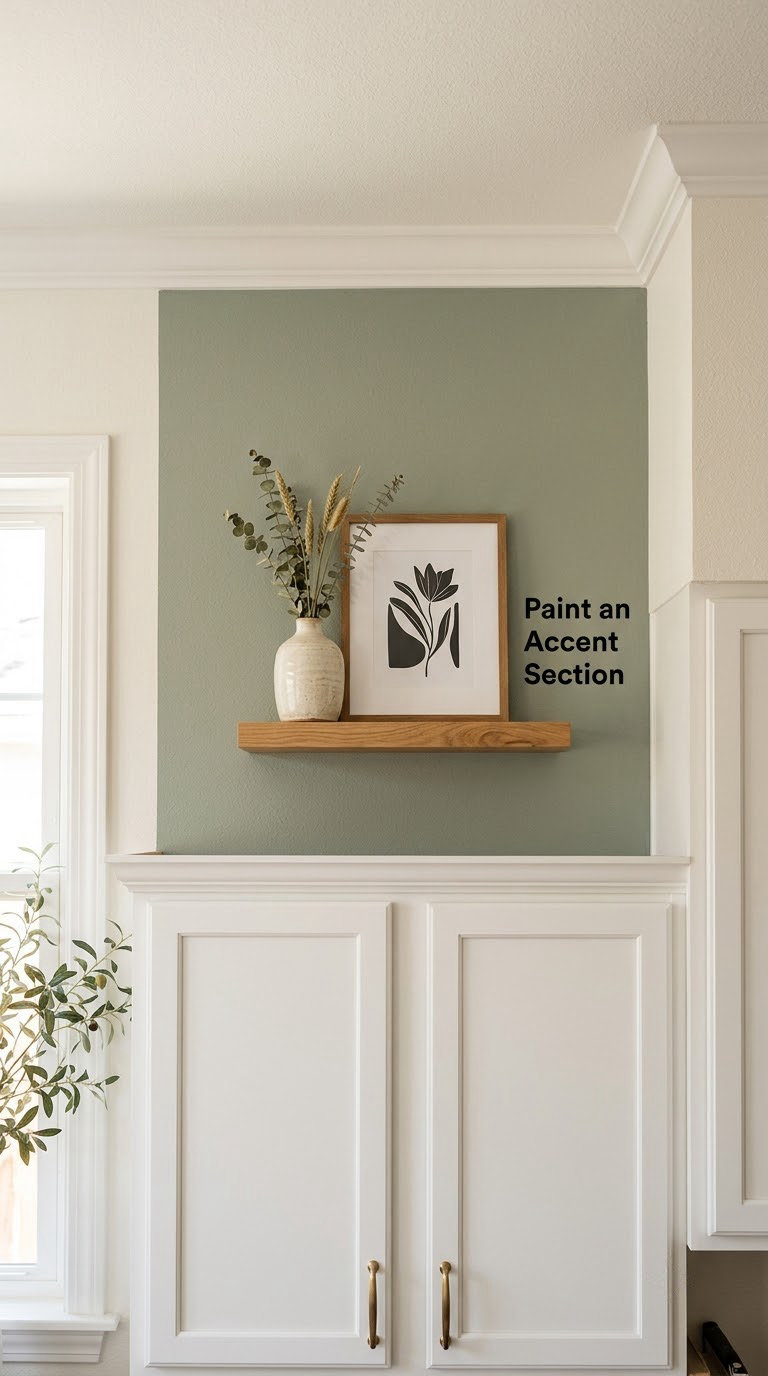
A contrasting color on the wall above the cabinets makes the gap look deliberate and visually shortens a tall room. It is the highest-impact idea that needs no tools beyond a roller.
How to do it: cut a clean line where the wall meets the cabinets and where it meets the ceiling, using painter’s tape for a sharp edge. Test on a 12-inch square first; paint colors shift dramatically next to a cabinet finish. Buy a sample pot rather than a gallon for the first coat.
Choose eggshell or satin for washable surface in a cooking space.
Cost tier: budget to mid-range. Difficulty: easy DIY. Time: 1 to 2 days including drying between coats.
Good to know: a contrasting color on the wall above white cabinets is a bigger commitment than it looks. Renters can use peel-and-stick wallpaper panels from the same color family instead.
16. Extend the Backsplash Pattern
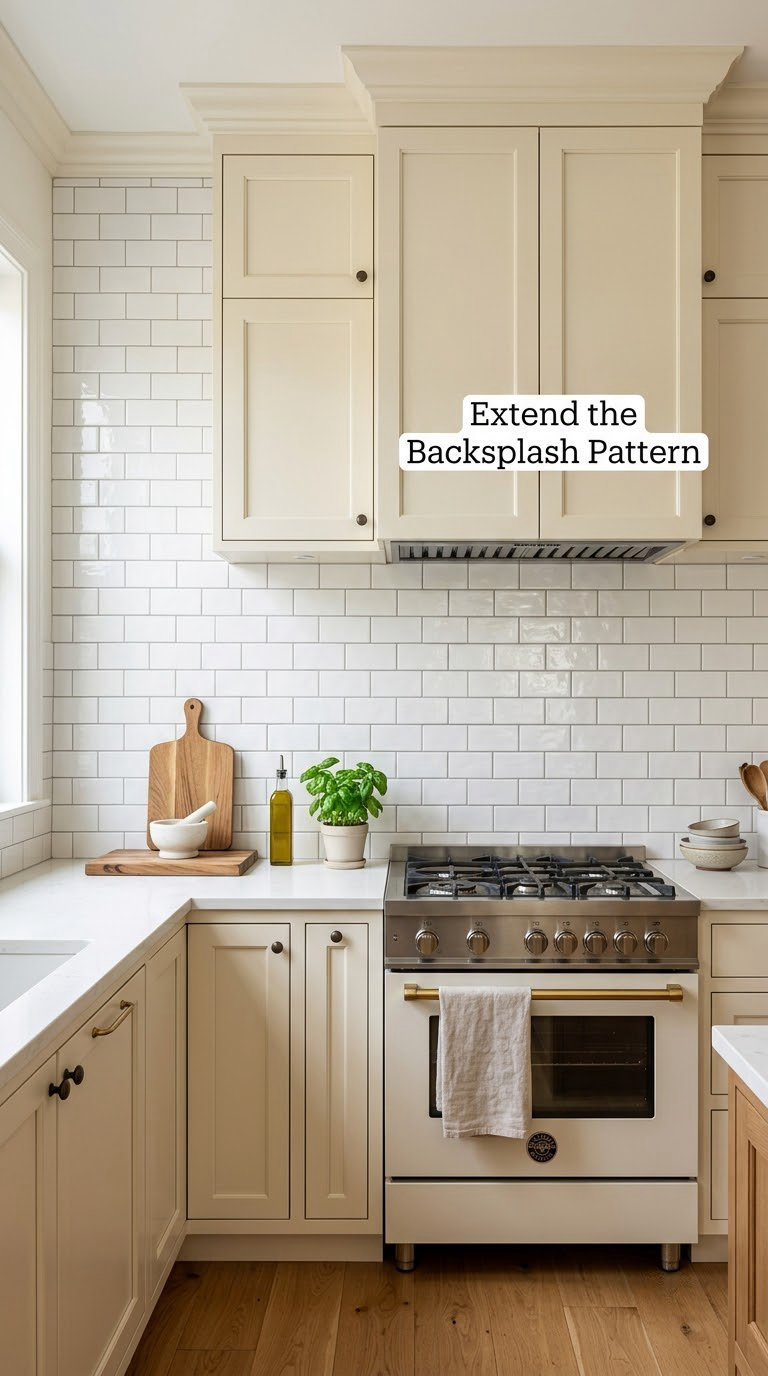
Carrying the backsplash material up to the cabinet line makes the upper wall feel like part of the kitchen instead of leftover paint. It is a strong move in older homes with plain drywall.
How to do it: real tile over drywall needs a backer board and thin-set, plus a full weekend. Peel-and-stick tile gets the same visual effect in an afternoon and lifts cleanly at move-out, which makes it the renter’s route. Align the pattern with the existing grout lines rather than starting a second rhythm.
Seal any exposed edges with grout or a silicone bead.
Cost tier: mid-range. Difficulty: moderate DIY. Time: 1 to 2 days.
Good to know: this is a heat-sensitive zone if your run is next to a range. Keep real tile well away from an open flame and use an adhesive rated for the surface.
17. Display Tableware in Glass Doors
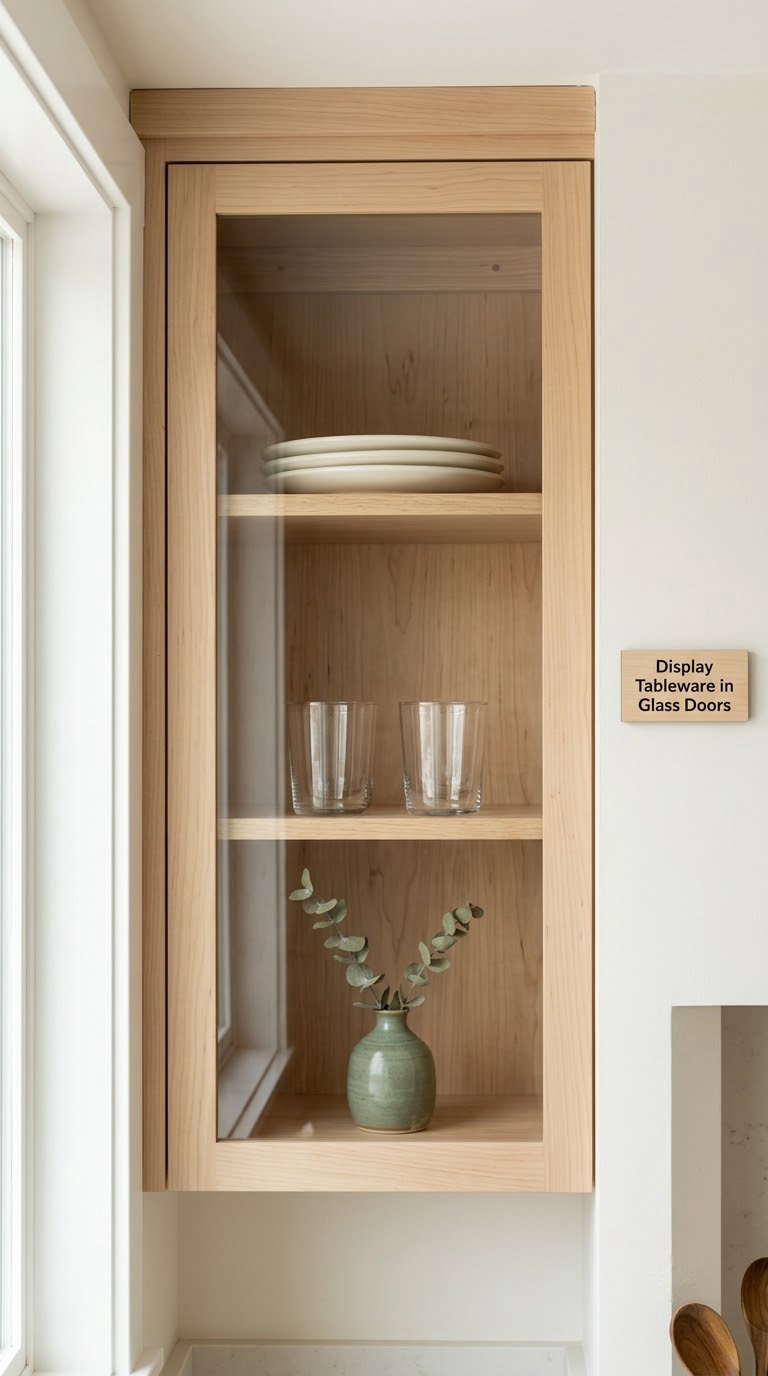
If you have a glass-front cabinet, you already have a display case built into the kitchen. Most people fill it with mismatched pieces and then wonder why it looks messy.
How to do it: line the shelves with plain liner or a scored liner so plates do not slide and the wood stays protected. Edit down to one collection with a common color, then space it with the odd gaps filled by negative space. Put the tallest pieces at the back where the glass gives the most depth.
Light the interior if the cabinet is dark.
Cost tier: no-buy to budget. Difficulty: easy DIY. Time: 1 to 2 hours.
Good to know: glass doors magnify dust and show fingerprints. A weekly wipe keeps the whole cabinet looking intentional.
18. Add Decorative Cabinet Trim
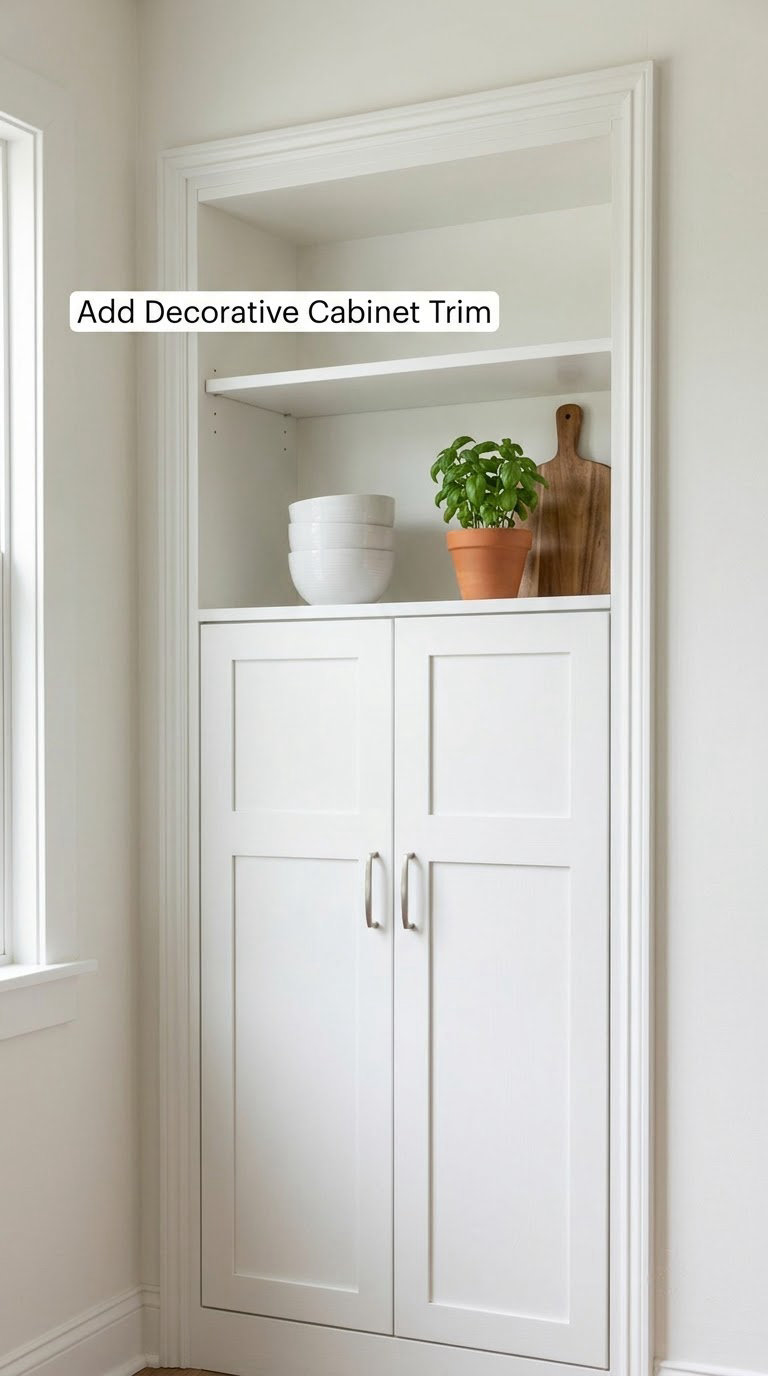
Lightweight molding bridges the gap between the cabinet boxes and the ceiling, which is the main reason above-cabinet spaces read as unfinished. It is a carpentry job, but a weekend one.
How to do it: measure the full width of the cabinet run plus the returns at each end, and buy trim 8 to 12 percent over. Cut miters with a fine-tooth handsaw or a miter saw, dry-fit every piece, then fasten into studs and use construction adhesive between joints. Nail every 8 to 10 inches into solid wood.
Fill, sand, and paint trim to match the cabinets for a built-in look.
Cost tier: mid-range. Difficulty: moderate DIY. Time: 4 to 6 hours.
Good to know: rent, and be honest about that. Nobody wants to fill nail holes and paint a wall on move-out day.
19. Hang Mirrored Panels
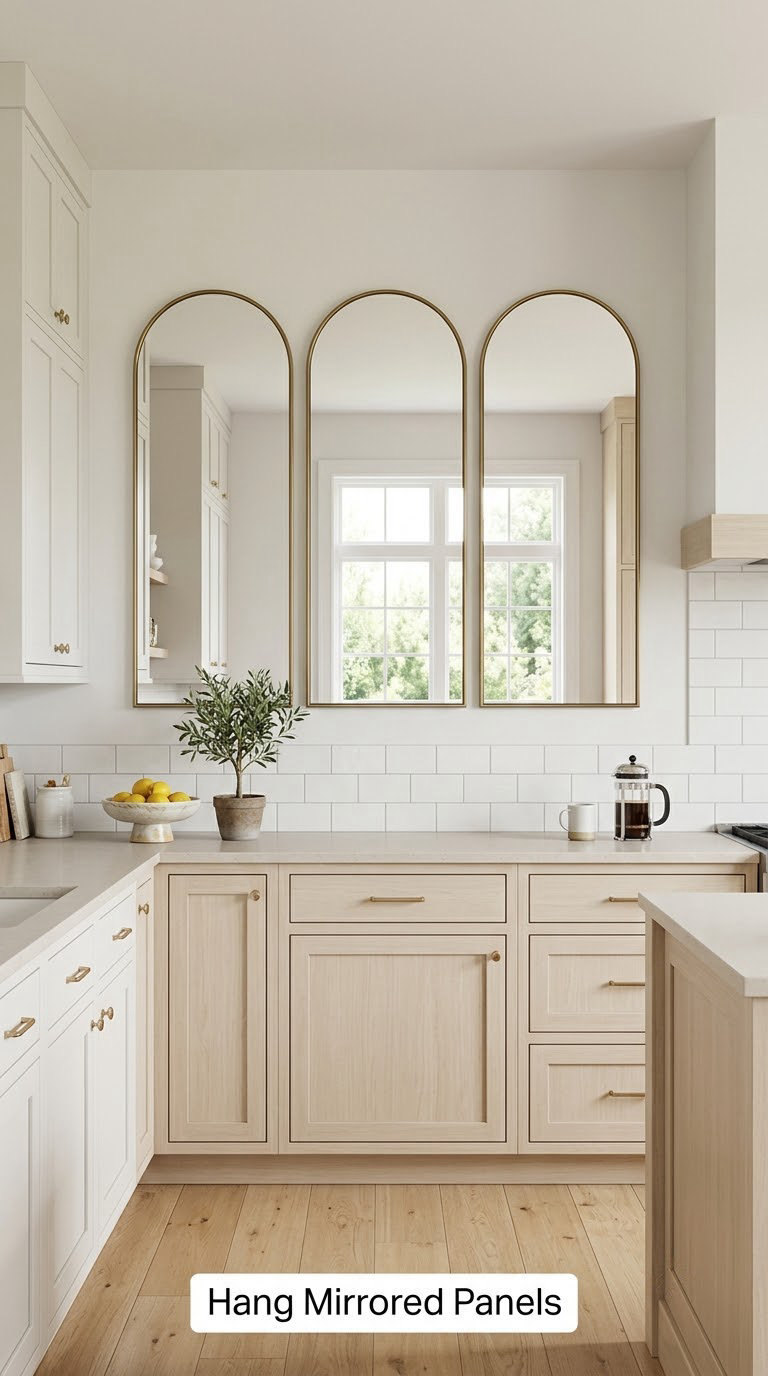
Mirrors bounce light and make a small gap feel deeper. In a kitchen with one window and dark cabinets, the effect is immediate.
How to do it: hang panels on D-rings or French cleats rated for double their weight, into studs wherever possible. Space them 4 to 6 inches apart and keep the total grouping narrower than the run below. Plan the reflected view before you hang, because a mirror facing a doorway reflects that doorway.
Set panels at a slight angle if you want to catch ceiling light.
Cost tier: mid-range. Difficulty: moderate DIY. Time: 2 to 3 hours.
Good to know: full-length mirrors above cabinets need a second person and a plan for the route in. Narrow panels are far easier and safer.
20. Style a Mini Gallery of Frames
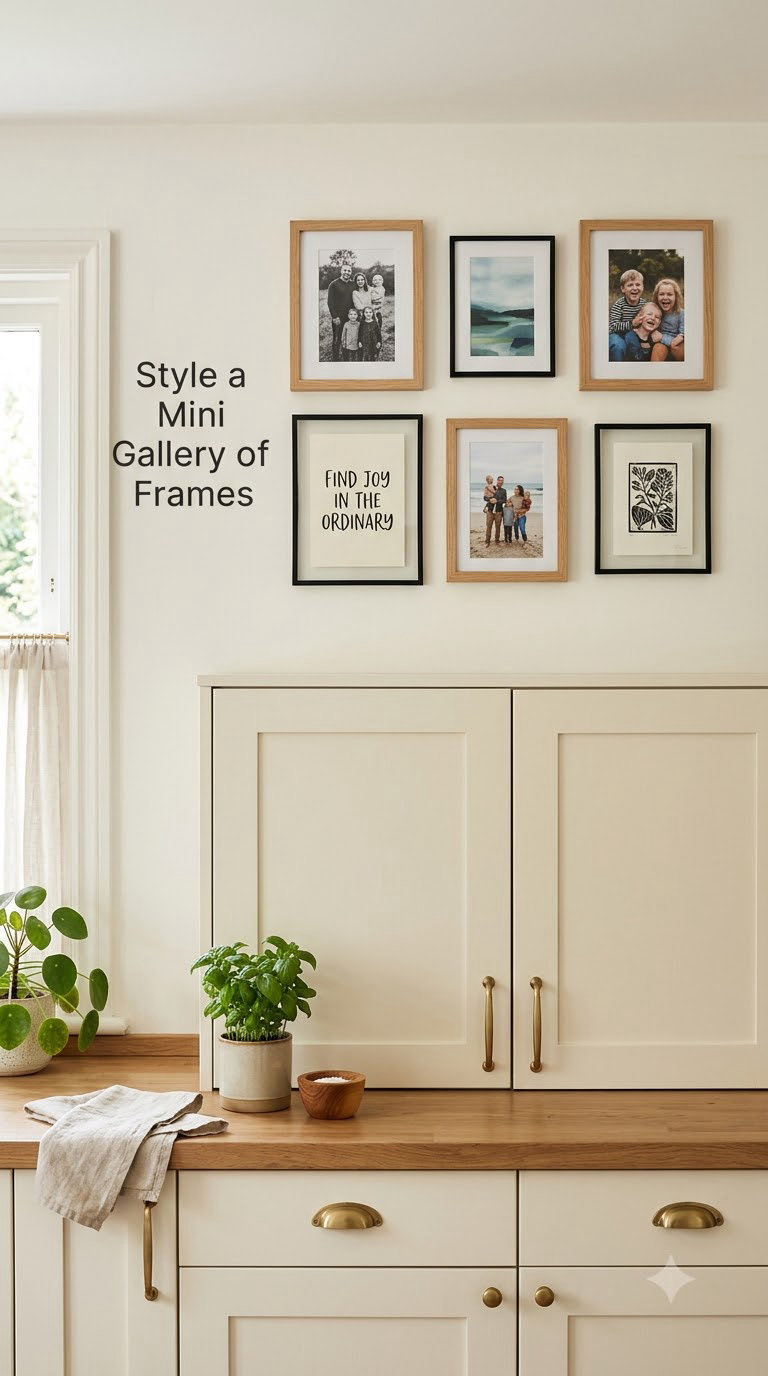
A small gallery works when the content is personal and the layout is disciplined. Recipe cards, family photos, and one typography print in matching frames read as collected rather than random.
How to do it: lay out the frames on the bed or the table first and photograph the arrangement before anything hits the wall. Keep the gallery between 60 and 75 percent of the cabinet run width, and hang it 8 to 10 inches above the cabinet tops. Trace paper templates for the nail positions.
Standard lightweight frames stay under 2 pounds each, which is well within drywall anchor ratings.
Cost tier: budget to mid-range. Difficulty: easy DIY. Time: 3 to 4 hours.
Good to know: a gallery is not a dust surface. Frame your photos in glass or acrylic and expect to wipe them down.
Planning Tips for Above Cabinet Styling
Work through these before you buy anything, in this order.
- Measure three numbers: the vertical gap from cabinet top to ceiling, the depth of the cabinet top, and the width of the whole run. If the gap is under about 8 inches, choose ideas 1, 2, 5, or 15 and skip everything that needs depth or height.
- Check what is already in the way: ceiling fans, recessed lights, vent grilles, and smoke detector coverage. Nothing gets installed where airflow or access is restricted.
- Plan groupings, not pieces: two or three groupings across a run reads calm. Four or more reads cluttered. Leave at least 24 inches of empty wall between groupings.
- Keep a 10 to 15 percent budget buffer: brackets, wall anchors, spackle, painter’s tape, and paint all add up faster than the decor itself.
- Repeat two materials: pull one finish from the cabinets and one from the counters or backsplash, and let everything else stay neutral.
- Test hanging with paper first: cut paper templates to the size of each piece and tape them to the wall so you can see the whole composition before the first nail.
- Order of work: paint and wall treatments first, then trim, then lighting, then shelves, then anything you would have to move to do the earlier steps.
- Plan for dusting: if the gap is above 7 feet, favor smooth, wipeable pieces over baskets, dried flowers, and anything with a lot of little edges.
Seasonal displays follow the same logic if you want to reuse this space through the year, and the same visual-weight rules apply to a mantel if you are styling spring mantel decorating alongside it.
Frequently Asked Questions
What should I display above kitchen cabinets?
Group two or three larger objects rather than many small ones. Tall vases, a large clock, oversized greenery, cookbooks, baskets, or a single wide art piece all work, provided each piece is big enough to read at height. Repeat a material already in the kitchen so the group looks deliberate, and leave at least 24 inches of empty wall between groupings.
How do I make the space above kitchen cabinets look less empty?
Measure the gap first, since that single number decides everything. Under about 8 inches calls for paint, lighting, or low-profile pieces. Between 8 and 18 inches takes baskets, canisters, vases, or one shelf. Above 18 inches can carry a clock, large art, floating shelves, or mirrored panels. If you want more color, an accent paint section changes the space more than any object.
How high should decor be above kitchen cabinets?
Leave 2 to 3 inches of air between the cabinet top and the tallest object so the two do not merge into one block. Hang wall-mounted pieces with their bottom edge 8 to 12 inches above the cabinet line. Going higher is fine on tall runs, but leave enough room to clean and enough space to reach the pieces you actually use.
Can renters decorate above kitchen cabinets without drilling?
Yes. Start with the cabinet tops themselves, which need no hardware at all: a tray, a vase group, cookbooks, or a plant. For the wall, use peel-and-stick panels, tension-mounted shelves rated for light objects, or a freestanding ladder shelf leaning against the wall. Avoid anything that requires studs or anchors, since patching those holes costs more than most renters want to spend.
What colors work best above kitchen cabinets?
Match something already in the room rather than introducing a new palette. Pull one color from the backsplash, the counters, or a rug and repeat it in small doses, then keep everything else neutral. Warm whites and wood tones suit most kitchens. A single saturated accent works in a neutral room; more than two competing accent colors usually looks busy.
How do I keep the area above kitchen cabinets from looking dusty?
Choose smooth, wipeable surfaces: sealed ceramics, glass, painted metal, and lacquered wood collect far less than dried stems, wicker, or fabric. Cover grouped pieces with a tray so you lift one item instead of dusting many, and keep anything near a cooktop or vent out of the display. A feather duster on a telescoping handle takes two minutes at that height.
Start with the measuring tape, not the shopping list. Once you know whether your gap is under 8 inches, between 8 and 18, or 18 and up, pick one idea from the table above and do it properly. Under-cabinet lighting plus a single tray grouping is the fastest weekend fix, and it makes the rest of the space easier to judge once you can actually see it.