15 Cheap Flooring Ideas for a Basement (October 2026)
The cheapest way to finish a bare concrete basement is to treat the slab itself: clean it, patch it, and roll on masonry floor paint or a sealer, which costs pennies a square foot in materials. That is the honest starting point for anyone searching for cheap flooring ideas for a basement, because most basements are damp, cold underfoot, and uneven, and the wrong material fails within a season.
The good news is you are not stuck with slab paint. Fifteen options below cover everything from peel-and-stick tiles you can pull back up in an afternoon to click-lock vinyl plank that looks like real wood, each one with a realistic cost per square foot, an honest difficulty rating, and a note on how it handles moisture. Pick based on what the room does, not just how it looks on a screen.
Contents
15 Cheap Flooring Ideas for a Basement at a Glance
Costs are realistic US ranges for materials and basic prep supplies, and they swing by region and season, so treat each number as a band rather than a quote. Difficulty runs from easy DIY to hire-a-pro based on the install method, not the material quality.
| Idea | Cost per sq ft | Difficulty | Install time |
|---|---|---|---|
| Luxury vinyl plank | 2 to 4 dollars | Easy DIY | 1 to 2 days |
| Waterproof ceramic tile | 3 to 7 dollars | Moderate DIY | 2 to 4 days plus cure |
| Peel-and-stick vinyl tile | 1 to 3 dollars | Easy DIY | 4 to 6 hours |
| Painted concrete | 1 to 2 dollars | Easy DIY | 1 to 2 days plus dry |
| Budget laminate | 2 to 4 dollars | Easy DIY | 1 to 2 days |
| Rubber tile or roll | 3 to 8 dollars | Easy DIY | 4 to 8 hours |
| Vinyl sheet | 2 to 4 dollars | Moderate DIY | 3 to 5 hours |
| Area rugs over hard floor | 2 to 8 dollars | Easy DIY | 30 minutes |
| Engineered wood plank | 5 to 9 dollars | Moderate DIY | 2 to 3 days |
| Cork plank or tile | 3 to 6 dollars | Moderate DIY | 1 to 2 days |
| Painted floorboards | 3 to 7 dollars | Moderate DIY | 1 weekend plus dry |
| Ground and sealed concrete | 2 to 5 dollars | Hire a pro | 2 to 3 days |
| Stone-look or cork-look vinyl | 2 to 5 dollars | Easy DIY | 1 to 2 days |
| Painted and sealed concrete with pattern | 2 to 4 dollars | Moderate DIY | 2 to 3 days plus dry |
| Zoned flooring with transition strips | 2 to 6 dollars | Moderate DIY | 2 to 3 days |
1. Use Luxury Vinyl Plank for a Clean, Budget-Friendly Look
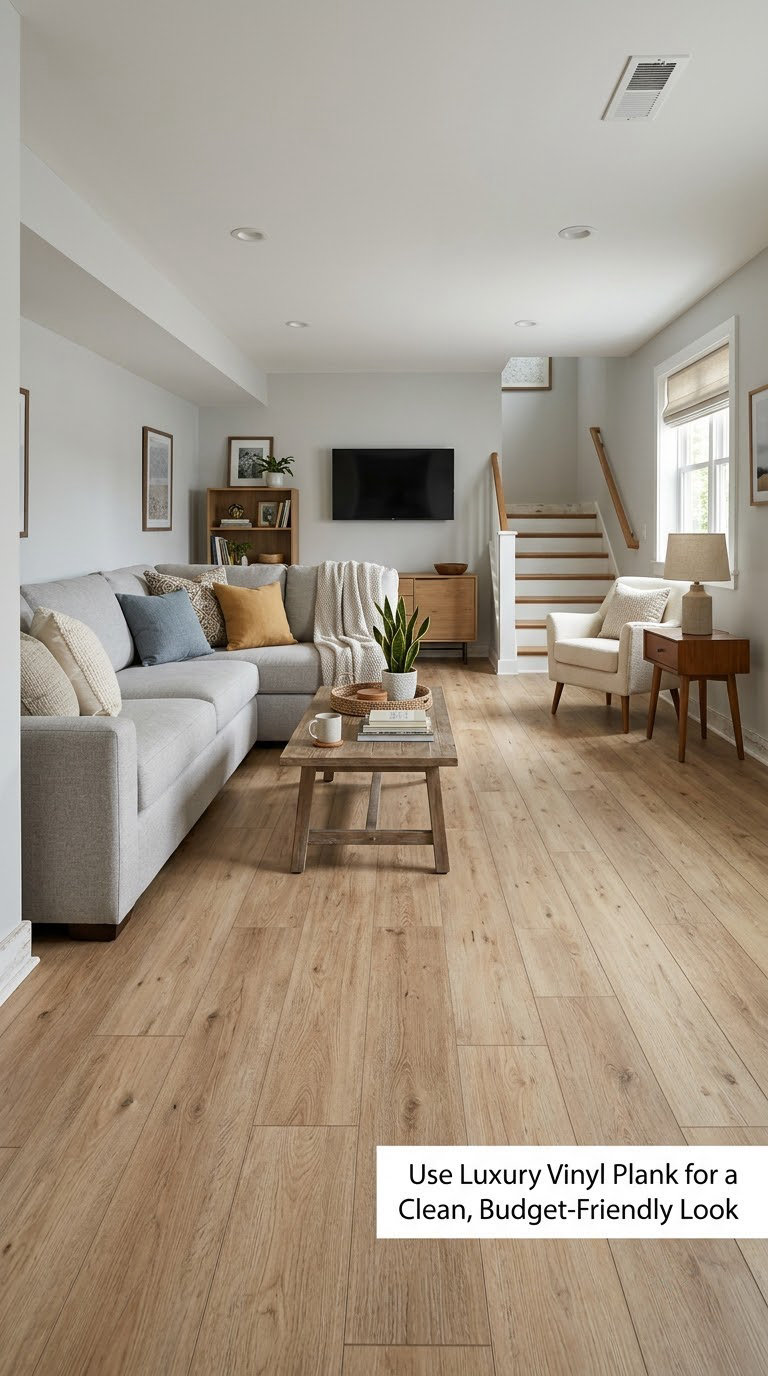
Luxury vinyl plank is the first thing I point most people toward. It imitates wood grain convincingly, it is fully waterproof at the core, and a 500 square foot room usually lands in the low thousands all in.
How to do it: Vacuum and degrease the slab, fill cracks with a concrete filler, and check flatness with a 6 foot level. Lay a 6 mil poly vapor barrier over the whole slab and butt the seams, then run a foam or cork pad if the slab is rough underfoot. Click the planks together starting from the longest wall, keeping a quarter inch expansion gap on every perimeter wall. Stagger end joints by at least 6 inches between rows.
Cost: 2 to 4 dollars a square foot for mid-grade waterproof plank plus pad and moisture barrier. Difficulty: Easy DIY. Time: One to two days for 500 square feet.
Good to know: Light oak and pale gray tones bounce light into a low-ceiling room, while dark walnut planks swallow it. Check that the wear layer is at least 12 mil if kids or a workout bench are involved.
2. Choose Waterproof Ceramic Tile for Easy-Care Durability
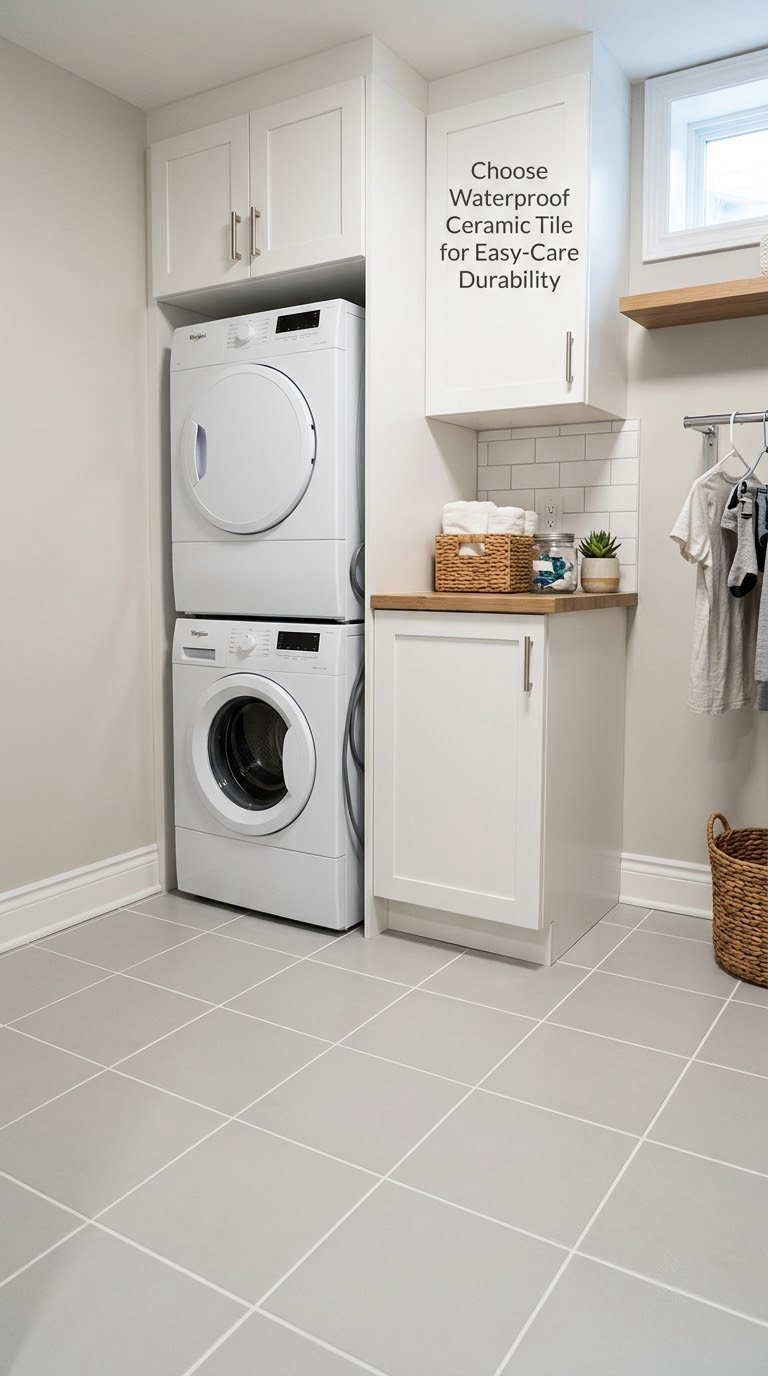
Ceramic tile is the least fussy surface on this list. Spills wipe up, dirt does not sink in, and it works well in laundry rooms, entry walkways, and playrooms where a soft floor would be a liability.
How to do it: Confirm the slab is level within a quarter inch over 10 feet, because tile follows the floor, not the other way around. Wet-tile larger low spots with thinset, then apply a concrete-compatible membrane or a roll-on moisture barrier across the whole slab. Use 12 by 12 inch or 18 by 18 inch tiles, and light gray grout on pale tile so the grid stays quiet. Let the thinset cure 24 hours before grouting and keep foot traffic off for another 24.
Cost: 3 to 7 dollars a square foot including thinset, grout, and barrier. Difficulty: Moderate DIY. Time: Two to four days plus cure time.
Good to know: Tile does nothing about a damp slab, so seal any wall cracks first. In a finished bedroom, tile is cold underfoot in January, which is why many people tile the wet zones only and use rug-friendly vinyl next door.
3. Lay Down Peel-and-Stick Vinyl Tiles for the Easiest Upgrade
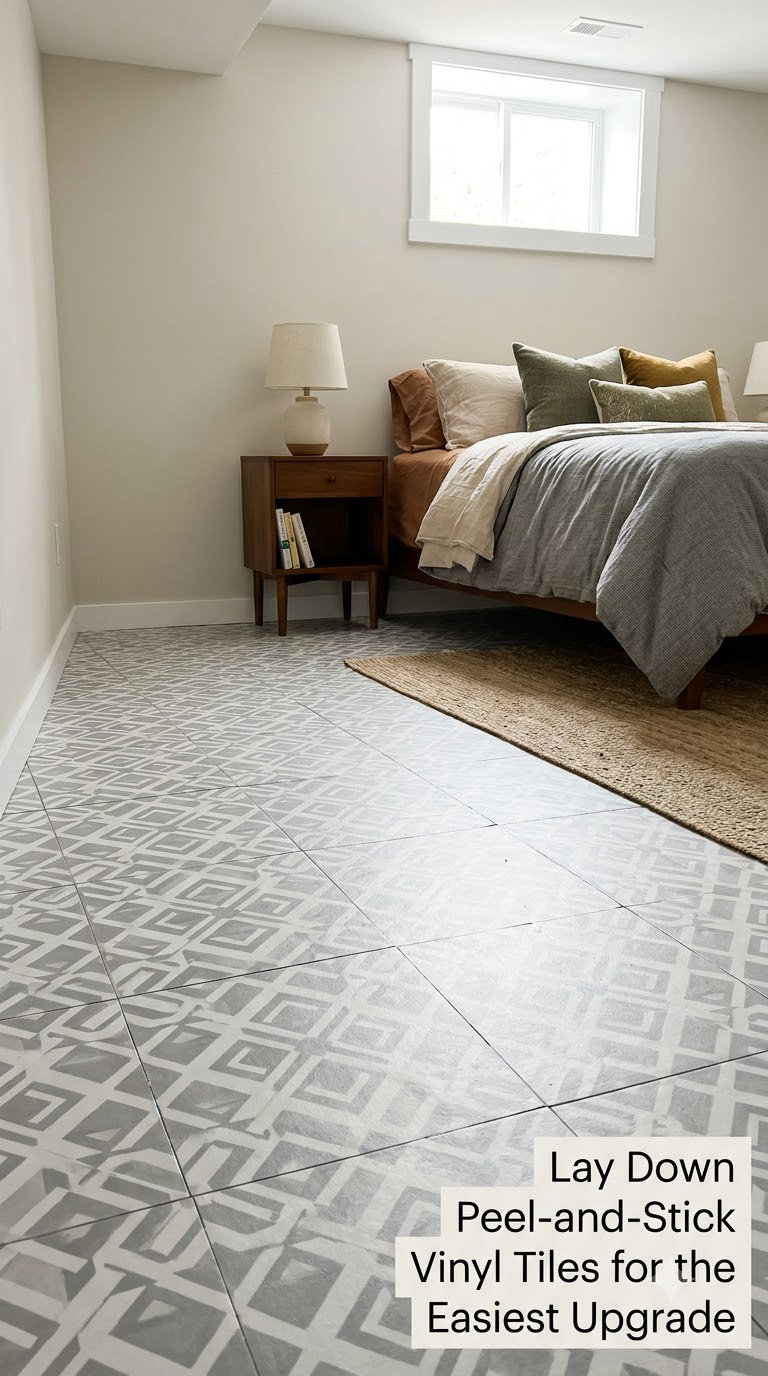
Peel-and-stick vinyl tile is the fastest way to change a basement’s whole personality. No adhesive, no nails, and when a leak shows up you pull up the damaged tile instead of demoing the room.
How to do it: The subfloor has to be dry, clean, and dead flat, so patch cracks and sand any ridges first. Wipe the slab with a pH-neutral cleaner and let it dry overnight. Plan the layout from the center of the room outward so border cuts land at the walls, then press each tile down with a flooring roller. Keep the room at 65 to 85 degrees Fahrenheit for 24 hours before and after laying.
Cost: 1 to 3 dollars a square foot for the tiles. Difficulty: Easy DIY. Time: Four to six hours for 500 square feet.
Good to know: This is the one option that fails on a bumpy slab. If seams lift later, it is almost always a moisture or subfloor-flatness problem, not a bad tile. A square layout also makes a small room look busier, so keep the pattern subtle.
4. Refresh Concrete With Bright, Painted Floor Finishes
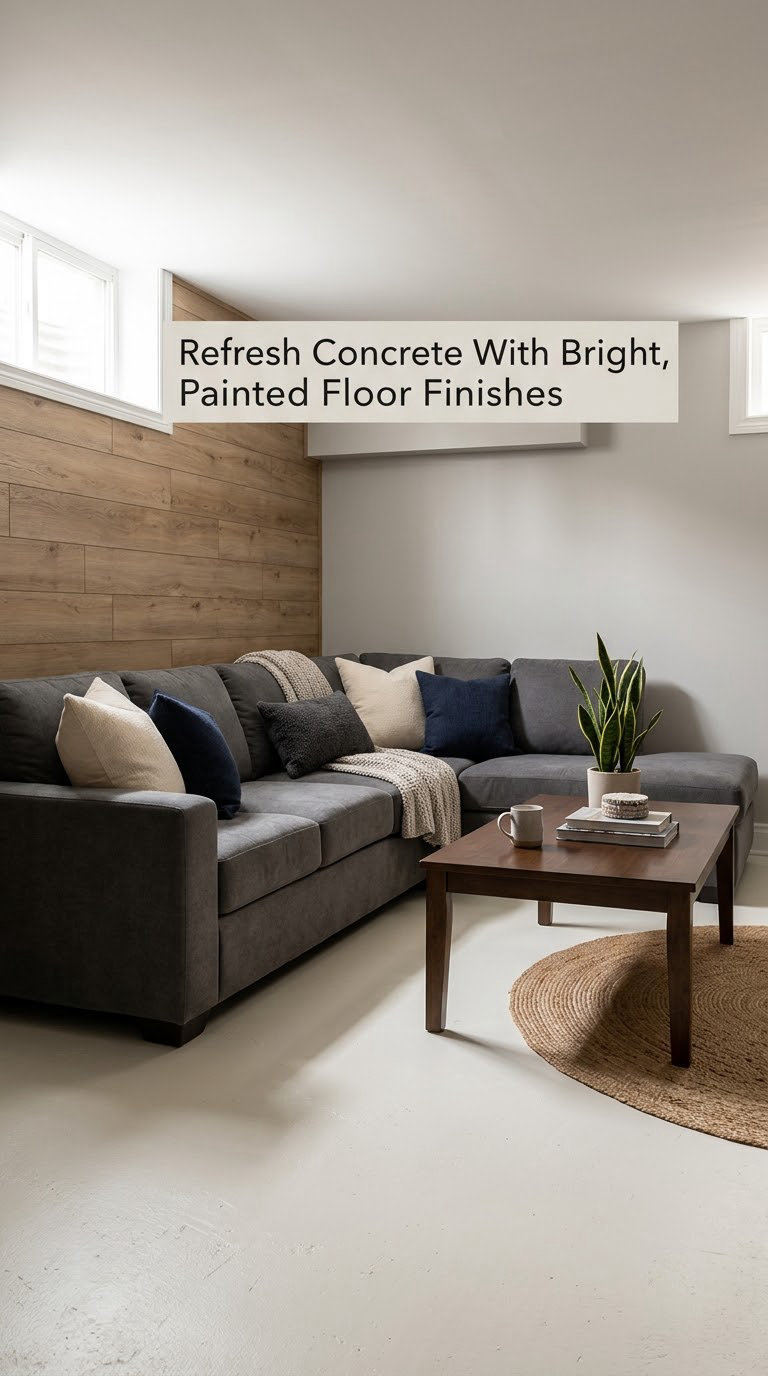
Painting the slab is the cheapest option on this list by a wide margin, and nothing else transforms a dark basement as fast. A soft warm white or pale greige floor reflects overhead light and makes a 7 foot ceiling feel higher.
How to do it: Open the windows and run a fan, because masonry floor paint needs ventilation to dry. Degrease with a concrete cleaner, patch cracks and spalled edges, then etch bare concrete with a masonry etcher to help adhesion. Apply one coat of concrete primer and two coats of porch-and-floor paint with a roller, cutting edges with a brush. Do not walk on it for 24 hours, avoid heavy furniture for 72 hours, and expect full cure around 7 days.
Cost: 1 to 2 dollars a square foot including primer and etcher. Difficulty: Easy DIY. Time: One to two days plus drying.
Good to know: Paint hides dampness, it does not fix it. If condensation beads on the slab during a humid week, coat the bare concrete with a damp-proofing sealer before priming or the paint will peel off in sheets.
5. Install Budget Laminate for a Warm, Finished Appearance
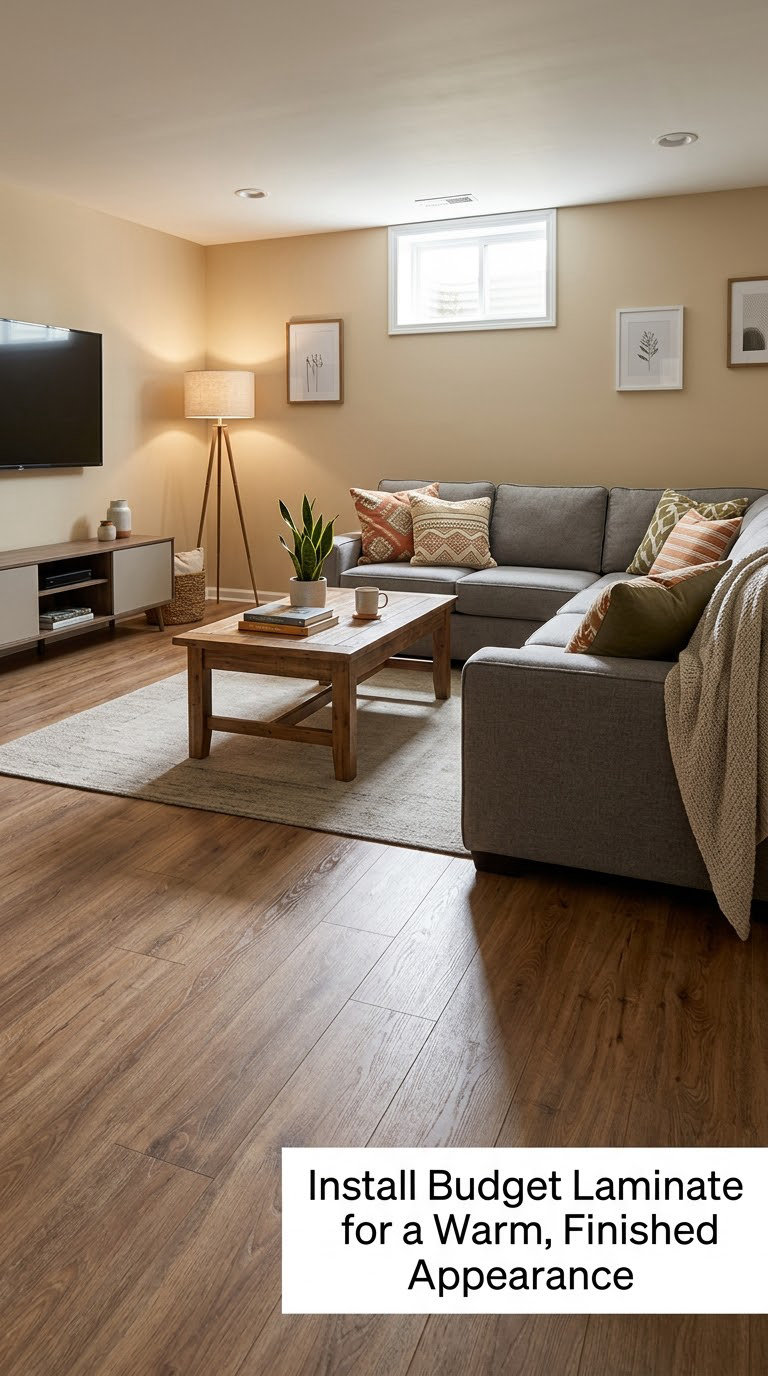
Laminate warms up a basement better than tile because it has a foam or fiberboard core under your feet. It is also the cheapest way to get the look of a plank floor, as long as your basement stays dry.
How to do it: Buy only planks labeled waterproof or moisture-rated for basements, not standard laminate, which can swell and buckle. Float the floor over a 6 mil poly barrier and the manufacturer moisture-rated pad, never gluing laminate down. Keep a quarter inch expansion gap at every wall and at any obstruction like a post. Stagger rows, use a pull bar at the last plank of each row, and check the box pattern before mixing planks from two cartons.
Cost: 2 to 4 dollars a square foot for budget planks, pad, and barrier. Difficulty: Easy DIY. Time: One to two days for 500 square feet.
Good to know: Homeowners on building-science forums keep repeating the same warning: laminate in a basement that has ever had standing water is a repair waiting to happen. If damp spots show up in spring, pick option 1 or 3 instead.
6. Use Rubber Flooring for a Practical Utility Space
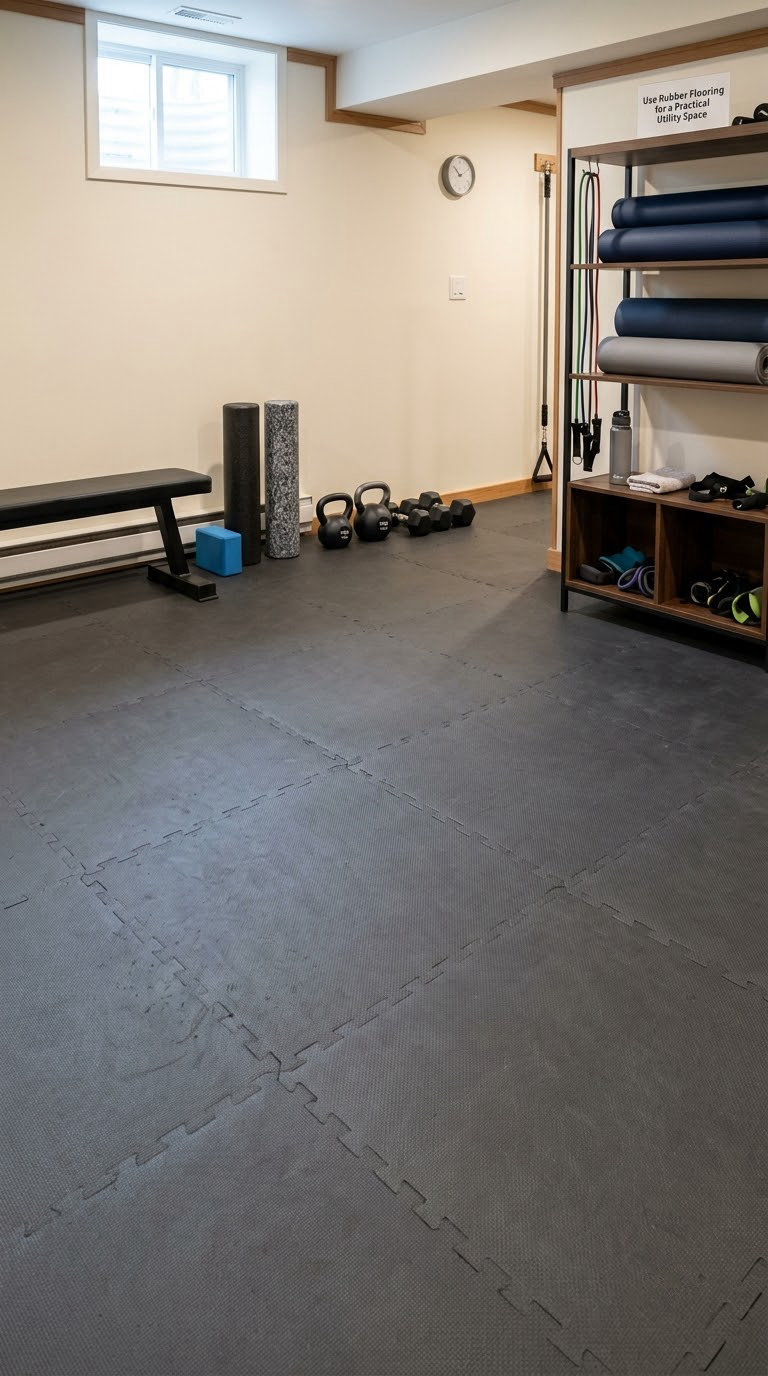
Rubber tile and rubber roll flooring get skipped because they look industrial, then win the room over once a treadmill starts shaking the walls. It absorbs impact, cleans with a shop vac and a damp mop, and shrugs off dropped tools.
How to do it: Common interlocking tiles are 24 by 24 inches and about 1/4 inch thick, and roll goods come in 4 foot widths that run wall to wall with no seams. Roll material out first and cut it to length with a utility knife, letting it relax overnight before trimming. For tiles, start from the center of the room, work outward, and cut border tiles with a straightedge. Finish edges with a ramp profile so they do not curl up.
Cost: 3 to 8 dollars a square foot, with 1/4 inch thick tiles at the top of that range. Difficulty: Easy DIY. Time: Four to eight hours.
Good to know: Rubber needs a flat slab because its weight magnifies dips you would never notice under vinyl. For a workout room, add 3/8 inch tiles or a rubber underlayment mat, and check your basement moisture levels first.
7. Cover a Small Basement Room in One Piece with Vinyl Sheet
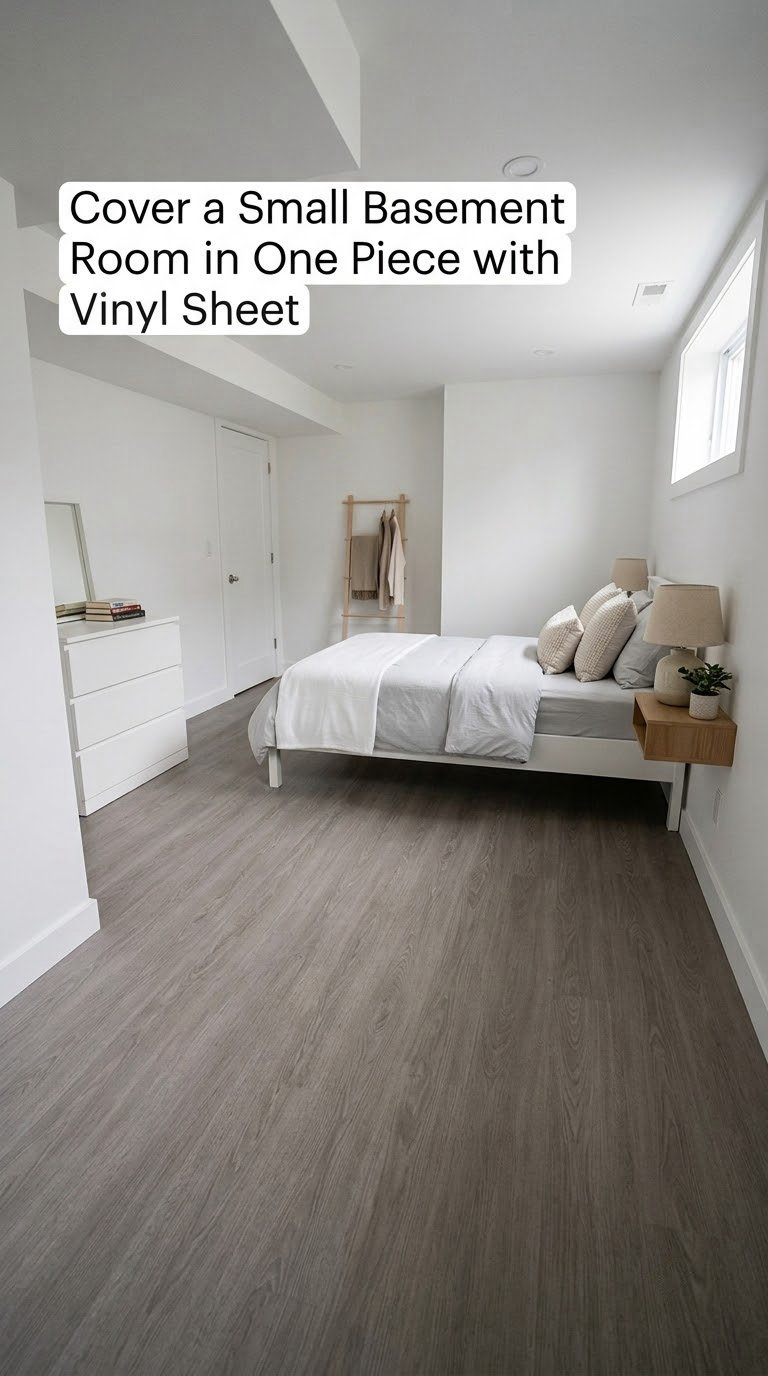
Sheet vinyl is the underrated middle ground between roll-out vinyl and tile. One piece means no grout lines to scrub and no seams for water to creep into, and it is often cheaper per square foot than the tile people compare it to.
How to do it: Sheets come in 4, 6.5, and 13 foot widths, so measure the room in both directions and pick the width that gives you the fewest cuts. Heat the sheet in a sunny spot or with a heat gun for 30 to 60 minutes before cutting so it relaxes, then trace the room outline and cut with a straightedge and sharp utility knife. Concrete-on-concrete adhesive goes down in a full spread for loose-lay needs, and roll the floor with a 100 pound roller. Overlap seams and heat-weld them for a true bathroom-quality joint.
Cost: 2 to 4 dollars a square foot plus adhesive. Difficulty: Moderate DIY. Time: Three to five hours for a small room.
Good to know: A dip in the slab shows up as a visible ripple under sheet vinyl, so self-leveling compound or a good skim coat is not optional here. Always install a poly vapor barrier first.
8. Add Cheap Area Rugs Over a Hard Basement Floor
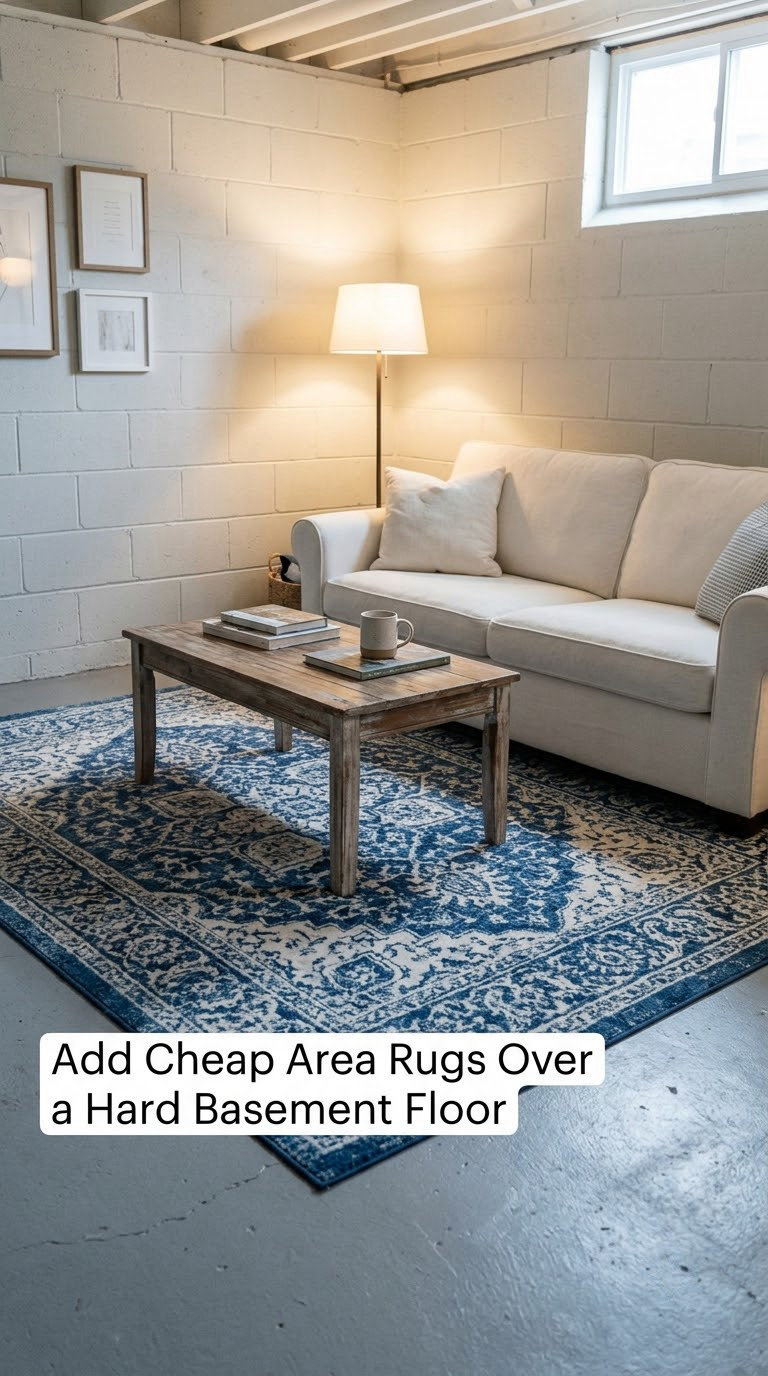
Area rugs are the honest answer when the budget is thin and the slab looks decent. One rug defines a seating area, adds color against gray concrete, and takes an hour to put down with no adhesive and no tools.
How to do it: Choose rugs sized so the front legs of the sofa and chairs sit on them, which is 8 by 10 feet or 5 by 8 feet for a typical basement seating group. Low-pile polypropylene or jute-look rugs clean easily and tolerate damp mopping. Use a rug pad with a grippy backing, and look for a breathable jute or felt pad rather than rubber, which can trap moisture against concrete.
Cost: 2 to 8 dollars a square foot for a budget rug plus a pad. Difficulty: Easy DIY. Time: Thirty minutes.
Good to know: A rug is the only option here that hides moisture problems rather than solving them. If your basement has a history of wet spots, seal the slab first so the rug is not sitting on damp concrete all winter.
9. Install Engineered Wood for a Higher-End Look
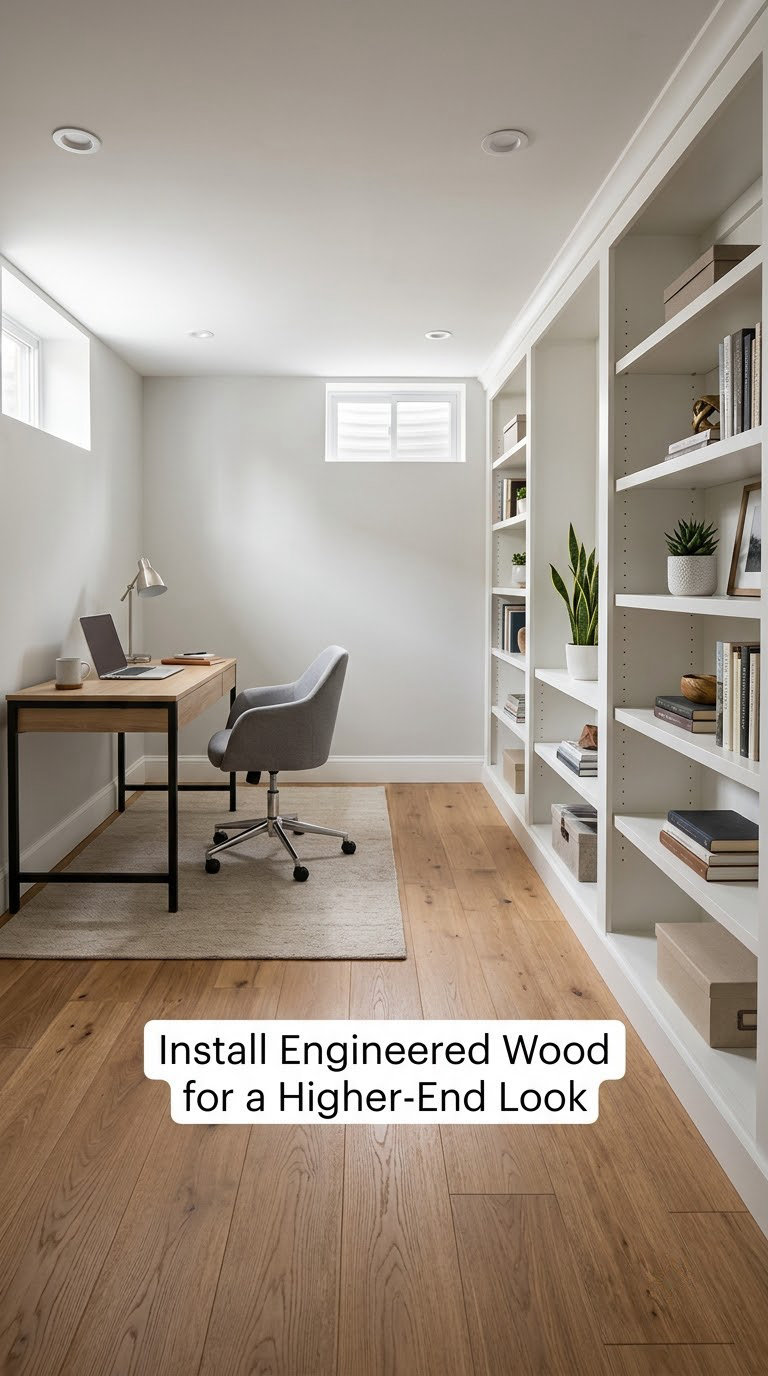
Engineered wood is the priciest option here and the only one that passes a resale test, since buyers see real wood veneer on top. It also carries the most risk in a basement, so it goes near the bottom of my list for a reason.
How to do it: Buy planks with a plywood or moisture-resistant core and a factory-applied finish, then let the acclimate in the room for 48 hours. Float the planks over a poly barrier with a foam or cork pad, or glue them down for the most stable result on a slab. Nail or staple the subfloor if you go floating, keep a half inch expansion gap at walls, and stagger joints 8 inches or more. Plan for three days on a 500 square foot room.
Cost: 5 to 9 dollars a square foot installed, plus pad and barrier. Difficulty: Moderate DIY. Time: Two to three days.
Good to know: Forum consensus is blunt here: most homeowners who put wood in a finished basement regret it the first time a dehumidifier fails. Only choose this in a basement with a dry history, and pair it with the dehumidifier guide below.
10. Use Cork Flooring for Comfort Under Foot
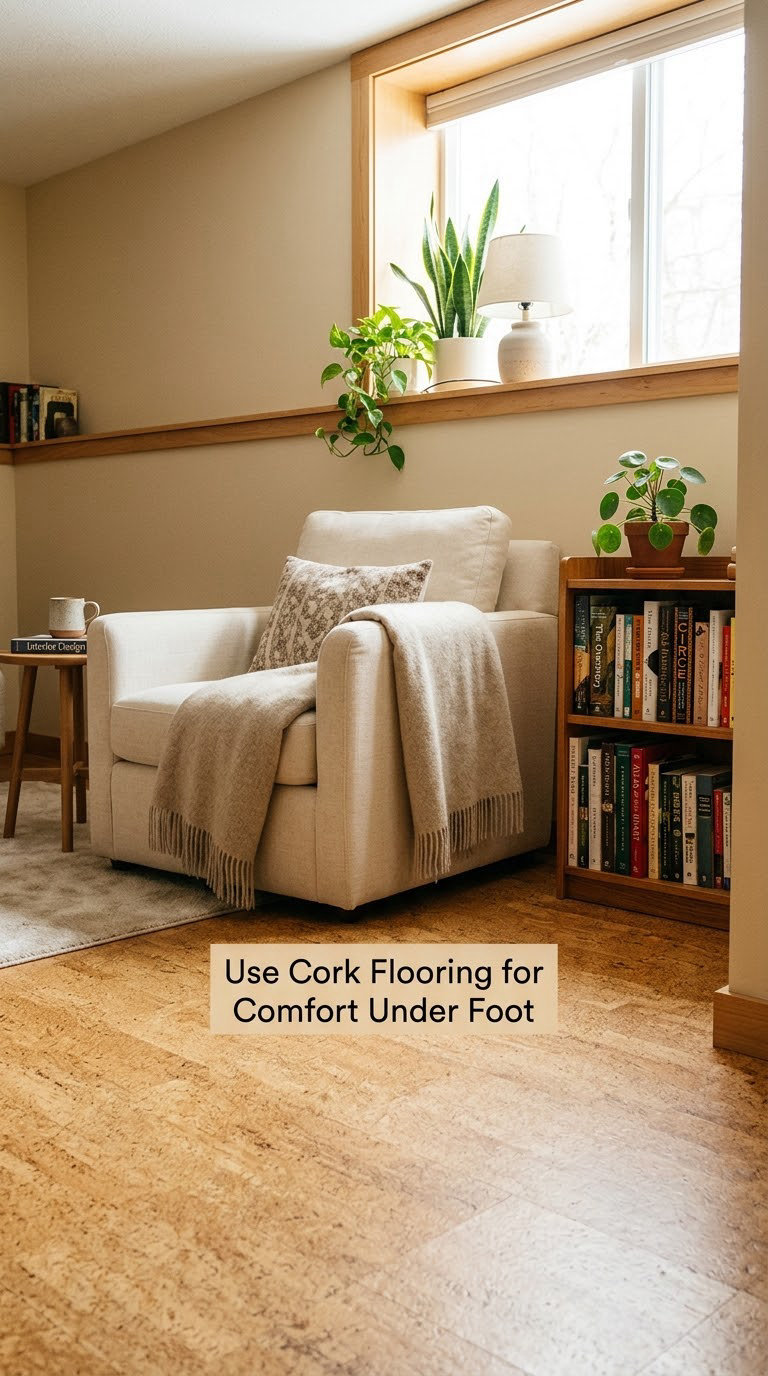
Cork is the warm, quiet flooring option. It cushions footsteps, softens echo in a low-ceilinged room, and feels good barefoot in a bedroom or reading nook, which no other material on this list manages.
How to do it: Cork comes as floating planks that click together like laminate, or as glue-down tiles. Use the floating planks over a 6 mil barrier and a thin cork underlayment, and keep a 3/8 inch gap at perimeter walls since cork expands. For glue-down tile, roll waterproofing adhesive over the sealed slab and work in sections you can finish within the product’s open time. Two coats of water-based polyurethane or a factory finish protect the surface.
Cost: 3 to 6 dollars a square foot. Difficulty: Moderate DIY. Time: One to two days.
Good to know: Cork is water-resistant, not waterproof, and it dents under sharp heels if the top layer is thin. Avoid it in laundry rooms and any room that takes standing water.
11. Try Painted Floorboards for Frugal Character
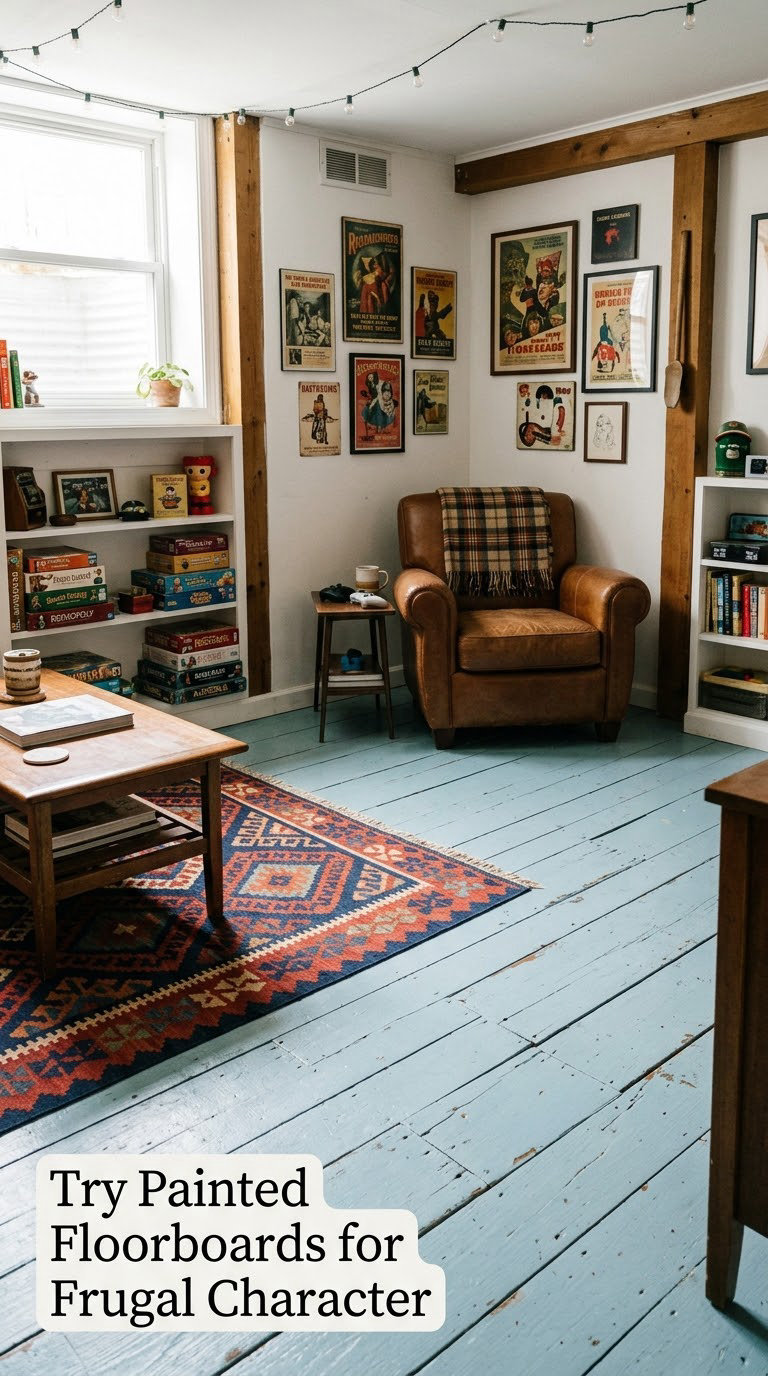
When plywood sheets over the slab is all the budget allows, painting the boards turns a construction surface into a deliberate look. Visible seams and nail heads become part of the design instead of a flaw.
How to do it: Use 3/4 inch plywood or OSB screwed down on furring strips if you want any crawl space, leaving a quarter inch gap between sheets so wood movement does not buckle them. Set every nail below the surface, sand the joints flush, and skim the sheet seams with drywall compound. Prime with an oil-based primer over bare wood, then two coats of porch-and-floor paint in a color you like. Add stencil borders or stenciled patterns if plain paint feels unfinished.
Cost: 3 to 7 dollars a square foot for plywood, screws, compound, primer, and paint. Difficulty: Moderate DIY. Time: One weekend plus drying time.
Good to know: Painting wood in a damp basement can lock moisture into the boards and lead to mold at the seams. Only use this route once a moisture test comes back dry, and never over a slab that gets wet.
12. Add Ground and Sealed Concrete for an Industrial Look
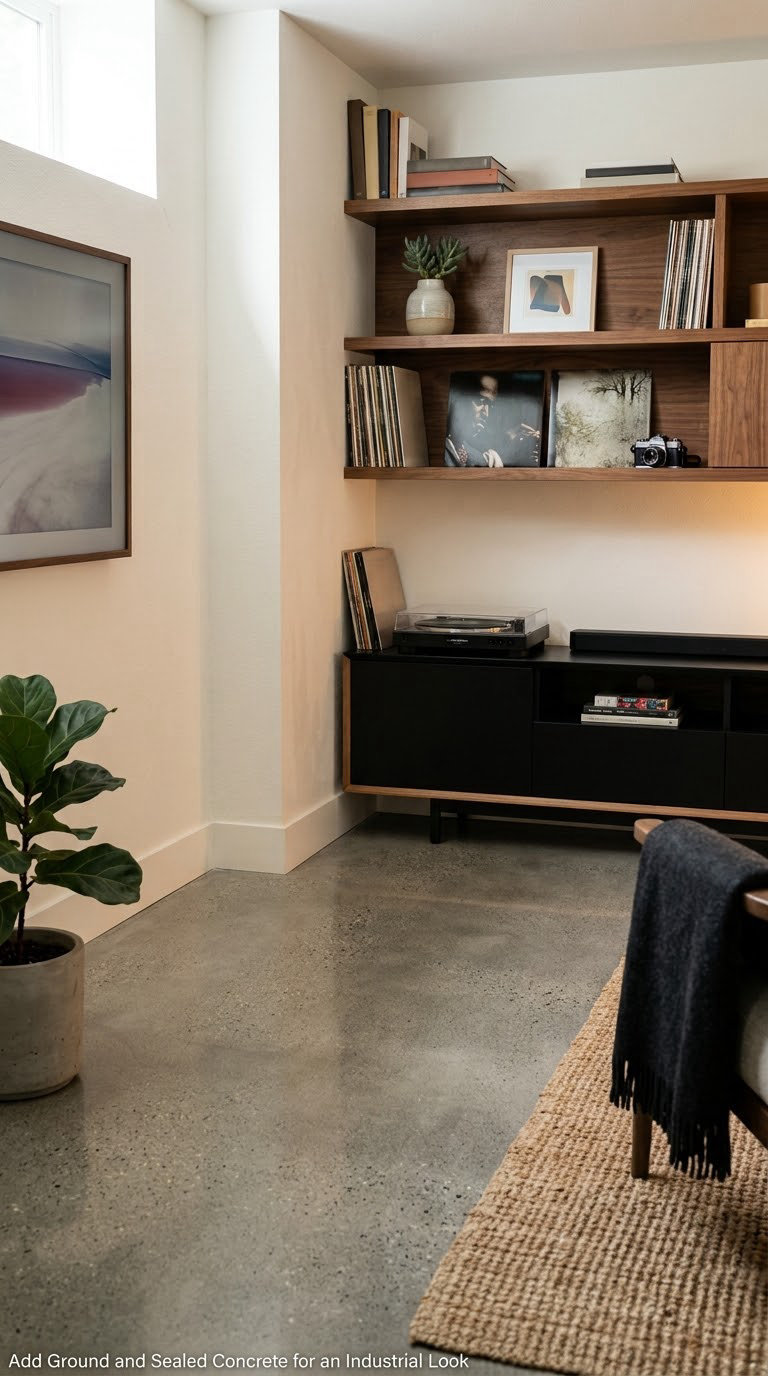
Grinding and sealing the slab you already have is the industrial look, and it is often cheaper than buying new material since you are not adding a floor at all. It is also the least DIY option on this list, because the grinding stage is genuinely hard work.
How to do it: Repair cracks and spalls, then grind the surface with a diamond grinder in 40 grit to open the pores, moving to 80 or 120 grit to even the sheen. Dust control matters here, so grind wet or use a HEPA vacuum attachment and wear a respirator. Squeegee on a concrete densifier, let it cure, then apply two coats of matte or gloss sealer with a roller. A matte finish hides fingerprints better in a room with a lot of foot traffic.
Cost: 2 to 5 dollars a square foot for grinding and sealing. Difficulty: Hire a pro. Time: Two to three days on site.
Good to know: Rent the grinder if the room is under 300 square feet and you have done masonry work before. Above that, the noise, the dust, and the shoulder strain make hiring out the cheaper option in real terms.
13. Use Cork-Look or Stone-Look Luxury Vinyl for a Finished Appearance
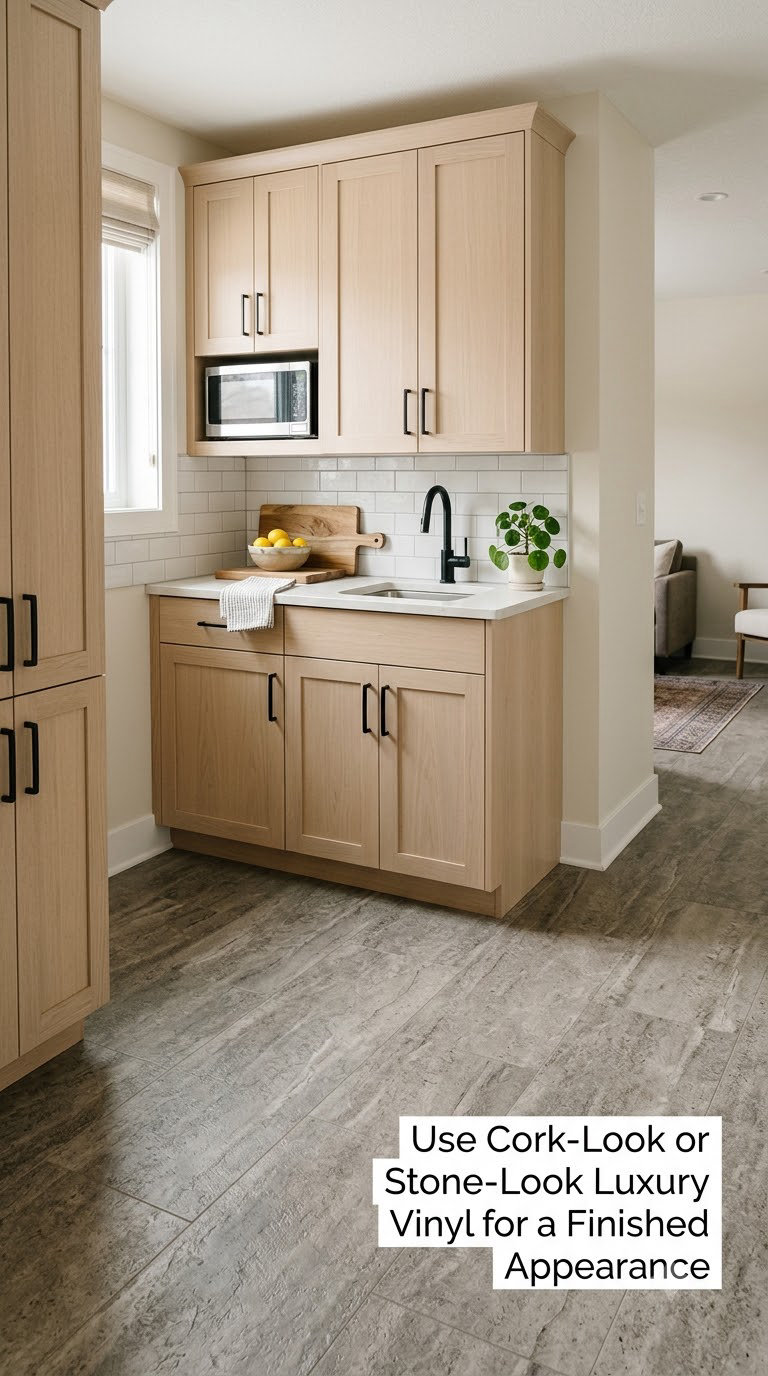
Patterned luxury vinyl gives you the visual richness of slate, travertine, or cork without the weight or the price. It is the pick when a room needs to look designed rather than merely covered.
How to do it: Pick planks or tiles rated waterproof for basements, and check the wear layer, where 20 mil or more holds up to dropped tools and pet claws. Install it the same way as any click-lock plank: poly barrier over the slab, optional pad, quarter inch gap at walls, staggered joints. Cut with a straightedge and a scoring knife for clean lines, and use a pull bar at the last plank of every row.
Cost: 2 to 5 dollars a square foot depending on the print quality. Difficulty: Easy DIY. Time: One to two days.
Good to know: Stone-look patterns in dark charcoal make a basement feel smaller, so choose a light or mid-tone pattern if your room has a low ceiling. Keep the transition strip color matched to the darker grout lines.
14. Build a Cheap Painted-and-Sealed Concrete Floor With a Pattern
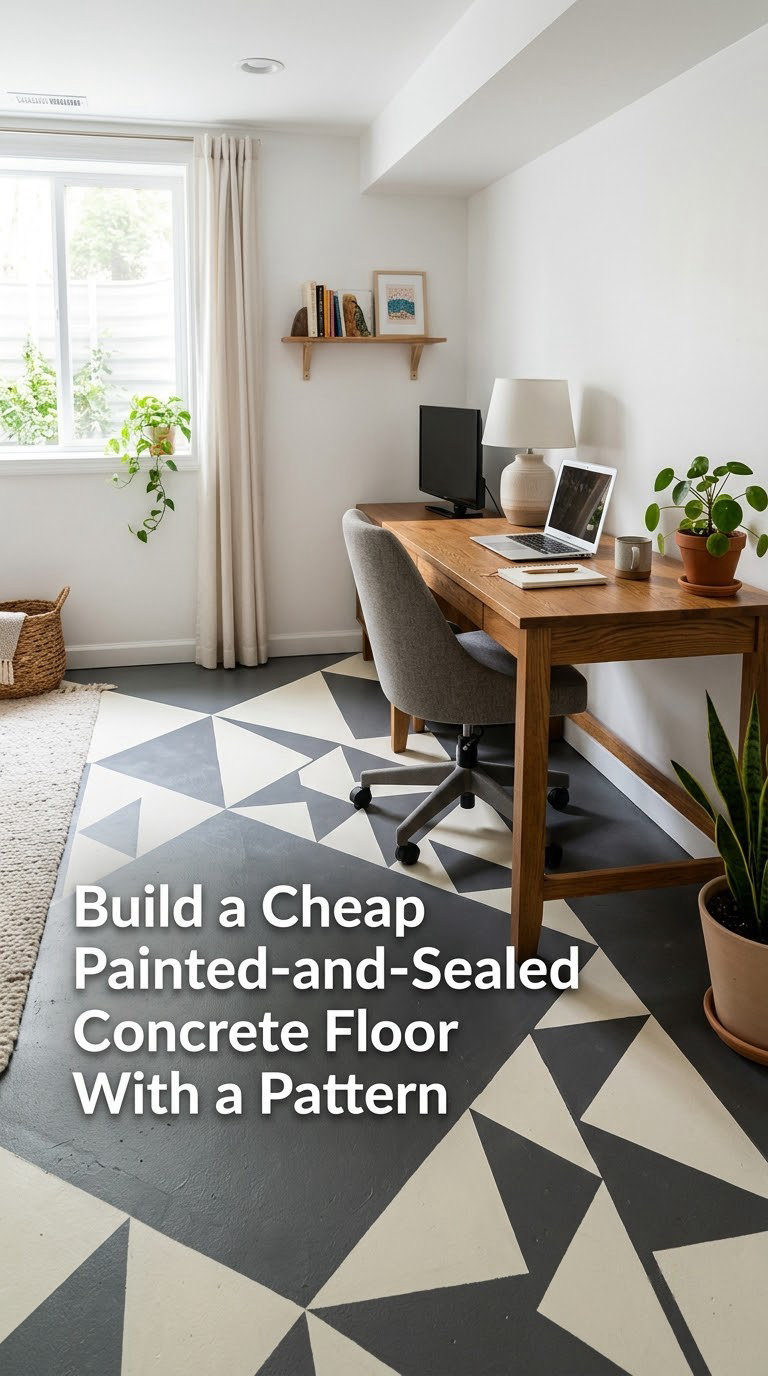
A two-tone painted slab looks intentional where a single color can look like a coat of paint over nothing. Stripes, checkerboards, and stenciled borders cost almost nothing more than one solid finish.
How to do it: Patch and clean the slab as you would for a solid finish, then apply masking tape for stripes at 24 inch widths before the first color goes on. Burnish the tape edges with a plastic tool so paint cannot creep underneath. Roll the base color on first, let it cure 24 hours, then apply the second color over the tape. Pull the tape while the second coat is still slightly tacky for a clean line, and finish with a clear floor sealer for scrubbable protection.
Cost: 2 to 4 dollars a square foot including tape, two colors, and sealer. Difficulty: Moderate DIY. Time: Two to three days including drying.
Good to know: A sealed painted floor is not for a storage room that sees a shovel or a bike tire, because the coating scuffs. Save the pattern for a finished room and use the solid coat in the utility spaces.
15. Combine Flooring Zones With Cheap Transition Pieces
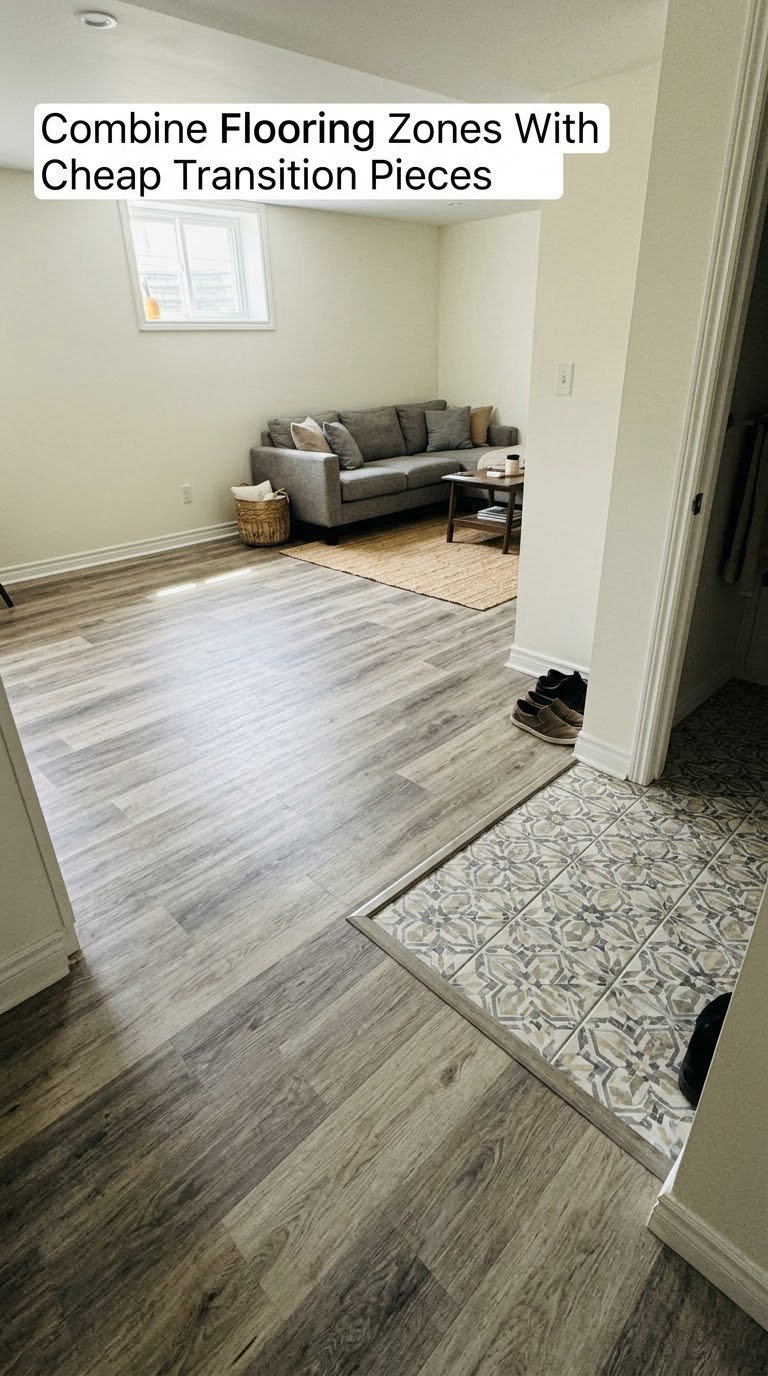
The cheapest way to make a modest flooring budget go further is to stop trying to cover everything identically. One main material for the big room plus a small accent zone at the entry gives you visual definition for very little extra material.
How to do it: Put the budget material in the largest area, usually the rec room, then run a cheap accent tile in the entry or laundry area. Cut both surfaces to a straight line and hide the joint with a T-molding or vinyl transition strip, which costs a few dollars per foot. Buy both materials from the same wear layer rating so one zone does not wear out years before the other, and order the accent zone first so its longer cure time does not hold up the main install.
Cost: 2 to 6 dollars a square foot blended across both zones. Difficulty: Moderate DIY. Time: Two to three days.
Good to know: Keep the zone split along a sightline, like the edge of a wall or a beam, so it reads as design instead of a seam. Two materials means two care routines, and that is the trade-off worth checking before you commit.
Planning Tips
A cheap floor that fails in a year is not cheap. Work through these before ordering anything.
How to test your basement for moisture before you spend money
- Tape test: Press 6 inch squares of plastic tape or duct tape to the slab in several spots, including near the foundation walls and the sump. Leave them for 24 to 48 hours, then peel them off. Any condensation or dark damp patch means hold off.
- Seasonal timing: Basements often look dry in January and wet in June. Homeowners on building forums recommend checking for wet spots after a heavy spring rain, not in the middle of a dry winter.
- Check for musty smell and efflorescence: White powdery salt deposits along a wall joint point to water moving through the slab.
- Measure with a meter: A concrete moisture meter reading above about 3 percent points to sealing or exterior water work first.
How to measure, order, and sequence the work
- Measure twice: Measure each wall at the floor and again at 6 feet up, since old basements are rarely square. Buy 10 to 15 percent extra material for cuts and mistakes.
- Prep is most of the budget on a bad slab: Crack filler, self-leveling compound, a moisture barrier, and a pH-neutral cleaner can add more per square foot than the flooring does.
- Do the slab work first: Clean, patch, and seal the concrete, then let it dry fully, ideally 24 to 48 hours, before anything goes down.
- Plan the order of rooms: Start in the room least likely to need rework, like storage, and leave the laundry or utility area for last.
- Add a 10 to 15 percent buffer to your total: Something will go wrong, and the buffer is what keeps a mid-project budget from becoming a second renovation.
- Decide on ventilation before the finish: A dehumidifier on a separate circuit keeps relative humidity in the 45 to 55 percent range, which protects whatever you install.
Once the floor is settled, the room still needs a plan. Our basement room ideas guide covers layout and lighting, and this list of cheap decor ideas that make a home feel cozier picks up where the floor leaves off.
Frequently Asked Questions
What is the most inexpensive option for basement flooring?
Painting or sealing the existing concrete slab is the cheapest option by a wide margin, because you are finishing a surface you already own. After cleaning, patching, and one coat of primer, two coats of masonry floor paint run roughly one to two dollars a square foot. It suits storage rooms, utility spaces, and finished rooms where you mainly want a brighter, cleanable floor.
What is the cheapest way to cover a concrete basement floor?
Peel-and-stick vinyl tile and self-adhesive vinyl sheet are the cheapest ways to cover concrete without adhesive work. Peel-and-stick runs about one to three dollars a square foot and comes up in an afternoon. The catch is preparation: the slab must be dry, clean, and flat, and every crack filled, or the tiles will lift at the seams later.
What is the best flooring for a concrete slab with moisture?
Waterproof click-lock luxury vinyl plank is the best balance for a damp slab. The rigid core does not absorb water, it installs over a poly vapor barrier without glue, and individual planks can be replaced if something leaks. Concrete-on-concrete glue-down vinyl planks are the other solid answer, since they grip an uneven slab better than click-lock does.
What can I put on my concrete floor to keep moisture out?
Start with a 6 mil polyethylene sheet over the slab, sealed at the seams and run up the wall edges, then add the finish over it. Seal any cracks in the foundation wall first, since water enters there. In a basement with real dampness, a damp-proofing sealer on bare concrete and a running dehumidifier matter more than any flooring choice you make.
Is laminate or carpet a bad idea in a basement?
Standard laminate swells and buckles after any water exposure, so it is risky in a basement with a wet history. Solid wall-to-wall carpet is worse, because it holds damp against the slab and gives mold a place to start. Waterproof vinyl, rubber, sealed concrete, and peel-and-stick tile are the choices most homeowners land on once they ask other owners.
Where to Start
Start with a moisture test, not a flooring catalog. If the tape test comes back dry, measure the room and put the budget material in the largest area, which is where cheap luxury vinyl plank or sealed concrete earns its keep.
Save the pattern work for one room so the floor has a focal point, and get a dehumidifier running before you open the first box. Our pick for a damp space is a budget dehumidifier for basements, and if the room doubles as a hangout, the layout ideas in our rock-and-roll themed basement decor guide are a good follow-up read.