20 Wallpaper Accent Wall Ideas for Bedrooms (October 2026)
A wallpaper accent wall is one wall covered in a distinct pattern, texture, or colour while the rest of the bedroom stays simple. It gives you the drama of a fully papered room for a fraction of the work, and the bed becomes the focal point instead of floating against four identical walls.
These 20 wallpaper accent wall ideas for bedrooms run from big botanical murals to quiet textured neutrals, and every one includes what it costs, how hard it is, and how long it takes. Autumn is when most people tackle a bedroom refresh, and it is the easiest season to get a paint and paper delivery that lands before the cold weather settles in.
Contents
20 Wallpaper Accent Wall Ideas for Bedrooms at a Glance
| Idea | Cost | Difficulty | Time |
|---|---|---|---|
| 1. Floor-to-ceiling botanical | USD 120-300 | Moderate DIY | One weekend |
| 2. Soft watercolor | USD 60-150 | Easy DIY | 3-4 hours |
| 3. Vertical geometric | USD 70-180 | Moderate DIY | 4-6 hours |
| 4. Textured neutral | USD 90-220 | Moderate DIY | 5-7 hours |
| 5. Vintage floral | USD 80-200 | Moderate DIY | One weekend |
| 6. Bold vertical stripe | USD 60-160 | Easy DIY | 4-5 hours |
| 7. Tropical leaf | USD 100-240 | Moderate DIY | One weekend |
| 8. Dark floral | USD 110-260 | Hire a pro for seams | 1-2 days |
| 9. Ombre gradient | USD 150-350 | Hire a pro | 2-3 days |
| 10. Abstract brushstroke | USD 70-180 | Easy DIY | 3-5 hours |
| 11. Herringbone | USD 90-200 | Moderate DIY | 5-7 hours |
| 12. Scenic mural | USD 100-245 | Easy DIY | 4 hours |
| 13. Checkerboard | USD 80-190 | Easy DIY | 4-6 hours |
| 14. Damask | USD 120-280 | Moderate DIY | One weekend |
| 15. Woodgrain | USD 60-170 | Easy DIY | 3-5 hours |
| 16. Paper lantern | USD 70-170 | Easy DIY | 3-4 hours |
| 17. Single mural panel | USD 90-245 | Easy DIY | 3-4 hours |
| 18. Two-tone colour block | USD 50-140 | Easy DIY | 2-3 hours |
| 19. Small-scale pattern | USD 60-150 | Easy DIY | 3-5 hours |
| 20. Removable peel-and-stick | USD 40-130 | Easy DIY | 2-4 hours |
Cost ranges are typical US prices for one standard bedroom wall, roughly 100 square feet, and they move with region, pattern complexity, and whether you paste traditional paper or use self-adhesive. Order an extra roll no matter what; a short roll is the one mistake that cannot be fixed halfway up a wall.
1. Floor-to-Ceiling Botanical Wallpaper Behind the Bed
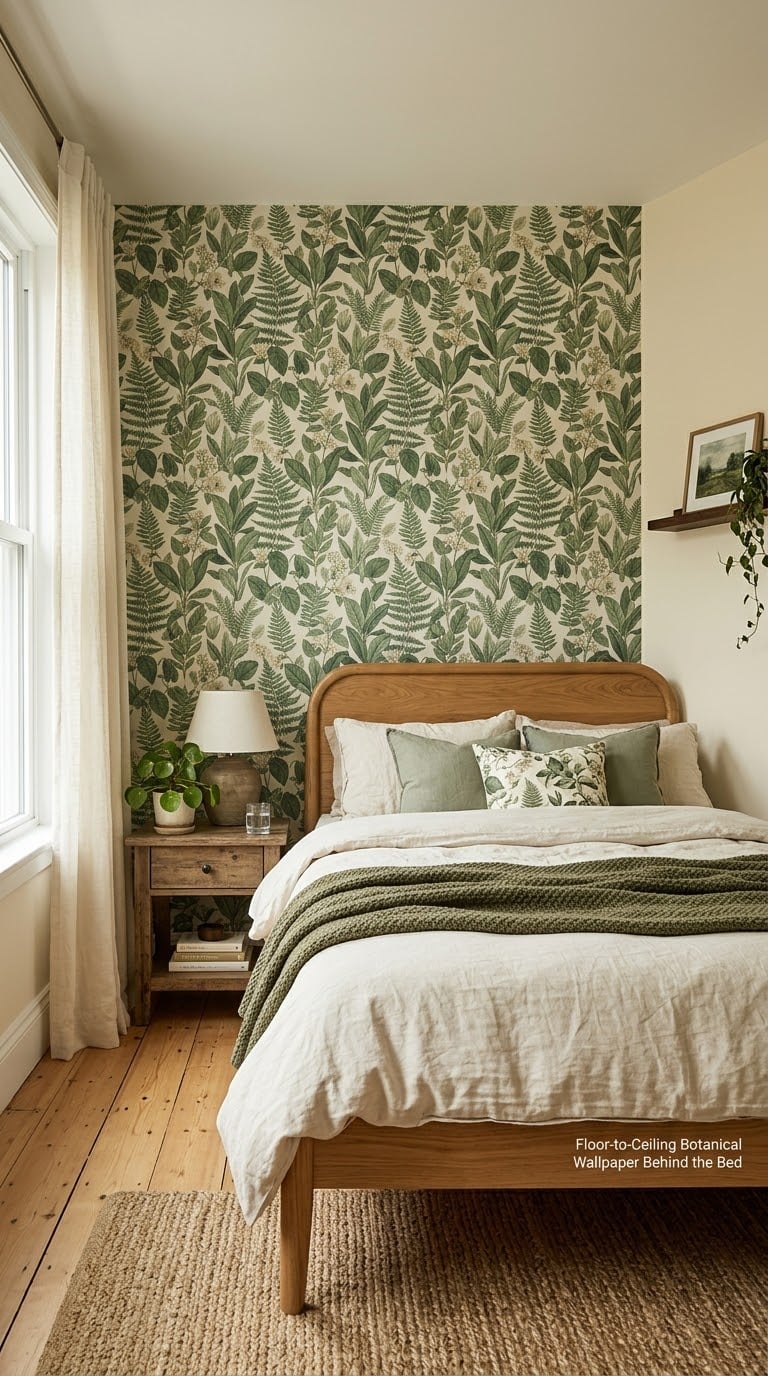
Oversized botanical wallpaper turns the wall behind the bed into a garden you can look at from the pillow. It adds vertical movement, which is exactly what a plain painted wall behind a low headboard is missing.
How to do it
- Measure the wall width and height, then add 6 inches (15 cm) of extra width for pattern repeat and trimming.
- Mark a plumb line with a level 24 inches (61 cm) from the corner, and use it as your reference for every panel.
- Start at the corner nearest the door so the first seam falls where the bed hides it.
- Cut panels slightly larger than the wall height, paste, smooth with a plastic squeegee, and trim at the ceiling line with a sharp utility blade.
- Work around outlets by cutting an X and trimming flaps, rather than trying to paper straight over them.
Cost: USD 120-300 for a large-scale print · Difficulty: Moderate DIY · Time: one weekend, about 7 hours
Good to know: This is the one idea that is not renter-friendly, so plan a colour-matched paint for the other three walls before you start. Keep the bedding plain white or cream, because a busy print behind a busy duvet turns into noise.
2. Soft Watercolor Wallpaper for a Calm Bedroom Retreat
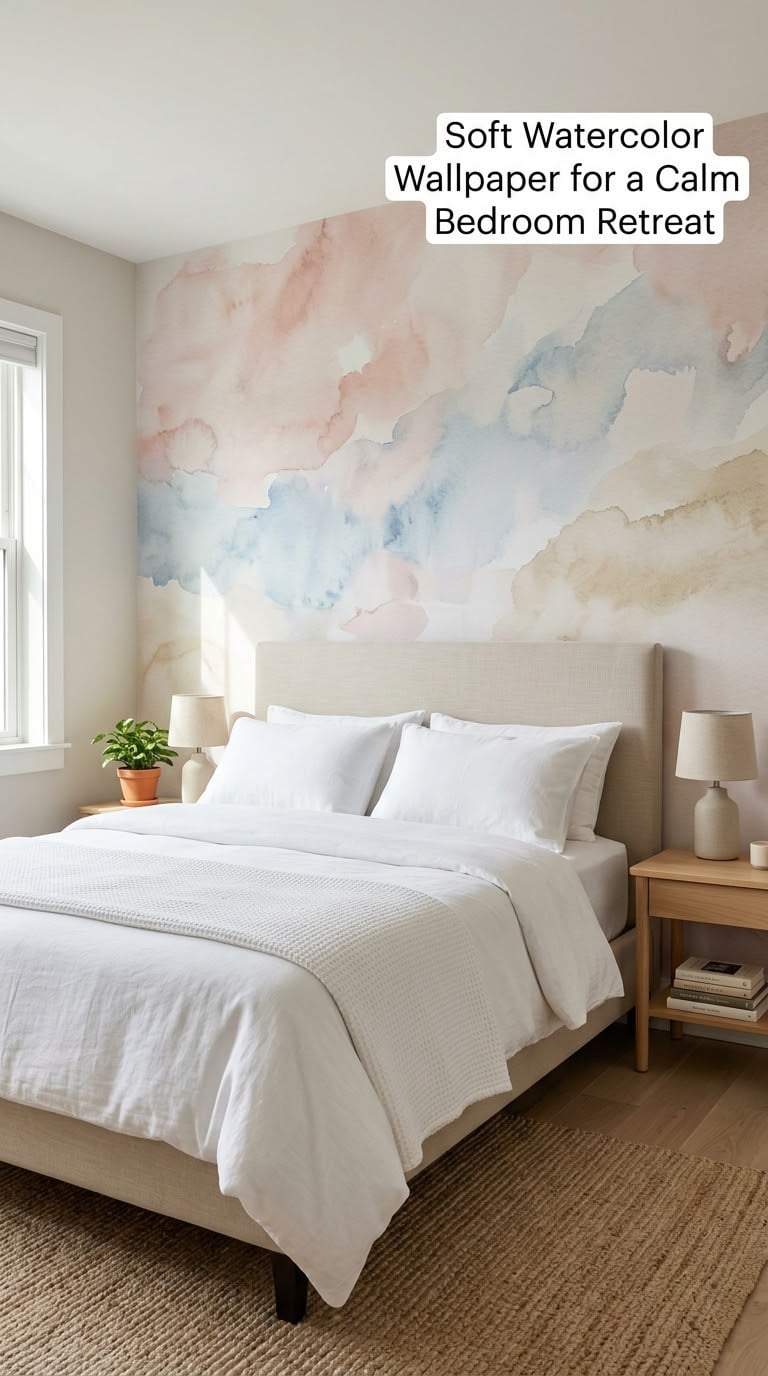
Blended watercolor wallpaper gives you colour without the shout. Pigments feather into each other rather than repeating sharply, so it reads as a wash of light on the wall.
How to do it
- Choose a self-adhesive panel sized to your wall so there are no seams at all.
- Wipe the wall with a damp cloth and let it dry overnight; adhesive grabs onto dust.
- Lay the panel at the top of the wall, smooth the top 12 inches (30 cm), then peel the liner back a few inches at a time while you work down.
- Push air bubbles toward the edge with the flat of your hand rather than a pin, so you do not puncture the print.
Cost: USD 60-150 · Difficulty: Easy DIY · Time: 3-4 hours
Good to know: Watercolor is the safest bold choice for a rental. Look at a sample taped to the wall at night as well as during the day, since warm bulbs shift pale pinks toward peach.
3. Geometric Wallpaper to Make a Small Bedroom Feel Wider
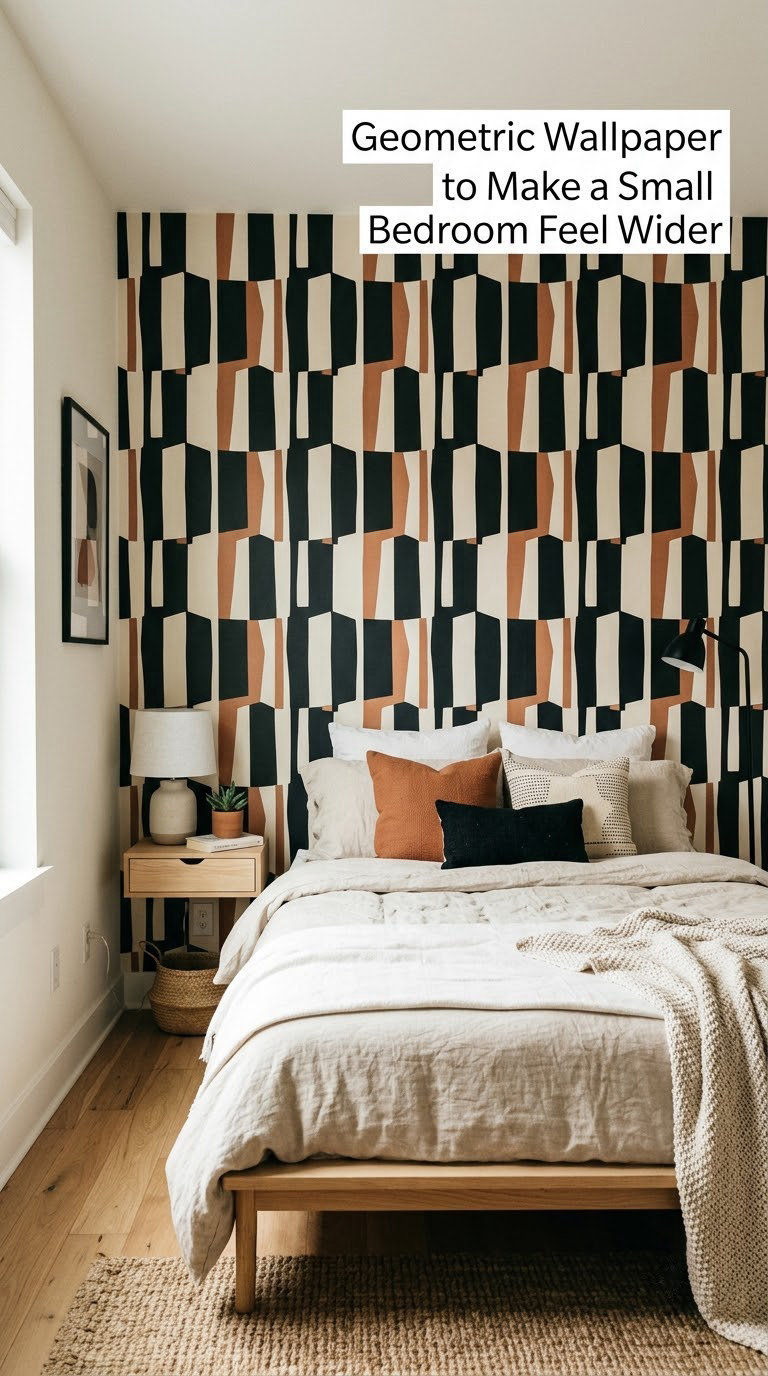
Geometric wallpaper with strong vertical lines pulls the eye upward, and that upward pull reads as more ceiling. It also gives an awkward wall with a door or a stubborn corner some order.
How to do it
- Pick a pattern with vertical elements and a repeat you can halve at the ceiling, so the top row finishes cleanly.
- Draw a level pencil line 1/2 inch (13 mm) below the ceiling to align the first panel across the whole wall.
- Hang full panels where you can, and use a cut panel only at the least visible corner.
- Keep furniture low, under about 30 inches (76 cm) at the headboard, so nothing competes with the vertical line.
Cost: USD 70-180 · Difficulty: Moderate DIY · Time: 4-6 hours
Good to know: Skip horizontal chevrons and wide horizontal bands in a low-ceilinged room; they do the opposite of what you want. If you like this direction, our feature wall wallpaper ideas show how the same geometry works in living spaces.
4. Textured Neutral Wallpaper for a Modern Minimalist Look
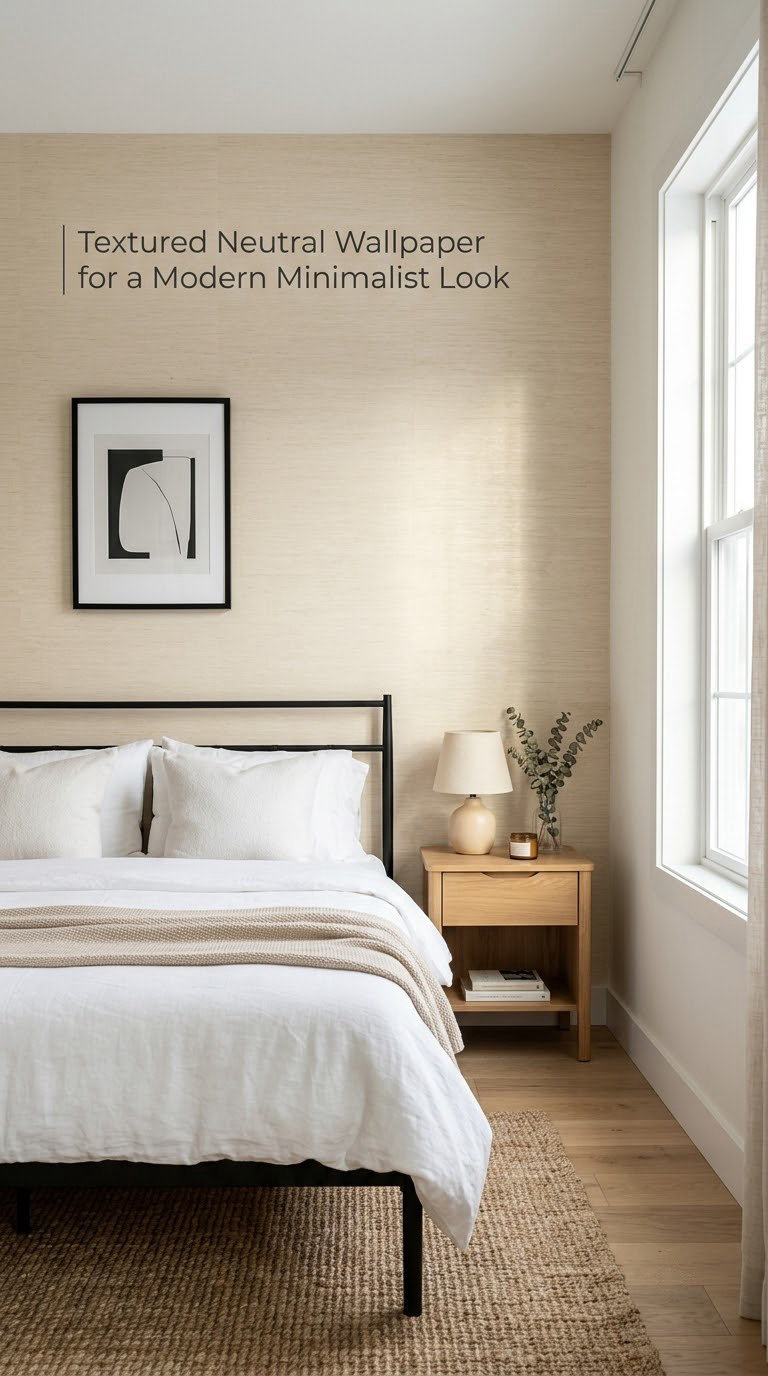
Linen-look, plaster-look, and woven-look wallpapers create shadow rather than pattern. They are the quietest way to stop a minimalist bedroom from feeling unfinished.
How to do it
- Sand any drips or nail holes flush, then wipe the wall down and fill gaps with a paintable filler.
- Apply a single coat of primer if the wall has been patched; textured paper follows every uneven spot.
- Paste and hang in the same day so the backing does not dry out before you are ready.
- Overlap seams by a few millimeters and roll the seam with a wallpaper seam roller.
- Let the paper dry for 24 hours before pushing furniture back against the wall.
Cost: USD 90-220 · Difficulty: Moderate DIY · Time: 5-7 hours
Good to know: Texture hides seams beautifully but also shows bad wall preparation. Non-vinyl textured papers can be scrubbed with a damp cloth, which matters in a bedroom with hair and dust.
5. Vintage Floral Wallpaper for a Romantic Bedroom
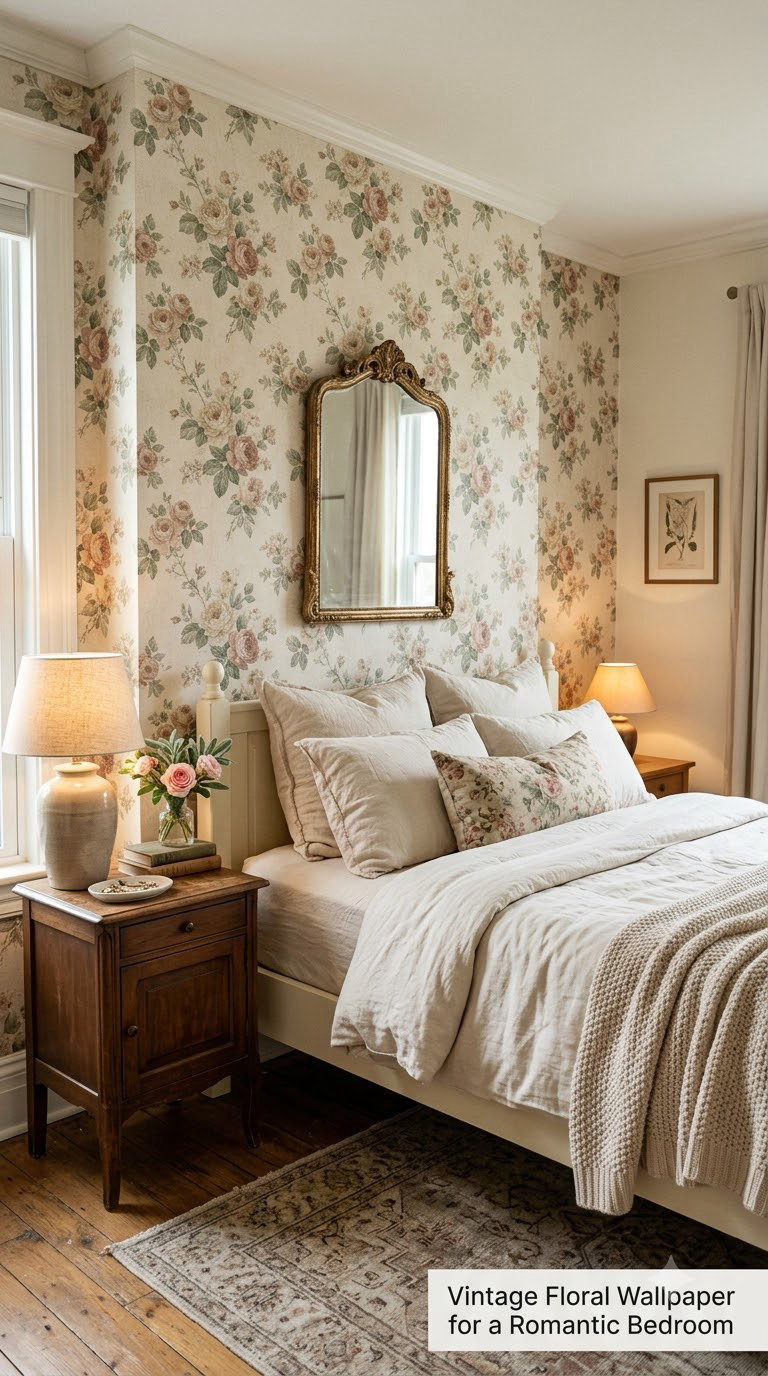
A small-scale chintz or rose print brings old-world character to a bedroom without touching the rest of the room’s finishes. The pattern is dense, so it holds its own across a large wall.
How to do it
- Match the paper’s repeat to your wall width so the pattern returns at the corners rather than cutting mid-flower.
- Mark the repeat height on the wall in pencil before the first panel goes up.
- Alternate panels left to right if the print is a drop match, which is common for florals.
- Choose bedding in one of the print’s colours so the bed reads as part of the wall, not pasted on top of it.
Cost: USD 80-200 · Difficulty: Moderate DIY · Time: one weekend, about 6 hours
Good to know: A faded floral is easier to live with than a crisp one because the low contrast forgives seams. Test any deep rose or burgundy in the room first; strong reds can make a dim bedroom feel heavy.
6. Bold Stripe Wallpaper for a Graphic Bedroom Makeover
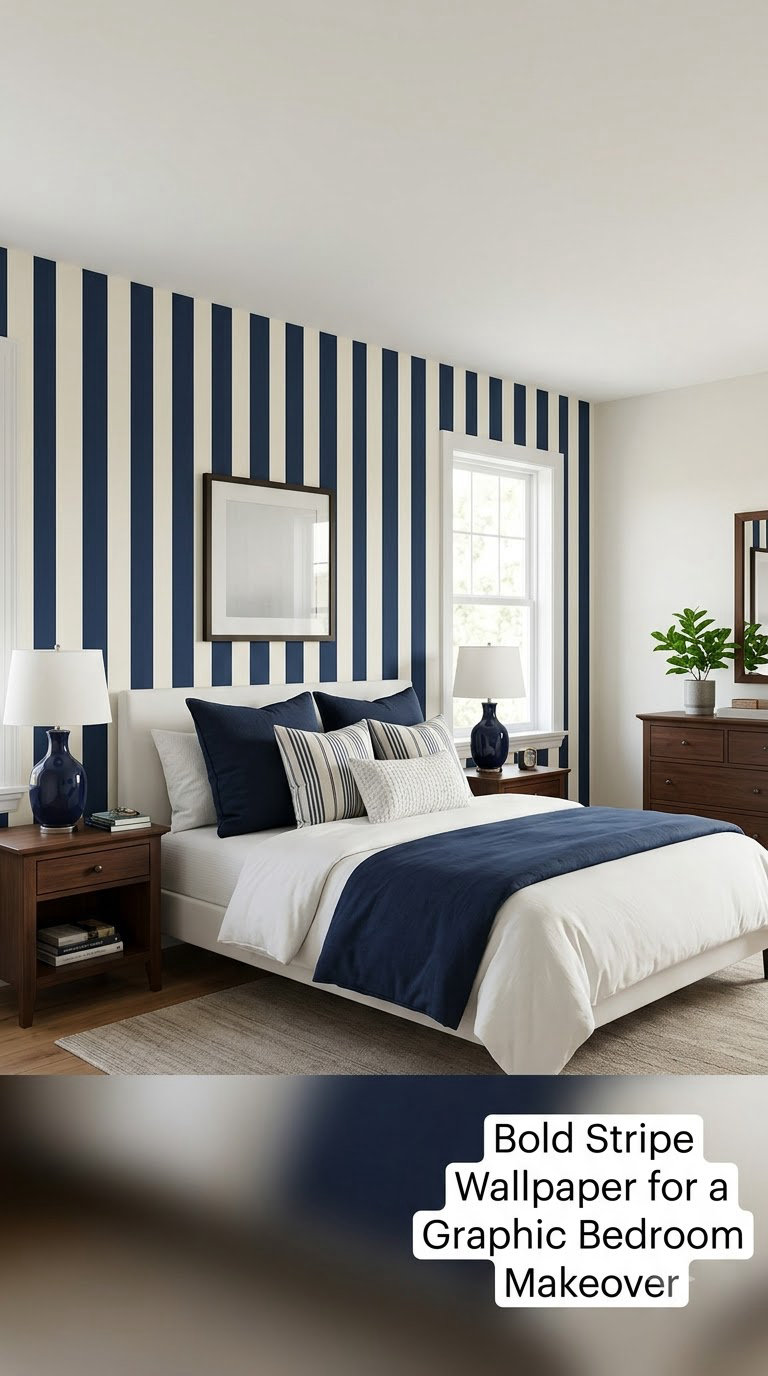
Vertical stripes do two useful things at once: they add energy to a plain room and make the ceiling feel a couple of inches higher. Navy and ivory is the easiest pairing to coordinate with furniture you already own.
How to do it
- Measure the wall and divide the width by the stripe repeat to see whether the pattern lands evenly at both corners.
- Hang a full-height panel at the most visible corner and butt every subsequent panel tightly against it.
- Use a spirit level every third panel; walls are rarely plumb for more than 8 feet.
- Repeat two or three stripe colours elsewhere in the room, in a cushion or a throw, to tie it together.
Cost: USD 60-160 · Difficulty: Easy DIY · Time: 4-5 hours
Good to know: Wide stripes need careful alignment because any drift is obvious. Thin, closely spaced stripes are the forgiving option if this is your first attempt.
7. Tropical Leaf Print for a Lush Bedroom Escape
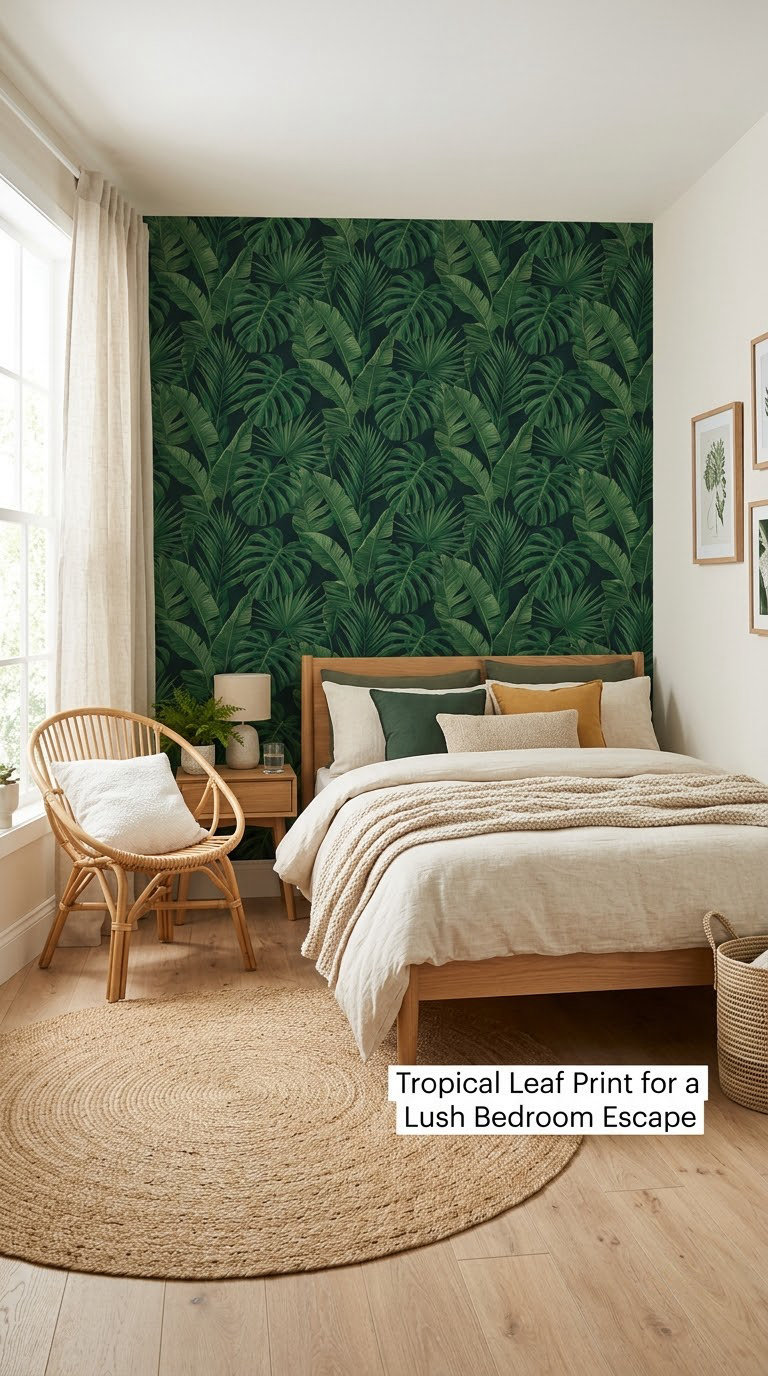
A banana leaf or monstera print brings a holiday feeling into a room that never sees the sea. The scale of the leaves is what sells it, so this pattern wants a bigger wall than most people think.
How to do it
- Check that the leaf motif is at least 18 inches (46 cm) tall before you commit; smaller leaves look busy rather than lush.
- Place the largest leaf so it sits just above the headboard, roughly 6 to 10 inches (15-25 cm) clear of it.
- Hang floor to ceiling with no top border, so the leaves run off the wall instead of stopping at a trim line.
- Add one rattan or woven-fibre piece and light wood furniture to pick up the same palette.
Cost: USD 100-240 · Difficulty: Moderate DIY · Time: one weekend, about 6 hours
Good to know: Deep green wallpaper shows dust and pet hair more than a flat painted wall. Keep a microfibre cloth by the nightstand and wipe the lower third monthly.
8. Dark Floral Wallpaper for a Moody Sleep Space
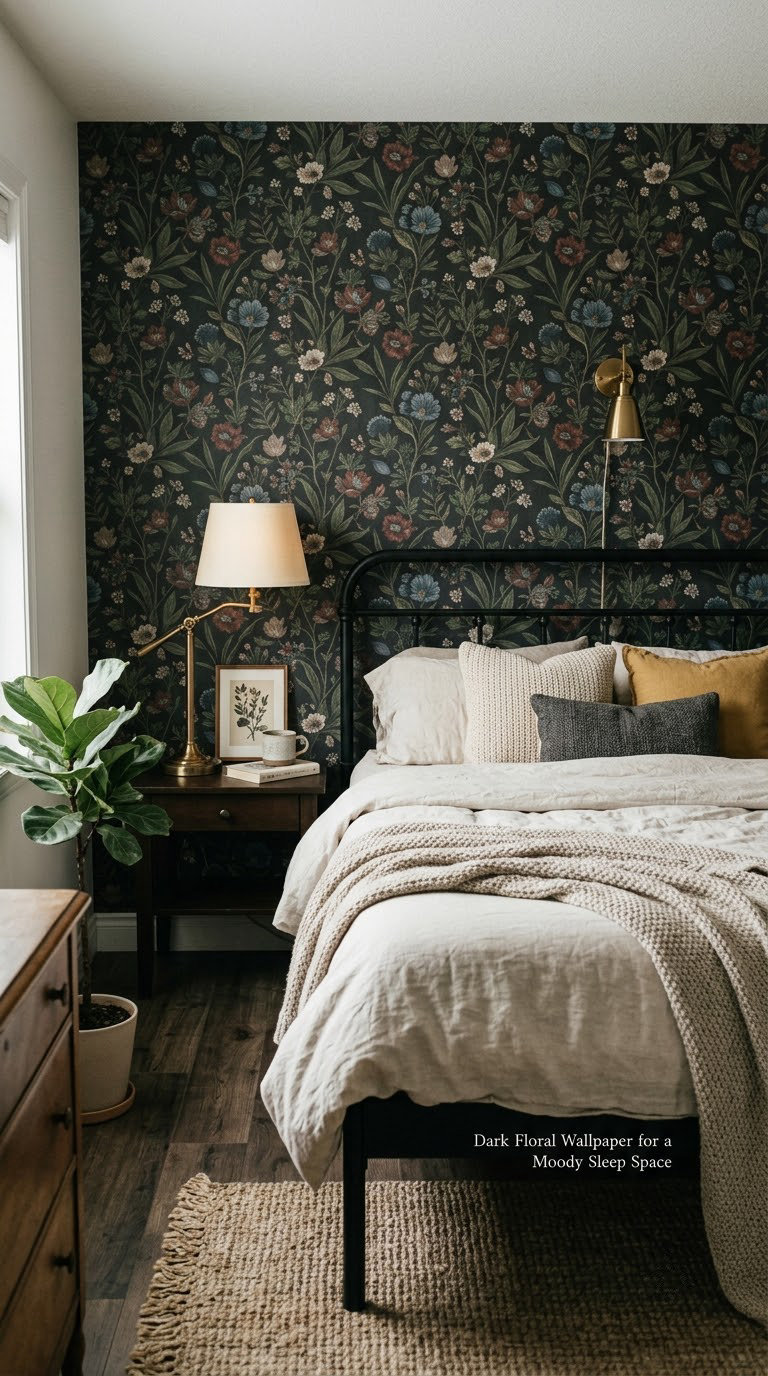
Dark floral wallpaper wraps the bed in a cocoon. Because the background is deep rather than white, the print reads as texture first and flower second, which keeps it from feeling busy.
How to do it
- Choose a wallpaper with a matte or suede finish; gloss on dark paper shows every roller mark.
- Light the wall with bulbs around 4000 kelvin so deep blues and charcoals do not turn muddy.
- Hang in a daylight window, because even paint looks flatter under a single warm bulb.
- Keep bedding light. Cream or white linens are what stop a dark accent wall from swallowing the room.
Cost: USD 110-260 · Difficulty: hire a pro if seams must be invisible · Time: 1-2 days
Good to know: Dark paper is unforgiving of crooked cuts at the ceiling line. If you want drama without the risk, start with a self-adhesive dark panel behind a headboard and keep the top edge hidden by a picture rail.
9. Ombre or Fade Wallpaper for a Dreamy Gradient
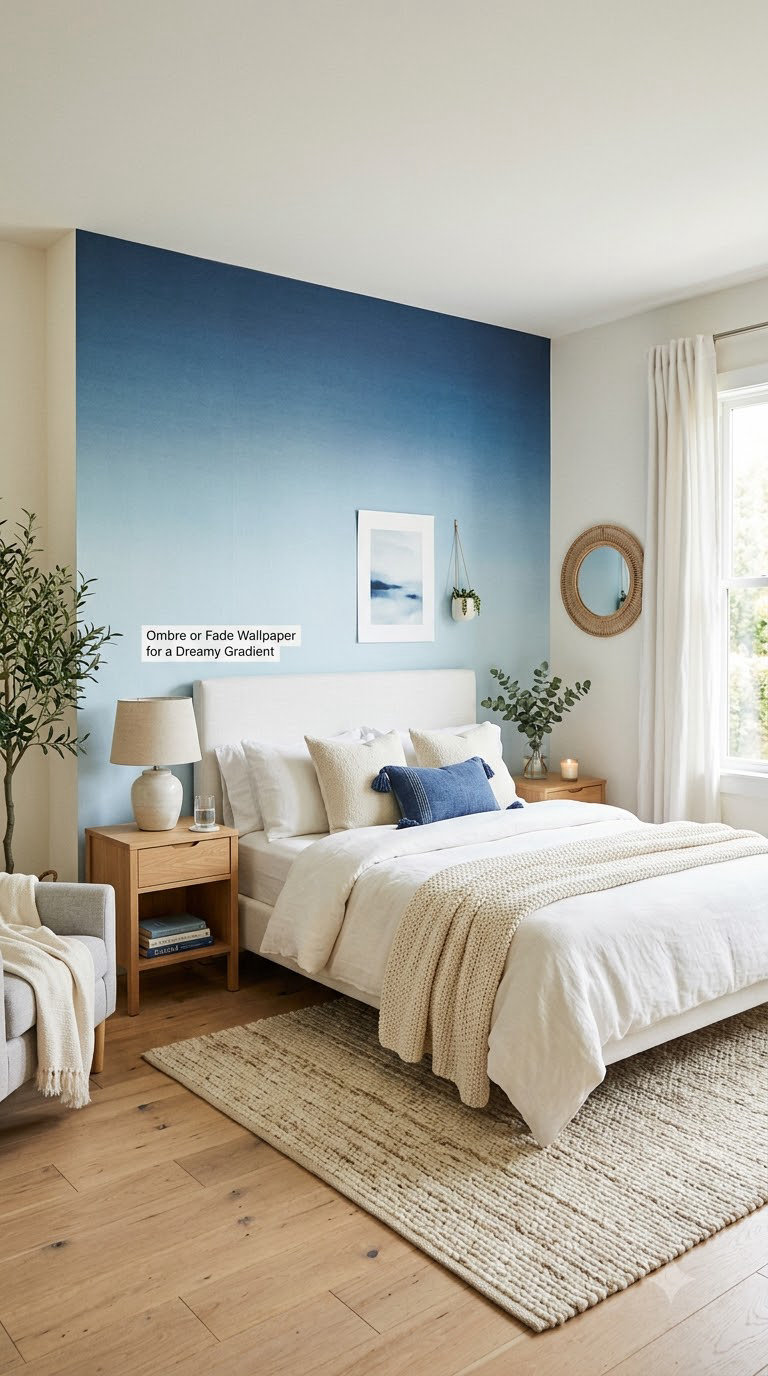
A fading gradient softens the hard line where wall meets ceiling, which is why it makes a plain box room feel taller and airier. It is also the most custom-looking idea here, because almost nothing else changes colour mid-wall.
How to do it
- Order all panels in a single order; gradients can shift slightly between production batches.
- Mark the wall with a level chalk line at the darkest point of the gradient before you start.
- Hang every panel before trimming, so you can adjust the drop until the fade lines up across the wall.
- Cut the top edge once the whole wall is up, working from the left with a long straightedge.
Cost: USD 150-350 · Difficulty: hire a pro · Time: 2-3 days
Good to know: A gradient is only seamless on one continuous wall. If your accent wall has a return or a chimney breast, expect a visible change of tone at the corner and plan the direction around it.
10. Abstract Wallpaper for a Contemporary Bedroom
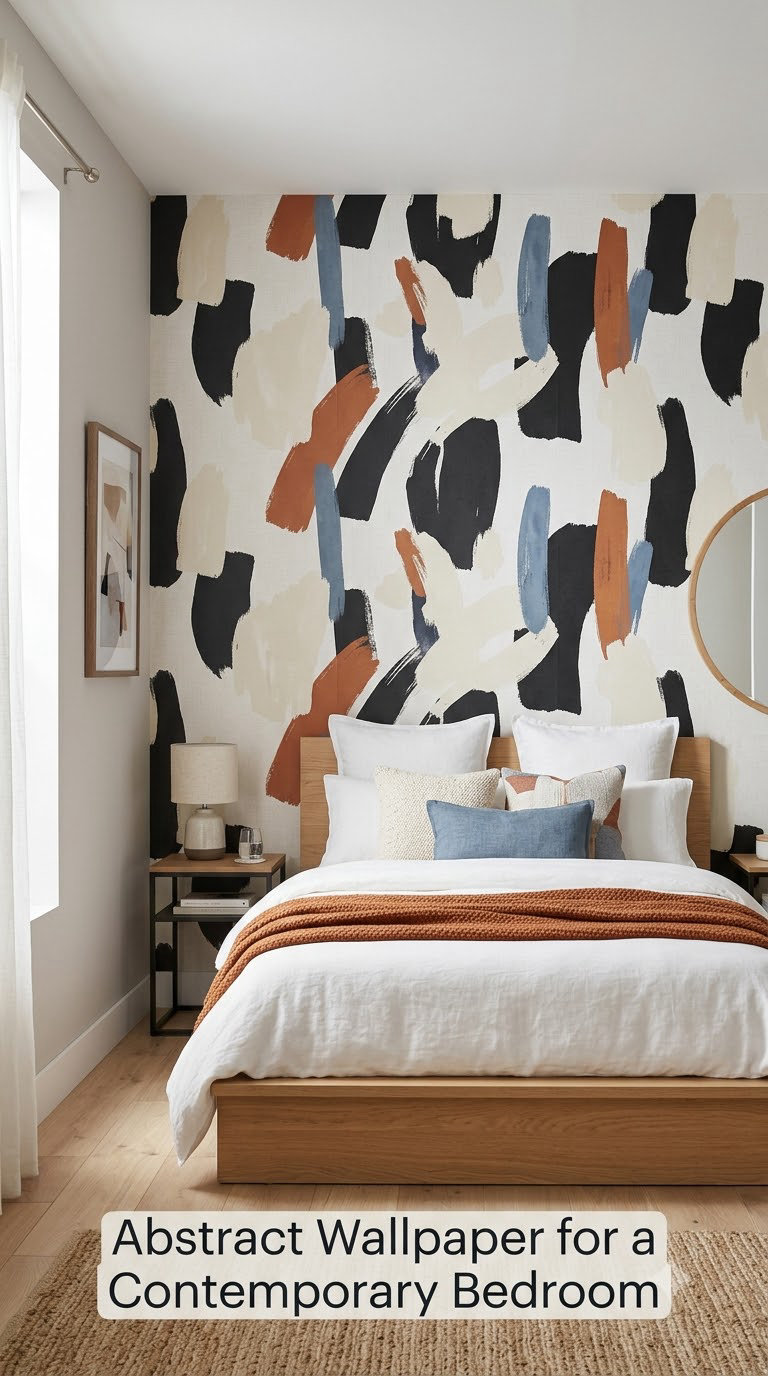
Abstract wallpaper gives you a focal point with no recognisable motif, which makes it the easiest pattern to live with. There is nothing to read, so it never looks tired of itself.
How to do it
- Pull three colours from the print and use one as bedding, one as a frame, one as a rug base.
- Hang it behind a low platform or upholstered bed so the horizontal line of the frame cuts across the brush strokes.
- Check the print from the doorway, not from the pillow; that is the view that has to work.
- Keep other walls plain to the eye, even if they are not plain in colour.
Cost: USD 70-180 · Difficulty: Easy DIY · Time: 3-5 hours
Good to know: Very high-contrast abstract prints make every misaligned panel obvious. A mid-contrast version in similar tones to your wall paint hides small errors and still reads bold from across the room.
11. Herringbone Wallpaper Pattern for Added Dimension
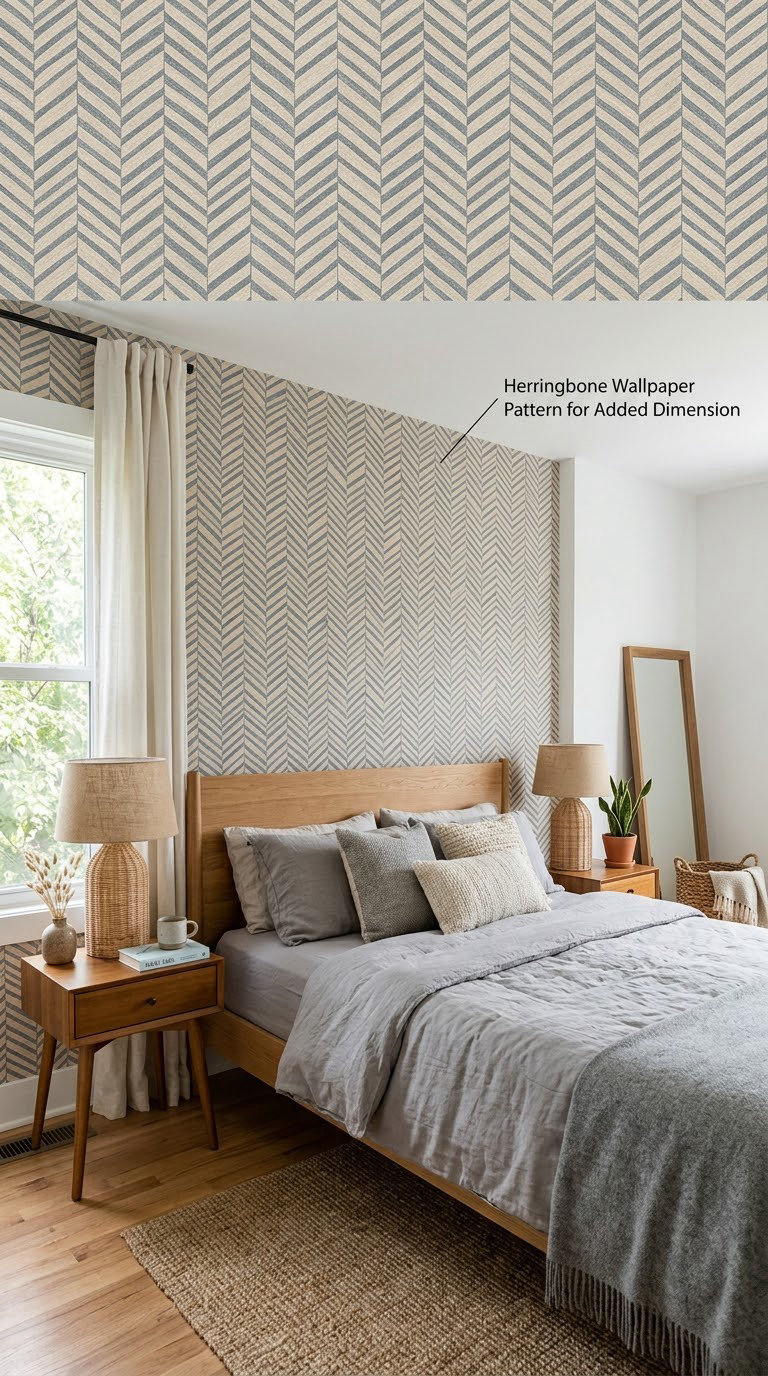
Herringbone wallpaper is a pattern that behaves like texture. The directional zigzags catch light as you walk past, so the wall changes through the day without any colour doing the work.
How to do it
- Choose a small-scale herringbone if your wall is under 10 feet wide, a larger one if you have room.
- Hang the first panel so the pattern points toward the bed, then match every joint by eye from 3 feet away.
- Roll each seam firmly with a seam roller; herringbone shows a lifted edge faster than any flat pattern.
- Use a plain rug in front of the bed so the floor does not add a third competing direction.
Cost: USD 90-200 · Difficulty: Moderate DIY · Time: 5-7 hours
Good to know: Herringbone is a good pick for a windowless bedroom because the pattern gives the flat wall depth. It is a poor match for a very small wall, where the zigzags start to look crowded.
12. Scenic Mural Wallpaper for a Bedroom Focal Point
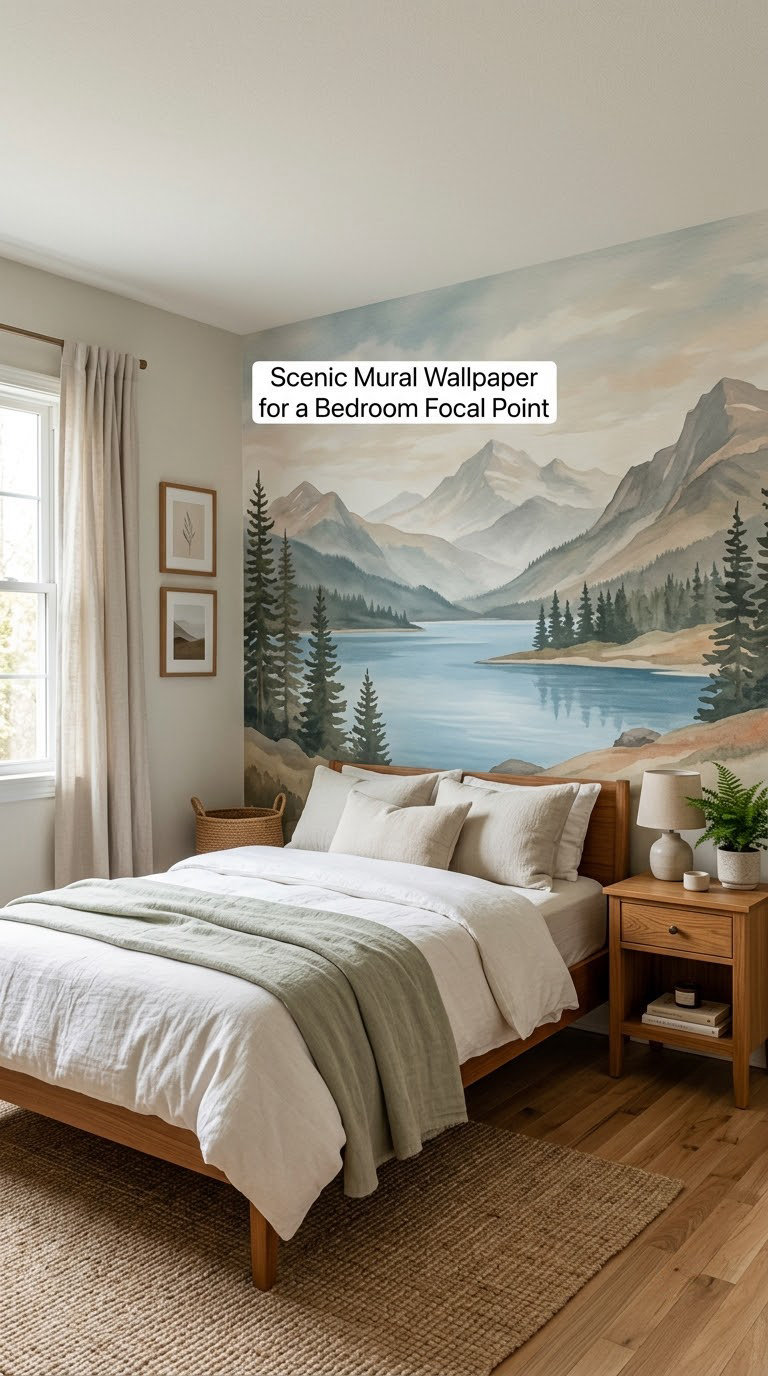
A photographic or illustrated mural makes one wall into a destination. It works best when the room around it stays quiet, so the eye travels to the scene rather than to a pile of art.
How to do it
- Order panels to fit the wall width exactly; a mural that runs out mid-sky looks like a mistake.
- Mark the horizon line with a level pencil before the first panel and check it again after every panel.
- Hang from the top of the wall down, trimming the bottom edge against the baseboard.
- Add one warm light source at the side of the bed so the mural gets even illumination at night.
Cost: USD 100-245 · Difficulty: Easy DIY · Time: about 4 hours
Good to know: Keep gallery art off the mural wall entirely. One bold surface per wall is the rule that makes a mural read as intentional rather than crowded.
13. Checkerboard Wallpaper for Playful Contrast
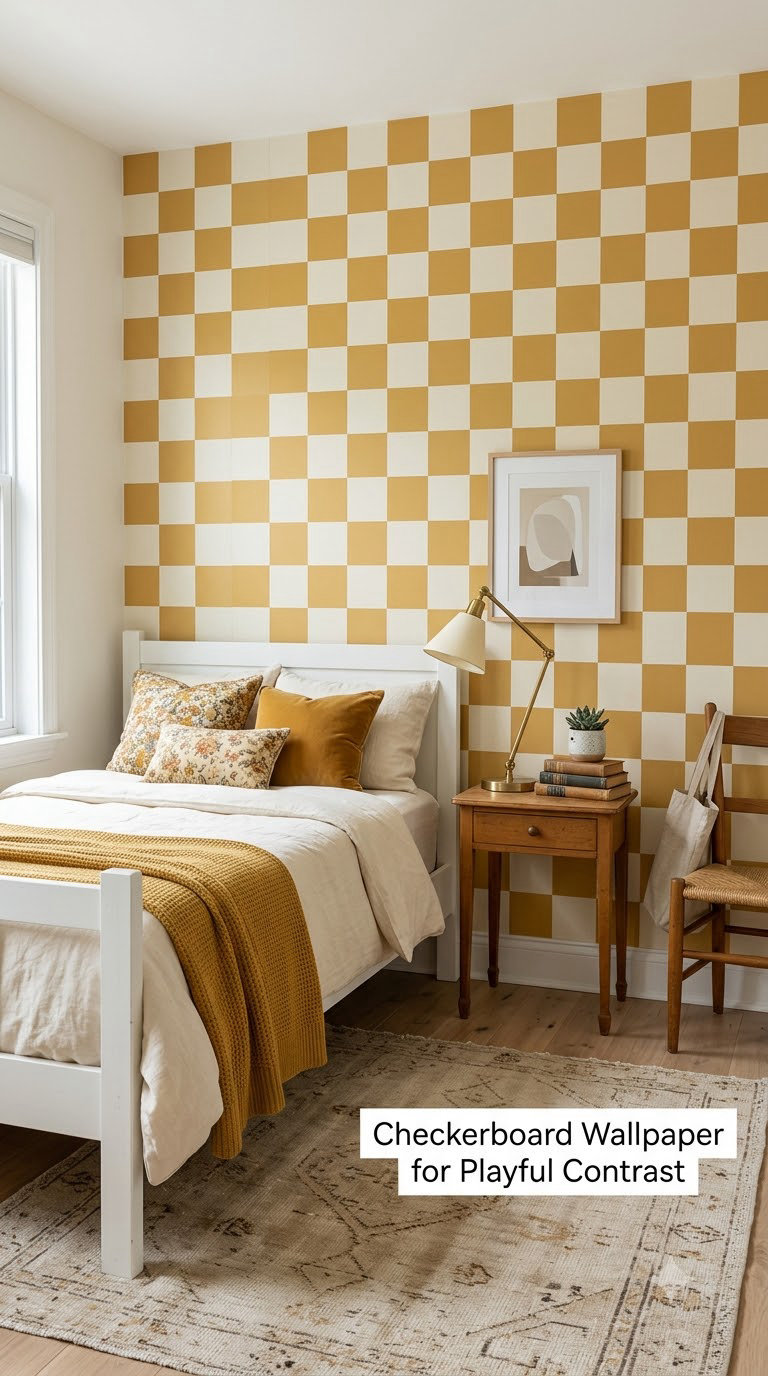
A softened checkerboard gives a bedroom graphic energy without a single flower on the wall. Cream and mustard reads warm and grown-up; pure black and white reads sharp and more urban.
How to do it
- Measure the wall and count the squares so the checker pattern lands square at the floor and ceiling.
- Mark the first square outline in pencil and fill it with a level before you paper.
- Hang every panel, then adjust the drop before trimming anything.
- Run a picture rail or a shelf across the wall at 60 inches (152 cm) to break the grid.
Cost: USD 80-190 · Difficulty: Easy DIY · Time: 4-6 hours
Good to know: This is the least forgiving pattern in the list, because every error is a visible right angle. Peel-and-stick panels that arrive pre-sized will help more here than a full roll.
14. Damask Wallpaper for a Classic Bedroom Makeover
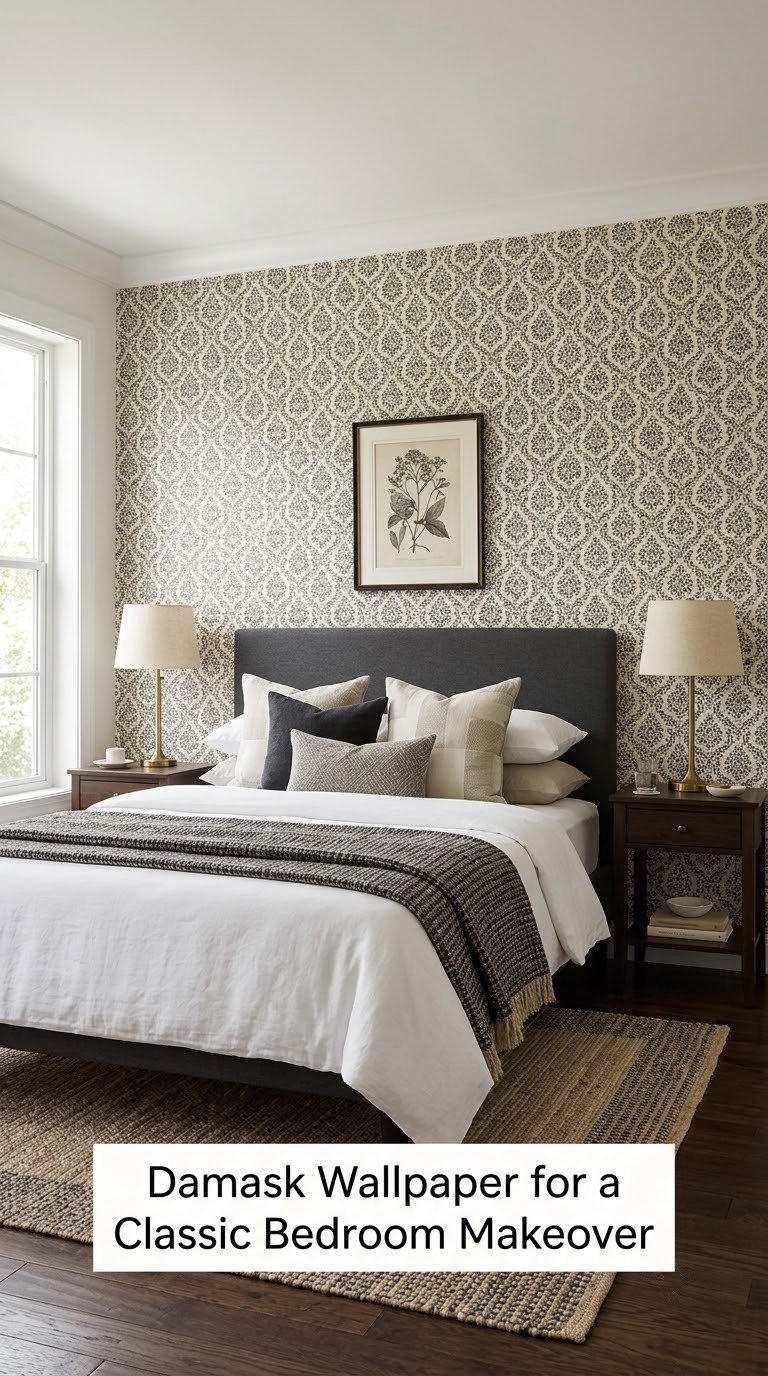
Damask brings traditional pattern into a bedroom without the museum feel, provided the scale is right. Small-scale damask in two tones stays contemporary; the same motif blown up to 24 inches (61 cm) reads dated fast.
How to do it
- Pick a damask with a repeat under 20 inches (51 cm) for walls under 9 feet wide.
- Centre the largest motif on the wall rather than starting at the corner, so the pattern is symmetric around the bed.
- Plan the lighting first; symmetrical lamps on each side of the bed are what make damask look deliberate.
- Keep window treatments plain so the wallpaper stays the only pattern in the room.
Cost: USD 120-280 · Difficulty: Moderate DIY · Time: one weekend, about 7 hours
Good to know: If you like a green room more than a neutral one, our green bedroom wallpaper ideas show how damask changes when the ground colour is a deep olive or sage.
15. Nature-Inspired Woodgrain Wallpaper for Warmth
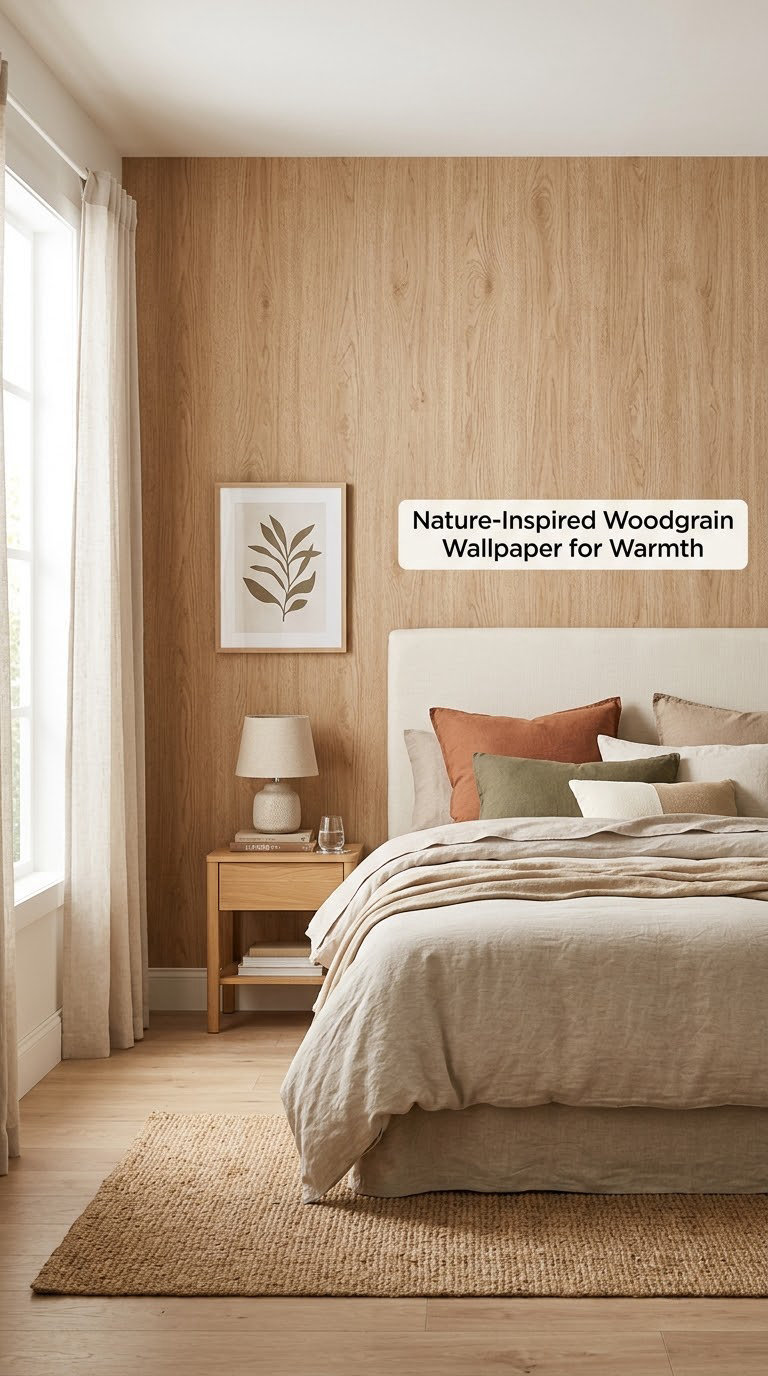
Woodgrain or tree-ring wallpaper brings warmth to a room built in a century when plaster walls were the only option. It also disguises uneven plaster better than flat paint does.
How to do it
- Decide on vertical or horizontal grain first; vertical makes the room taller, horizontal makes it wider.
- Start at a corner and work toward the least-lit wall so your mistakes land in shadow.
- Stagger panel cuts by at least 12 inches (30 cm) when the grain repeats in bands.
- Add one linen or cotton textile and one black metal detail to stop the room reading as a cabin.
Cost: USD 60-170 · Difficulty: Easy DIY · Time: 3-5 hours
Good to know: Real wood veneer and printed woodgrain look nothing alike under raking light. If a room gets strong side light, buy a sample and check it in the evening before ordering a full roll.
16. Paper-Lantern Wallpaper for a Delicate Bedroom Glow
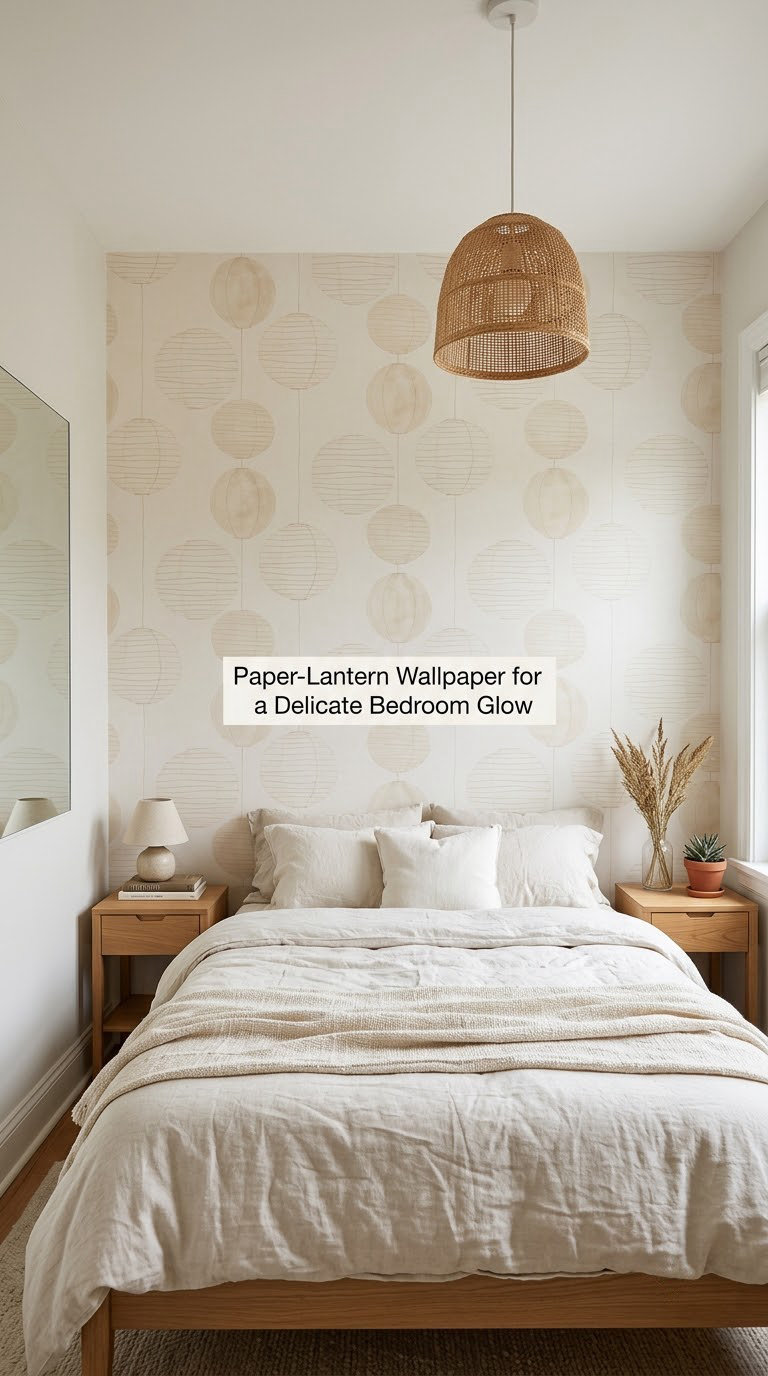
A repeating lantern motif is the gentlest way to add pattern to a bedroom that is mostly white. Because the repeat is soft-edged, it reads as light rather than as print.
How to do it
- Measure so the repeat divides evenly into the wall width, then start at the floor line.
- Hang the first panel with the bottom 2 inches (5 cm) longer than the wall, and trim once the wall is complete.
- Use warm bulbs around 2700 kelvin; the print is designed to look lit from within.
- Repeat the motif in a lamp shade or a curtain panel so the pattern appears at two heights.
Cost: USD 70-170 · Difficulty: Easy DIY · Time: 3-4 hours
Good to know: This pattern is more prone to showing a plumb line drift than most, so check your level every second panel. It suits a guest room or a teen bedroom particularly well.
17. One-Wall Mural-Style Print for a Bold Bedroom Focal Point
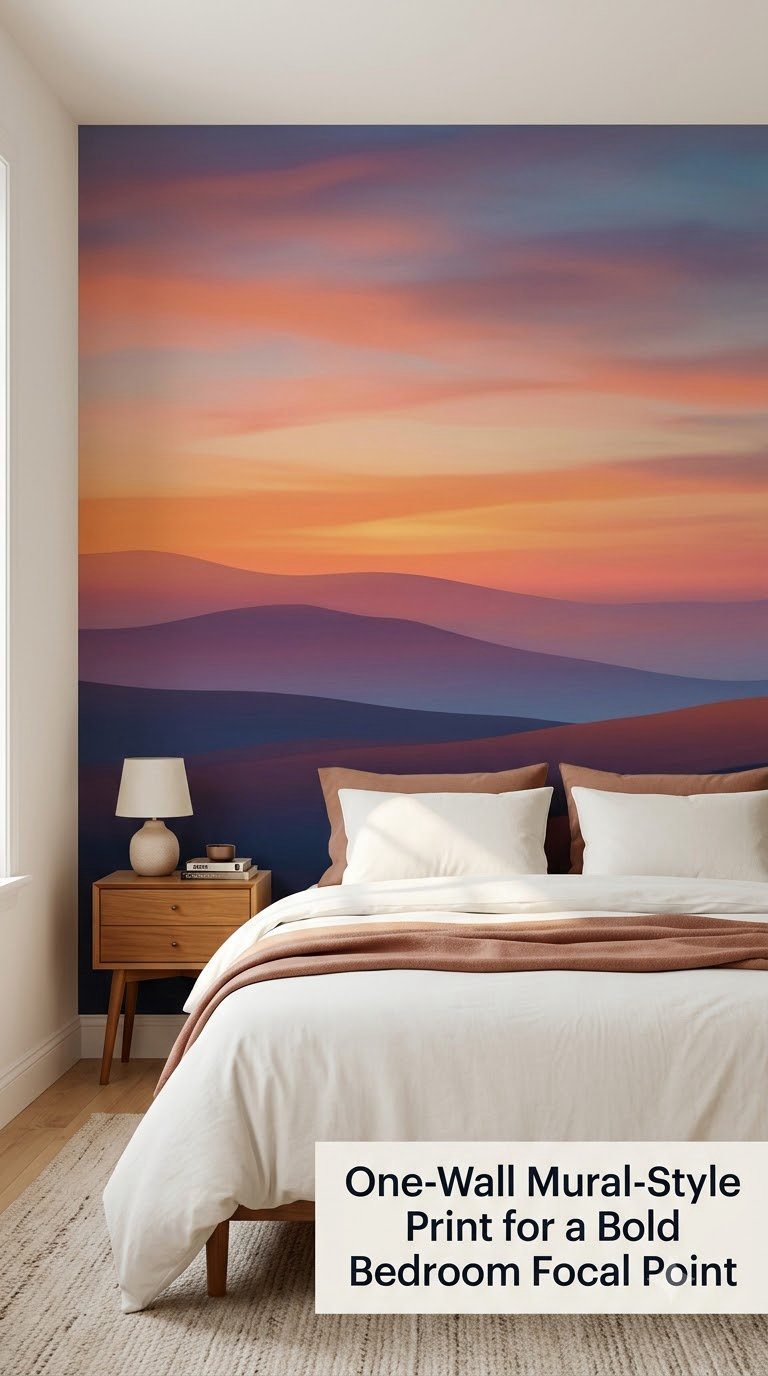
A single oversized panel delivers more visual impact per sheet than a small repeat, and it is the version of a mural most people can actually install themselves.
How to do it
- Size the panel so it is wider than the headboard by at least 12 inches (30 cm) on each side.
- Centre it on the bed, then check the composition from the doorway and from the pillow.
- Apply the top third first, let it set for 10 minutes, then work down the wall.
- Trim the bottom edge last, against the baseboard, with the wall fully covered.
Cost: USD 90-245 · Difficulty: Easy DIY · Time: 3-4 hours
Good to know: One panel means one seam at most, which is why this is the sane choice for renters. Make sure the panel is printed to a non-woven backing; heavy woven paper will sag on a full wall.
18. Two-Tone Block Wallpaper for a Graphic Modern Look
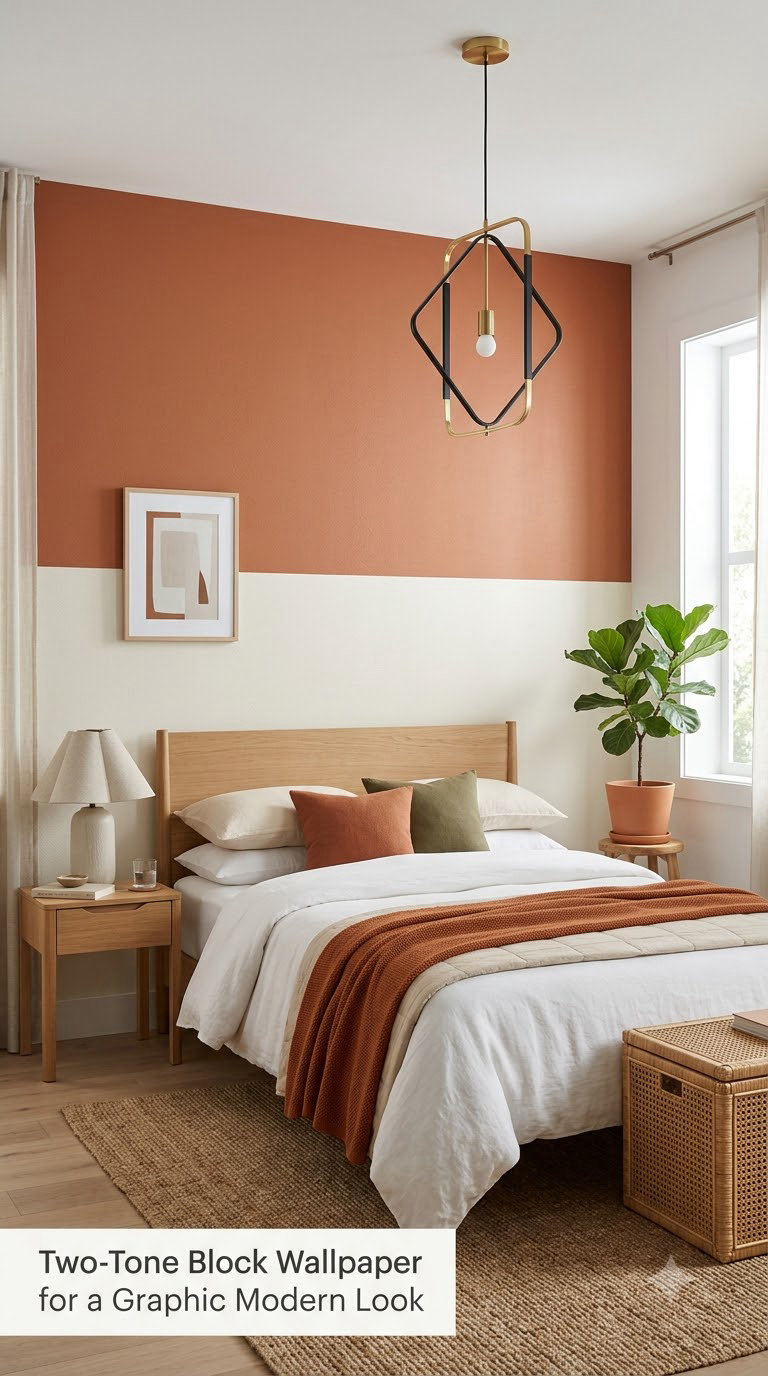
Two large blocks of colour divide the sleeping area and give a plain wall a clean modern backdrop. It is the least fussy idea here, and the fastest to change when your taste moves on.
How to do it
- Mark your split line with a level chalk line; a straight horizontal division 36 to 42 inches (91-107 cm) above the floor sits at eye level from the bed.
- Hang the first colour across the whole wall, then butt the second pattern tightly along the chalk line.
- Use a removable painter’s tape edge under the join to keep the line crisp while you burnish.
- Repeat both colours once each in bedding and a rug so the wall reads as one decision.
Cost: USD 50-140 · Difficulty: Easy DIY · Time: 2-3 hours
Good to know: Two patterns with very different repeats will fight at the join. Pair a plain tonal block with a pattern, or two blocks with the same repeat, and the line stays invisible.
19. Small-Pattern Wallpaper for a Petite or Narrow Bedroom
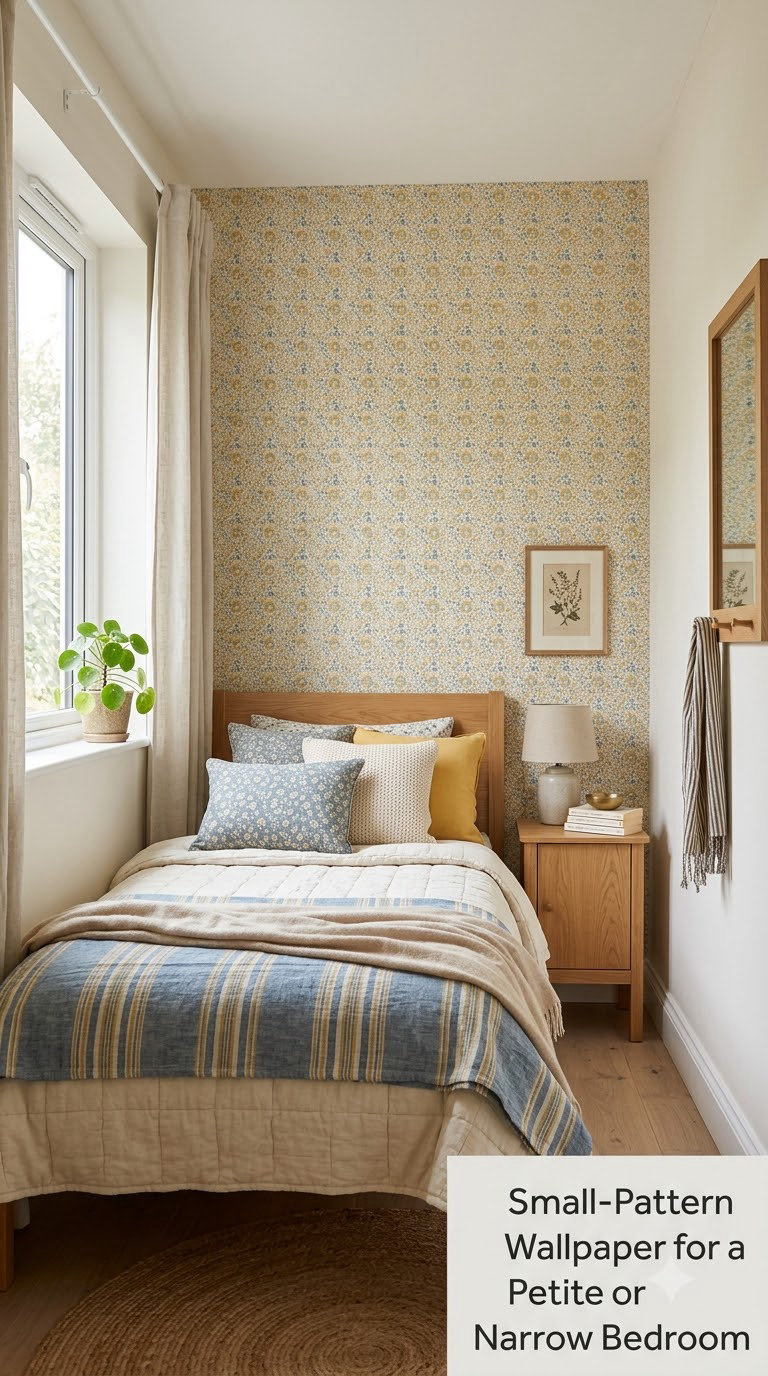
A compact repeat is the answer for a narrow bedroom, where a large print has no wall to expand into. Small pattern also hides seams, which is a bonus in a room you paper alone.
How to do it
- Choose a repeat under 12 inches (30 cm) and a two-colour palette.
- Paper the narrowest wall in the room, where the print is compressed, rather than the widest.
- Use leftover paper from each panel to patch future scrapes; save the offcuts in a labelled envelope.
- Keep the ceiling line unpainted if possible, so the pattern runs to the top and the room gains height.
Cost: USD 60-150 · Difficulty: Easy DIY · Time: 3-5 hours
Good to know: More than three colours in a small room starts to look busy at 8 feet. Two colours plus one accent in the bedding is the safe maximum.
20. Removable Wallpaper Accent Wall for a Flexible Bedroom Update
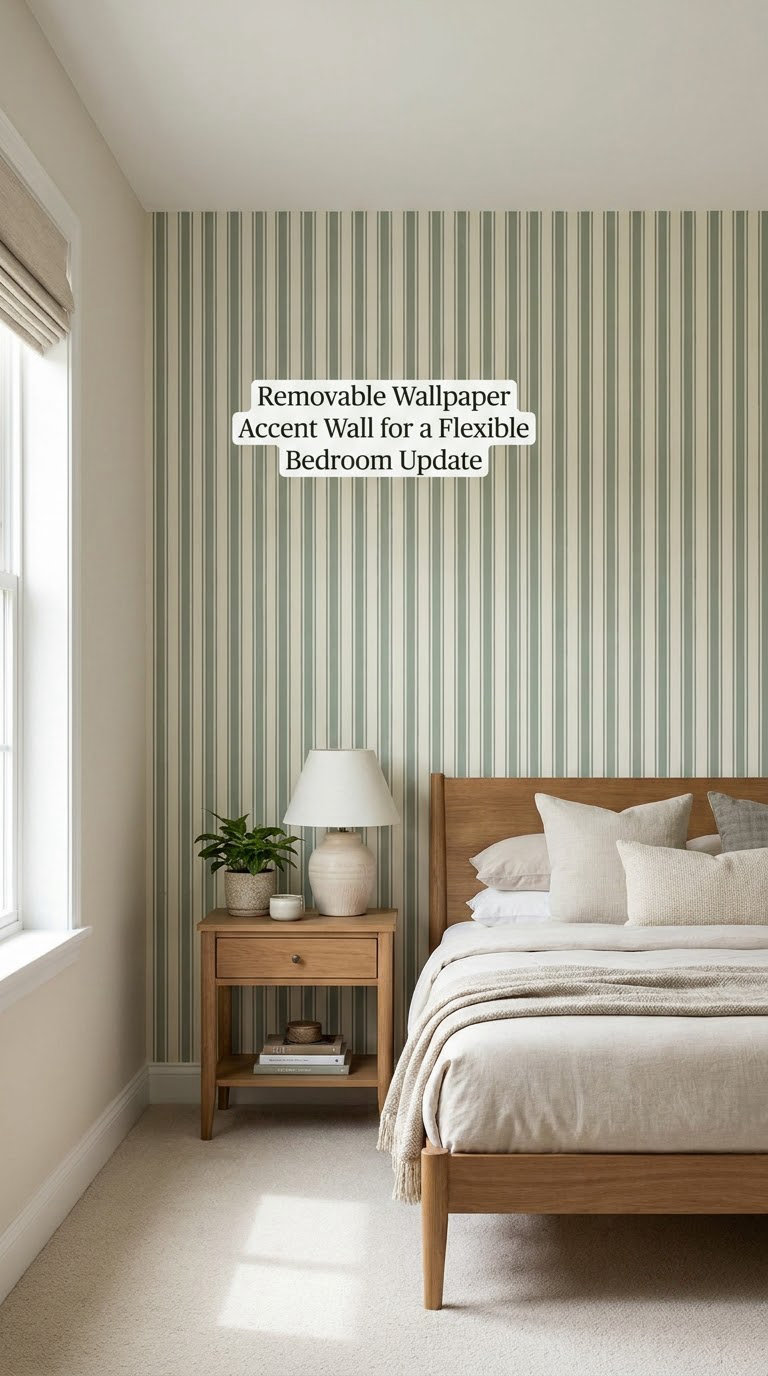
Removable peel-and-stick wallpaper is the practical choice when you rent, when you want to change your mind, or when the wall behind the bed is in bad shape. It also fails more gracefully than pasted paper: a lifted corner can be re-stuck, a torn seam cannot.
How to do it
- Run a finger across the wall. Any texture you can feel, such as orange peel or popcorn, will stop adhesive, so sand it flat or prime it first.
- Clean with a damp cloth, let the wall dry for 24 hours, and fill nail holes with paintable filler.
- Leave a 1/2 inch (13 mm) expansion gap at the floor and ceiling; vinyl moves with temperature.
- Peel the liner back 6 inches (15 cm) at a time, pressing with a squeegee from the centre outwards.
- Remove by lifting a corner slowly at a low angle, one hand holding the paper, the other pressing it back on itself.
Cost: USD 40-130 · Difficulty: Easy DIY · Time: 2-4 hours
Good to know: The honest downsides: it lifts in humid rooms, it can strip matte paint if left for years, and every bubble you push out now saves you a corner coming loose later. Test a 4-inch (10 cm) square in a corner for 48 hours before you commit to a whole wall.
Planning Tips
Measure first, then order. Multiply wall width by wall height, add 15 percent for pattern repeat, trimming and mistakes, and buy the extra roll rather than saving USD 30 and running out two panels short.
- Measure twice, order once. Note the width at the floor, the middle and the ceiling. Old walls are rarely the same size top to bottom, and the difference decides how you trim.
- Wait for the paint to cure. Fresh paint needs 2 to 4 weeks before paper or adhesive goes on. Adhesive on a curing wall is the most common reason peel-and-stick lifts at the corners.
- Sample first. Buy two or three samples, tape them to the wall, and look at them morning and evening for three days. Most print-on-demand wallpaper cannot be returned, so a sample is cheaper than a mistake.
- Keep a 10 to 15 percent budget buffer. Add a roller, a seam roller, a paste brush, extra liner and a utility blade to the paper cost. Tooling is usually under USD 40 and saves the project.
- Plan the furniture second. Know the bed width before you pick the pattern. A large-scale print looks fantastic behind a low bed and crowded behind a tall upholstered one.
- Do the work in order. Patch, sand, clean, prime, hang, then paint the trim last so stray drips never land on finished paper.
If you are working around a fireplace rather than a bed, the approach changes, and our fireplace wall wallpaper ideas cover how heat and hearth stone change the layout.
Frequently Asked Questions
Which wallpaper is best for a bedroom accent wall?
The best wallpaper depends on your room size, furniture, lighting, and the mood you want. Large-scale patterns such as botanicals or murals create drama and suit rooms with 9-foot ceilings or more, while small repeated patterns suit compact rooms and restrained furniture. In a dark or windowless bedroom, choose a pattern with a deep ground colour and a matte finish. In a small room, pick a vertical pattern with a repeat you can match to the wall width.
Can I use peel-and-stick wallpaper in a bedroom?
Yes, peel-and-stick wallpaper suits bedrooms, especially in rentals, because it comes down without leaving heavy adhesive residue. Apply it only to a clean, smooth, dry wall. Textured drywall, freshly painted walls inside four weeks, and matte paint are all common failure points, so sand texture flat, let paint cure, and test a small square in a corner for 48 hours before you cover a whole wall.
Should the accent wall go behind the bed?
Behind the bed is the default choice because it creates a focal point and makes the bed look deliberately placed. The wall you face from the bed is the second best, since you see it all night. In a very small bedroom, check the clearance either side of the bed and choose a lighter or smaller-scale pattern so the wall does not crowd the frame.
How much wallpaper do I need for one bedroom wall?
Measure the wall width and height, then multiply the two to get the surface area in square feet. Add 15 percent to cover the pattern repeat, trimming, uneven walls, and a mistake or two. Buy one extra roll rather than relying on an exact match, because most print-on-demand wallpaper has no returns and a short roll cannot be fixed halfway up the wall.
What color wallpaper is best for a bedroom?
Choose a color that reflects the light in the room and the mood you want when you wake up. Muted blues, sage, warm greys, and dusty pinks suit low-light rooms because they soften contrast. Deep greens, navy, and charcoal work well in bright rooms with strong artificial light. Pick a color you will still like in five years rather than the one currently trending, since you see it every morning.
What is the downside of peel and stick wallpaper?
The main downsides are lifting corners, bubbles that do not press out, and paint damage on removal. Adhesive does not bond well to textured drywall, and long-term pressure can strip matte or flat paint. Pattern matching is harder than on pasted paper, and humidity in a poorly ventilated bedroom weakens the bond. Repositioning is possible early on, but not after the paper has set for weeks.
Start with the sample. Tape two patterns to the wall you actually want to change, live with them for three days, and pick the one that still looks right when the room is dark. Then measure, order the extra roll, and hang the wall you look at every morning.