How to Repair a Chipped Bathtub: Easy DIY Guide (2026)
A chip in a bathtub is a break in the surface coating, and on cast iron or steel it exposes raw metal that starts rusting within two to four weeks. How to repair a chipped bathtub is mostly a matter of cleaning, sanding, filling and sealing, and most chips smaller than a quarter inch are good candidates for a weekend project.
The catch is material. A rigid porcelain enamel repair that works beautifully on a cast iron tub will crack on a flexible acrylic one, and a soft filler meant for acrylic will never sit flush on enamel. Get that match right and the rest is straightforward.
Contents
Time: 2 to 3 hours of active work plus drying time · Cost: one repair kit and a few sandpaper sheets · Difficulty: Moderate DIY · Skill level: Comfortable with sanding and mixing a two-part compound
Tools and Materials
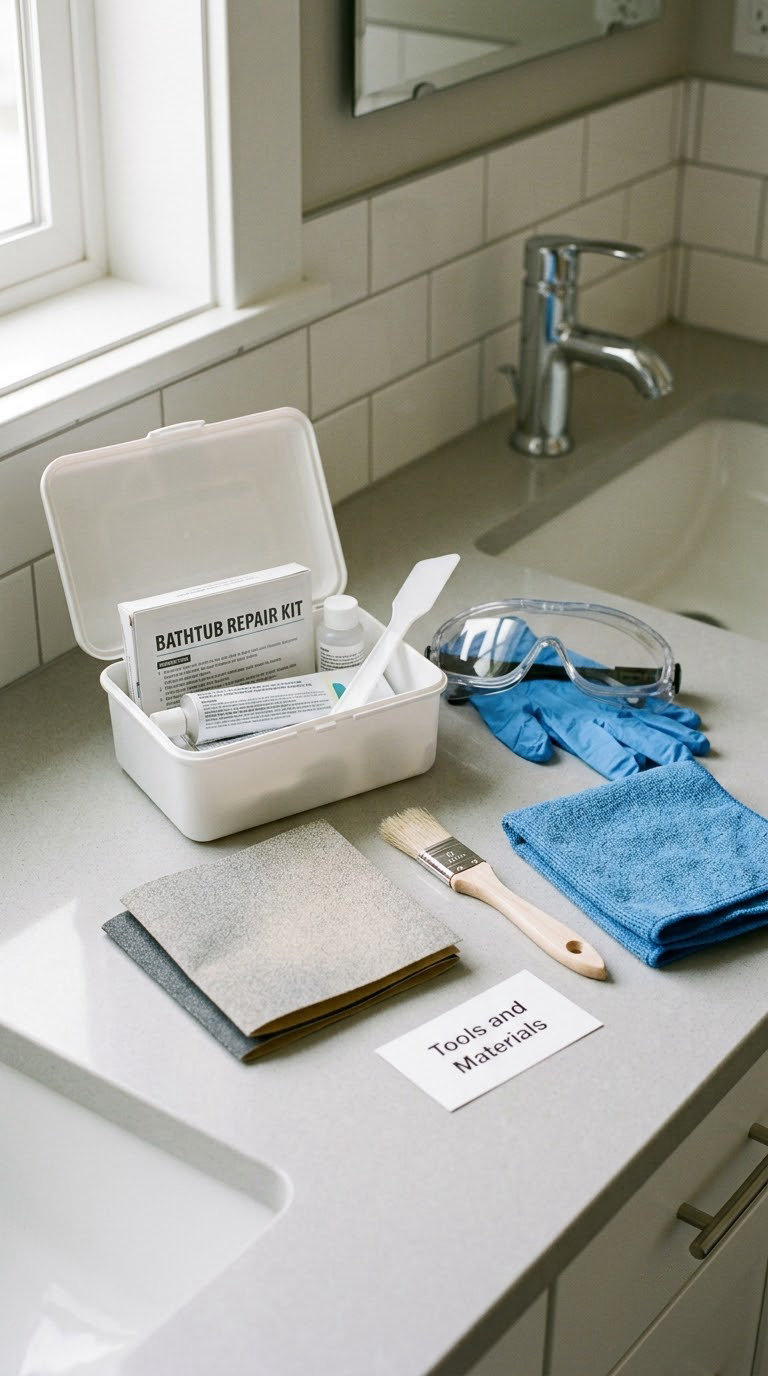
Everything here fits in one toolbox. Gather it all before you start, because a mid-repair trip to the hardware store usually means the filler sits open longer than its working time.
Safety and prep supplies
- Clear safety goggles and nitrile gloves
- Paper or cloth drop cloth, plus a small plastic tray for mixing
- Low-tack painter’s tape, 1 inch wide
- Mild dish soap, a degreaser, isopropyl alcohol or acetone
- Two lint-free microfiber cloths and a soft nylon brush
Repair and finishing supplies
- Two-part epoxy or acrylic repair filler matched to your tub material
- Wet-or-dry sandpaper: 120 grit, 220 to 320 grit, 400 to 600 grit, and 1000 to 1500 grit
- Putty knife or small plastic spreader, 1 to 2 inch wide
- Touch-up enamel or a tub-and-tile topcoat in the closest matching white
- Compatible primer, a cast iron or metal primer for steel tubs
- A small brush (1.5 inch) or a foam roller, plus a rust remover or rust converter if metal shows orange
Before You Start: Identify the Tub and Assess the Damage
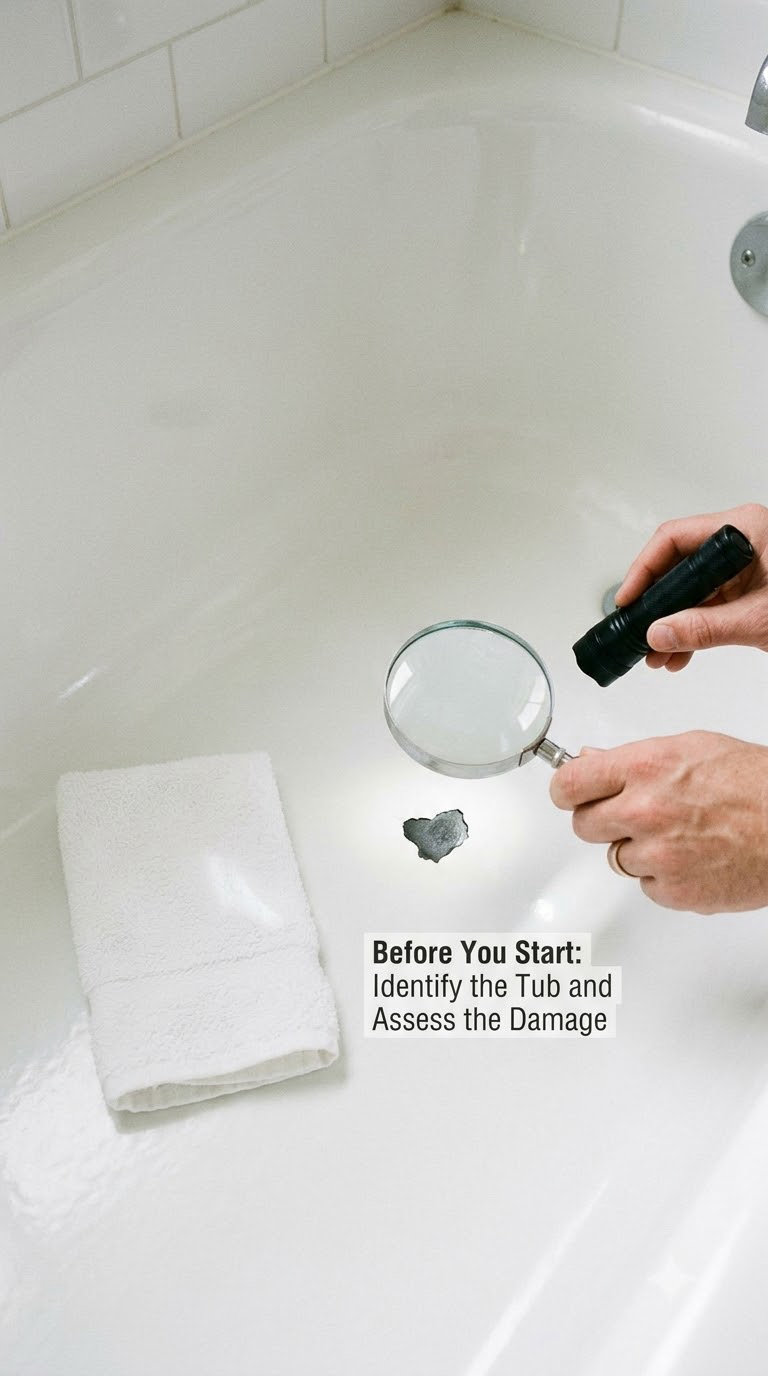
Identify the tub before you buy a compound, because it decides everything else. Knock firmly on the sidewall with your knuckles and listen. Cast iron rings deep and cold, steel rings thin and high pitched, fiberglass and acrylic both knock hollow but flex slightly under your palm when you press.
Weight confirms it. A standard 60 inch cast iron tub runs around 300 pounds, steel closer to 70 to 100, and molded fiberglass or acrylic tubs are light enough to lift with two people.
What makes a chip a good DIY candidate
- Smaller than a quarter inch, or roughly the size of a dime
- Shallow, with no sharp edge cutting into the tub
- On the tub floor or a flat area of the sidewall, not right on a curve or a corner
- The rest of the surface still feels smooth and firm under your palm
Walk away from the project and call a refinisher if the crack runs longer than an inch, if the metal is pitted or bleeding rust beyond the chip border, if the surface around the chip flexes or sounds hollow, or if the damage sits next to the drain, overflow plate or a fixture flange. If you find more than three or four chips, full refinishing usually costs less per chip than patching them one at a time.
If you spot bright orange metal, act the same day. Brush on a coat of clear nail polish to seal the exposed metal from moisture, which buys you time without committing to the full repair.
Step 1: Clean and Dry the Damaged Area
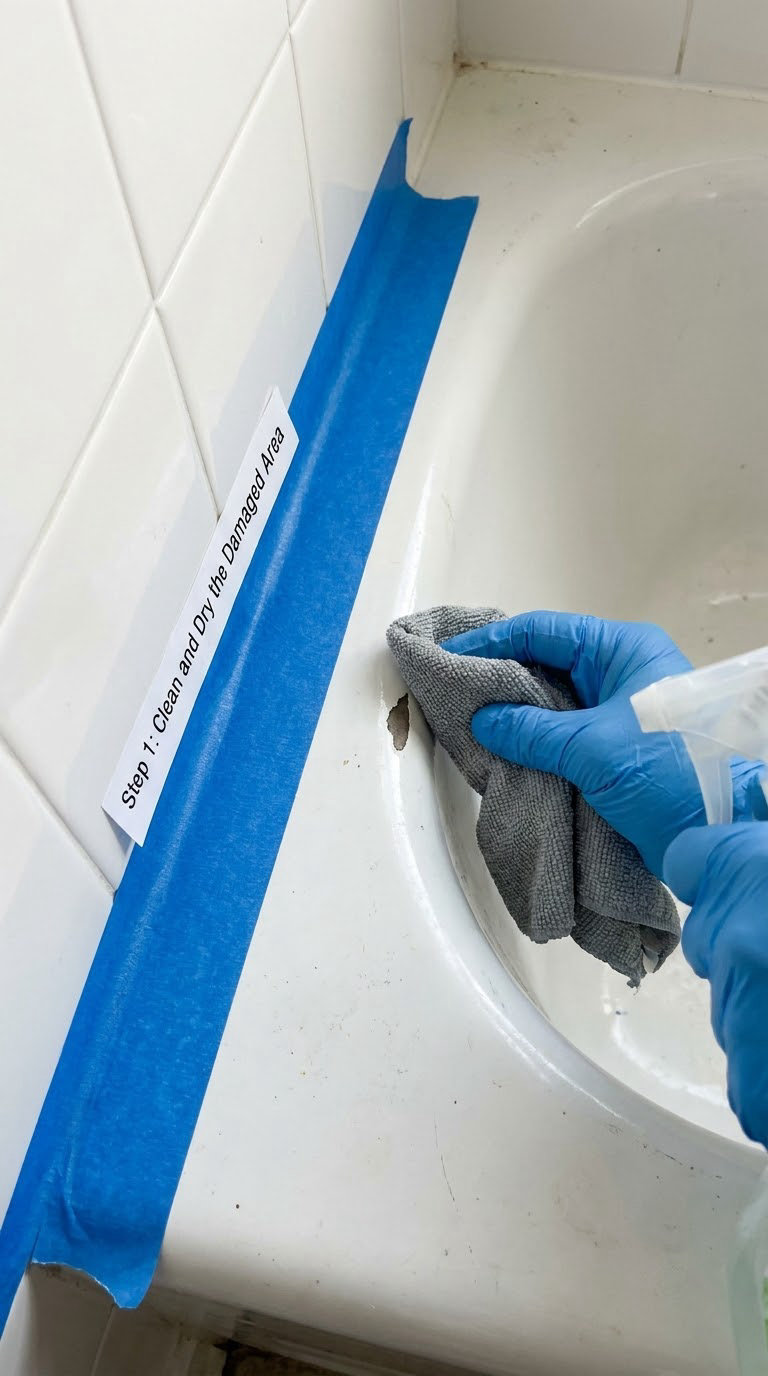
Surface prep decides how long the patch lasts, more than any brand of filler. Wash the area with dish soap and warm water, then scrub the chip itself with a nylon brush to loosen any loose enamel or dirt sitting in the void.
Rinse, then wipe with isopropyl alcohol or acetone to cut through soap film, skin oils and any wax. Let the chip dry completely, ten minutes at minimum, and keep water out of the basin for the whole job.
Tape a border of low-tack tape a couple of inches around the chip so drips and dust stay off the gloss. On a vertical sidewall chip, tape a scrap of paper below the damage to catch runs.
Step 2: Sand the Chip and Its Edges
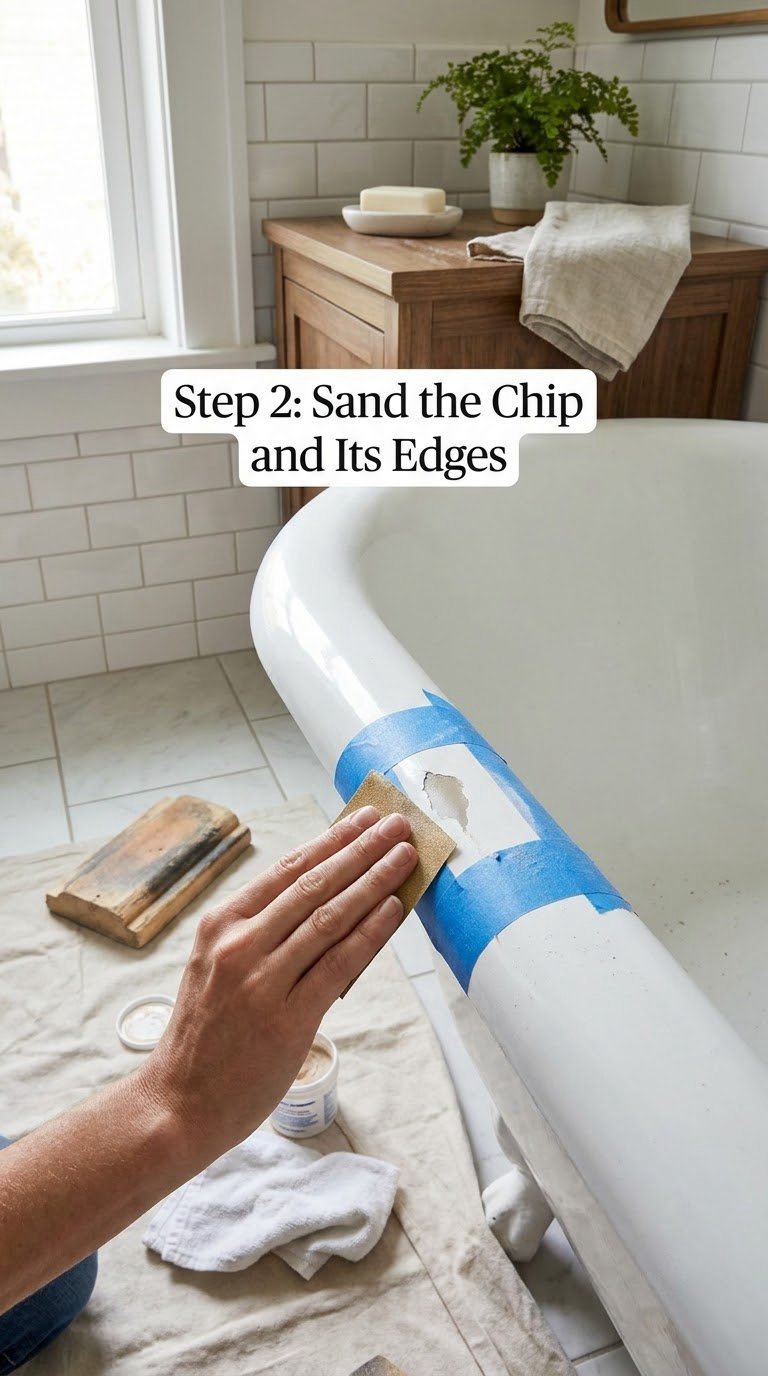
Start at 120 grit to knock back any raised or flaking enamel, staying inside the chip. Then work to 220 or 320 grit and scuff the enamel a few millimeters past the edge, feathering outward in a circle until the scuffed zone blends into the surrounding surface.
That feathered ring is what gives the filler something to grip. You are not trying to remove the chip here, only to create tooth and a gradual ramp.
Wipe the dust away with a damp cloth and dry it again. On fiberglass and acrylic, use a random orbital sander or light hand pressure, because those surfaces sand dull fast and do not polish back to a shine.
Step 3: Apply the Bathtub Repair Filler
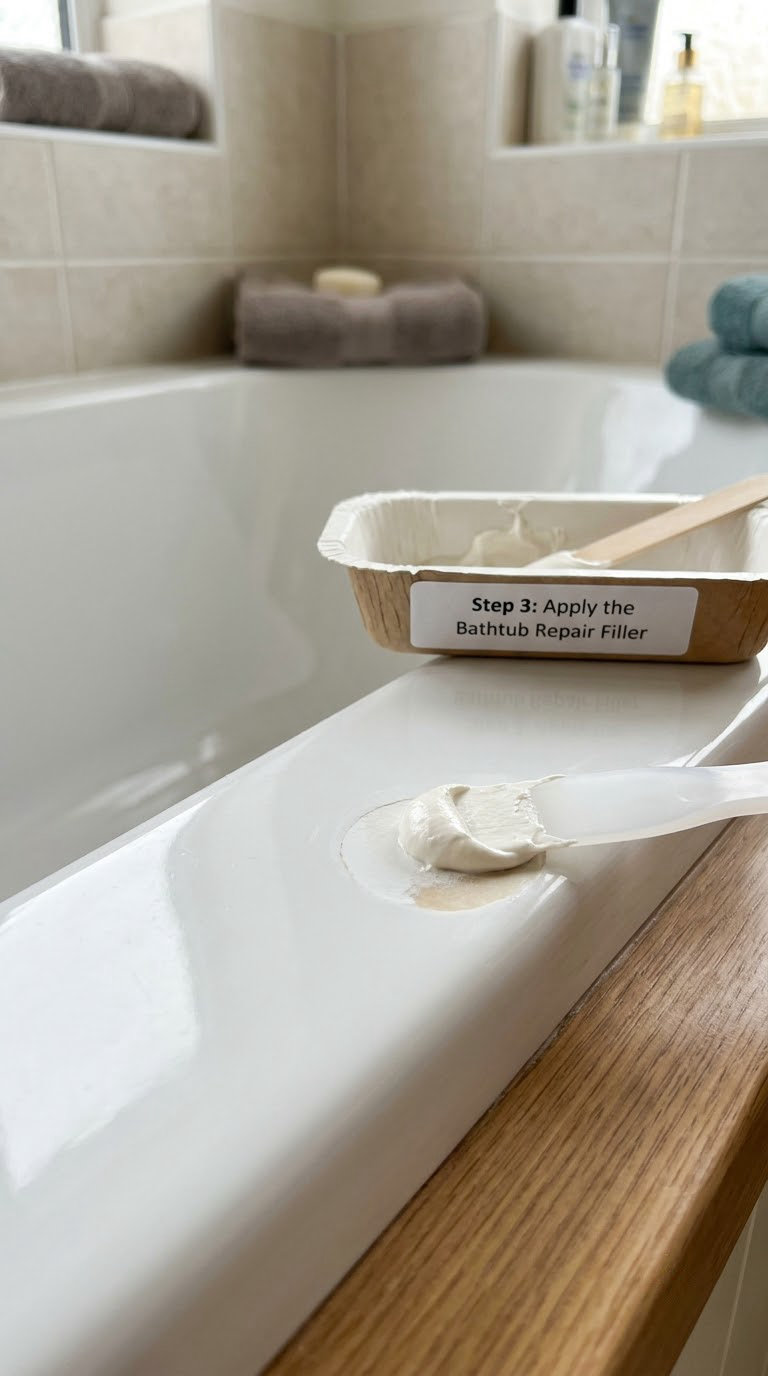
Squeeze out equal parts resin and hardener on your tray and stir for the full time the label specifies, usually 30 to 60 seconds, until the colour is even with no streaks. You get five to ten minutes of working time before it starts to set, so mix only what you can place in a few minutes.
Paste a thin layer into the chip with the spreader, pressing out air pockets from the bottom up. Then build a second thin coat that sits a hair proud of the surface, about the thickness of a grain of rice. Building thin coats and sanding between them beats one thick layer that sinks and cracks later.
How to repair a chipped cast iron or steel tub
If bare metal is showing, treat it first. Knock the rust back to clean bright metal with 120 grit, apply a rust converter if any orange remains, let it dry, and coat the metal with a metal or cast iron primer before the filler goes on. Skipping that primer on exposed iron is the most common reason patches peel off within months.
Sidewall and vertical chips are harder than floor chips because gravity pulls the filler down as it levels. Work in smaller amounts, hold the spreader against the surface a moment longer, and tape a piece of plastic film over the fresh fill so the slumping compound sets against a flat plane.
Acrylic and fiberglass tubs take a flexible repair filler made for those surfaces, applied almost flush rather than proud, since a rigid epoxy on a flexing panel cracks at the edges. Chips deeper than about an eighth inch want a square of fiberglass mesh laid into the wet filler for reinforcement.
Let the filler cure for the full time on the label, commonly 24 hours for a thick epoxy fill, before you touch it with sandpaper.
Step 4: Level the Repair and Clean the Surface
Sand the cured filler with 400 to 600 grit until it sits level with the surrounding surface, then finish with 1000 to 1500 grit wet, keeping the area damp so dust does not settle into the repair. Wipe with a damp cloth between grits to see the true surface.
Run a fingernail across the repair with light pressure. Any catch means more sanding, and a bump that never comes flush will stay visible forever under bathroom light.
If the filler sank below the surface, lay a second thin coat, let it cure, and sand again. If it stayed proud, keep sanding. Either way, wipe the dust off and let the area dry fully before any primer or paint goes near it.
Step 5: Prime and Paint the Bathtub Repair
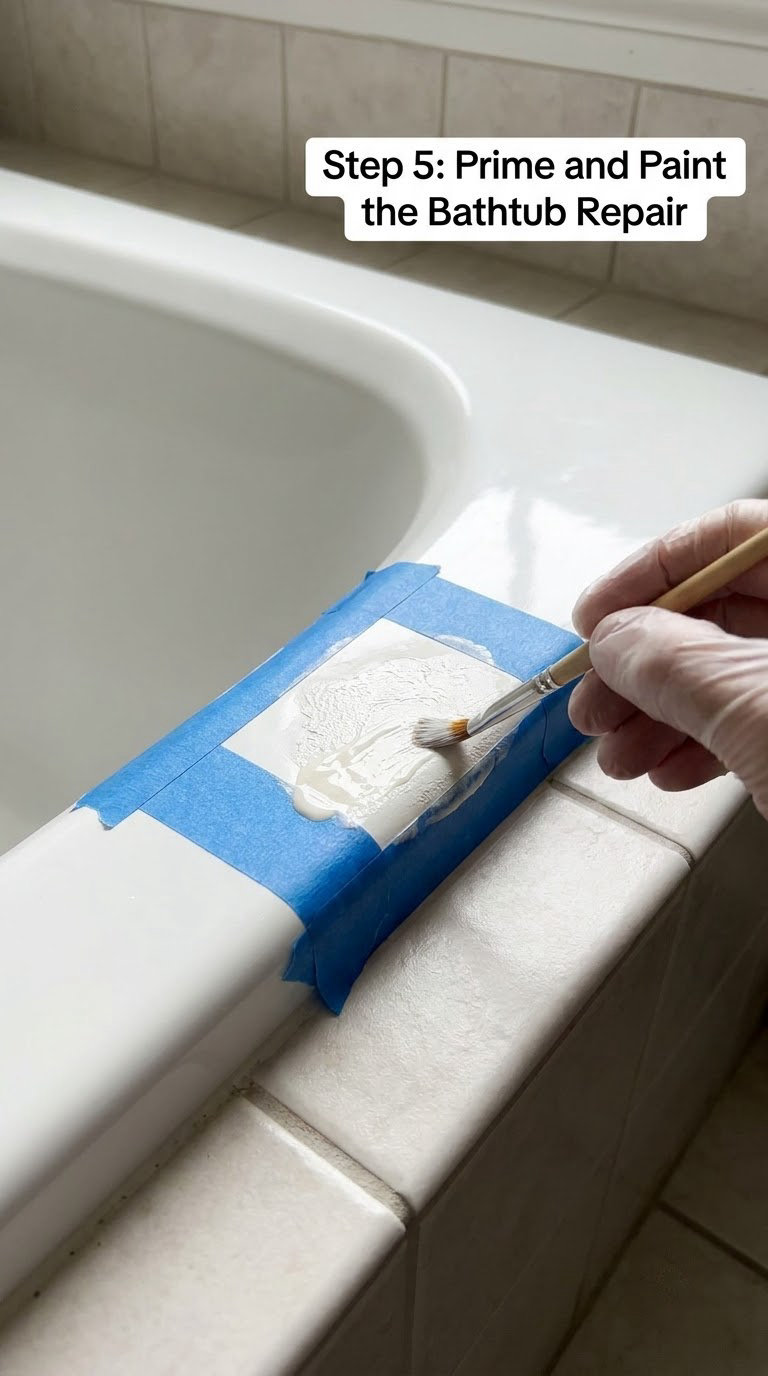
Prime first when the product calls for it. On enamel over metal, a compatible bonding primer keeps the topcoat from lifting; on bare steel or cast iron, use the cast iron primer you applied under the filler, or a fresh coat if it was sanded through.
Brush on thin coats rather than one heavy one, following the direction of the tub’s gloss. Two or three light coats dry evenly and blend, while a thick coat skins over and stays tacky underneath.
Follow the label for recoat timing, which is often two to four hours between coats and longer in a cold or damp bathroom. Ventilate the room and keep the tub dry and unused until the whole system has cured.
Step 6: Inspect and Cure the Finished Repair
Hold a dry finger flat across the repair and the surrounding enamel together. The transition should feel like one surface, with no ridge, dip or tacky patch.
Then check the colour in daylight and under the bathroom lights. Older enamel tubs yellow over decades, and a bright white patch on a cream-coloured tub is the most common complaint about DIY repairs. If you have not started yet, look for a kit that lets you mix a custom shade, or paint the whole tub instead.
Wait at least 24 hours before the repair sees water, and up to 48 hours for a deep fill or a cold room. Using the tub early is the number one cause of patches peeling within months. If the finish still looks slightly uneven once cured, a tub-safe polish and a soft cloth usually blend the last of it.
Common Mistakes to Avoid
Most failed bathtub repairs trace back to one of seven things. Here is how each one shows up and what to do instead.
Painting over soap film or damp surface
The filler never bonds, and the patch peels within months. Degrease with alcohol or acetone, dry for ten minutes, and sand the glossy skin off the enamel around the chip.
Skipping the feathered edge
A patch with a hard rim lifts at the border first. Scuff two to three times the chip’s width in a circle so the filler has a gradual ramp to grip.
Using the wrong compound for the substrate
Acrylic filler on porcelain enamel stays soft and dents; rigid epoxy on fiberglass cracks as the panel flexes. Match the compound to the material you identified first.
Sanding before the filler has cured
You tear the surface instead of smoothing it, and the repair never recovers. Wait the full label cure time, 24 hours for a typical thick epoxy fill.
Putting the tub back into service too soon
Hot water and flexing reach a half-cured repair and dent it. Give it 24 hours, longer in cold conditions, and skip the shower during that window.
Choosing the wrong colour or sheen
A white patch on a yellowed tub reads as a flaw from across the room. Mix a custom shade, or sand the whole tub and refinish it so the colour matches everywhere.
Using epoxy with no UV protection indoors
Non UV stable epoxy yellows under bathroom lights and sunlight, which is why a repair can look worse than the original chip a year later. Use a product labelled for enamel and porcelain surfaces, or add a clear protective topcoat once the paint cures.
When to Call a Pro
Sanding and filling hides damage, it does not fix it. Some bathtub problems need a bathroom refinishing professional or a licensed plumber, and the signs are clear enough to spot before you buy a kit.
- A crack that runs more than an inch or reaches a corner or the tub’s edge
- Rust that has spread into a stain larger than the chip, or rust-through you can probe with a fingernail
- A hole through to the substrate, or enamel that flutters and sounds loose when you tap it
- Damage next to the drain, overflow plate or a fixture flange where leaks can hide
- A tub that flexes or moves when you load it, which points to a support or frame issue
- A previous refinished surface that is already peeling across the tub
A refinisher can also handle colour. If the tub has yellowed badly or you have four or more chips, a full refinish or an acrylic tub-and-tile coating usually costs less per repair than patching, and it looks like one job instead of a patchwork.
Maintenance
A repaired spot lasts as long as the surface around it, so gentle habits matter more than the product you used. Clean the tub with a nonabrasive bathroom cleaner and a soft cloth, and skip the scouring powders and abrasive sponges that dull gloss enamel.
Push bath oils off the surface rather than leaving them to soak, keep acidic drain cleaners away from the repair, and store shampoo and razors in a caddy instead of on the tub rim, since a dropped metal razor is the classic cause of a chip in the first place.
Wipe standing water off after every bath rather than letting it pool, especially on a repaired patch. Every few months, run a dry finger over the repair area and look at it under daylight. If the filler turns yellow, softens, or a corner starts lifting, you can sand the old patch flat and refill the same way instead of letting it spread.
Related reading: if the damage is near the overflow plate instead of the basin, our bathtub overflow rust repair guide covers the rust stains that come with it. For older Americast tubs, the Americast bathtub problems guide explains why those surfaces chip differently, and if the tap is dripping into the chip area our bathtub faucet repair guide is worth reading first.
Frequently Asked Questions
Can a chipped porcelain tub be repaired?
Yes, most porcelain enamel chips can be repaired at home. If the chip is smaller than a quarter inch, the enamel around it is still firm, and the damage is not next to a drain or fixture, a two-part epoxy or porcelain repair filler will hold. Clean and degrease the area, scuff the edges with 220 to 320 grit, fill, sand flush with 400 to 1500 grit, then seal with a matching topcoat and leave it for 24 hours.
What is the best bathtub chip repair kit?
The best kit is the one matched to your tub material rather than the highest rated one. Cast iron and steel take a rigid two-part epoxy or porcelain enamel filler with a cast iron primer underneath. Fiberglass and acrylic need a flexible filler made for those surfaces, applied nearly flush. Colour matched white topcoats hide a chip best on a newer tub, and kits that let you mix a custom shade work better on older enamel that has yellowed.
How can I fix a chip in my acrylic bathtub?
Clean the chip with soap and alcohol, then scuff it and a ring of the surrounding surface with 120 to 220 grit. Apply a flexible acrylic or epoxy repair filler in thin layers, almost flush rather than proud, since the panel flexes under load. Sand level with 400 to 600 grit, keeping pressure light because acrylic dulls quickly and will not polish back to a shine. Seal with a compatible topcoat and wait 24 hours.
Is a chipped bathtub dangerous?
A small chip on fiberglass or acrylic lets moisture into the substrate and softens it, so the damage spreads slowly. On cast iron and steel it is more urgent: exposed metal begins rusting within two to four weeks, and rust spreads underneath sound enamel and stains permanently. The tub stays usable for showering, but seal exposed metal with clear nail polish as a stopgap and do the full repair promptly rather than waiting.
How long does a bathtub chip repair take to cure?
Give it at least 24 hours before the repair sees any water, and 48 hours for a deep fill or a cold, damp bathroom. Using the tub earlier is the most common reason patches peel within a few months, because hot water and flexing reach a compound that has not finished hardening. Many people also find the surface still dents slightly at the 24 hour mark while it finishes curing underneath.
How do I know what material my bathtub is made of?
Knock on the sidewall with your knuckles and listen. Cast iron rings deep and cold, steel rings thin and high pitched, and fiberglass or acrylic knock hollow and flex slightly under pressure. Weight is the second clue: a 60 inch cast iron tub runs roughly 300 pounds, steel around 70 to 100, and molded tubs are light enough for two people to lift. Check for a warm, slightly soft surface, which points to acrylic.
Start by identifying your tub and knocking out any rust. Everything after that is a clean, sand, fill, sand, paint sequence you can finish in an afternoon. Let it cure a full day before anyone runs water, and take extra care with the colour match on an older enamel tub.