
20 Gallery Wall Layout Ideas for a Hallway (October 2026)
Twenty gallery wall layout ideas for a hallway are collected below, each with real measurements, a cost range and a weekend-sized time estimate. Hallways are the hardest walls in a house to decorate: they are narrow, brightly lit at one end, and most people walk through them three times a day without looking. That is exactly why they work. A well-planned arrangement turns dead wall space into the thing people remember about the house.
Most people get a hallway gallery wall wrong in the same two ways. They hang each frame at eye level instead of the whole arrangement, so the group ends up looking like it is sliding down the wall. And they space frames by eye, which produces the crooked drift that gives gallery walls their bad reputation. Mock the layout out on the floor with painter’s tape first, commit to one shape, and the rest is simple.
Contents
Are gallery walls still in style in 2026? Yes. The over-the-top salon wall has cooled off, but a considered arrangement on a corridor wall is one of the easiest ways to make a rental or a plain 1970s hallway feel finished.
20 Gallery Wall Layout Ideas for a Hallway at a Glance
Cost ranges are typical US figures for frames, prints and hanging hardware, and they move a lot by region. Thrifted frames and free prints pull every range toward the bottom.
| Idea | Cost | Difficulty | Time |
|---|---|---|---|
| 1. Single-frame centerpiece | 80 to 300 dollars | Easy DIY | 1 to 2 hours |
| 2. Staggered pair | 40 to 140 dollars | Easy DIY | 1 hour |
| 3. Vertical gallery column | 90 to 320 dollars | Moderate DIY | 2 to 3 hours |
| 4. Symmetrical three-frame grid | 120 to 380 dollars | Easy DIY | 2 hours |
| 5. Salon-style cluster | 150 to 500 dollars | Moderate DIY | 4 to 6 hours |
| 6. Horizontal photo runner | 120 to 400 dollars | Easy DIY | 3 hours |
| 7. Grid gallery | 200 to 650 dollars | Moderate DIY | 4 to 5 hours |
| 8. Offset two-row gallery | 150 to 480 dollars | Moderate DIY | 4 hours |
| 9. L-shaped corner gallery | 180 to 600 dollars | Moderate DIY | 5 to 7 hours |
| 10. Picture ledge with leaning art | 50 to 250 dollars | Easy DIY | 2 hours |
| 11. Stair-style ascending layout | 200 to 700 dollars | Moderate DIY | 5 hours |
| 12. Large print with accent frames | 150 to 500 dollars | Easy DIY | 3 hours |
| 13. Alternating frame-height shelves | 120 to 450 dollars | Moderate DIY | 4 hours |
| 14. Botanical focus wall | 130 to 420 dollars | Easy DIY | 3 to 4 hours |
| 15. Black-and-white typographic gallery | 90 to 350 dollars | Easy DIY | 2 to 3 hours |
| 16. Color-blocked frame collection | 110 to 400 dollars | Easy DIY | 3 hours |
| 17. Vintage frame mix | 40 to 380 dollars | Moderate DIY | 5 hours |
| 18. Narrow gallery above a console | 140 to 480 dollars | Easy DIY | 3 hours |
| 19. Single-column triptych | 90 to 300 dollars | Easy DIY | 2 hours |
| 20. Minimal line-art gallery | 80 to 260 dollars | Easy DIY | 1 to 2 hours |
1. Single-Frame Centerpiece Layout
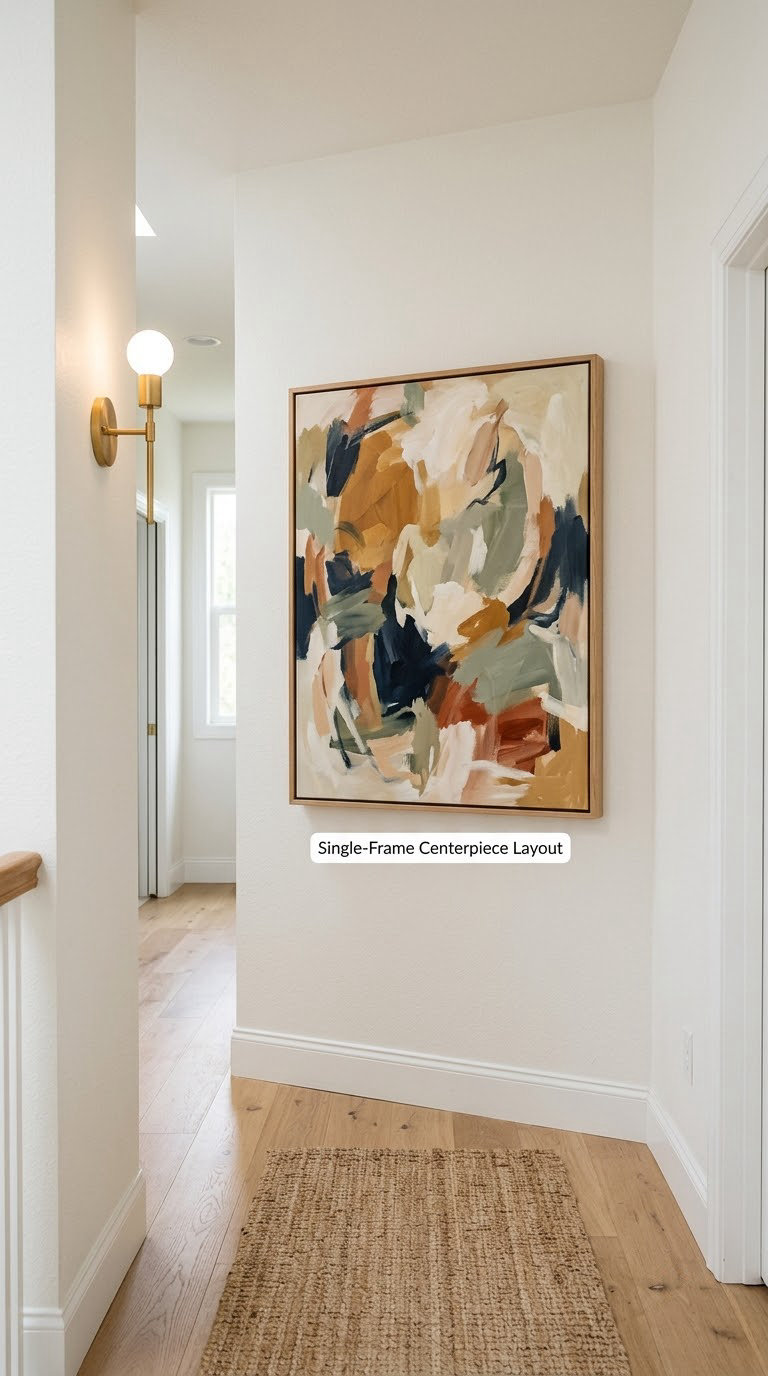
One oversized piece is the surest way to make a corridor look deliberate. Where several small frames feel fussy, a single big canvas reads as confidence, and it is the cheapest layout to hang because there is only one nail hole to patch later.
How to build a single-frame centerpiece
- Measure the clear wall run between the door swing and the nearest obstruction. Subtract 12 inches (30 cm) at each end for breathing room.
- Choose art between 60 and 70 percent of that run. A 5-foot wall takes roughly a 36 to 40 inch wide piece; a 9-foot wall takes 60 inches.
- Mark the visual center at 57 to 60 inches (145 to 152 cm) from the floor and hang the frame so that line crosses the middle of the art, not the top of it.
- Use two nails rated above the frame weight, 8 to 12 inches apart, and check with a level before tightening.
Cost: 80 to 300 dollars. Difficulty: Easy DIY. Time: 1 to 2 hours including drying and patching.
Good to know: For a corridor narrower than 36 inches (91 cm), keep the frame depth under 2 inches (5 cm) so nobody brushes it while walking past. Our hallway decor ideas cover lighting and trim tricks for tight runs.
2. Staggered Pair Layout
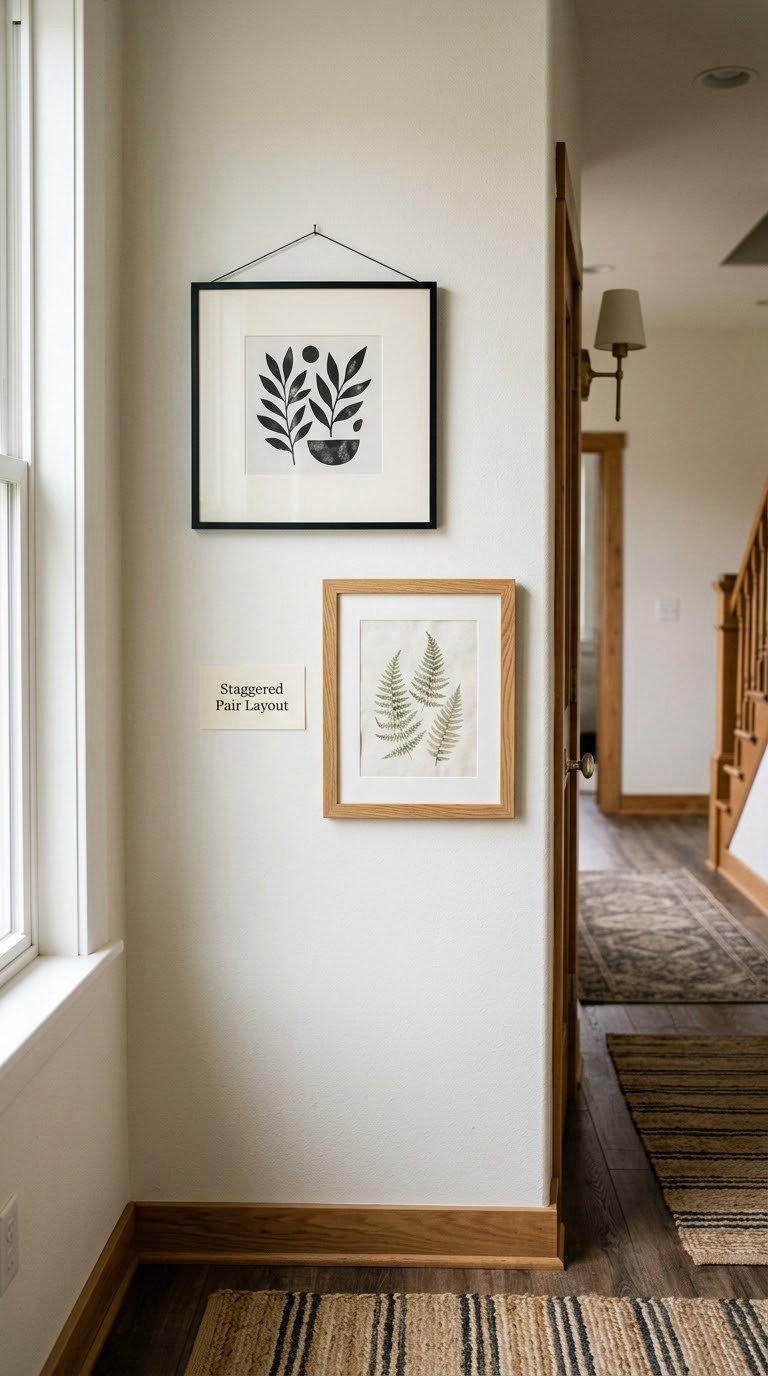
A staggered pair looks relaxed and costs half as much as a grid. The offset heights give a narrow wall some movement without turning it into a full gallery wall, which is why it suits short runs under 6 feet.
How to hang a staggered pair
- Pick a larger piece, roughly 16 by 20 inches (41 by 51 cm), and a second piece about two-thirds that size.
- Hang the larger frame on the 58-inch centerline, offset 8 inches (20 cm) from the wall run center.
- Hang the smaller one so its top sits 6 to 8 inches (15 to 20 cm) below the larger frame’s bottom, with a 3-inch (8 cm) gap between edges.
- Step back 10 feet and nudge until the diagonal between them looks deliberate.
Cost: 40 to 140 dollars. Difficulty: Easy DIY. Time: 1 hour.
Good to know: Keep the two frames within one color family so the offset reads as intention. Mixing a warm wood frame with a black frame works; mixing gold, oak and white does not.
3. Vertical Gallery Column
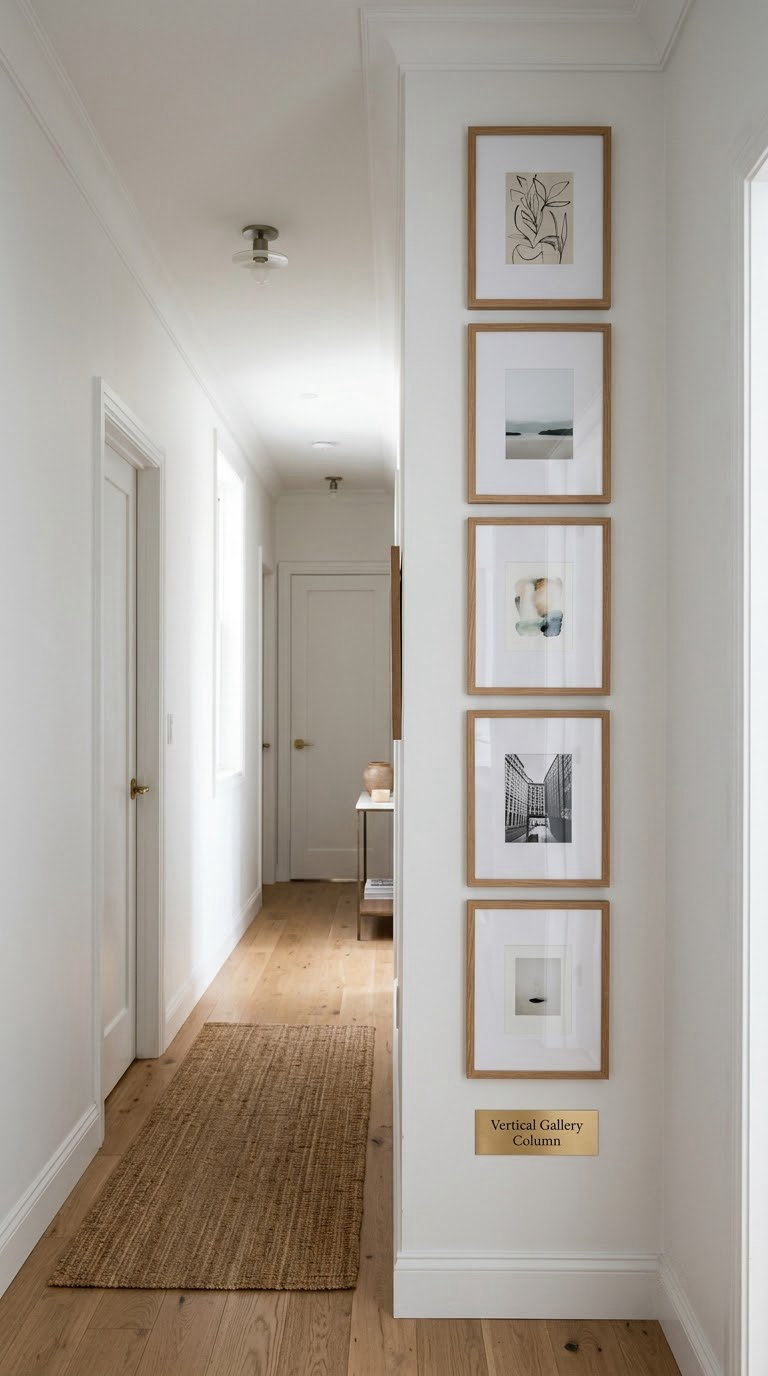
A single vertical column uses the height a hallway usually has to spare and ignores the width it does not. In old houses with 9-foot ceilings this is the layout that finally makes the corridor feel taller instead of tighter.
How to build a vertical gallery column
- Tap for studs along the wall; in a 1960s or newer home you should find one every 16 inches (41 cm).
- Draw a 2-foot (61 cm) wide centerline with a level, then mark frame centers at 12-inch (30 cm) intervals.
- Hang 4 to 6 frames, alternating vertical and horizontal orientation so the column has rhythm.
- Keep a consistent 3-inch (8 cm) gap between frames and check the whole column’s center at 57 to 60 inches.
Cost: 90 to 320 dollars. Difficulty: Moderate DIY. Time: 2 to 3 hours.
Good to know: A column reads as one object, so leave 18 inches (46 cm) of clear wall on either side. If your hallway is under 32 inches (81 cm) wide, the column will crowd the walkway.
4. Symmetrical Three-Frame Grid
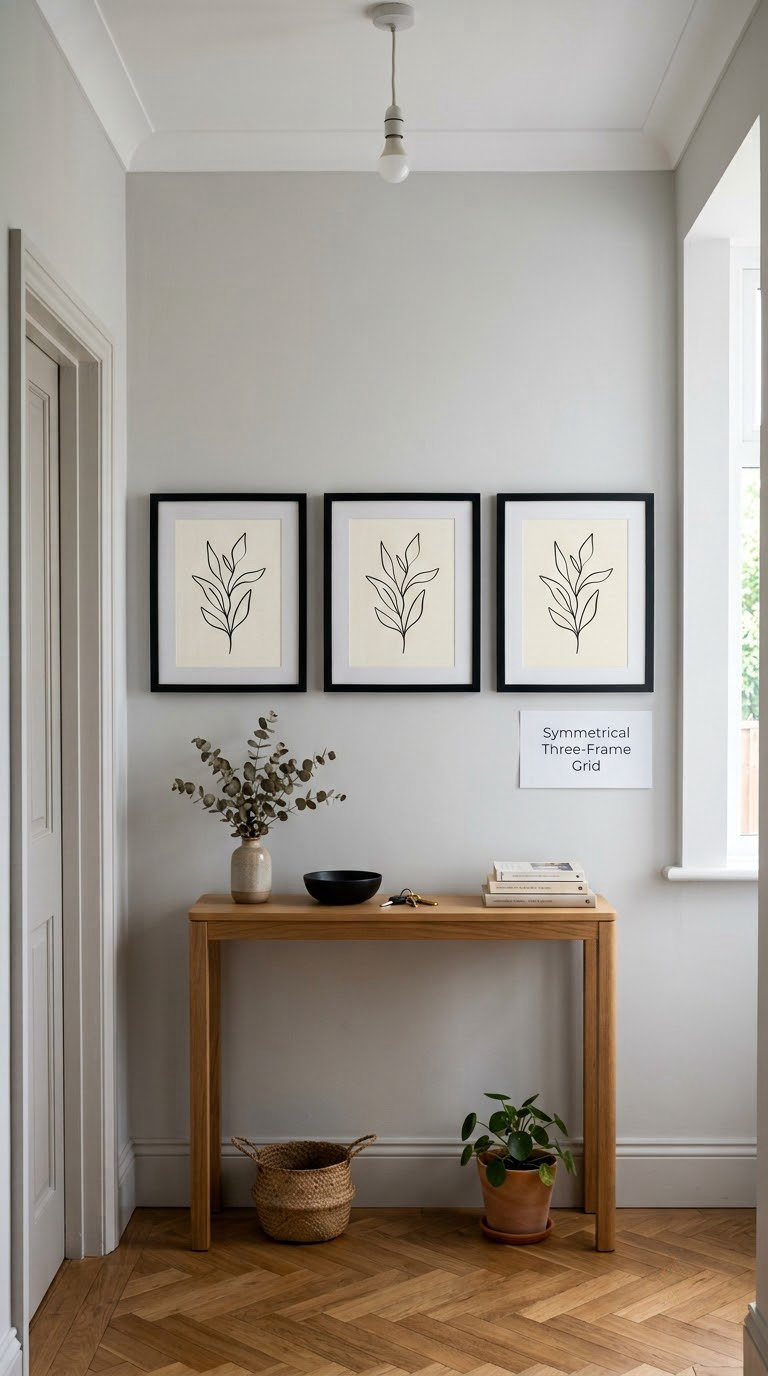
Three matching frames in a straight row is the most forgiving layout there is, and it is the one that survives a rental because it needs so little wall. Buy three of the same 8 by 10 inch (20 by 25 cm) frame and the alignment takes care of itself.
How to set up a symmetrical three-frame grid
- Lay the three frames face down on the floor with 3-inch (8 cm) gaps and trace around them.
- Measure the total width; a typical set runs about 40 inches (102 cm) wide and 14 inches (36 cm) tall.
- Center that block on your 58-inch centerline, then transfer each frame outline to the wall with painter’s tape.
- Nail through the taped outlines, spacing nails 10 inches (25 cm) apart inside the frame.
Cost: 120 to 380 dollars. Difficulty: Easy DIY. Time: 2 hours.
Good to know: Three identical frames can look flat. Give it life by mixing the contents: one photograph, one print, one piece of handwriting or a small textile.
5. Salon-Style Cluster
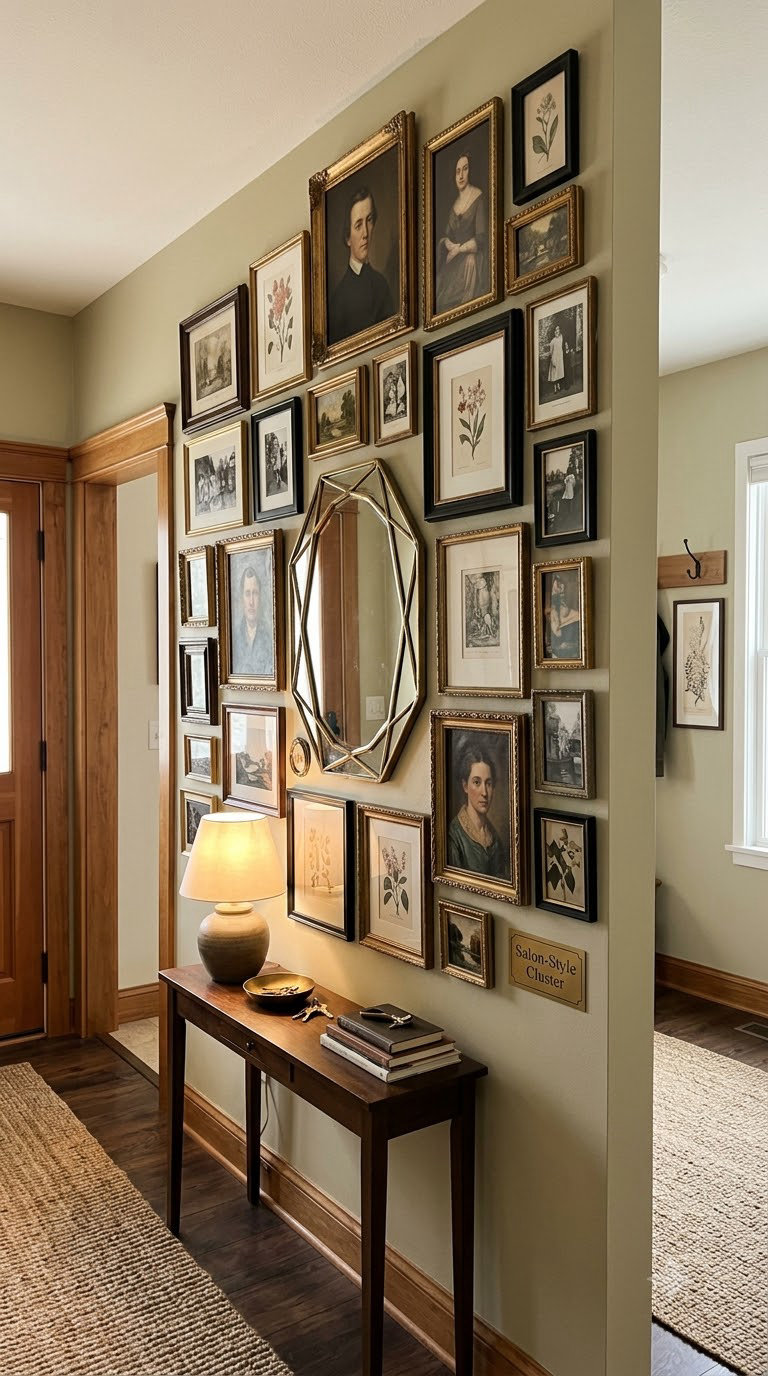
A salon cluster packs frames tightly with no fixed outline, usually with one big piece anchoring an outer corner and smaller ones filling in toward the middle. It suits a short, awkward stretch of wall that refuses to look right in a straight line, and it is the layout interior designers mean when they say gallery wall.
How to assemble a salon-style cluster
- Choose an anchor piece first, often 18 by 24 inches (46 by 61 cm) or larger, and place it in an outer corner rather than dead center.
- Put the second-largest piece diagonally opposite, then fill the long gap between them with medium frames.
- Keep every gap between 2 and 3 inches (5 to 8 cm); tighter than 2 inches looks crowded, wider than 4 inches (10 cm) breaks the cluster.
- Reserve roughly a quarter of the cluster area as negative space. A break in the pattern is what stops it reading as wallpaper.
Cost: 150 to 500 dollars. Difficulty: Moderate DIY. Time: 4 to 6 hours.
Good to know: Expect 8 to 12 pieces for a 4-foot (1.2 m) section. Mock it on the floor with the actual frames and a tape outline; a cluster planned only on paper always ends up too small.
6. Horizontal Photo Runner
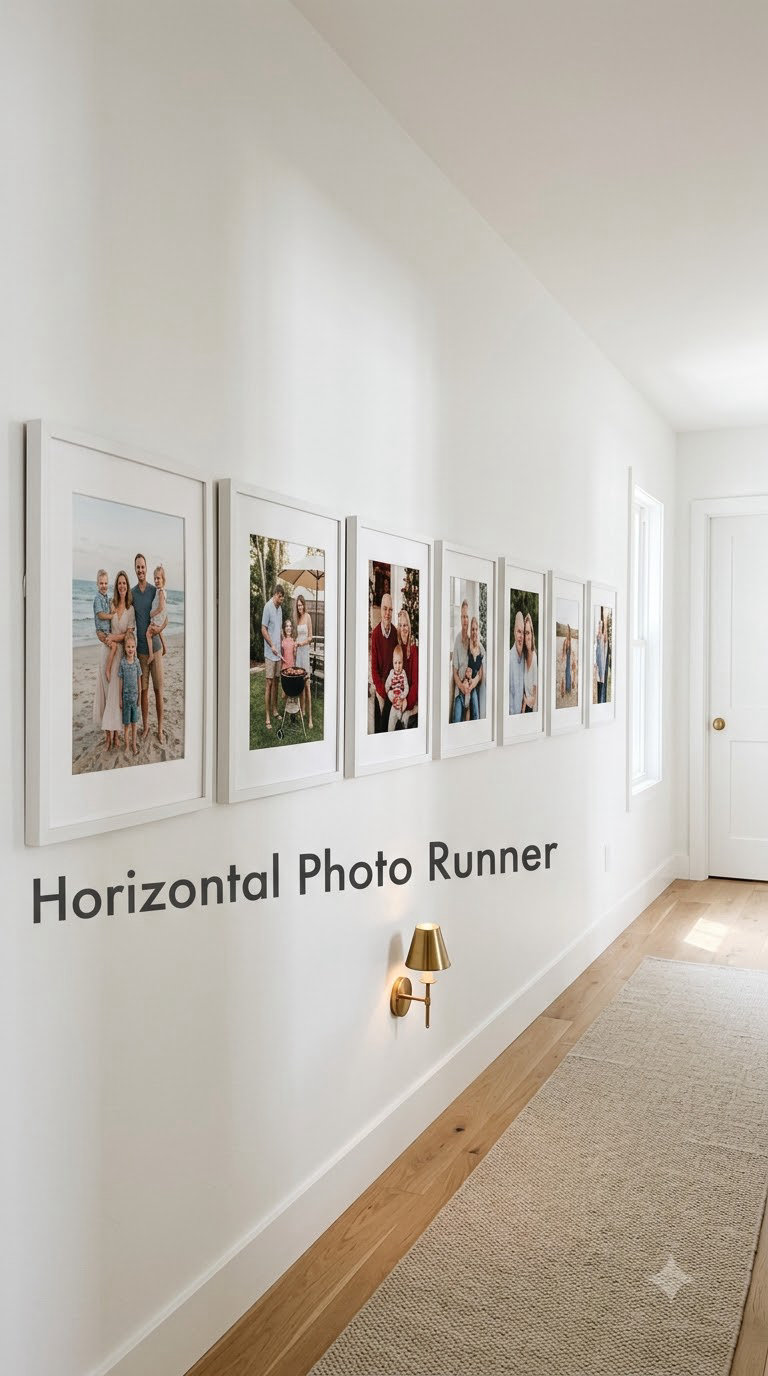
A single horizontal row of same-size frames visually widens a hallway, which is the opposite of what most art does. It is the right answer for a long corridor where you have more photos than wall space and want them to read as one line.
How to hang a horizontal photo runner
- Measure the longest uninterrupted wall run; a 16-foot (4.9 m) corridor comfortably holds 10 to 14 frames.
- Lay frames on the floor in the order you want them walked past, with 3-inch (8 cm) gaps.
- Mark the endpoints, measure the total, and divide by the number of gaps to confirm even spacing before the first nail.
- Hang from the center frame outward so mistakes stay at the ends, not in the middle.
Cost: 120 to 400 dollars. Difficulty: Easy DIY. Time: 3 hours.
Good to know: One runner per wall works better than two facing rows in a narrow corridor; opposite walls of art make a passage feel like a tunnel. Our entryway gallery wall guide has the same spacing math for a front corridor.
7. Grid Gallery
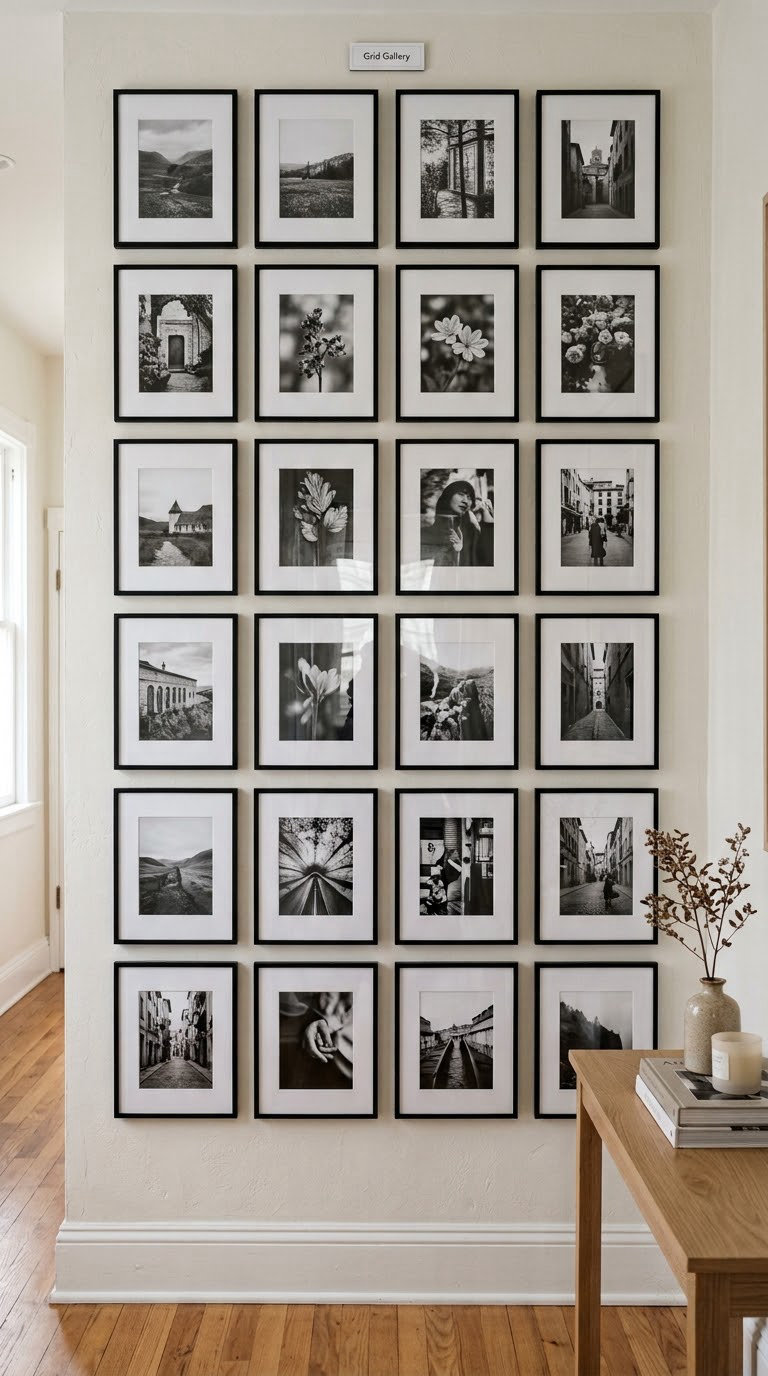
A grid uses one frame size, one mat size and one color, repeated. That repetition is the point: mismatched artwork in matched frames looks deliberate instead of unresolved, which makes a grid the safest choice when the art itself is a mixed bag.
How to plan a grid gallery
- Decide on a frame size, usually 8 by 10 or 11 by 14 inches (20 by 25 cm, or 28 by 36 cm).
- Choose rows and columns so the block lands between 60 and 80 percent of the available wall run; a 4 by 3 grid of 11 by 14 inch frames is about 62 inches (157 cm) wide.
- Hang the center frame first, then build outward in all four directions with a 2-inch (5 cm) gap, keeping gaps exact by measuring once and reusing the number.
- Check every outer edge with a level once the grid is complete.
Cost: 200 to 650 dollars. Difficulty: Moderate DIY. Time: 4 to 5 hours.
Good to know: Grids bother some people. Break one square by swapping in a round frame or a small mirror in an otherwise perfect grid, and the whole wall gains a focal point.
8. Offset Two-Row Gallery
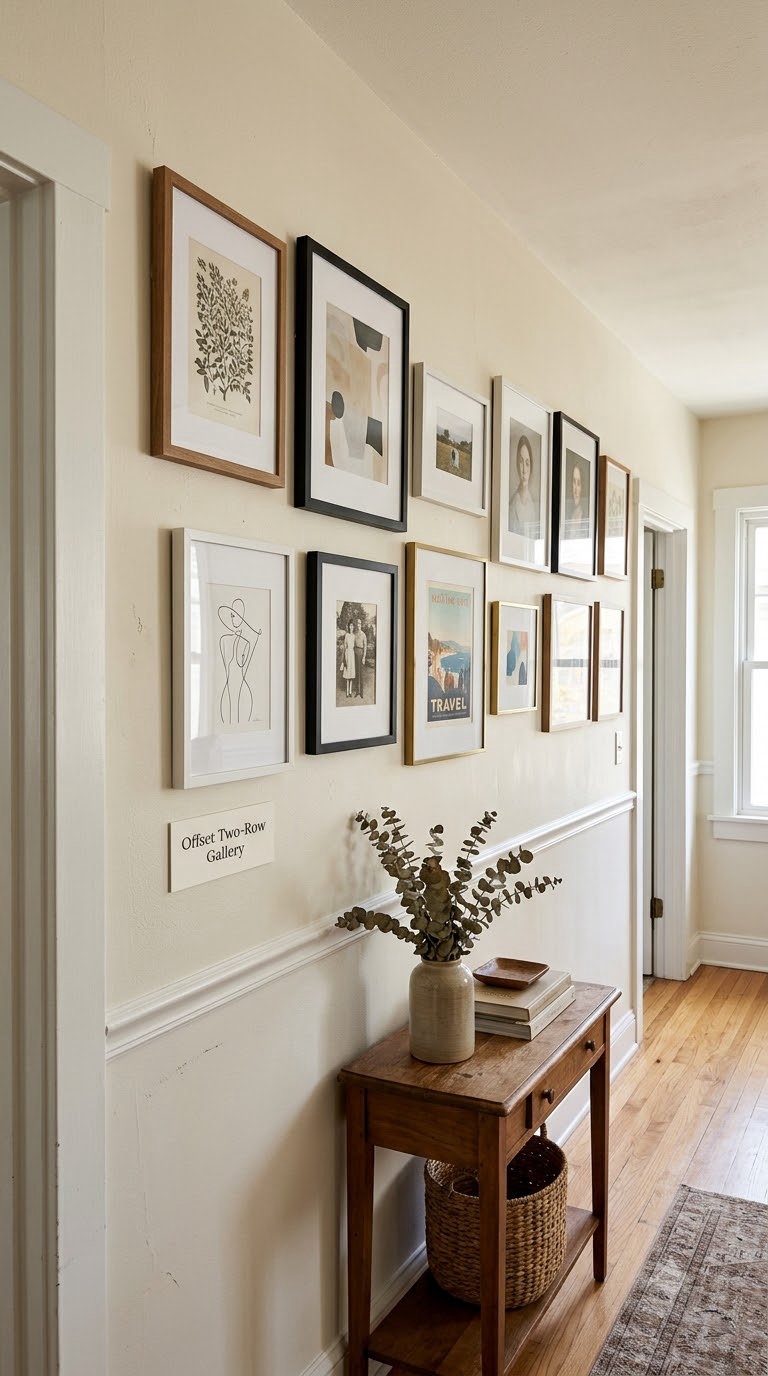
Two rows with the top row shifted half a frame to one side look collected rather than installed. It is a good middle ground for a medium wall run between 6 and 10 feet, where a single runner leaves the wall bare and a full salon cluster is too heavy.
How to offset two rows without drifting
- Plan both rows on the floor, top row first, with each frame overlapping the gap below it by about half its width.
- Mark a single 58-inch centerline and hang the top row 6 inches (15 cm) above it, then hang the bottom row 6 inches below.
- Use one spacing measurement for both rows, 3 inches (8 cm), and re-measure at every third frame.
- Keep the outer edges of both rows flush with the wall run so the block stays rectangular.
Cost: 150 to 480 dollars. Difficulty: Moderate DIY. Time: 4 hours.
Good to know: Two rows need at least 60 inches (152 cm) of clear width. In a narrower hall, use the triptych in idea 19 instead of stacking.
9. L-Shaped Corner Gallery
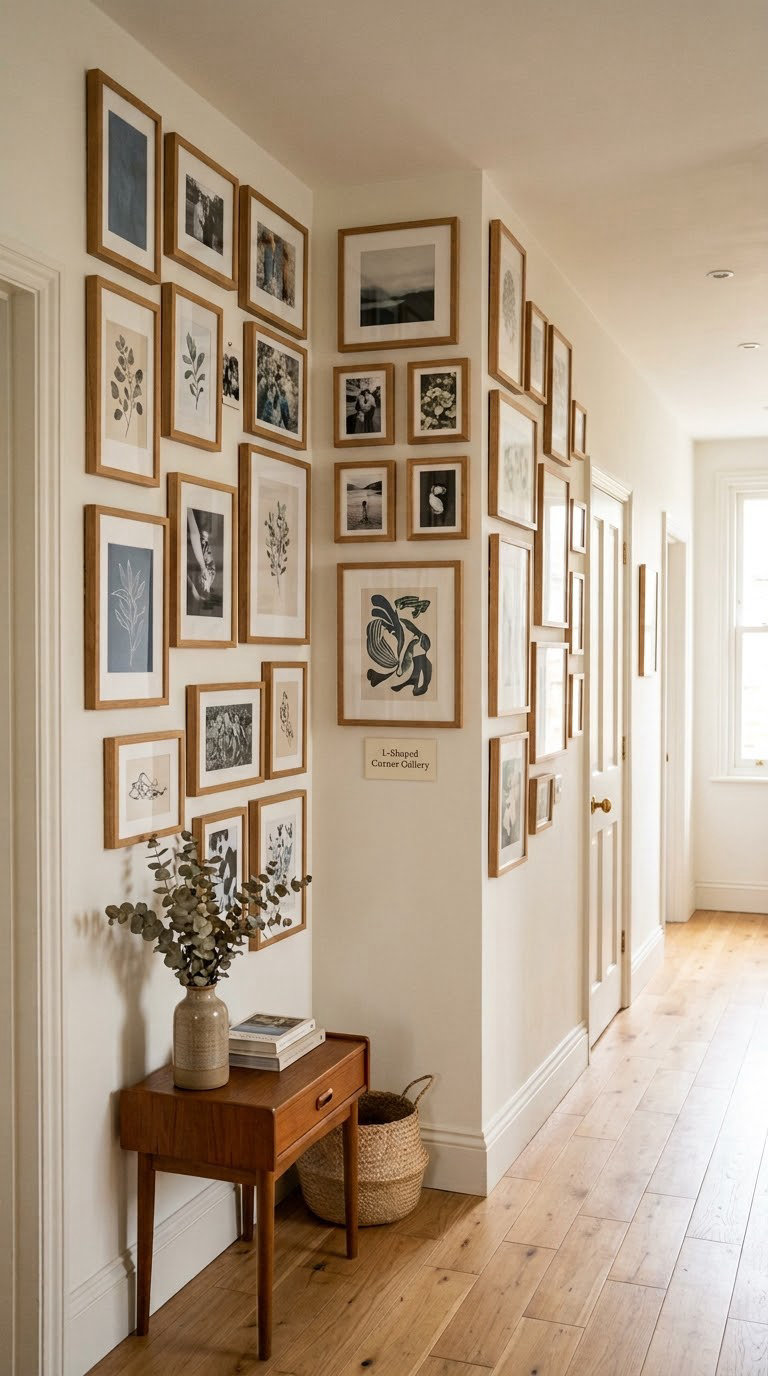
Wrapping art around an interior corner solves the short-dead-end problem and makes a stub hallway look deeper. It also hides the fact that you had nothing to do with that corner, because the eye follows the arrangement from one wall to the next.
How to wrap a gallery around a corner
- Measure both walls from the corner outward and plan the largest piece at least 12 inches (30 cm) from the corner so nothing gets scraped.
- Set the visual center on the longer wall at 57 to 60 inches and step the shorter wall’s frames down or up to echo the corner.
- Keep gaps at 3 inches (8 cm) on both walls, then connect the two planes by aligning one frame height across the corner.
- Mark the corner with a corner protector strip before hanging anything that a shoulder bag will catch.
Cost: 180 to 600 dollars. Difficulty: Moderate DIY. Time: 5 to 7 hours.
Good to know: Avoid putting the biggest piece on the corner itself. It gets hit, and it hides the wall angle you were trying to show off.
10. Picture Ledge with Leaning Art
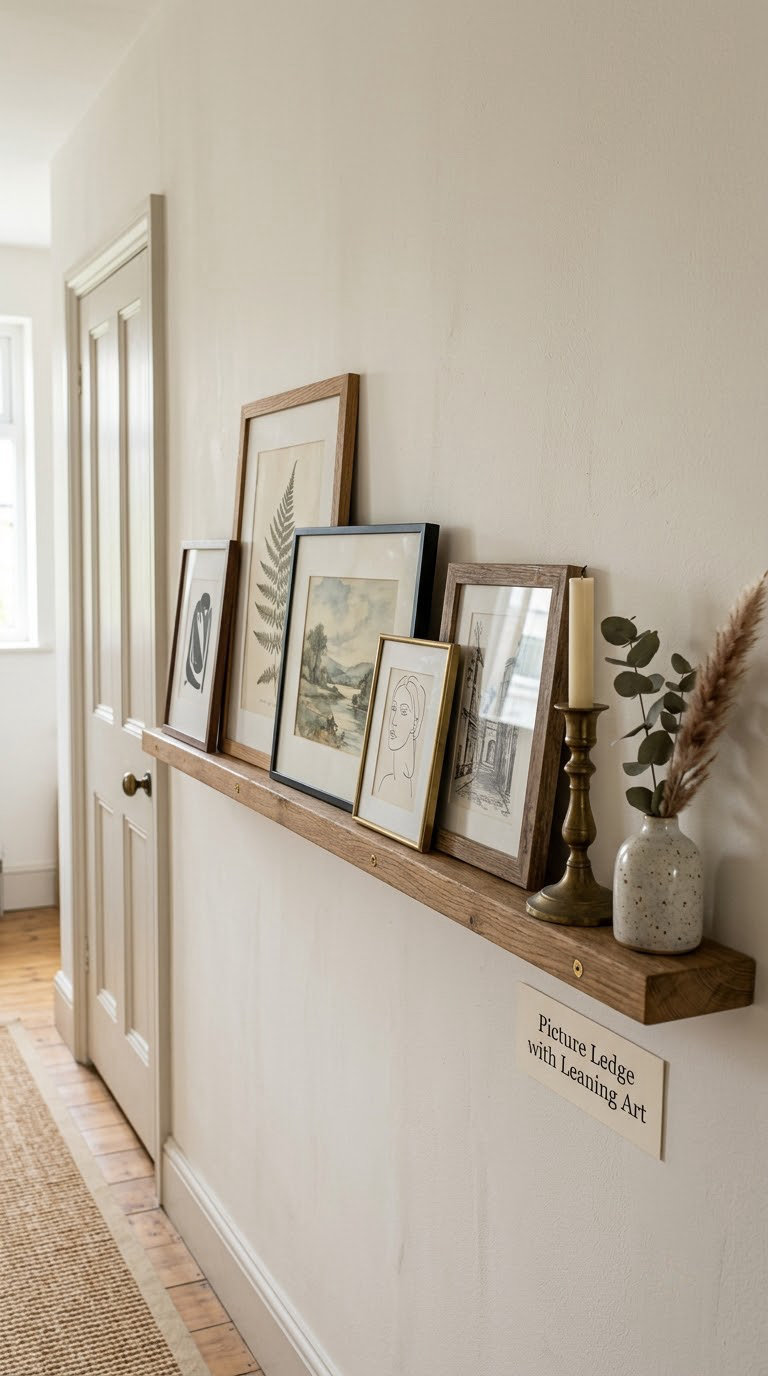
A picture ledge lets frames lean instead of hang, so nothing touches the wall and everything rearranges in under a minute. It is my pick for rentals and for anyone who likes to change the display seasonally.
How to install a picture ledge
- Pick a ledge at least 6 inches (15 cm) deep so an 8 by 10 inch frame leans back safely rather than tipping.
- Mount it into studs with the top edge at 60 to 64 inches (152 to 163 cm) from the floor, checking the length is level front to back.
- Lean frames with about 2 inches (5 cm) of overlap and vary their forward lean slightly for depth.
- Add a small lip or rubber feet under each frame so they cannot slide.
Cost: 50 to 250 dollars. Difficulty: Easy DIY. Time: 2 hours.
Good to know: Leaned frames catch dust and show fingerprints, so a microfiber cloth on the shelf is not optional if the hallway is near your entry door.
11. Stair-Style Ascending Layout
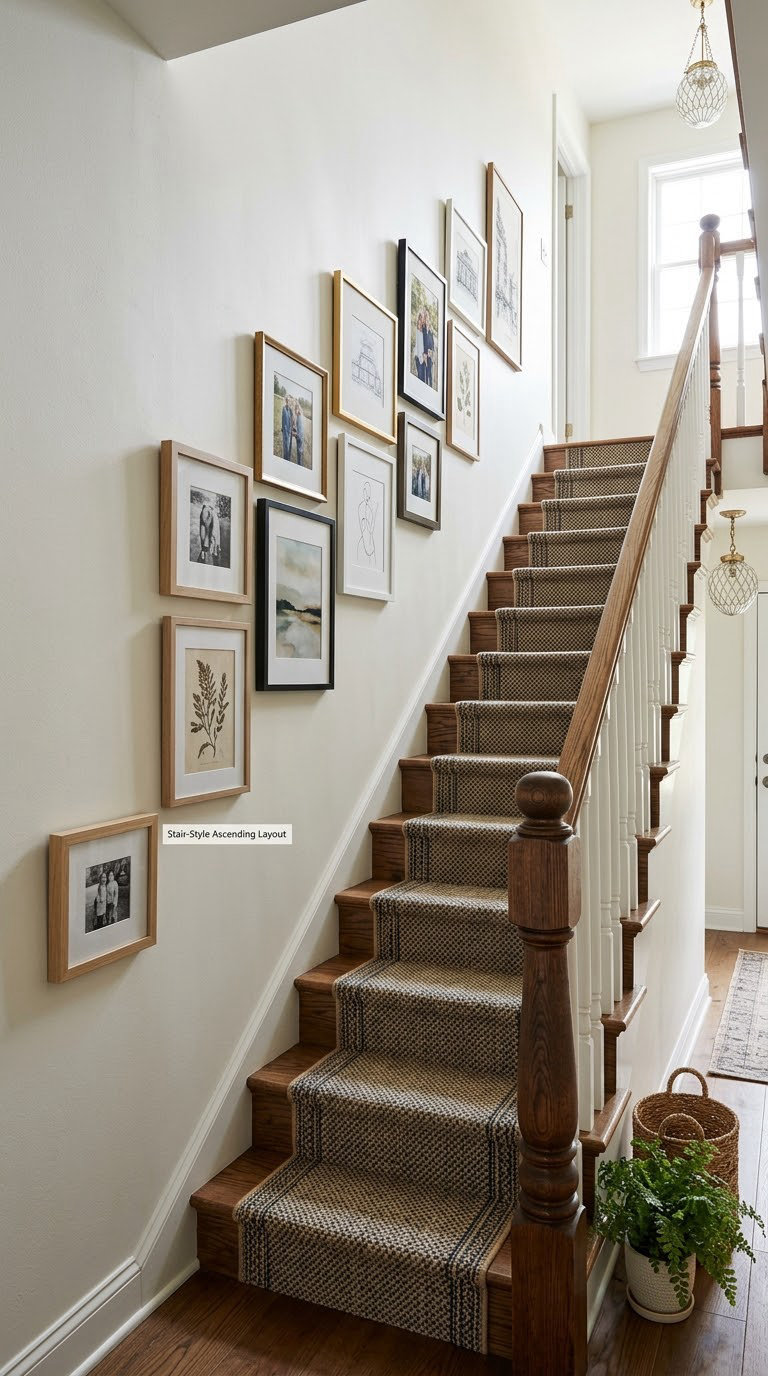
Frames that step upward turn a landing or a stair transition into the most dynamic wall in the house. The rising line echoes movement, so a hallway that feels like a corridor becomes a route with a beginning and an end.
How to hang a stair-style ascending layout
- Pick the lowest frame, place its center at 57 inches (145 cm), and note the floor-to-center measurement.
- Rise 10 to 14 inches (25 to 36 cm) for each frame up the run; taller gaps look better on a 12-foot (3.7 m) wall than on a short one.
- Keep each frame horizontally 4 to 6 inches (10 to 15 cm) apart from its neighbor, offsetting the line slightly to follow the stair pitch.
- Tape the whole diagonal on the wall first and walk past it before committing to nails.
Cost: 200 to 700 dollars. Difficulty: Moderate DIY. Time: 5 hours.
Good to know: Renting a laser level or a stair stringer saves an afternoon of guesswork on anything steeper than 30 degrees.
12. One Large Print with Small Accent Frames
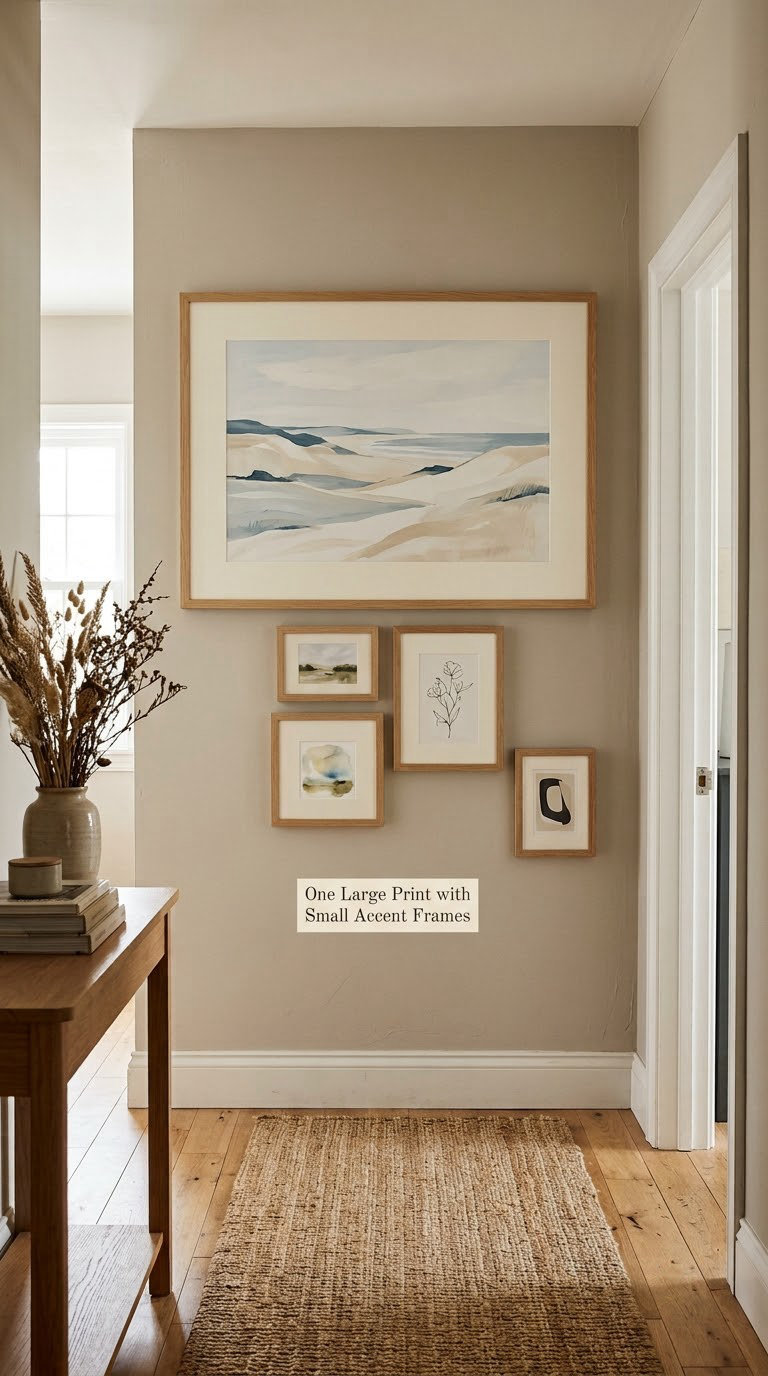
Anchor one dominant print in the middle and let small frames orbit it, closer near the center and drifting outward. The result has more depth than a single piece because the small frames catch light at different angles, and it uses fewer nails than an equal-weight arrangement.
How to frame a large print with accents
- Center your large print, 24 by 36 inches (61 by 91 cm), at 58 inches (147 cm) on the visual centerline.
- Place small frames, 4 by 6 inches (10 by 15 cm), 3 inches (8 cm) from the print edge, clustered at the bottom corners for weight.
- Add one small frame above and off-center if the wall is tall, then stop.
- Repeat the large print’s dominant color in two of the small mats to tie the group together.
Cost: 150 to 500 dollars. Difficulty: Easy DIY. Time: 3 hours.
Good to know: Limit accents to six. Beyond that the small pieces stop reading as accents and the big print loses the wall.
13. Alternating Frame-Height Shelf Display
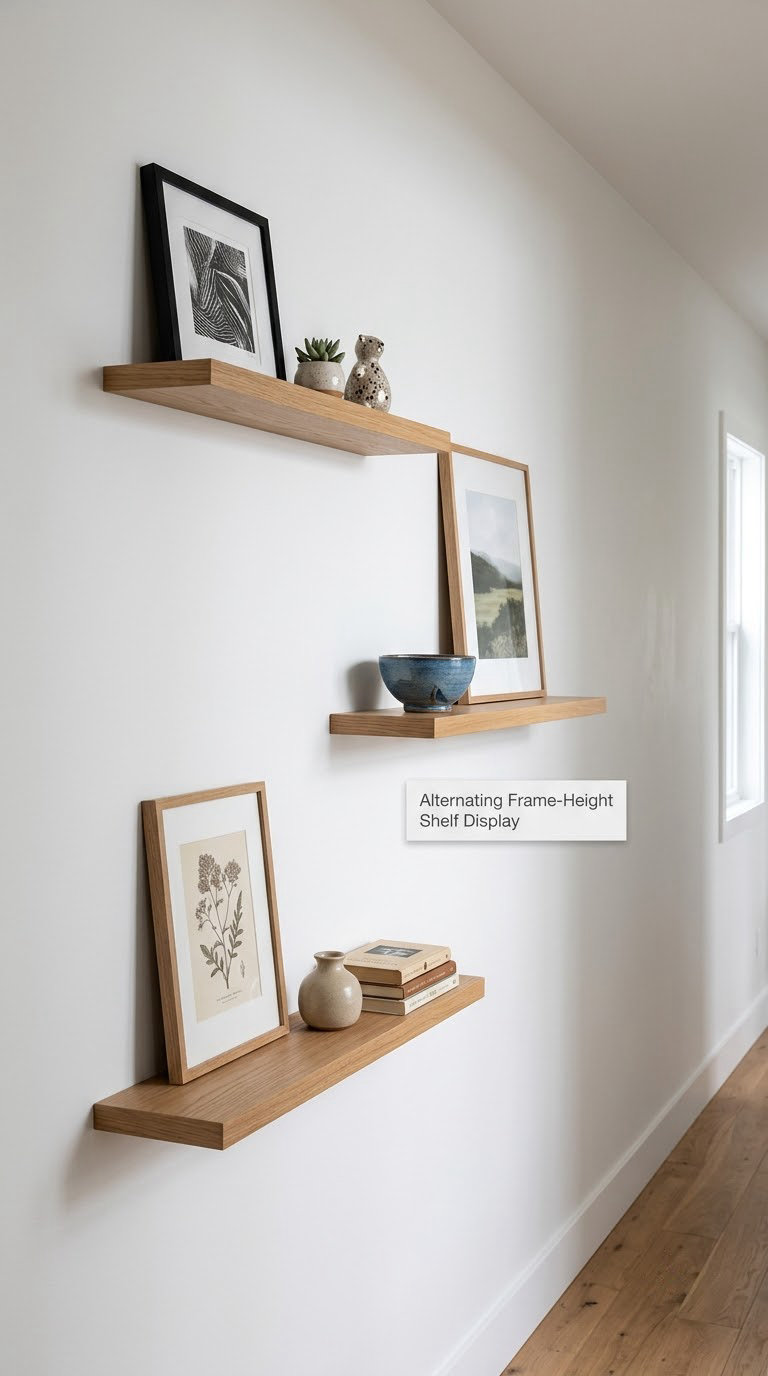
Stack narrow floating shelves at different heights and lean a frame or two on each. Because the shelves give up only 2 to 3 inches (5 to 8 cm) of depth, they work in corridors where a 2-inch-deep framed gallery wall would make you flinch every time you passed.
How to install alternating frame-height shelves
- Mark shelf heights 14 inches (36 cm) apart, starting so the lowest shelf top sits near 48 inches (122 cm) from the floor.
- Stud the wall and screw each shelf into two studs; hollow-wall anchors alone will sag under ceramic and glass.
- Lean one or two small frames per shelf, angled back 10 to 15 degrees against the wall.
- Use the shelf tops as the anchor line for a staggered cluster rather than a straight grid.
Cost: 120 to 450 dollars. Difficulty: Moderate DIY. Time: 4 hours.
Good to know: Skip the lowest shelf if it lands under 40 inches (102 cm), where a frame is easy to knock with a vacuum or a coat.
14. Botanical Focus Wall
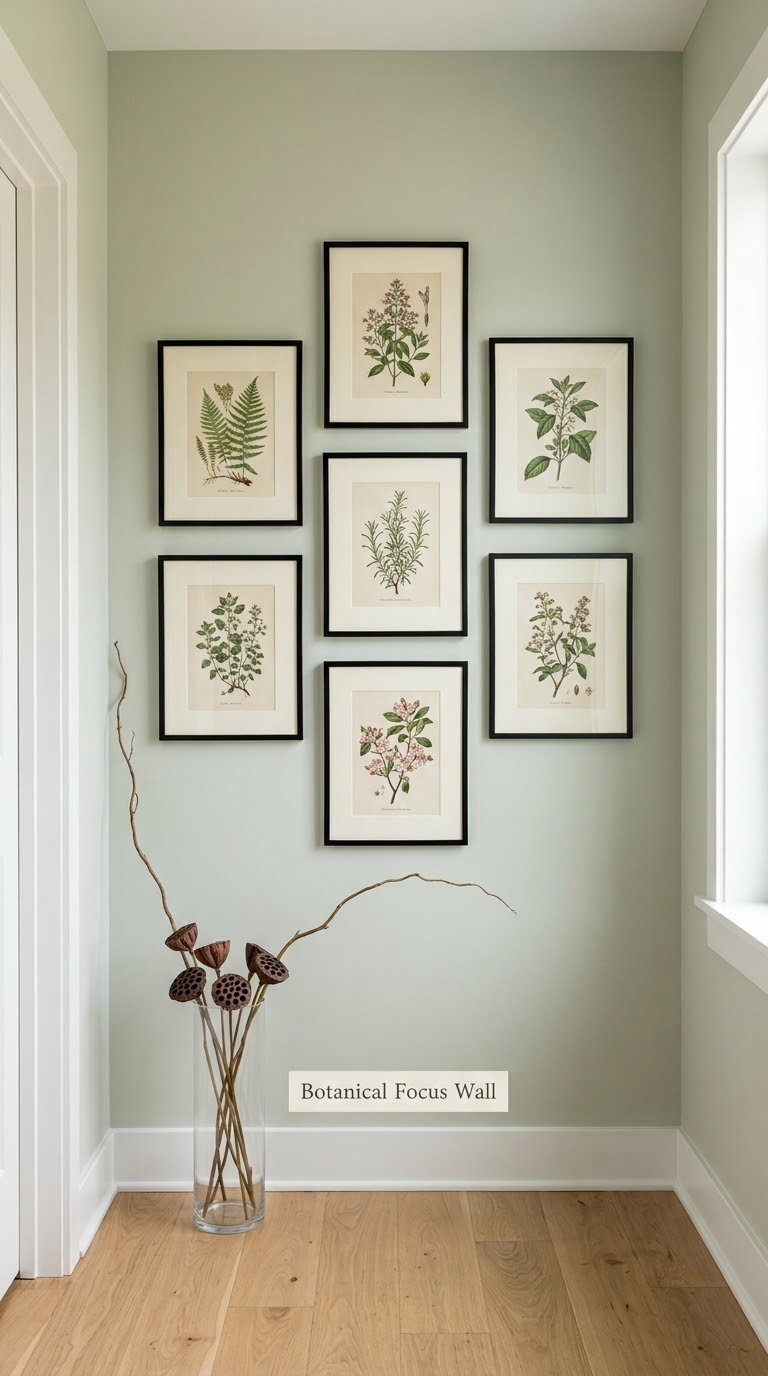
A botanical wall pulls every frame toward one subject, so mixed sizes and mixed frame finishes still look like a set. It is also the easiest theme to source on a budget, since inexpensive botanical prints print cleanly at standard sizes.
How to build a botanical focus wall
- Choose 5 to 8 botanical images with a shared palette, usually greens on a cream or white background.
- Print or source them at 8 by 10, 11 by 14 and 16 by 20 inches (20 by 25 cm, 28 by 36 cm, 41 by 51 cm), mixing at least three sizes.
- Mat each one on cream board with a consistent 2-inch (5 cm) border so mismatched print sizes still read evenly.
- Cluster with 3-inch (8 cm) gaps, tallest prints near the center, and let the group breathe around a single lighter piece.
Cost: 130 to 420 dollars. Difficulty: Easy DIY. Time: 3 to 4 hours.
Good to know: Thrifted frames in wood and gold work better here than elsewhere because the consistent subject carries the cohesion.
15. Black-and-White Typographic Gallery
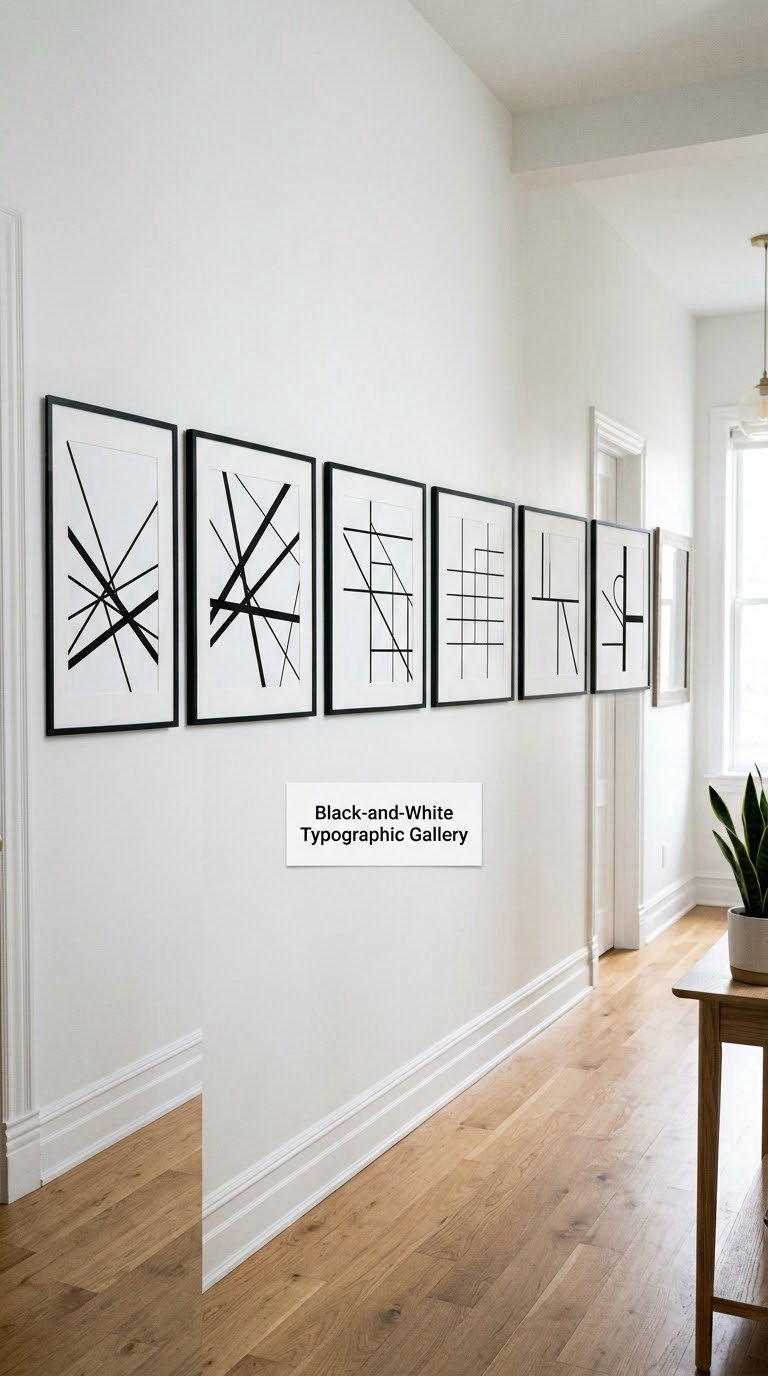
Monochrome typography adds graphic punch to a hallway with a busy carpet or a strong wall colour, because it adds contrast without adding hue. It also photographs well and needs no art-direction skills beyond picking typefaces that share a weight.
How to hang a typographic gallery
- Pick two or three typefaces in the same weight, then set them at large sizes so the words read from the far end of the corridor.
- Frame everything in black with white mats, 18 by 24 inches (46 by 61 cm) and 11 by 14 inches (28 by 36 cm).
- Lay out an alternating row with 3-inch (8 cm) gaps, keeping all baselines level.
- Center the whole run at 58 inches (147 cm) and check it reads from the doorway, not just from beside it.
Cost: 90 to 350 dollars. Difficulty: Easy DIY. Time: 2 to 3 hours.
Good to know: Typography in a hallway needs generous spacing; frames almost touching turn words into visual static from a distance.
16. Color-Blocked Frame Collection
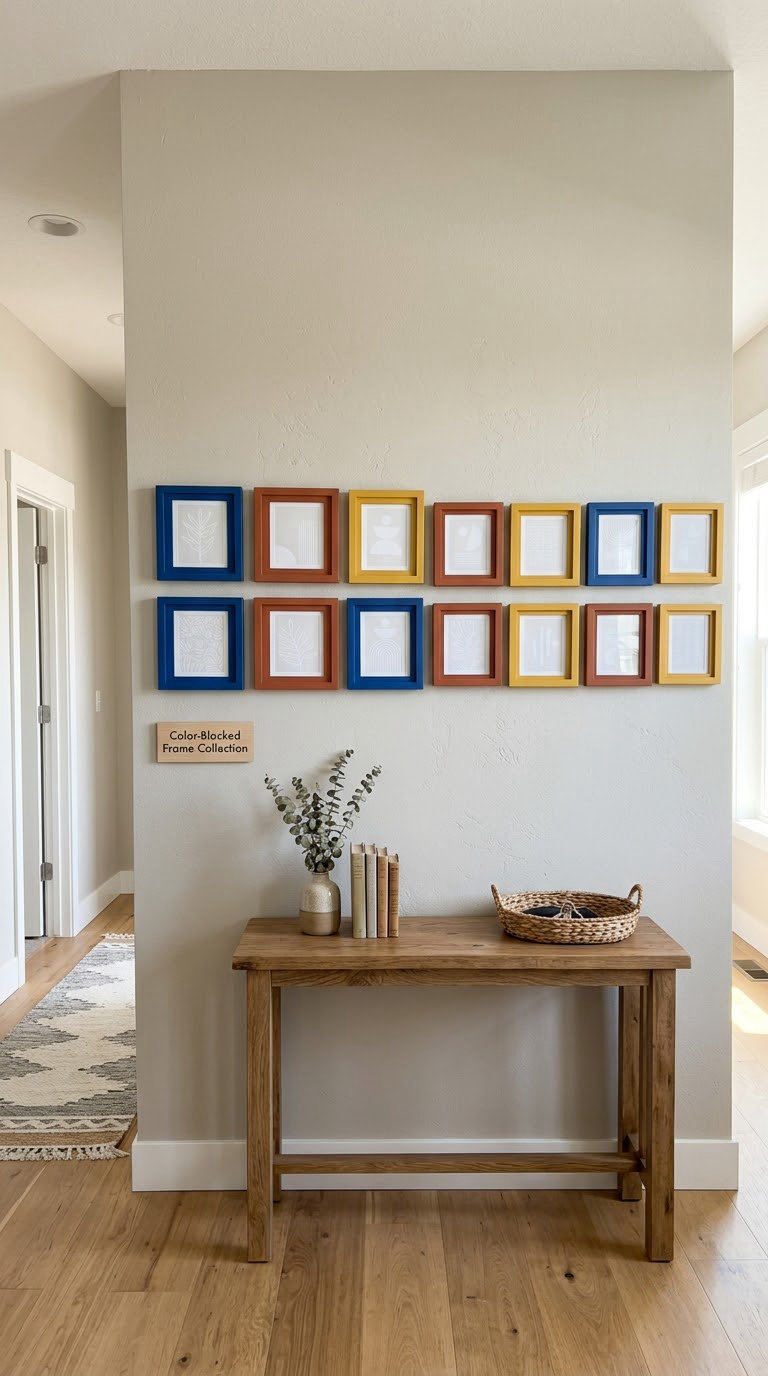
Paint or buy frames in two or three coordinated colours and the collection looks intentional even when the art inside is mismatched. On a neutral wall the colour becomes the thing you see, which is exactly what a plain corridor needs.
How to build a color-blocked frame collection
- Pick one base colour pulled from your hall runner or door colour, then two supporting shades 30 percent lighter or darker.
- Order or paint frames in those three colours, keeping the same profile and depth throughout.
- Group by colour in blocks of two or three rather than scattering them randomly.
- Hang at 3-inch (8 cm) gaps with the group’s visual center at 57 to 60 inches (145 to 152 cm).
Cost: 110 to 400 dollars. Difficulty: Easy DIY. Time: 3 hours.
Good to know: Use the same colour twice as often as the others. Three colours in equal measure gets noisy fast.
17. Vintage Frame Mix
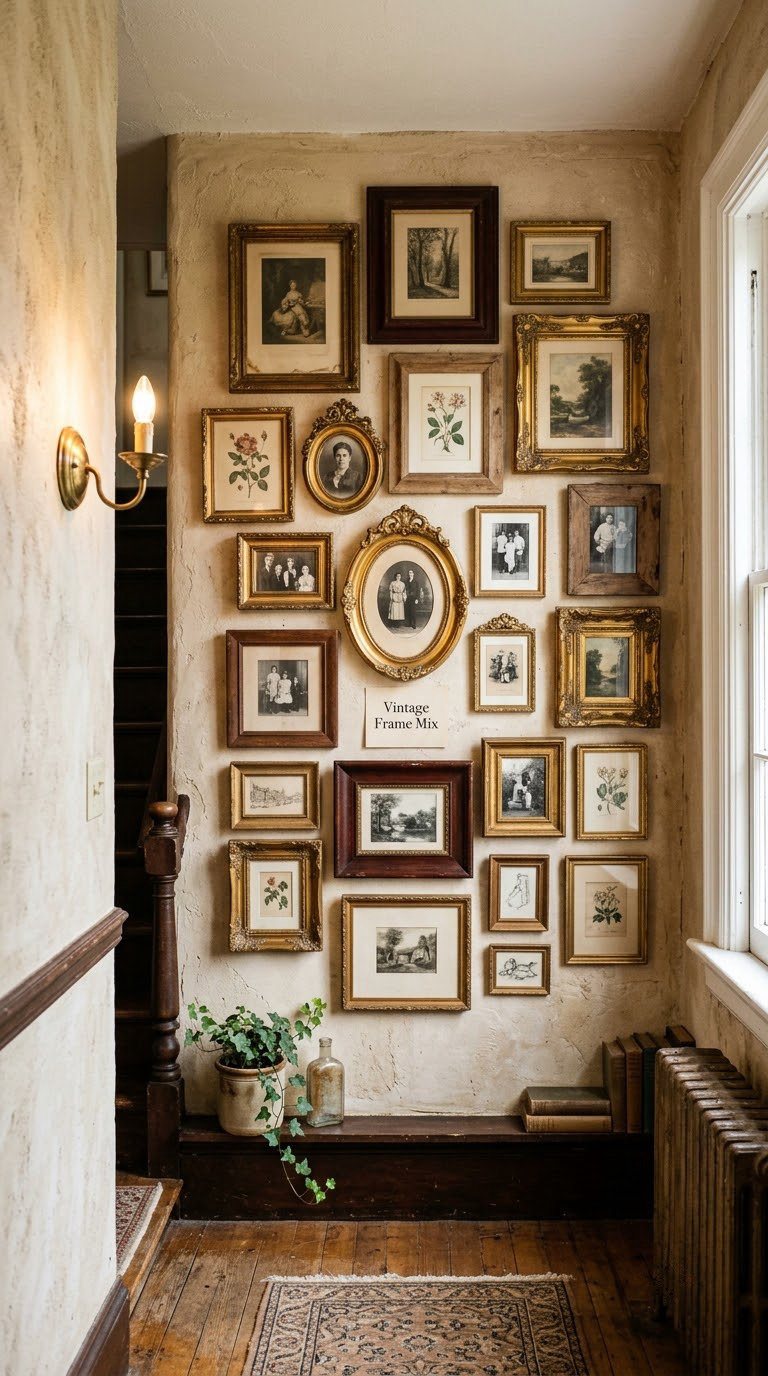
Mixing frames from different periods gives a hallway the collected quality that new frames never have, and secondhand frames cost a fraction of retail. It suits historic homes, and it suits anyone who would rather have twenty interesting frames than three matching ones.
How to mix vintage frames without chaos
- Group thrifted frames into three finish families, such as gold, dark wood and painted white, and aim for roughly a third of the wall in each.
- Repeat at least two frames of the same size so the collection has a visual refrain.
- Fill in gaps with matting rather than more frames; a bare mat is a cheap, invisible fixer.
- Keep gaps at 3 inches (8 cm) and let the biggest ornate frame anchor one outer corner.
Cost: 40 to 380 dollars. Difficulty: Moderate DIY. Time: 5 hours, mostly hunting.
Good to know: Check old frames for glass with a faint brown tint, which makes photos look faded. Replacing it with clear glass is a two-dollar fix.
18. Narrow Gallery Above a Console
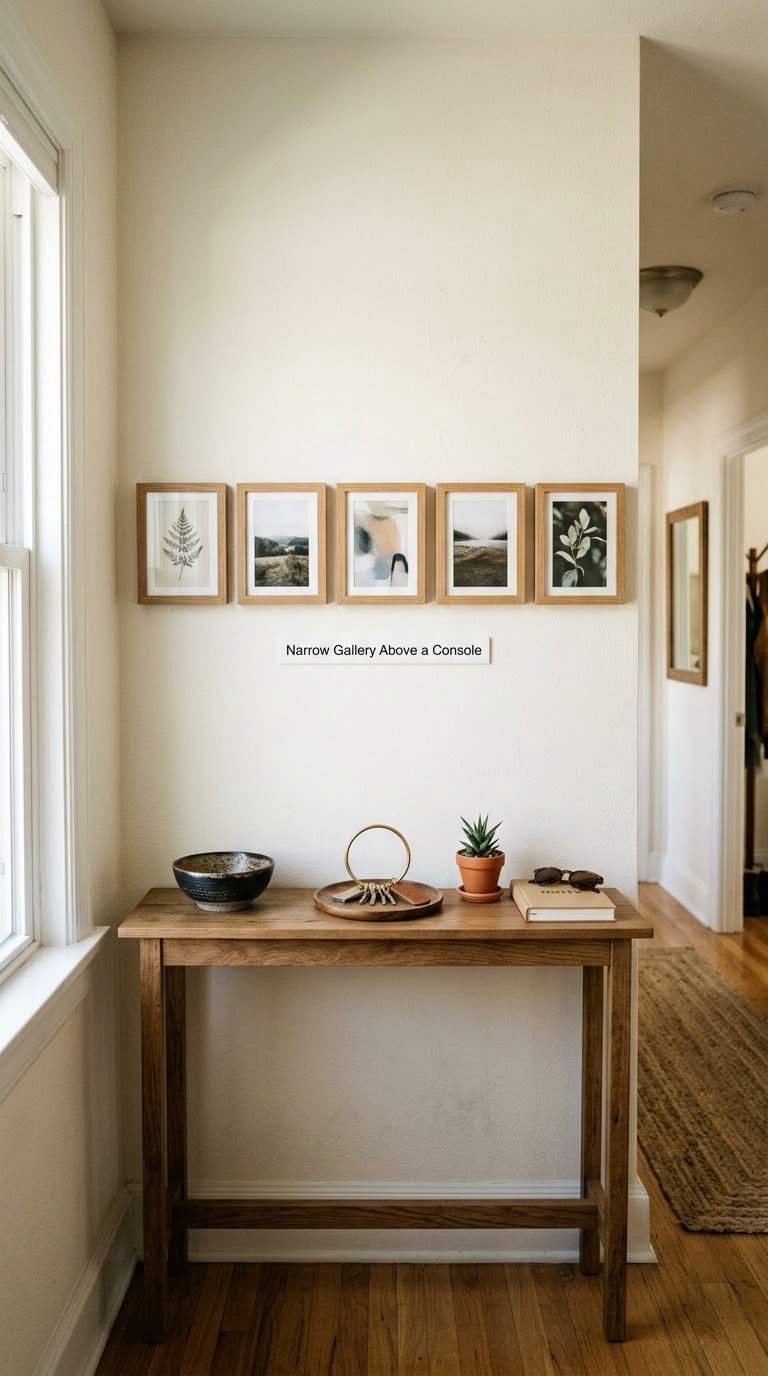
A shallow arrangement above a hallway console reads as a vignette rather than a gallery, and it solves the problem of art hanging over nothing. Keep the grouping wider than the furniture by 6 to 10 inches (15 to 25 cm) on each side and it will look deliberate.
How to hang a narrow gallery above a console
- Measure the console and mark a centre point on the wall 8 to 10 inches (20 to 25 cm) above its top.
- Set the bottom of the lowest frame at that line, which usually puts the grouping’s visual center near 55 to 58 inches (140 to 147 cm).
- Keep the arrangement within 1.5 times the console width so it does not look top-heavy.
- Check the door swing of anything beside the console; frames within 6 inches (15 cm) of a door edge get clipped.
Cost: 140 to 480 dollars. Difficulty: Easy DIY. Time: 3 hours.
Good to know: In a hallway under 36 inches (91 cm) wide, a console already narrows the passage. Keep the gallery to two or three frames instead of crowding above it.
19. Single-Column Triptych
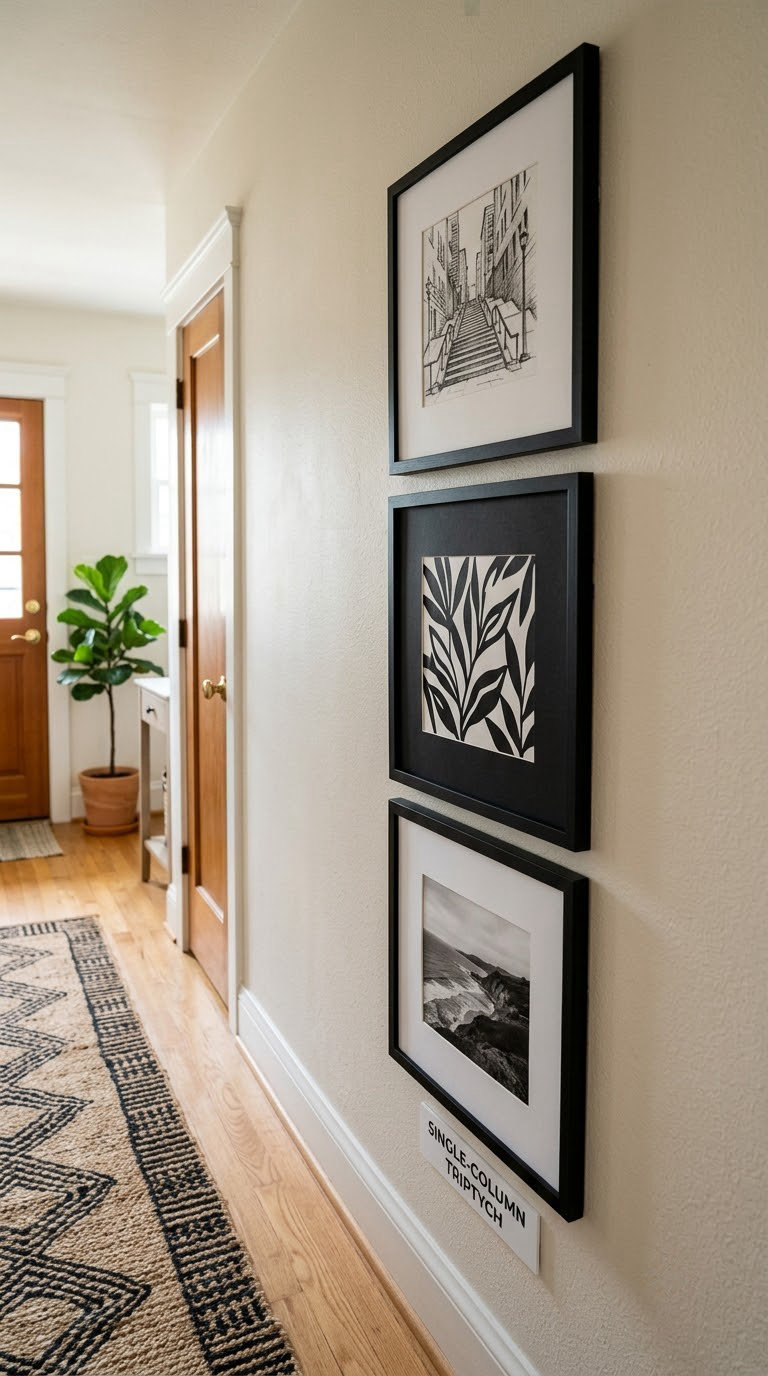
Three frames stacked in one vertical column is the most compact layout on this list and the one that fits the tightest hallway. Because the group reads as a single tall object, you can hang it on a wall run as short as 24 inches (61 cm).
How to hang a single-column triptych
- Choose three frames of the same width, 11 by 14 inches (28 by 36 cm), and one tall, 11 by 30 inches (28 by 76 cm) if you want variation.
- Center the column on the wall run and mark the top frame’s center at 64 inches (163 cm).
- Space the frames 4 inches (10 cm) apart vertically so the column reads as three, not one tall frame.
- Check that the bottom of the lowest frame clears 8 inches (20 cm) above any console or bench.
Cost: 90 to 300 dollars. Difficulty: Easy DIY. Time: 2 hours.
Good to know: On a wall with a picture rail or dado rail, hang below the rail and treat the rail as the top edge of your composition.
20. Minimal Line-Art Gallery
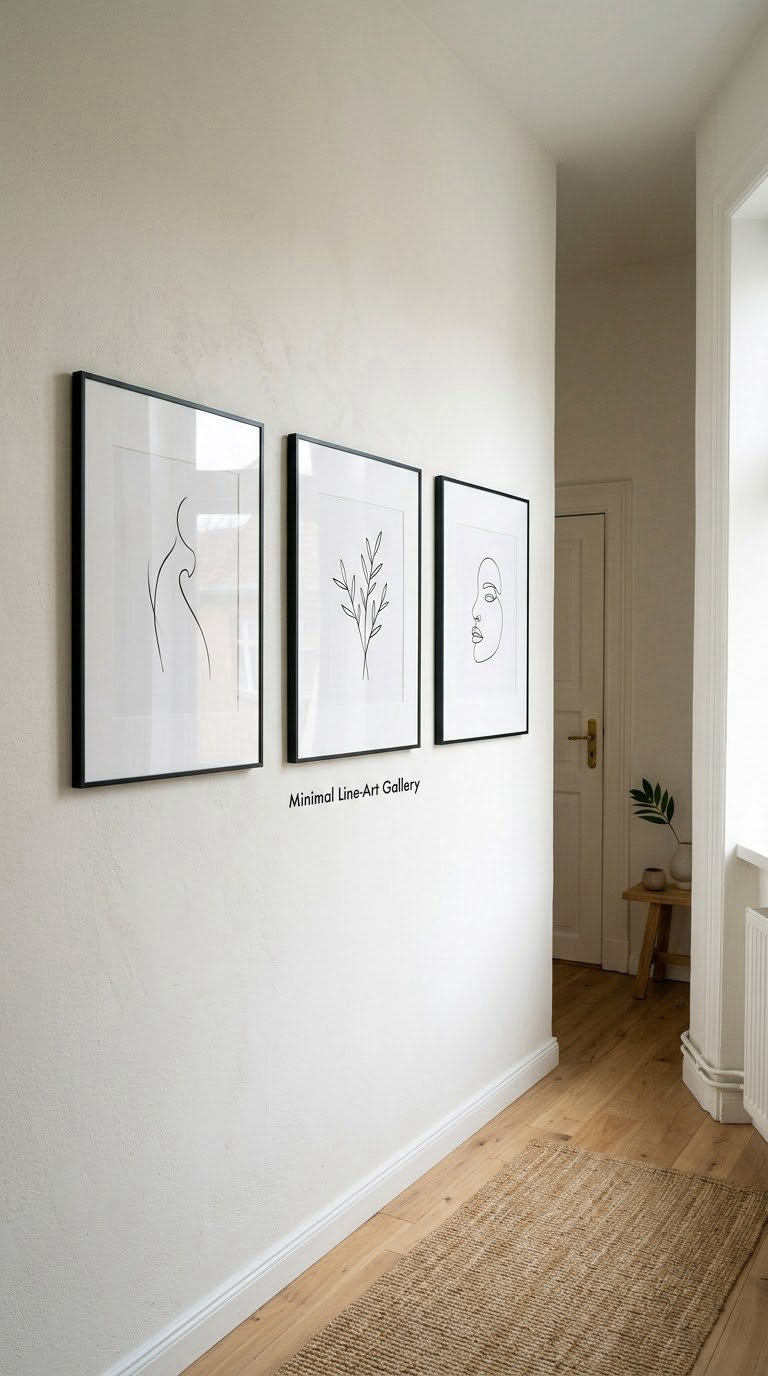
Two or three line-art prints with wide mats and a lot of empty wall is the calmest option here. It suits Scandinavian and minimalist hallways, and it works in the narrowest corridors because the whitespace does the visual work instead of the frames.
How to hang a minimal line-art gallery
- Choose prints no larger than 16 by 20 inches (41 by 51 cm), with 3-inch (8 cm) white mats.
- Space them 12 to 18 inches (30 to 46 cm) apart, or hang one piece per 4 feet (1.2 m) of wall run.
- Align all centers to a single line at 57 to 60 inches (145 to 152 cm) rather than staggering them.
- Stop at three pieces. A fourth in the same style usually removes the calm that made the layout work.
Cost: 80 to 260 dollars. Difficulty: Easy DIY. Time: 1 to 2 hours.
Good to know: If frames feel scattered rather than spacious, widen the mats before you move anything. Mat width is the fastest fix for a cheap-feeling arrangement.
Planning Tips for a Hallway Gallery Wall
How to measure a hallway wall before you plan
Start at the ends and work in. Measure the clear run between door swings, light switches, thermostats, radiators and picture rails, then subtract 12 inches (30 cm) of margin on each side. The usable number, not the wall number, decides how many frames fit. On a 16-foot (4.9 m) wall at 2 to 3 inch (5 to 8 cm) gaps and 11 by 14 inch (28 by 36 cm) frames, you are looking at roughly 10 to 14 pieces in a single row.
How high to hang pictures in a hallway
Hang the visual center of the whole arrangement at 57 to 60 inches (145 to 152 cm) from the floor. That 57-inch rule applies to the group, not to each frame, which is the mistake behind most lopsided hallway walls. Over furniture, drop the bottom edge of the lowest frame to 6 to 8 inches (15 to 20 cm) above the piece and let the center fall where it falls.
Gallery wall layout ideas for a hallway on a rental
Ads on flat drywall work, and picture ledges and leaning frames work anywhere. On brick, textured plaster or stone, nails are not an option and adhesive strips often let go, so lean everything: a ledge, a shelf system, or frames propped on a console with an anti-slip pad under each one.
Beyond the layout itself, a few habits keep the result tidy. Keep 2 to 3 inches (5 to 8 cm) between frames on a defined layout and 4 to 6 inches (10 to 15 cm) on a loose one, and never mix the two in the same wall. Work out the whole design on the floor before any nails go in, and expect to move a frame or two once you can see it from across the room.
Two more details worth getting right. Leave about 9 inches (23 cm) between the bottom of the arrangement and a console or bench beneath it, and check the wall at night under its own lighting, since downlights and sconces cast shadows that make tight 2-inch (5 cm) gaps disappear and wide 4-inch (10 cm) gaps look deliberate.
If you are still deciding on a direction, our notes on what designers notice in a gallery wall cover frame cohesion and the mixing rules that keep mixed collections from turning chaotic. For a bigger colour move on the same walls, these wall painting ideas give you the background to hang against.
Frequently Asked Questions
How far apart should gallery wall frames be in a hallway?
Leave 2 to 3 inches (5 to 8 cm) between frames in a grid, symmetrical row or defined cluster, and that consistent gap is what makes the wall read as one arrangement. On a long wall with a loose, no-fixed-outline style, wider 4 to 6 inch (10 to 15 cm) gaps look intentional instead of scattered. Measure one gap, then reuse that exact number for every frame rather than eyeballing each space.
What size gallery wall is best for a narrow hallway?
Fill about 60 to 70 percent of the clear wall run and stop. In a corridor narrower than 36 inches (91 cm), that usually means a single vertical column, a triptych or two to four frames rather than a full salon cluster. Keep frame depth under 2 inches (5 cm) so the walkway stays clear, and leave at least 18 inches (46 cm) of bare wall on either side of the arrangement.
How do I hang gallery art without damaging the wall?
Tape the full layout on the wall with painter’s tape first, mark the frame outlines, and hang from that map so corrections happen on tape rather than in drywall. Adhesive strips work on flat painted surfaces for light frames under a few pounds each, but they can let go on textured plaster or brick. Picture ledges, leaning frames and shelves need no holes at all and suit rentals completely.
Can renters create a hallway gallery wall?
Yes, and most of the best hallway galleries are renter-made. Use a picture ledge, floating shelves or frames leaning on a console, all of which come down cleanly at move-out. A leftover wall with filled nail holes patches in under an hour with spackle and a dab of paint, so small holes are not worth avoiding at the cost of never starting.
Should hallway gallery art match my existing decor?
Match the frames and hardware to the room, not the subject matter. Repeat at least one wall colour, one metal finish or one wood tone somewhere in the arrangement and you have pulled the hallway into the rest of the house. Art that has nothing in common with the palette can still work as long as the frames around it tie back to the hall runner, the door colour or the light fittings.
How do I keep a hallway gallery wall from feeling crowded?
Leave negative space. Fill only 60 to 70 percent of the available wall, keep gaps even at 2 to 3 inches (5 to 8 cm), and skip pieces rather than shrinking the gaps to fit one more frame. A partly finished gallery is a normal strategy: hang a few pieces in a planned position and add the rest as art arrives. Step back ten feet and look again before adding anything.
If you only do one thing this weekend, measure the clear run of your hallway wall, tape one layout on the floor in full size, and pick a single centerline at 58 inches (147 cm) to hang everything from. Start with the layout that matches your wall length rather than the one in the picture you like most, and these 20 gallery wall layout ideas for a hallway will fill in from there.
