
How to Fix Peeling Paint on Walls: Easy DIY Guide (2026)
Peeling paint is a wall telling you it lost its grip. How to fix peeling paint on walls comes down to four things: find the cause, scrape off every loose edge, fill and prime the bare spots, then lay down two thin coats. Skipping any one of those steps is why the flakes come back a fortnight later.
Most of the work is scraping and sanding, both of which are forgiving. The part that catches people out is diagnosis. Paint that lifts in big sheets, paint that lifts only in a bathroom, and paint that lifts right where you pushed a nail in are three different problems wearing the same coat of colour, and each one needs a slightly different fix.
Contents
Time: 60 to 90 minutes for a patch the size of a dinner plate, most of a day for a full wall. Cost: one quart of paint, a small tub of filler, a can of primer. Difficulty: Easy DIY for small flakes, moderate DIY for tape or delaminated drywall. Skill level: Beginner friendly with patience.
Tools and Materials
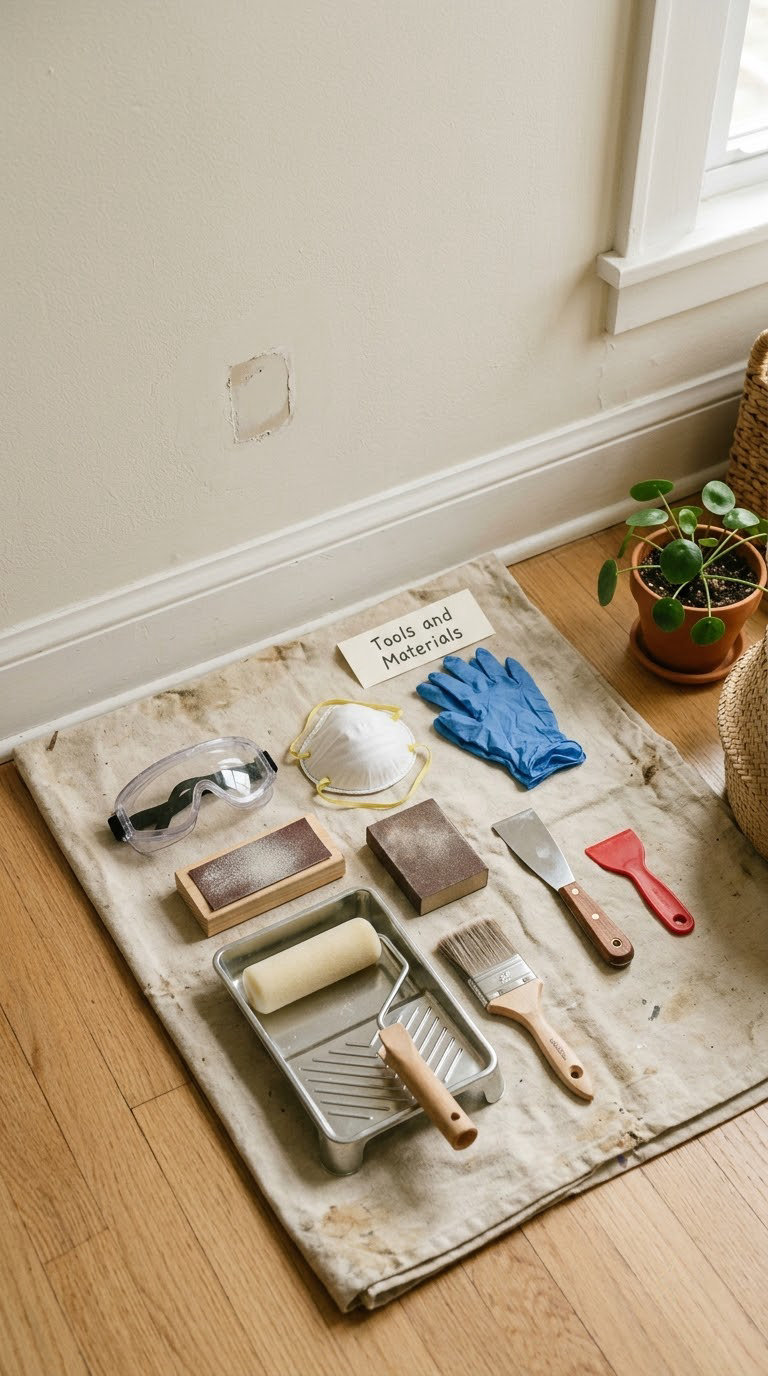
Everything on this list is cheap and most of it is reusable. If you already own a scraper, a brush and a roller, the rest is a single shopping trip.
For removing and repairing
- Plastic paint scraper or a 4-inch (10 cm) putty knife — never a metal blade, it gouges paper
- 2-inch (5 cm) and 6-inch (15 cm) flexible putty knives for filling
- Shrink-free spackle or lightweight setting-type joint compound, plus all-in-one filler if you have a lot of nail holes
- Mesh drywall tape for cracks and loose seams
- Sanding block with 120, 220 and 400 grit sheets
For priming and painting
- Stabilizing or bonding primer, plus a stain-blocking primer if the wall has water marks
- Interior latex paint in the same colour and sheen as the existing wall
- 2.5 inch (6 cm) angled sash brush for cutting in
- Roller with a nap matched to the texture — 3/8 inch (10 mm) for smooth drywall, 1/2 inch (13 mm) for heavier texture
- Paint tray, painter’s tape, canvas drop cloth, tack cloth
For your safety
- Nitrile gloves and safety goggles
- Dust mask for sanding, or a NIOSH-approved respirator if the house predates 1978
Before You Start: Find the Cause and Prepare the Room
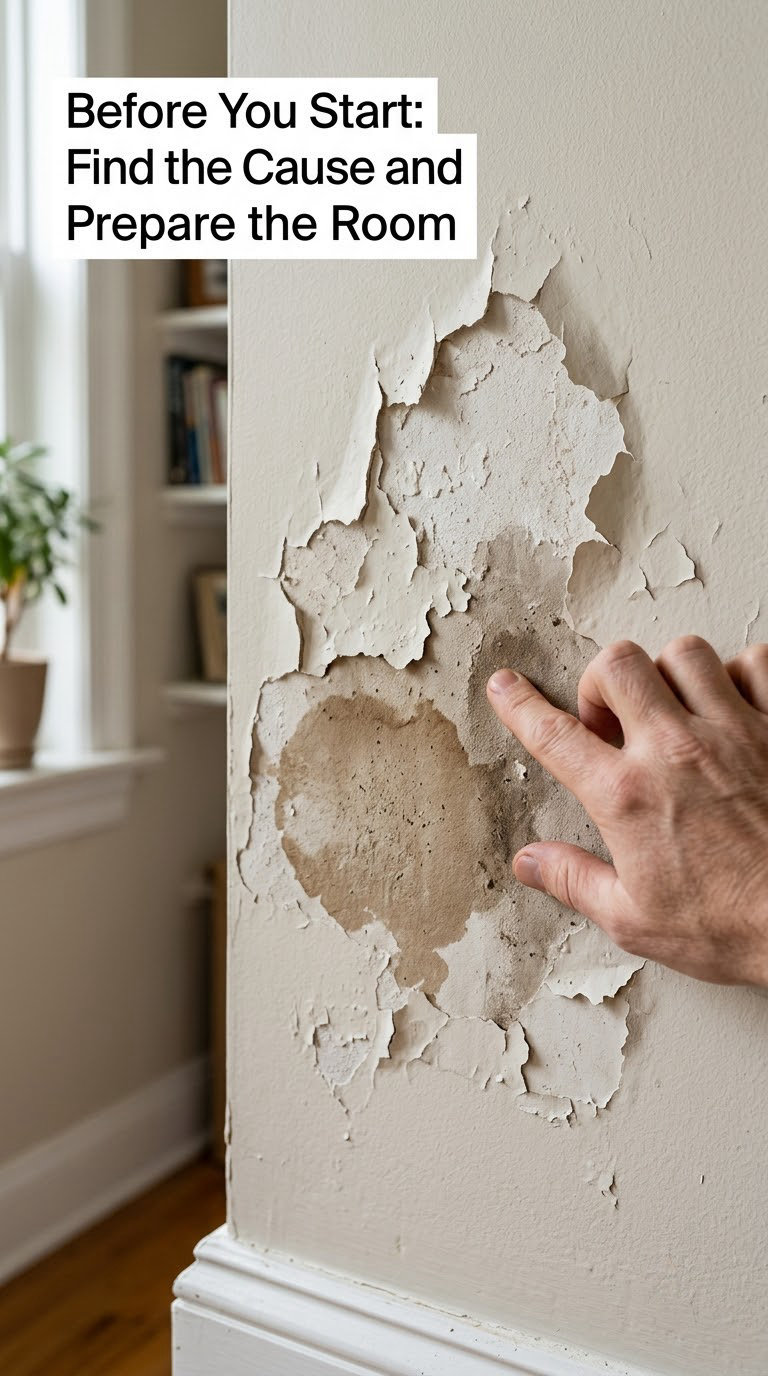
Every cause has a signature. Look at where the paint is lifting and what the bare wall underneath looks like before you touch a scraper.
| What you see | Likely cause | What to do about it |
|---|---|---|
| Sheets of colour coming away, wallpaper or paper underneath | Paint pulled the drywall paper loose | Cut back to solid paper, patch, prime with a bonding primer |
| Peeling above the shower or in a bathroom corner | Persistent humidity from shower steam | Fix ventilation, use a mildew-resistant primer, repaint with bath-rated paint |
| A patch that peeled right where you pulled a nail or picture | Nail holes were filled but never primed | Fill, sand, prime before painting |
| Paint peels off in thin curls everywhere on one wall | New latex applied straight over old oil-based paint | Use a bonding primer that seals the old film |
| Peeling in long strips along a seam | Drywall tape or joint compound letting go | Cut out the loose tape and re-tape the seam |
| Soft, chalky wall or white powdery bloom behind the flakes | Damp, or efflorescence pushing salts out of masonry | Dry the wall out and fix the water source before painting |
| Peeling in blistered patches, wall feels warm or damp | Water trapped behind the paint film | Find and stop the leak first, then repair |
Run the back of your hand along the suspect area. Cool and soft means water is still there, and painting over it will just produce flakes again in a few weeks.
Then protect the room. Push furniture and rugs to the centre, tape the baseboards and any trim you are not painting, and spread the drop cloth. Open windows or run an exhaust fan, because old paint dust is unpleasant at best. Wear the gloves and goggles, and put on the dust mask before you start scraping.
If your house was built before 1978, treat the old paint as lead-containing unless it has been tested. Do not sand it dry or use a heat gun. A cheap lead test kit from a home centre settles the question in a minute, and if it is positive, get a certified abatement contractor.
Finally, decide the size of the job. A patch smaller than a dinner plate with firm paint around it is a weekend fix. Peeling over several square feet, or a wall that has already been repainted and failed twice, is a bigger job, and the cause is likely still in the wall.
Step-by-Step Instructions: How to Fix Peeling Paint on Walls
The order matters. Removing first and filling last is what separates a repair that lasts from one that flakes off in your hand. Four steps, and each one has a ready signal before you move on.
Step 1: Remove Loose Paint and Locate All Damaged Areas
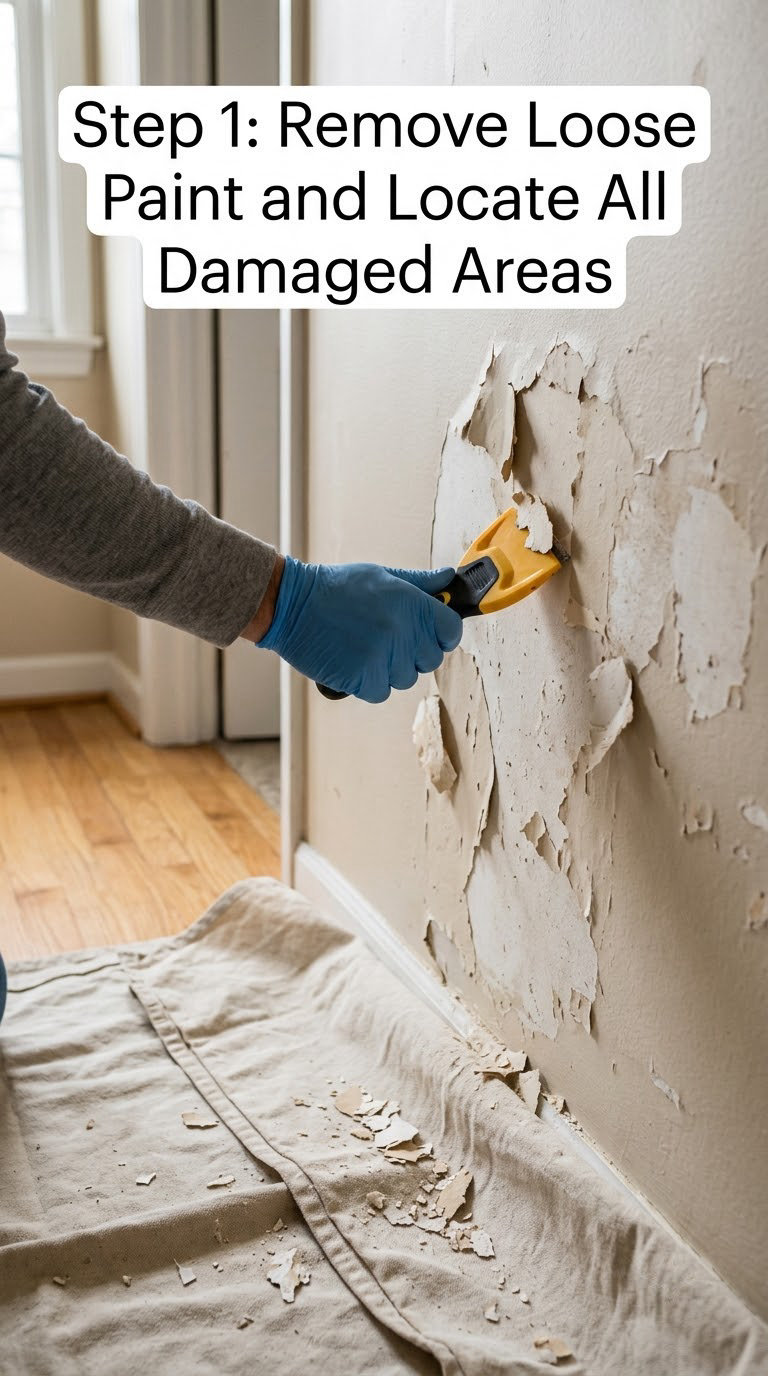
Score the edges of the flaking area first with the putty knife, cutting just inside the loose paint so you separate the film from the sound coating. Then push the blade under the flake at a shallow angle and lift.
Work in slow strokes and let the scraper do the work. If paint is fighting you or coming off in thick chunks, stop and reassess, because a heavy chip usually means the paper underneath has already lifted.
Keep a couple of the flakes, especially one about the size of a quarter. That chip is your best colour sample, and a paint store can match it far more closely than a photograph or a dried-out wall. Reddit repair threads recommend this every single time, and it works.
Once the obvious flakes are gone, press and listen around the area. Paint that sounds hollow or gives slightly under a firm tap is about to go too, so mark those spots now while you have the scraper out. Scrape them back to firm paint that grips the wall.
Checkpoint: everything left on the wall should feel solid under your fingernail, not lift with a light tug.
Step 2: Repair Holes, Cracks, and Uneven Edges
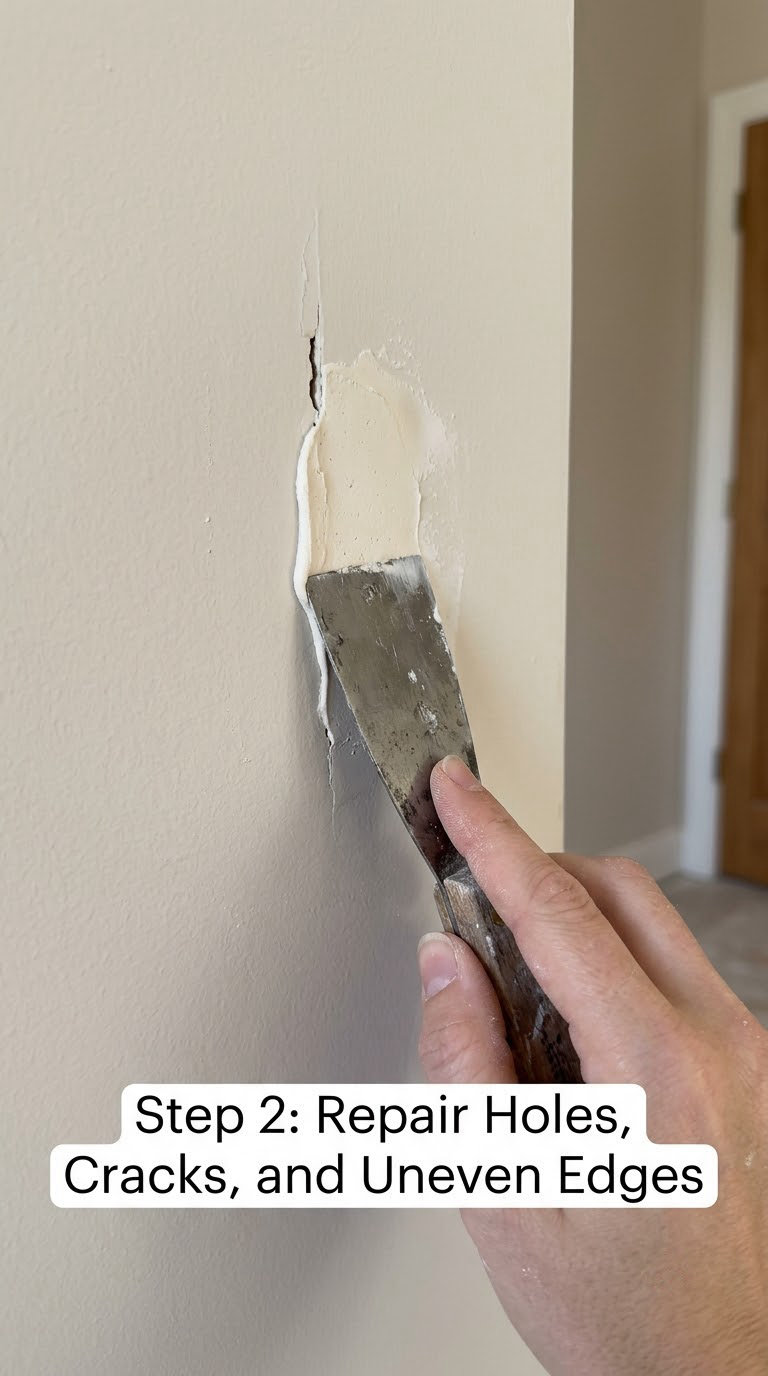
Pick your filler by what you found. Shrink-free spackle suits small nail holes and divots on drywall. Lightweight setting-type joint compound suits larger dents and does not need priming under most latex top coats. All-in-one filler with primer built in saves a step on trim and small holes, but paint still will not stick to it properly unless you let it cure fully and follow the label.
Load the 6 inch (15 cm) knife with a modest amount and pull it across the hole with one steady pass. Let the first layer sit about 1/8 inch (3 mm) proud of the surface, skim off the excess, and let it dry. Shrunken filler is the reason patches look like craters a week later, so a thin first coat and a second skim beat one thick glob every time.
Wait until the filler is hard and no longer cool to the touch. Shrink-free spackle dries in about an hour for small fills; joint compound needs 24 hours for a full skim.
Special case: peeling drywall tape. Cut the loose tape out with a utility knife, cutting just outside the edges of the peel so you remove the whole strip rather than leaving a ragged flag. Fill the exposed seam lightly, press in fresh mesh tape with the excess compound, feather the edges 4 inches (10 cm) wide, then let it dry and sand. Where the drywall paper itself has lifted or the sheet feels soft, cut back to solid material and replace the sheet, because a patch over soggy board never dries properly.
Checkpoint: the repaired area feels level with the surrounding wall and the filler has lost its cool, damp feel.
Step 3: Sand, Clean, and Prime the Surface
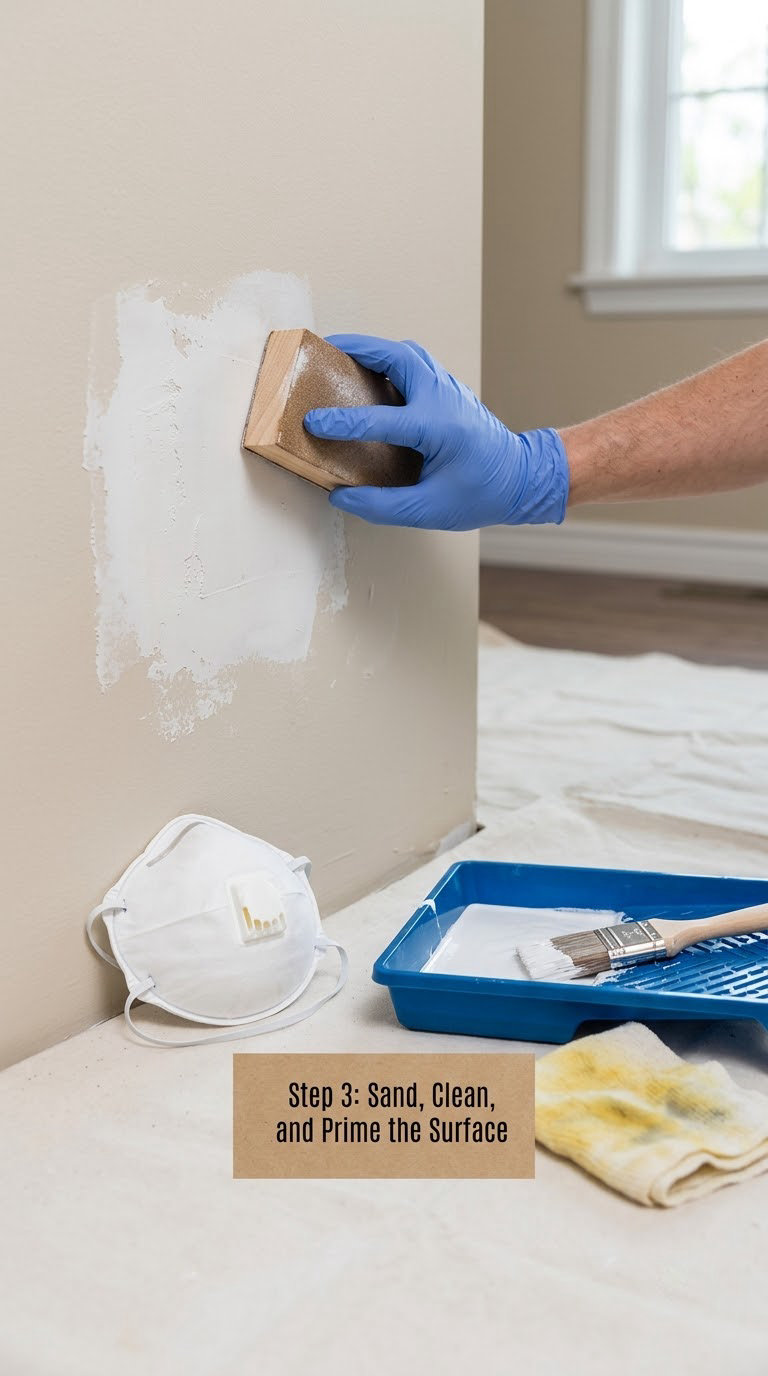
Sand the edges of the old paint at 120 grit to feather the step between the sound coating and the bare wall, then go over the filler with 220 grit, finishing with 400 for a glass-smooth surface under the roller. Sand with the grain and keep the block flat, or you will leave swirl marks that show under paint.
Vacuum or wipe the dust away, then go over it with a tack cloth. Paint will not bond to drywall dust, and that is the whole point of the primer step.
Prime the full bare area, not just the patch. A stabilizing or bonding primer soaks into chalky old paint and stops the edges of the sound coating from lifting later. Over any water-marked or stained section, add a stain-blocking primer first. On bathroom walls, use a mildew-resistant primer. On bare plaster or concrete, use a masonry primer, since those surfaces drink paint differently from drywall.
Give the primer the time on the label before painting, usually one to four hours. It should look evenly matte and feel dry with a light fingertip, not tacky.
Checkpoint: the primed patch is uniformly matte, no filler ridges under the light, and no damp patches left.
Step 4: Repaint the Repaired Area to Blend the Finish
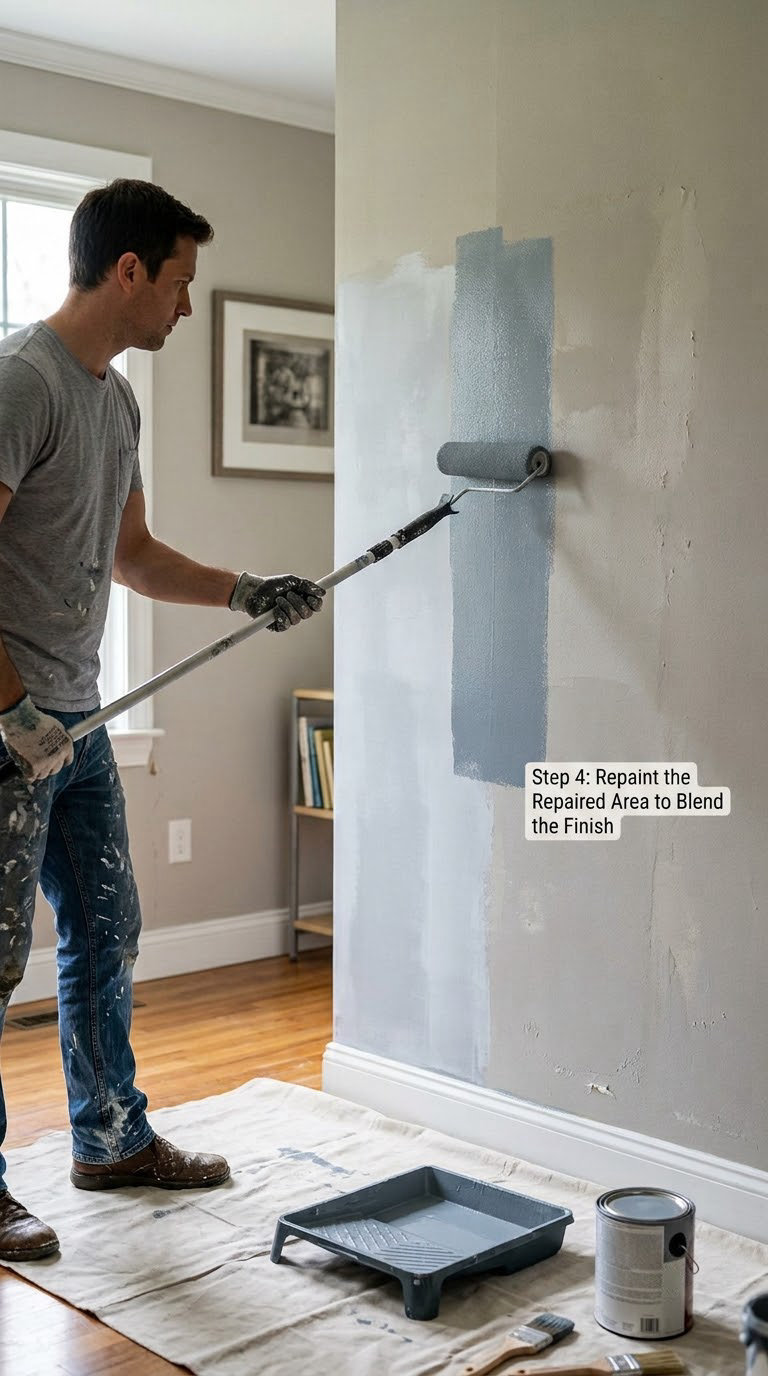
Match the sheen as closely as the colour. Flat, eggshell and satin each read differently under the same daylight, and sheen is what gives away a touch-up even when the colour looks right. Bring your saved chip to the store if you are unsure.
Cut in first with the angled brush along the baseboard, trim and inside corners, loading lightly to keep the bristles controlled. Then roll the field, working in the W pattern and keeping a wet edge about a foot ahead of you. Two thin coats beat one heavy one, and if you can see the primer through the first coat, it needs another pass.
Blend the new paint into the old by feathering the boundary of the repair, rather than ending on a hard line that catches every light. The larger the area of failing paint, the wider you should feather, since a narrow touch-up is what makes a wall look patched.
Let the first coat dry for the label time, usually one to four hours, and check it under angled light for missed patches before you start the second. Two to four weeks is a reasonable window before gentle use of the wall, longer for bathrooms and cool rooms. If you would rather not roll the whole wall, a paint sprayer handles a wide repair quickly and evenly; our [guide to the best paint sprayers for walls and ceilings](https://www.rosenberryrooms.com/best-paint-sprayers-for-walls-and-ceilings/) covers the home-sized options.
Checkpoint: the repair disappears in raking daylight, with no patch edge visible and no primer showing through.
Common Mistakes to Avoid
Painting over loose paint is the big one. A new coat bonds to a film that is already letting go, and it will peel off in sheets within days.
Ignoring moisture sends you straight back to square one. Check with the back of your hand before anything else, and fix the leak or the extractor fan first.
Leaving raised edges un-sanded is the second most common failure. Feather that step or the new paint will crack along the same line later.
Using plain primer instead of a bonding one over chalky old paint lets the edges keep lifting. Skip the stain-blocking primer over a water mark and the stain reappears through the new coat.
Applying paint too thickly traps water in the film, so it never cures hard and peels at the first cold snap. Brush out the ridges and let it dry between coats instead.
Mismatched colour or sheen makes a good repair look bad. Match both, and check a dried sample in natural light before you commit to the whole wall.
Painting over filler that has not cured or been primed is the classic mistake on touch-up jobs, and it is why paint peels off the patch instead of the wall. Let the filler cure fully and prime it.
When to Call a Pro
Some walls need more than a scraper and a can of primer. Book a pro when any of these show up.
- The paint keeps peeling in the same spot after a proper repair, which usually means water is still moving through the wall
- Black spotting, a musty smell or fuzzy growth, which is mould rather than a paint problem
- Large soft or delaminated areas where the drywall paper comes away in strips
- Walls that failed twice after being prepared and primed correctly, or a whole room that needs redoing
- Possible lead paint in a pre-1978 home, which needs certified containment and disposal
- Peeling around electrical boxes, outlets or where plumbing or wiring runs behind the wall
Water damage, mould abatement and lead work all fall under codes that require licensed trades. Patching the paint is fair game; moving the cause is not.
Maintenance
Control moisture first, since it causes most peeling. Run the bathroom extractor fan during and for twenty minutes after a shower, and check that it actually vents outside rather than into the attic.
Clean walls gently with a soft cloth and mild soapy water. A stiff brush and a heavy scrub strip the film and take the paint with them.
Watch seasonal humidity. Basements and north-facing exterior walls get damp in spring, and touching up paint at the first sign of trouble beats sanding back a full wall later.
Avoid loading the same wall repeatedly with heavy shelving or picture hooks. Every nail hole is a future peel point if it is filled but not primed.
Touch up small flakes as they appear with the same primer and paint you used before. A ten-minute fix now saves a full day of scraping later.
Frequently Asked Questions
Can I just paint over peeling paint?
No. New paint bonds to a film that has already lost adhesion, so it usually lifts off in sheets within days or weeks and takes a fresh coat with it. Scrape back to paint that grips, sand the edges, prime bare areas with a bonding primer, and then paint two thin coats. Painting over flakes also makes the peeling spread, because the lifted edge gives the next coat something to grab.
Can I spackle over peeling paint?
Not over paint that is still lifting. Spackle only grips a firm surface, so any flakes or curled edges underneath will take the filler and the top coat with them. Remove every loose piece first, feather the edge, then fill the bare spot. One exception: sound paint that is merely stained or chalky can sometimes be sealed and filled, but check the label on the filler and prime it regardless.
What is the main cause of peeling paint?
Adhesion failure, and moisture is usually behind it. Paint loses its grip when water gets behind the film, when a thick coat traps moisture so the finish never cures, when latex goes straight over old oil-based paint without a bonding primer, or when filler was painted before it cured. Movement in the wall and impact around nail holes account for a lot of local peeling too.
Is peeling paint harmful?
For most people the flakes and dust are an irritation rather than a danger, but old paint is the real concern. In homes built before 1978 it may contain lead, and dry sanding or scraping releases lead dust into the air. Use a cheap lead test kit first, wear a dust mask or NIOSH respirator while sanding, and get a certified contractor if the test comes back positive.
My drywall tape is peeling under my paint. How can I fix it?
Cut the loose tape out entirely with a utility knife, taking a thin strip of sound paint and compound with it. Fill the seam lightly, press in fresh mesh tape with the compound, feather the edges about 4 inches (10 cm) wide, then let it dry, sand smooth, prime with a bonding primer and repaint. If the drywall paper underneath is soft or lifting, cut back to solid board and replace that section.
Conclusion
Start with the cause, not the scraper. Find out whether you are dealing with moisture, incompatible paint or an unprimed patch, and fix that first. Then remove every loose and feathered edge, fill the bare drywall, prime with a bonding primer and repaint in two thin coats.
Done in that order, peeling paint on a wall stays fixed. Skipped in the other direction, it comes back in a couple of weeks and costs you the repair twice.
