
How to Sand Hardwood Floors Without a Drum Sander (2026)
You can sand hardwood floors without a drum sander. For a full room, rent a random orbital floor sander; for edges, closets, stair landings, and anything under 200 square feet, work with a handheld belt sander and a palm sander instead. Same grit ladder, more time, far less risk of a permanent gouge.
Most people buy or rent the drum sander because it is the machine a crew uses, not because it is the only option. It weighs 90 to 100 pounds, it lives at a rental shop that may be hours away, and it will cut a scallop into your floor the second you stop moving. That fear is reasonable. The slower tools work. They just work at a different pace and with a different sequence.
Contents
Time: 2 to 4 days for a 150 to 250 square foot room, longer on a heavy finish. Cost: tool rental plus abrasives, filler, and finish; rates vary a lot by region. Difficulty: Moderate DIY. Skill level: careful beginner, with a test area before the first full room.
Tools and Materials
Quantities below assume one 150 to 250 square foot room. Buy or rent the abrasives before you start, not halfway through the first grit.
- Random orbital floor sander, 17-inch pad, with a dust bag and a spare filter
- Handheld belt sander, 3-inch belt, for edges and heavy removal
- Palm sander plus assorted hook-and-loop sanding discs
- Detail edger or 5-inch random orbital for corners and baseboards
- Sandpaper assortment: 36 or 40, 60, 80, 100, and 120 grit, plus extra 40 and 60
- Sanding screen, 100 to 120 grit equivalent, for the final buff
- Hand sanding blocks, 4-inch and 8-inch, with 80 and 120 grit sheets
- Belt scraper, plastic paint scraper, and a small hand chisel
- Shop vacuum with a HEPA filter and a second filter on hand
- Wood filler, water-based, and a matching stainable putty knife
- Low-VOC floor finish, water-based polyurethane or oil-based polyurethane
- 4-inch poly lambsfoot roller or a T-bar applicator, plus extension pole
- Polyester or cotton sheeting, 6-mil plastic, painter’s tape, hammer, pry bar
- Safety glasses, N95 or P100 respirator, ear plugs, knee pads
Rental shops stock the floor sander and edger separately, and many do not stock palm sanders or belts in every grit. Call ahead and confirm what is on the shelf in your size. Rural shops carry less inventory and fewer machines, and prices swing by region, so get the rate before you drive out.
If your sander has a vacuum hose, a hose adapter and an inline filter keep most of the dust in the can instead of the air. And if you want a comparison of the bigger machines before you commit to anything, our guides to drum sanders for floors and edger sanders for hardwood floors are worth a look.
Before You Start
Confirm what you actually have underfoot. Solid hardwood can be sanded repeatedly. Engineered hardwood can sometimes be sanded once, but only if the wear layer is thick enough, and many products are built with a layer too thin to touch. Laminate has a paper or melamine face over the core and cannot be sanded at all, because there is no wood to reveal.
Scratch the finish in a closet corner with a coin or a key. If you get a pale wood shaving or powder, it is solid or thick engineered and you can proceed. If you see a brown paper layer, stop. That is laminate, and sanding it exposes the core.
Then run a damp cloth over a few boards. Dark cupped edges that lift as they dry mean moisture is still moving through the floor, and that has to be fixed before sanding.
Other prep that matters:
- Move all furniture. Baseboards usually come off with a pry bar and a block of wood protecting the paint.
- Drive every nail and staple 1/32 inch below the surface with a punch and hammer. Anything proud will tear a disc.
- Tape 6-mil plastic across doorways and over supply registers, then close interior doors so dust stays in one room.
- Run an extension cord or a vacuum hose along the route you will walk so you are not tripping mid-pass.
Wear eye protection, ear plugs, a respirator, and knee pads. Old floors in homes built before 1978 can carry lead in the finish or in adjacent paint, and rental machines may have cut lead-painted material before you picked them up. If the paint in the room tests positive for lead, get the floor tested before you sand anything.
Step-by-Step Instructions
Step 1: Inspect the Floor and Make a Sanding Plan
Measure the room and write the square footage down. Note the board direction, the worst areas, and which door you will finish from last so you never have to walk across a finished surface.
Work out where the light falls from a window at one end of the day. Every scratch you miss will show up in that raking light, and now is the time to know where to look hardest.
Keep your passes with the grain wherever you can. A cross-grain pass is fine for stripping finish and for blending the last grit, but doing the whole floor against the grain invites chatter and leaves marks the finish will magnify.
Step 2: Prepare the Room and Set Up Dust Control
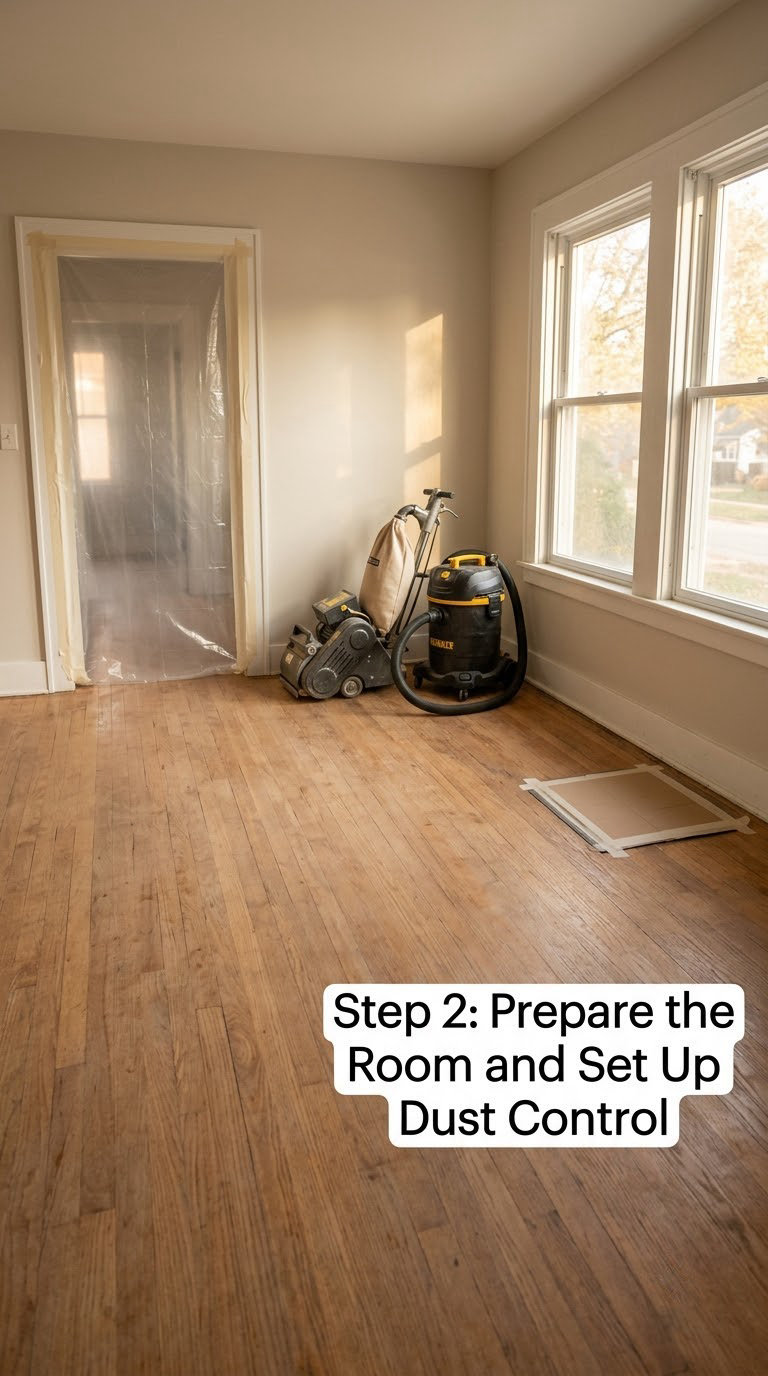
Hang plastic over every opening into the rest of the house, tape the seams, and treat the room as sealed. Cover or unplug anything that draws air, because the exhaust fan on a shop vacuum pulls dust into the hallway the second you open the door.
Connect the sander to the vacuum, run the vacuum for a minute before you start, and confirm the hose does not tug against the sander as you turn. Keep a second filter ready; a loaded filter cuts airflow and the sander stops collecting properly.
Step 3: Choose the Right Grit Sequence
Start at 36 or 40 grit when there is thick finish, varnish, paint, or adhesive. Start at 60 grit if the floor is bare wood, new construction, or only needs a refresh. Do not start at 80 grit and hope; you will spend three times as long with loaded discs and still chase the finish.
Then climb the ladder without skipping: 36 or 40, then 60, then 80, then 100, then 120 for a smooth finish under a satin or gloss coat. Jumping from 40 straight to 100 leaves a scratch pattern that shows through the finish, and that is the single most common DIY complaint on the floor forums.
Grind a 12-inch square in a closet at your starting grit and check it with your fingertip. Rub a finger across it. If it feels rough, drop to the next coarser grit. If it still feels fuzzy, go one step finer than planned.
Step 4: Sand the Main Field with an Orbital Sander
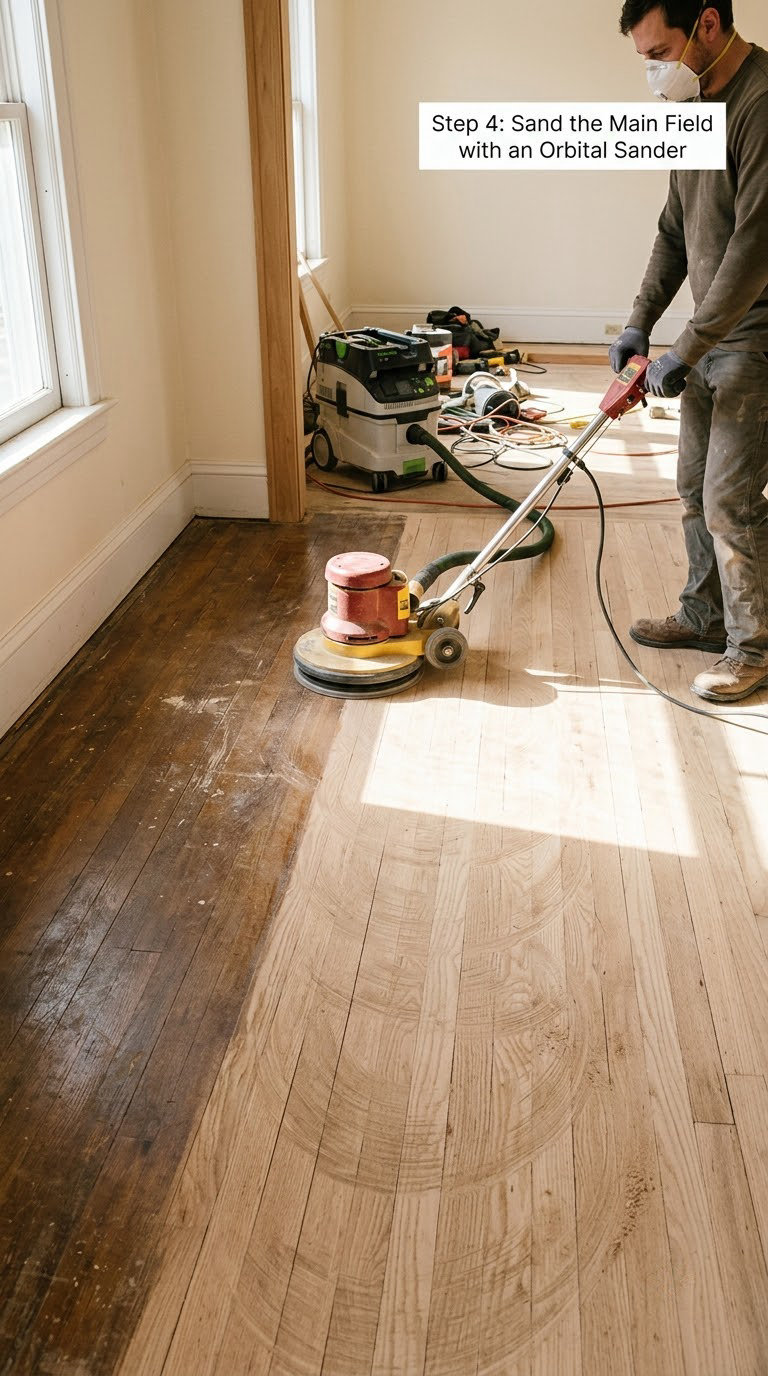
Load the pad so the disc sits flat and the lock nut is snug. A disc that wobbles under load makes a pattern no amount of finishing will hide.
Overlap each pass by about a third of the pad width, and vary the direction every few rows so the scratch pattern scatters. A random orbital spreads its own scratches in a small circle, which is why it is forgiving, but a fixed gear setting will concentrate them.
Vacuum after every grit, not at the end of the day. Dust that gets worked into the next pass scratches the wood, and a clogged disc stops cutting and starts heating, which is how swirl marks appear out of nowhere.
Keep clear of the outer three inches of the room. Edges are an edger job, and the drum was never the tool that finished them anyway.
Step 5: Sand Edges and Tight Spaces
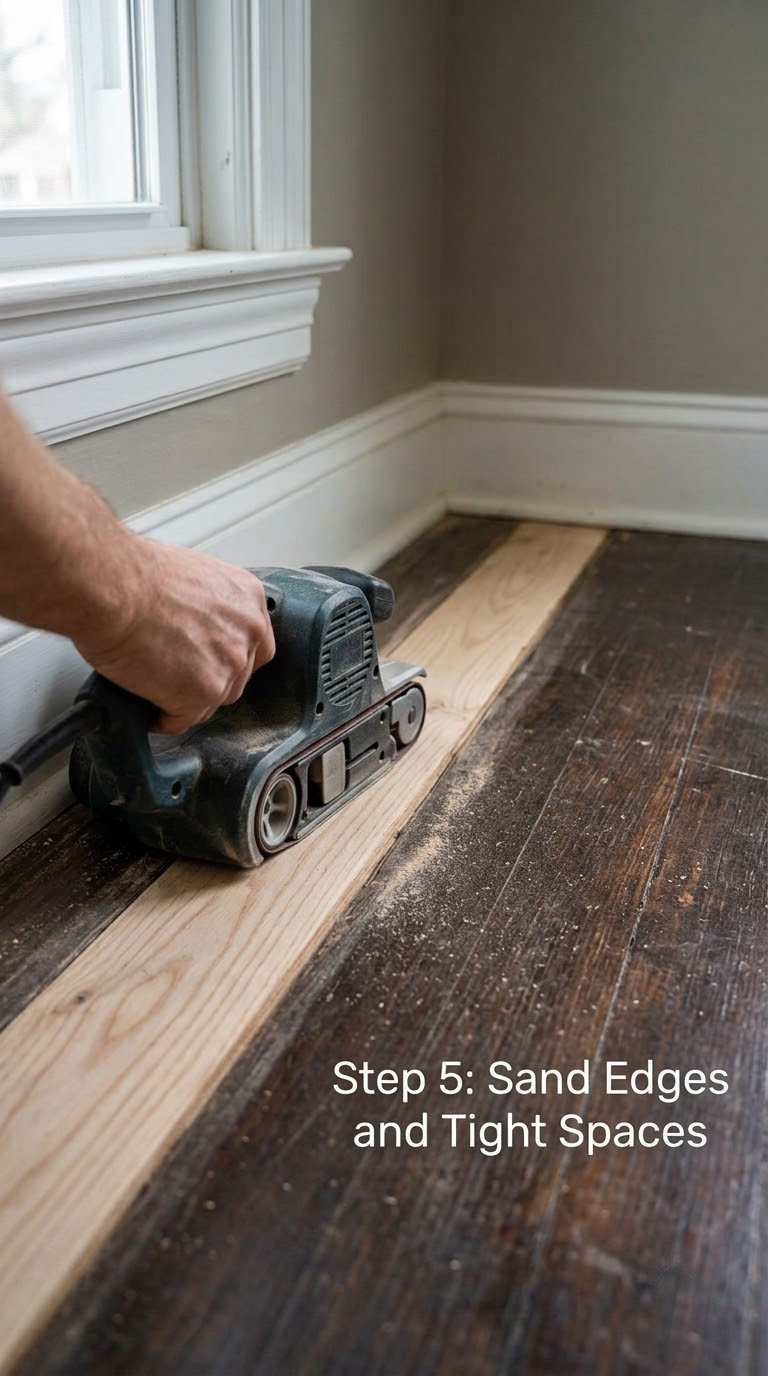
Use the belt sander along the walls with the belt running with the grain, working from the middle of the room outward. If it starts to dig, lift it immediately. A belt sander has no braking instinct on softwood or on cupped boards.
Switch to the palm sander or a detail edger for baseboard lines, closet interiors, door thresholds, and under-cabinet gaps. Corner edges where two walls meet get hand sanding blocks at 120, worked in small circles with light pressure.
The goal is a smooth transition, not a perfectly straight line. Sand the last two inches of the field and the first two inches of the edge at the same grit and feather them into each other. A hard change in level is what creates the visible perimeter line and the darker border after stain.
Step 6: How to Sand Hardwood Floors Without a Drum Sander Safely
The whole method rests on one habit: the machine is always moving when it touches the wood. Park a drum or a belt sander in one spot and it cuts a scallop. Keep an orbital gliding and it can only scratch.
Operating habits that separate a good result from a bad one:
- Keep the pad in contact with the floor under light, even pressure. Pressing harder just heats the disc.
- Unload the sander before you set it down. Lift it off the boards instead of parking it.
- Change discs the moment they load up. A glazed disc leaves scratches that no finer grit fully removes.
- Swap grit direction every pass or two, especially on the last two grits.
- Inspect at an oblique angle under a work light, not straight down.
- Stop sanding when the pad stops cutting. That is your signal the grit is wrong, not that you need more force.
Take breaks before you need them. Kneeling work and a handheld machine at 60 grit will tell you about your shoulders by the second hour, and fatigue is how gouges happen.
Step 7: Vacuum, Fill, and Check the Final Surface
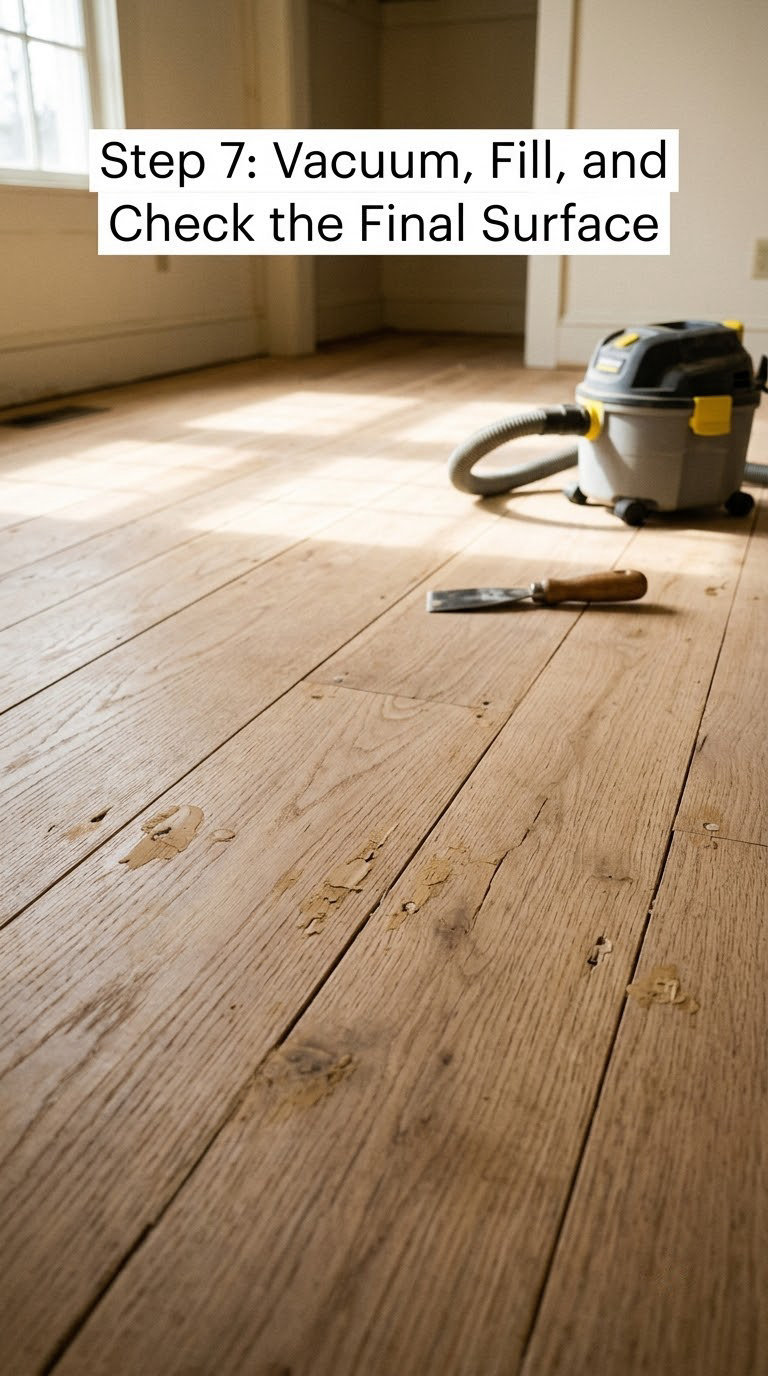
Make the final pass at 100 or 120 grit. Vacuum the whole room, then vacuum again with the nozzle and brush head, then wipe with a barely damp cloth to raise the dust you missed.
Press wood filler into nail holes, screw holes, and small cracks with a putty knife. Let it dry as the label directs, usually a couple of hours for a water-based product in a dry room. Scrape the excess flat and sand it level with 120 grit on a hand block.
Vacuum once more, then walk the room at low angle from every doorway. Anything you can see now will be more visible under finish. Finger-sand what the machine missed.
Step 8: Apply the Finish
Pick the finish for the look and the room. Water-based polyurethane dries fast, cleans up with water, and stays clear over most natural wood tones. Oil-based polyurethane adds depth and warmth but needs ventilation, longer cure, and solvent cleanup. Follow the product data sheet for spread rate, temperature, and humidity limits.
Apply thin coats. A heavy coat dries soft on top and traps solvent underneath. Cut in along the walls first with a brush, then roll or T-bar the field with the recommended applicator, and keep a wet edge as you go.
Allow the full dry time on the data sheet before the next coat, and never recoat a coat that feels tacky anywhere. Buff between coats with a 100 to 120 grit screening pad or sanding screen to give the next coat something to grip.
Typical windows: light foot traffic after about 24 hours for water-based finish, rugs and furniture after several days, and full cure over weeks. Use the numbers on your can, not these.
Common Mistakes to Avoid
- Sanding laminate or thin engineered veneer. There is nothing underneath to sand into. Check the wear layer spec before you plug in.
- Skipping grits. Every jump leaves a scratch step the finish will show. Climb one step at a time.
- Staying on a loaded disc. Change it. A loaded disc glazes, heats, and polishes the wood instead of cutting it.
- Leaving dust in the room before filling. Vacuum twice and wipe damp, or the filler will peel off later.
- Over-sanding a thin wear layer. Once you see colour change from light to dark on the edge of a board, stop. That is the limit.
- Creating a hard perimeter line. Feather the edge into the field at the same grit.
- Using glue and sawdust as filler. It shrinks, it stains differently, and it falls out. Use a real wood filler.
- Too much finish in one coat. Thin coats cure harder and level better.
- Walking on it early. Socks and shoes leave heel marks that polish into a permanent scuff.
When to Call a Pro
Some floors are outside what a hand tool can fix. Hire a professional refinisher if any of these apply:
- Deep gouges or a chewed area where boards are broken or missing.
- Warped, cupped, or twisted boards that would sand unevenly at the edges.
- Water damage with swelling, staining, or dry rot underneath.
- Any structural movement, sagging subfloor, or joist problem.
- Suspicion of lead paint or an untested home built before 1978.
- Engineered flooring with an unknown or thin wear layer.
- Pet urine damage that has gone into the wood rather than sitting on it.
- Black carpet mastic across a large area, which takes heavy stock removal and a second machine to hold.
Large jobs are worth pricing too. Beyond roughly 500 square feet, the rental logistics and the sheer number of passes often cost more than a pro day rate. If the sander cannot reach the room at all, a loft or a spiral stair landing, that is another reason to hire out.
Maintenance
A finished floor lasts as long as you let it. Vacuum or dust mop weekly with a hard floor setting, since grit is what scratches finish, and pick up spills immediately rather than letting them soak in.
Use a hardwood-specific cleaner, not vinegar, ammonia, or a steam mop. Steam forces moisture into the seams, which lifts the finish and can cup the boards underneath.
Put down entry mats, and use felt pads under every furniture leg. Keep indoor humidity between 35 and 55 percent with a small hygrometer, because seasonal swing is what opens gaps and cups boards. After finishing, follow the data sheet for waiting periods: light foot traffic usually after about a day, rugs and furniture after several days, heavy traffic later, and full cure takes weeks whatever you do.
Frequently Asked Questions
Can I sand hardwood floors without a drum sander?
Yes, on most solid hardwood floors. A rented random orbital floor sander handles the open field and a handheld belt sander handles the edges, and together they do everything a drum and edger pair would do. The trade is time rather than result. Deep finish buildup, cupped boards, and very large rooms are the cases where the drum still wins.
What is the best sander to use instead of a drum sander?
For a full room, the random orbital floor sander. It rotates the pad while orbiting it, which spreads scratches instead of concentrating them, and it forgives a beginner. For rooms under about 200 square feet, edges, closets, and stairs, a handheld belt sander with a palm sander for corners is faster and easier to control.
What grit should I start with when sanding hardwood floors?
Use 36 or 40 grit for thick finish, varnish, paint, or adhesive. On bare wood or a floor in good shape, start at 60 grit instead. From there climb to 80, then 100, then 120 without skipping a step. Grinding a small test square in a closet first takes ten minutes and tells you whether you need to drop one grit coarser.
Is it safe to sand engineered hardwood floors yourself?
Only if the wear layer is thick enough. Many engineered floors have less than a millimetre of veneer, and one pass can sand through to the core and stain it black. Check the manufacturer spec for the wear layer, assume one sanding at most, and stop as soon as the colour changes at the board edge. If the spec is not printed anywhere on the floor, do not risk it.
How much dust does sanding a hardwood floor create?
A great deal, and it travels further than you expect. Hang 6-mil plastic across every doorway, tape the seams, cover the floor registers, and run the sander into a vacuum with a HEPA filter. Vacuum after every grit rather than at the end of the day, and keep a second filter on hand because a loaded one kills airflow and collection.
Conclusion
Here is the whole job in order. Test the floor in a closet corner and confirm it is solid wood or thick engineered. Choose your starting grit based on the finish you found, 36 or 40 for heavy buildup and 60 for a light refresh. Seal the room, cover the vents, and connect the sander to the vacuum. Grind a 12-inch test square and check it with your finger. Then work the grit ladder without skipping, vacuum after every pass, keep the machine moving, and finish with 120 grit, filler, and a second vacuum.
Take your time with the edges. That is where the visible line shows up, and it is the part a hand tool does better than a drum ever did. Do the coats thin, follow the data sheet for drying, and give people a reason to take their shoes off at the door. A good vacuum makes the whole routine faster, and our picks for cordless vacuums for hardwood floors handle the dust step well.
