How to Paint Cabinet Hardware Instead of Replacing It 2026
Yes, you can paint cabinet knobs, pulls and handles instead of buying a whole new set. Clean them, scuff the shine off, prime for metal, apply thin coats, seal, and dated brass or nickel becomes matte black in an afternoon.
If your kitchen still has that builder-grade brass everyone recognises on sight, painting is the fix. It costs a few cans of spray paint, it keeps the original fit and screw spacing, and it survives daily use when the prep is done properly. Learning how to paint cabinet hardware instead of replacing it is mostly about prep discipline, not talent.
Contents
Time: 2 to 4 hours of hands-on work plus 48 hours of drying · Cost: Low, a couple of cans of paint and a sheet of sandpaper · Difficulty: Easy DIY · Skill level: Beginner, as long as you’re patient between coats
One planning note before you start: if you are picking a new colour anyway, our paint colour ideas for the home guide is a good place to settle on a shade you actually like, rather than picking whatever the first can on the shelf happens to be.
Tools and Materials
Nothing here is specialist gear. If you already own a screwdriver, some sandpaper and a spray can, you’re most of the way there.
Preparation supplies
- Phillips and flat-head screwdrivers: two, matching whatever screws your cabinets use. Take a photo of each screw before you turn it so you can buy the right driver once, not twice.
- Small plastic bags or a muffin tin: for screws, grouped by cabinet. One bag per drawer stops the hunt at 9pm.
- Masking tape: one roll. You will use it for labelling, for hanging pieces, and for protecting cabinet faces.
- Degreaser or mineral spirits: half a bottle. Sugar soap, a degreaser paste, or warm soapy water for light grime.
- Wire brush or 80 grit sandpaper: for rust and pitting on older brass or iron pieces.
- 180 grit and 220 grit sandpaper: for scuffing the existing finish and knocking down drips between coats.
- Microfibre cloths: three or four. One for grease, one for dust, one for the final wipe.
- Drop cloth or cardboard: plus a scrap of 1 inch painter’s tape or two skewers for hanging pieces.
Painting supplies
- Metal or bonding primer: one can. Bonding primer for chrome, lacquer or unknown plating; a self-etching or automotive-style spray primer for bare or rusted steel and zinc.
- Paint and primer in one spray can: one can per coat of colour. Satin is the safe pick for hardware; matte and gloss both fingerprint badly.
- Clear lacquer or water-based clear topcoat: one can. Optional, but it is the difference between paint that lasts two years and paint that lasts ten.
- Nitrile gloves and safety glasses: one pair and one pair. Spray paint belongs in a ventilated space, not in your face.
- Respirator with organic vapour cartridges: if you are using lacquer-based paint or topcoat indoors. A dust mask is not enough for fumes.
- 220 grit sandpaper or a polishing pad: if you want the final topcoat knocked back from glossy to satin.
How long each stage takes
- Removal and cleaning: 20 to 40 minutes. Faster if you remove every piece in one session.
- Sanding or scuffing: 15 to 30 minutes. Skip the 80 grit unless there is rust or pitting.
- Primer: 15 minutes to apply, dry to the touch in 30 to 60 minutes.
- Colour coats: 10 minutes per coat. Three thin coats, 30 to 60 minutes apart.
- Clear topcoat: 10 to 15 minutes, dry to the touch in 1 to 2 hours.
- Full cure before use: 48 hours, and 72 is better for busy kitchens.
Paint and primer in one, or two separate products?
- Bonding primer, then colour: best for chrome, lacquer and unknown plating. Watch out for two cans and two extra hours of drying.
- Paint and primer in one: best for clean metal and matte or satin finishes. Weak on chrome and glossy plating without a scuff.
- Chalk paint: best for wood, plastic and decorative pieces. It peels on bare metal under hand contact, so not my pick for pulls.
- Spray paint: best for curved knobs, cup pulls and hinges. Watch out for overspray indoors, which needs ventilation and masking.
- Brushed liquid paint: best for flat bar pulls and square knobs. Brush marks show on chrome under a clear coat.
Before You Start: Check the Finish and Plan the Project
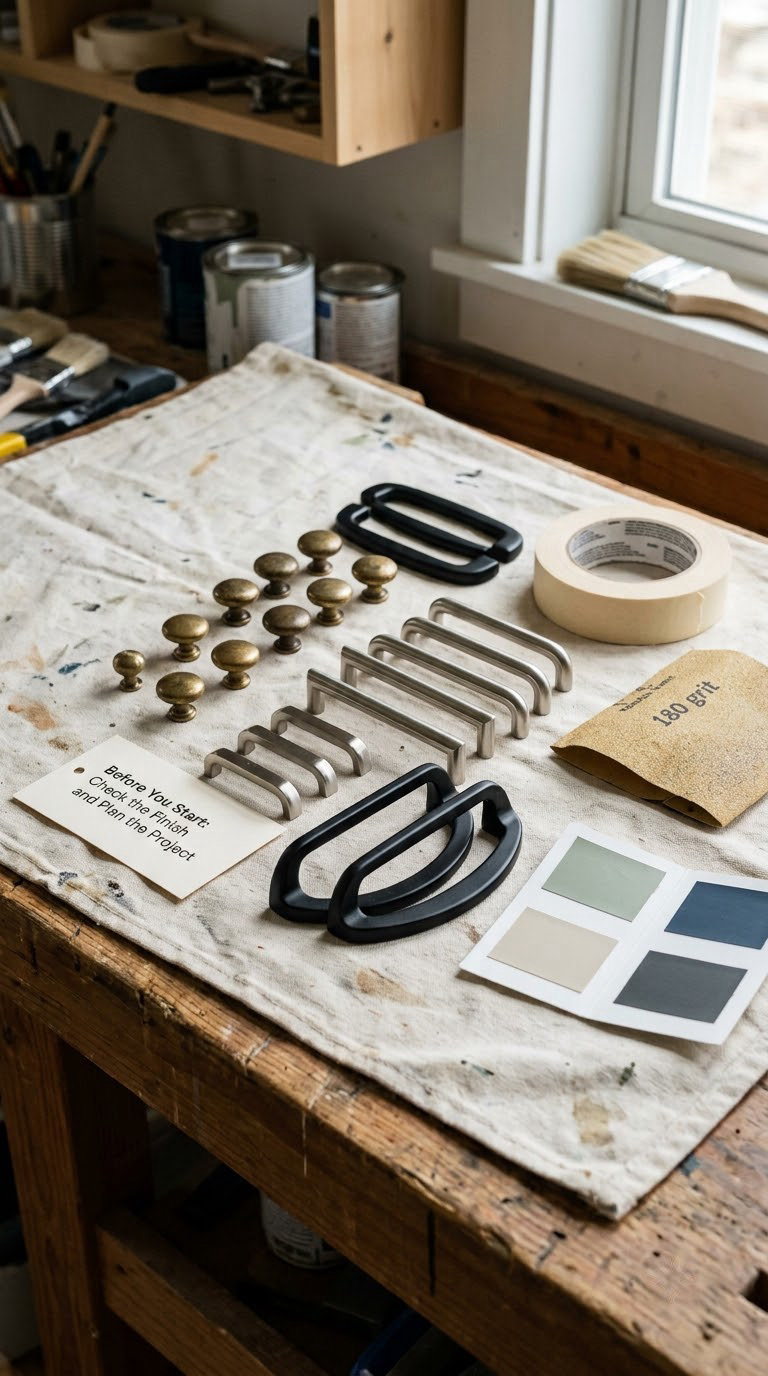
Not every piece of hardware should be painted. Spend ten minutes checking before you commit an afternoon to it.
Work out what the hardware is made of
A fridge magnet tells you a lot. Steel and iron stick. Brass, zinc alloy and aluminium do not.
- Solid or plated brass: common on 1980s to 2000s cabinets. The plating underneath is often thin, so scuff well and prime thoroughly.
- Zinc alloy: the most common cheap die-cast knob. Paints well once cleaned and scuffed.
- Steel and iron: rust risk. Any rust bloom needs removing before paint, or it comes back later as brown bubbles under the colour.
- Aluminium: scuff and prime. Bare aluminium will not hold paint without it.
- Plastic or hollow faux-metal: often paints acceptably with a bonding primer, but chips easily where hands grip it. This is one of the cases where replacing is the better call.
Decide whether the finish is paintable
Scratch the underside with a key. If the mark is clean metal or bare brass, you are painting over solid material. If it flakes, dents or smells strongly of solvent, there is an old lacquer or plating layer that needs a bonding primer rather than a scuff.
Protect the cabinets and yourself
Tape the cabinet face around each screw hole before you drill, because a slipped screwdriver will scar paint you never meant to touch. Open a window and work outside or in a garage if you can, and keep hardware away from food prep surfaces while it is wet.
Sort and label everything
A kitchen with 29 pulls takes an afternoon. A house with 150 handles and hinges, like the brass set one r/DIY reader was contemplating, takes a weekend and a system: one bag of screws per cabinet, hardware grouped in matching piles, and the same colour applied to every pile in the same session.
How to Paint Cabinet Hardware Instead of Replacing It: Step by Step
Step 1: Remove and Clean the Hardware
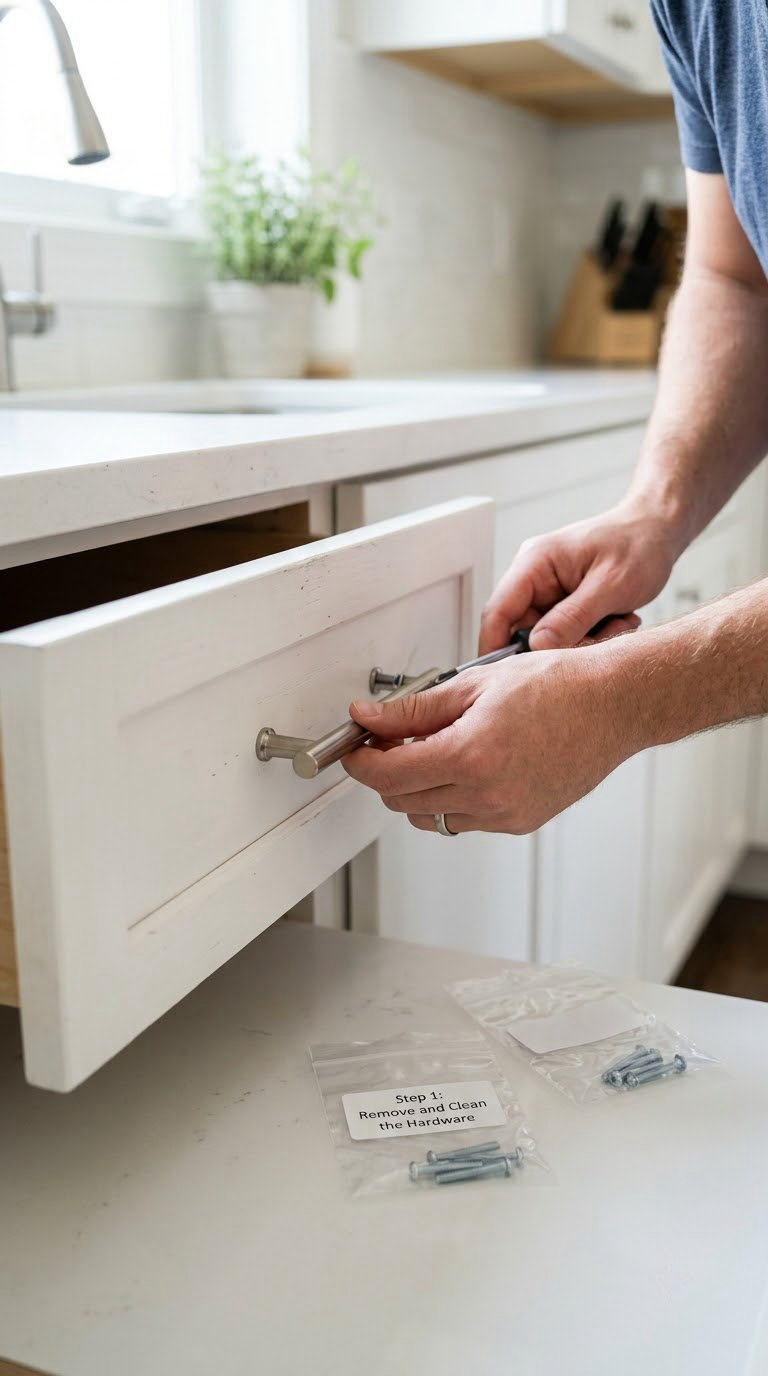
Photograph or draw a quick sketch of how each piece sits before you remove it, especially on hinges and cup pulls where orientation matters.
Back the screw out by hand for the last half turn so it cannot drop down behind the door. Fill the hole with a folded tissue or a blob of painter’s tape so a dropped screw has somewhere to land. Store screws in labelled bags and tap them into position later.
Wash every piece in warm soapy water and scrub it with a sponge or toothbrush, concentrating on the bar and the back plate where grease builds up. Rinse, then wipe with mineral spirits on a microfibre cloth until the cloth comes away clean. That second pass is the one people skip, and it is the one that decides whether the paint sticks.
Dry everything completely before sanding. Paint applied over a film of moisture blisters within a day.
Checkpoint: the hardware should feel dry, look grease-free, and smell like nothing. If it smells like cooking oil, clean it again.
Step 2: Sand or Etch the Existing Finish
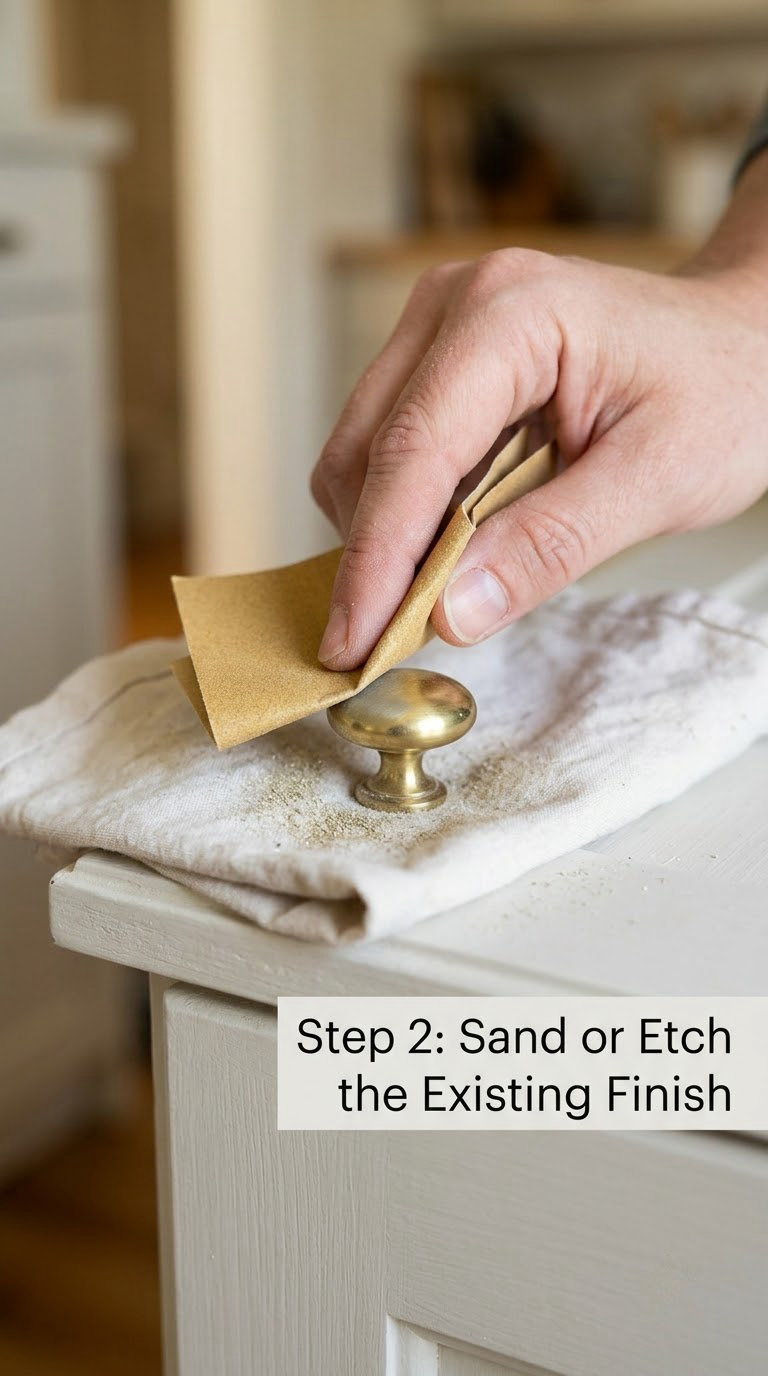
Use 80 grit only where there is rust, pitting or thick plating, and only until the rust is gone. Then step up: 180 grit to knock the shine down, 220 grit for a final pass on anything glossy.
You are not trying to strip the piece. You are trying to leave a matte surface with fine scratches that primer can grip. On chrome and mirror-polish hardware, a bonding primer is often enough on its own, and skipping it is a common route to peeling paint within a few months.
Blow off the dust with a clean brush or canned air, then wipe with a tack cloth or a barely damp cloth. Do not touch the surface with your fingers afterwards; skin oil is exactly what primer is there to seal against.
Checkpoint: the finish should look dull, not scratched. Deep grooves in plating are a sign you went too far.
Step 3: How to Paint Cabinet Hardware With Primer or Paint and Primer in One
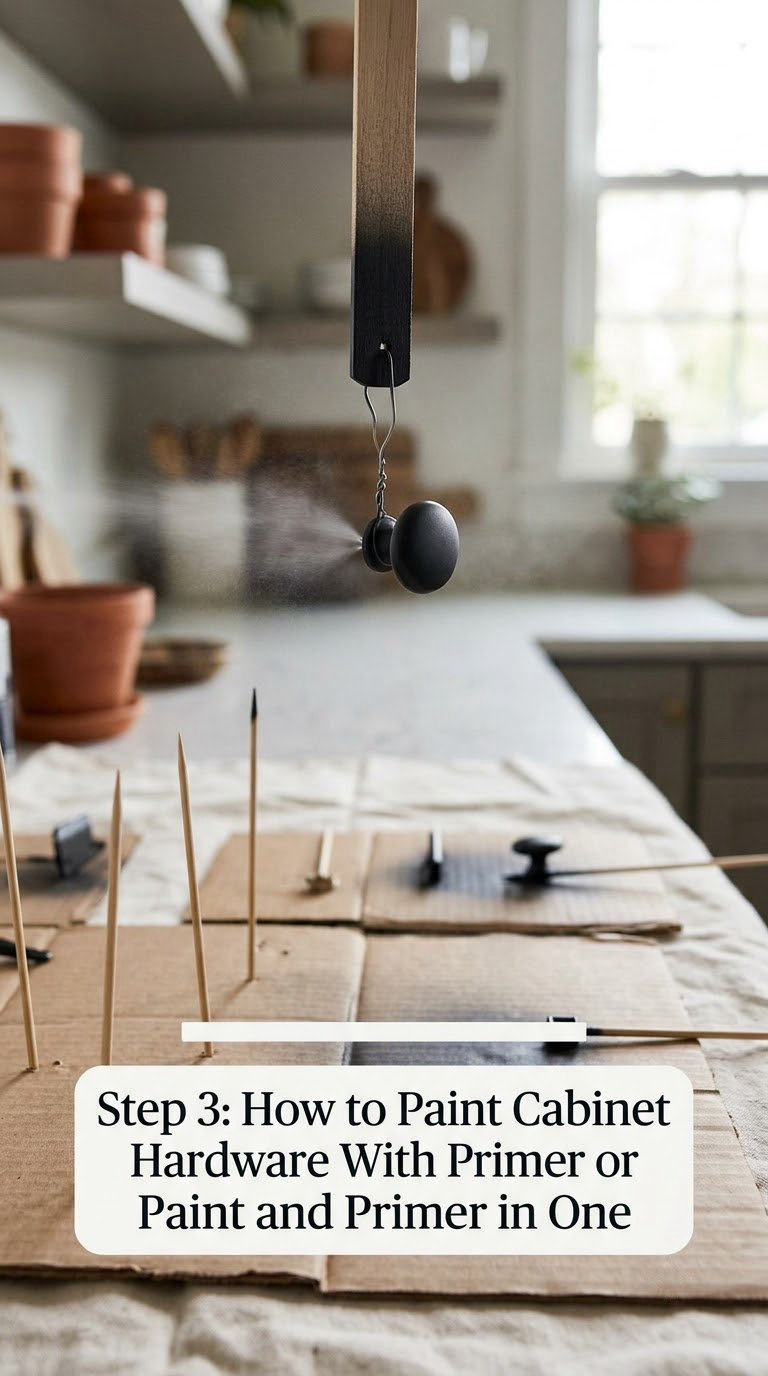
Hang pieces on skewers taped to a scrap of cardboard, or stand them on nails driven into scrap wood. Laying hardware flat makes paint pool around the base of a pull and dry into a blob, and you end up repositioning the piece three times per coat anyway. The hanging method gives cleaner, more even coverage.
Prime from 8 to 12 inches away, moving in a steady side-to-side sweep, and stop when the surface just looks evenly damp. Heavy coats take forever to dry and wrinkle as they go. Can thickness is the single biggest cause of orange peel texture on finished hardware.
Let primer dry for 30 to 60 minutes until it is touchable but still slightly soft. Steel and iron give you a window to paint while primer is still slightly soft; for most other metals, wait for the label time rather than guessing.
If you are using paint and primer in one instead, you can skip the separate primer, but only after a proper scuff, and only on clean metal. On chrome, lacquer or unknown plating, add a bonding primer coat first.
Checkpoint: the primer should be an even matte grey or off-white with no glossy patches. Sand any glossy patches with 220 grit before moving on.
Step 4: Paint Between Coats and Add Details
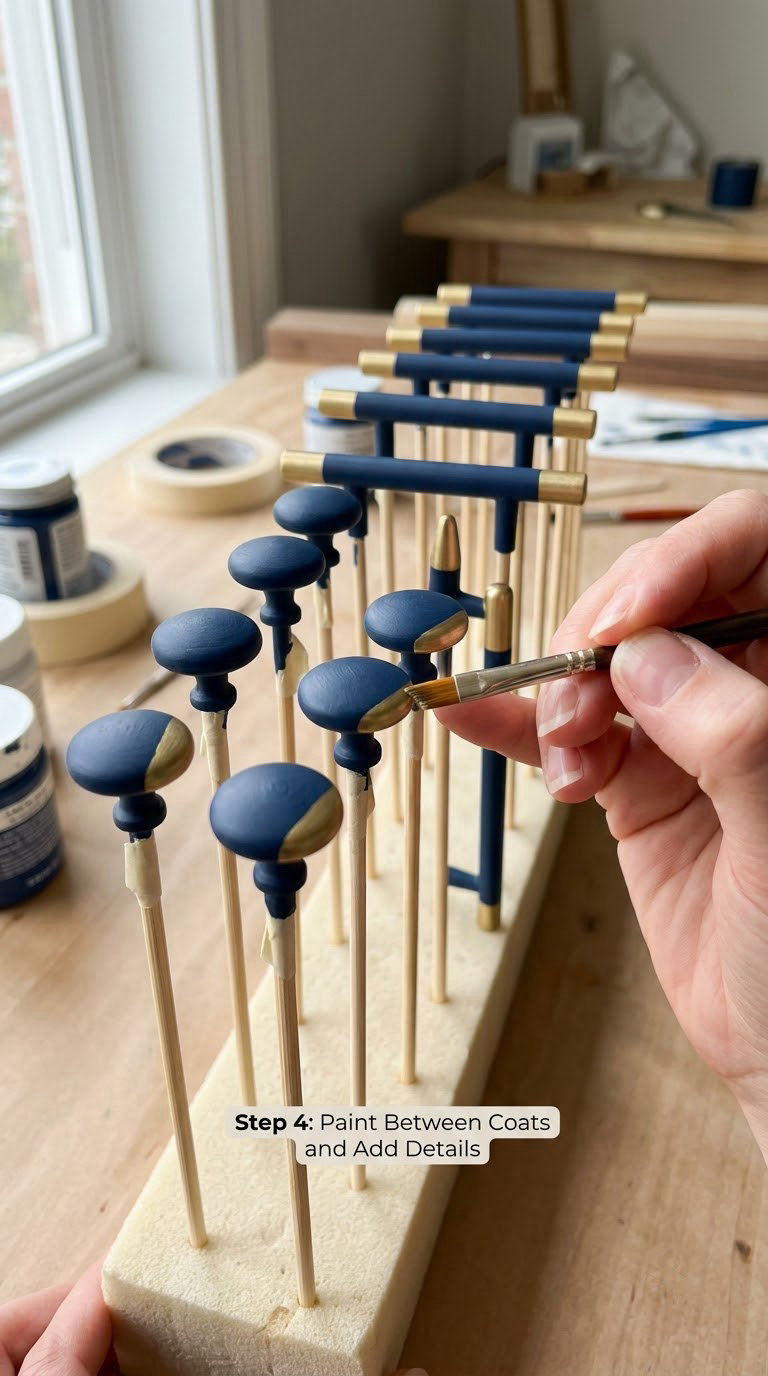
Apply three thin colour coats rather than one thick one, 30 to 60 minutes apart. Maintain a wet edge on curved pieces and keep the can moving; a pause mid-sweep leaves a dry line that shows up permanently under clear coat.
Between coats, if a drip or fingerprint has landed, knock it down with 220 grit and wipe the dust off. Do not paint over a defect and hope the topcoat hides it, because it will not.
For a two-tone look, tape the detail line before the first colour coat and peel it while the coat is still slightly tacky. For crisp edges on a knob or a bar pull, use a small angled brush with paint thinned slightly by the label’s own thinner.
Match the screws by pushing them into a piece of cardboard, coating the heads with a short spray burst, or painting them with a detail brush while they sit in the foam of an egg carton.
Checkpoint: each coat should look thin and even, not wet and glossy. If it pools in the curve of a cup pull, wipe it or let it level before moving on.
Step 5: Seal, Cure, and Reinstall the Hardware
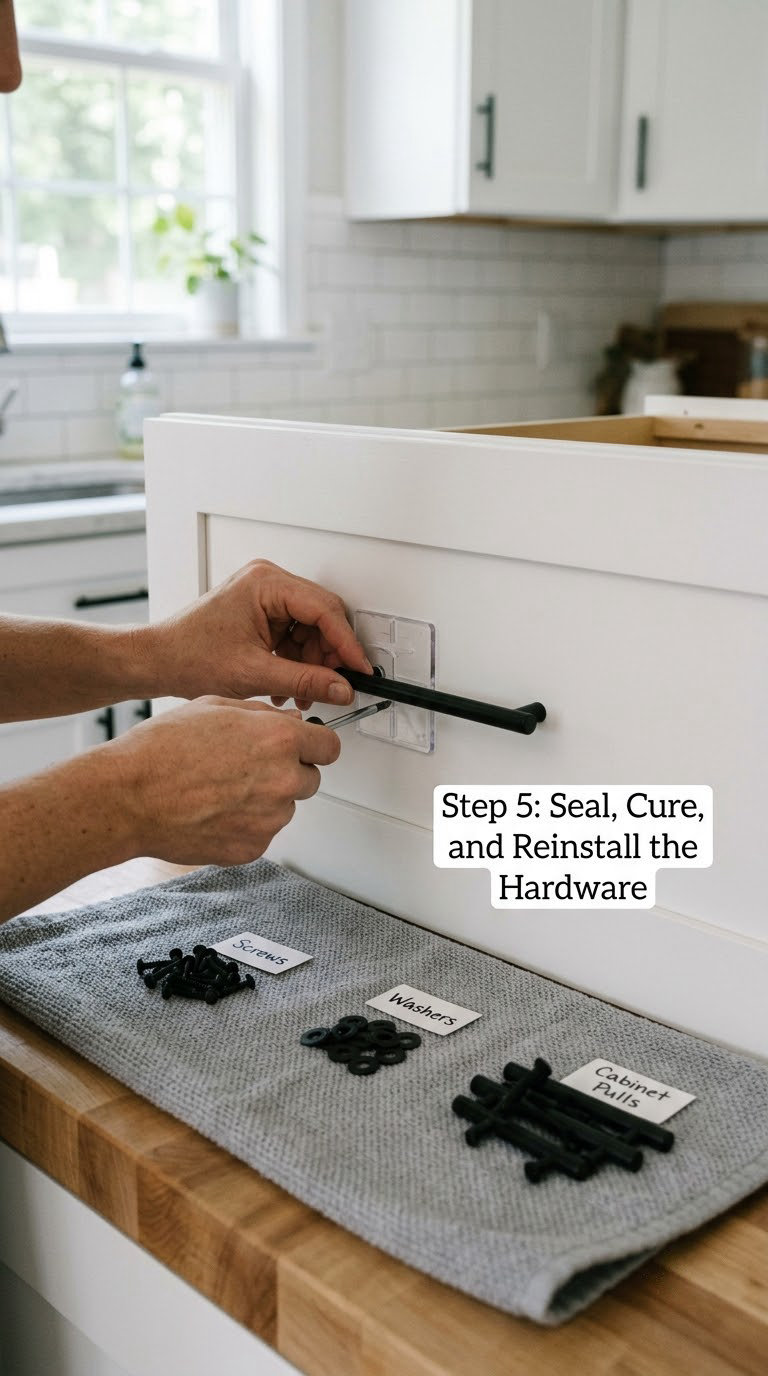
Once the final colour coat is dry, add a clear lacquer or water-based clear topcoat if the hardware gets daily hand contact. This is the step most people skip and the reason painted hardware often gives up early.
Understand the difference between dry to the touch and fully cured. Paint feels dry in about an hour, but it is still soft underneath. Full cure takes 48 to 72 hours, and handling hardware early is exactly how you get the scratched, smeared finish that wrecks an otherwise good job. Wait the full 48 hours before reinstalling, and 72 for a kitchen that gets heavy daily use.
Handle pieces by the base or thread, not the bar. Reinstall with a cloth between the driver and the cabinet face so you do not chip the finish you just applied, and set each screw by hand first before tightening.
Line everything up before you commit. If a painted piece no longer lines up with its neighbours, the screw holes may have shifted, and you can use a slightly longer screw or a washer behind the plate to bring it back into alignment.
Common Mistakes to Avoid
Painting straight over grease. Paint peels off a handle in months because the cooking film under it never let go. Degrease, then wipe with mineral spirits until the cloth is clean.
Thick coats. A heavy coat runs, wrinkles and dries orange-peel, especially on curved cup pulls. Three thin coats beat one heavy coat every time.
Skipping the scuff. Glossy chrome and lacquer need either 180 grit or a bonding primer. Paint sitting on shine is paint that peels.
Rust that was only painted over. On older iron hardware, especially near the coast, remove rust with a wire brush or 80 grit first. It returns as brown bubbles otherwise.
Primer leaving a grainy finish. One r/DIY writer found the opposite result of what happened for me: their primed handles came out noticeably grainy and rough. If that happens to you, a light 220 grit pass between primer and colour fixes it.
Reinstalling too soon. This is the deal-breaker. Paint that feels dry is not cured, and putting screws into soft hardware is what causes the smeared, chipped look. Give it 48 hours.
Losing the screws. With 29 pulls or more, use a labelled bag or a foam egg carton per cabinet. Reassembly should never be a scavenger hunt.
Going gloss without thinking. High gloss on cabinet pulls is a fingerprint magnet in a busy kitchen. Satin hides smudges and still looks clean.
When to Call a Pro
Some jobs are worth handing over. Antique or solid brass hardware with real patina should be restored by someone who knows strippable finishes, because an aggressive scuff can permanently destroy the detail you were trying to keep.
Severe rust that has pitted the metal is the same story. You cannot paint your way out of pitting, because the pitted surface holds moisture under the coating and the corrosion continues underneath.
Hinges buried inside a cabinet, built-in or non-removable hardware, and door hardware that has been painted shut all need a professional hand or at least a second set of hands. None of that work involves power, wiring or structural changes, so permits rarely apply here.
Call a pro when the batch is large enough that a remount and a redo would cost more than hiring out, or when the cabinets themselves need repair, refacing or door adjustment before hardware goes back on.
Maintenance
Wipe painted hardware with a damp microfibre cloth and a drop of dish soap once a week, then dry it. Skip abrasive sponges, scouring powders and ammonia, all of which cut into a cured finish.
Touch up chips while they are small. Sand the chip to the edge, wipe clean, and apply one thin colour coat plus topcoat, matched to your chosen paint colour family if you kept a spare can. Keeping one sealed can of the exact product in a garage is cheap insurance.
The first six months matter most. Until the finish has fully hardened, be gentler than usual and avoid loading pulls with heavy kitchen gear. Furniture Flippa reported no chips after three months on 29 black pulls finished with a satin lacquer topcoat, and properly prepped, primed and painted hardware does hold up fine under daily use.
If you are planning the wider project while the hardware is off, browsing our partial overlay cabinet ideas is a useful detour.
Frequently Asked Questions
Can I paint cabinet knobs and pulls instead of buying new ones?
Yes. Painting cabinet hardware is a normal DIY job on brass, steel, zinc alloy and aluminium pieces. Clean off grease, scuff the shine with 180 grit, prime for metal, apply three thin colour coats, then seal with clear lacquer. It keeps your original screw spacing and door fit, which matters on older cabinets where new hardware will not line up.
What type of paint works best on metal cabinet hardware?
A spray paint and primer in one, in a satin finish, is the easiest choice for most hardware. Satin hides fingerprints and smudges better than matte or gloss. For chrome, lacquer or unknown plating, add a bonding primer or metal primer first. Chalk paint is popular but tends to peel on bare metal where hands grip it.
Do I need to prime chrome or shiny cabinet hardware before painting?
Yes, either prime it or scuff it thoroughly. Chrome is the hardest finish to paint because it will not hold anything without a mechanical key or a bonding primer. Use 180 grit to dull the shine, then a bonding primer designed for difficult surfaces. Skipping this step on chrome is the most common reason painted chrome flakes off within a year.
How long should painted cabinet hardware dry before installing it?
Wait 48 hours after the final coat before reinstalling, and 72 hours if the hardware sees heavy daily use. Paint feels dry to the touch in about an hour, but it is still soft underneath until it cures. Putting screws into hardware that feels dry is what causes the scratched and smeared finish people end up disappointed by.
Can I use spray paint on cabinet handles and knobs?
Yes, and spray paint is usually the best method for curved pieces like knobs, cup pulls and hinges. Hold the can 8 to 12 inches away, keep it moving in a steady sweep, and apply thin coats rather than one heavy one. Work outdoors or in a very well ventilated space, and mask off the cabinet faces because overspray travels further than you expect.
Will painted cabinet hardware hold up in a kitchen or bathroom?
Properly prepped, primed, painted and topcoated hardware holds up fine in a busy kitchen. Durability comes from three things: removing all grease, priming for the metal, and adding a clear lacquer topcoat. Without a topcoat, paint on frequently touched pulls wears faster. In bathrooms, watch the humidity and clean the finish gently rather than scrubbing it.
Start with one door. Remove its two pulls, clean, scuff, prime and spray three thin coats of satin matte black, then leave them for 48 hours before you put them back. If you like the result, the rest of the kitchen is the same job repeated, and it will look like you bought new hardware.