How to Install a Smart Thermostat Yourself (October 2026)
Yes, you can install a smart thermostat yourself, and on most homes the whole job takes 45 to 90 minutes with a screwdriver and a phone camera. The wiring behind a thermostat is low-voltage, 24 volts, not household current, so the risk is a loose screw rather than a shock. You need a standard forced-air system, a clear read of what your existing wires do, and about an hour of attention.
That last part is the one people skip. Plenty of installs fail not because the thermostat is hard, but because someone pulled the old wires off before writing down what each one was. Photograph first, label second, always.
Contents
If you are swapping out a manual dial for something you can control from your phone, this is the weekend to do it, ideally before the first cold snap so you can run a full heating test in real conditions. Anyone still holding a 1980s mercury dial switch should check the waste guidance for 2026 before it comes out of the wall.
Time: 45-90 minutes · Cost: the thermostat, plus a trim plate or power adapter if your wall needs one · Difficulty: Beginner to moderate DIY · Skill level: Comfortable with a screwdriver, careful with small screws
Tool prices and adapter availability move around constantly, so check current listings rather than trusting any number written down months ago. What follows is the order I would work in, with the compatibility check first because it is the only step that can send you back to the store.
Tools and Materials
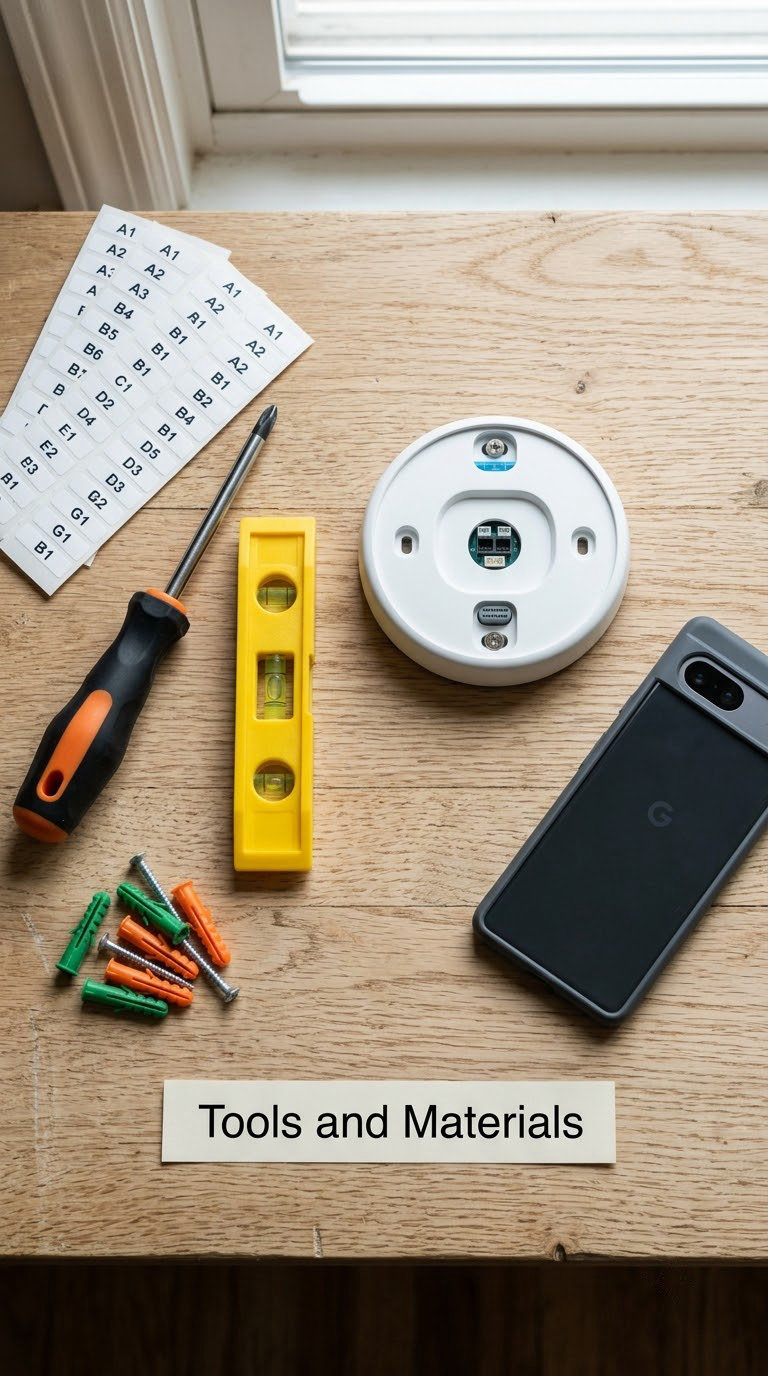
A full tool bag is not needed. This is a hand-tool job with one power-tool exception, and the exception is optional.
Essential:
- Phillips screwdriver, a stubby 1/4-inch shaft one if your terminal screws are recessed, which is common on the base of a wall thermostat.
- Small flat-head screwdriver or plastic pry tool for lifting the old faceplate without cracking the bezel.
- Wire label strips or masking tape and a pen – a small pack of pre-printed thermostat labels is easier than hand-lettering and costs almost nothing.
- Smartphone with a working camera for the before photos, plus the manufacturer’s app downloaded before you begin.
- Level, a 6-inch torpedo or a small bubble level, to mount the new base square.
- Voltage tester or non-contact voltage pen to confirm the circuit is dead before you touch a conductor.
- Safety glasses. Low voltage rarely throws sparks, but a stripped wire springing back is genuinely unpleasant.
Useful, not always required:
- Drill with a 1/4-inch bit and two plastic wall anchors, only if your wall is drywall or plaster and the new base needs new screw holes. Check for a stud first with a stud finder, a phone app can be wrong on wires behind the wall.
- Wire strippers for cutting a new C-wire cleanly, only if you are running one.
- Trim plate or wall plate cover for a new thermostat that does not match the old footprint. A mismatched base leaves a ring of holes or bare screw slots.
- Fiberglass insulation or fire-rated putty for the hole in the wall behind the base, so conditioned air does not leak into the attic or chase.
- 24-volt power adapter if your system has no C-wire and the model you picked needs one.
- Vacuum or brush, because pulling an old base off a painted wall can take a fine layer of paint with it.
As a renter, check one more thing before shopping: whether your model ships a peel-and-stick or adhesive-backed base plate. Most current bases come with a 3M-style pad as well as screws, and that pad alone will hold a plastic thermostat on a flat drywall wall, which is the difference between a no-damage install and a deposit on your mind.
Before You Start
There are four checks worth doing, and all of them happen before the wall comes apart.
1. Confirm your system is a low-voltage forced-air system. Standard central air, a gas furnace with a blower, a heat pump and a mini-split all use a 24-volt control circuit and are in scope. Electric baseboard heat, mill-voltage radiant systems, line-voltage mini-splits and any two-wire-only arrangement are not, and installing a standard smart thermostat on them can damage a heating element that costs several hundred dollars to replace.
2. Turn the system off properly. At the breaker panel, switch off the furnace or air handler breaker and label it. That controls the equipment; the breaker on the wall circuit that feeds the thermostat itself is often labelled and sometimes has nothing to do with the thermostat at all. If the equipment breaker is off and the old thermostat is dead, you have the right circuit. Confirm with a voltage tester rather than trusting the label.
3. Look at your existing wires before you buy anything. Pull the cover off the old thermostat and count. The letters printed beside each terminal are the real map, not the wire colours, which is where most mistakes begin. If you see a C terminal you have what most smart thermostats want. If you see only R and W you have a heating-only system and a limited set of models. If you see bare stranded wire with no labels at all, note that and read the mismatch notes in Step 5.
4. Get permission if you rent. A thermostat is usually considered a fixture, which means it can be part of the lease in a way a shelf is not. Ask in writing, and expect the answer to be yes with a note to patch the wall on the way out. Keep the old thermostat in a bag either way; it is your backup plan if the new one cannot be scheduled, and it takes 20 seconds to reinstall.
One more piece of timing advice: do not start this on a day when a cold front is due to arrive, or during a holiday week when nobody is in the house. You want a few hours of observation after switching power back on, and you want a person able to reach the system if something trips.
Two more practical notes. Photograph the old base and the new base side by side before connecting anything, because several manufacturers use a different letter for the same function, and a photo settles it in seconds. And if you have previously had to set the thermostat on an air conditioner, write down your old schedule first so you are not rebuilding a routine from scratch in the app.
Step-by-Step Instructions
Eight steps, in order. Do not skip ahead to step 5 even if the new base looks identical to the old one.
Step 1: Confirm Your HVAC System Is Compatible
Start at the equipment, not the wall. Find the furnace or air handler, open the access panel, and look at the label or the schematic taped inside. Confirm the system is 24-volt and check what stages it has: a two-stage furnace or a multi-stage heat pump has W1/W2 and Y1/Y2 terminals that a single-stage smart thermostat cannot fully control. The schematic will also tell you whether a C terminal exists back at the wall, which saves you a trip with a drill.
Then check the model’s own compatibility list. Some models require a C-wire, some ship an adapter that steals power from the furnace instead, and a few older ones accept only two wires. If your wall has only R and W, you are looking at a heat-only system; a thermostat that needs Y and G for cooling will simply never fire the air conditioner.
Worth knowing if you are still shopping: the easiest smart thermostats to install are the ones that ship with a power adapter, because they do not need a new wire run. If you have decided on a brand, our smart thermostat deal roundup is a reasonable place to compare current models before you commit.
Step 2: Turn Off Power and Photograph the Existing Wiring
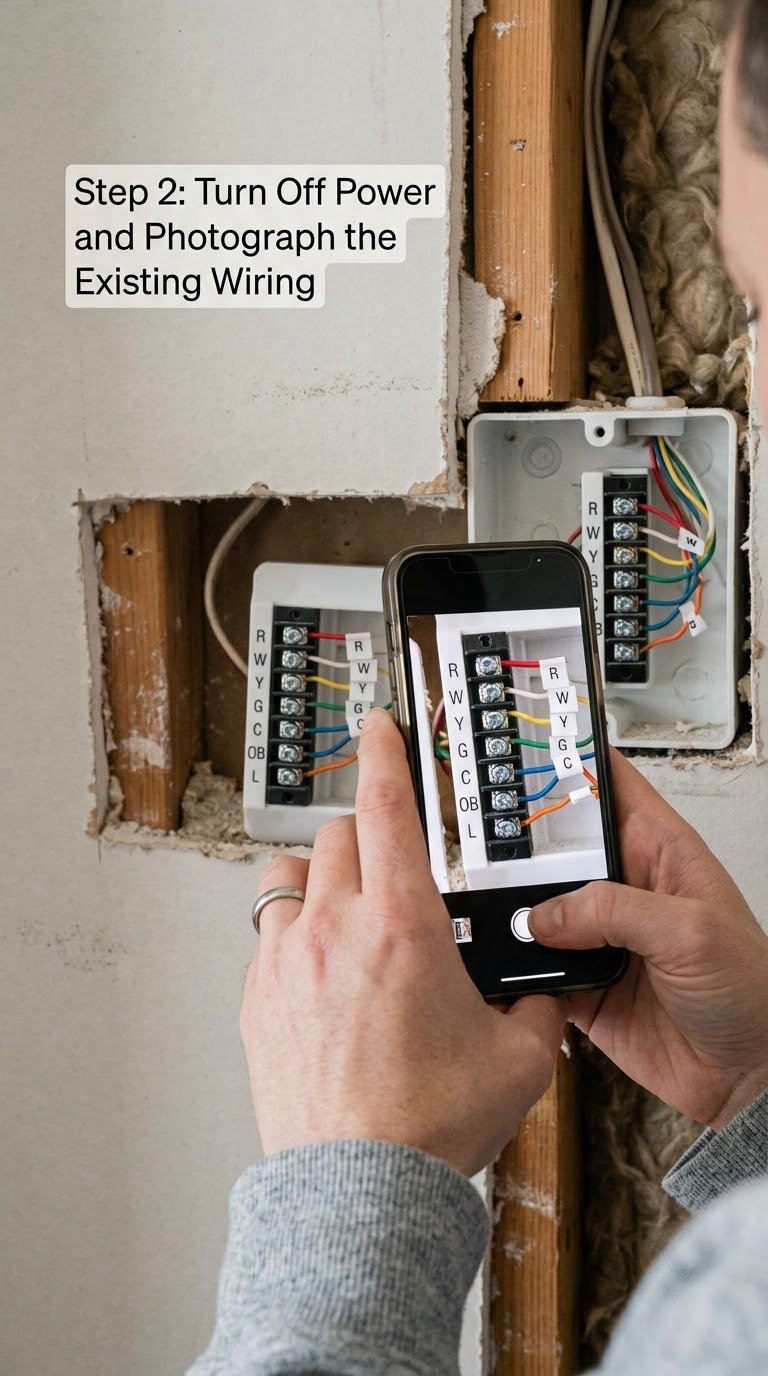
Switch off the labelled equipment breaker, and if the thermostat shares a circuit with wall lighting, that breaker too. Give the panel a moment, then test at the old thermostat with a voltage tester and confirm it reads dead.
Now take four photos before touching anything: a wide shot of the whole wall opening, a close shot of the terminal letters, one shot showing how the wires enter the base, and one shot with good light on the wire ends themselves. These are your recovery instructions if a wire drops behind the wall and you need to know which hole it went into.
Step 3: Label the Wires and Remove the Old Thermostat
Write a label on every single wire, using the printed letter on the old terminal it is currently sitting in. Do not trust colour alone. On a clean 24-volt circuit the common conventions are:
- R, Rc or Rh – the 24-volt power or hot wire. Rc is used on systems with both heating and cooling, Rh on heat-only systems, and some heat pumps use both Rc and Rh.
- W, W1, W2 – heat call. W1 is first stage, W2 is second stage on a two-stage furnace. W2 only matters if your system has it.
- Y, Y1, Y2 – compressor call for cooling. Never jumper Y to G yourself to force a system to cool; that is a classic way to burn out a compressor contactor.
- G – indoor blower fan, used for both heating air and cooling air.
- C – the common wire, a steady 24-volt supply that lets the thermostat power its display, Wi-Fi radio and schedule without stealing power from the system.
- O or B – reversing valve on a heat pump, either one depending on whether your system is heat or cool dominant.
- S or S1/S2 – an outdoor model or humidity control line, if the old unit has one.
Some thermostats also carry W/X, a single wire used for both heating and cooling in a ducted heat pump, and a blank or spare terminal tucked behind the plate. Leave any spare wire alone and cap it; that is often a C-wire someone pulled out years ago and left in place, and it will save you a wall repair later.
With everything labelled, take a clear photo of your own labels as a second record. Then pull the wires off the terminals one at a time, gently, straight out and not at an angle. If a wire resists, stop and check that the screw is fully loosened. Leave the loose ends long enough to reach the new base once it is mounted, and do not trim anything yet.
Remove the old baseplate by taking out its screws. If it is stuck, a plastic pry tool and a little patience works better than a metal screwdriver, which gouges drywall in seconds. Fill the old hole with a fire-rated foam or putty if you are installing a C-wire adapter, so you are not leaving conditioned air escaping into the wall cavity all winter.
Step 4: Mount the New Thermostat Base
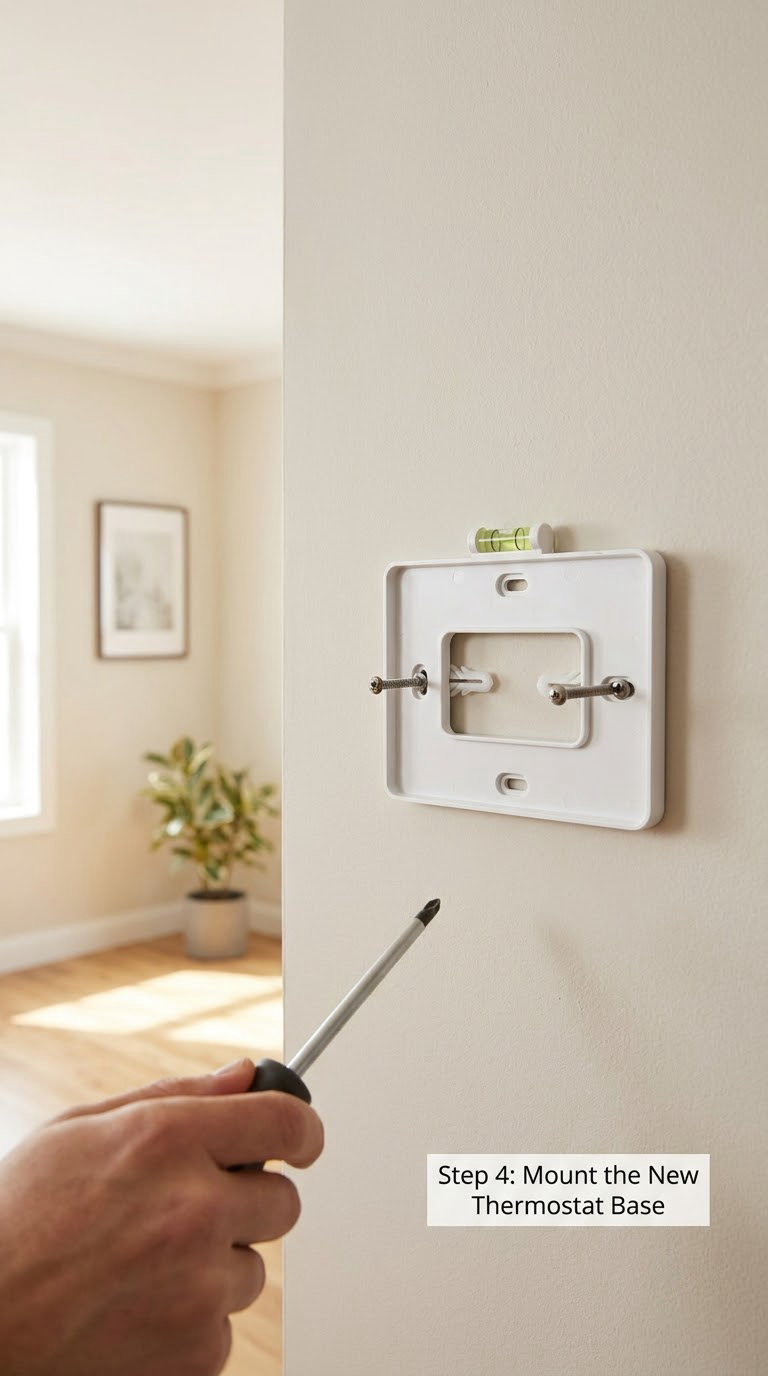
Position the new base where the old one was, roughly 5 feet above the floor and on an inside wall, away from direct sun, drafts from a door, and any heat source. Inside placement matters more than most people expect: a thermostat mounted on an exterior wall or above a fireplace reads warmer than the rooms you actually live in and will overheat the house.
Hold it up, check it with the level, and mark the holes. If you hit a stud, use those screws directly and skip the anchors. If you are in drywall, use the anchors that came with the base, or the adhesive pad if you are renting and the wall is flat and painted with latex. Screw until the base is snug and no longer rocks, then tighten a further quarter turn, no more, or you will crack the plate.
Route the wires through the centre opening so nothing is pinched behind the plate, and leave enough slack that you can pull the display off later without straining the conductors.
Step 5: Connect the Wiring Exactly to the Terminal Labels
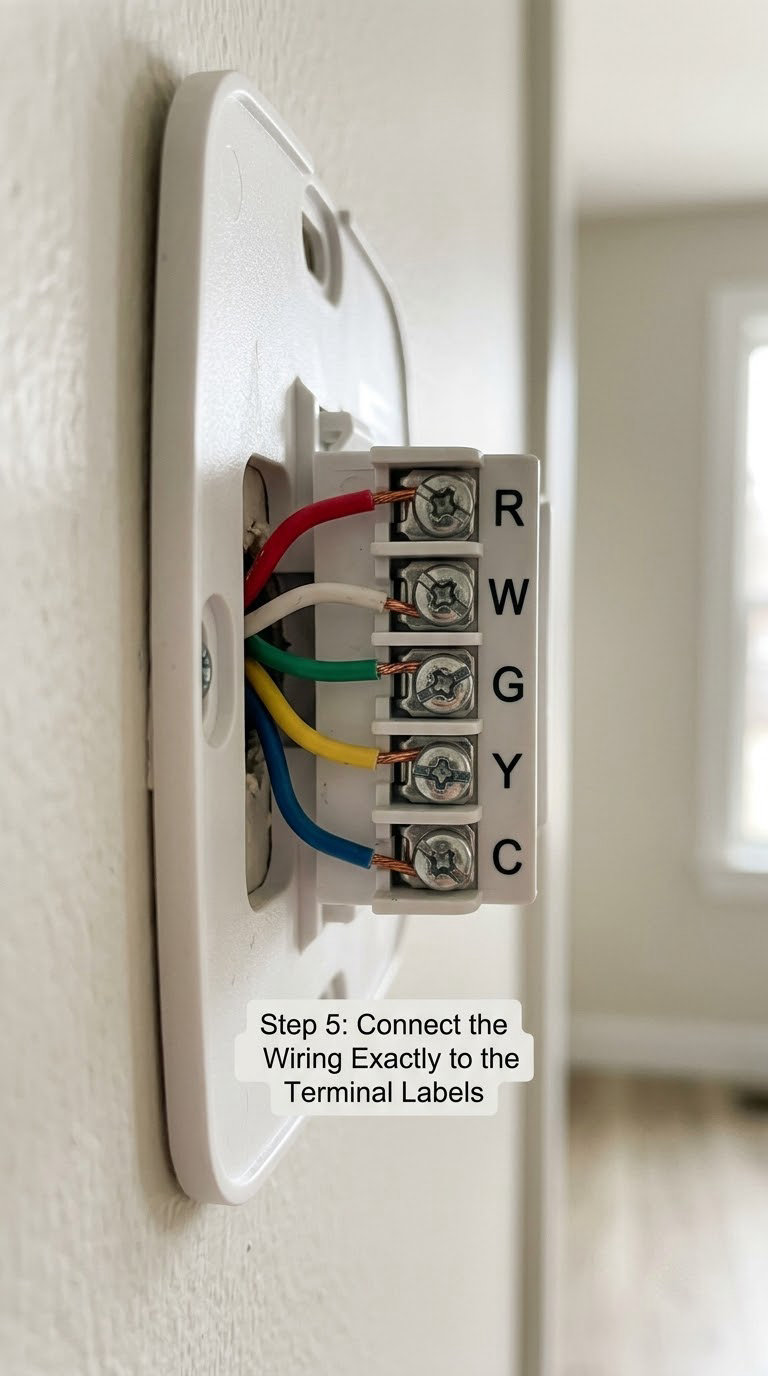
One wire, one terminal, one label. Loosen the screw, insert the bare end about 1/4 inch, and tighten until the wire is gripped with no exposed copper beyond the screw. Stranded wire is a special case: fan it gently into a tight bundle so no strand escapes and shorts to the metal plate, and check the manual, because several bases accept stranded wire directly and others want a ferrule.
The main point of confusion is when the new base uses a different letter for the same wire. Most often the new base just says R where the old one said Rc or Rh, which is the same wire. If a wire ends up with no matching terminal on the new base, tuck it back out of the way and cap it rather than guessing. A practical mismatch guide:
- Old Rc, new R – connect it to the new R terminal. Same job.
- Old Rc plus Rh, new R only – this is a heat pump that expects separate heating and cooling power. Do not guess. Choose a heat-pump-rated model or have the equipment checked.
- Old W and W2, new W only – the second stage of heat will be lost. Acceptable on many homes, but the manual will say whether the thermostat supports two-stage.
- Old W/X, new W – on a ducted heat pump, W/X handles both. The new thermostat must be set to heat pump mode, or it will call heat in summer.
- Old Y to G, new Y and G – some very old systems shared one wire. This one needs a technician.
If the base has a C terminal and you have a C-wire, it goes there and that is the whole story. If the base needs a C-wire and you do not have one, a power adapter is the clean answer: it mounts behind the base and taps 24 volts at the furnace or from the R wire, so no wall cutting is involved. Do not improvise a splice outside a listed part. If you do decide to run a new wire, start at the equipment end, use the same wire gauge as the existing run, route it away from high-voltage cables, and secure it so it cannot chafe on a sharp edge inside the wall.
After the last wire, tug each one gently. Nothing should move. Photograph the finished connections with the labels visible before you fit anything over them.
Step 6: Install the Thermostat Display and Turn On the HVAC System
Click or screw the display onto the base until it seats firmly, and remove any battery tab or pull film from the back. Restore the equipment breaker first, then any wall circuit breaker you switched off.
Give it 20 to 30 seconds. The screen should light up, show a current temperature, and display the current time and date. If it does not, stop here and do not keep reconnecting wires at random. Check the obvious things in order: breaker on, wall plate fully seated, and a C-wire or adapter present if the model needs one. A screen that lights and then reports a wiring error almost always means one wire is in the wrong terminal or a screw is not making contact.
Step 7: Connect Wi-Fi and Set Heating and Cooling Schedules
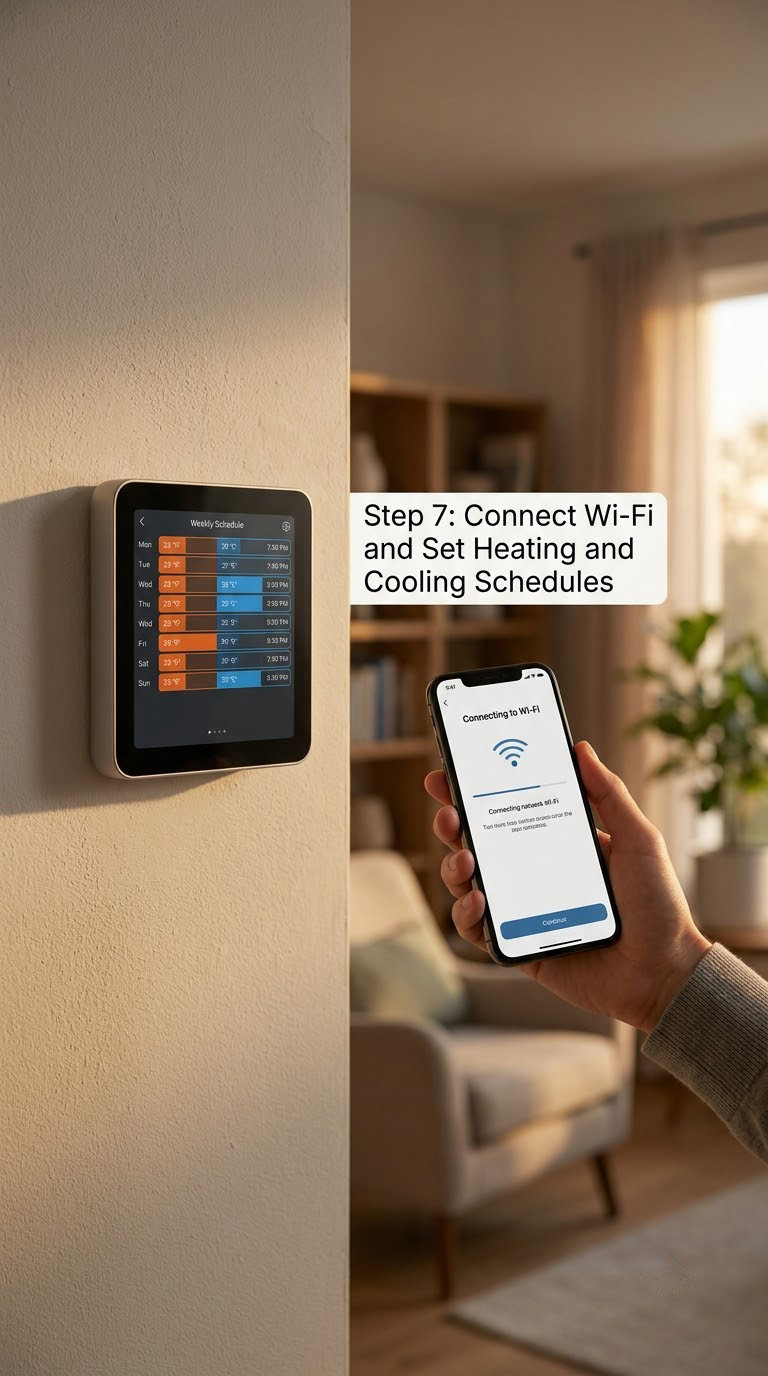
Most thermostats start pairing once they are powered. For the common route: install the app, create an account, choose your home and room, then enter the 2.4 GHz Wi-Fi network name and password. If your router only broadcasts 5 GHz, most thermostats will not see it, so enable the 2.4 GHz band or use a phone on mobile data as a hotspot for setup. Position the phone close to the thermostat during pairing; the signal is weak at 20 feet in a plaster-walled older home.
Then set the basics, in this order:
- Temperature units and system mode – choose heat, cool or auto, and set the system type to match what you confirmed in Step 1. Heat pump versus furnace is the setting people skip and then wonder about.
- Heating and cooling setpoints – start with 68 F heating and 76 F cooling as reasonable baselines and adjust to your household after a week.
- Schedule – build three blocks first: wake, away, home. A learning model will refine them in about a week, and giving it three clean starting points is faster than leaving it to guess from day one.
- Eco or setback temperatures – a few degrees of setback on an 8-hour night block is where the savings actually come from.
- Notifications and geofencing – geofencing lowers the temperature when the last phone leaves the property, which is worth more than most people expect in shoulder months.
- Remote sensors – one sensor in the room you actually use solves the sensor-versus-average-temperature argument in bedrooms and hallways.
If your utility offers rebates or demand-response programs, this is the screen to enter your details on. Those programs pay you to let them raise the setpoint for an hour or two during peak demand, and the money is real, but it is a trade you should opt into knowingly.
Step 8: Test the System and Check for Common Problems
Do not declare victory because the screen came on. Run both systems through a full cycle and walk the house while it happens.
- Heating test: set the mode to heat, raise the setpoint 5 F above the current room temperature, then listen. Within a minute you should hear the furnace click on, then air moving from the registers. Feel the vents and confirm warm air. Then set it back and confirm the cycle stops within a few minutes.
- Cooling test: repeat with cool, dropping the setpoint 5 F. You should hear the compressor start and the blower kick in, with cool air at the registers. This confirms the Y and G wires and the whole cooling circuit, and on a heat pump it also confirms the reversing valve, because the air should be warm in heat mode and cool in cooling mode.
- Schedule test: change one block to two minutes out and confirm the app pushes a notification and the unit follows it.
If something failed, match the symptom here rather than rewiring at random:
- No heating or cooling at all, blank or error screen – check the breakers again, then verify the C-wire or adapter is seated. A model that needs a C-wire and does not have one will not light up at all.
- Screen works, but the furnace never turns on – almost always a heating-only system trying to cool, or a W wire in the wrong terminal. Check the mode setting first, then the terminals.
- AC will not turn on but heating works – the Y wire is missing, in the wrong terminal, or your system is heat only. A Y to G jumper is not a fix.
- Runs non-stop and never reaches setpoint – the equipment is undersized for the house, or the fan is running in a continuous mode from a setup option.
- Screen cuts out after a while – no C-wire and no adapter. The display is stealing power from the call circuit and only works while the system happens to be running.
- Blower runs but no air at the registers – the blower wheel came loose in transit, or the filter is completely blocked. Reset the wheel or change the filter before assuming a wiring problem.
Common Mistakes to Avoid
Every one of these shows up in install threads, and every one is avoidable in a minute of the work.
- Unlabelled wires. The number one cause of a second trip to the hardware store. Label by the printed terminal letter, photograph, and only then disconnect. If a wire slips back into the wall, you can fish it out with a bent coat hanger through the hole.
- Trusting wire colour. Colours are a convention, not a promise. Red is not always the only power wire, and yellow is not always present. Read the letters on the base you are looking at.
- Putting the C-wire in the wrong place. On an adapter-equipped system, a stray wire touching the metal plate causes most error codes. Cap unused wires individually with wire nuts; do not bundle them together.
- Leaving a bare copper end exposed outside the terminal screw. About 1/4 inch inside the screw and no more. A visible copper tail can touch the plate and short the circuit.
- Forcing a wire into a terminal. Thermostat terminals are small. If the wire will not go in, strip it a little shorter or re-curl it. Do not lever the plate with a screwdriver.
- Setting the system type to furnace when you have a heat pump. The unit will run backwards: the reversing valve stays where it is, so cooling blows warm air and heating blows cold.
- Leaving the old thermostat schedule in place. The old schedule rarely transfers. Rebuild three blocks and let the learning mode refine them.
- Forgetting the C-wire hole in the wall. Seal the old opening with fire-rated foam so you are not heating the attic all season.
- Assuming the new base fits the old screws. Spacing varies. Hold the new plate over the old holes before committing, and grab a trim plate if they do not line up.
- Testing in one mode only. A thermostat that heats perfectly can still have a loose Y wire. Test heat and cool on the same afternoon.
One fear that comes up more than any other, for what it is worth: people assume the job risks the equipment. On a standard 24-volt system the realistic failure modes are a tripped breaker, a wire that needs a new terminal, or a hole to patch. Forum consensus, including on r/DIY and r/hvacadvice, is that compatible installs are quick and mostly not worth paying someone else to do, and the people who are nervous tend to be nervous about the household-current wiring they cannot see, which is not what is behind a thermostat base.
When to Call a Pro
Sometimes the right call is an HVAC technician, and there is no version of this job where calling one is a failure. Reach for a pro when any of these apply:
- You see thick, stiff or bundled wiring, or more conductors than any thermostat base has terminals. That is not low-voltage control wiring and should not go into a smart thermostat base.
- There is no C-wire, no spare wire, and you want a model that requires one. Running a new wire through finished walls means fishing through the wall cavity, and a fish tape job is where the drywall bill starts.
- Your system is mill-voltage, line-voltage, or electric baseboard. Those need a line-voltage thermostat and a licensed electrician, full stop.
- The old terminal letters are illegible, or a wire was already jumpered. Someone has already modified this circuit and you cannot tell what state it is in.
- The equipment is two-stage or a multi-stage heat pump and you want full staging. Wiring that correctly takes a schematic, not guesswork.
- You are dealing with refrigerant, a tripping breaker that resets, or a system that needs service. A thermostat swap cannot fix a mechanical fault, and a compressor that will not start is a service call.
- The wall itself is the problem – crumbling plaster, wiring in an active multi-zone relay rack, or asbestos-containing material near the old device.
- You want an in-wall wiring run or a new circuit. That is electrical work, and in most jurisdictions it needs a permit and a licensed electrician.
Renting changes the equation rather than the technique. Some landlords require an approved model, some require a licensed contractor, and many ask you to patch the old hole on the way out. Get the answer in writing before you buy, and a landlord who says yes with a note is the easy case.
For everyone else, the honest position is this: a thermostat swap is one of the shorter jobs in a house, the wiring is 24 volts, and you can put the old one back in twenty seconds if something goes sideways. A technician is worth it when the system is unusual or the wall is complicated, not because the job is dangerous.
Maintenance
A smart thermostat needs less upkeep than an old dial, but not none.
- Dust it monthly. Static and pet hair collect on the vent slots underneath and on the temperature sensor, and a dirty sensor reads high by a degree or two. A dry microfiber cloth is enough; no solvent near plastic or the sensor.
- Change the HVAC filter on schedule, usually every 60 to 90 days, and set a phone reminder for the months you forget. A clogged filter makes the system run long and overshoot setpoint, which looks like a thermostat problem and is not one.
- Install app and firmware updates when prompted. Most updates land overnight and fix real compatibility or scheduling bugs. The thermostat will usually tell you itself.
- Check the schedule twice a year, at the change of seasons. Daylight hours shift through the year, and a home office that nobody occupies on weekends should not be heated to 70 F.
- Replace batteries on battery-powered models every 18 months or so, or when the app warns you. C-wire powered models do not need this. Low battery symptoms are a screen that dims, a schedule that resets, or a unit that ignores heat calls.
- Clean the outdoor unit if you have a heat pump, and keep 2 feet clear of the discharge. A clogged coil in a 2026 summer is the reason your system stops cooling in August.
- Re-check the trim plate fit and the sealed wire hole after a year. Paint and movement can open a small gap around the base, and a fireplace-adjacent install is worth a glance each heating season.
Frequently Asked Questions
Can I install a smart thermostat myself?
Yes, on almost any standard 24-volt forced-air system, a heat pump or a mini-split. You are working with low-voltage control wiring, not household current, and the job is 45 to 90 minutes with a screwdriver, wire labels and a phone camera. Stop and call a technician if your wall has line-voltage wiring, more conductors than the base has terminals, or a system you cannot identify.
Do I need an electrician to install a smart thermostat?
Usually not. A thermostat swap on a standard 24-volt system is low-voltage work and most jurisdictions do not require a permit or a licensed electrician. You do need one if you are running a new C-wire through a finished wall, adding a circuit, dealing with mill-voltage or line-voltage heating, or wiring a multi-zone relay panel. Confirm the wall wiring type before you buy anything.
Do I need a C-wire for a smart thermostat?
Not always, but it is the single most common reason installs go wrong. The C-wire, also called the common wire, is a steady 24-volt supply that powers the display, Wi-Fi radio and schedule continuously. Models that do not need one may work by stealing power from the system, which causes blank screens and schedules that reset. A listed power adapter is the clean alternative to running a new wire.
What wires go where on a thermostat?
Match the printed letter on the old terminal, not the wire colour. R, Rc or Rh is power, W and W1 or W2 are heat, Y and Y1 or Y2 call for cooling, G is the indoor blower fan, C is the common power wire, and O or B is the heat pump reversing valve. Y and G are separate circuits: never jumper them together to force cooling on, because that can burn out the compressor contactor.
Can you install a smart thermostat with only 2 wires?
Possibly. Two wires usually means R and W, a heating-only system, and that limits you to thermostats without cooling. If you see a second wire that is not a labelled power wire, it may be a repurposed C-wire worth checking with a voltage tester. If your system is genuinely heat only, choose a model designed for it rather than forcing a cooling model that will never call for air.
Which is the easiest smart thermostat to install?
The easiest models ship with a listed power adapter, because they do not need a C-wire run and mount on the existing two or four wires. Among those, pick a base with screw terminals and a clear wiring diagram in the manual. Thinner displays with magnetic mounts are also easier because the display lifts off for wiring. Whatever you choose, buy the version that supports your system type, heat pump or furnace.
What to Do First
Do this in order and the install takes one afternoon: pull the cover off your current thermostat, photograph the terminals, and count the wires against the compatibility list for the model you want. If a C is there, you can buy anything and install it this weekend. If it is not there, decide between a model with a power adapter and a wire run before you buy, because that choice changes how the install goes.
Then label every wire before you touch a single one. That single habit is what separates a 45-minute job from a trip to the hardware store. If you want a refresher on the equipment side of things first, our air conditioner thermostat install guide covers the cooling-only setup in more detail.