How to Repair Loose Vinyl Plank Flooring Without Damage 2026
Most loose vinyl plank flooring comes loose in one of two ways: the plank slid sideways and opened a seam, or it lifted and popped up at one edge. Slide shifted planks back with a suction cup floor tool and a rubber mallet, and secure lifted edges with waterproof flooring adhesive held under weight overnight. The repair takes about an hour per loose plank.
Time: 1 to 3 hours for a single-plank repair · Cost: nothing beyond tools you may already own, plus one plank and a tube of adhesive · Difficulty: Moderate DIY · Skill level: Careful beginner
Contents
Worth saying up front: the repair itself is the easy part. What separates a fix that lasts from one that reopens in three months is figuring out what moved the plank in the first place. An uneven subfloor or a pinched expansion gap will push the same boards back up no matter how much adhesive you use.
If you have leftover planks from the original install, keep them. Matching a replacement board years later is far harder than people expect, because flooring fades with sun exposure and different dye lots never match exactly. Our guide to vinyl plank flooring sets covers picking a close colour match if the leftovers are gone.
Tools and Materials
Gather everything before you lift a plank. Lifting a loose board with the wrong tool is how a two-plank job turns into a ten-plank job.
Tools
- Suction cup floor tool, 4 inch diameter (a rigid vinyl plank grabber works too). If you don’t own one, a clean, uncracked silicone suction cup from the hardware aisle does the same job.
- Rubber mallet, 16 to 24 ounce head. Never a steel hammer; it bruises the locking edge.
- Tapping block, 12 inch hardwood or PVC scrap. A scrap of 1 by 4 works.
- Pull bar or flooring pry bar, 12 inch, with a nylon or rubber-tipped jaw.
- Putty knife, 4 inch, plus a flat pry bar for lifting glue-down planks.
- Utility knife with fresh blades and a straightedge or speed square.
- Fine-tooth saw or fine-tooth blade for a reciprocating saw. Vinyl plank cuts cleaner and quieter with 40 to 60 teeth.
- Shop vacuum and a soft brush.
- Safety glasses and cut-resistant gloves.
Materials
- Replacement plank. Buy two so you have a spare if the first cut goes wrong.
- Waterproof flooring adhesive or construction adhesive rated for vinyl, one 10 oz tube. A squeeze bottle with a fine nozzle works for injection under a lifted edge.
- Wax paper or parchment paper, one square foot, to spread adhesive under the plank without it bonding to the paper.
- Double-sided carpet tape, 2 inch wide, for re-locking a long seam with no adhesive.
- Flat weight: a 20 to 30 pound sandbag, a stack of books in a plastic bag, or a paint bucket. About 15 pounds per square foot of repair area is the usual target.
- Floor-leveling patching compound and a notched trowel, only if the subfloor dips more than 1/8 inch over 10 feet.
- Touch-up paint or vinyl seam filler for chips and gouges, if you are patching instead of replacing.
Our vinyl plank flooring installation kit guide covers which tools are worth owning beyond this one repair.
Before You Start
First, work out how the floor is installed. Every repair method below depends on this one answer, and it takes about a minute to find.
A floating click-lock floor is one big sheet that is held down by its own weight and the baseboards. It rocks slightly when you step on it and you can hear a hollow sound. The joints click together without glue. A glue-down floor feels solid underfoot, does not rock, and the planks stay put when you lift an edge, because adhesive is bonded to the back.
Then match your symptom to the likely cause. This index is the fastest way to know which method to use.
| What you see and hear | Likely cause | Method |
|---|---|---|
| Click or hollow tap underfoot, planks still flat | Planks not fully clicked together at install | Step 5 re-lock the joint |
| Open gap along a long seam, planks still in the floor | Seasonal shrinkage or heavy furniture drag | Step 5 close the gap |
| One plank lifted at one edge, tongue visible | Adhesive failure, moisture or debris under the board | Step 5 inject adhesive and weight |
| Plank rocks and tilts, no lift | Subfloor dip or spongy area | Step 3 level or shim |
| Peaking or buckling along a wall | Expansion gap pinched by trim or cabinets | Trim the edge, reinstall baseboard loose |
| Musty smell, dark staining, soft spongy floor | Moisture under the floor | Stop. Call a pro |
Check for moisture before you glue anything down. Press a palm flat to the floor and leave it for 30 seconds; a damp or cool feeling means water is moving under there. Look for water staining, dark patches, or a musty smell in the room.
Check the subfloor for flatness with a 6 foot straightedge. Lay it across the floor and look for gaps under it. Any gap bigger than 1/8 inch over that span is worth fixing, because that dip is what rocks the plank above it.
Protect the rest of the room. Move rugs out of the area, and lay a scrap sheet or cardboard over the surrounding floor so your knees and tools do not scratch sound boards. If you are working in a rental or a lived-in family room, this step saves you an argument with yourself later.
If the loose plank sits in the first row along a wall, take the baseboard off first so you can work on the joint without levering against the trim. Score the top edge with the utility knife, insert a shim behind the baseboard, and pull it away from the wall in one piece. Set the nails aside and reuse them later.
Put on eye protection and gloves. Vinyl plank edges are sharp when they break, and a splintered locking edge is the one mistake you cannot undo.
Step-by-Step Instructions
Step 1: Inspect and Mark the Loose Area
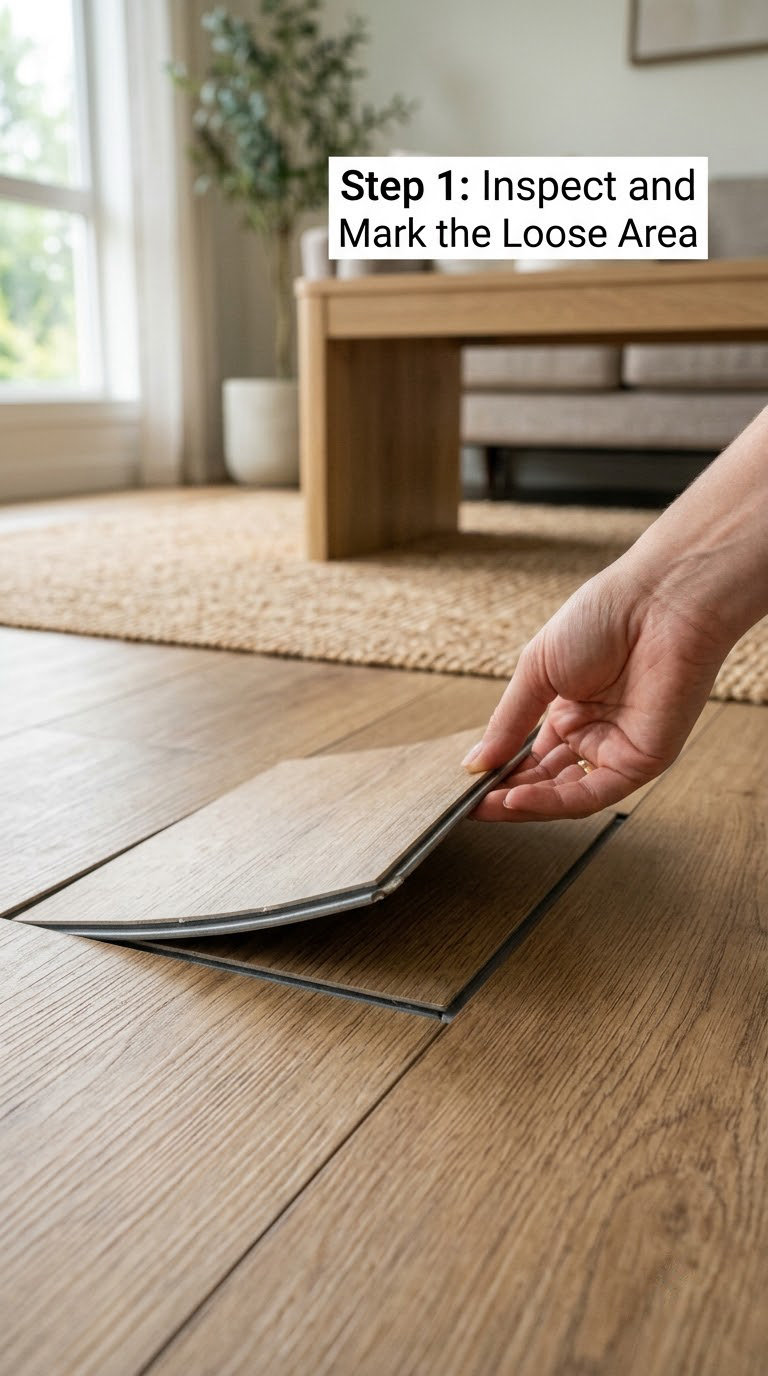
Start by kneeling at the edge of the problem and pressing down on the loose plank with your palm. If it springs back and clicks down, the joint is separating and you can re-lock it. If it stays lifted and the tongue-and-groove locking edge is exposed, you have a lifted plank that needs adhesive.
Mark the boundary with painter’s tape on the surface of the sound boards, not a scratch on the loose one. Note which direction the boards run, since the replacement piece has to match the grain and the lock profile.
Step 2: Remove Damaged or Loose Planks
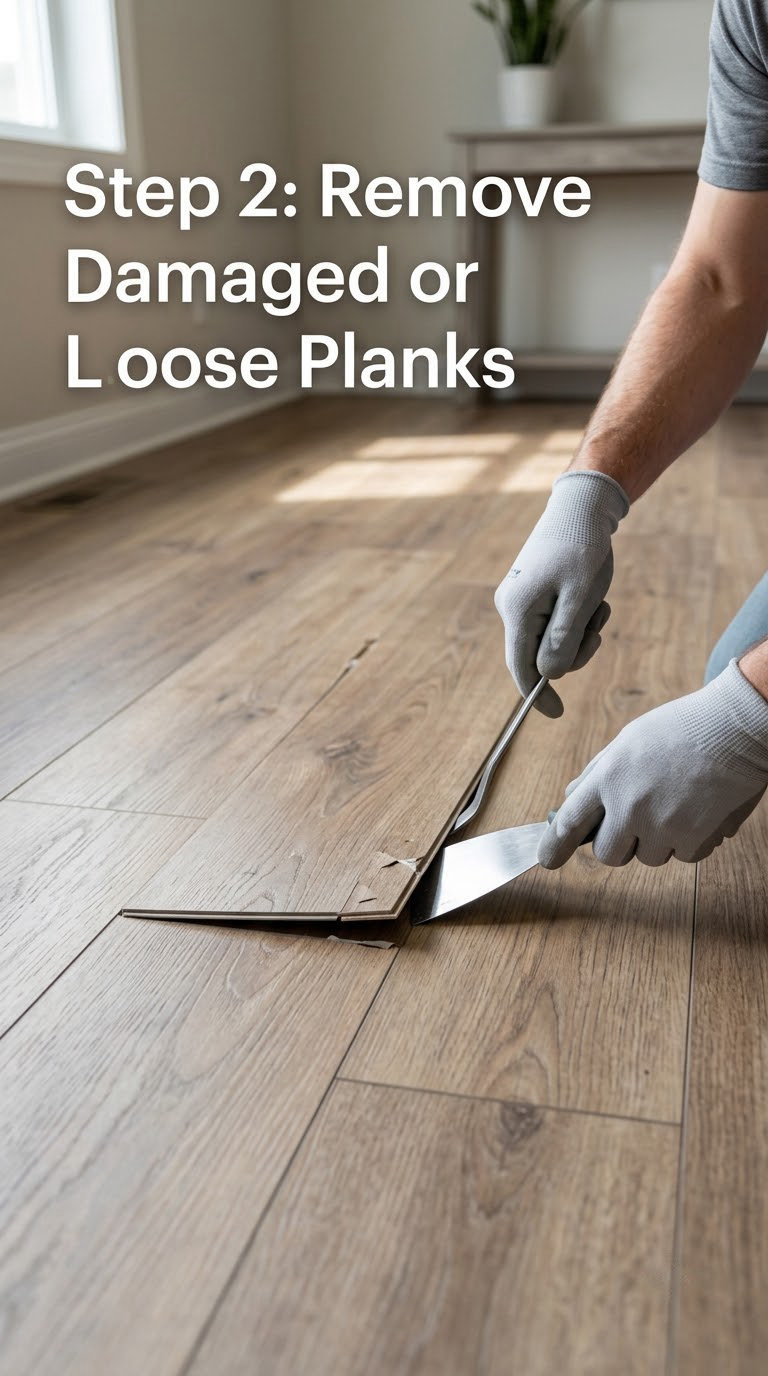
On a floating floor, slide the loose plank toward you at a shallow angle until the long edges disengage. Do not pull upward. If it will not release by hand, work the putty knife into the joint and rock it gently, staying below the top face so the tool never catches the locking edge of the neighbouring plank.
On a glue-down floor, slide the putty knife under the plank and cut the adhesive, then pry the board up from the short end. Pull slowly. Adhesive is tenacious, and most torn planks are damaged by impatience rather than by the pry bar.
Keep any plank that comes up intact. You will probably want it as a pattern template and as a colour reference for the replacement.
Step 3: Clean and Prepare the Subfloor
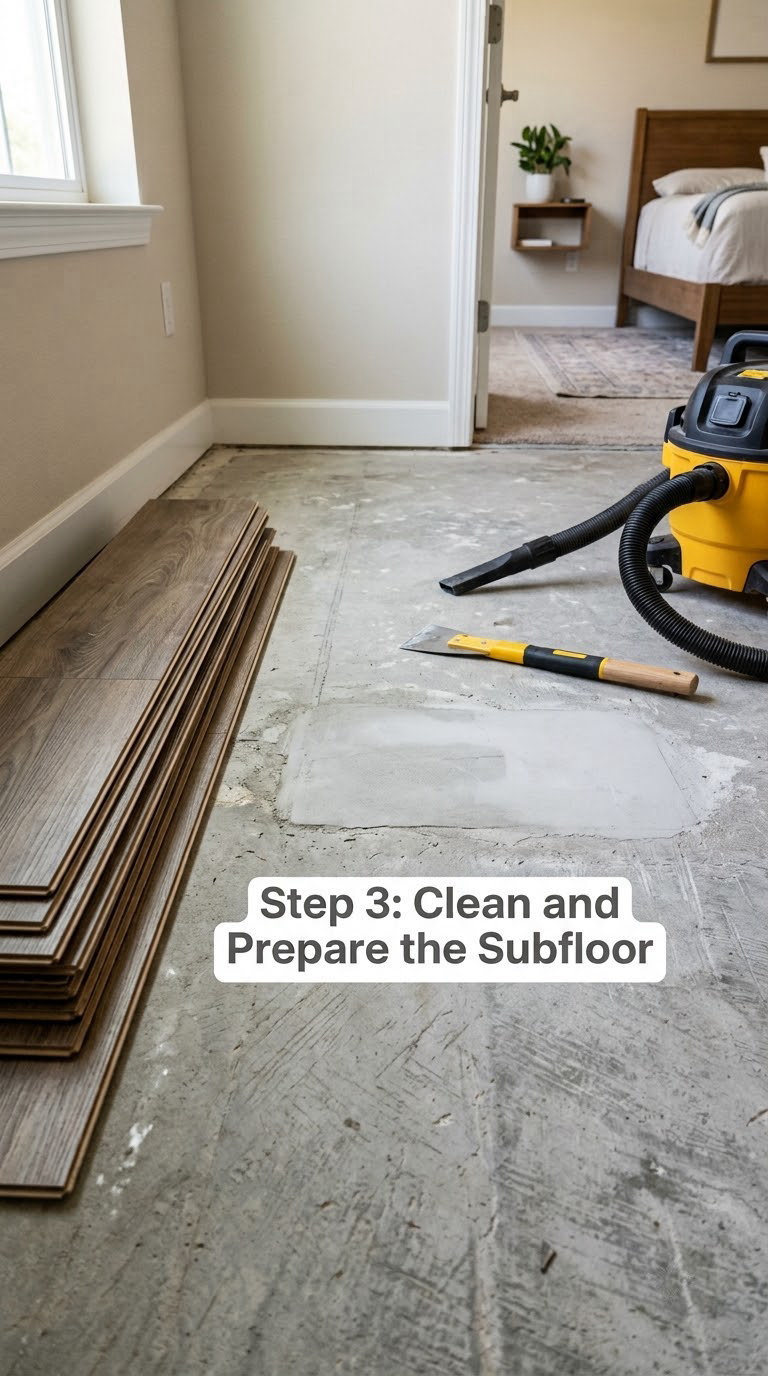
Vacuum the exposed area thoroughly. Grit under a plank is the single most common reason a lifted edge lifts again within weeks, and it takes 30 seconds to deal with.
Scrape off old adhesive ridges with the putty knife, then pull out old nails or staples that stick up. If the floor is glue-down, the substrate should feel like solid concrete or plywood, not gritty residue.
Test flatness again now that the plank is off. Fill any dip under 1/8 inch with leveling patching compound, let it cure fully, then sand it flush. On a floating floor where the underlayment has compressed, replace that section with new underlayment rather than packing it with filler, because a floating floor needs a consistent cushion to sit on.
Step 4: Measure and Cut the Replacement Plank
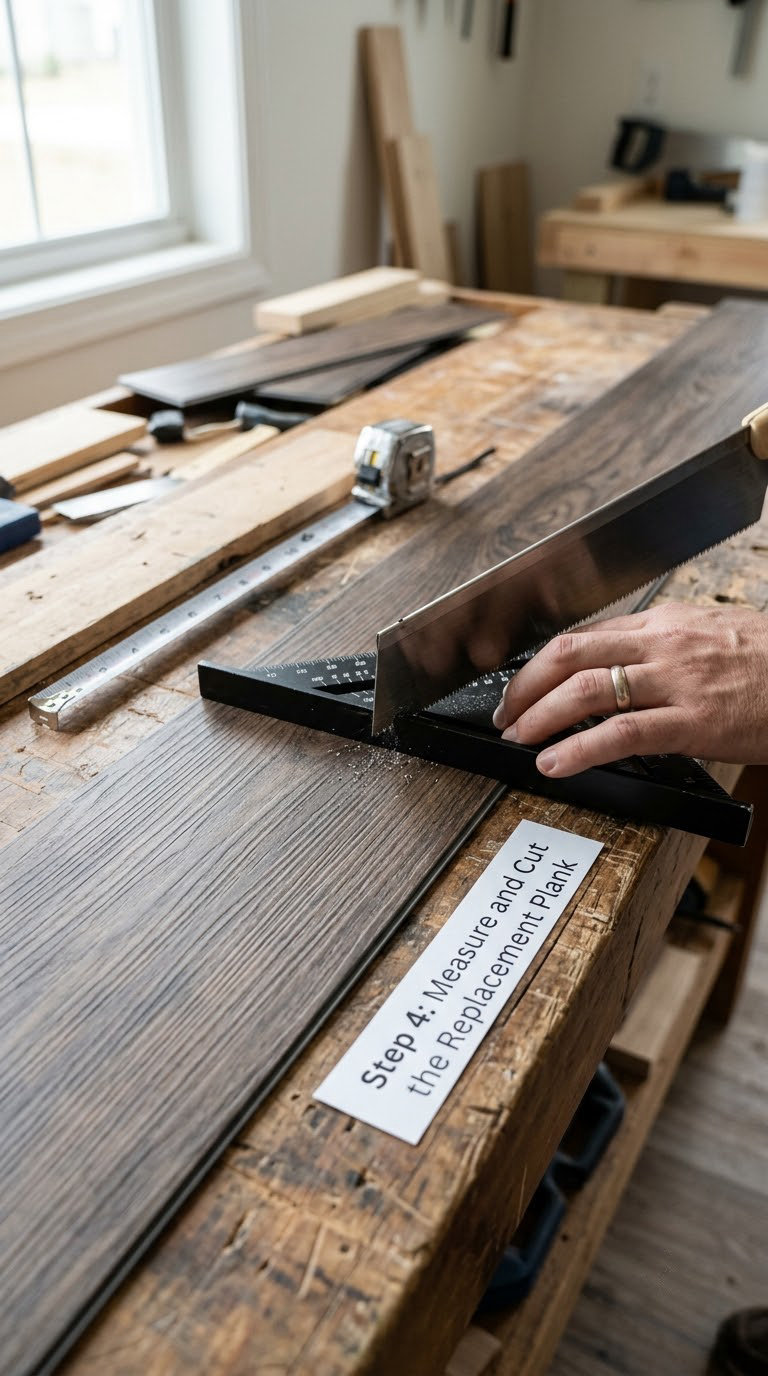
Measure the opening at two points and use the smaller number. Cut the new plank 1/8 inch narrower than the opening so it drops in without force. If the plank goes in tight on a hot day, it will buckle in January.
Score and snap for a straight cut across the plank: press the straightedge firmly, run the utility knife several times along the line, then snap the panel face down against the edge of a workbench. For a notch around a pipe or a trim return, use the fine-tooth saw.
Flip the cut plank face down and check the locking edge. Tap off any burr with the utility knife blade. A burr will stop the click from engaging, and it is the reason a fresh plank sometimes refuses to lock.
Step 5: Fit and Secure the Replacement Plank
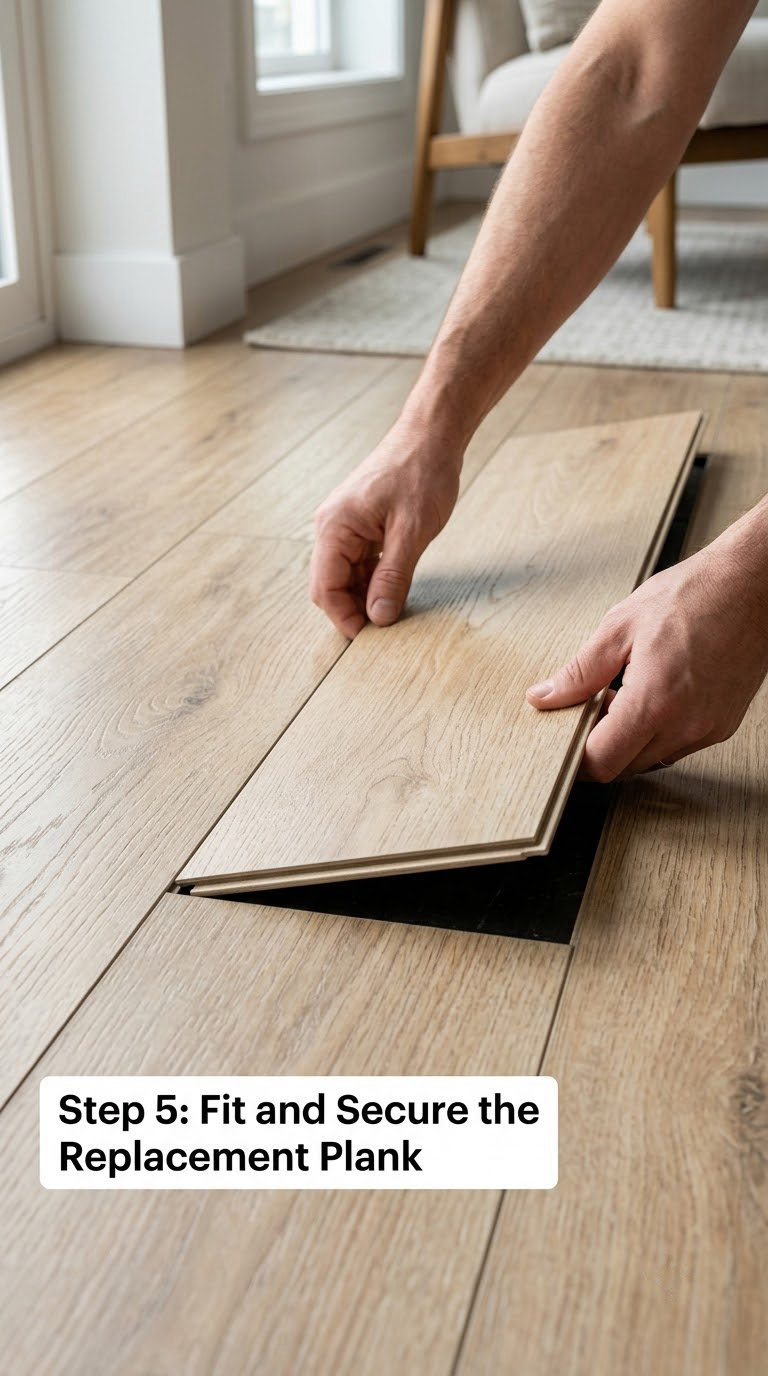
Set the plank into the opening at a shallow angle, engage the long locking edge first, then lower the plank flat while pressing the click joint with the suction cup tool. The joint should feel like it drops into place. If it does not, lift it and check for debris or a misaligned edge rather than pressing harder.
Lock the rest of the joint with the tapping block and rubber mallet, working from the middle of the plank outward. Work the seam closed with the pull bar if you are closing a long gap. Tap, do not slam; a rubber mallet on a wood block is plenty.
If the seam will not hold and you want adhesive instead, inject a bead of waterproof flooring adhesive along the seam with a squeeze bottle, lay the plank down on wax paper, and weight it. For a lifted plank on a floating floor, lift the edge slightly, run adhesive underneath, lay the wax paper over the top, and put the weight on. Leave it 12 to 24 hours.
On a floating floor, glue one spot only. Gluing a whole floating floor edge to edge locks in the expansion and causes buckling somewhere you are not currently looking. Check the installer’s warranty terms before spot-gluing, since some exclude it.
Step 6: Check the Repair and Finish the Area
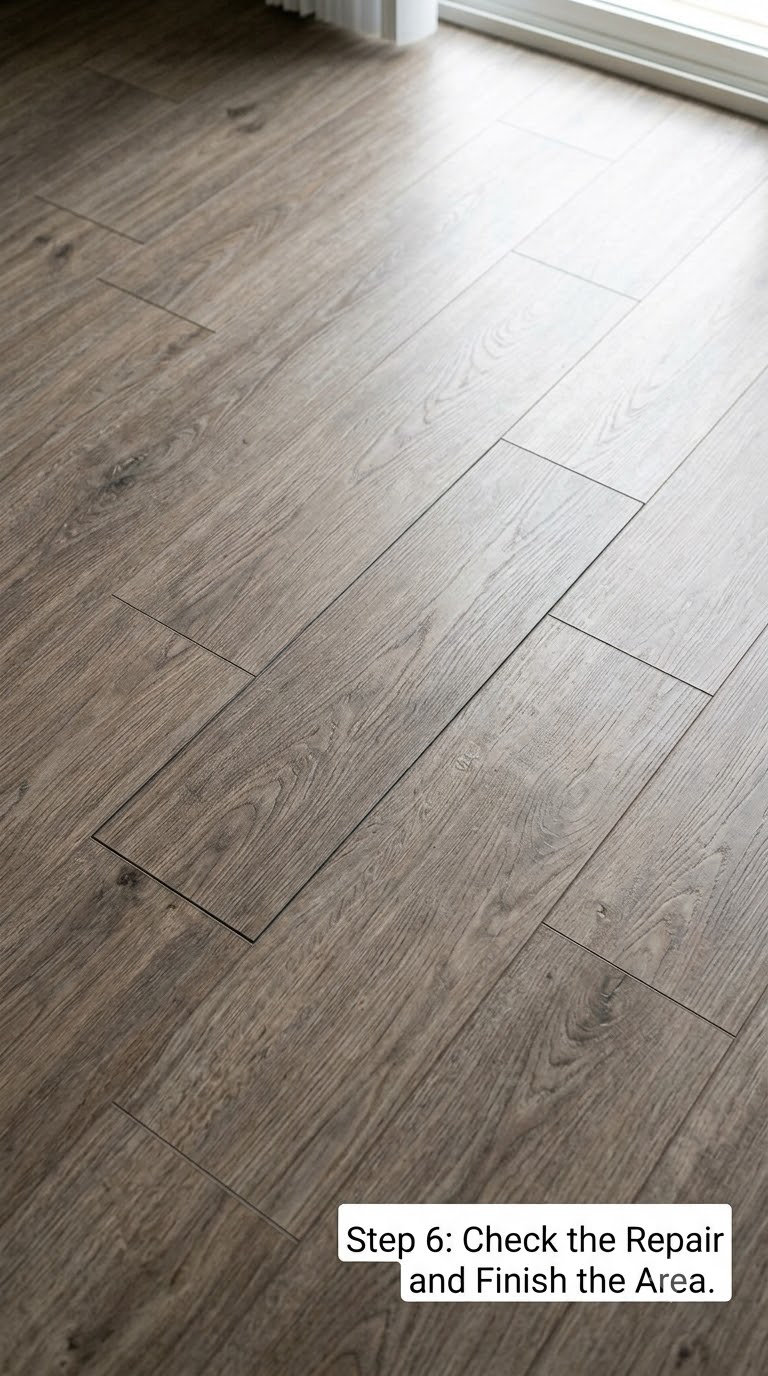
Wait the full cure time before walking on it. Adhesive needs 12 hours minimum and reaches full strength closer to 24, so keep traffic off overnight.
Press along the repaired joint with your palm, then walk across it with your weight. It should feel the same as the surrounding floor, with no rock and no click. Use the straightedge again to confirm the repaired area sits flush with its neighbours.
Trim the plank to length if it overlapped an underlayment seam, then put the baseboard back on without pinning the floor down. Nailing through the plank and into the subfloor turns a floating floor into a glued one at that spot, which is exactly what causes the buckling you were trying to avoid.
Common Mistakes to Avoid
- Forcing a locked edge. If the plank will not click with a tap, something is in the joint. Pull it back out and find it.
- Caulking a gap. Rigid caulk or a rigid filler locks the two boards together permanently, and they can no longer move with the season.
- Skipping the gap measurement. A plank cut to the exact opening size leaves nothing for seasonal movement.
- Re-gluing over moisture. Adhesive on a damp subfloor fails, and the moisture keeps going.
- Caulking the perimeter. The 1/4 inch gap at the wall is there on purpose. Fill it and the floor has nowhere to expand.
- Walking on it too soon. Most adhesive repairs fail because someone stepped on them at hour six.
- Pulling up sound flooring. Work from the wall inward and only remove the boards you actually need.
- Reusing an adhesive-coated plank. Old glue prevents a new bond. Scrape it back to bare material.
When to Call a Pro
Call a flooring pro, not a handyman, when any of these show up.
- Lifting across a large area rather than one or two boards, especially in traffic lanes.
- A spongy or rotten subfloor, or a dip larger than 1/8 inch over 10 feet.
- Moisture that comes back after drying, or a musty smell with no visible spill.
- Peaking along a cabinet run, where cabinets are blocking the expansion gap permanently.
- Floor movement in the structure itself, which is a framing question, not a flooring one.
- Vinyl flooring installed before 1990 that may contain asbestos. Do not sand, saw, or pull it up.
- Commercial or code-sensitive work where a permit and a licensed installer are required.
If you rent, tell the landlord before you start. Loose planks in a rental are usually a habitability item, and many leases prohibit adhesive repairs.
Maintenance
Keep the repair intact with a few habits. Vacuum with a hard floor setting or a soft brush attachment so the vacuum head does not chew a lifting edge. Damp mop only, never flood, and never use a steam cleaner, which forces moisture into the seams.
Put felt pads under every piece of furniture and lift rather than drag when you move something. Dragging is what opens a seam in the first place. Fix leaks promptly, keep indoor humidity between 30 and 50 percent through heating season, and leave the perimeter gap alone when you replace baseboards. If the floor sits over a heated system, read our notes on luxury vinyl plank for radiant heat before you change your cleaning habits, since heat cycling is its own cause of seam movement.
Every few months, walk the traffic lanes and press down on the joints. Catching a lifted edge in month two is a ten-minute fix with a squeeze bottle. Catching it in month eight is a board replacement.
Frequently Asked Questions
Can you glue down a floating vinyl plank floor to stop it moving?
Glue one lifted spot if you must, but never glue a whole floating floor edge to edge. A floating floor expands and contracts with the season and needs that freedom. Locking it rigidly causes peaking and buckling somewhere else, usually in the middle of the room, and it can void the installer’s warranty. Inject adhesive under the lifted edge, weight it overnight, and leave the rest of the floor free to move.
Why does my LVP floor make a clicking sound?
Clicking usually means the locking edge is not fully engaged. Two planks sit side by side without the tongue fully seated, often from not clicking together properly at install or from a later shift. It is rarely a damaged plank. Press the joint down with a tapping block and rubber mallet. If the click persists in the same spot, lift the board and check the edge for a burr or debris.
What causes vinyl plank flooring to lift?
In order of frequency: an uneven or spongy subfloor, a pinched expansion gap against a wall or cabinet, planks that were never fully clicked together, moisture underneath, skipped acclimation, and heavy furniture dragged across the floor. Fixing the symptom without checking the cause is why most repairs reopen. Find the cause before you re-glue anything.
How do I replace one plank in the middle of the room?
Cut the damaged plank into two pieces across the middle, pry each end up from the short sides, and lift them straight out. This avoids the long snap that travels to the far wall and takes sound boards with it. Cut the replacement to the same size less 1/8 inch, click it into the exposed joint, and weight it if you used adhesive.
How long should I wait before walking on a repaired plank?
Wait at least 12 hours and up to 24 for full cure. Keep pets, kids, and furniture off the repair until then. Most adhesive repairs that failed within a week were stepped on before they had set. Keep the area clear overnight and check the joint the next morning with your palm.
Why did my repair not hold?
Repeat movement in the same spot almost always points to the subfloor or the expansion gap, not to weak adhesive. A dip under 1/8 inch keeps rocking the plank, and a pinched gap keeps pushing it up as the floor expands. Also check for grit under the board and for a moisture source. If the subfloor is flat and dry and the gap is clear, then the adhesive was the problem.
Conclusion
Lift the loose plank carefully and look at the joint before you cut anything. What you learn there decides the whole repair: a separated seam gets re-locked with a suction tool and a mallet, a lifted edge gets adhesive and weight, and a floating floor keeps its expansion gap either way. Diagnose the cause first, and the fix usually stays a one-plank job.