How to Replace a Bathroom Exhaust Fan Motor (October 2026)
To replace a bathroom exhaust fan motor yourself, expect about an hour on a straightforward unit and closer to two if the housing sits in an awkward spot between joists. You switch off the breaker, remove the grille, unclip or unscrew the motor, wire the new one in, and test it.
The motor is a separate part from the housing and the grille, so a dead motor rarely means a dead fan. That is good news, because swapping just the motor costs a fraction of fitting a complete new fixture and it is the single most common bathroom repair homeowners tackle themselves.
Contents
Time: 45 minutes to 2 hours · Cost: one replacement motor, far less than a whole new fan · Difficulty: Moderate DIY, beginner-friendly with patience · Skill level: Comfortable with a screwdriver, a step stool, and following a wiring diagram
Tools and Materials
Everything here is common kit. If you own a screwdriver set and a tester, you are already most of the way there.
- Phillips and flat-blade screwdrivers, plus a 1/4 inch hex key or nut driver for the setscrew that holds the blower wheel
- A non-contact circuit tester and a plug-in outlet tester
- Wire strippers and a pair of needle-nose pliers
- Wire nuts or the quick-connect harness your existing motor uses
- Safety glasses, work gloves, and a dust mask for attic dust and decades of packed lint
- A stable step stool, not a chair, and a flashlight or headlamp for attic work
- A clean towel or magnetic tray to hold screws so none land in the ductwork
- A phone camera, for recording the wiring before you touch it
- Your replacement motor, matched using the checklist below
Before You Start: Work Out What Actually Failed
Before ordering anything, spend ten minutes with the fan off. Most humming fans are not dead motors at all, and a ratchet set plus a cleaning rag fixes a surprising share of complaints.
| Symptom | Likely cause | What to try first |
|---|---|---|
| Loud hum, blades barely turning | Dry or seized motor bearings | Spin the wheel by hand; gritty resistance means the motor is going |
| Rattling or shaking | Loose housing screws, often original nails | Tighten the housing screws and replace nails with 1-1/4 inch drywall screws |
| Squeal that changes with speed | Worn bearings or a bent blower wheel | Clean the blades; replace the wheel if it is warped |
| Grinding or scraping | Blower wheel rubbing the housing | Check the wheel sits fully on the shaft and the setscrew is tight |
| Runs but moves almost no air | Clogged ducts, undersized duct, or a blocked grille | Clean the grille and duct; check the duct is a full 4 inches |
| Will not start at all | Tripped breaker, failed switch, or a burned motor | Reset the breaker; test the switch before blaming the motor |
| Steam lingers, ceiling paint peels | Underpowered fan, not a failed one | Size check: 50 CFM minimum or 1 CFM per square foot, whichever is larger |
Then confirm the fan is compatible before you buy. Six things have to line up: housing diameter, motor body diameter and length, shaft diameter and whether it is keyed, motor position and orientation inside the housing, volts, amps, and hertz on the label, and whether the replacement includes a blower wheel. If the listing does not state shaft diameter, do not guess. That single mismatch is the number one cause of a part that will not seat.
Read the model number stamped on the motor or on the housing nameplate. It is usually on a sticker on the housing or printed on the motor body, and it is more reliable than guessing from the fan’s appearance. If the plate has faded to nothing, measure the motor assembly across its widest point and note the housing diameter, then match those numbers to a universal motor listing.
Shut the fan off at the circuit breaker, never at the wall switch. Switches and breakers are in different places, and the switch only tells the fan to stop, not that the wires are dead. Confirm it with a non-contact tester, then confirm again with a meter or an outlet tester on a known-live outlet. Put a strip of tape over the breaker handle so nobody flips it back on while you are up on the stool.
Lay a drop cloth over the tub or shower, and clear the bathroom of towels you will want dry later. If you rent, get written permission first; the fan and its wiring usually belong to the landlord. Replacing a fixture in a different location is a rough-in job, and our bathroom fan rough-in guide covers that side of things.
Step-by-Step Instructions
Step 1: Identify the Fan and Confirm the Power Is Off
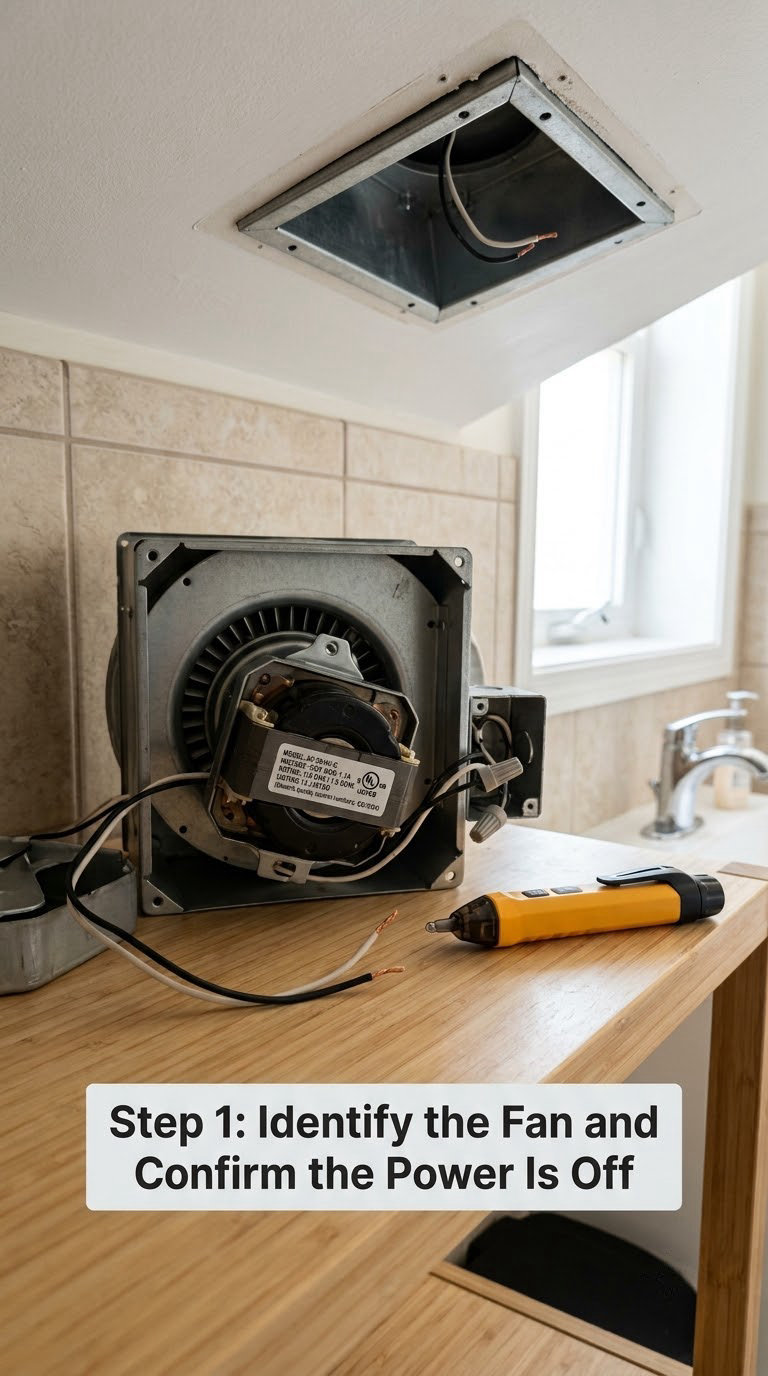
Photograph the fan in place before you touch a screw, then photograph the nameplate closely enough to read the model number later. Note the motor body diameter, the housing diameter, and where the motor sits relative to the duct outlet.
Kill the breaker and test. Hold a non-contact tester near the wiring and then near the fan blades; a loud fan hum that stops the instant you flip the breaker confirms the right circuit. Verify once more with a tester on a live receptacle so you know the tester itself works.
Step 2: Remove the Grille and Access the Motor
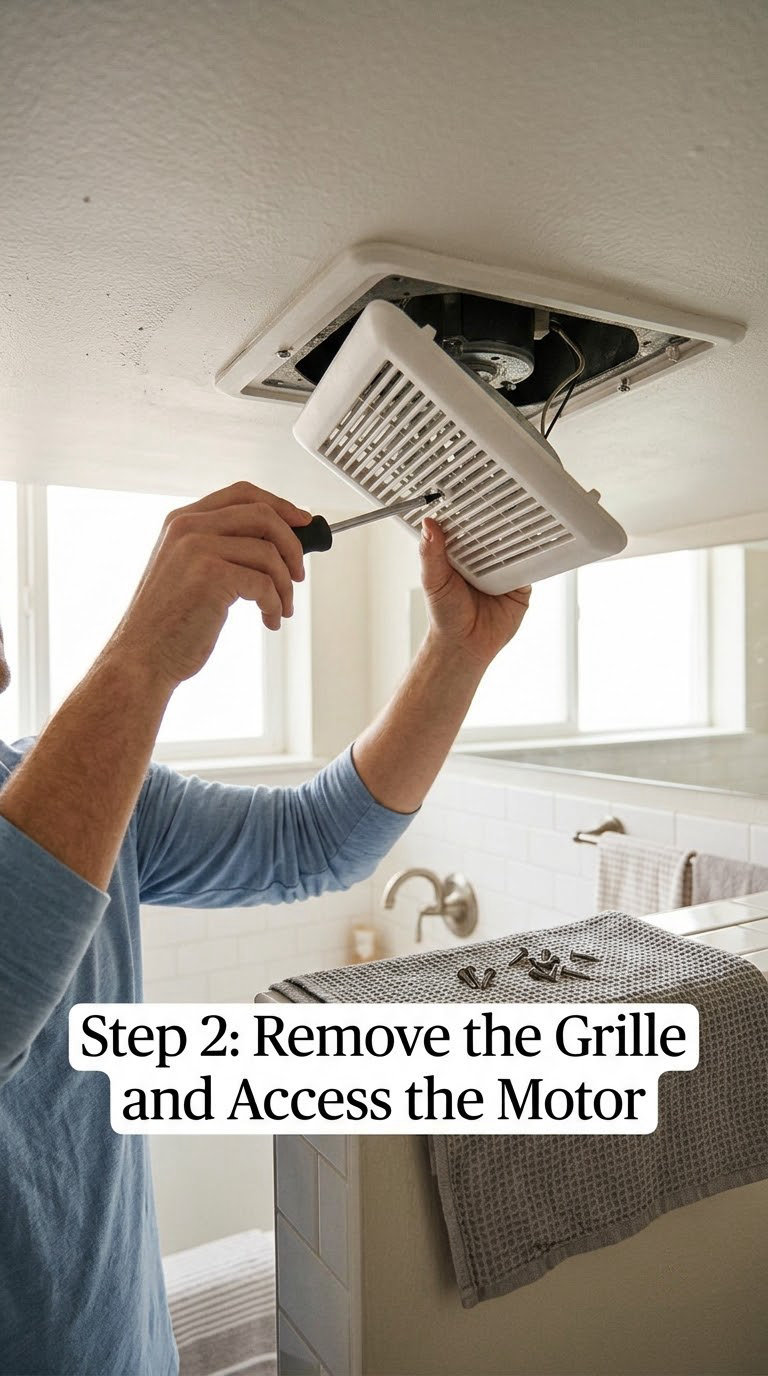
Most grilles are held by one or two screws at the edge of the frame, or by spring clips on the housing tabs. Back out the screws and place them in a bowl or on a folded towel, not on the edge of the tub where they will disappear forever.
On a combination fan and light, remove the light bulb or lens cover first so nothing can fall into the housing. If the grille flexes or cracks, buy the replacement grille before you force anything; these are cheap parts and a bent grille will never sit flat again.
Support the housing from below with one hand while you work. A housing held only by drywall can shift, and a shifting housing cracks the ceiling around the opening.
Step 3: Disconnect and Remove the Old Motor
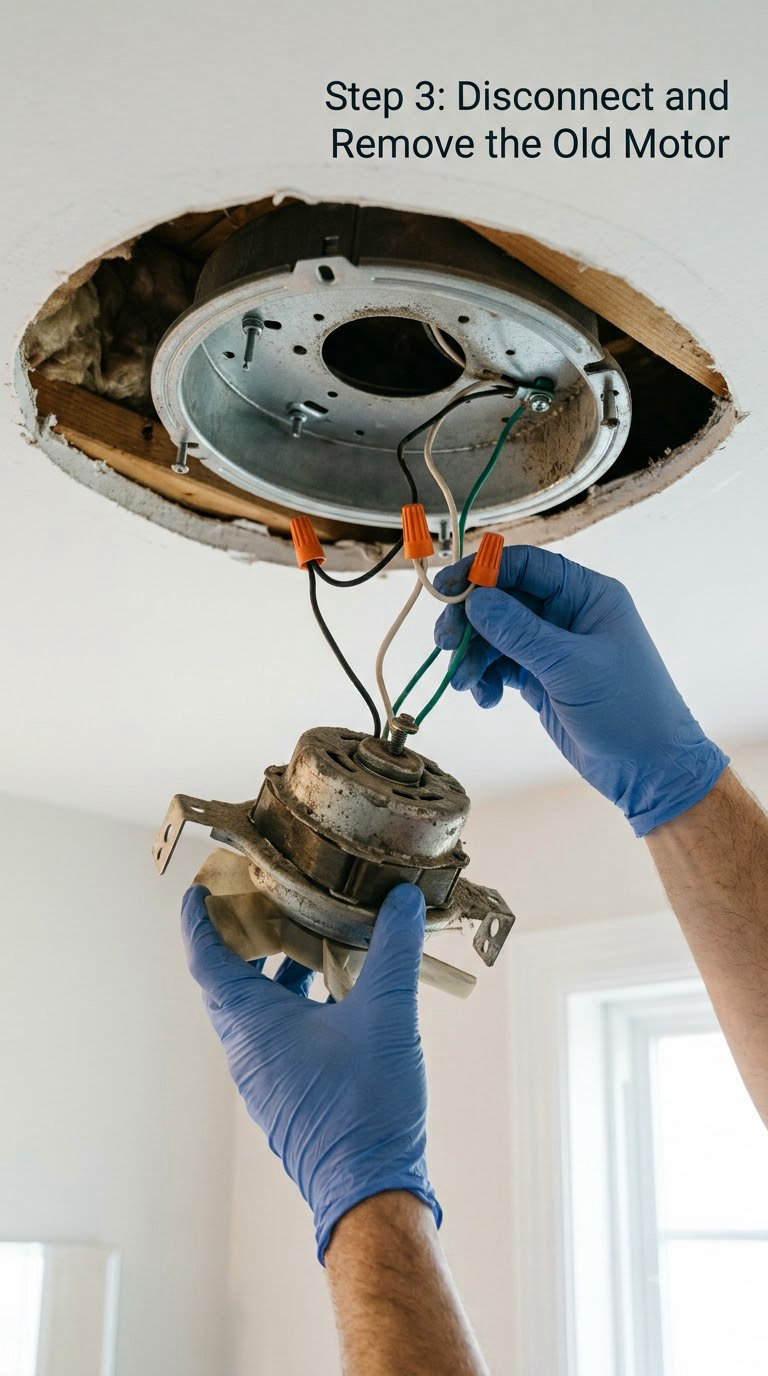
Take a clear photo of every wire and connector before you disconnect anything. This one photo saves the job when the wires go back in the wrong way round.
Three connection types turn up. A plug-in harness unplugs straight out. A quick-connect block releases when you press the tab and tug. Wire nuts unwind counter-clockwise after a gentle twist, and never yank; if a nut is stuck, leave it and cut the wires just below it rather than twisting the conductors.
Note the colour coding before you pull: black to hot, white to neutral, green or bare copper to ground. Old installs sometimes ignore the colours, so photograph rather than assume.
Remove the mounting hardware next. Most motors hang from a metal bracket or a flat motor plate held by two to four screws, sometimes with spring clips or tabs that snap into slots. Support the motor with one hand as the last screw comes out so it does not fall into the duct. Lower it out of the housing slowly, keeping the wiring attached and clear of the sharp edge of the housing sheet metal.
Step 4: Test the Old Motor Before You Commit
Hold the blower wheel and turn it by hand. It should spin freely and quietly. Heavy resistance, grinding, or a wheel that only moves in one spot tells you the bearings are gone and the part is genuinely needed.
If it spins smooth, the motor may still work while the switch or the breaker does not. Worth thirty seconds to know before you buy. While the assembly is out, vacuum the housing and wipe the blades, and replace any original nails holding the housing with 1-1/4 inch drywall screws. Loose fasteners are the leading cause of rattling fans.
Step 5: Install the Replacement Motor
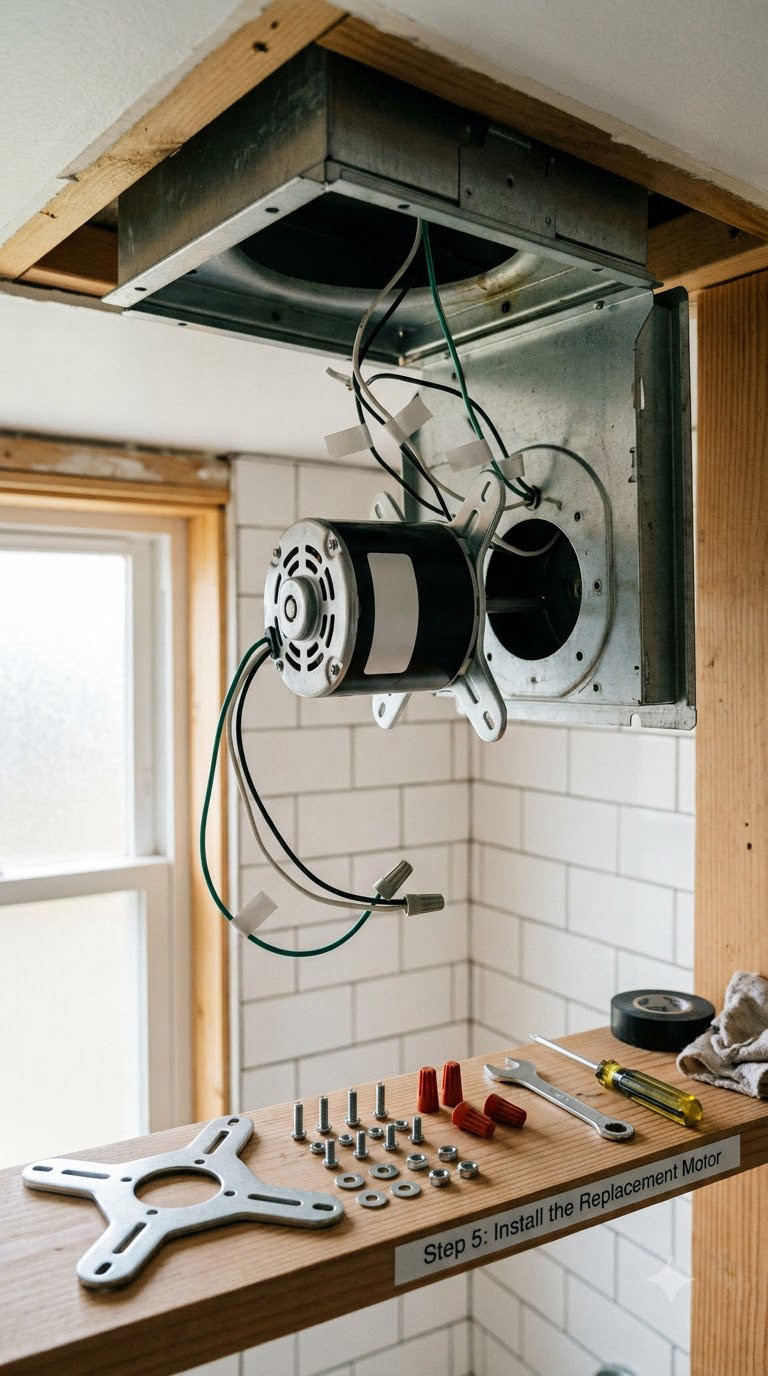
Set the new motor in the housing and compare it against the old one before you tighten anything. Same body length, same shaft height, same bracket spacing, same orientation relative to the duct.
If the blower wheel stayed on the old motor and the new one did not come with one, slide it back onto the new shaft and tighten the setscrew with the hex key. Hold the wheel and tighten the screw at the same time so the shaft does not spin and strip the thread. A stripped setscrew is an annoying afternoon.
Fasten the new motor to its bracket or plate, snug but not buried. Over-tightened screws deform the housing metal and can cause a hum of their own.
Step 6: Reconnect the Wiring Safely
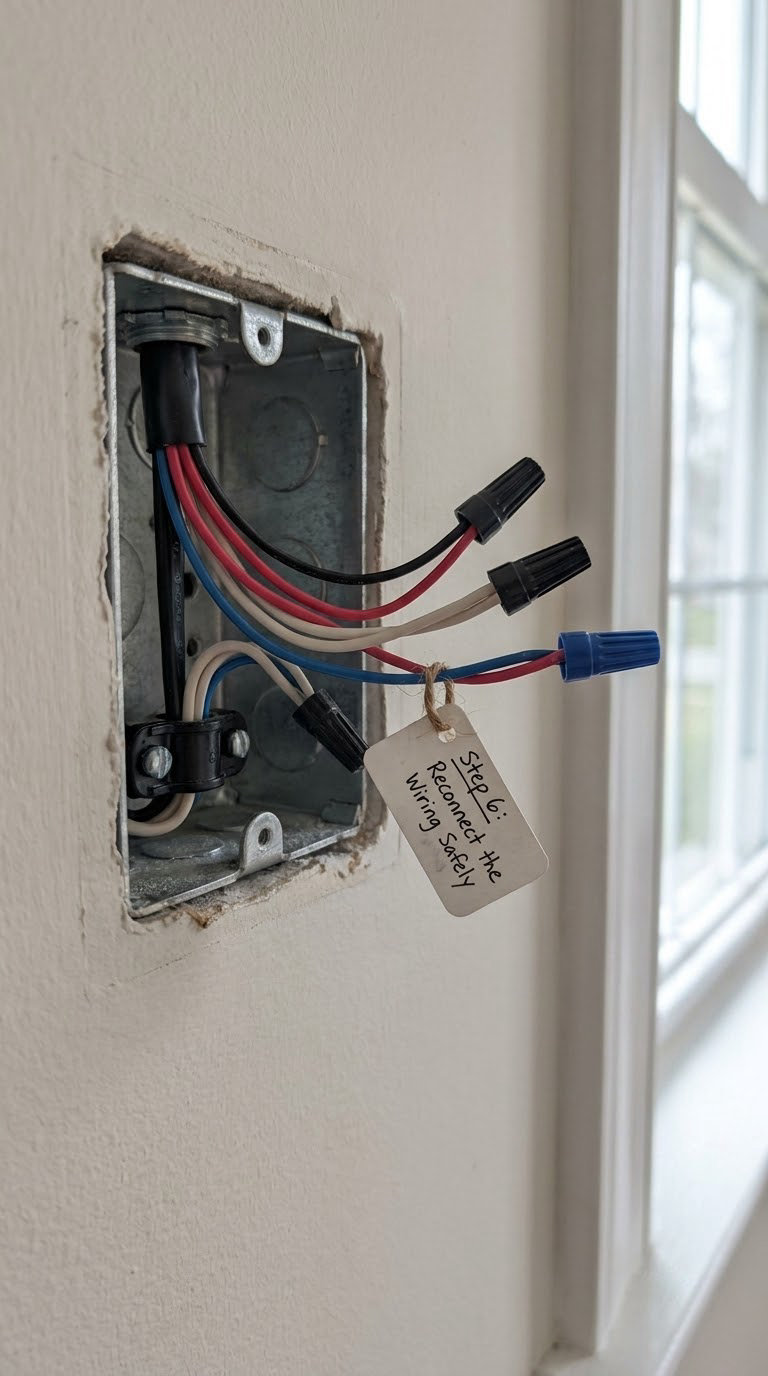
Match the wiring to the photo you took, not to your memory of it. Black to black, white to white, and the ground conductor to the green or bare lead. If the original used a plug-in harness, buy the matching harness rather than improvising with wire nuts.
Use wire nuts rated for the conductor size, twist them tight, and pull gently on each wire to confirm it is gripped. Tug the ground connection especially; a loose ground is the connection that causes flicker and intermittent running.
Seat every wire inside the housing or an approved junction box. Nothing pinched, stripped, or resting on a screw. Then tuck the wiring up and out of the airflow path so the new motor does not rattle against it at speed. If you are not certain which conductor is which, stop here and call an electrician. Guessing at wiring is not a shortcut.
Step 7: Reassemble and Test the Fan
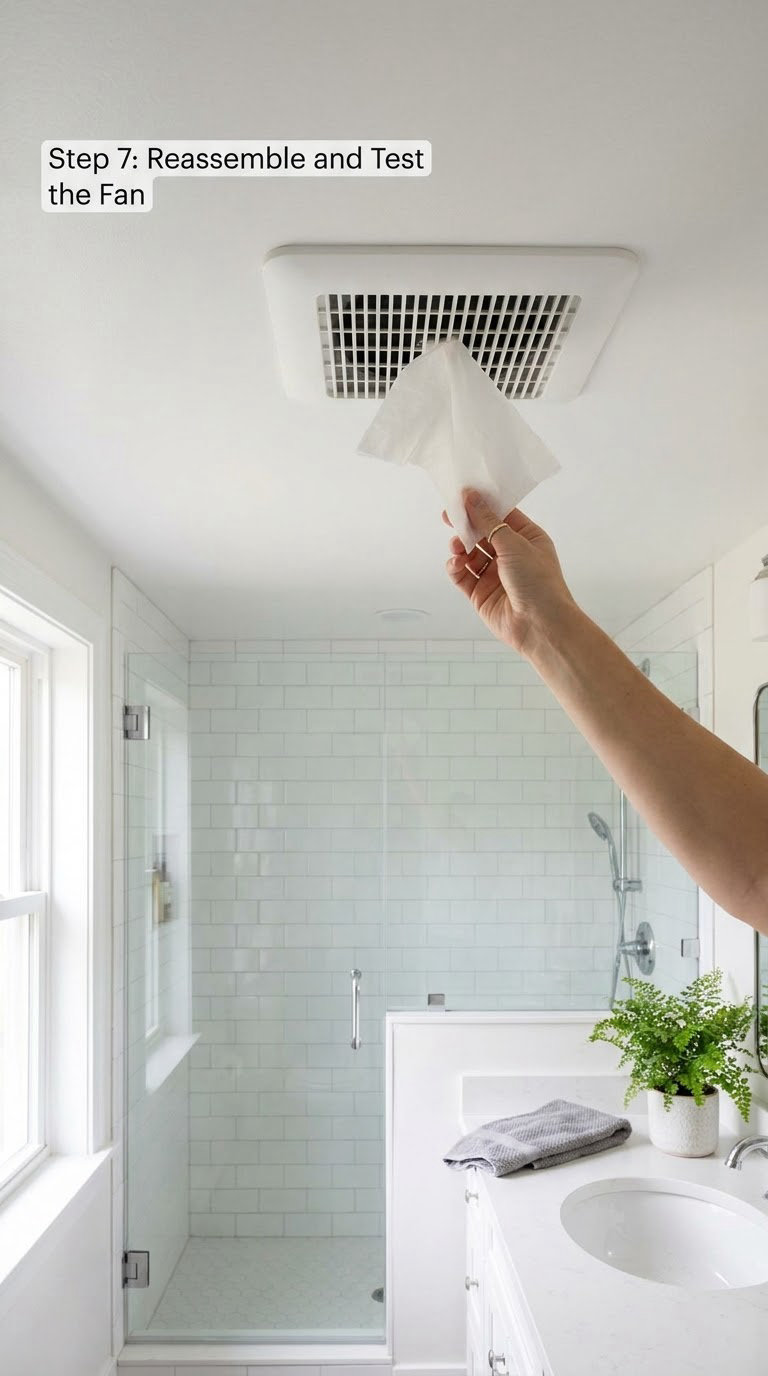
Refit the grille, tighten the housing screws evenly, and make sure nothing rattles when you tap the housing with a knuckle. Restore the breaker and run the fan.
Listen for hum first, then for rattle or scrape. Hold a tissue at the grille; it should draw in firmly. Then run a shower with the door open and check whether the mirror clears. Any rattle is a loose screw until proven otherwise; any grinding is the wheel touching the housing; any hum that continues with the breaker off is a wiring fault worth a phone call.
If the new motor hums but moves no more air than the old one did, the motor was never the problem. The duct is likely undersized or clogged, and that is a separate fix.
Common Mistakes to Avoid
- Trusting the wall switch. The breaker, always, then verify with a tester you have seen work on a live outlet.
- Stripping the setscrew. Hold the blower wheel while tightening, or the shaft turns and chews the thread.
- Forgetting the ground. Reattach it and pull on it hard to test the grip.
- Forcing the assembly. If the motor will not seat, the dimensions are wrong. Do not bend the housing to make it fit.
- Snagging wires on housing metal. The sharp edge of the housing cut is where insulation gets abraded and then shorts.
- Losing grille screws in the duct. Use a magnetic tray or a folded towel every time.
- Buying before measuring. Housing diameter and shaft diameter are not interchangeable, and the listing has to say.
- Testing with the housing open. Never run the fan with the grille off; blades and wiring are right there.
- Overtightening housing screws. Snug is enough, and it stops stripped screw holes in the drywall.
When to Call a Pro
Stop and hire a licensed electrician if the wiring is aluminium, if the conductors are cloth-wrapped or brittle, if there is no ground, if the box is overcrowded, or if you cannot confidently say which conductor is hot. Older homes also carry surprises a non-contact tester will not catch, so test with a meter if anything looks odd.
A breaker that trips again right after the swap is a call for a pro. Same for scorch marks, a warm or hot faceplate, a fan that hums with the breaker off, or a circuit shared with other loads you cannot identify. A repeated trip means a real fault, not a stubborn switch.
Whole-fixture replacement in a new location, added circuits, GFCI or AFCI protection changes, and anything touching the attic where you may disturb wiring or insulation all fall under permit territory in most jurisdictions. If you are replacing the entire fan rather than just the motor and the ductwork needs resizing, that is a bigger job than this guide covers.
Maintenance: Preventing the Next Failure
Dust is what kills most of these motors. Vacuum the grille every three to six months and pull the whole assembly down once a year for a proper clean.
Use compressed air or a soft brush on the blades, wipe the housing, and run the blade edge across a fingertip to feel for gum and buildup. Do not balance the blades with household scissors; an off-balance wheel produces vibration that wears bearings quickly.
Run the fan after every shower for ten minutes rather than switching it off the moment the mirror clears, and make sure it is ducted outdoors rather than into an attic or wall cavity. Backdraft dampers keep cold air out and cut noise at the same time; our bathroom fan damper guide covers the options.
If you hear a change in pitch, reach for a damp cloth and a clean grille before you reach for a screwdriver. Service the fan before humid summer months, when failing ventilation starts showing up as peeling paint and a musty smell.
Frequently Asked Questions
Can I replace my bathroom exhaust fan myself?
Yes, on most fans the motor is a separate, replaceable part and the job is a straightforward weekend-afternoon task. You need to turn off the circuit breaker, test that the circuit is dead, remove the grille, swap the motor, and rewire it. If you are not comfortable identifying a hot, neutral, and ground conductor, or the wiring looks old, cloth-wrapped, or aluminium, stop and hire a licensed electrician.
Do I need an electrician to replace a bathroom fan motor?
You do not need one for a straightforward like-for-like motor swap on modern wiring with a proper ground. You do need one if the conductors are aluminium or cloth-wrapped, if there is no grounding conductor, if you cannot tell which wire is hot, if the breaker trips again after the replacement, or if the job also involves moving the fixture, resizing ductwork, or adding a circuit. Those need permits in most areas.
Is it worth replacing the motor or the whole fan?
Replace the motor when the housing and ductwork are sound, the blades are clean, and the failure is noise, weak airflow, or a dead motor. That is the cheaper repair and the housing is usually the part that lasts longest. Replace the whole fan when the duct is undersized or clogged, the housing is damaged, the fan is very old, or you want a quieter, larger-capacity, or light-equipped upgrade while you are already up there.
Why is my bathroom exhaust fan humming?
A hum with the blades barely turning almost always means dry or worn motor bearings, sometimes with dust packing the wheel. Test the old motor before buying a part: spin the blower by hand. Smooth and quiet means the motor may be fine and the switch or breaker is the culprit. Gritty, grinding, or one-spot rotation confirms the motor has gone. A hum that continues with the breaker off points to a wiring fault.
How many CFM do I need for a bathroom exhaust fan?
Aim for 50 CFM as a minimum for a half-bath, or 1 CFM per square foot of floor space for a full bath, whichever is greater. For eight air changes per hour, use CFM equals eight times the floor area in square feet times the ceiling height in feet, divided by 60. A 40 square foot bathroom with 8 foot ceilings needs about 43 CFM by formula, so 50 CFM is the sensible pick.
How long does a bathroom exhaust fan motor last?
A well-ventilated motor in a fan that gets cleaned regularly commonly runs ten years or more. Motors in dusty bathrooms, on attic vents, or in fans running continuously can fail much sooner, and two to five years is not unusual in a badly dusty install. Cleaning the blower wheel once or twice a year removes the grease and grit that destroy bearings, and it is the cheapest life extension available.
Conclusion
Identify the fan first. Photograph the model number, the wiring, and the existing hardware before you loosen a single screw, and confirm the breaker is off with a tester you have watched light up.
Buy only a motor that matches on housing diameter, shaft diameter, orientation, and volts, then swap it, rewire black to black and white to white with the ground firmly attached, and run the fan with the grille back on.
That is how to replace a bathroom exhaust fan motor safely, start to finish. If the wiring is not something you genuinely understand, stop at the disconnect step. That judgment call is what separates a safe afternoon repair from a house fire, and it costs nothing to make.