How to Paint Behind a Toilet Without Removing It (2026)
Painting behind a toilet without removing it takes about ninety minutes of work, and the only real obstacle is finding a tool slim enough to fit in the gap. A standard roller frame will not go back there, and a brush handle is no better. What does work is a low-profile mini roller, that 1 to 1 1/4 inch foam cylinder painters call a whiz roller, or an edger pad taped to the end of a stir stick.
You never touch the bowl. Take the porcelain tank lid off, clean and mask the back of the wall, then roll two thin coats onto the wall and the baseboard in the crevice.
Contents
Time: about 90 minutes, plus a 4 to 6 hour wait between coats. Cost: roughly $10 to $25 for a mini roller, tape, sheeting and a quart of paint. Difficulty: Easy DIY. Skill level: Beginner, as long as you are comfortable kneeling on a folded drop cloth.
Tools and Materials
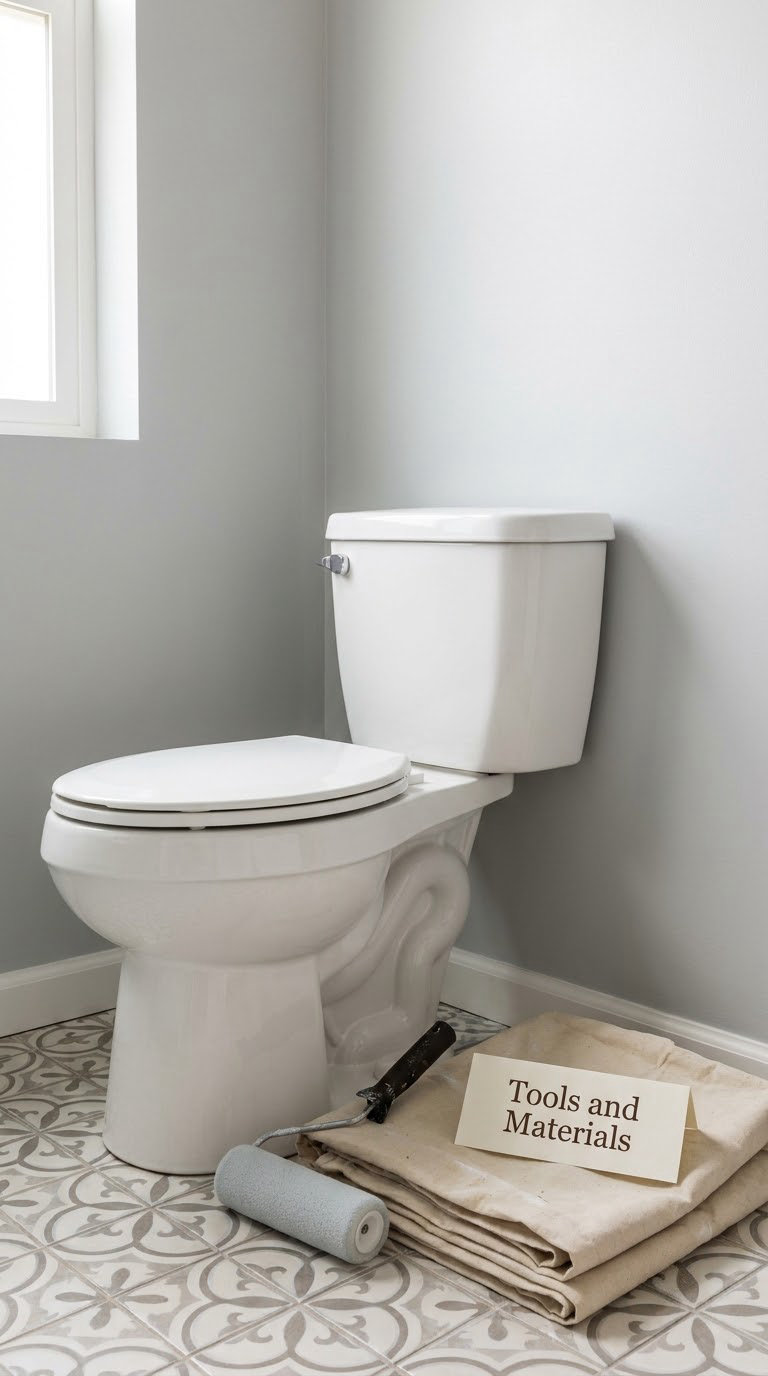
Buy or borrow what you have, then fill the gaps. Nearly every tool on this list is already in a garage or a junk drawer somewhere.
Tools
- Low-profile mini roller, 1 to 1 1/4 inch diameter, mohair or velour nap (sold as a whiz roller, hot dog roller, or tight-space foam roller), one
- Roller cage and frame, or a mini roller handle with a 12 inch extension rod, one
- Small paint tray and a drips shield or tray liner, one
- 2 inch angled sash brush for cutting in the ceiling line and the baseboard corner, one
- Painter’s tape, 1.5 inch wide, one roll
- Plastic sheeting or two large garbage bags for wrapping the tank
- Cotton rags, a damp cloth, and a plastic scraper for cleaning
- Step stool, only if you are painting the full height of the wall rather than just the crevice
- Safety glasses and nitrile gloves
Materials
- 1 gallon of interior latex bathroom paint in a satin or semi-gloss finish, which covers roughly 120 to 150 square feet in two coats
- One extra quart if the wall behind the toilet is a dark-to-light colour change, since a full hide needs three coats
- Drop cloth, canvas or plastic, 3 by 5 feet or larger
- Painter’s plastic sheeting, 2 or 3 feet wide, cut into panels
If you are picking a colour rather than matching one, the palette questions come up fast. Our paint colour ideas guide covers the finishes that hold up in a bathroom.
Before You Start
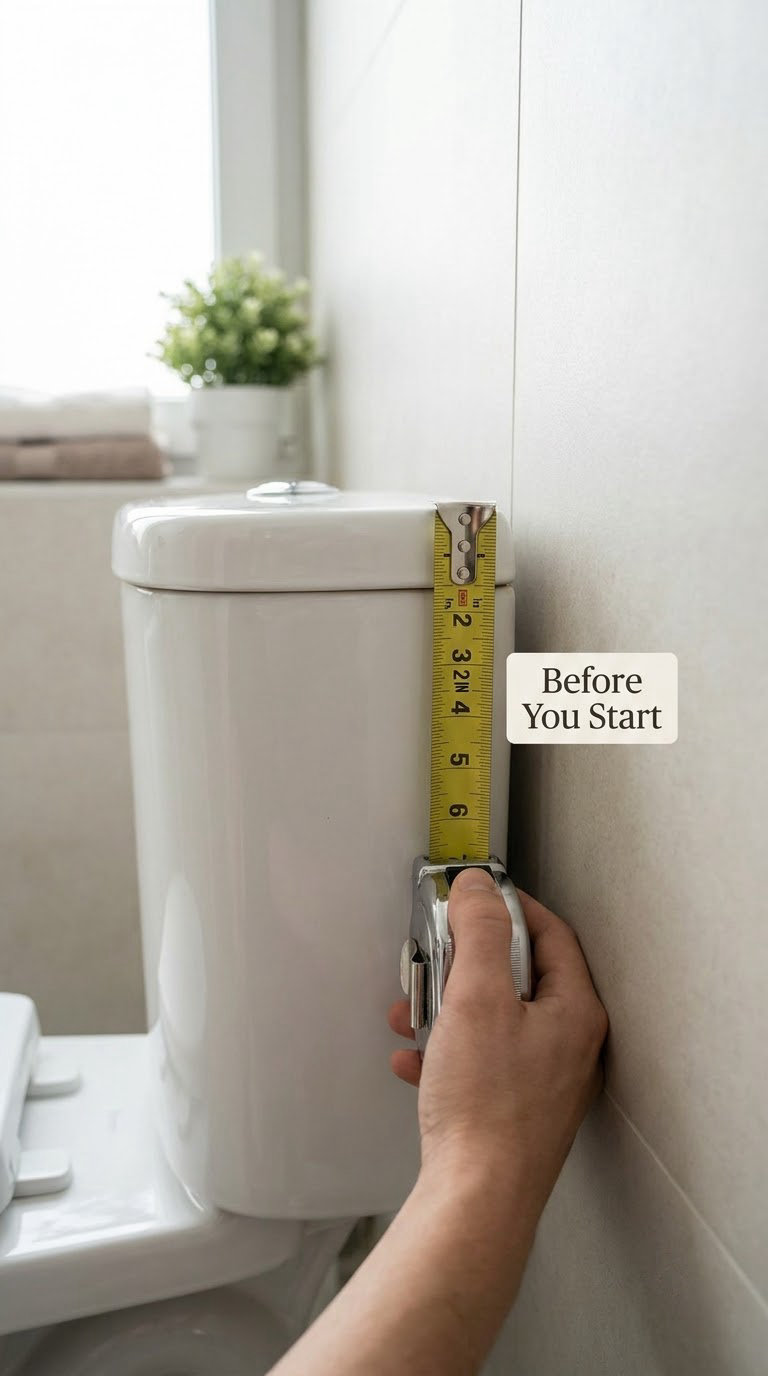
Measure the gap first
Slide a tape measure or a flat ruler behind the tank and read the clearance from the wall to the back of the porcelain.
- 2 inches or more: a mini roller on a frame works comfortably, and this is the easy case
- 1 to 2 inches: a mini roller still works if you keep the handle flat and work slowly
- Under 1 inch: a hand-held mini roller or the stir stick and pad method, with light pressure only
- Zero clearance, where the tank touches the wall: you cannot paint there without lifting the tank or the whole toilet
Measure before you buy anything. A gap under an inch is the only situation that justifies more than a $10 roller.
Protect the toilet and the floor
Lift the porcelain tank lid off and set it on towels in another room. It is heavy, it is slippery, and it is the one thing in the bathroom you cannot afford to chip.
Wrap the tank in a large plastic garbage bag or a sheet of painter’s plastic, tuck the plastic at the base of the tank, and tape the seam flat against the porcelain. Tape the plastic to the wall behind the tank as well, so the roller cannot push it loose mid-stroke.
Lay a drop cloth over the tile and tuck it up against the baseboard on both sides of the toilet. Paint drips land on the floor first, and tile is the hardest surface in the room to clean paint off.
Ventilate and check the paint
Open the window and run the exhaust fan for at least an hour after you finish. Bathroom walls collect soap scum and hair spray, and you are painting directly over that film.
Use interior latex paint in a satin or semi-gloss finish. Flat paint shows every roller mark in a gap this narrow, and it wipes clean like a chalkboard.
Step-by-Step Instructions
Step 1: Clean the wall and baseboard behind the tank
Do not paint over grime. A damp rag on the end of the stir stick reaches the back wall and the cobwebs behind the tank that tend to hang over the bowl.
Wipe the baseboard in the crevice with warm water and a bathroom cleaner. If there are old paint drips on the baseboard, lift them with a plastic scraper first, then wipe again. Our grime and soap scum cleaner guide covers what actually shifts film off a bathroom wall.
Let the wall dry completely. Paint over a damp crevice in a space this tight will stay tacky for days and will hold onto every fibre of the roller nap.
Step 2: Cut in the ceiling line and the baseboard corner
Load a 2 inch angled brush with about half an inch of paint and run it along the wall and ceiling line behind the tank, then along the seam where the wall meets the baseboard.
Cutting in first means the roller never has to sit right on those edges, which is where most lap marks come from in a tight gap. Keep the brush lightly loaded and let the paint flow instead of scrubbing it.
Step 3: Load the roller and roll off the excess
Pour paint into the tray and roll the mini roller through it three or four times to load the nap evenly.
Roll it out on the ramp of the tray until you see no more solid colour on the surface, then give it one extra pass. This offloading step is what keeps paint off the porcelain tank and off the tile below.
Step 4: Paint the gap behind the toilet without removing it
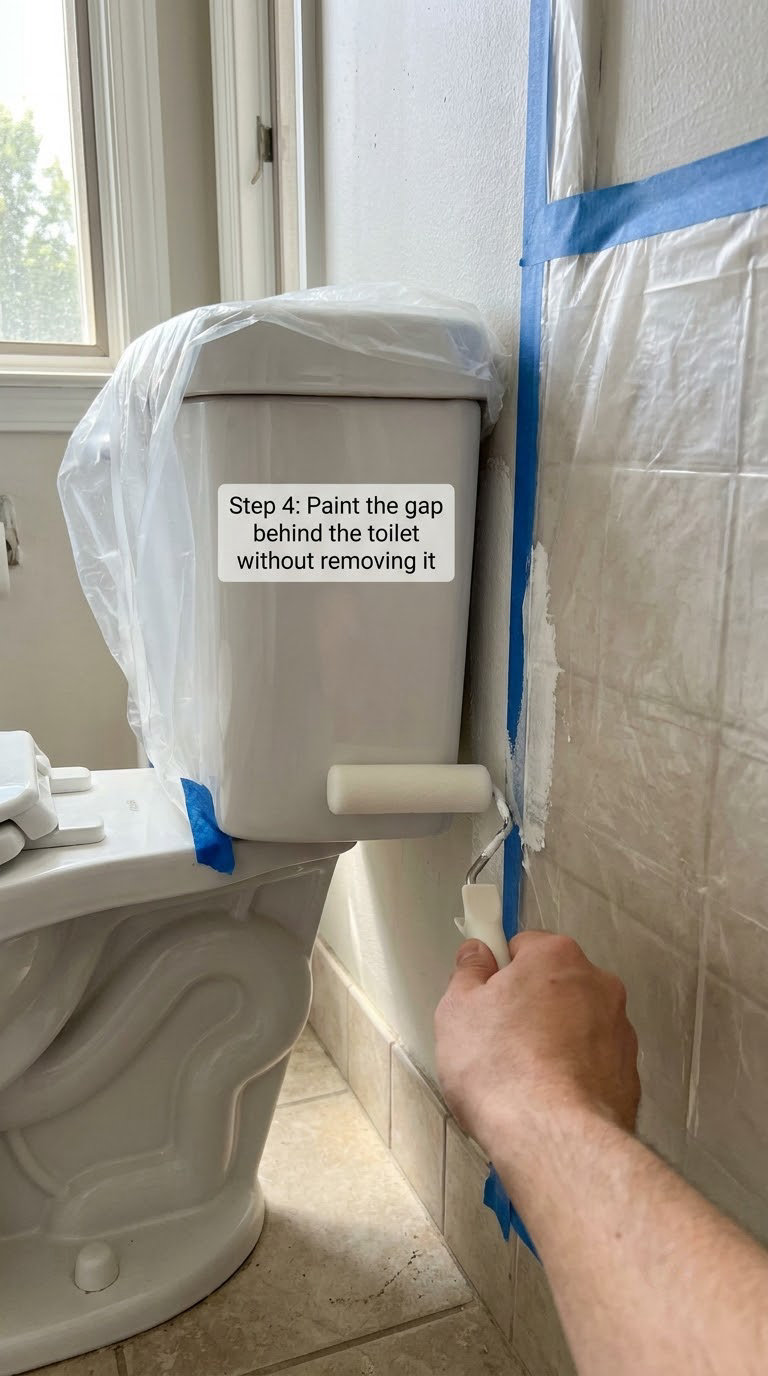
Slide the roller in horizontally, handle flat, and roll straight down from the cut-in line to the floor. Keep the roller moving vertically, not side to side, so you lay a clean stripe rather than scrubbing a patch.
Reload often. Paint dries fast in a narrow slot with little airflow, and a roller that starts to dry out leaves streaks you will have to sand.
Work the crevice in four passes, not one long roll: upper gap behind the tank, lower gap behind the bowl, then the baseboard corner, then the side wall nearest you. Reload between every pass.
Step 5: Roll the visible wall and let the first coat dry
Once the gap is covered, roll the rest of the wall from top to bottom with the same mini roller or a regular roller, keeping a wet edge as you move across the room.
Tape lines are easier to keep crisp against the ceiling than a freehand brush stroke, so lay the tape first if the whole wall is being painted.
Wait 4 to 6 hours before the second coat, longer if the bathroom is cold or poorly ventilated. The surface should feel dry and cool, not tacky, to a fingertip.
Step 6: Apply the second coat
Recut the ceiling line and the baseboard corner if the tape left a ridge, then roll the second coat the same way. Two thin coats beat one heavy coat every time, because heavy coats in a crevice run before they level out.
A third coat is worth it if you are going from a dark colour to a light one, or if the first coat still shows through in patches under a bright vanity light. Peeling tape too early pulls the fresh edge, so leave it until the paint is dry to the touch.
Which Tool Should You Use?
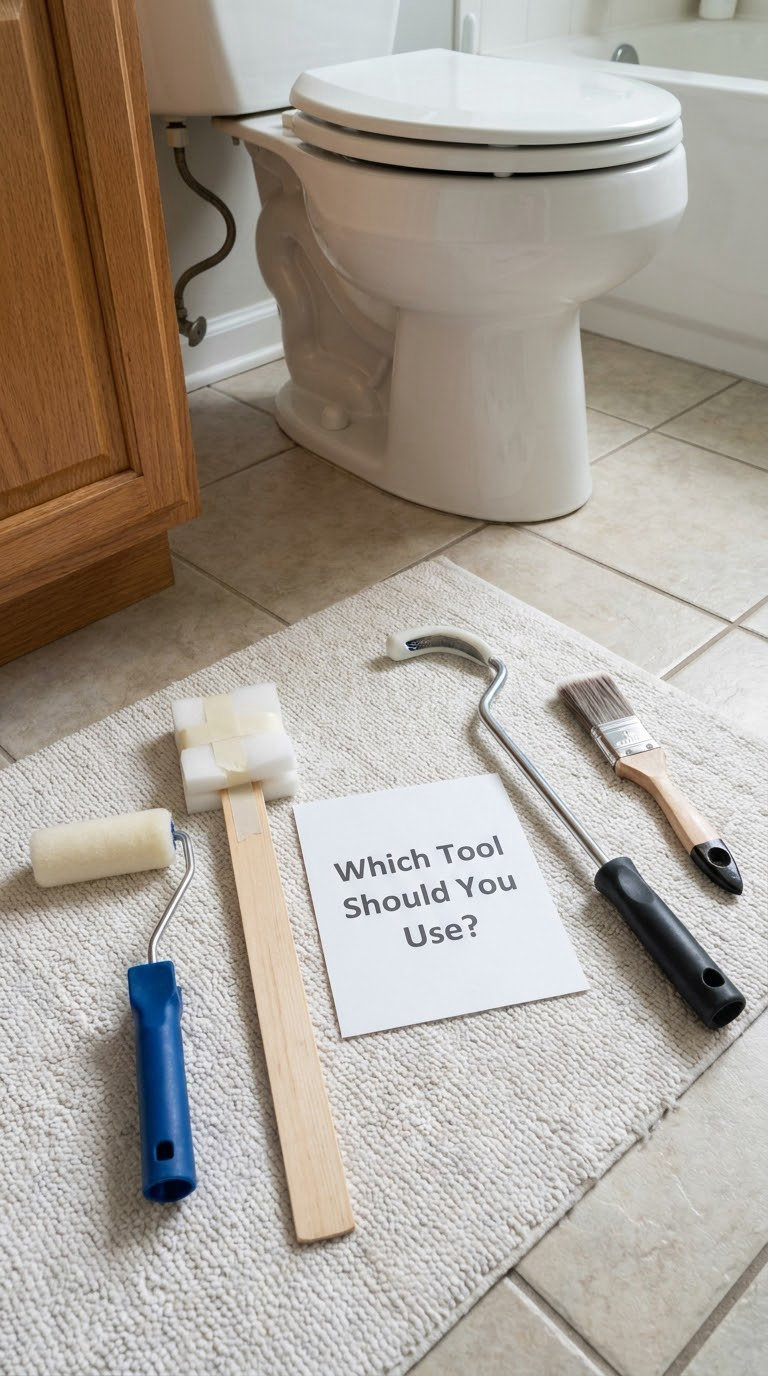
Four approaches work. They differ mostly in reach, cost, and how much mess they make.
| Approach | Cost | Reach | Mess | Skill level |
|---|---|---|---|---|
| 1 inch mini roller (whiz roller) on a frame or extension rod | About $8 to $12 | Full wall height in a 2 inch gap | Low, rolls off in the tray | Easy |
| Edger replacement pad taped to a stir stick | About $3 to $5 | Baseboard and mid-wall, awkward at the ceiling line | Moderate, the pad holds a lot of paint | Easy |
| Long-handled paint behind applicator with a replaceable head | About $12 to $18 | Best reach for a tight or deep gap | Low | Easy |
| Remove the tank from the bowl | No extra cost, more time | Full access, no angle guessing | Low, once it is wrapped | Moderate |
For most bathrooms the mini roller wins. It is the tool the DIY crowd reaches for, because it lays down a stripe rather than a dab, and a stripe hides the roller texture that a pad leaves behind.
When Removing the Tank Is Worth It
Taking the tank off the bowl gives you real access without touching the plumbing that matters. It is worth doing when the gap measures under an inch, when the back of the tank has a bolt or bracket you cannot paint around, or when the wall behind it has damp or a stain to treat.
Taking the tank off in five steps
- Shut off the water supply valve on the wall behind the tank and flush until the bowl runs dry
- Empty the tank with a cup or a small siphon pump, then set towels under the tank
- Loosen the two wing nuts or nuts between the tank and the bowl and lift them out with pliers, keeping them in a bowl so they do not disappear down the drain
- Disconnect the water line from the tank inlet with a wrench, then lift the tank straight up and off the bowl
- Set the tank on towels against a wall, paint the wall and baseboard, then refit the tank in reverse order
That is a two hour job with a wrench, pliers and a cup. It does not disturb the wax ring, because the bowl never moves.
Never pull the whole bowl unless you are prepared for a real plumbing job. A snapped bolt or a disturbed wax ring turns a paint project into a leak, and that is the situation where a toilet that keeps running or will not vent properly is one a plumber should handle.
Choosing Paint Finish for a Bathroom Wall
Satin or semi-gloss latex is the right call. Both resist splashes and wipe clean, and both take a roller texture well.
Flat and matte paint absorbs the light bouncing around a small bathroom and shows every skipped patch, so skip them on the wall behind the bowl. Ceilings are the opposite, which is why ceilings get flat.
You can paint straight over sound existing latex paint. Clean it, scuff any glossy area with a coarse sponge, patch nail holes, and roll. Peel or blistered paint has to come off first, and oil-based paint on the wall needs a bonding primer before latex will stick to it.
Common Mistakes to Avoid
- Skipping the ceiling line and the baseboard corner. These are the two edges the roller cannot reach, and skipping them is what makes a tight space look rushed.
- Overloading the roller. A drip on porcelain does not wash off. Roll out twice more than you think you need.
- Painting over grime or moisture. Both stop the paint adhering in the crevice first, where you would notice it last.
- Forgetting the tank lid. It blocks your hand and catches drips instead of letting them fall.
- Working on bare tile in a bad position. Kneel on the folded drop cloth. Half of this job is done hugging a bowl at floor level, and that is how people end up sore for two days.
- Going over a coat too early. The second coat pulls the first one up and leaves lap marks that show under a vanity light.
- Using a brush alone. A brush works for the corner, but it leaves brush marks in a narrow slot where a roller stripe would have blended.
When to Call a Pro
Call a plumber or a remodeler, not a painter, when the job crosses into the fixture or the wall itself.
- The wall behind the toilet is damp, soft, or has a stain that came back after a shower
- A floor bolt is corroded into the flange, or the toilet rocks when you sit on it
- You need to replace the toilet, the flange, or the supply line and want the wall opened up at the same time
- The home predates 1980 and you are disturbing suspect tile, vinyl, or textured coatings
- You are removing the whole bowl rather than just the tank
Painting itself never needs a permit. Repainting a room with the toilet plumbed in is a weekend project with no paperwork.
Caring for a Freshly Painted Bathroom Wall
Give the paint a week before you scrub anything near it. A light damp cloth with a mild cleaner is enough for everyday soap residue on a satin finish.
Avoid abrasive pads and scrub brushes, which scratch satin and semi-gloss and leave a dull halo you can see in raking light. Keep a small amount of the original paint for touch-ups, because the first months are when scuffs from a towel or a toilet brush seat show up.
Bathroom walls that get daily use typically hold up 3 to 5 years before the finish breaks down enough to want a full repaint. If you are already behind the toilet once, it is easier to paint the whole room while the tape and drop cloth are out.
If the paint is on other wood in the bathroom, our guide to painting a wooden toilet seat covers the prep that most people get wrong on painted wood.
Frequently Asked Questions
Can you paint behind a toilet without moving it?
Yes, and most people do it that way. Leave the bowl plumbed in and in place, lift off the porcelain tank lid for room to move, then roll two thin coats onto the back of the wall and the baseboard with a 1 to 1 1/4 inch mini roller. Only a gap narrower than about an inch, or a bolt or bracket in the way, is a reason to take the tank off the bowl.
What type of tool is best for painting behind a toilet?
A low-profile mini roller is the most reliable choice. Painters call it a whiz roller or a hot dog roller, and it is 1 to 1 1/4 inches in diameter with a short mohair or velour nap. A purpose-made long-handled paint behind applicator reaches deeper gaps, and an edger pad taped to a stir stick is the cheapest option for baseboards and low wall.
What mini roller is good for painting behind a toilet?
Pick a high-density foam or mohair mini roller between 1 and 1 1/4 inches in diameter. Short nap lays paint down smoothly in a tight slot and is less likely to dry out before you finish a pass. Buy one with a matching mini frame or a 12 inch extension rod so you can reach the floor without crouching into the bowl.
How do professional painters paint behind toilets?
They paint around the tank in place, exactly as a homeowner would. The tank lid comes off, the fixture gets wrapped in plastic and taped, and a small roller works the crevice in light passes. Painters return for a second coat once the first is dry, rather than loading heavy coats in a narrow slot that has little airflow.
How do you remove a toilet tank to paint behind it?
Shut off the wall valve and flush, empty the tank into a cup, then loosen and remove the two nuts or wing nuts holding the tank to the bowl. Disconnect the supply line with a wrench and lift the tank straight up onto towels. The bowl and the wax ring stay where they are, so you gain full wall access without real plumbing work.
What should I put on the wall behind my toilet?
Most people repaint the wall in satin or semi-gloss latex bathroom paint, which wipes clean and hides roller marks. If the gap is too narrow to paint properly, put a peel-and-stick vinyl wall panel on the visible wall beside the bowl instead, and trim it to the height of the baseboard so it reads as part of the room.
Start by measuring the gap behind your tank with a tape measure. If you have 2 inches or more, buy a 1 inch mini roller with a frame and an extension rod, tape a plastic bag over the tank, and start rolling.
Two coats, four to six hours apart, satin latex, and the wall behind the bowl is done with no plumber, no tools on the water line, and no evening spent reassembling a toilet you had every reason to leave alone.